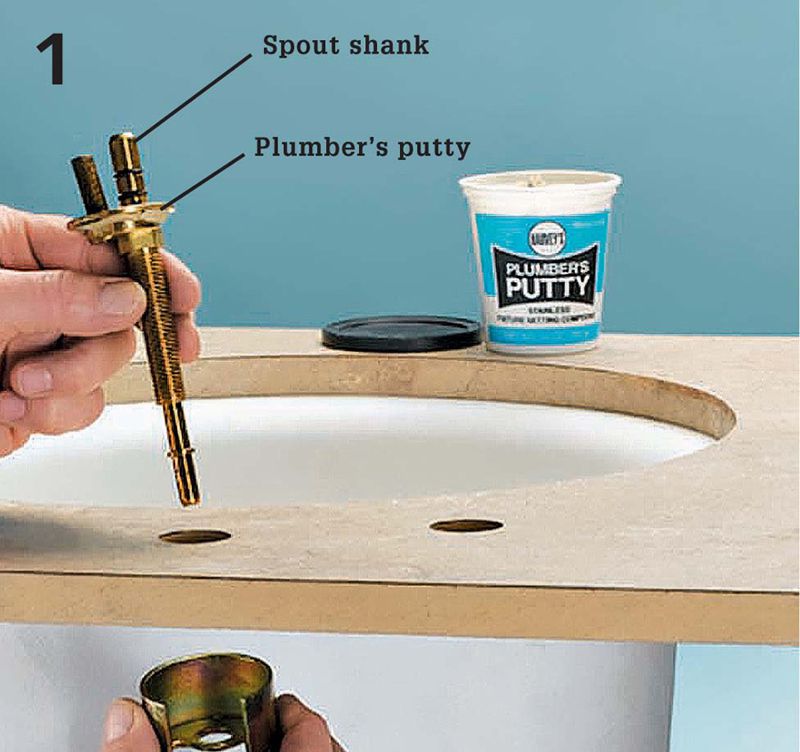

Insert the shank of the faucet spout through one of the holes in the sink deck (usually the center hole, but you can offset it in one of the end holes if you prefer). If the faucet is not equipped with seals or O-rings for the spout and handles, pack plumber’s putty on the undersides before inserting the valves into the deck. Note: If you are installing the widespread faucet in a new sink deck, drill three holes of the size suggested by the faucet manufacturer.
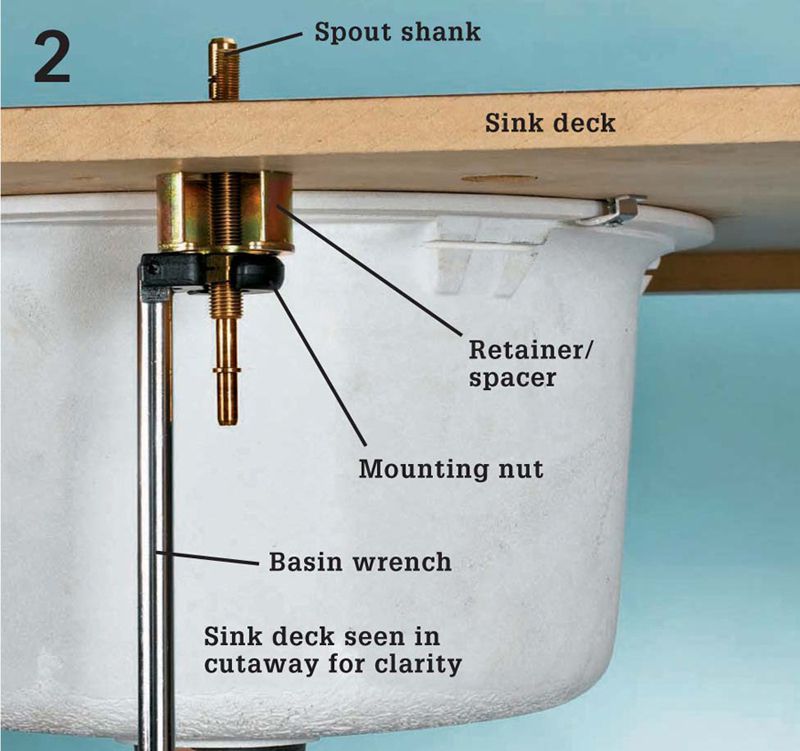
In addition to mounting nuts, many spout valves for widespread faucets have an open-retainer fitting that goes between the underside of the deck and the mounting nut. Others have only a mounting nut. In either case, tighten the mounting nut with pliers or a basin wrench to secure the spout valve. You may need a helper to keep the spout centered and facing forward.
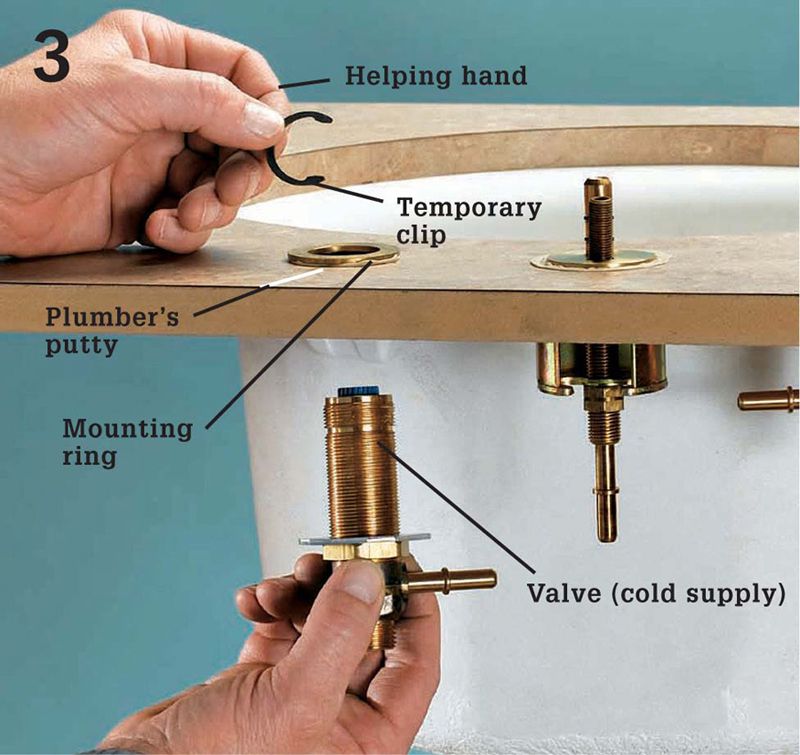
Mount the valves to the deck using whichever method the manufacturer specifies (it varies quite a bit). In the model seen here, a mounting ring is positioned over the deck hole (with plumber’s putty seal) and the valve is inserted from below. A clip snaps onto the valve from above to hold it in place temporarily (you’ll want a helper for this).
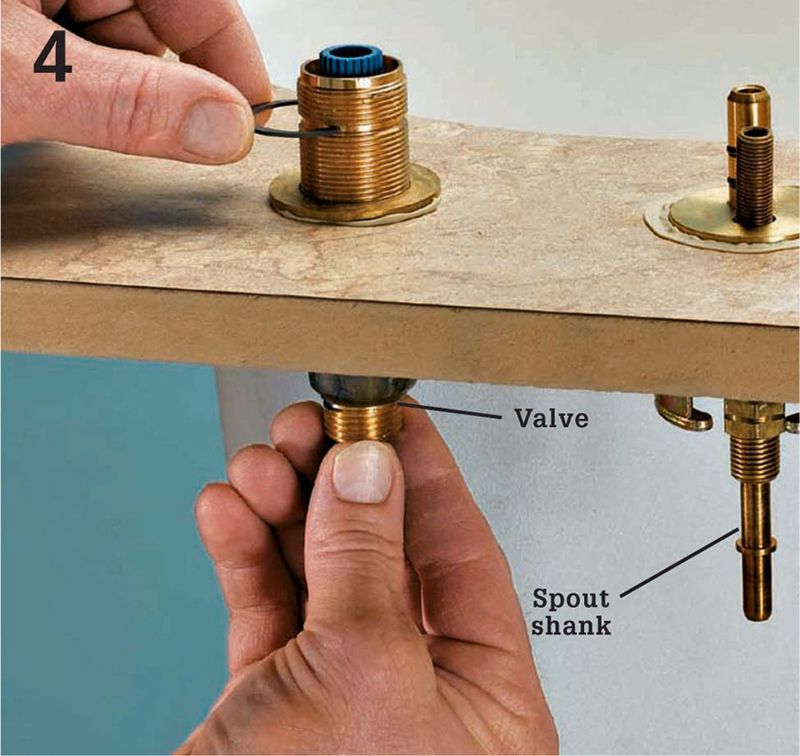
From below, thread the mounting nuts that secure the valves to the sink deck. Make sure the cold water valve (usually has a blue cartridge inside) is in the right-side hole (from the front) and the hot water valve (red cartridge) is in the left hole. Install both valves.
Once you’ve started the nut on the threaded valve shank, secure the valve with a basin wrench, squeezing the lugs where the valve fits against the deck. Use an adjustable wrench to finish tightening the lock nut onto the valve. The valves should be oriented so the water outlets are aimed at the inlet on the spout shank.
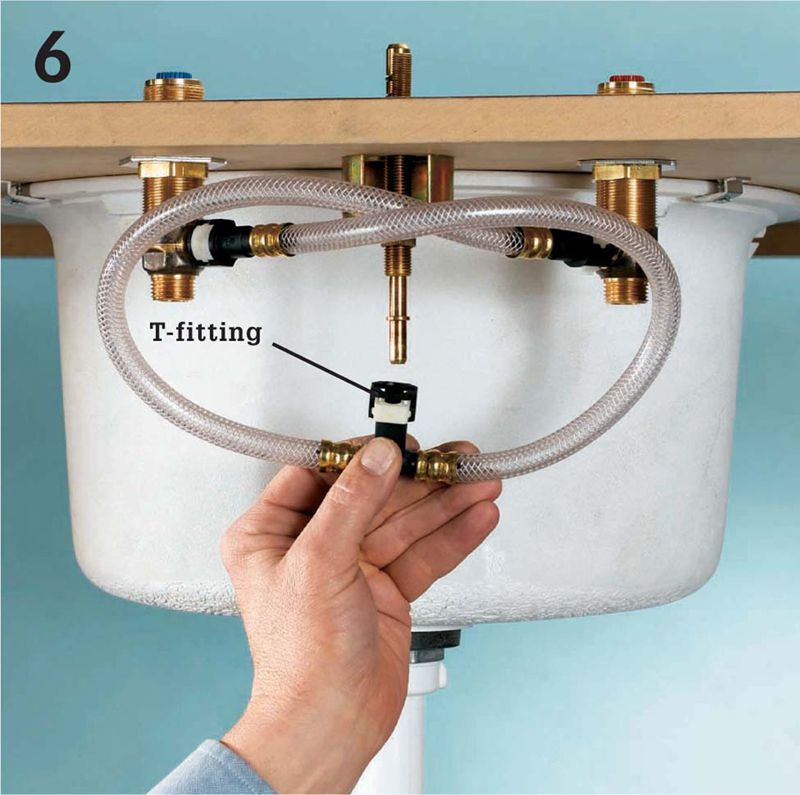
Attach the flexible supply tubes (supplied with the faucet) to the water outlets on the valves. Some twist onto the outlets, but others (like the ones above) click into place. The supply hoses meet in a T-fitting that is attached to the water inlet on the spout.
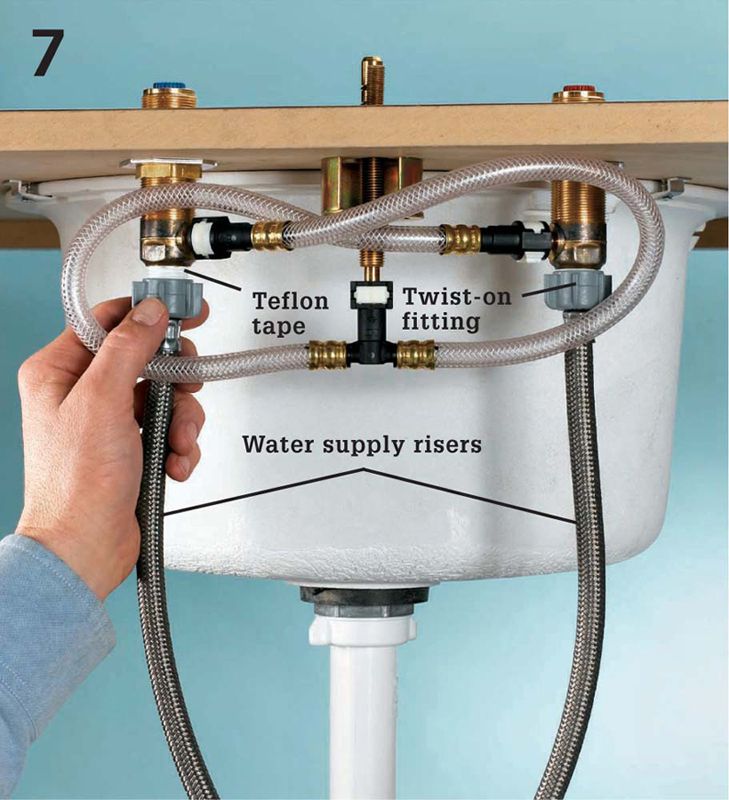
Attach flexible braided-metal supply risers to the water stop valves and then attach the tubes to the inlet port on each valve (usually with Teflon tape and a twist-on fitting at the valve end of the supply riser).
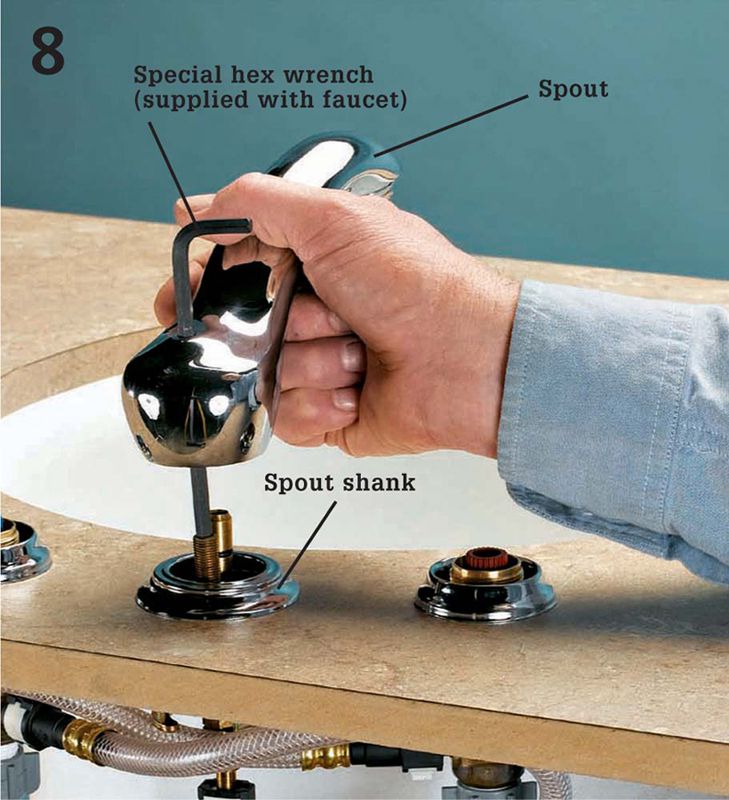
Attach the spout. The model shown here comes with a special hex wrench that is threaded through the hole in the spout where the lift rod for the pop-up drain will be located. Once the spout is seated cleanly on the spout shank, you tighten the hex wrench to secure the spout. Different faucets will use other methods to secure the spout to the shank.
If your sink did not have a pop-up stopper, you’ll need to replace the sink drain tailpiece with a pop-up stopper body (often supplied with the faucet). See page 404. Insert the lift rod through the hole in the back of the spout and, from below, thread the pivot rod through the housing for the clevis screw.
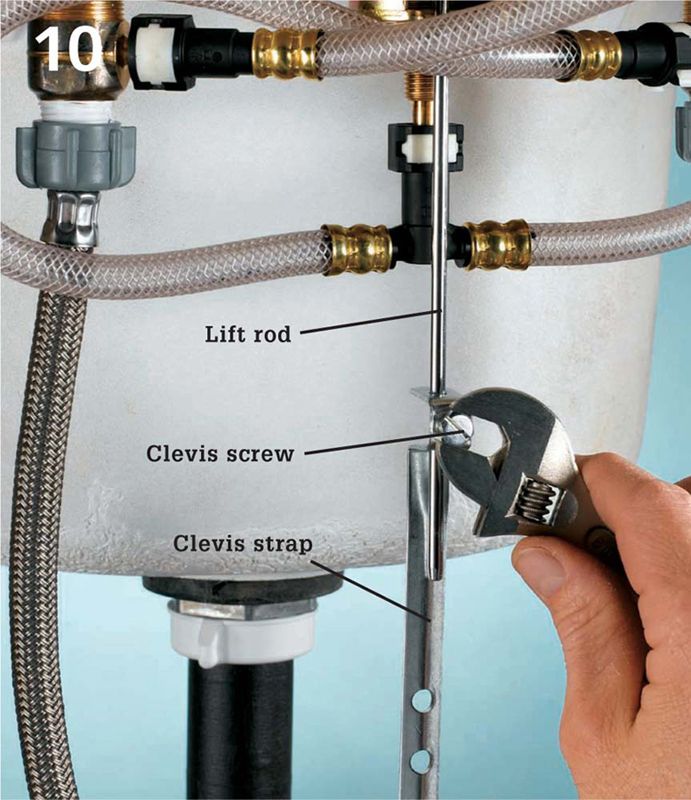
Attach the clevis strap to the pivot rod that enters the pop-up drain body, and adjust the position of the strap so it raises and lowers properly when the lift rod is pulled up. Tighten the clevis screw at this point. It’s hard to fit a screwdriver in here, so you may need to use a wrench or pliers.

Attach the faucet handles to the valves using whichever method is required by the faucet manufacturer. Most faucets are designed with registration methods to ensure that the handles are symmetrical and oriented in an ergonomic way once you secure them to the valves.
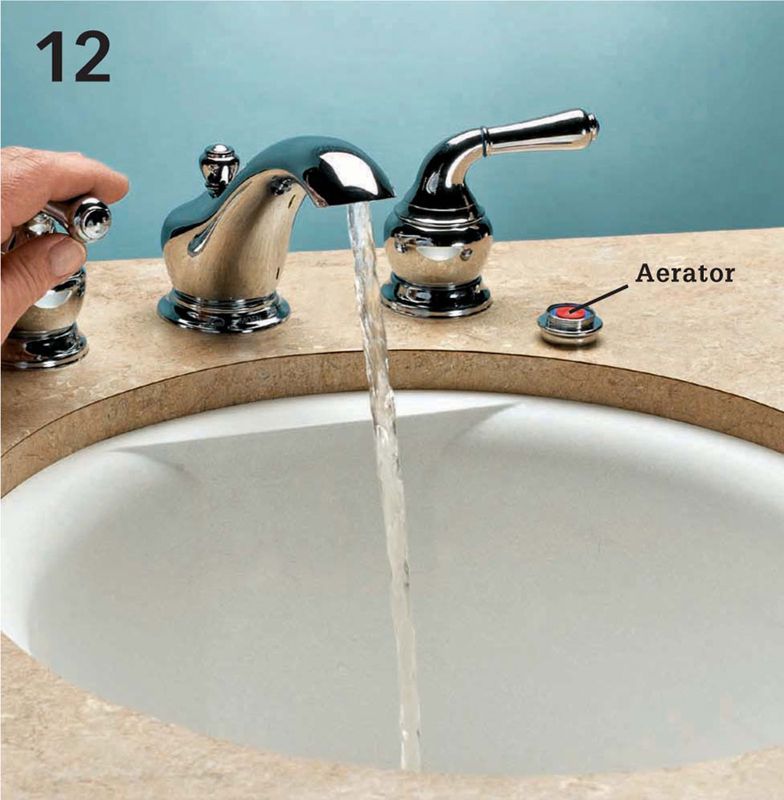
Turn on the water supply and test the faucet. Remove the faucet aerator and run the water for 10 to 20 seconds so any debris in the lines can clear the spout. Replace the aerator.