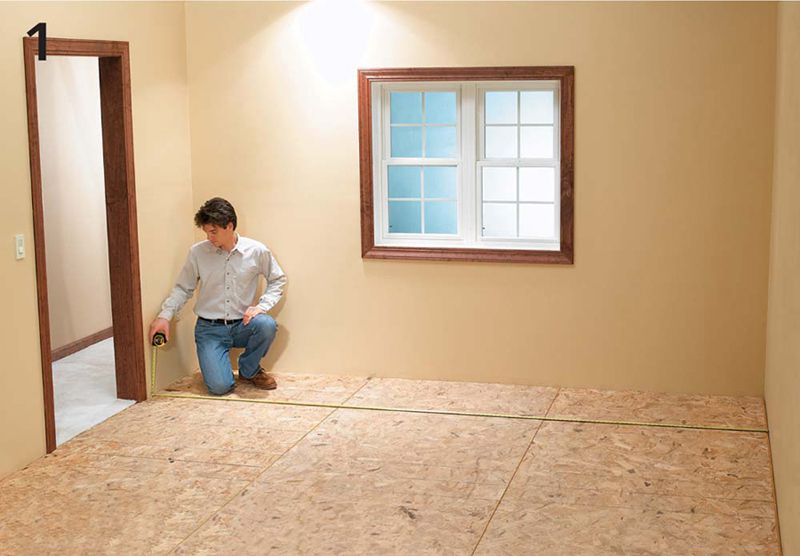
Plan your layout. In most cases, you’ll need to trim one row of floorboards for width so the flooring fits into the room with the correct expansion gaps between it and the wall. Measure the width of the flooring installation area and subtract 1/2". Divide this distance by the actual width of a plank. If the leftover amount is more than one-half of a plank width, trim the planks for your first course to that width. If it is less than one-half, add the amount to the plank width, divide by two, and trim the planks in both the first and last rows to this width.
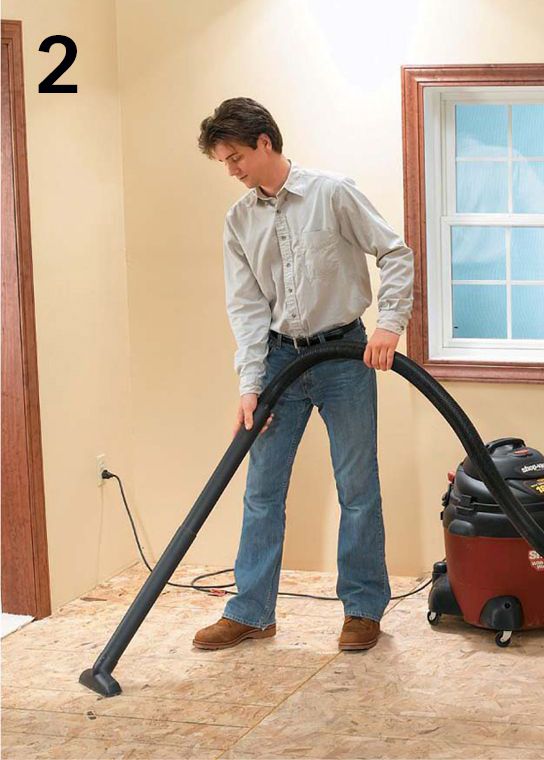
Clear out the installation room completely and vacuum the floor thoroughly to get rid of any debris that might interfere with the installation. A vacuum cleaner is the best tool for this.
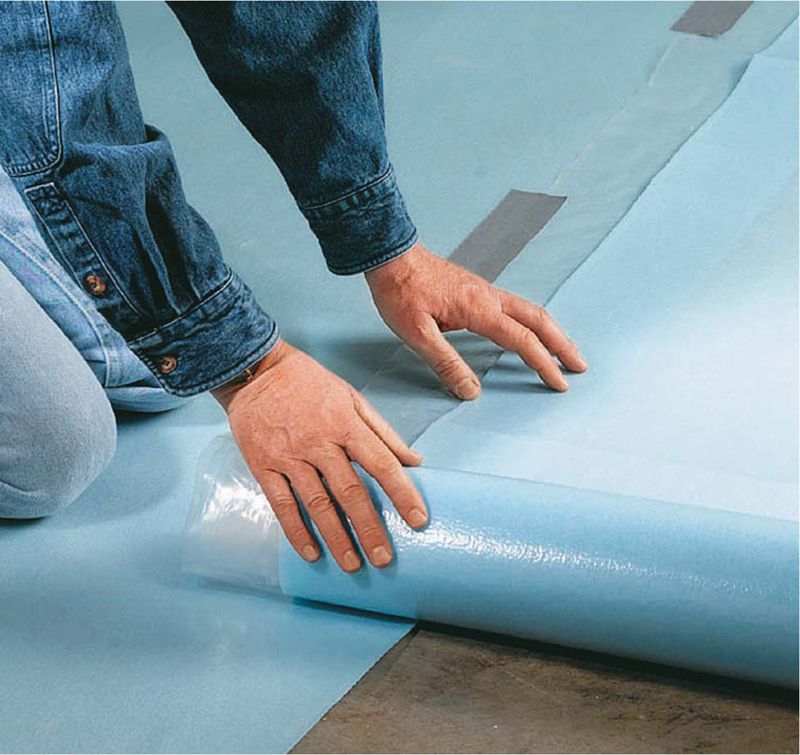
Option: Install underlayment if the product you’re installing doesn’t have the pad preattached. Roll out underlayment pad from the starting corner to the opposite wall. Cut the pad to fit using a utility knife or scissors. Some manufacturers recommend overlapping the rows by 2 to 3". Otherwise, butt the seams together. Tape seams with 2 or 3" clear or duct tape. Smooth sheets out as you work.
Trim the tongues off the edges of the floorboards in the first course. If you need to trim the boards for width this can be done in the same cut. Check your manufacturer’s instructions first: some recommend installing the boards with the groove side facing the wall.
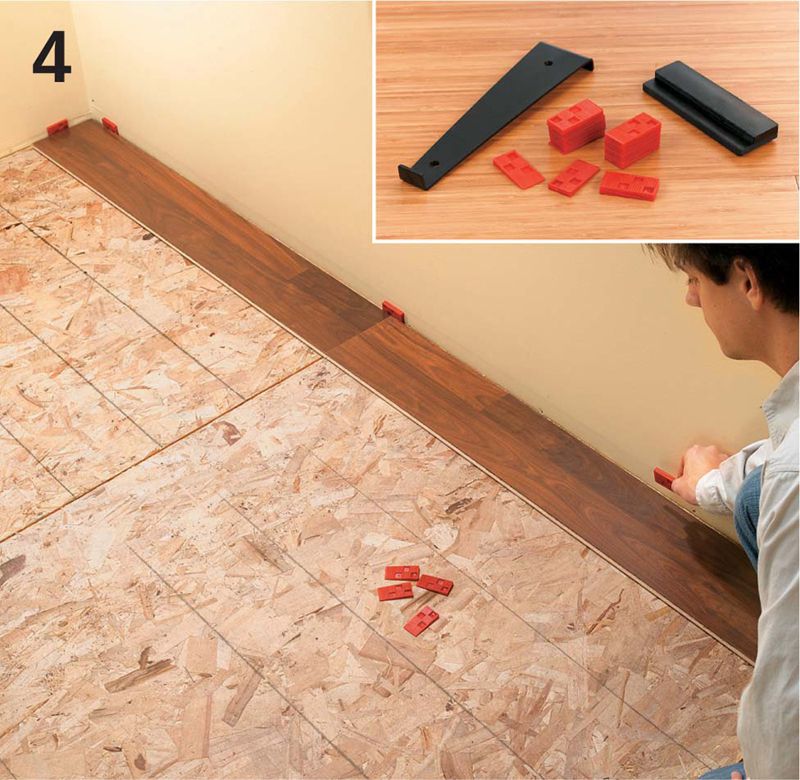
Set spacers against the wall around the perimeter of the installation area. Spacers are 1/4 to 1/2" thick. If you are installing the flooring over a wood subbase you can drive finish nails 1/4" away from the walls to create stops. The point of the spacers is to create an expansion gap between the flooring and the wall. Tip: Buy an installation kit (inset) to make laying your laminate flooring an easier job. A typical kit contains a pull bar, a tapping block, and a selection of spacers.

Cross-cut a floorboard into a 2/3-length piece and a 1/3-length piece to start the second and third courses, respectively. Install the floorboards so the uncut edge with the tongue or groove intact will fit with the second board in the course. Alternating the length of the first board in each course will ensure that the butt joints where floorboard ends meet do not align from course to course.

Lay the first floorboard (use a full-length board) in the farthest corner of the installation. Make sure spacers are in place so there is a gap of approximately 1/4" at each corner wall. Snap a 2/3-length floorboard next to it, and a 1/3-length next to that. This will establish a repeating pattern with a 1/3-length offset between all board ends.
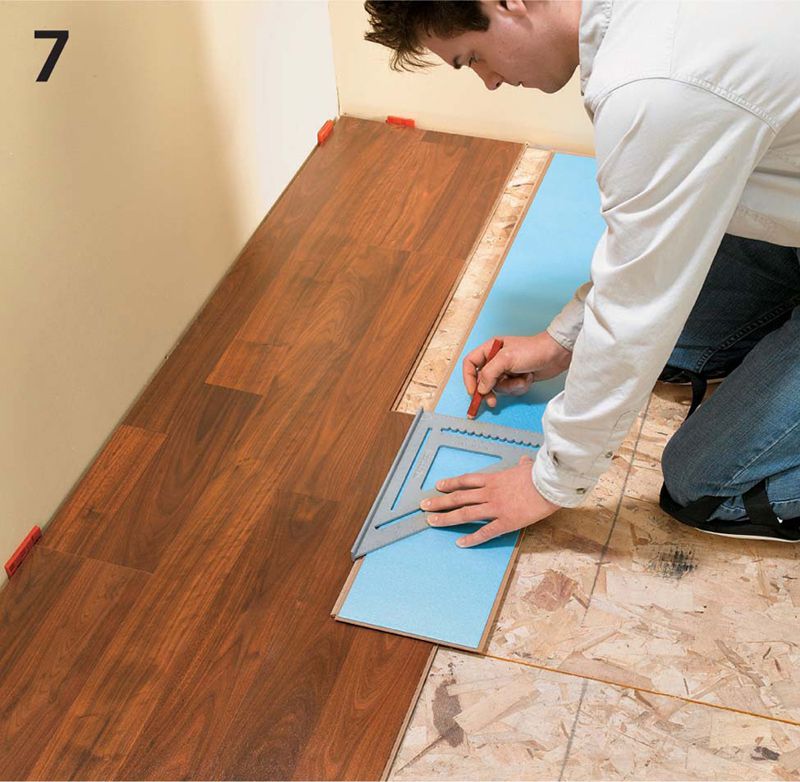
Fill out the first three courses and then repeat the installation sequence to fill out the entire floor area. Mark the final board in each row for cutting by placing it upside down (tongue toward wall) on the previous plank. Push it flush to the spacer on the end wall. Line up a speed square with the bottom plank edge and trace the cut line.
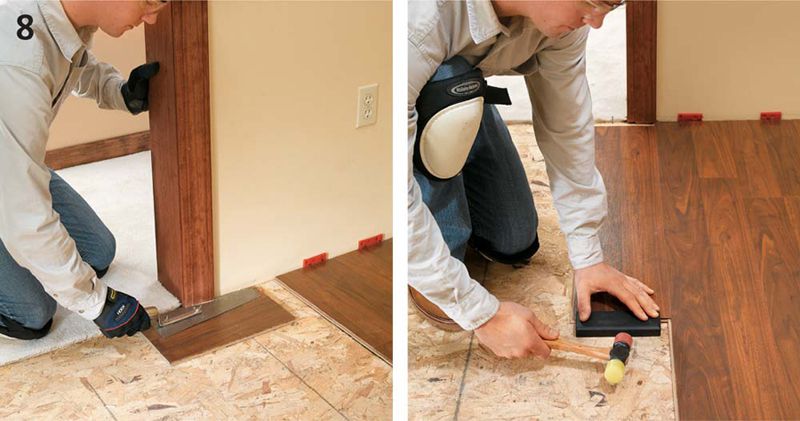
Work around door thresholds. At door openings, cut the bottoms of the door casing with a flush cutting saw to provide clearance for the flooring (left photo). When you reach the door as you lay floorboards, drive the flooring board that meets the door underneath the trimmed casing. Use a block and mallet to drive the board so the end is flush against the wall underneath the casing (right photo).
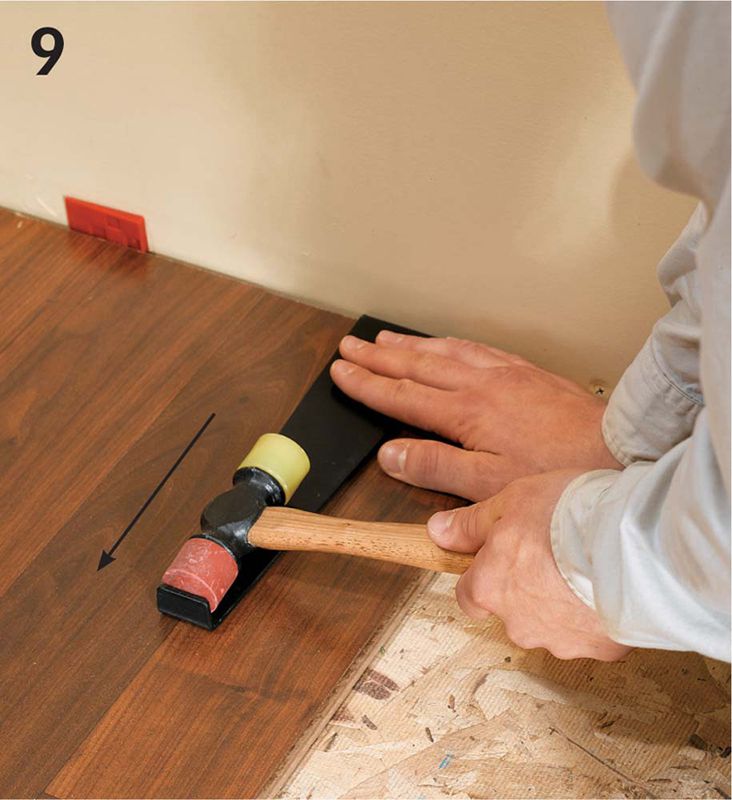
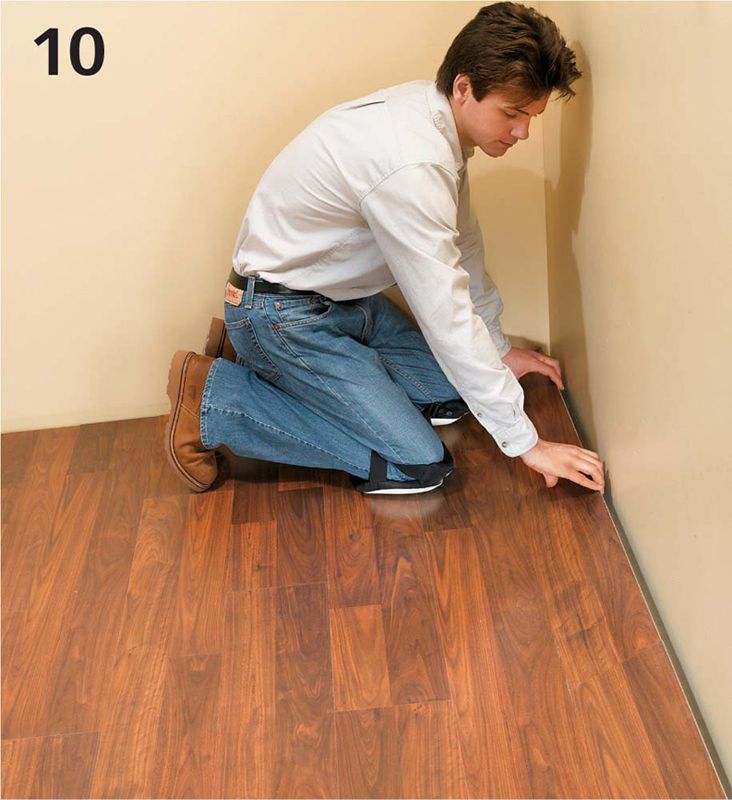
To fit the end plank for the row tightly into position, wedge one end of the pull bar between the spacer and the outside end of the plank. Tap the opposite end of the pull bar with a rubber mallet.
Finish installing floorboards. Rip-cut the floorboards for width if necessary (see next page). Test-fit the pieces in the last course and, if necessary, make adjustment cuts to fit using a utility knife. Finally, snap and lock the last course into place and remove all spacers. Work around obstacles as you go. Add transitions as needed.
 CUTTING LAMINATE FLOORING
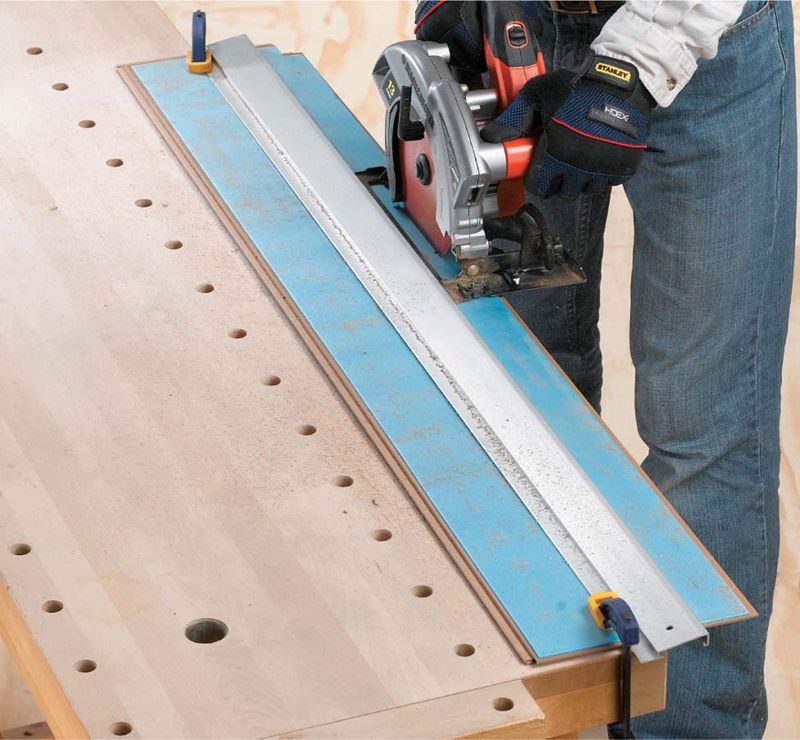
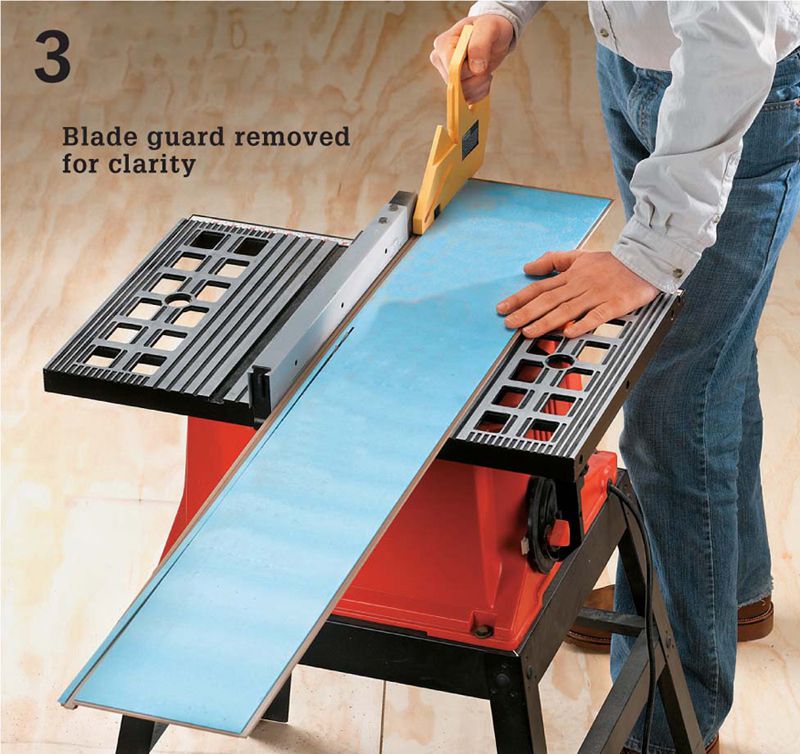
Rip-cut floorboards with a circular saw or table saw equipped with a fine-toothed, carbide-tipped wood blade. In either case, cut on the back side of the plank and make sure the board is clamped securely to a worksurface (when cutting with a circular saw). Cut along the waste side of the marked cut line. Use a straightedge as a guide, as shown.
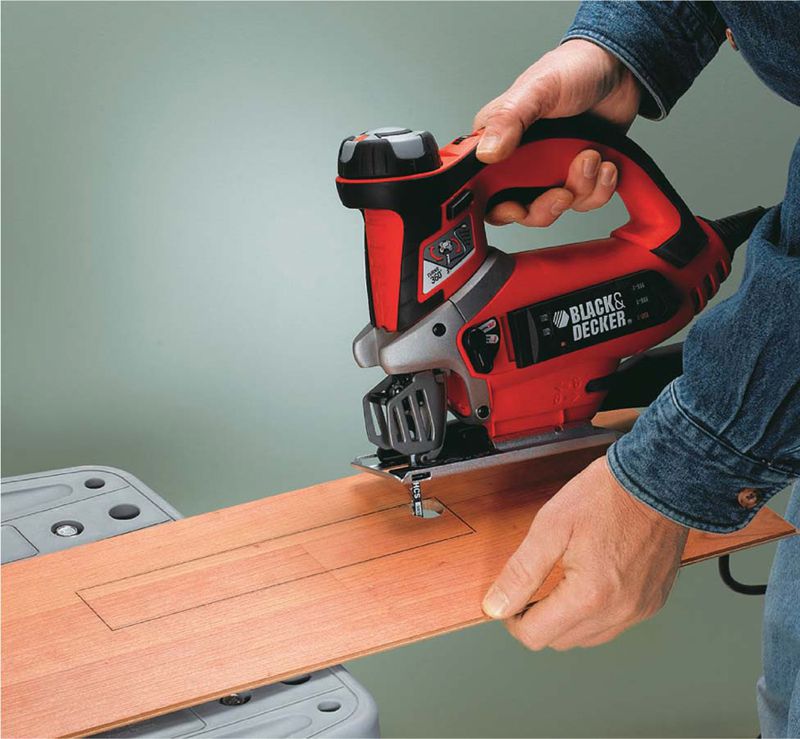
Make internal cutouts with a jigsaw. If you’re experienced with using power tools you can make a plunge cut with the saw blade, but to be on the safe side drill a starter hole near one corner and then make your cutout.
HOW TO MARK FOR CUTTING AROUND OBSTACLES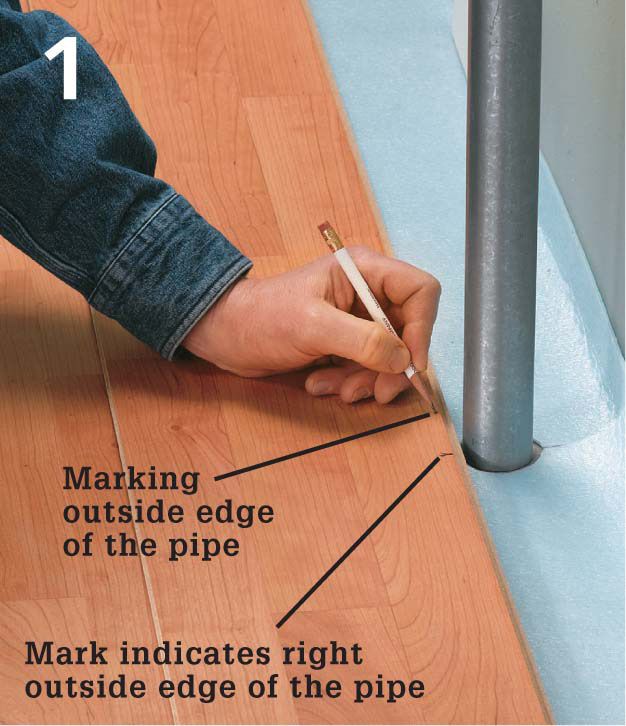
Position a plank end against the spacers on the wall next to the obstacle. Use a pencil to make two marks along the length of the plank, indicating the points where the obstacle begins and ends.
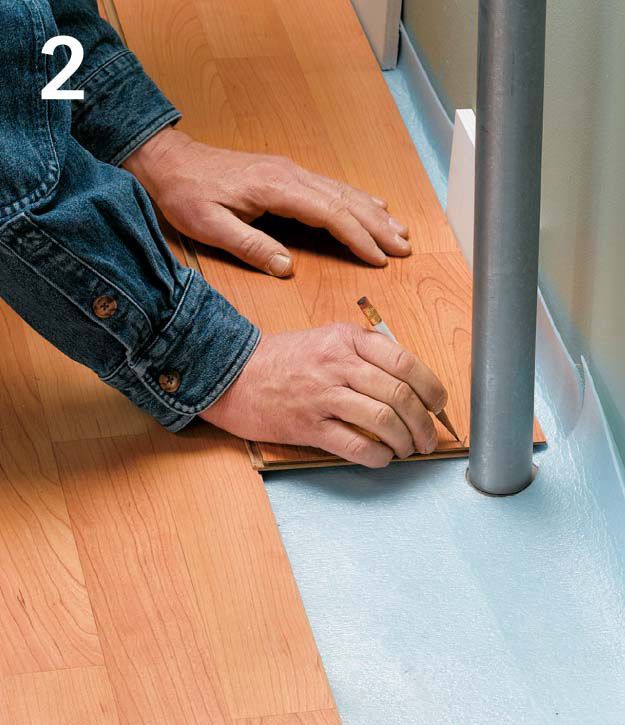
Once the plank is snapped into the previous row, position the plank end against the obstacle. Make two marks with a pencil, this time on the end of the plank to indicate where the obstacle falls along the width of the board.

Use a speed square to extend the four lines. The space at which they intersect is the part of the plank that needs to be removed to make room for the obstacle to go through it. Use a drill with a Forstner bit, or a hole saw the same diameter as the space within the intersecting lines, and drill through the plank at the X. You’ll be left with a hole; extend the cut to the edges with a jigsaw.