Tools & Materials 
Measuring tape
Pencil
Stud finder
Level
Drill
Masonry bit
Grab bar
Hollow-wall anchors
#12 stainless steel screws
Silicone caulk
Protective equipment
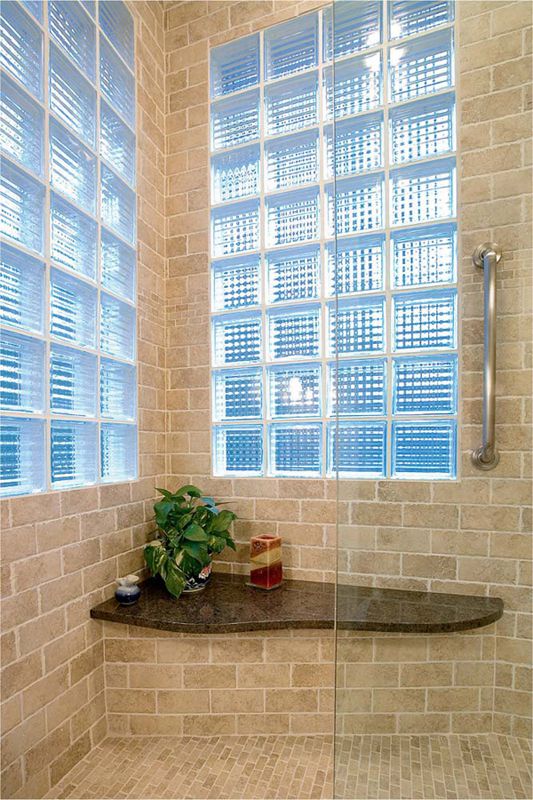
Bathrooms are beautiful with their shiny ceramic tubs, showers, and floors, but add water and moisture to the mix and you’ve created the perfect conditions for a fall. The good news is many falls in the bathroom can be avoided by installing grab bars at key locations.
Grab bars help family members steady themselves on slippery shower, tub, and other floor surfaces. Plus, they provide support for people transferring from a wheelchair or walker to the shower, tub, or toilet.
Grab bars come in a variety of colors, shapes, sizes, and textures. Choose a style with a 1 1/4-inch to 1 1/2-inch diameter that fits comfortably between your thumb and fingers. Then properly install it 1 1/2-inch from the wall with anchors that can support at least 250 pounds.
The easiest way to install grab bars is to screw them into wall studs or into blocking or backing attached to studs. Blocking is a good option if you are framing a new bathroom or have the wall surface removed during a major remodel (see Illustration A). Use 2 × 6 or 2 × 8 lumber to provide room for adjustments, and fasten the blocks to the framing with 16d nails. Note the locations of your blocking for future reference.
As an alternative, cover the entire wall with 3/4" plywood backing secured with screws to the wall framing, so you can install grab bars virtually anywhere on the wall (see Illustration B).
Grab bars can be installed in areas without studs. For these installations, use specialized heavy-duty hollow-wall anchors designed to support at least 250 pounds.
Tools & Materials
Measuring tape
Pencil
Stud finder
Level
Drill
Masonry bit
Grab bar
Hollow-wall anchors
#12 stainless steel screws
Silicone caulk
Protective equipment
Grab bars promote independence in the bathroom, where privacy is especially important. Grab bars not only help prevent slips and falls, they also help people steady themselves in showers and lower themselves into tubs.
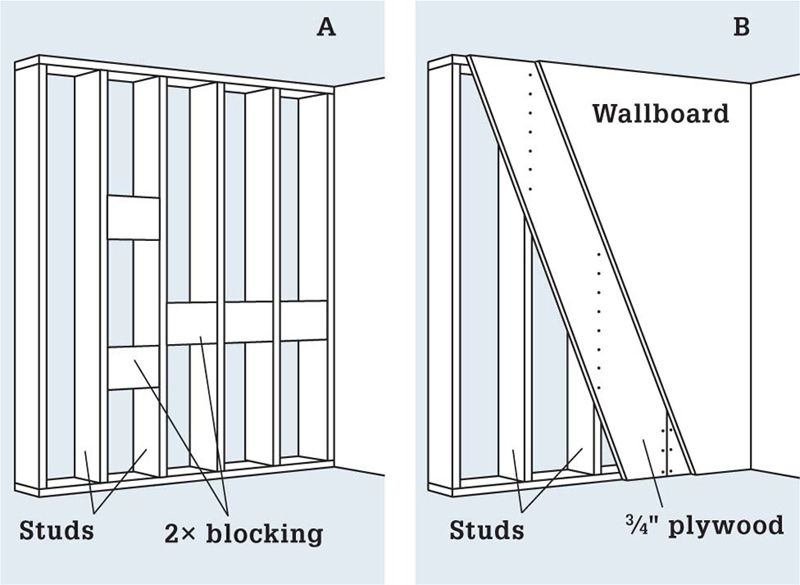
Blocking or backing is required for secure grab bars. If you know where the grab bars will be located, add 2× blocking between studs (Illustration A). You also can cover the entire wall with 3/4" plywood backing, which allows you to install grab bars virtually anywhere on the wall.
 HOW TO INSTALL GRAB BARS
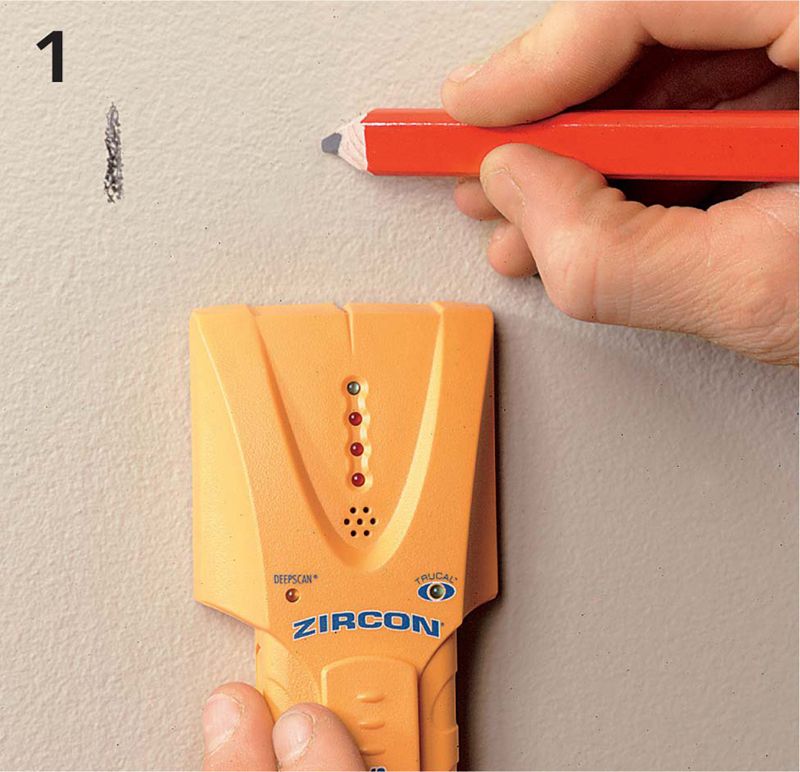
Locate the wall studs in the installation area using a stud finder. If the area is tiled, the stud finder may not detect studs, so try to locate the studs above the tile, if possible, then use a level to transfer the marks lower on the wall. Otherwise, you can drill small, exploratory holes through grout joints in the tile, then fill the holes with silicone caulk to seal them. Be careful not to drill into pipes.
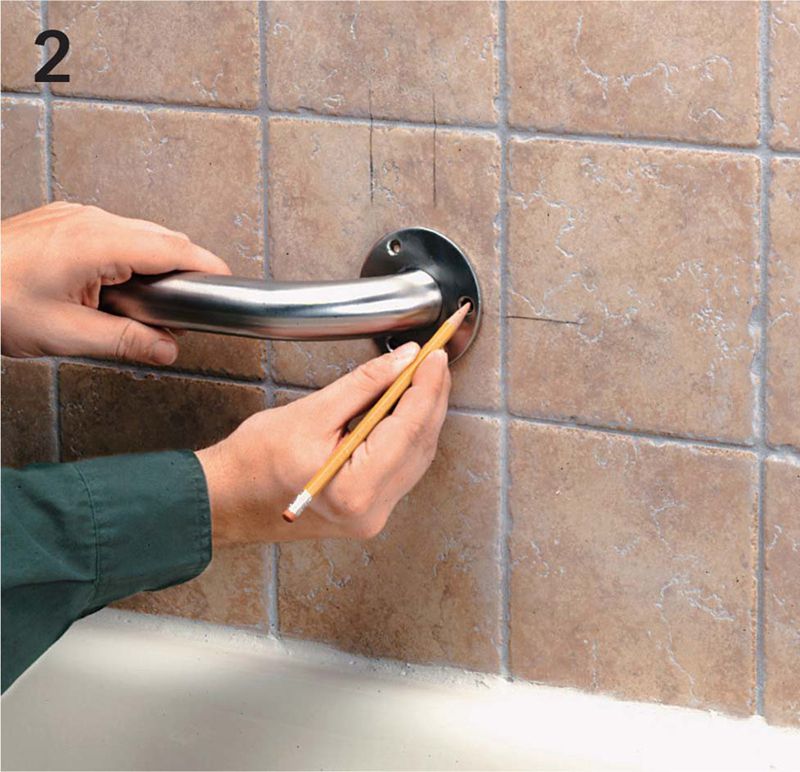
Mark the grab bar height at one stud location, then use a level to transfer the height mark to the stud that will receive the other end of the bar. Position the grab bar on the height marks so at least two of the three mounting holes are aligned with the stud centers. Mark the mounting hole locations onto the wall.
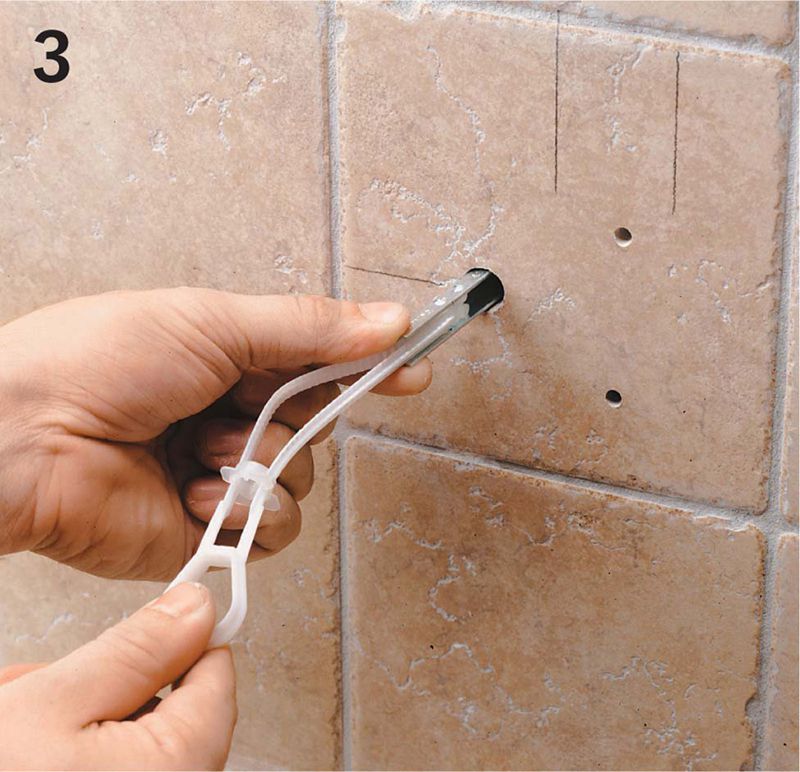
Drill pilot holes for the mounting screws. If you are drilling through tile, start with a small bit (about 1/8"), then redrill the hole with the larger bit. For screws that won’t hit studs, drill holes for wall anchors, following the manufacturer’s directions for sizing. Install anchors, if necessary.
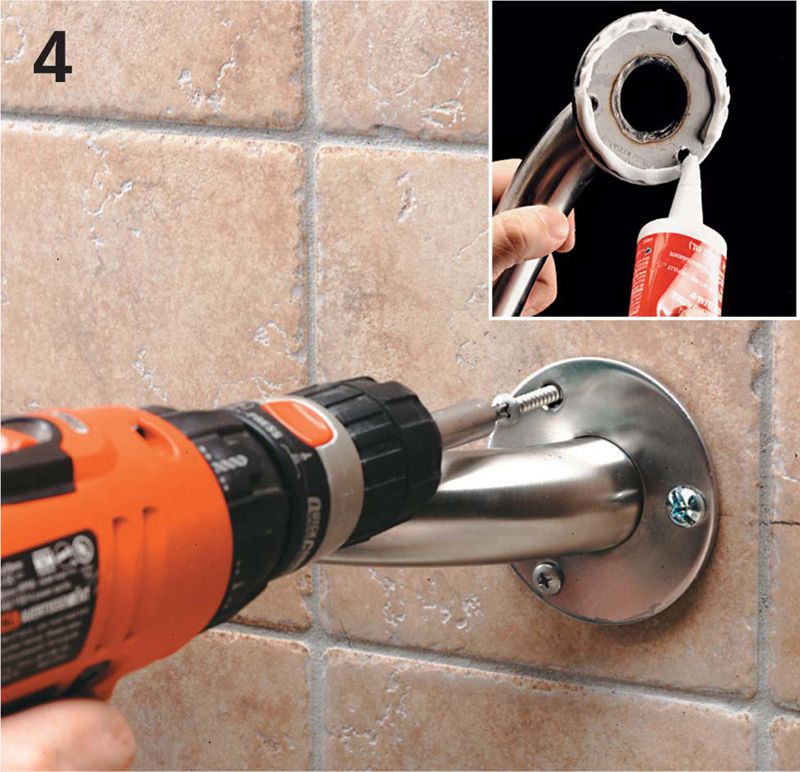
Apply a continuous bead of silicone caulk to the back side of each bar end (inset). Secure the bar to the studs using #12 stainless steel screws (the screws should penetrate the stud by at least 1"). Install a stainless steel screw or bolt into the wall anchors. Test the bar to make sure it’s secure.