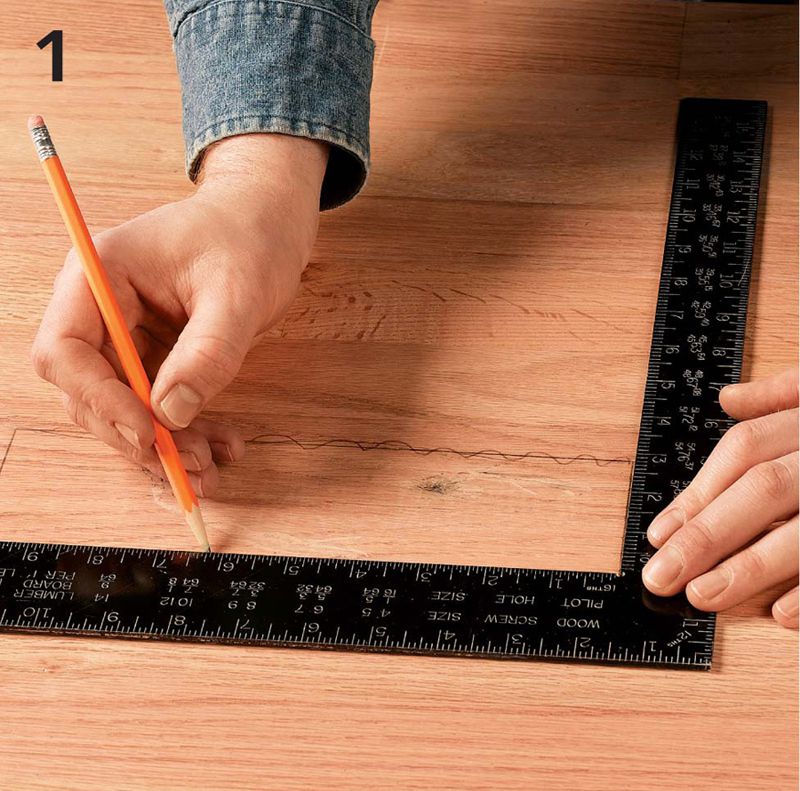
Use a straightedge to draw cut lines above and below the damaged portion of the board. To avoid nails, be sure to mark cut lines at least 3/4" inside the outermost edge of any joints. The goal is not to cut out the entire section of floorboard, but to remove a strip down the middle so you can create room to pry it out.
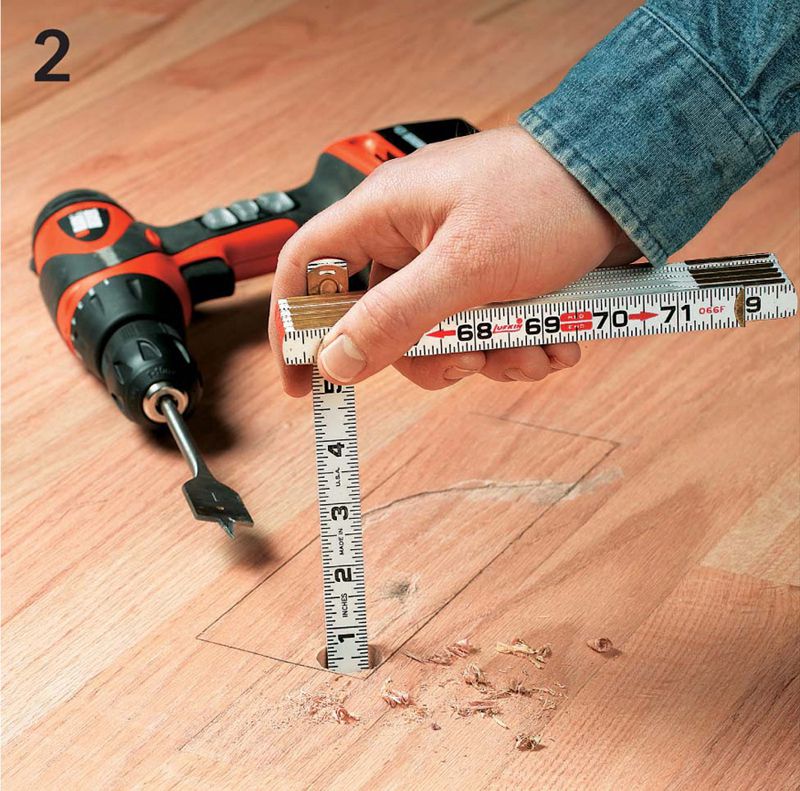
Determine the depth of the boards to be cut. With a drill and 3/4"-wide spade bit, slowly drill through a damaged board. Drill until you see the top of the subfloor. Measure the depth. A common depth is 5–8 or 3/4". Set your circular saw to this depth.
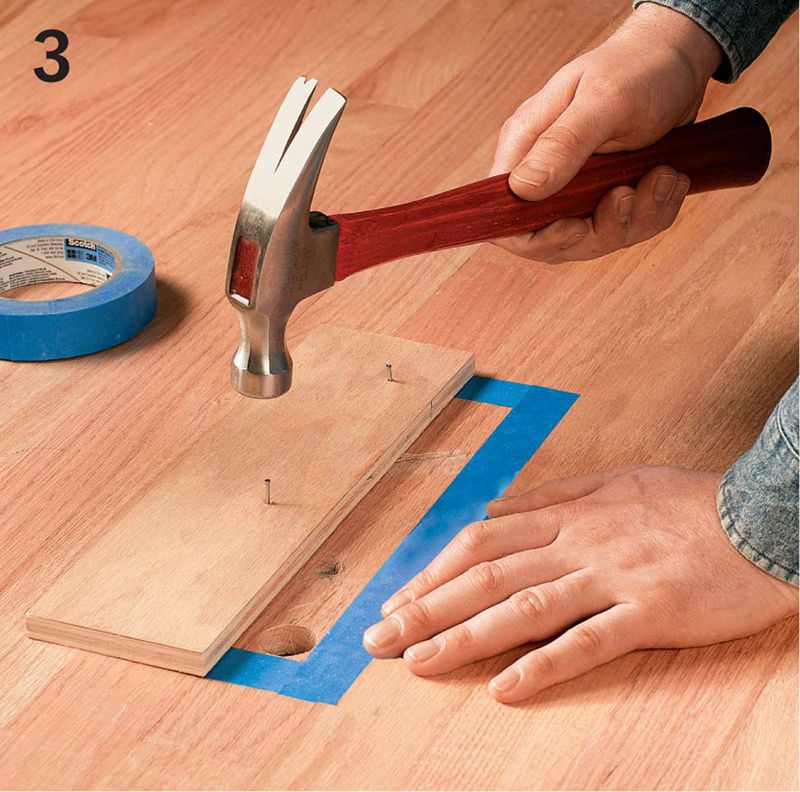
To prevent boards from chipping, place painter’s tape along the outside of the pencil lines. To create a wood cutting guide, tack a straight wood strip inside the damaged area (for easy removal, allow nails to slightly stick up). Set the guide back the distance between the saw blade and the guide edge of the circular saw.
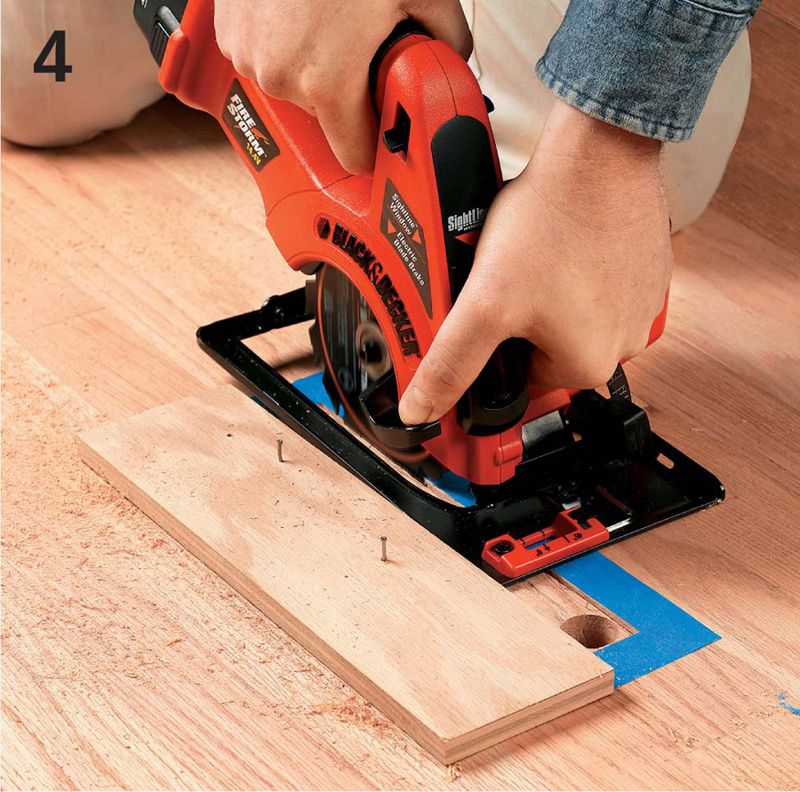
Align the circular saw with the wood cutting guide. Turn on the saw. Lower the blade into the cutline. Do not cut the last 1/4" of the corners. Remove cutting guide. Repeat with other sides.
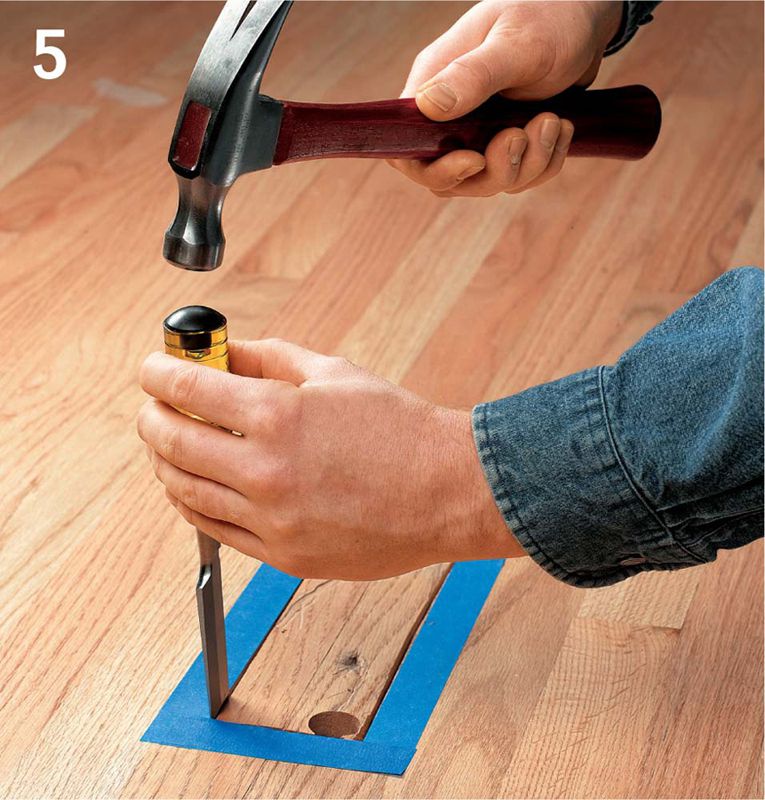
Complete the cuts. Use a hammer and sharp chisel to completely loosen the boards from the subfloor. Make sure the chisel’s beveled side is facing the damaged area for a clean edge.
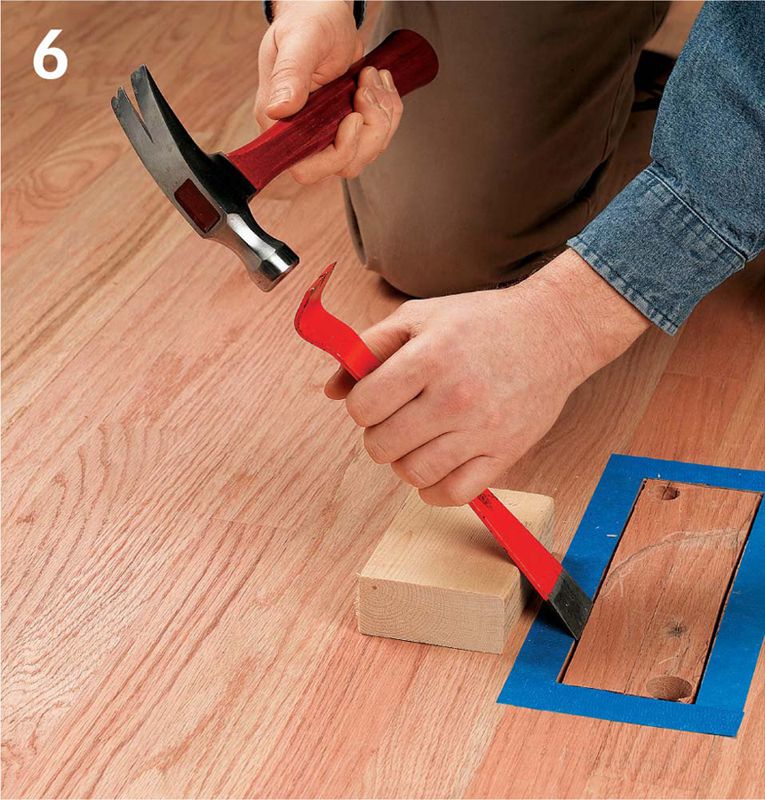
Remove split boards. Use a scrap 2 × 4 block for leverage and to protect the floor. With a hammer, tap a pry bar into and under the split board. Most boards pop out easily, but some may require a little pressure. Remove exposed nails with the hammer claw.

Use a chisel to remove the 2 remaining strips. Again, make sure the bevel side of the chisel is facing the interior of the damaged area. Set any exposed nails with your nail set.
Trimming Tongues & Grooves 

When tongue-and-groove hardwood floors are installed, each new course is blind-nailed through the tongue before the next course is placed. The process is called “blind-nailing” because you can’t see the nail after the floor is finished because it is angled into the tongue-and-groove joint. This brings up two points: 1. You should be aware of the nails angled into the groove side of every board, so you have a better chance of avoiding them when you are cutting or drilling into floorboards. 2. The last board you install has to be “facenailed” (nailed through the top of the board) because you no longer have access to the tongue. The lower lip of this board is first removed, to fit into place.
Cut strips of new flooring to the length and width and slip the patch strip into the repair opening, forming the tongue-and-groove joint with the board at the edge of the opening. If you are installing a single board, trim off the bottom shoulder of the groove edge first.
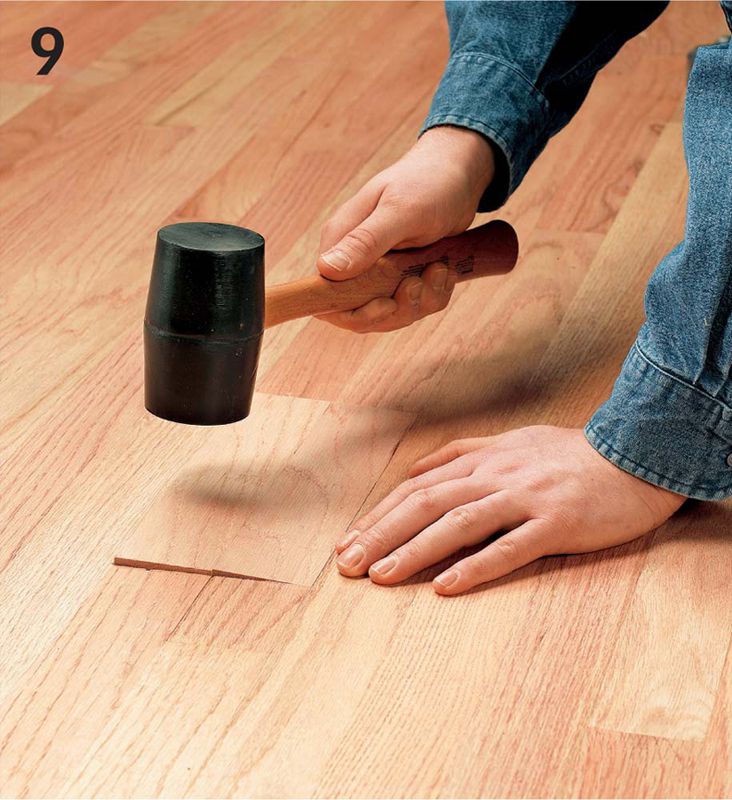
To install the last board, hook the tongue into the groove of the old floor and then use a soft mallet to tap the groove side down into the previous board installed.
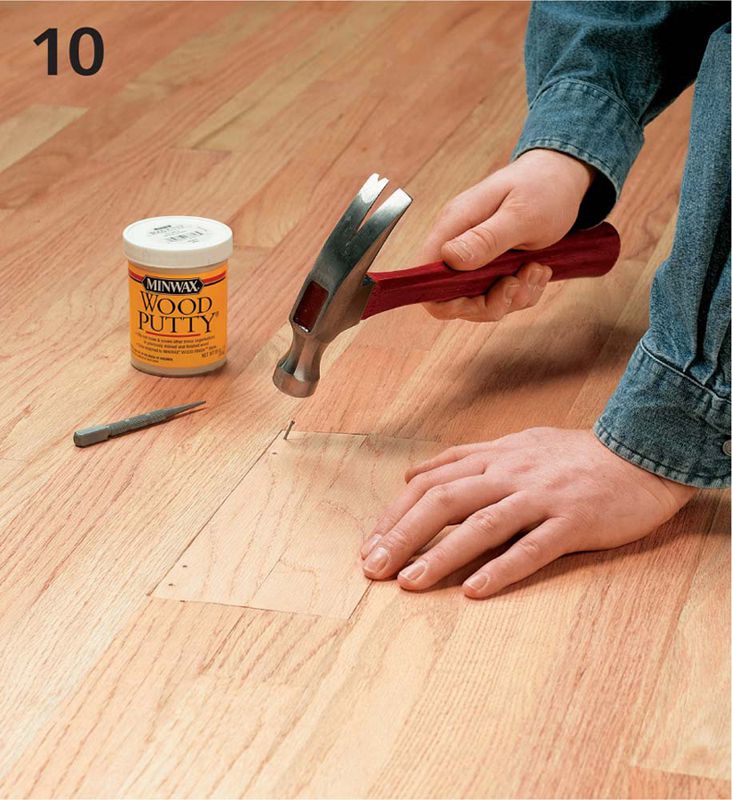
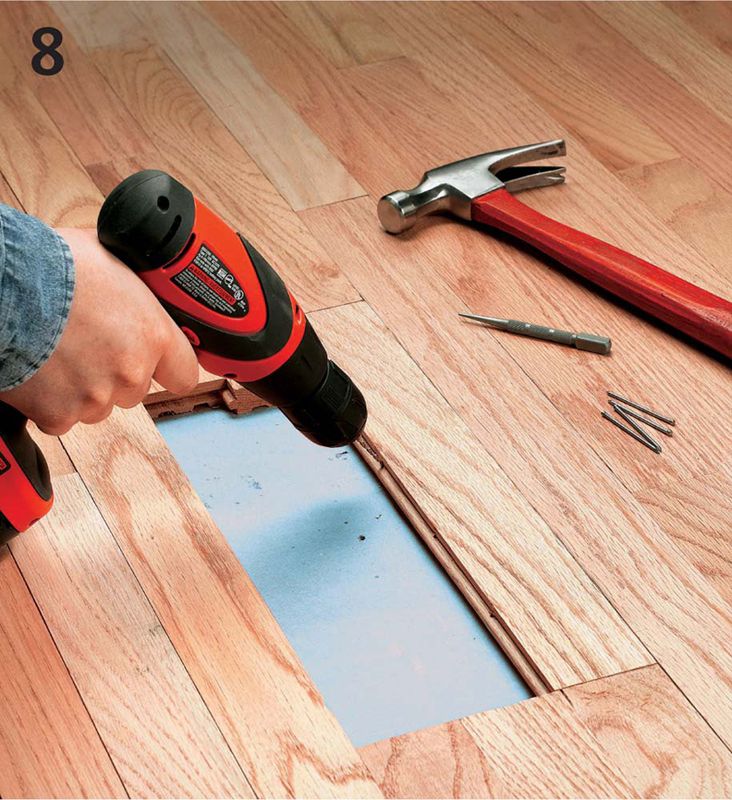
Drill pilot holes angled outward: two side-by-side holes about 1/2" from the edges of each board, and one hole every 12" along the groove side of each board. Drive 1 1/2"-long, 8d finish nails through the holes. Set nails with a nail set. Fill holes with wood putty.
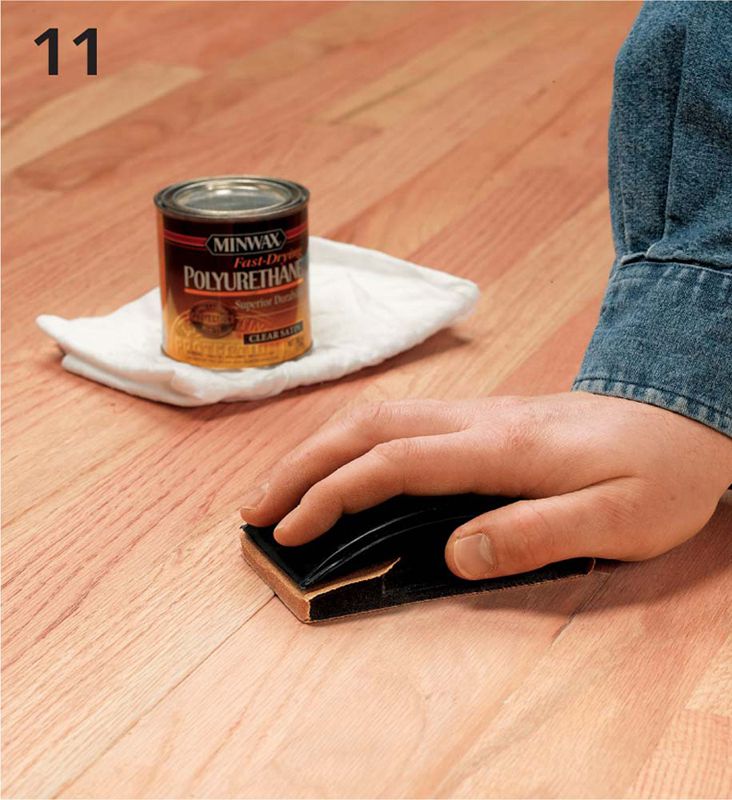
Once putty is dry, sand the patch smooth with fine-grit sandpaper. Feather sand neighboring boards. Vacuum and wipe the area with a clean cloth. Apply matching wood stain or restorer; then apply 2 coats of matching finish.