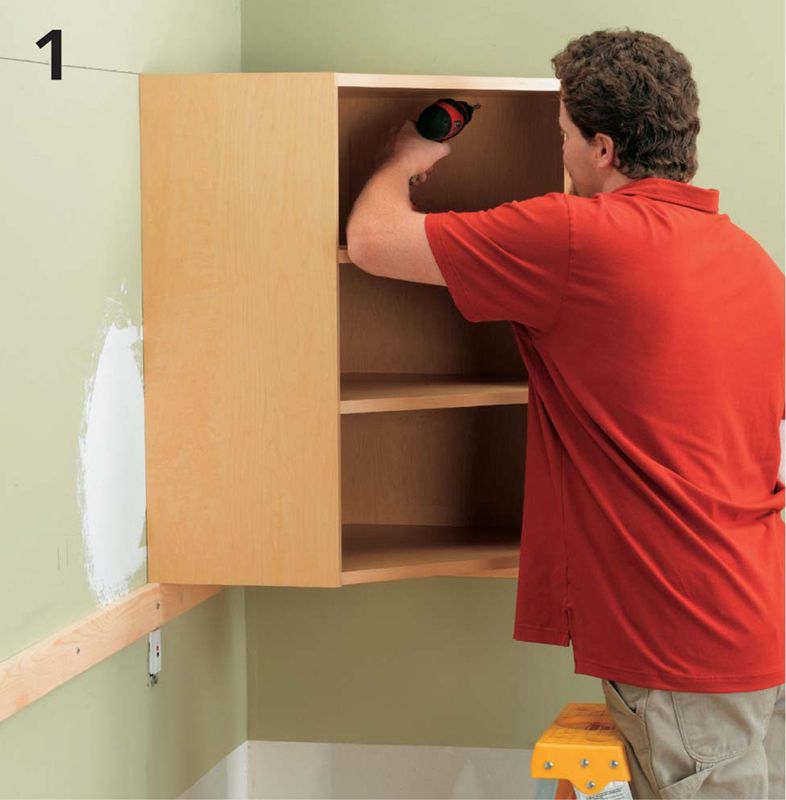

Position a corner upper cabinet on a ledger and hold it in place, making sure it is resting cleanly on the ledger. Drill 3/16" pilot holes into the wall studs through the hanging strips at the top rear of the cabinet. Attach the cabinet to the wall with 2 1/2" screws. Do not tighten fully until all cabinets are hung.
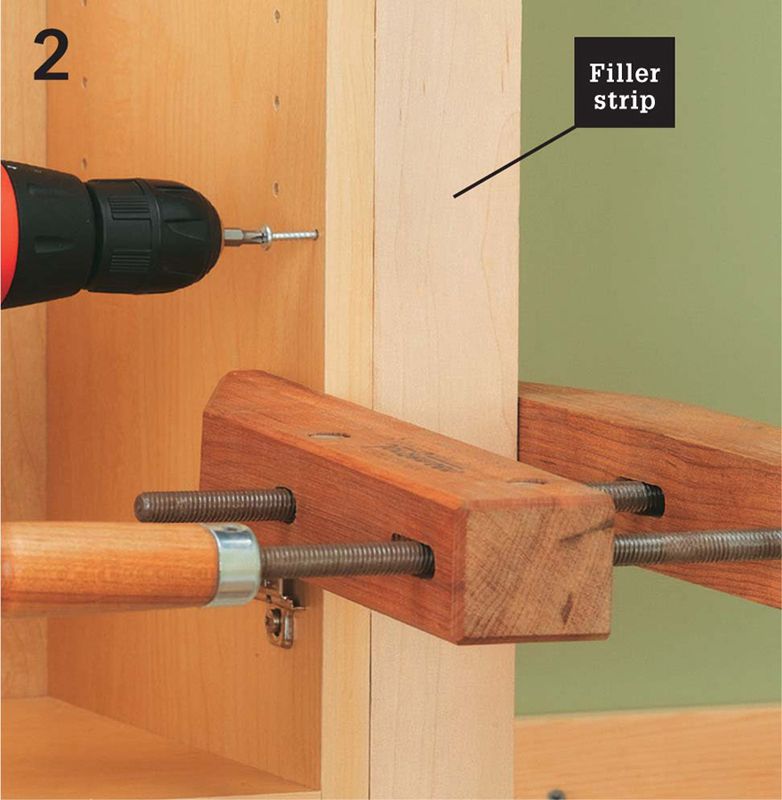
Attach a filler strip to the front edge of the cabinet, if needed. Clamp the filler in place and drill counterbored pilot holes through the cabinet face frame near hinge locations. Attach filler to cabinet with 2 1/2" cabinet screws or flathead wood screws.
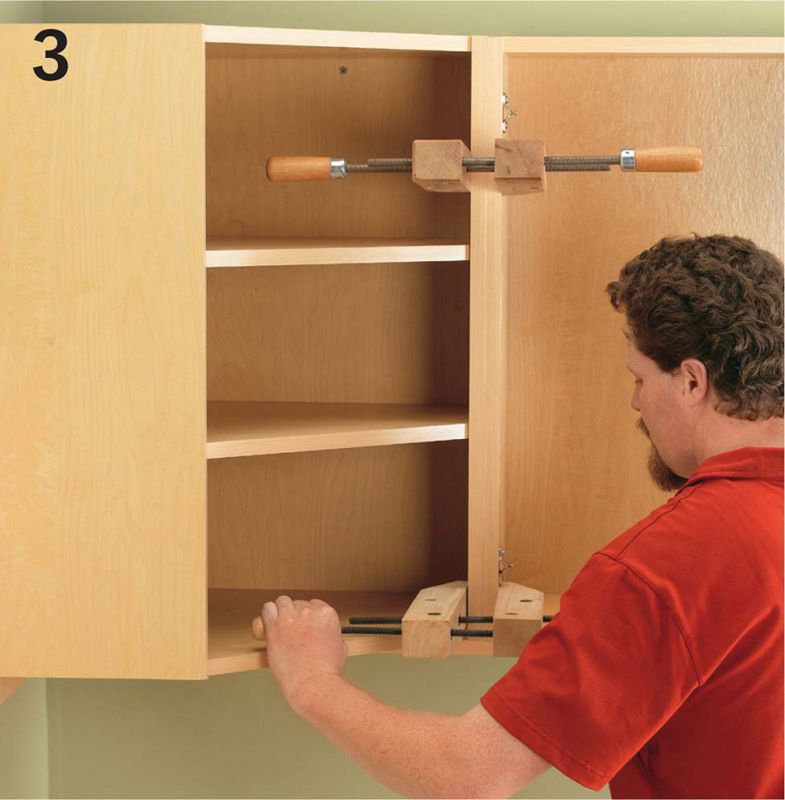
Position the adjoining cabinet on the ledger, tight against the corner cabinet or filler strip. Clamp the corner cabinet and the adjoining cabinet together at the top and bottom. Handscrew clamps will not damage wood face frames.
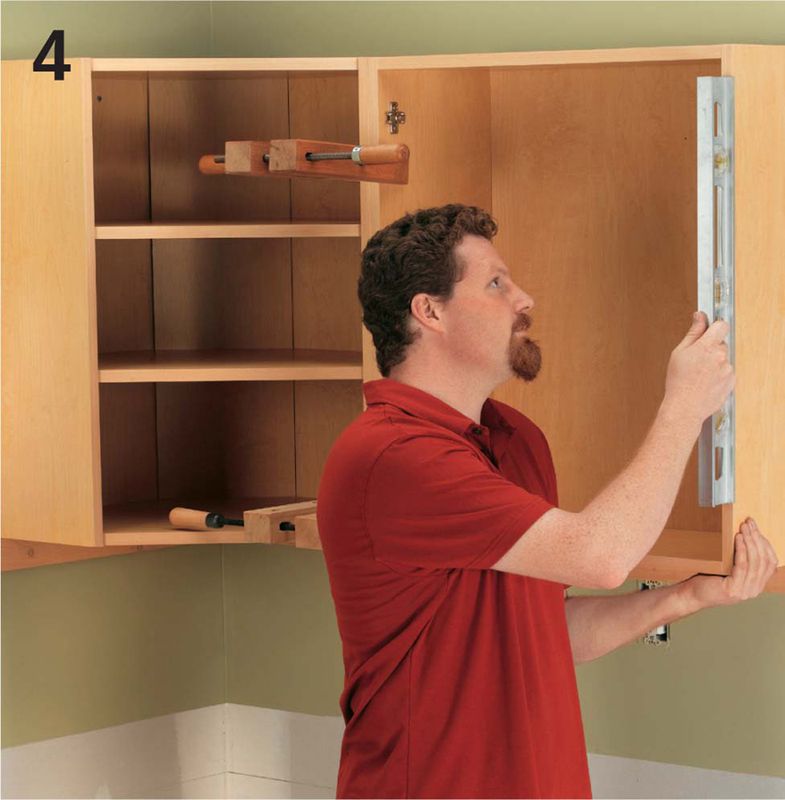
Check the front cabinet edges or face frames for plumb. Drill 3/16" pilot holes into the wall studs through the hanging strips in the rear of the cabinet. Attach the cabinet with 2 1/2" screws. Do not tighten the wall screws fully until all the cabinets are hung.
Attach the corner cabinet to the adjoining cabinet. From the inside corner cabinet, drill pilot holes through the face frame. Join the cabinets with sheet-metal screws.
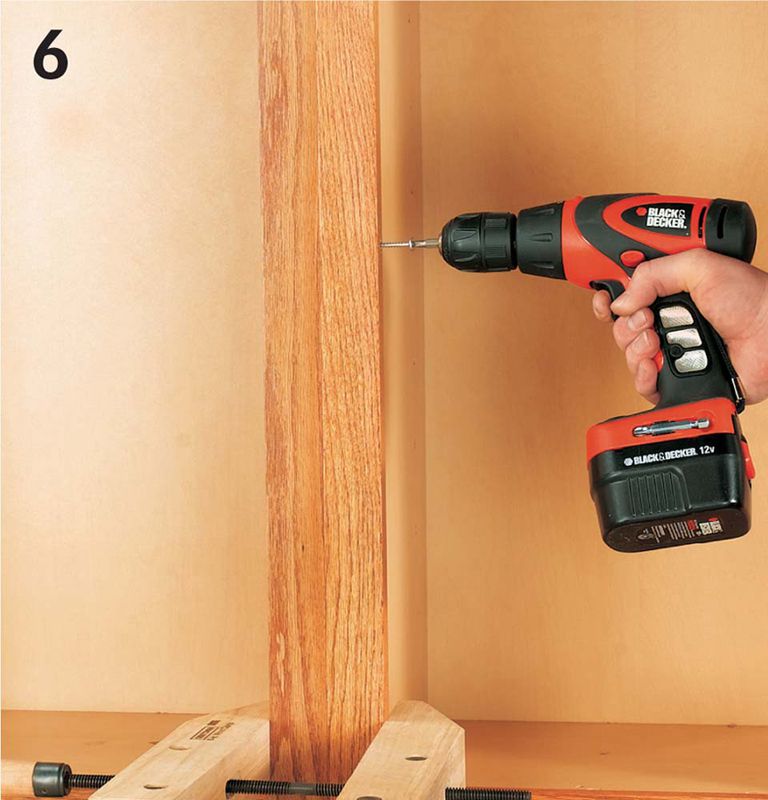
Position and attach each additional cabinet. Clamp frames together, and drill counterbored pilot holes through the side of the face frame. Join the cabinets with wood screws. Drill 3/16" pilot holes in the hanging strips, and attach the cabinet to the studs with wood screws.
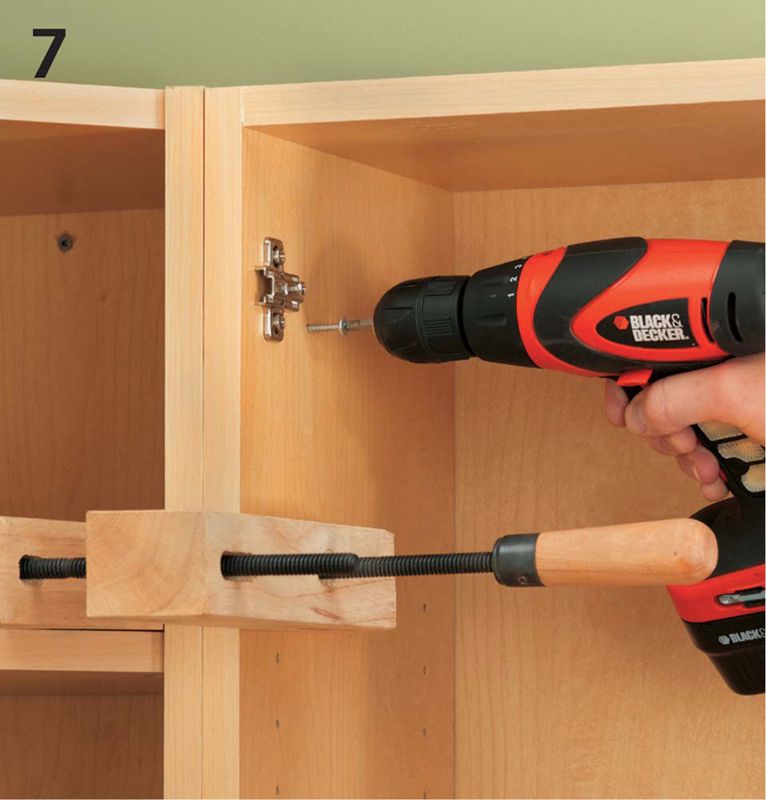
Join the frameless cabinets with #8 × 1 1/4" panhead wood screws or wood screws with decorative washers. Each pair of cabinets should be joined by at least four screws.
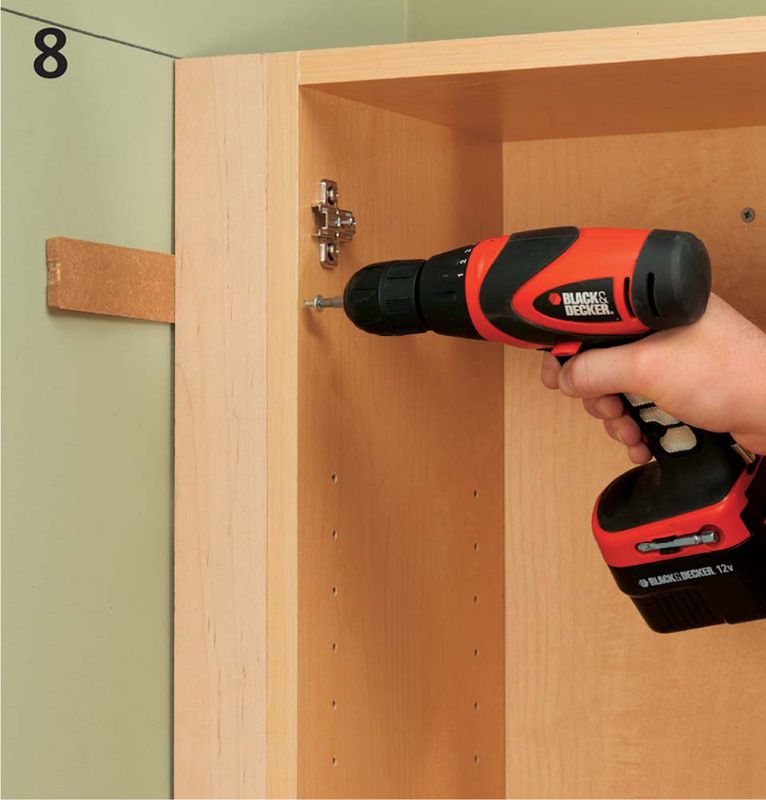
Fill the gaps between the cabinet and wall or neighboring appliance with a filler strip. Cut the filler strip to fit the space, then wedge wood shims between the filler and the wall to create a friction fit that holds it in place temporarily. Drill counterbored pilot holes through the side of the cabinet (or the edge of the face frame) and attach filler with screws.
Remove the temporary ledger. Check the cabinet run for plumb, and adjust if necessary by placing wood shims behind the cabinet, near the stud locations. Tighten the wall screws completely. Cut off the shims with a utility knife.
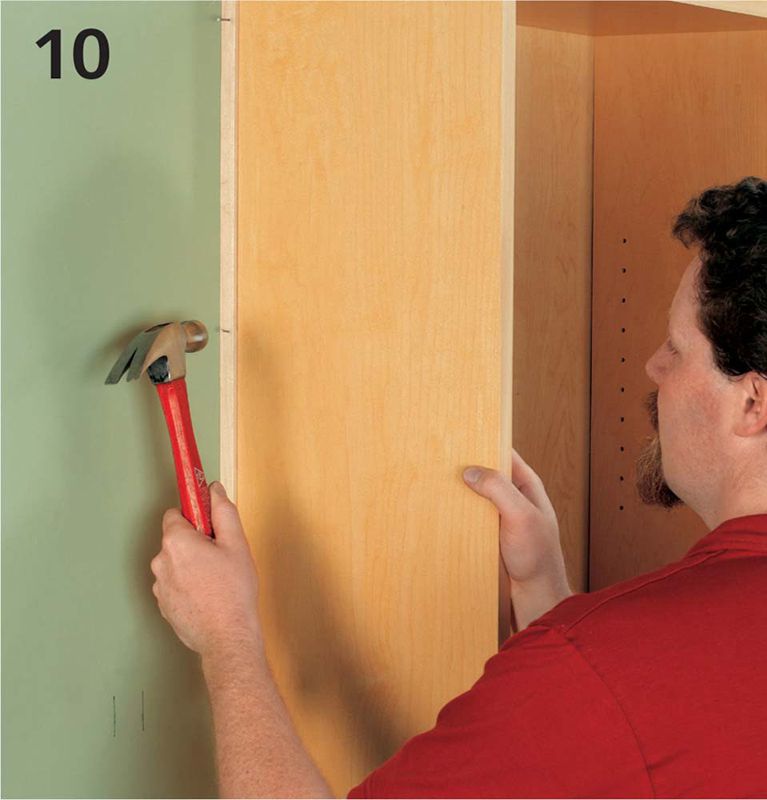
Use trim moldings to cover any gaps between the cabinets and the walls. Stain the moldings to match the cabinet finish.
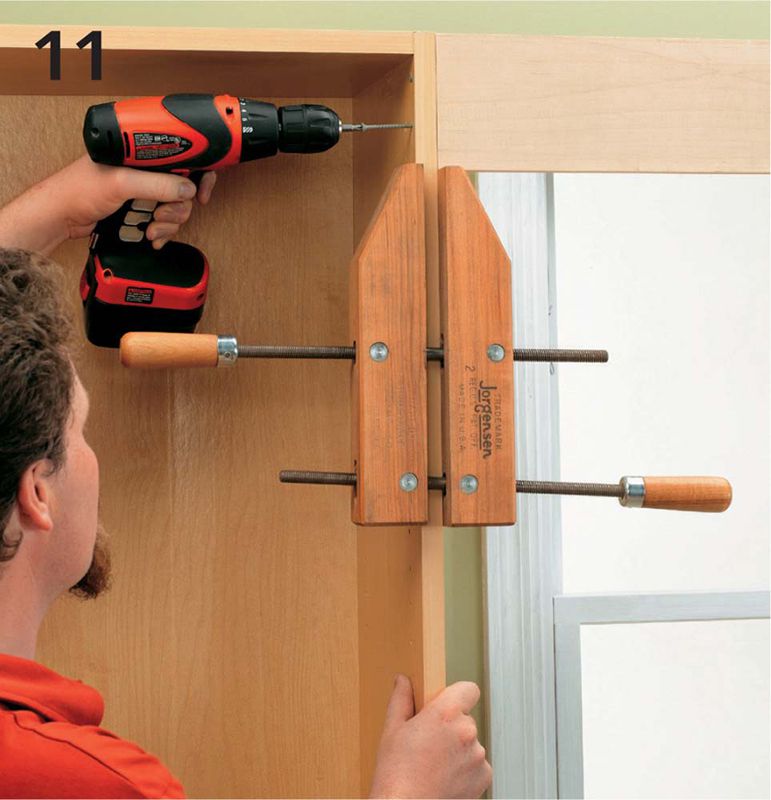
Attach decorative valance above the sink. Clamp the valance to the edge of cabinet frames and drill counterbored pilot holes through the cabinet frames and into the end of the valance. Attach with sheet-metal screws.
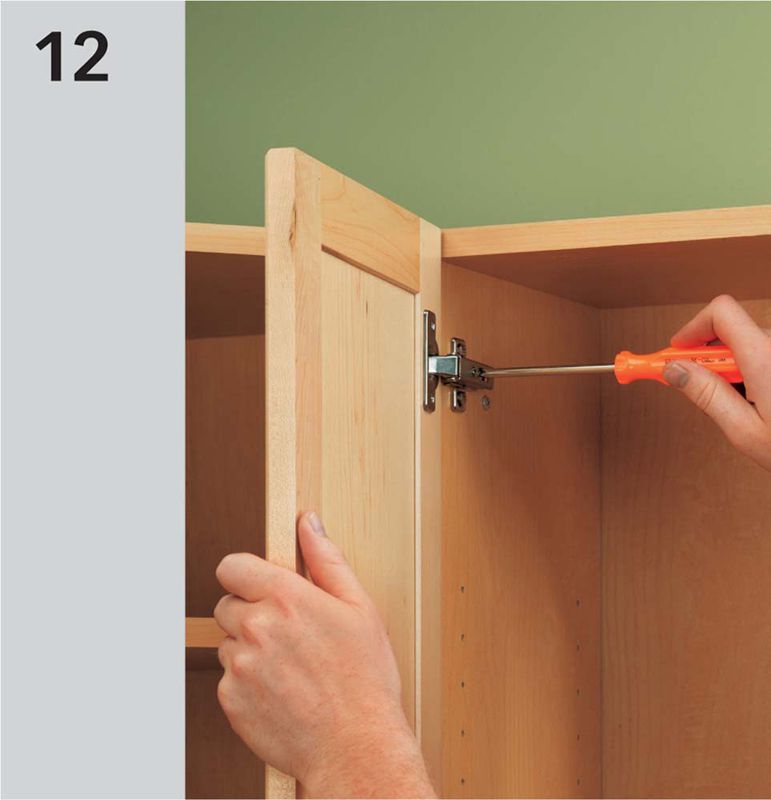
Install the cabinet doors. If necessary, adjust the hinges so that the doors are straight and plumb.
 HOW TO INSTALL BASE CABINETS
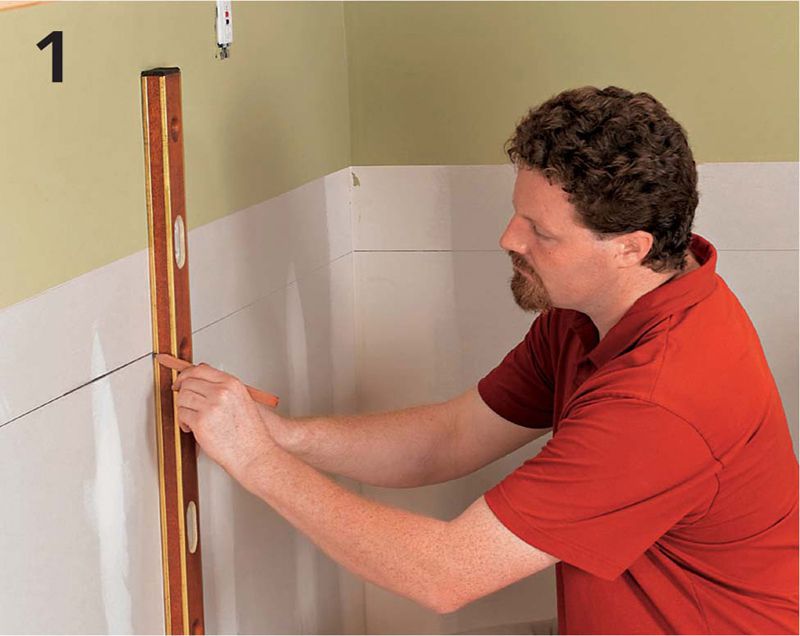
Begin the installation with a corner cabinet. Draw plumb lines that intersect the 341/2" reference line (measured from the high point of the floor) at the locations for the cabinet sides.
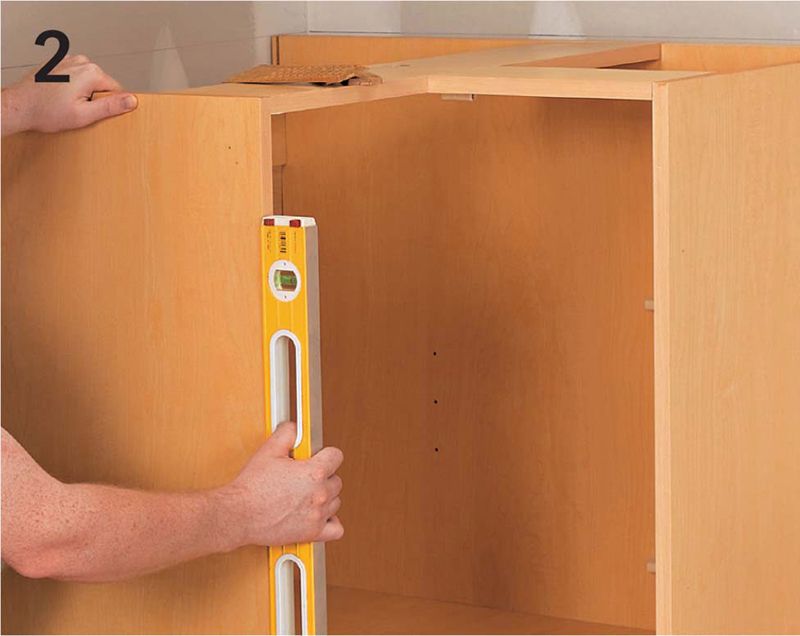
Place the cabinet in the corner. Make sure the cabinet is plumb and level. If necessary, adjust by driving wood shims under the cabinet base. Be careful not to damage the flooring. Drill 3/16" pilot holes through the hanging strip and into the wall studs. Tack the cabinet to the wall with wood screws or wallboard screws.
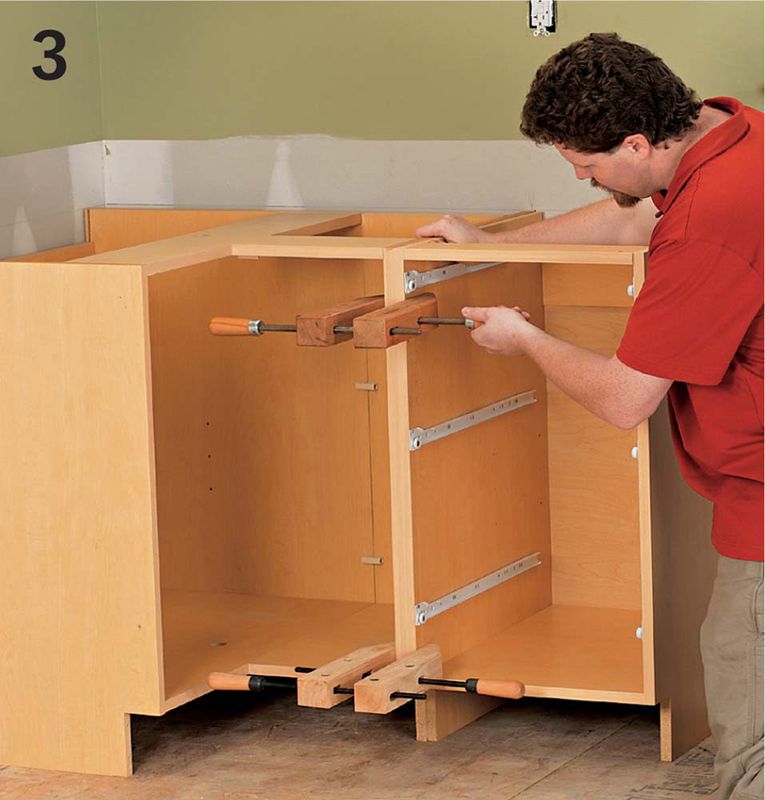
Clamp the adjoining cabinet to the corner cabinet. Make sure the new cabinet is plumb, then drill counterbored pilot holes through the cabinet sides or the face frame and filler strip. Screw the cabinets together. Drill 3/16" pilot holes through the hanging strips and into the wall studs. Tack the cabinets loosely to the wall studs with wood screws or wallboard screws.
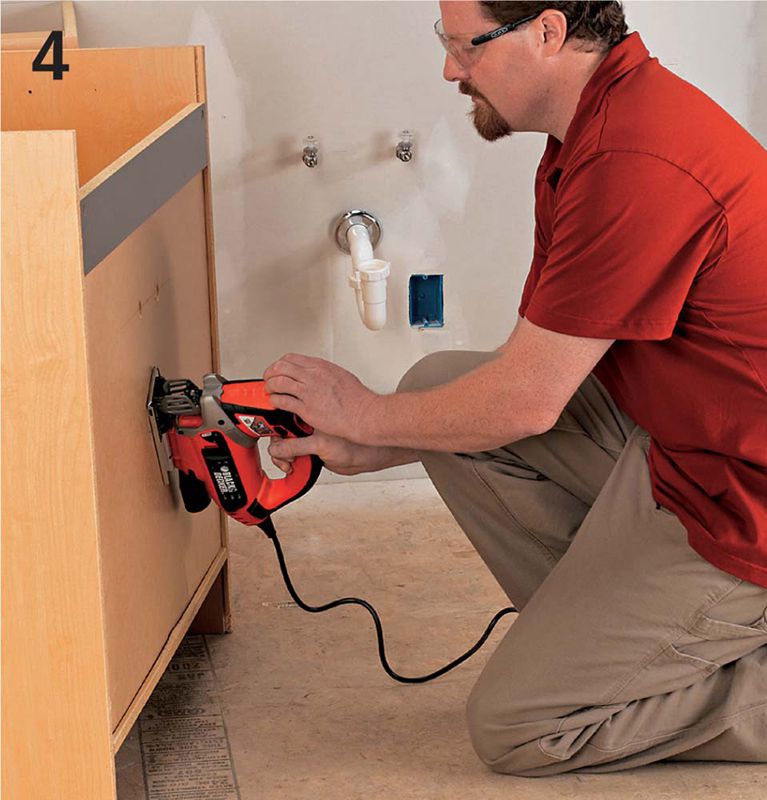
Use a jigsaw to cut any cabinet openings needed in the cabinet backs (for example, in the sink base seen here) for plumbing, wiring, or heating ducts.
Position and attach additional cabinets, making sure the frames are aligned and the cabinet tops are level. Clamp cabinets together, then attach the face frames or cabinet sides with screws driven into pilot holes. Tack the cabinets to the wall studs, but don’t drive screws too tight—you may need to make adjustments once the entire bank is installed.
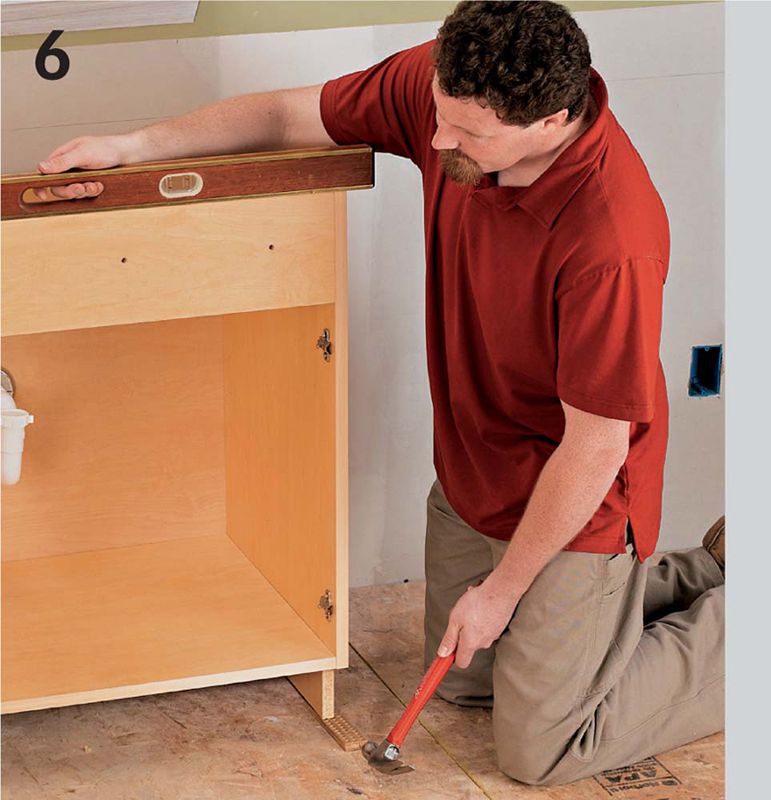
Make sure all the cabinets are level. If necessary, adjust by driving shims underneath the cabinets. Place the shims behind the cabinets near the stud locations to fill any gaps. Tighten the wall screws. Cut off the shims with a utility knife.
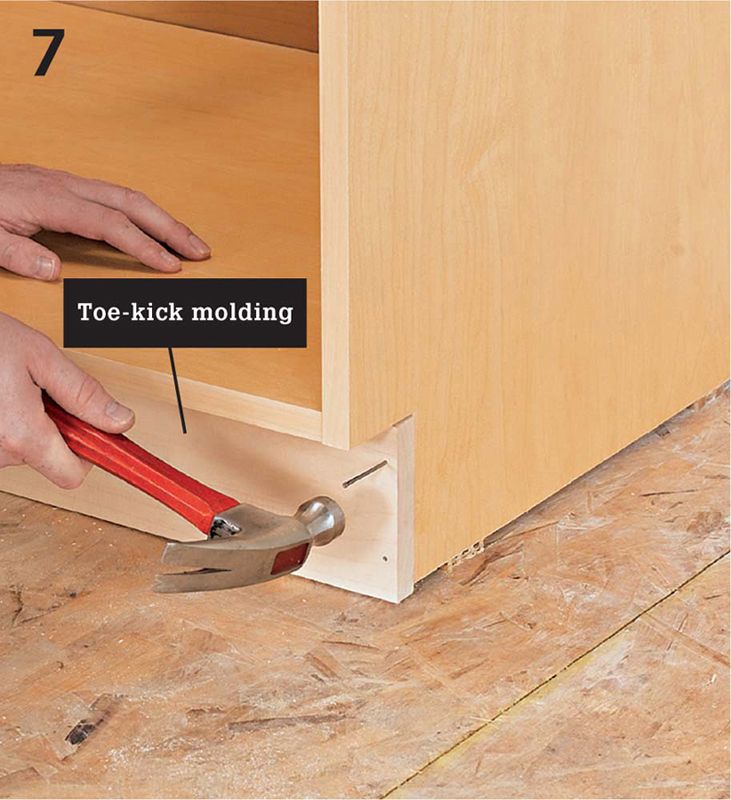
Use trim moldings to cover gaps between the cabinets and the wall or floor. The toe-kick area is often covered with a strip of wood finished to match the cabinets or painted black.
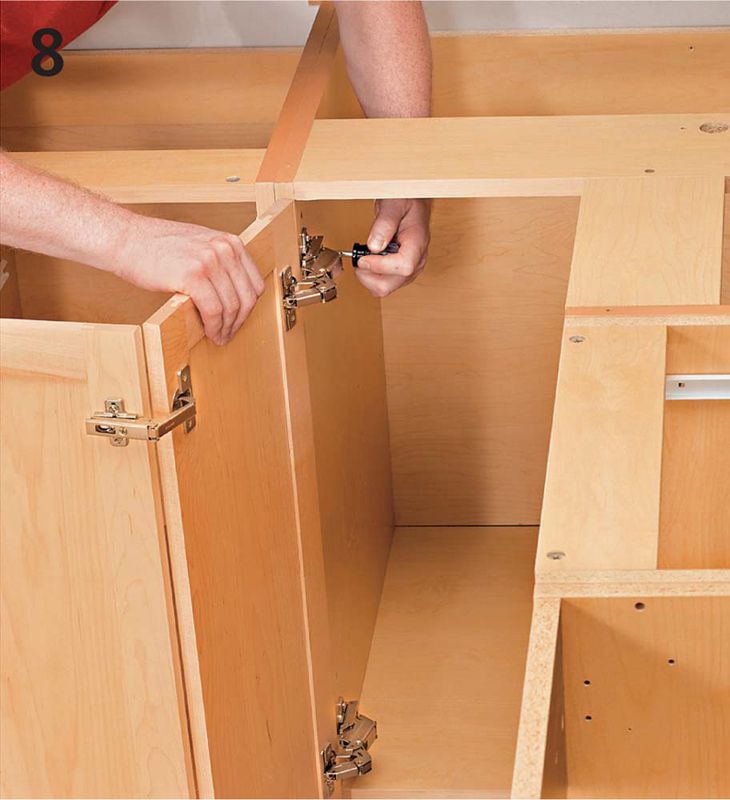
Hang the cabinet doors and mount the drawer fronts, then test to make sure they close smoothly and the doors fit evenly and flush. Self-closing cabinet hinges (by far the most common type installed today) have adjustment screws that allow you to make minor changes to the hardware to correct any problems.
 VARIATION: INSTALLING FACE-FRAME CABINETS
The more traditional-looking face-frame cabinets differ only slightly from frameless cabinets in terms of installation. The opening of the cabinet is surrounded by vertical and horizontal frames called “stiles” and “rails.” The face frame typically overhangs the cabinet case on the outside by 1/16" to 1/8". Because of this overhang, the frames must be the connection point rather than the cabinet case. Use 2 1/2" No.10 wood screws to connect the frames (or use special 2 1/2"- or 3”-long cabinet screws). Do not screw the cabinet sides together at any other point than the face frame, as this will skew the cabinets and create structural stress.
Most face-frame cabinets use overlay doors. The hinges for these doors simply attach to the back of the door and to the side or face of the cabinet face-frame with screws. They are called “overlay wrap” or “partial wrap” hinges if they attach to the side of the face frame, and they are called “semi-concealed” if they attach to the front of the face-frame. Cup or Euro-style hinges are available for face-frame cabinets, but are somewhat more difficult to install if the doors have not been predrilled for this hinge style. The best way to attach the door hardware uniformly is to use a drilling template. You can usually purchase one where you purchase the cabinets or hardware.
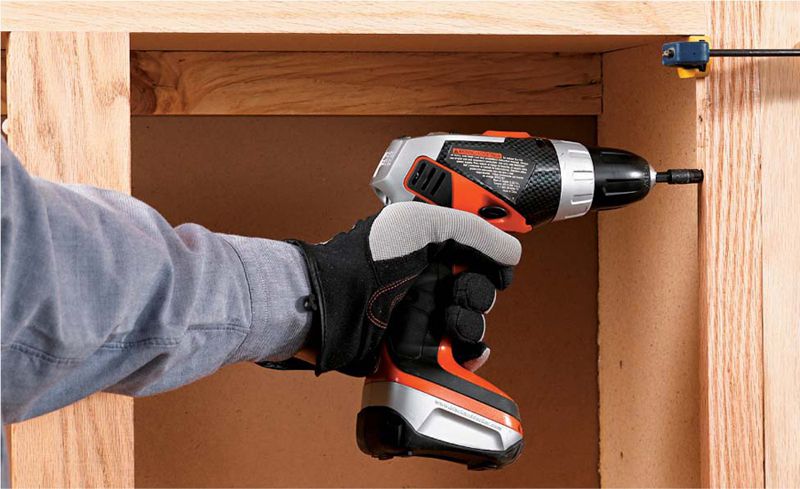
To join face-frame cabinets, set the cabinets in position, aligned with the frame faces flush and the frame tops flush. Clamp the frames together at the top and bottom. Using a drill with a No.10 counterbore bit, drill two pilot holes through the sides of the frame into the adjoining frame. Attach the frames with cabinet screws or 2 1/2" No. 10 screws.
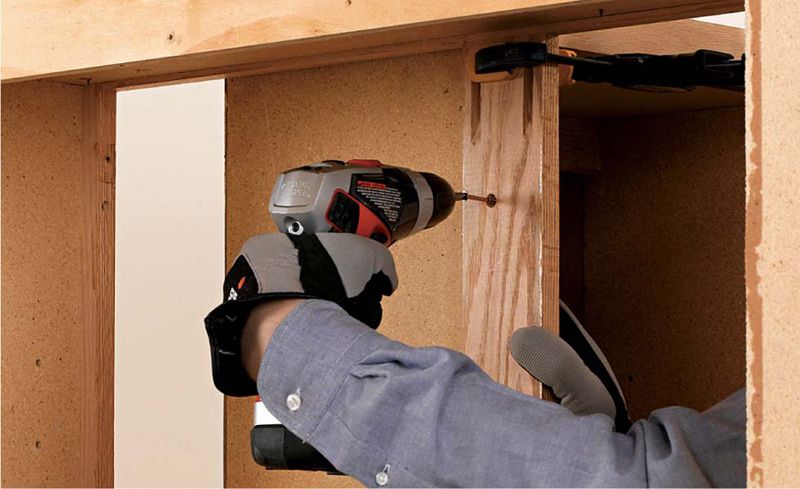
Start at the corner when installing a bank of cabinets that includes a blind corner cabinet. Attach the cabinet adjoining the corner by driving screws through the face frame (see photo at the top of this page). If a filler strip is necessary to fill a gap between the two cabinets, attach the filler strip to the base cabinet first and then run screws through the corner cabinet face frame and into the filler strip only after the adjoining cabinet is positioned and shimmed.
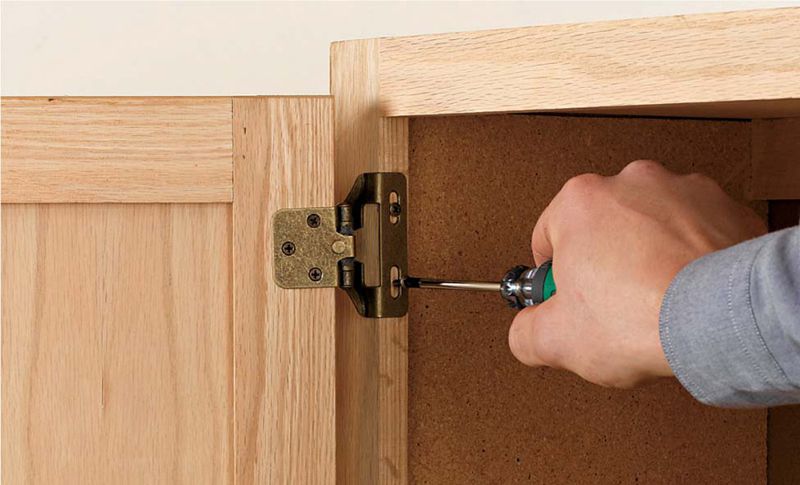
To install partial wrap overlay hinges, use a template to mark the hinge locations on the back of the door. Drill 5/64"-dia. pilot holes no more than 3/8" deep using a self-centering vix bit. Screw the hinge to the door back. Place the hinge against the face frame and mark the screw holes. Drill 5/64" pilot holes. Drive all the screws for both hinges partially, then tighten all.