Tools & Materials 
Circular saw, jigsaw, or handsaw
Clamps
Eye and ear protection
3/8" spacers
Linoleum click tiles
Speed square
Wedge
2 × 4 scrap lumber
Glue
Tape measure
Like sheet linoleum, linoleum tile is a natural floor covering produced from sustainable resources that include linseed oil, pine resin, and other organic additives. These ingredients make for an exceptionally green floor covering with little or no negative impact in air quality in your home. Linoleum is also antistatic and has antimicrobial properties that inhibit the growth of germs and harmful microorganisms.
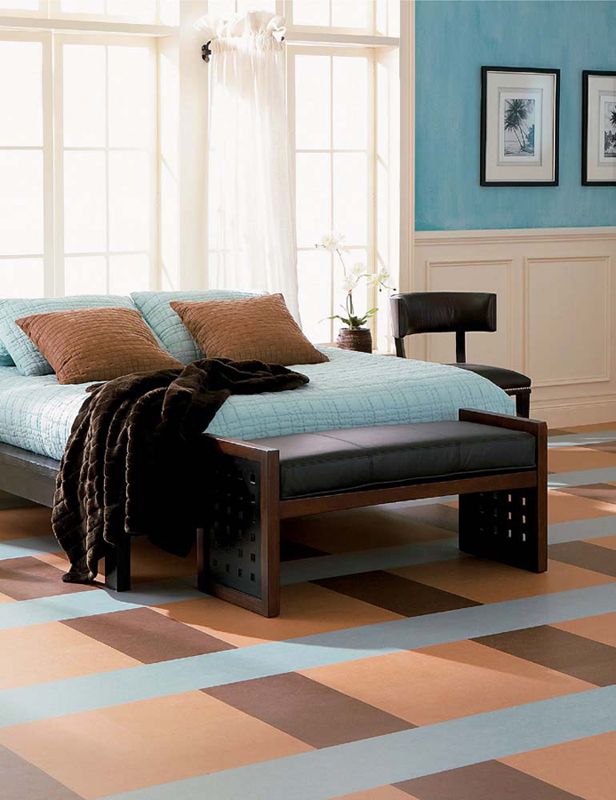
Although linoleum is still offered as sheet flooring, the far easier option to install is linoleum tile in the form of “click” panels, such as the Marmoleum product seen here. These tiles are comprised of a linoleum surface bonded over moisture-resistant, high-density fiberboard. A cork layer also adds a comfortable feel underfoot and dampens sound transmission. The flooring is available in 12-inch square tiles and panels sized at 12 inches by 36 inches.
These formats—and a noteworthy palette of available colors—give you a great deal of flexibility in designing a floor to fit your décor. Although the moisture-resistant nature of linoleum tile makes it a great choice for kitchens and baths, the dusky colors, appealing finish, and comfortable, warm feel make it appropriate for just about any room or décor. The tiles and panels can be mixed and matched to create a complex pattern of shapes and shades, or you can use one or the other to create a floor design that’s more restful visually.
No matter what colors or design you choose, installing a linoleum click floor is an easy process. The panels can be installed over any clean, dry, structurally sound surface with no more than 3/32-inch of height variation per six feet of surface. The panels are simply snapped together row by row. And because the process uses no glue or adhesive, the floor can be walked on as soon as you’re done installing it.
Tools & Materials
Circular saw, jigsaw, or handsaw
Clamps
Eye and ear protection
3/8" spacers
Linoleum click tiles
Speed square
Wedge
2 × 4 scrap lumber
Glue
Tape measure
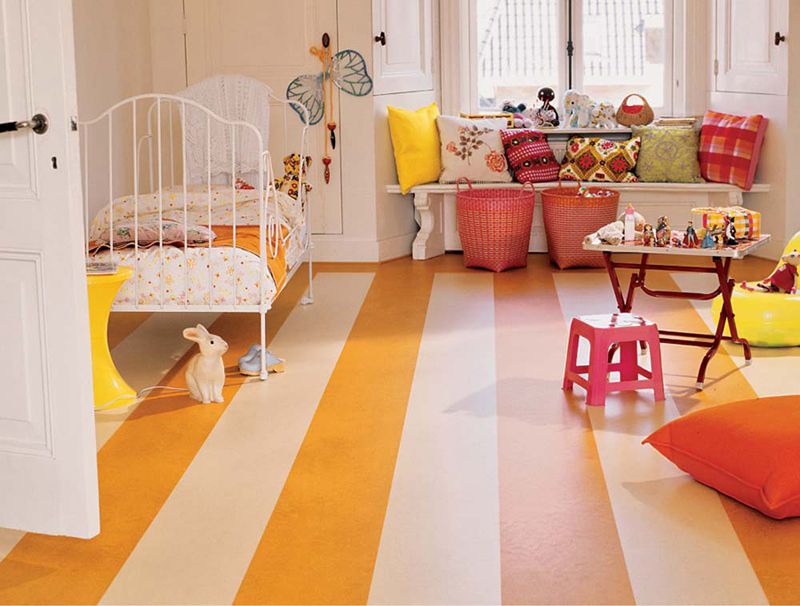
Click-together planks with linoleum for the top layer make striped floor patterns very easy to create. You can choose two colors to alternate, or several colors, preferably within a single family of tones.
Visually, this floor features the soft, natural beauty of linoleum. But where sheets of linoleum typically require a professional installer, the click-together tiles used here are as easy to install as any laminate flooring made for DIYers.
 INSTALLING LINOLEUM TILES OR STRIPS
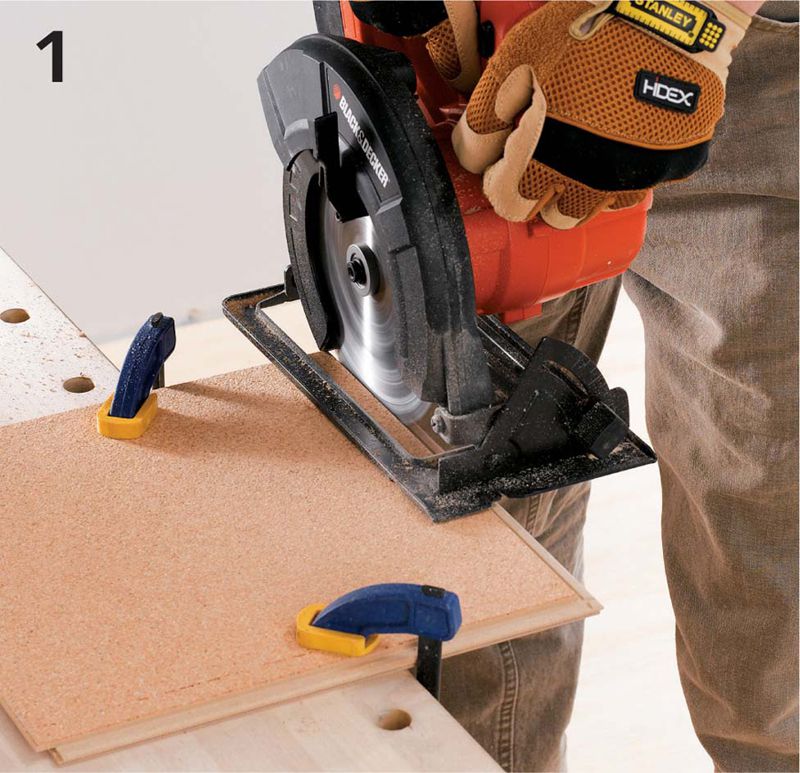
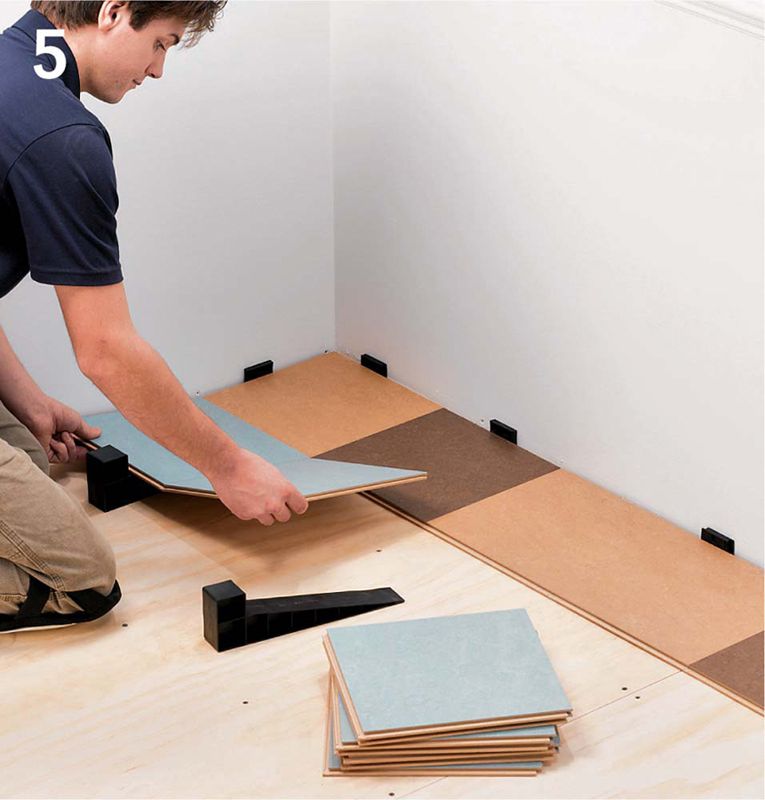
Prepare the subfloor and the flooring. Ensure that the subfloor surface is clean and free of protrusions. Remove tiles or panels from the box and inspect each one for damage. Choose the first panel or tile in the starter row and saw off the tongue from the sides that will butt against walls. Make sure the workpiece is clamped securely and use a circular saw, jigsaw, or handsaw to trim off the tongues.
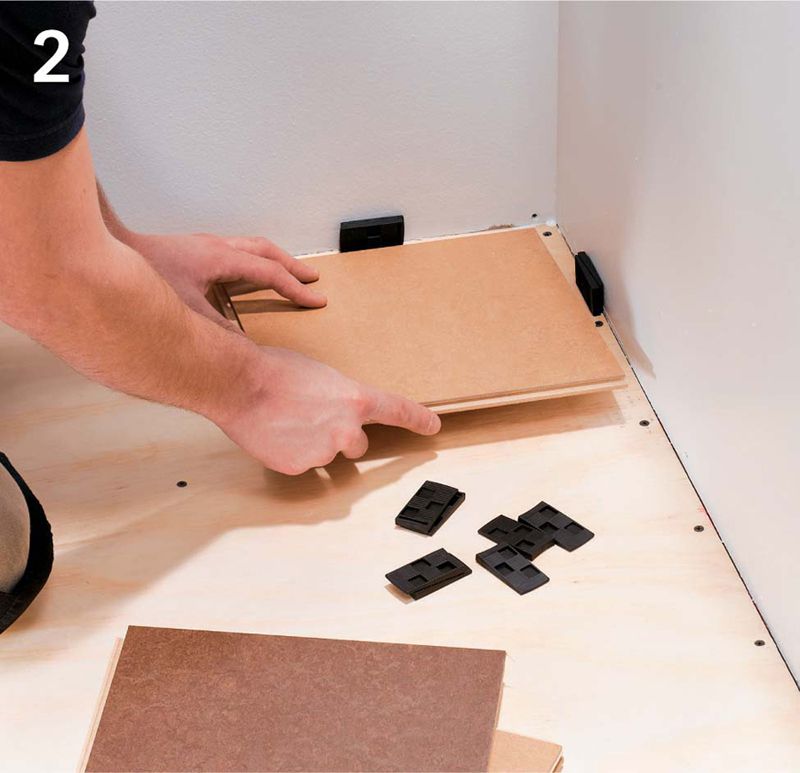
Position the first panel or tile in the corner of the longest wall (preferably opposite to the largest window in the room), positioning the sides from which the tongue has been removed against the walls. Use 3/8" spacers to maintain an expansion gap between the panels and the walls.
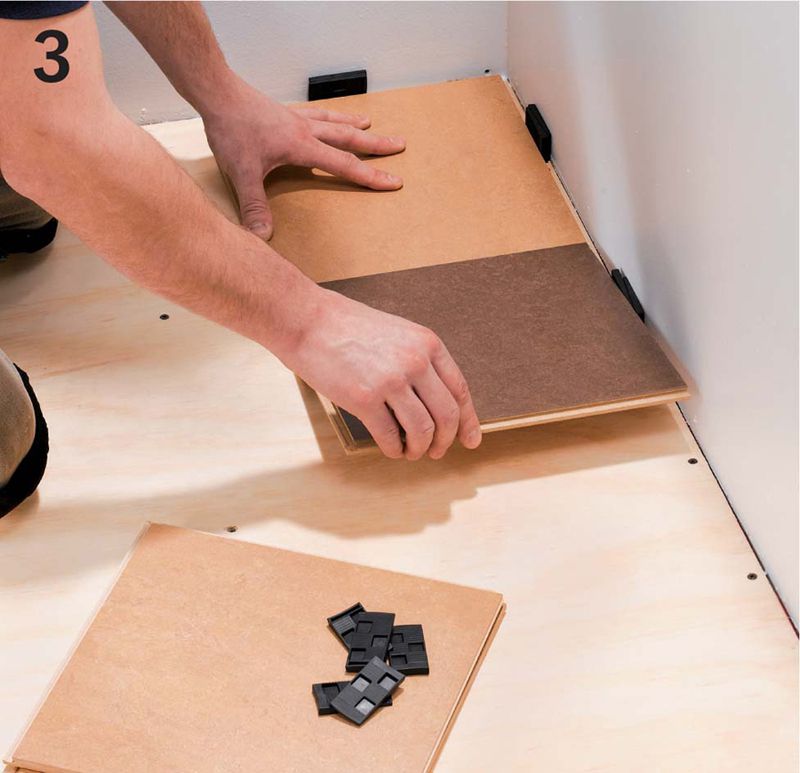
Position the tongue end of the second panel or tile inside the groove in the first, with the far end raised about 30°. Lower the raised end to lock the second panel into the first. Continue installing the row in this fashion, positioning two spacers evenly along the length of each panel.

Measure the last panel or tile in the row for cutting by placing it on top of the preceding panel and butting it to the corner walls. The end panel should be marked on the top side (linoleum surface), with the groove side facing the wall. This is to ensure that the tongue of the end panel piece matches the preceding panel’s groove. Click the end panel into place.
Begin the second row. Set the edge tongue on the preceding row’s lip. Slide the wedge under the tile. Connect the next tile in the row to the first tile, set on the preceding row’s lip, and slide the wedge under the strip.
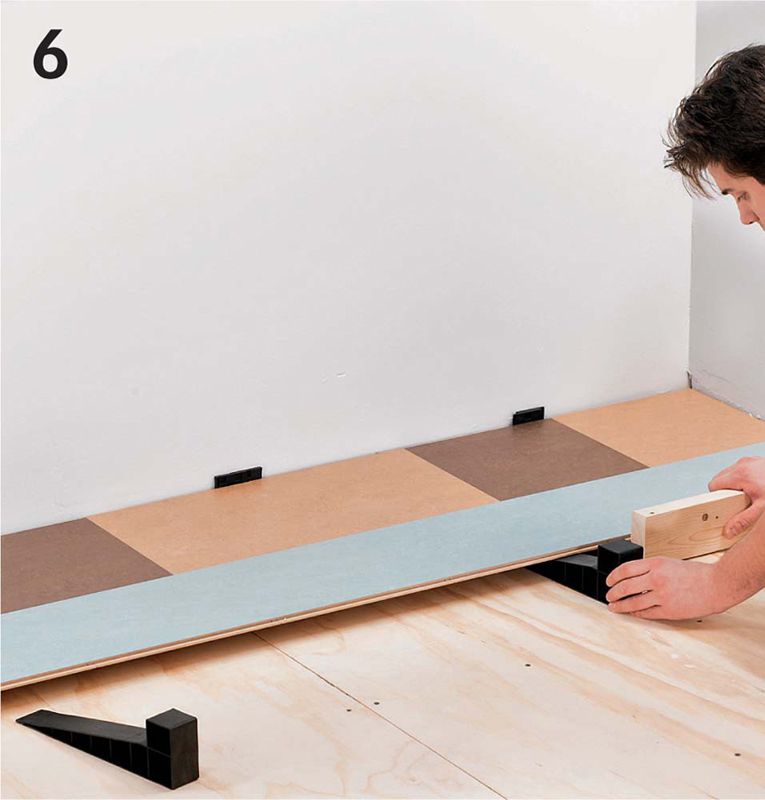
Continue connecting second-row panels or tiles to each other until you have completed the row. Slide wedges out from underneath the row. Use a 2 × 4 scrap piece to brace against the second row edges and push the entire row forward to engage with the lips on the first row’s panels. Lower the second row to lock the rows together.
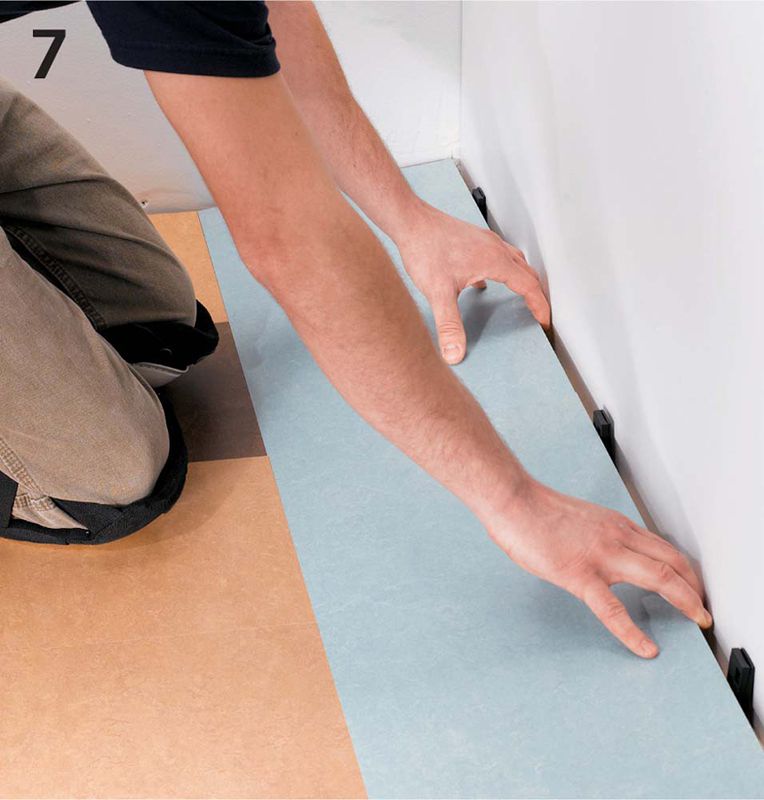
Install the remaining rows in the same manner, changing the measurement of the first panel in each row by 12" from the preceding row if you are installing strip panels. Measure, mark, and rip the pieces in the final row, using a circular saw and cutting on the faces of the pieces to prevent tearout. The final row is installed in the same way as previous rows.
Door Casings 
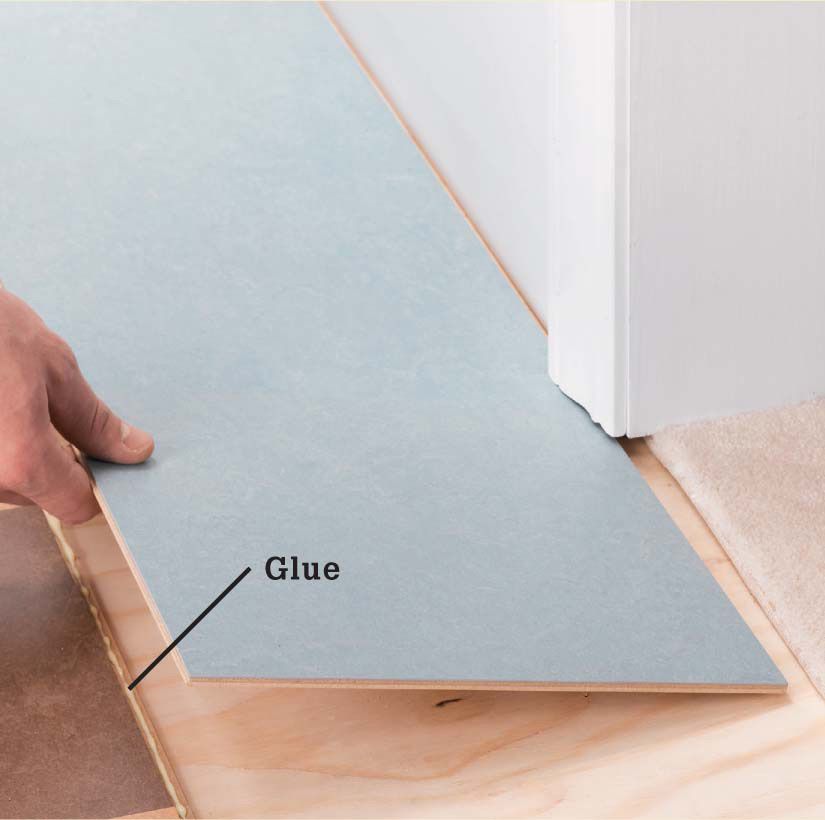
Where final panels must slide under door casings or other obstructions, remove the locking ridge from the groove side of the previous row. Lay a bead of glue along the modified groove. Slide the final row panel into place under the obstruction and pull it back snug against the glue-coated groove.