Tools & Materials 
Miter saw
Pencil
Tape measure
Utility knife
Pneumatic finish nail gun
Air compressor
Air hose
Molding
T-bevel
Eye protection
Work gloves
Although most professionals prefer to cope-cut inside corners, it is common to see moldings that are mitered to inside corners. These joints are more likely to separate over time and to allow gaps to show. For that reason it is not advised to use inside corner miters when installing a stain-grade trim product. The gaps will be visible and are very difficult to fill with putty. For paint-grade projects, mitering inside corners makes more sense because joints can be filled and sanded before the top coats of paint are applied.
Tools & Materials
Miter saw
Pencil
Tape measure
Utility knife
Pneumatic finish nail gun
Air compressor
Air hose
Molding
T-bevel
Eye protection
Work gloves
 HOW TO MITER SQUARE INSIDE CORNERS
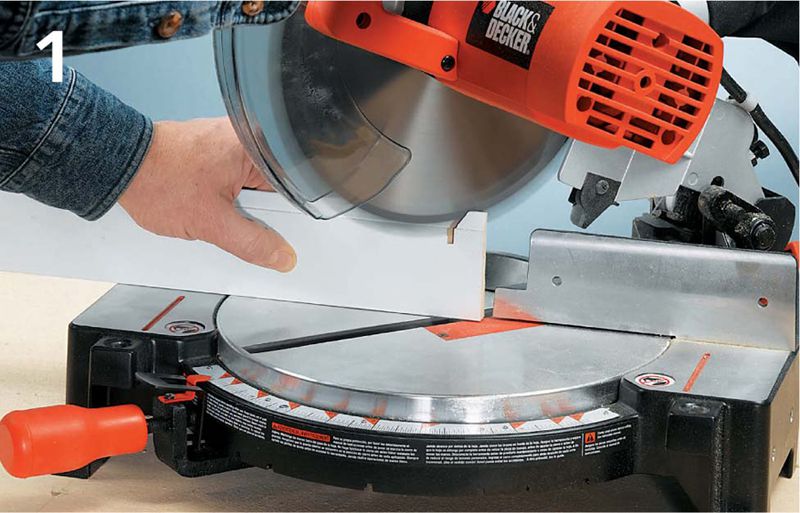
Set the miter saw to 45° and place the first piece of trim on edge, flat on the miter box table and flush against the fence. Hold the piece firmly in place with your left hand and cut the trim with a slow, steady motion. Release the power button and remove the molding after the blade stops.
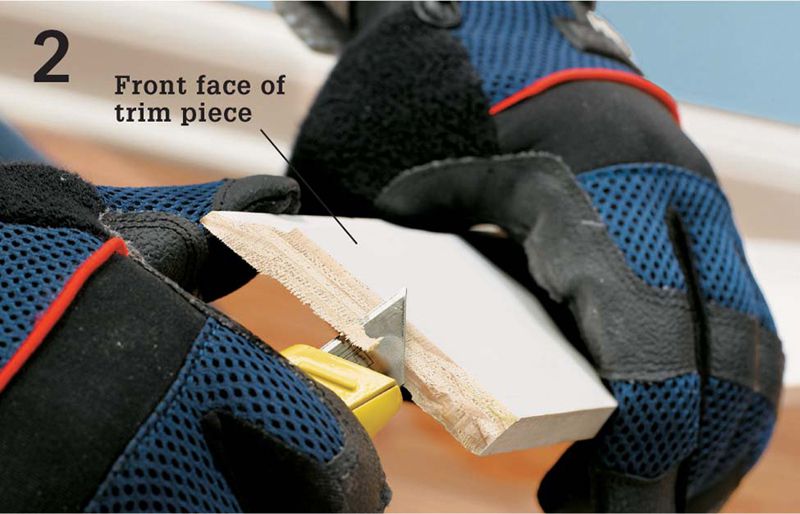
Back-cut the inside edge of the trim piece with a utility knife so that the top corner will sit flush against the wall corner.
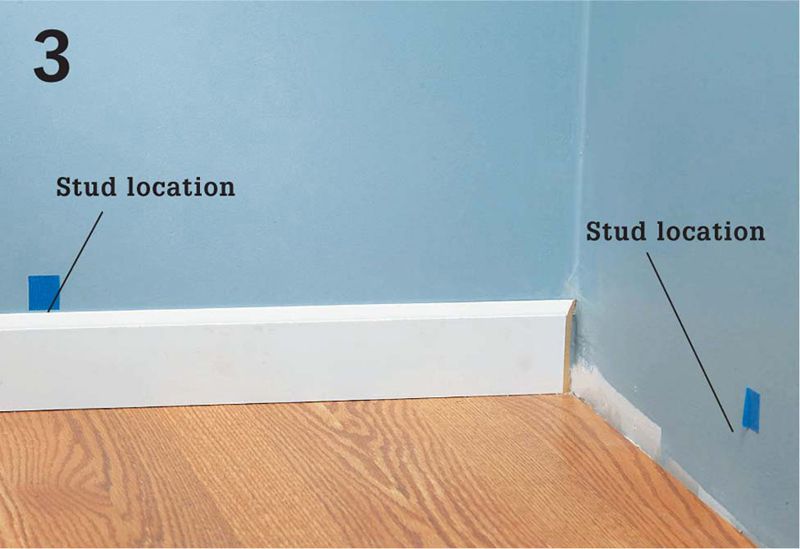
Butt the molding tightly against the wall and tack it into place. Adjust the blade of the miter saw to the opposite 45° angle and cut the mating piece.
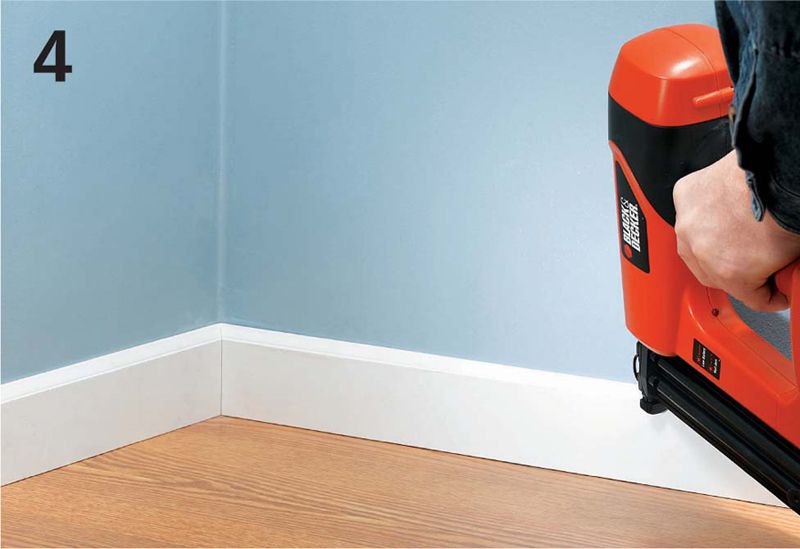
Test the fit of the joint, adjusting the miter angle if necessary. Once the fit is tight, nail both pieces at stud locations.
OUT-OF-PLUMB CORNER CUTSOut-of-plumb walls are concave, convex, or simply not perpendicular to the floor and ceiling at one or more points. It is a common condition. In some cases, the condition is caused by the fact that drywall sheets have tapered edges to make taping joints easier and the tapers fall at the edge of a work area where trim is installed. In other cases, the condition may be caused by wall framing issues. In either case, you’ll find that it’s easier to adapt your trim pieces to the wall than to try and straighten the finished wall surface. To do this, the trim pieces need to be cut to match the out-of-plumb area, to compensate for the taper in the panel. Another option is to install a running spacer along the bottom edge and then to cut your molding square, as shown on the previous page.

Tip: Occasionally, a compound cut is necessary for cutting miters on out-of-plumb corners. When this situation arises, set the bevel of the miter saw to match the out-of-plumb wall and miter the angle at the appropriate degree. Compound cuts can be difficult to get right the first time, so test the fit with a piece of scrap material first.
HOW TO MAKE OUT-OF-PLUMB CORNER CUTS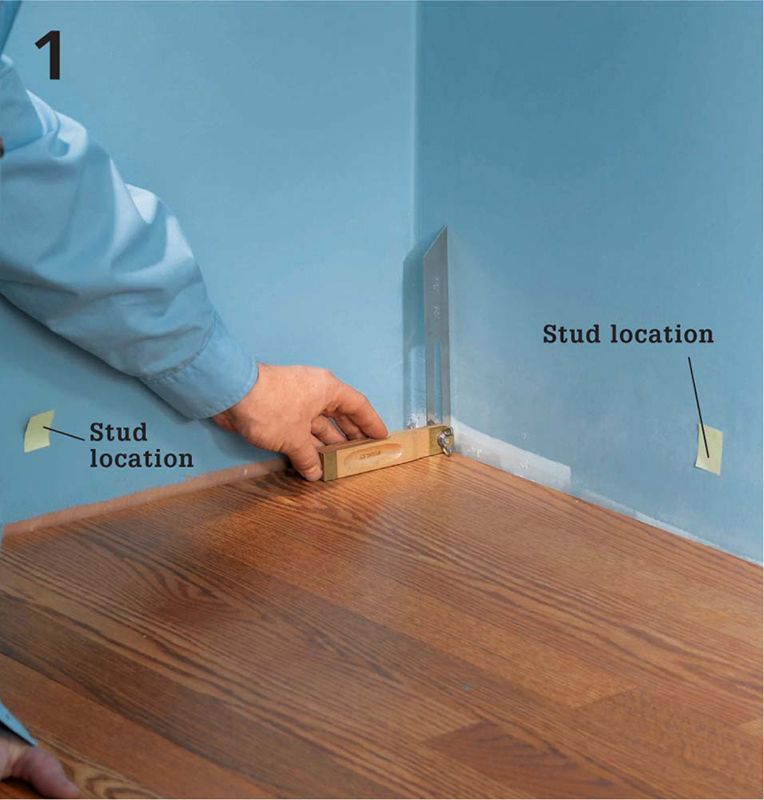
Place a T-bevel into the corner and press the blade flush to the wall surface. Tighten the adjustment knob so the blade conforms to the angle of the profile of the wall.
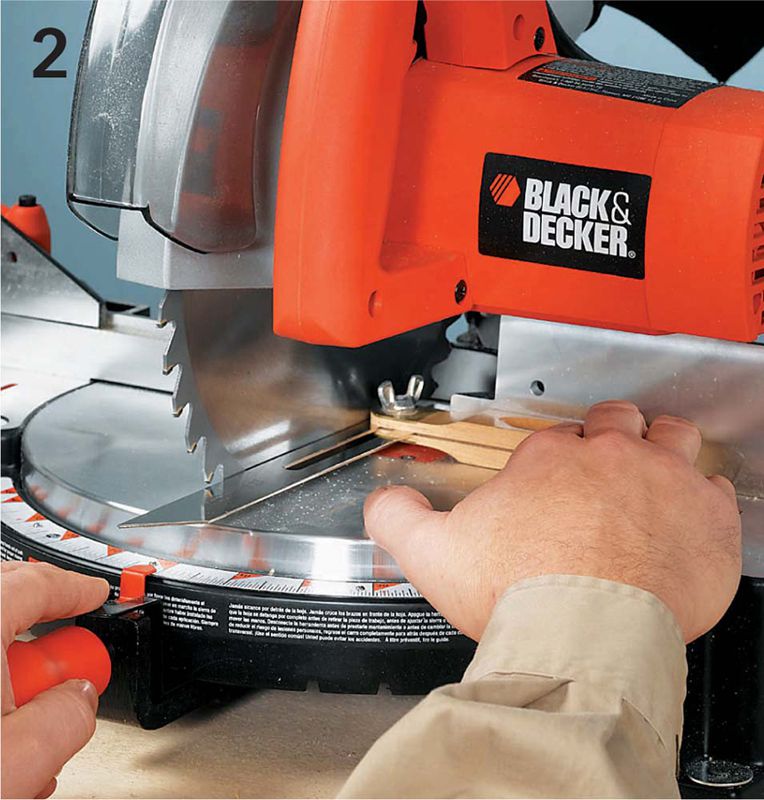
Transfer the angle of the T-bevel to the miter saw blade by locking the saw in the down position and adjusting the angle to match the angle of the T-bevel. Cut the molding to match the angle.