Tools & Materials 
Combination square or framing square
Miter saw
Pencil
Tape measure
Pneumatic finish nail gun
Air compressor
Air hose
T-bevel
Molding
Masking tape
1 × 4
Eye protection
Cutting outside miters is one of the main functions of a power miter saw. Most saws have positive stops (called detents) at 45° in each direction, so standard outside corners are practically cut for you by the saw. Keep in mind that your saw must be accurately set up to cut joints squarely. Read the owner’s manual for setting up your saw as well as for safety precautions. Before you begin, check the walls for square with a combination square or a framing square. If the corner is very close to square, proceed with the square corner installation. If the corner is badly out of square, follow the “Out of Square” procedure on the following page.
Tools & Materials
Combination square or framing square
Miter saw
Pencil
Tape measure
Pneumatic finish nail gun
Air compressor
Air hose
T-bevel
Molding
Masking tape
1 × 4
Eye protection
 HOW TO MITER OUTSIDE CORNERS
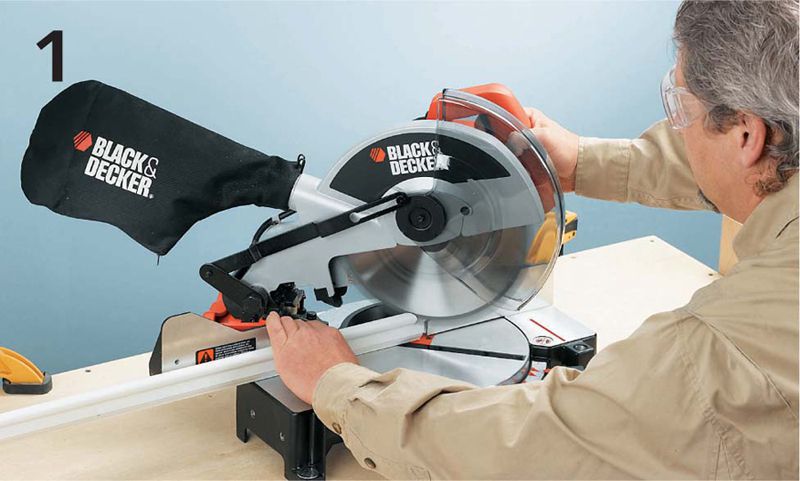
Set the miter saw to 45°. Position the first piece on edge, flat on the miter box table, flush against the fence. Hold the piece firmly in place with your left hand and cut the trim with a slow, steady motion. Release the power button of the saw and remove the molding after the blade stops.
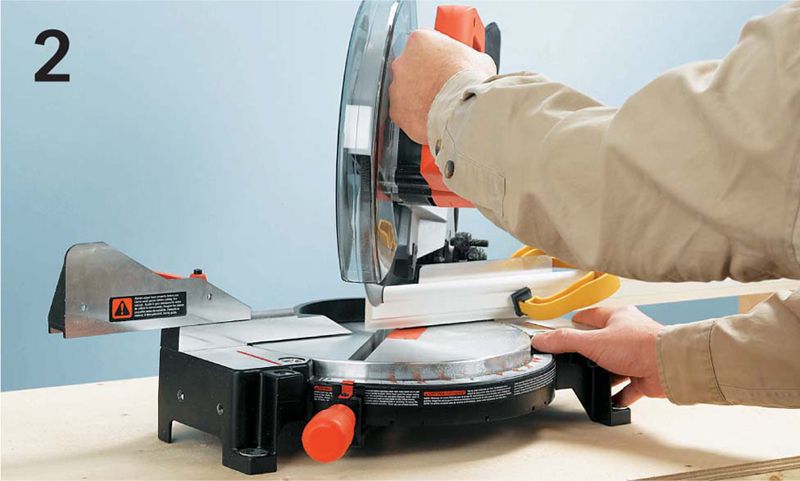
Set the miter saw blade to the opposing 45° positive stop. Place the second piece of molding on edge, flat on the saw table, flush against the fence. Fasten the piece tightly in place with a hold-down or clamp. Cut the molding with a slow, steady motion.
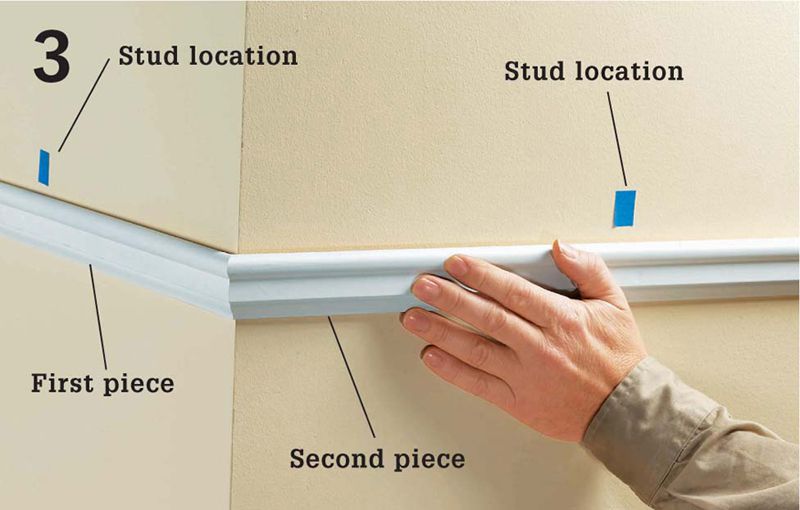
With the first piece of molding tacked in place, hold the second piece in position and check the fit of the joint. If the joint is tight, nail both pieces at stud locations with a pneumatic finish nail gun.
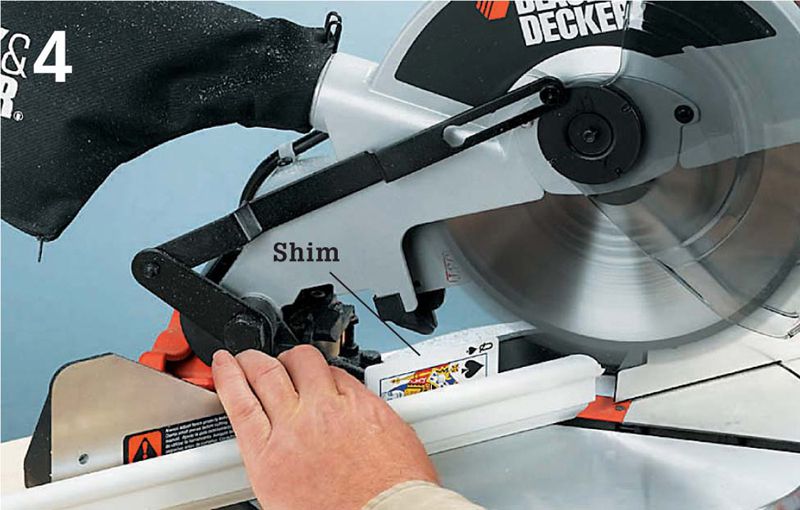
If the corner joint does not fit tightly, shim the workpiece away from the fence to make minor adjustments until the joint fits tightly. Shims should be a uniform thickness. Playing cards work well as shims.
HOW TO MITER OUT-OF-SQUARE OUTSIDE CORNERS: METHOD 1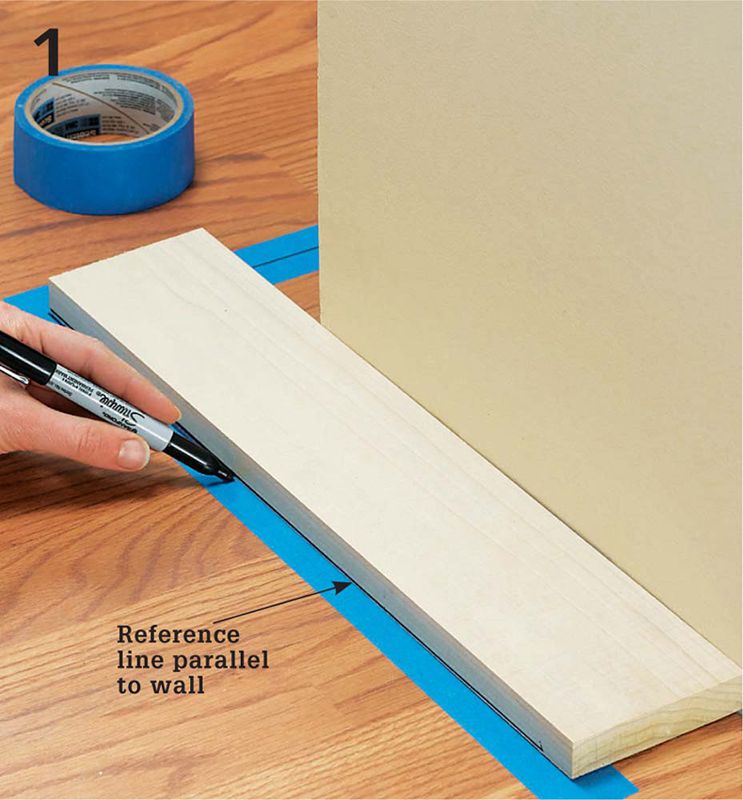
Draw a reference line off each wall of the corner using a straight 1 × 4. Put masking tape down on the finished floor to avoid scuffing it and to see your lines clearly. Trace along each wall, connecting the traced lines at a point out from the tip of the corner.

To find the angle you need to miter your moldings, place a T-bevel with the handle flush against one wall, and adjust the blade so that it intersects the point where your reference lines meet. Lock the blade in place at this angle.
HOW TO MITER OUT-OF-SQUARE OUTSIDE CORNERS: METHOD 2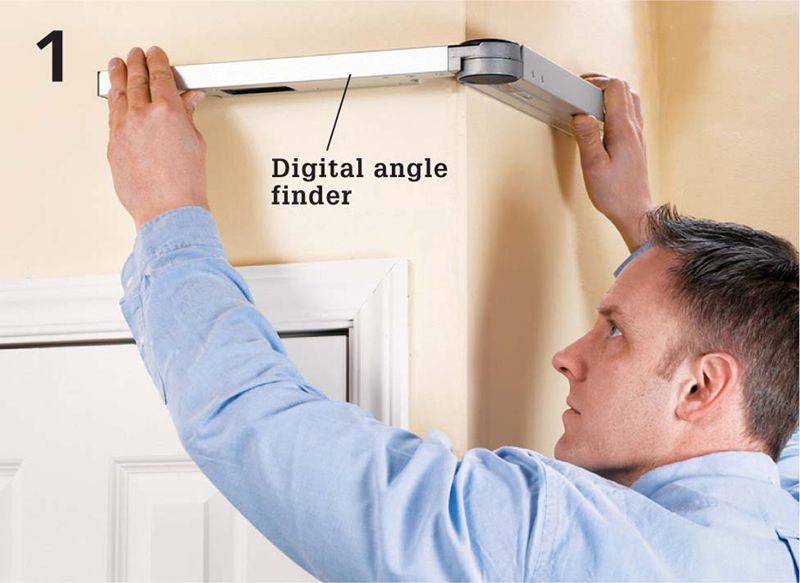
Use a digital angle finder to record the exact outside corner angle. These tools are sold in a wide price range, with some costing as little as $30.
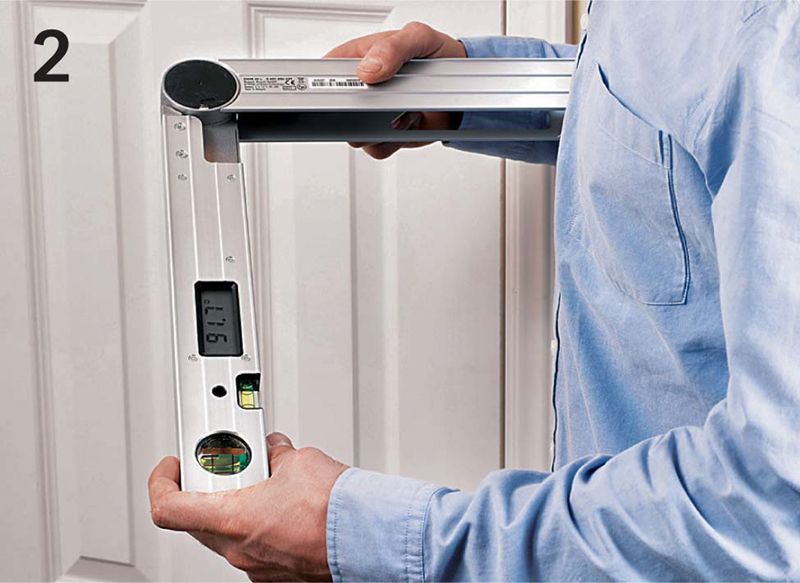
Do some math. If the outside corner angle is not a whole number (most angle finders give readings in 0.1° increments), then round up. For example, if the angle finder measures the outside angle at 91.4°, round up to 92° and cut the miter at 44° (180° – 92° = 88° and the miter is half of this, which is 44°). A big mistake is to divide the angle in half without subtracting it from 180. In this case, a 92° angle readout divided in half would yield 46°, which at 2° off the mark would easily cause a visible mistake in the miter.