EXTERIOR
PAINTING EXTERIORS: PREPARING
The key to an even paint job is to work on a smooth, clean, dry surface—so preparing the surface is essential. Generally, the more preparation work you do, the smoother the final finish will be and the longer it will last.
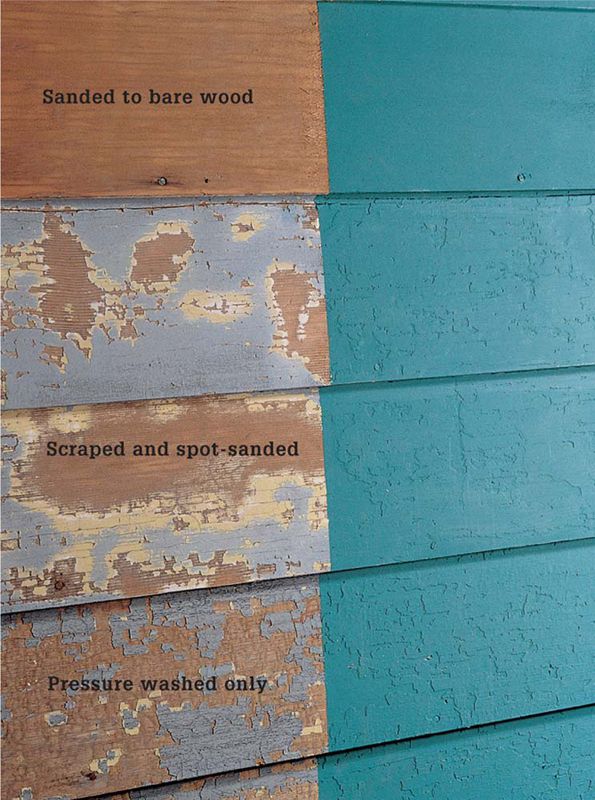
For the smoothest finish, sand all the way down to the bare wood with a power sander. For a less time-consuming (but rougher) finish, scrape off any loose paint, then spot-sand rough areas. You can use pressure washing to remove some of the flaking paint, but by itself, pressure washing won’t create a smooth surface for painting.
The amount of surface preparation you do will largely determine the final appearance of your paint job. Decide how much sanding and scraping you’re willing to do to obtain a finish you’ll be happy with.
 HOW TO REMOVE PAINT
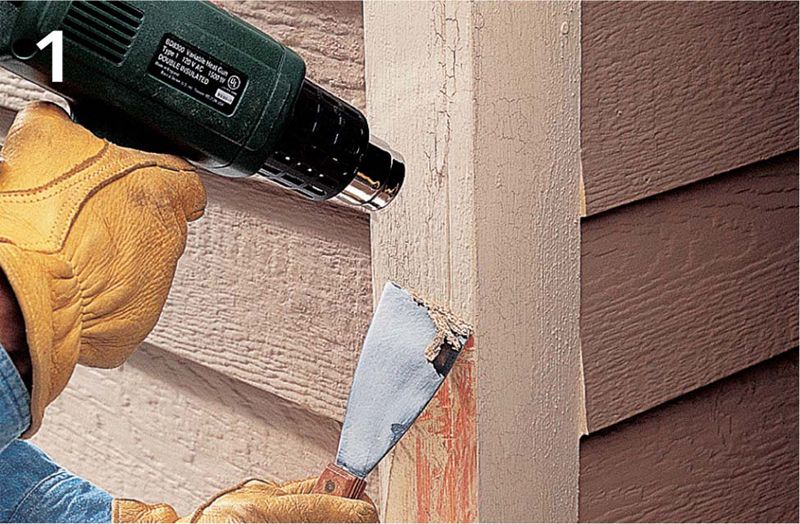
Use a heat gun to loosen thick layers of old paint. Aim the gun at the surface, warm the paint until it starts to bubble, then scrape the paint as soon as it releases.
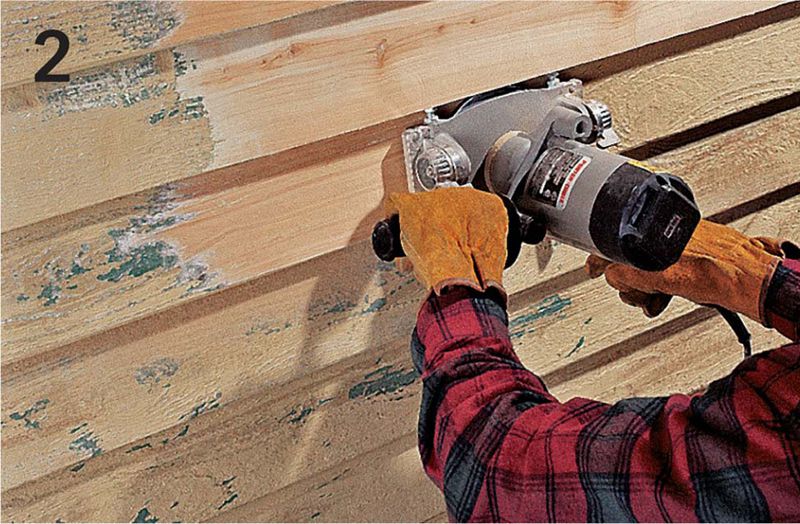
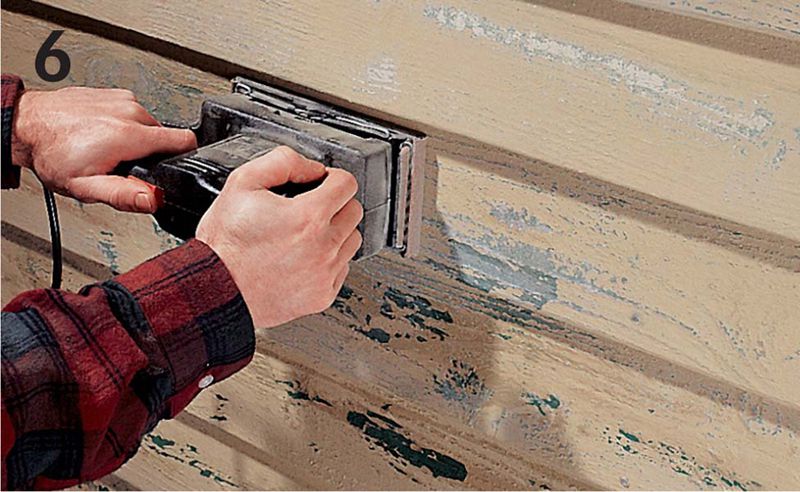
To remove large areas of paint on wood lap siding, use a siding sander with a disk that’s as wide as the reveal on your siding.
HOW TO PREPARE SURFACES FOR PAINT
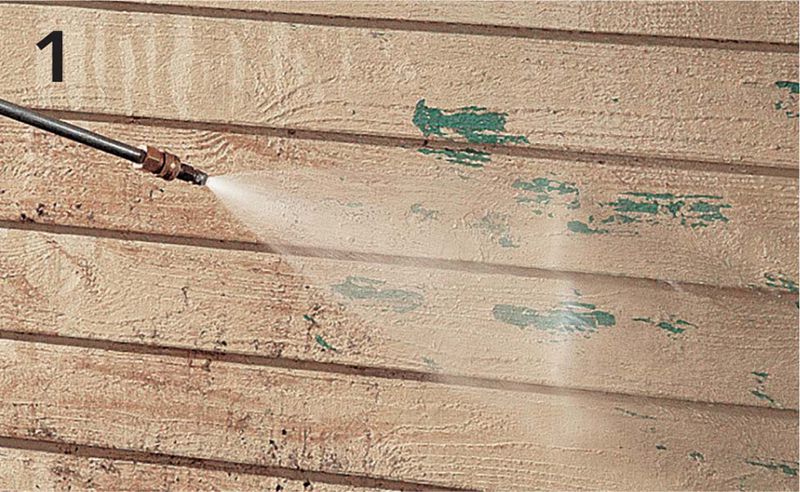
Clean the surface and remove loose paint by pressure washing the house. As you work, direct the water stream downward, and don’t get too close to the surface with the sprayer head. Allow all surfaces to dry thoroughly before continuing.
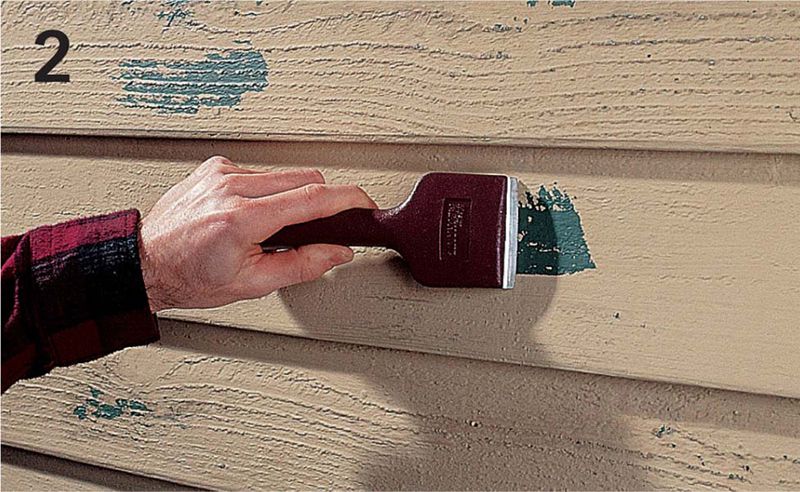
Scrape off loose paint using a paint scraper. Be careful not to damage the surface by scraping too hard.
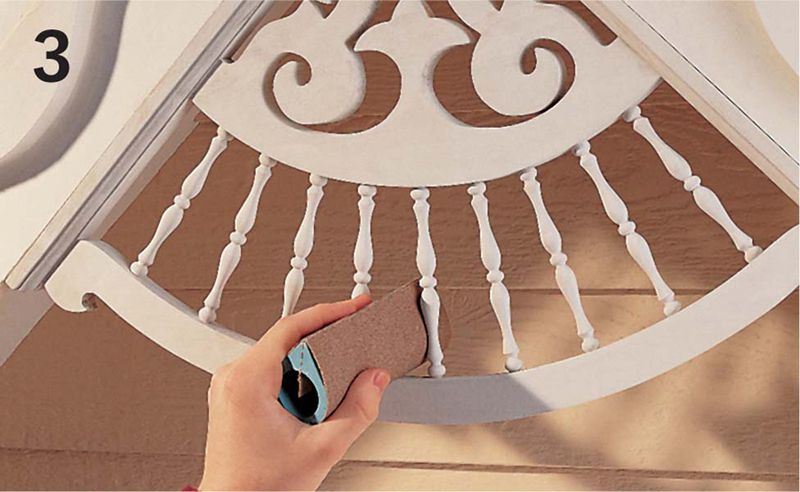
Smooth out rough paint with a finishing sander and 80-grit sandpaper. Use sanding blocks and 80- to 120-grit sandpaper to sand hard-to-reach areas of trim. Tip: You can make sanding blocks from dowels, wood scraps, or garden hoses.
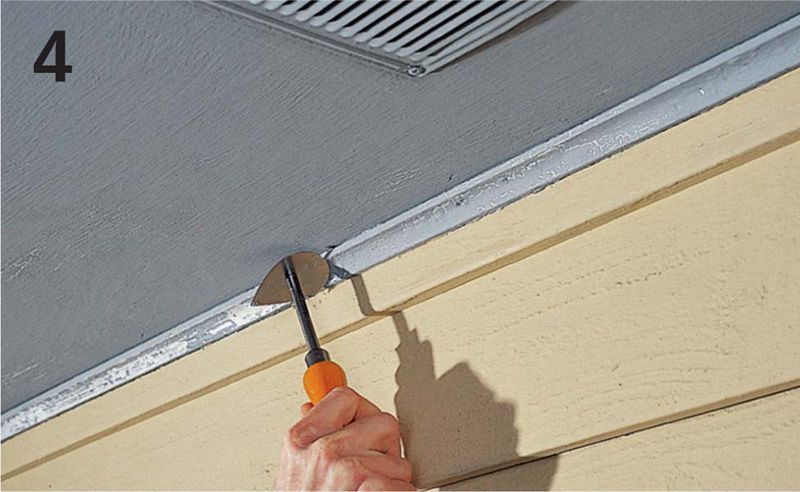
Use detail scrapers to remove loose paint in hard-to-reach areas. Some of these scrapers have interchangeable heads that match common trim profiles.
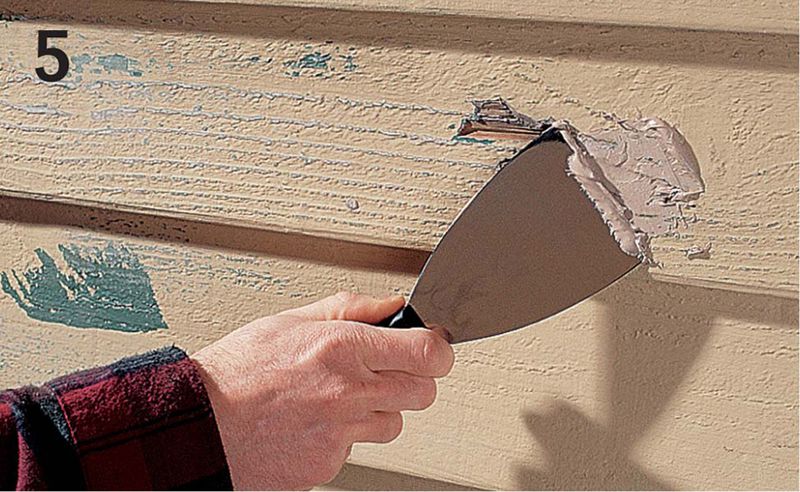
Inspect all surfaces for cracks, rot, and other damage. Mark affected areas with colored pushpins or tape. Fill the holes and cracks with epoxy wood filler.
Use a finishing sander with 120-grit sandpaper to sand down repaired areas, ridges, and hard edges left from the scraping process, creating a smooth surface.
HOW TO PREPARE WINDOW & DOOR TRIM FOR PAINT
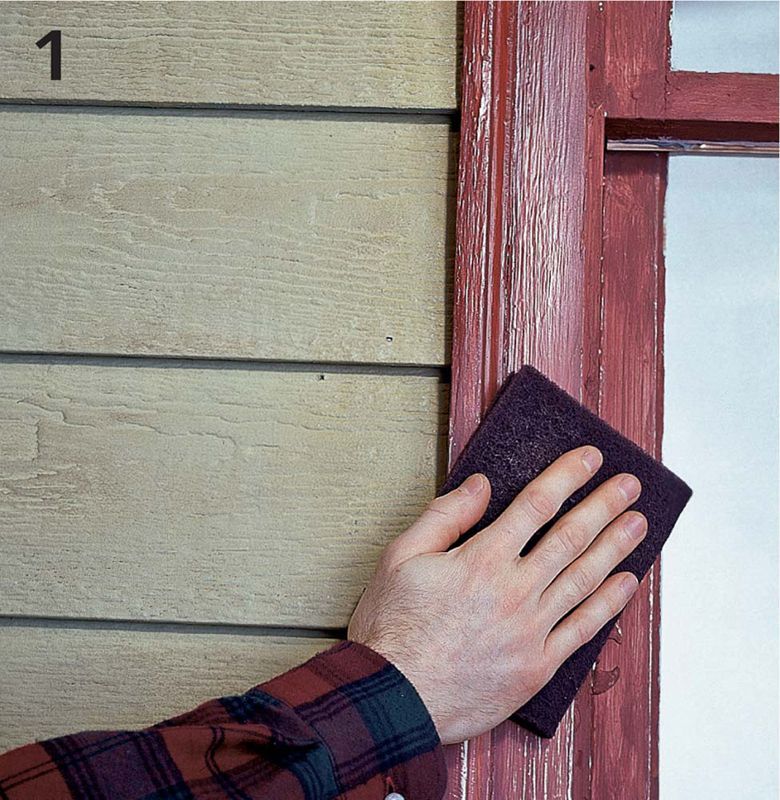
Scuff-sand glossy surfaces on doors, window casings, and all surfaces painted with enamel paint. Use a coarse abrasive pad or 150-grit sandpaper.
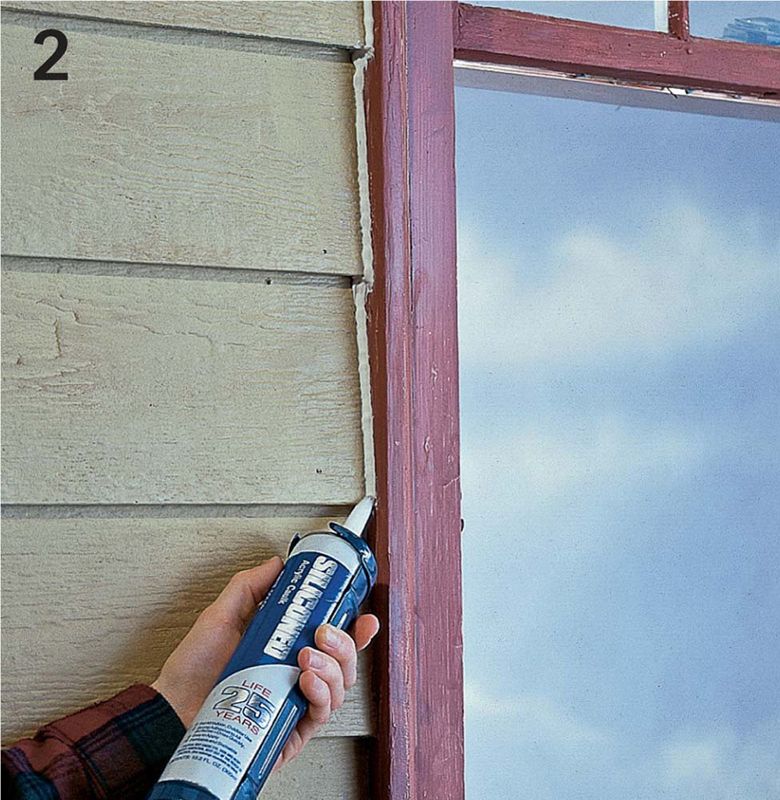
Fill cracks in siding and gaps around window and door trim with paintable siliconized acrylic caulk.
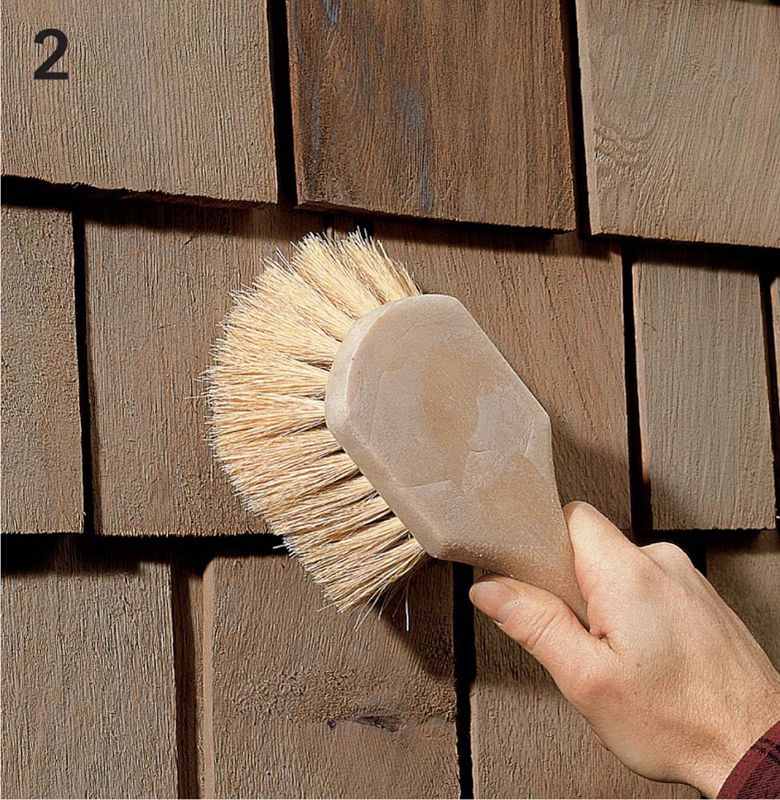
HOW TO REMOVE CLEAR FINISHES
Pressure wash stained or unpainted surfaces that have been treated with a wood preservative or protectant before recoating them with fresh sealant.
Use a stiff-bristle brush to dislodge any flakes of loosened surface coating that weren’t removed by pressure washing. Don’t use a wire brush on wood surfaces.
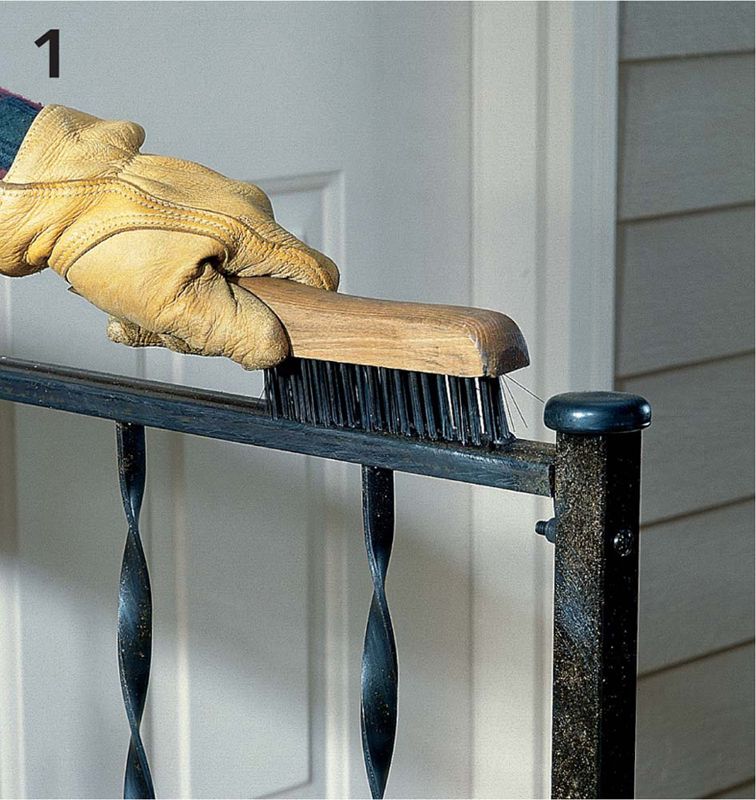
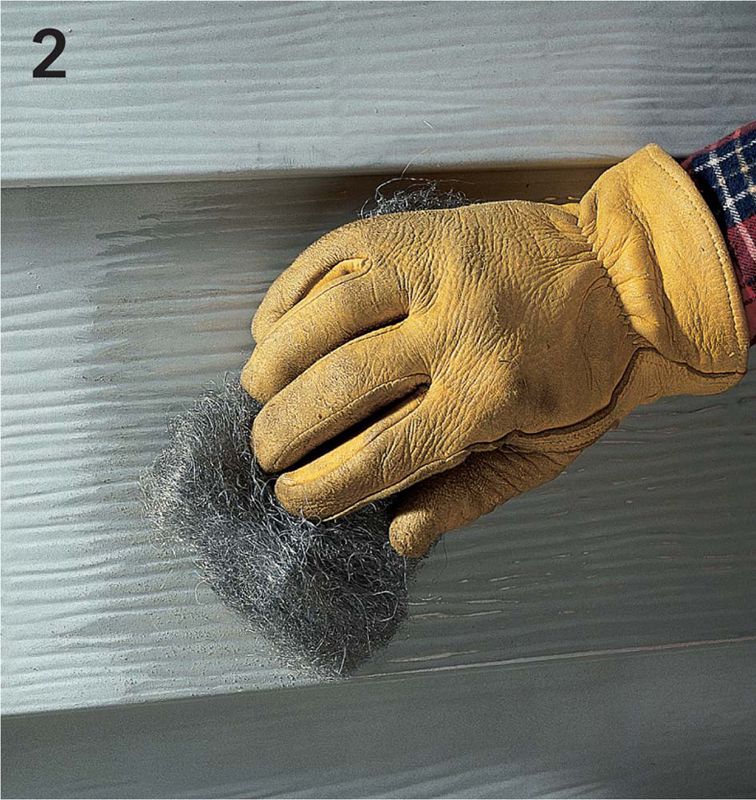
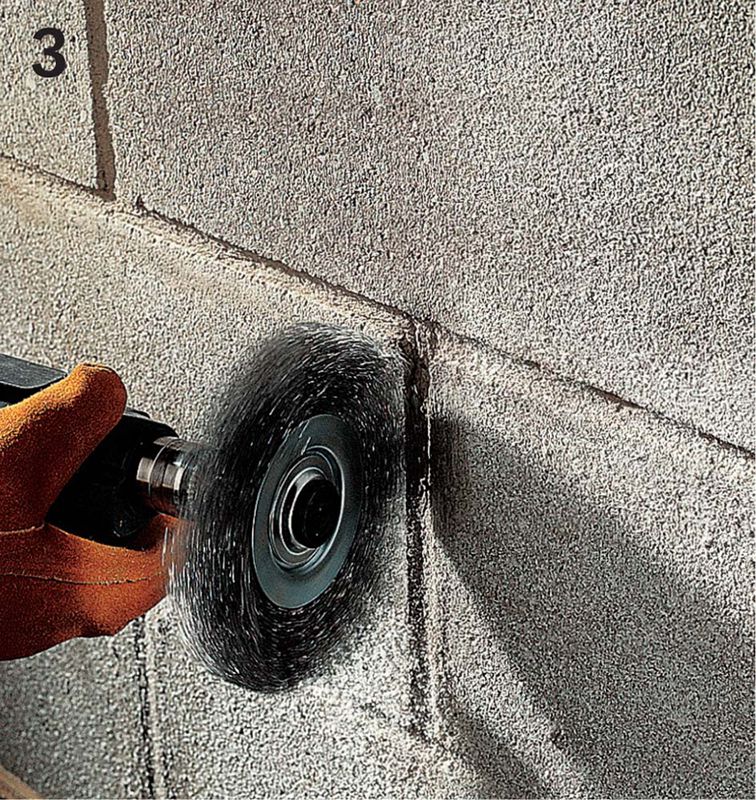
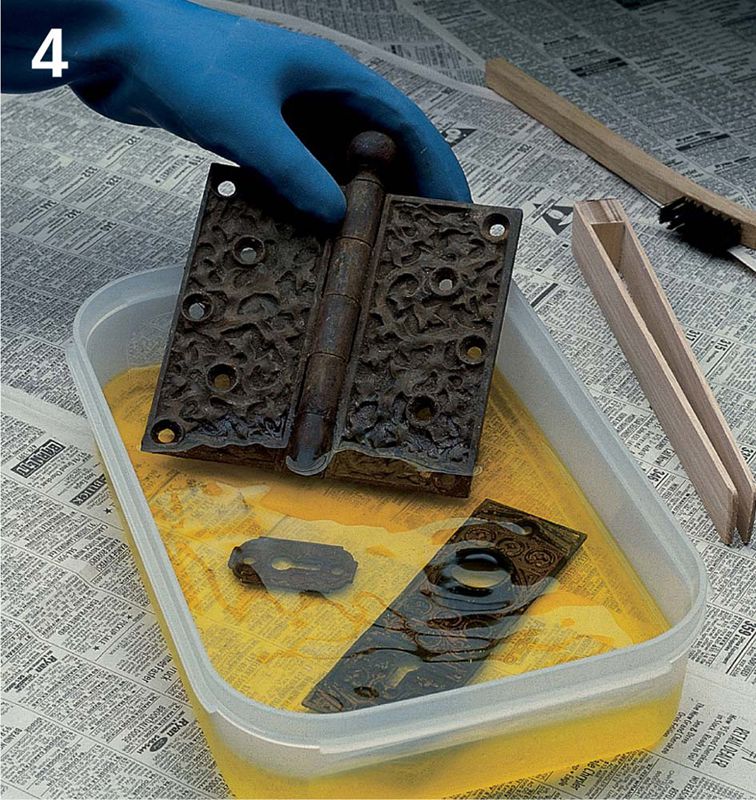
HOW TO PREPARE METAL & MASONRY FOR PAINT
Remove rust and loose paint from metal hardware, such as railings and ornate trim, using a wire brush. Cover the surface with metal primer immediately after brushing to prevent the formation of new rust.
Scuff-sand metal siding and trim with medium-coarse steel wool or a coarse abrasive pad. Wash the surface and let dry before priming and painting.
Remove loose mortar, mineral deposits, or paint from mortar lines in masonry surfaces with a drill and wire-wheel attachment. Clean broad, flat masonry surfaces with a wire brush. Correct any minor damage before repainting.
Dissolve rust on metal hardware with diluted muriatic acid solution. When working with muriatic acid, it’s important to wear safety equipment, work in a well-ventilated area, and follow all manufacturer’s directions and precautions.