Tools & Materials 
Tape measure
Felt-tipped pen
Full-circle crimping tool
Go/no-go gauge
Tubing cutter
PEX pipe
Manifolds
Protector plates
PEX fittings
Utility knife
Plastic hangers
Crimp ring
Protective equipment
Cross-linked polyethylene (PEX) is growing quickly in acceptance as a supply pipe for residential plumbing. It’s not hard to understand why. Developed in the 1960s but relatively new to the United States, this supply pipe combines the ease of use of flexible tubing with the durability of rigid pipe. It can withstand a wide temperature range (from subfreezing to 180°F); it is inexpensive; and it’s quieter than rigid supply pipe.
PEX is flexible plastic (polyethylene, or PE) tubing that’s reinforced by a chemical reaction that creates long fibers to increase the strength of the material. It has been allowed by code in Europe and the southern United States for many years, but has won approval for residential supply use in most major plumbing codes only recently. It’s frequently used in manufactured housing and recreational vehicles and in radiant heating systems. Because it is so flexible, PEX can easily be bent to follow corners and make other changes in direction. From the water main and heater, it is connected into manifold fittings that redistribute the water in much the same manner as a lawn irrigation system.
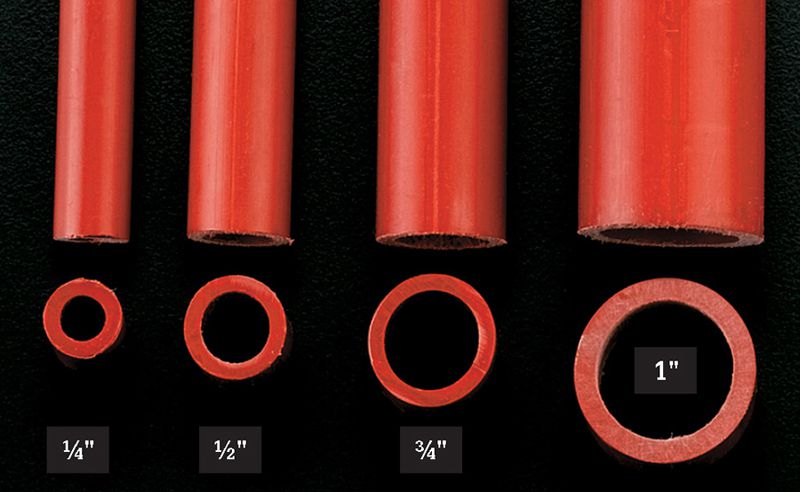
For standard residential installations, PEX can be joined with very simple fittings and tools. Unions are generally made with a crimping tool and a crimping ring. You simply insert the ends of the pipe you’re joining into the ring, then clamp down on the ring with the crimping tool. PEX pipe, tools, and fittings can be purchased from most wholesale plumbing suppliers and at many home centers. Coils of PEX are sold in several diameters from 1/4" to 1". PEX tubing and fittings from different manufacturers are not interchangeable. Any warranty coverage will be voided if products are mixed.
Tools & Materials
Tape measure
Felt-tipped pen
Full-circle crimping tool
Go/no-go gauge
Tubing cutter
PEX pipe
Manifolds
Protector plates
PEX fittings
Utility knife
Plastic hangers
Crimp ring
Protective equipment
PEX pipe is a relatively new water supply material that’s growing in popularity in part because it can be installed with simple mechanical connections.
 PEX TOOLS & MATERIALS
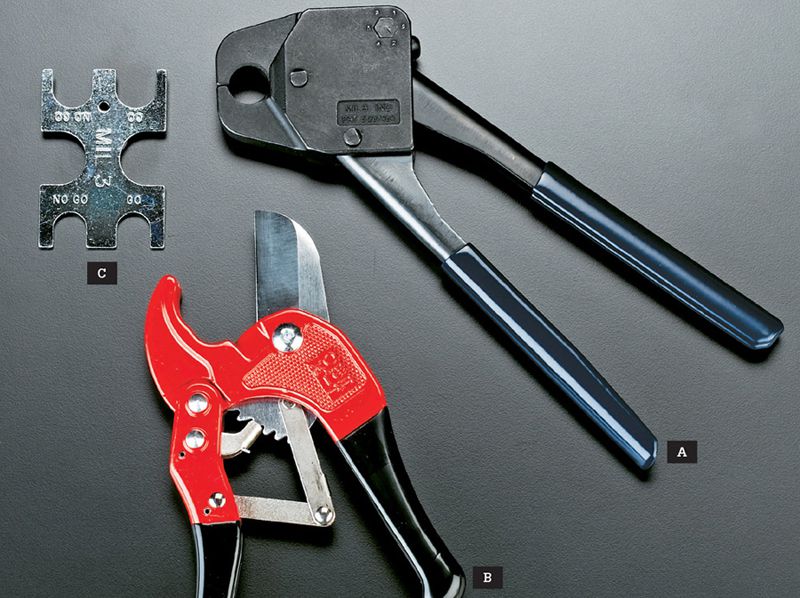
Specialty tools for installing PEX are available wherever PEX is sold. The basic set includes a full-circle crimping tool (A), a tubing cutter (B), and a go/no-go gauge (C) to test connections after they’ve been crimped. Competing manufacturers make several types of fittings, with proprietary tools that only work with their fittings. The tools and fittings you use may differ from those shown on these pages.
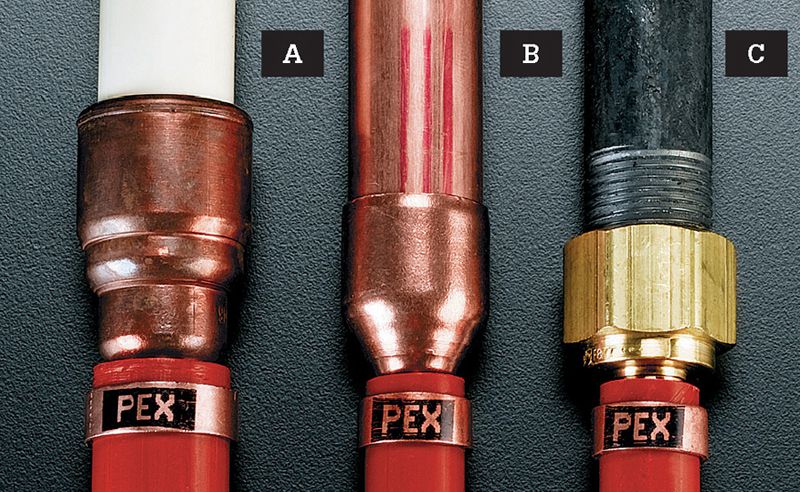
PEX is connected to other water supply materials with transition fittings, including CPVC-to-PEX (A), copper-to-PEX (B), and iron-to-PEX (C).
Generally, you should use the same diameter PEX as is specified for rigid supply tubing, but in some “home run” installations (see next page) you can use 3/8" PEX where 1/2" rigid copper would normally be used.
PEX INSTALLATIONCheck with your local plumbing inspector to verify that PEX is allowed in your municipality. PEX has been endorsed by all major plumbing codes in North America, but your municipality may still be using an older set of codes. Follow the guidelines below when installing PEX:
• Do not install PEX in above-ground exterior applications because it degrades quickly from UV exposure.
• Do not use PEX for gas lines.
• Do not use plastic solvents or petroleum-based products with PEX (they can dissolve the plastic).
• Keep PEX at least 12" away from recessed light fixtures and other potential sources of high heat.
• Do not attach PEX directly to a water heater. Make connections at the heater with metallic tubing (either flexible water-heater connector tubing or rigid copper) at least 18" long; then join it to PEX with a transition fitting.
• Do not install PEX in areas where there is a possibility of mechanical damage or puncture. Always fasten protective plates to wall studs that house PEX.
• Always leave some slack in installed PEX lines to allow for contraction and in case you need to cut off a bad crimp.
• Use the same minimum branch and distribution supply-pipe dimensions for PEX that you’d use for copper or CPVC, according to your local plumbing codes.
• You can use push fittings to join PEX to itself or to CPVC or copper.
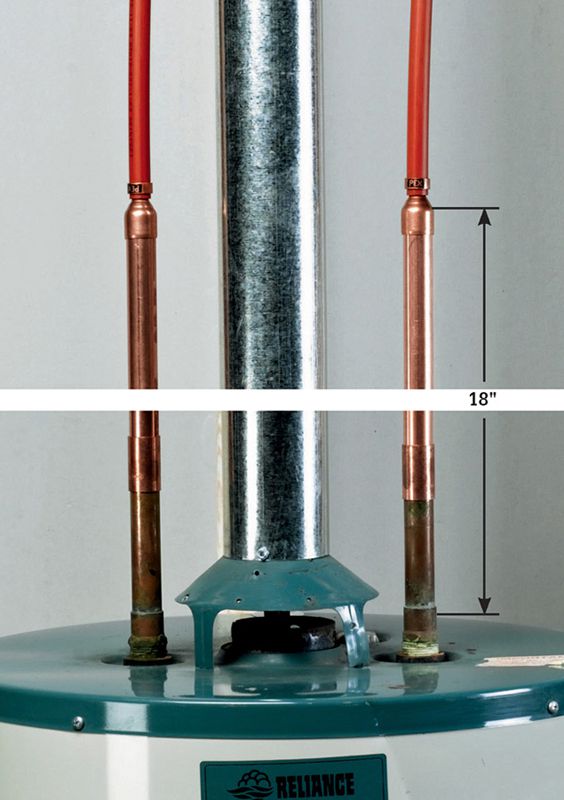
Do not connect PEX directly to a water heater. Use metal connector tubes. Solder the connector tubes to the water heater before attaching PEX. Never solder metal tubing that is already connected to PEX lines.
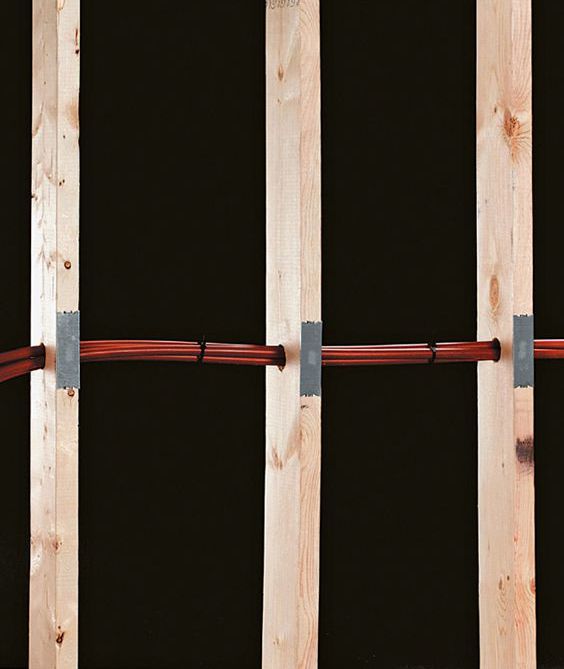
Bundle PEX together with plastic ties when running pipe through wall cavities. PEX can contract slightly, so leave some slack in the lines.
BUYING PEX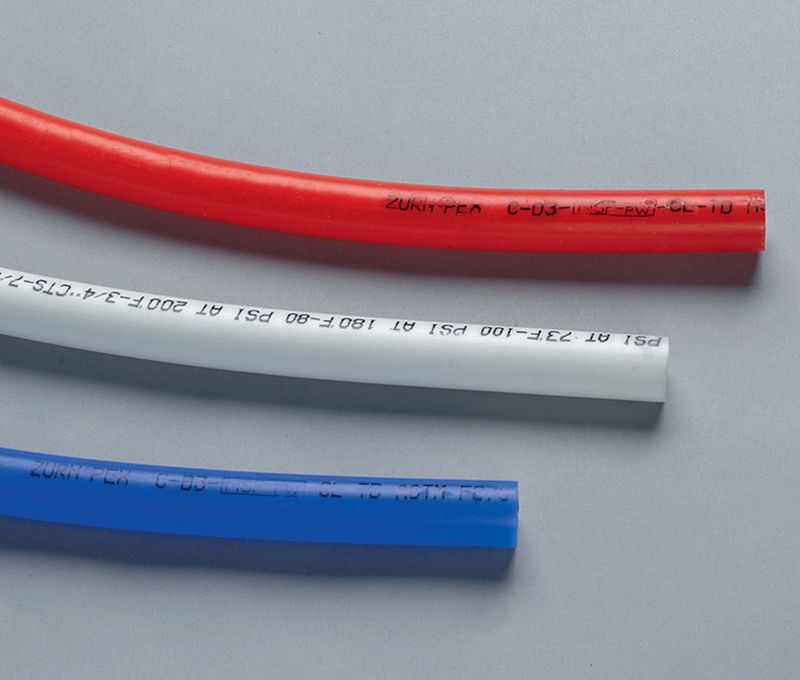
Color coding is a practice many PEX manufacturers have embraced to make identification easier. Because the material is identical except for the color, you can buy only one color (red is more common) and use it for both hot and cold supply lines.
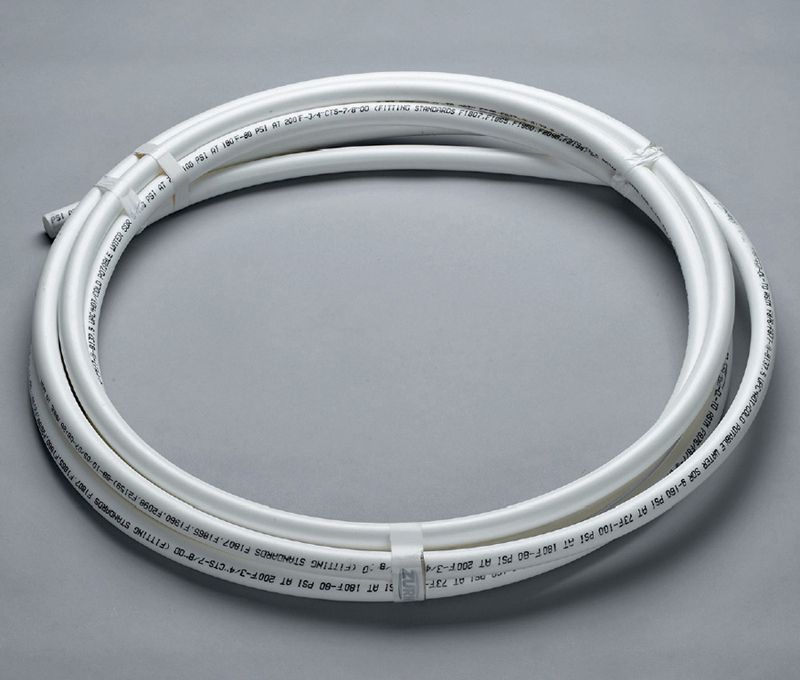
PEX combines the flexibility of plastic tubing with the durability of rigid supply pipe. It is sold in coils of common supply-pipe diameters.
The PEX Advantage 
PEX supply tubing offers a number of advantages over traditional rigid supply tubing:
• Easy to install. PEX does not require coupling joints for long runs or elbows and sweeps for turns. The mechanical connections do not require solvents or soldering.
• Easy to transport. Large coils are lightweight and much easier to move around than 10 ft. lengths of pipe.
• Good insulation. The PEX material has better thermal properties than copper for lessened heat loss.
• Quiet. PEX will not rattle or clang from trapped air or kinetic energy.
• Good for retrofit jobs. PEX is easier to snake through walls than rigid supply tubing and is compatible with copper, PVC, or iron supply systems if the correct transition fittings are used. If your metal supply tubes are used to ground your electrical system, you’ll need to provide a jumper if PEX is installed in midrun. Check with a plumber or electrician.
• Freeze resistance. PEX retains some flexibility in subfreezing conditions and is less likely to be damaged than rigid pipe, but it is not frostproof.
General Codes for PEX
PEX has been endorsed for residential use by all major building codes, although some municipal codes may be more restrictive. The specific design standards may also vary, but here are some general rules:
• For PEX, maximum horizontal support spacing is 32" and maximum vertical support spacing is 10 ft.
• Maximum length of individual distribution lines is 60 ft.
• PEX is designed to withstand 210°F water for up to 48 hours. For ongoing use, most PEX is rated for 180 degree water up to 100 pounds per square inch of pressure.
• Directional changes of more than 90 degrees require a guide fitting.
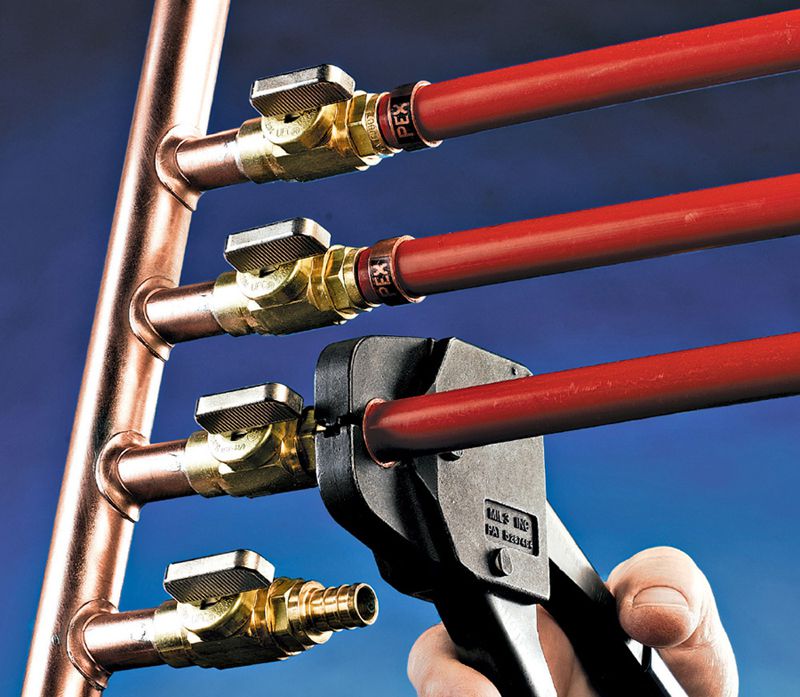
HOW TO MAKE PEX CONNECTIONS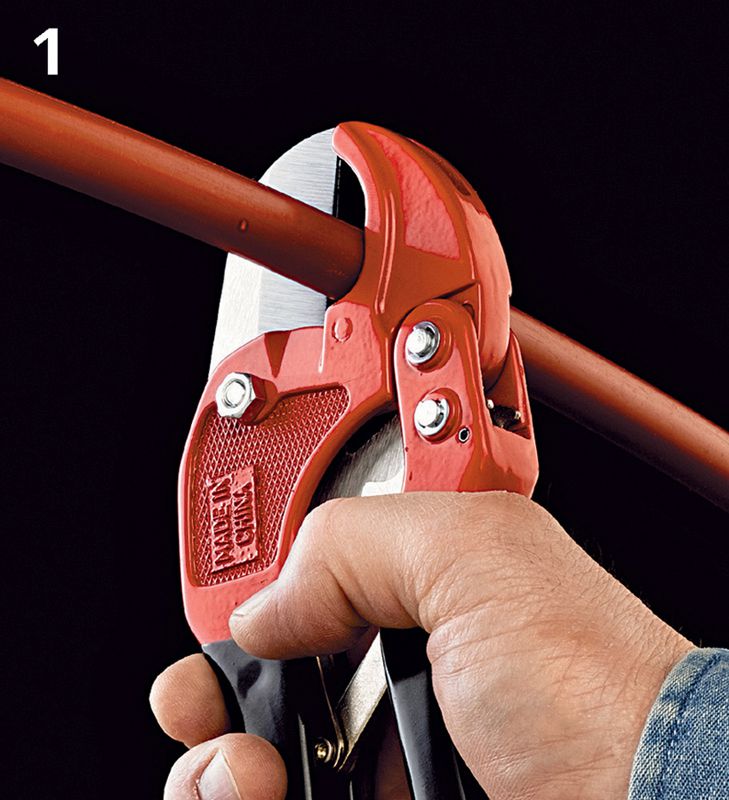
Cut the pipe to length, making sure to leave enough extra material so the line will have a small amount of slack once the connections are made. A straight, clean cut is very important. For best results, use a tubing cutter.
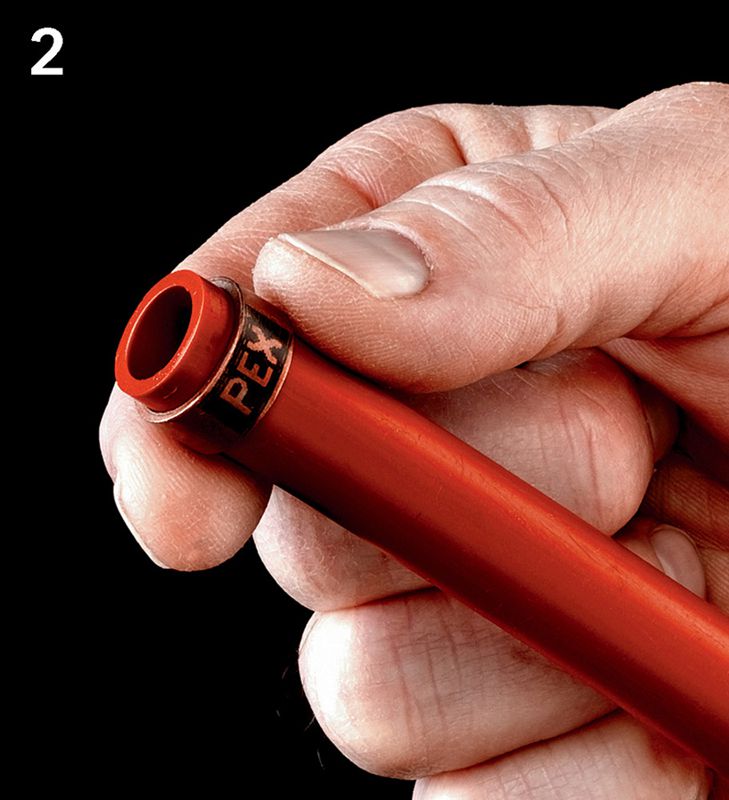
Inspect the cut end to make sure it is clean and smooth. If necessary, deburr the end of the pipe with a sharp utility knife. Slip a crimp ring over the end.

Insert the barbed end of the fitting into the pipe until it is snug against the cut edges. Position the crimp ring so it is 1/8" to 1/4" from the end of the pipe, covering the barbed end of the fitting. Pinch the fitting to hold it in place.
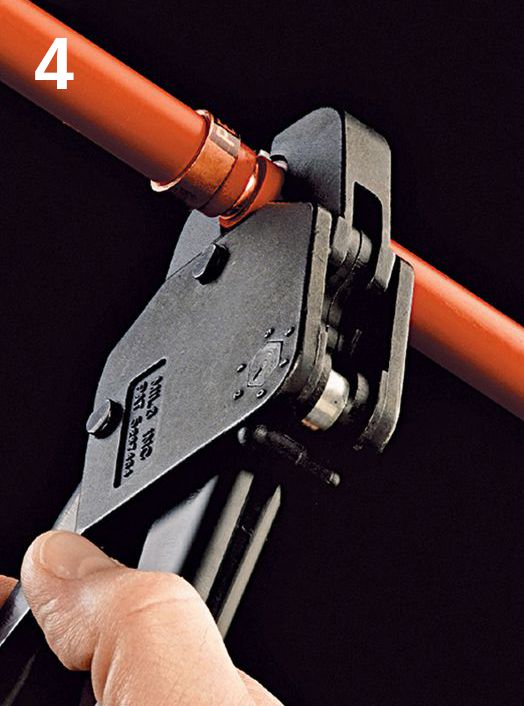
Align the jaws of a full-circle crimping tool over the crimp ring and squeeze the handles together to apply strong, even pressure to the ring.
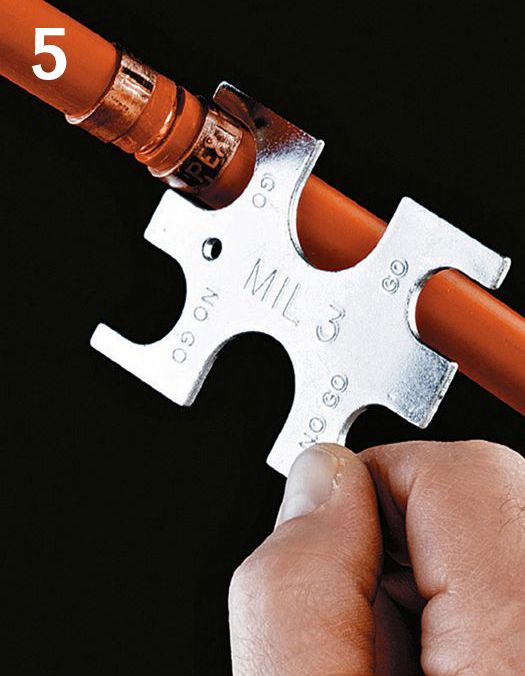
Test the connection to make sure it is mechanically acceptable, using a go/no-go gauge. If the ring does not fit into the gauge properly, cut the pipe near the connection and try again.