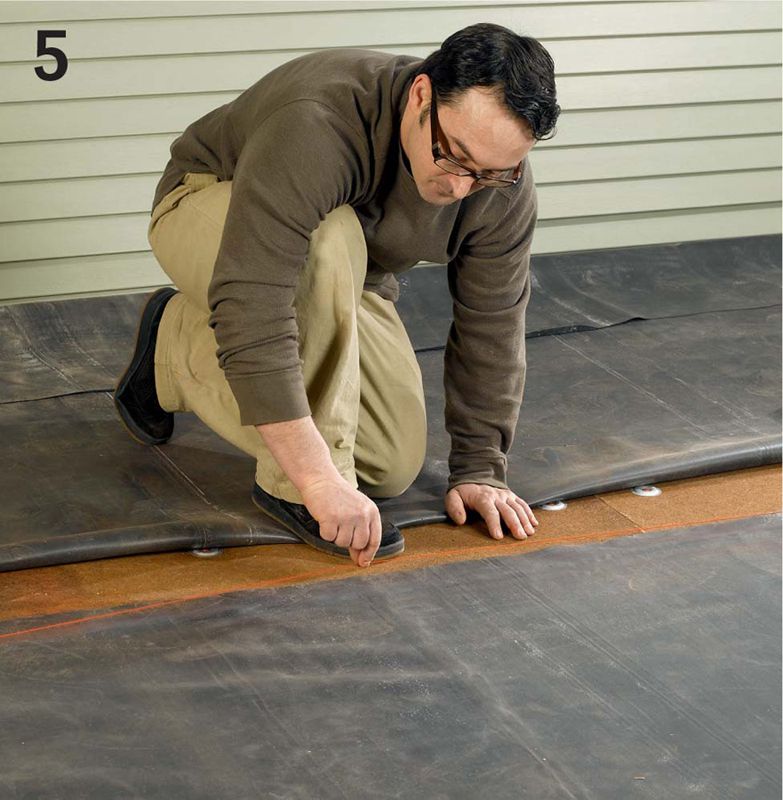
Prepare the roof deck for membrane roofing by removing the old roofing material down to bare decking. Look closely for signs of deterioration. Replace deteriorated decking. For a smooth surface, cover the roof with a new layer of high-density fiberboard (sold at roofing materials suppliers). Secure with fasteners recommended by the manufacturer for this purpose—usually long screws with large insulation plates.

Sweep the roof deck thoroughly, and spread out the membrane so it has a chance to relax. Make any cutouts in the membrane that may be necessary to allow for vent pipes or other protrusions. Overlap the sheets by 3" and wipe them down with the recommended cleaner to prepare the surfaces for adhesive.
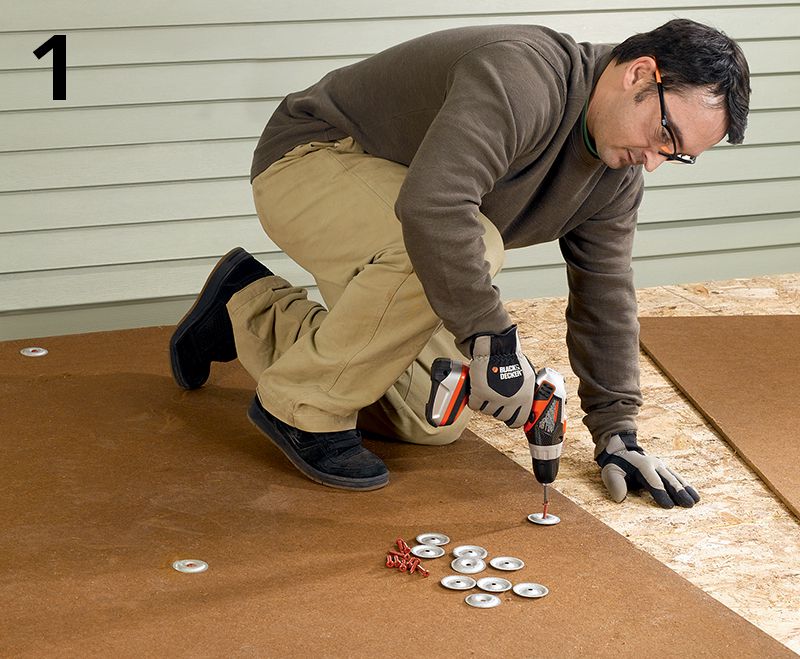
Apply the latex adhesive. Fold half of the first membrane sheet over on itself to expose the roof deck, and roll a heavy coat of adhesive onto both the deck and membrane surfaces with a medium-nap paint roller. However, do not apply adhesive to the overlapped section of membrane. Once the adhesive begins to set (about 20 minutes in normal conditions), carefully roll the folded rubber down into place. Avoid wrinkling the membrane.
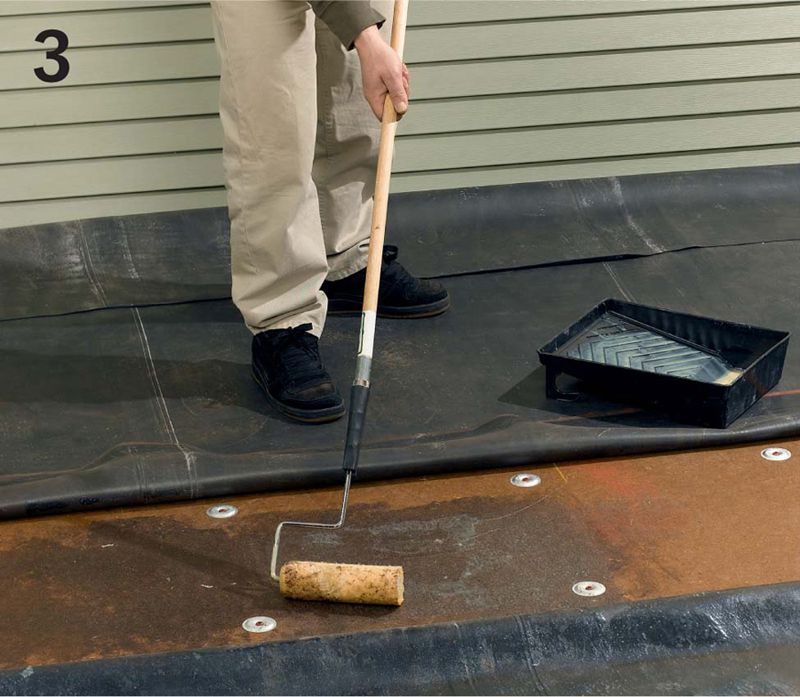
Use a stiff-bristle push broom to brush out any air pockets that may be evident under the bonded half of the membrane. Brush from the middle of the roof outward to the edges. Then fold the other unbonded half over, apply adhesive to the rubber and roof deck again, and adhere this half of the membrane to the roof. Apply all sections of membrane to the roof deck in this fashion, but do not apply adhesive within 3" of the edges of any overlapping sections of rubber; these must be accessible for applying seaming tape along the seams.
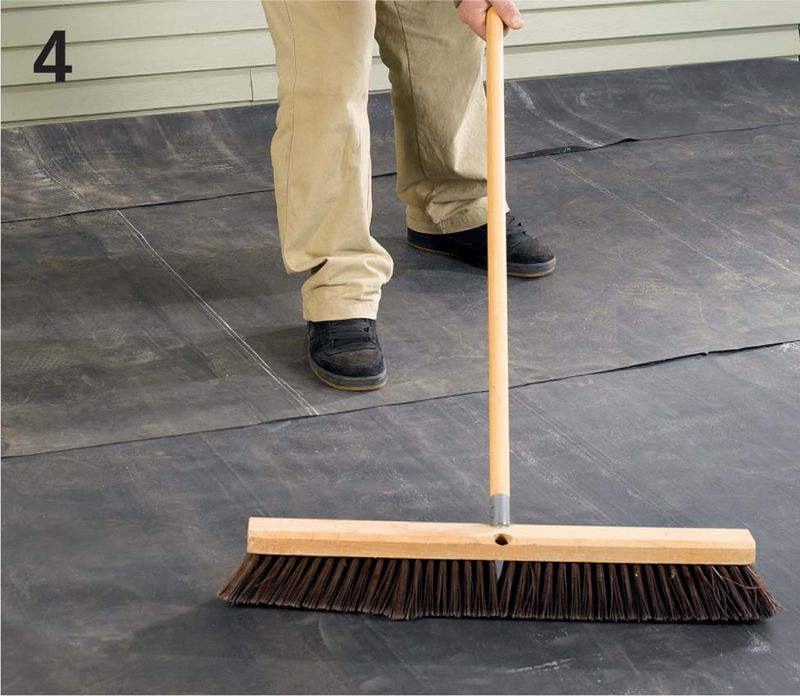
Roll the top section of overlapping membrane back along the seam area, and chalk a reference line 3" from the edge of the bottom membrane. This marks the area for applying seaming tape.
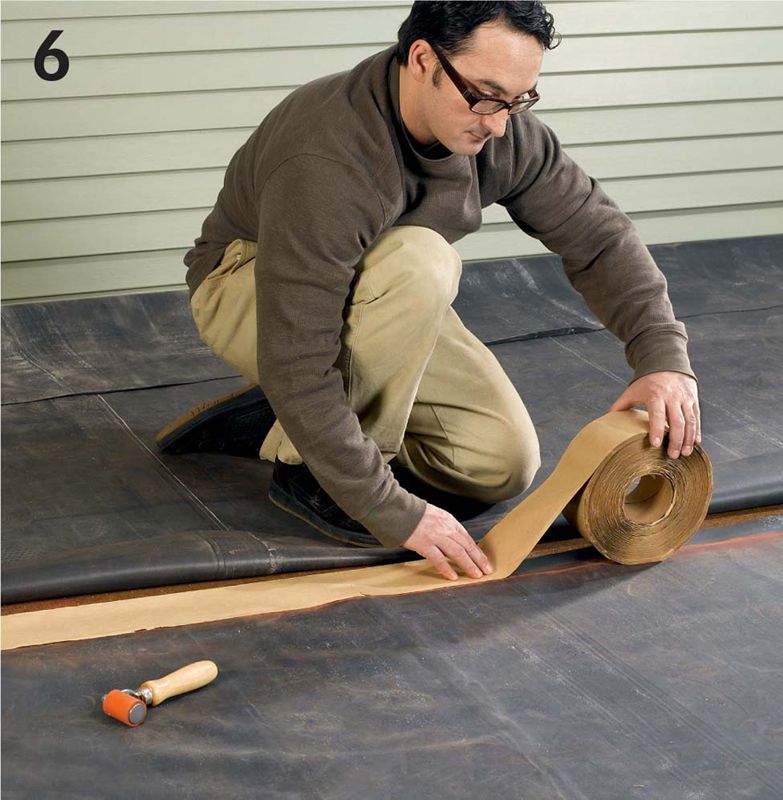
Tape the seams. Use the recommended cleaning solvent to clean both halves of the overlapping membrane in the tape areas, then apply seaming tape sticky side down to the bottom membrane within the marked area. Press the tape down firmly to ensure good adhesion to the membrane.
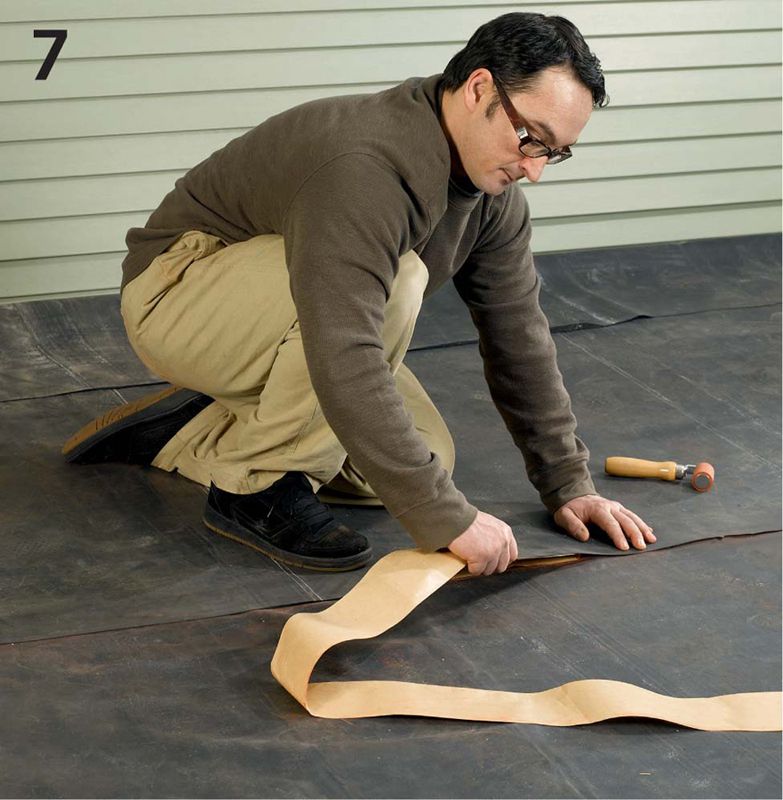
Fold the top membrane overlap back in place on the tape. Slowly pull off the tape’s paper backing with the membrane edges now overlapping. Press the overlapping edges down to create a tighter, smooth seam. Roll the seamed areas with a J-roller or seam rolling tool to bond the seam.

If the roof meets a vertical wall, you may need to remove siding so you can bond the membrane to wall sheathing. Use contact adhesive to apply the membrane 12" up the wall. Seal the edge with a metal termination bar fastened to the wall with exterior screws. Trim off overhanging membrane around the roof edges, and flash it according to the manufacturer’s recommendations using rubber adhesive flashing and rubber boots.