EXTERIOR
SIDING: REPAIRING
Damage to siding is fairly common, but fortunately, it’s also easy to fix. Small to medium holes, cracks, and rotted areas can be repaired with filler or by replacing the damaged sections with matching siding.
If you cannot find matching siding for repairs at building centers, check with salvage yards or siding contractors. When repairing aluminum or vinyl siding, contact the manufacturer or the contractor who installed the siding to help you locate matching materials and parts. If you’re unable to find an exact match, remove a section of original siding from a less visible area of the house, such as the back of the garage, and use it for the patch. Cover the gap in the less visible area with a close matching siding, where the mismatch will be less noticeable.
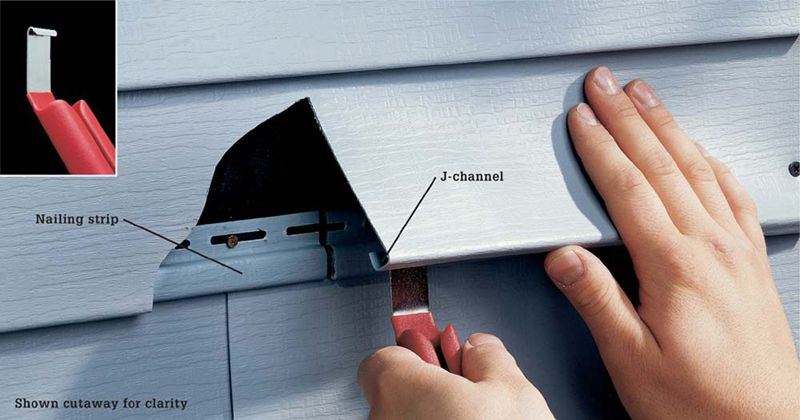
Vinyl and metal siding panels have a locking J-channel that fits over the bottom of the nailing strip on the underlying piece. Use a zip-lock tool (inset) to separate panels. Insert the tool at the seam nearest the repair area. Slide it over the J-channel, pulling outward slightly, to unlock the joint from the siding below.
 HOW TO PATCH VINYL SIDING
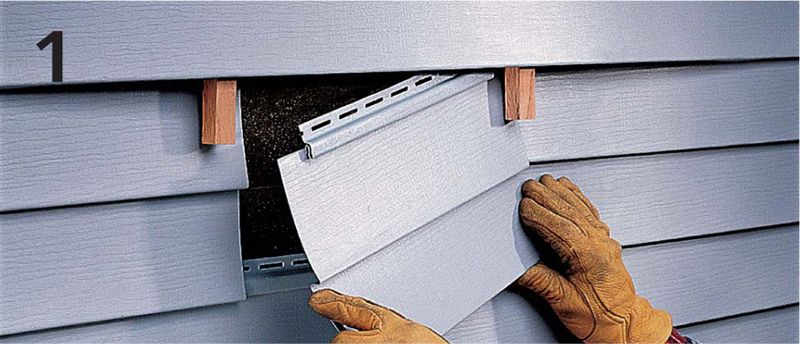
Starting at the seam nearest the damaged area, unlock interlocking joints using a zip-lock tool. Insert spacers between the panels, then remove the fasteners in the damaged siding using a flat pry bar. Cut out the damaged area using aviation snips. Cut a replacement piece 4" longer than the open area, and trim 2" off the nailing strip from each end. Slide the piece into position.
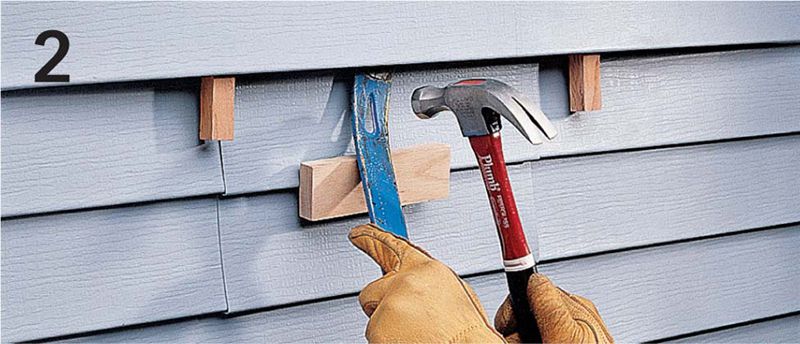
Insert siding nails in the nailing strip, then position the end of a flat pry bar over each nail head. Drive the nails by tapping on the neck of the pry bar with a hammer. Place a scrap piece of wood between the pry bar and siding to avoid damaging the siding. Slip the locking channel on the overlapping piece over the nailing strip of the replacement piece. Tip: If the damaged panel is near a corner, door, or window, replace the entire panel. This eliminates an extra seam.
HOW TO PATCH ALUMINUM SIDING
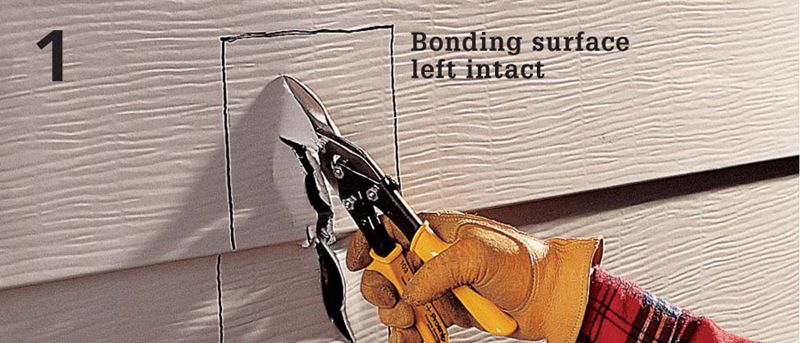
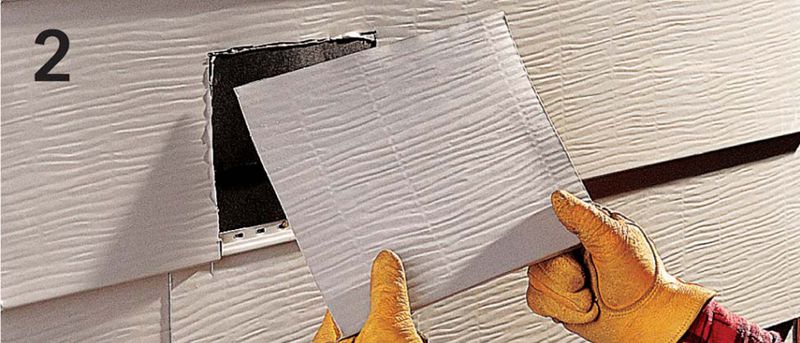
Cut out the damaged area using aviation snips. Leave an exposed area on top of the uppermost piece to act as a bonding surface. Cut a patch 4" larger than the repair area. Remove the nailing strip. Smooth the edges with metal sandpaper.
Nail the lower patch in place by driving siding nails through the nailing flange. Apply roofing cement to the back of the top piece, then press it into place, slipping the locking channel over the nailing strip of the underlying piece. Caulk the seams.
HOW TO REPLACE ALUMINUM END CAPS
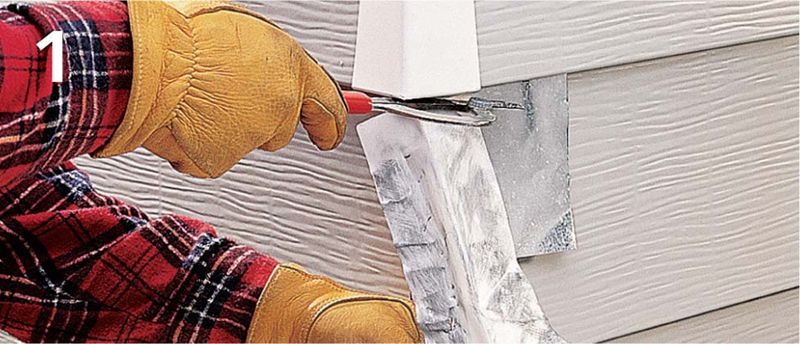
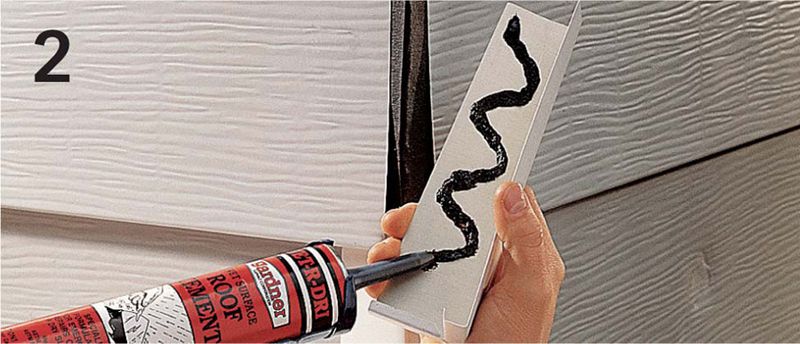
Remove the damaged end cap. If necessary, pry the bottom loose, then cut along the top with a hacksaw blade. Starting at the bottom, attach the replacement end caps by driving siding nails through the nailing tabs and into the framing members.
Trim the nailing tabs off the top replacement cap. Apply roofing cement to its back. Slide the cap over the locking channels of the siding panels. Press the top cap securely in place.
HOW TO REPLACE BOARD & BATTEN SIDING
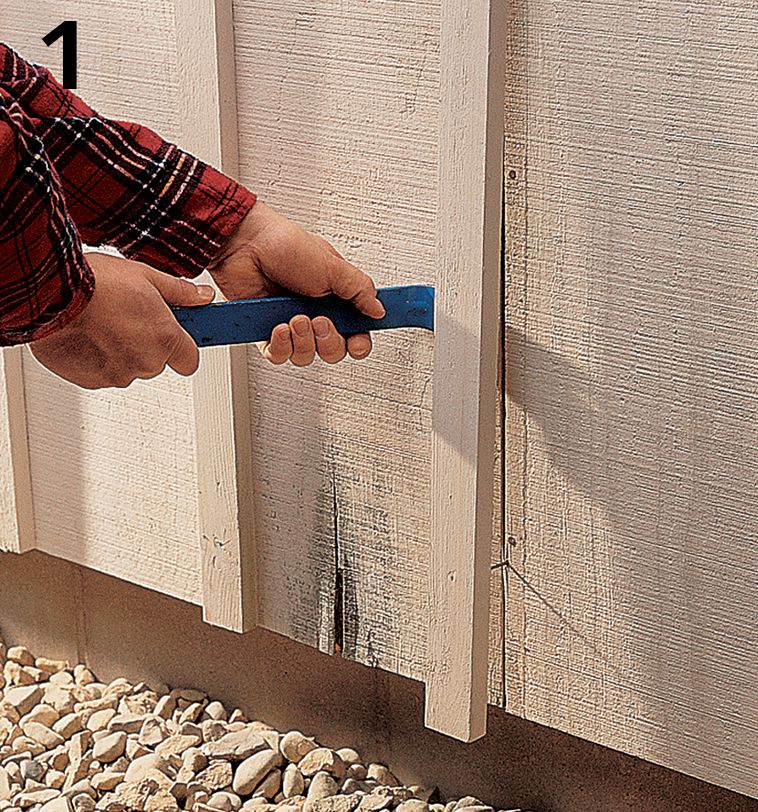
Remove the battens over the damaged boards. Pry out the damaged boards in their entirety. Inspect the underlying housewrap, and patch if necessary.
Cut replacement boards from the same type of lumber, allowing a 1/8" gap at the side seams. Prime or seal the edges and the back side of the replacement boards. Let them dry.
Nail the new boards in place using ring-shank siding nails. Replace the battens and any other trim. Prime and paint or stain the new boards to blend with the surrounding siding.
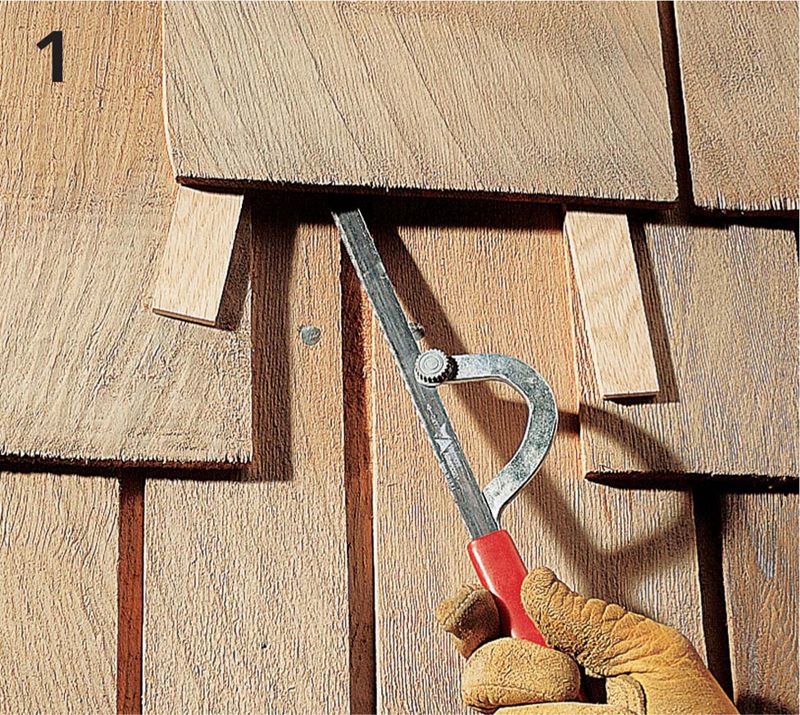
HOW TO REPLACE WOOD SHAKES & SHINGLES
Split damaged shakes or shingles with a hammer and chisel, and remove them. Insert wood spacers under the shakes or shingles above the repair area, then slip a hacksaw blade under the top board to cut off any remaining nail heads.
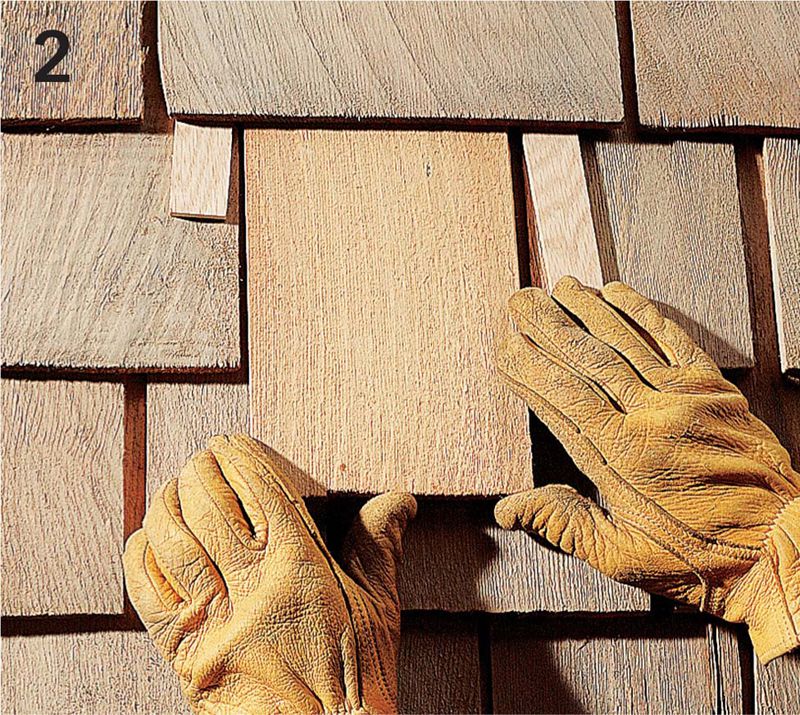
Cut replacement shakes or shingles to fit, leaving a 1/8- to 1/4"-wide gap at each side. Coat all sides and edges with wood preservative. Slip the patch pieces under the siding above the repair area. Drive siding nails near the top of the exposed area on the patches. Cover nail heads with caulk. Remove the spacers.
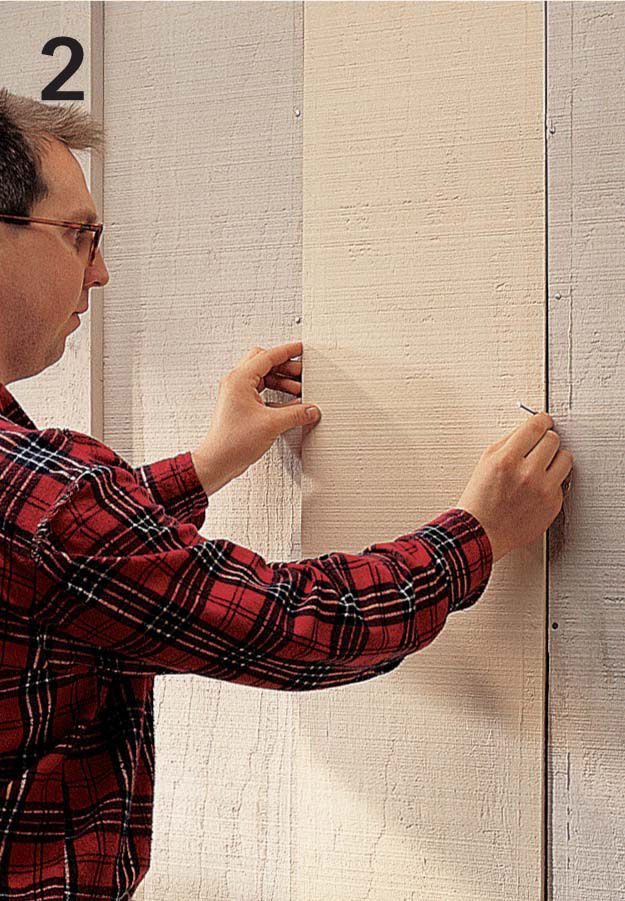
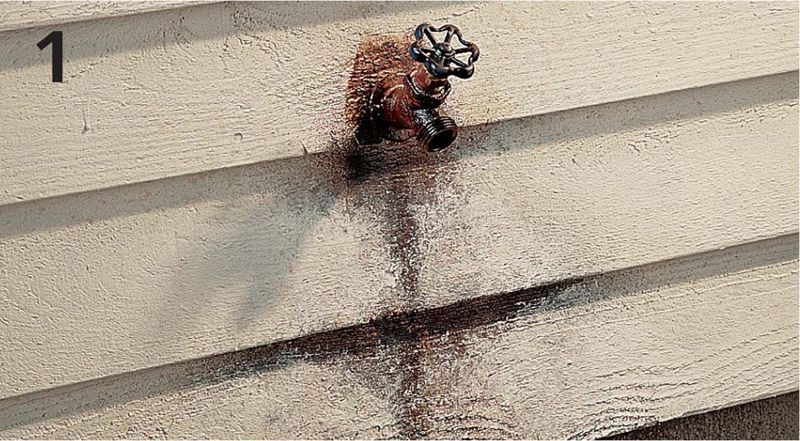
HOW TO REPLACE LAP SIDING
If the damage is caused by water, locate and repair the leak or other source of the water damage.
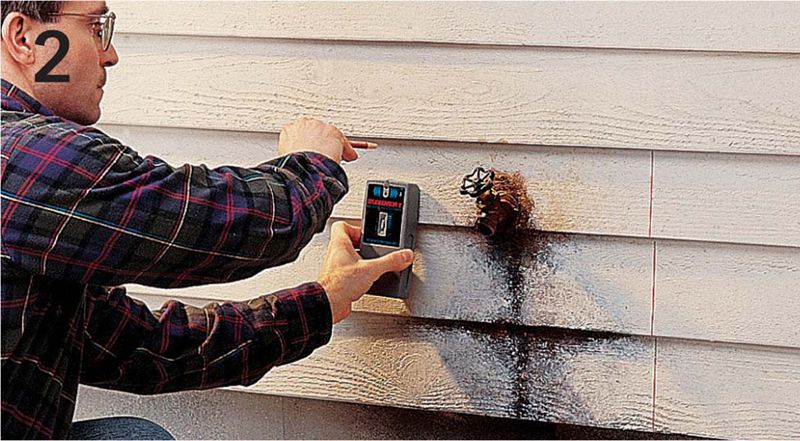
Mark the area of siding that needs to be replaced. Make the cutout lines over the center of the framing members on each side of the repair area, staggering the cuts to offset the joints. Tip: Use an electronic stud finder to locate framing members, or look for the nail heads.
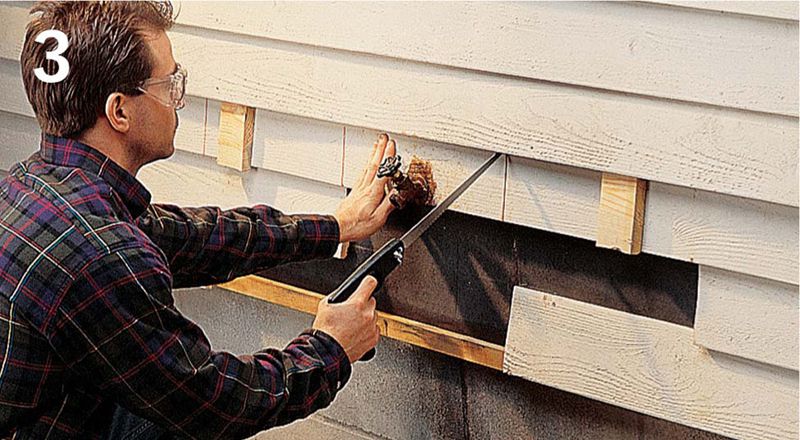
Insert spacers beneath the board above the repair area. Make entry cuts at the top of the cutting lines with a key hole saw, then saw through the boards and remove them. Pry out any nails or cut off the nail heads using a hacksaw blade. Patch or replace the sheathing and building paper, if necessary.
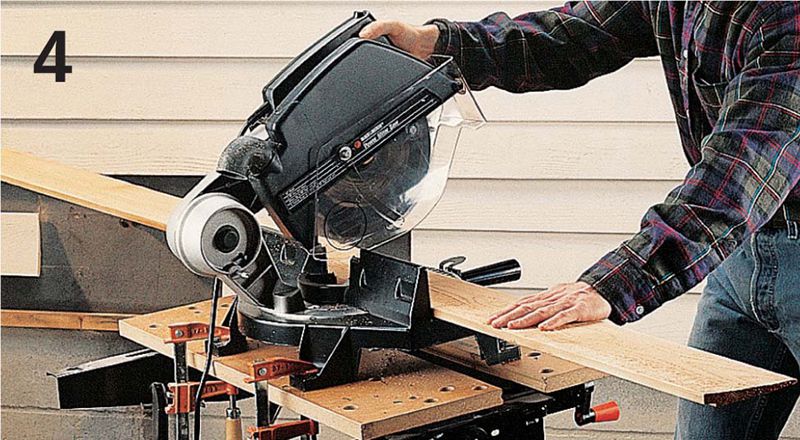
Measure and cut replacement boards to fit, leaving an expansion gap of 1/8" at each end. Use the old boards as templates to trace cutouts for fixtures and openings. Use a jigsaw to make the cutouts. Apply wood sealer or primer to the ends and backs of the boards. Let them dry.
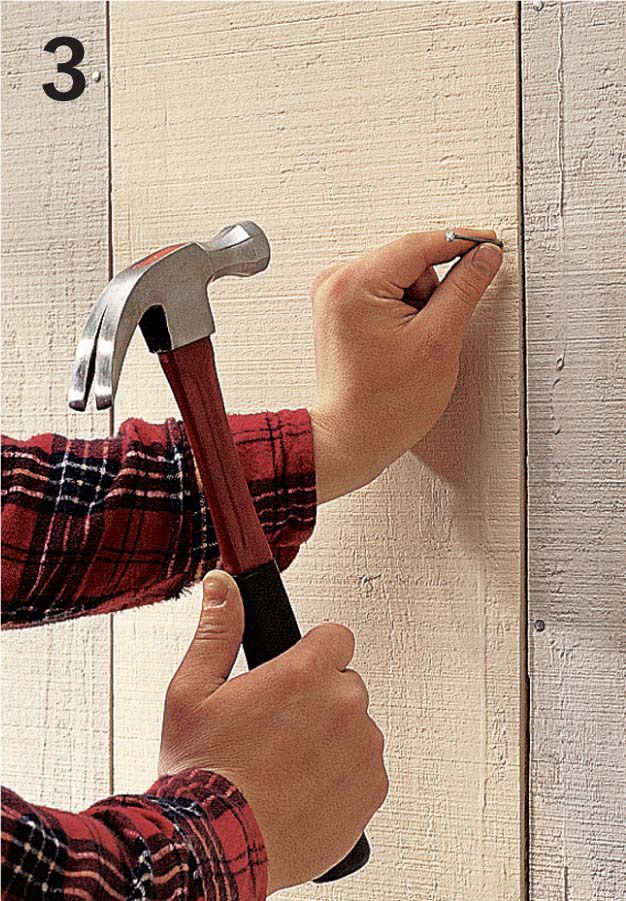
Nail the new boards in place with siding nails, starting with the lowest board in the repair area. At each framing member, drive nails through the bottom of the new board and the top of the board below. Tip: If you removed the bottom row of siding, nail a 1 × 2 starter strip along the bottom of the patch area.
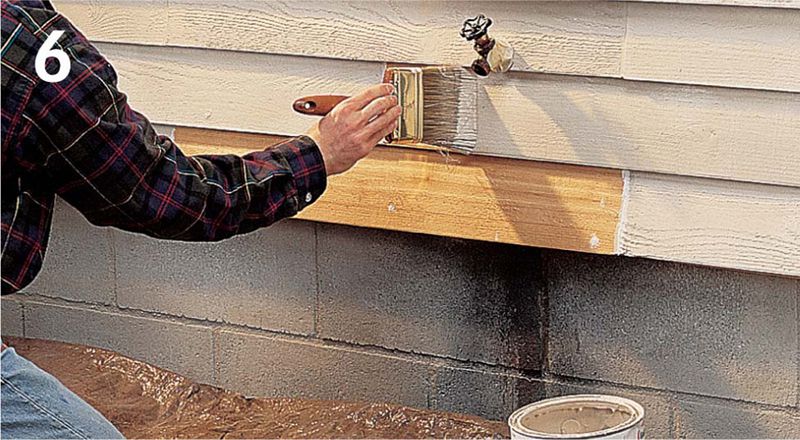
Fill expansion joints with caulk (use paintable caulk for painted wood or tinted caulk for stained wood). Prime and paint or stain the replacement boards to match the surrounding siding.