Tools & Materials 
Screwdriver
Combination tool
Fish tape
Drywall saw
Wall or ceiling outlet boxes
Cable clamps (if boxes are not self-clamping)
Two- and three-wire 14-gauge NM cable
Alarms
Wire connectors
15-amp single-pole breaker
Eye protection
Smoke and carbon monoxide (CO) alarms are an essential safety component of any living facility. All national fire protection codes require that new homes have a hard-wired smoke alarm in every sleeping room and on every level of a residence, including basements, attics, and attached garages. A smoke alarm needs to be protected with an AFCI circuit if it is installed in a bedroom.
Most authorities also recommend CO detectors on every level of the house and in every sleeping area.
Heat alarms, which detect heat instead of smoke, are often specified for locations like utility rooms, basements, or unfinished attics, where conditions may cause nuisance tripping of smoke alarms.
Hard-wired alarms operate on your household electrical current but have battery backups in case of a power outage. On new homes, all smoke alarms must be wired in a series so that every alarm sounds regardless of the fire’s location. When wiring a series of alarms, be sure to use alarms of the same brand to ensure compatibility. Always check local codes before starting the job.
Ceiling-installed alarms should be 4" away from the nearest wall. Smoke alarms always need to be protected with an AFCI circuit.

Smoke detectors and carbon monoxide (CO) detectors are required in new construction. Hard-wired carbon monoxide detectors (A) are triggered by the presence of carbon monoxide gas. Smoke detectors are available in photoelectric and ionizing models. In ionizing detectors (B), a small amount of current flows in an ionization chamber. When smoke enters the chamber, it interrupts the current, triggering the alarm. Photoelectric detectors (C) rely on a beam of light, which when interrupted by smoke triggers an alarm. Heat alarms (D) sound an alarm when they detect areas of high heat in the room.
 HOW TO CONNECT A SERIES OF HARD-WIRED SMOKE ALARMS
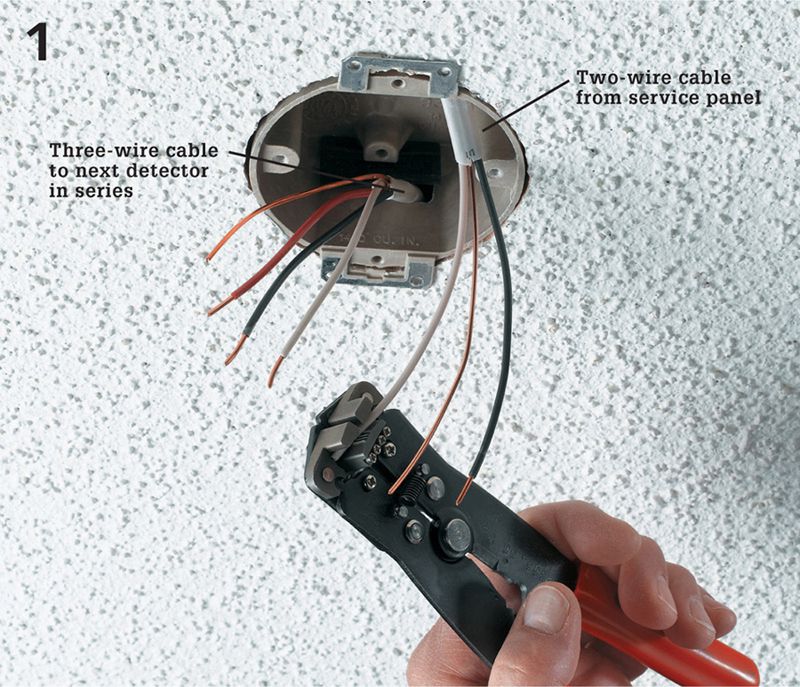
Pull 1 4/2 NM cable from the service panel into the first ceiling electrical box in the smoke alarm series. Pull 1 4/3 NM cable between the remaining alarm outlet boxes. Use cable clamps to secure the cable in each outlet box. Remove sheathing and strip insulation from wires.

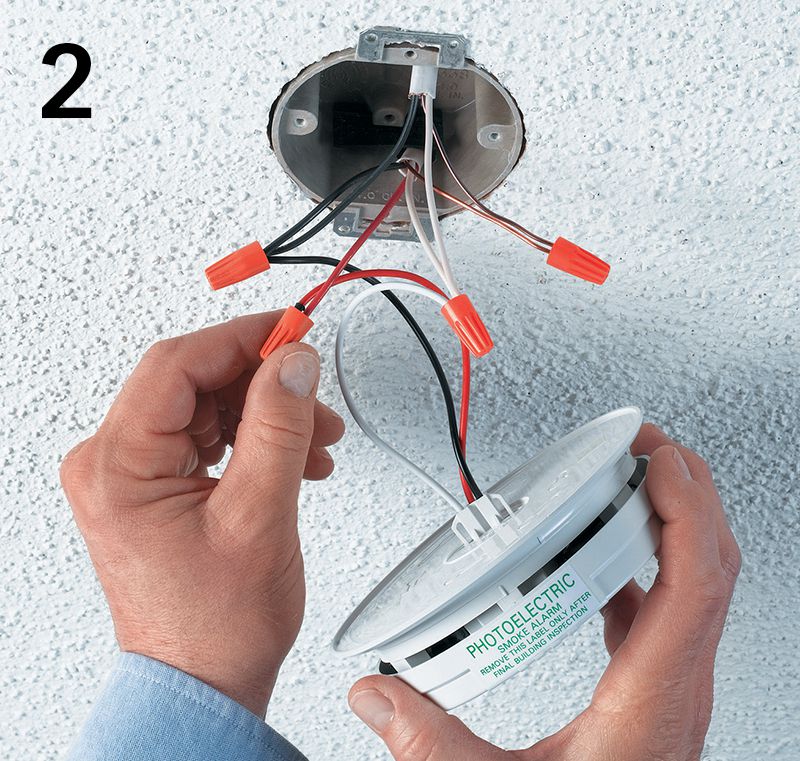
Ensure power is off and test for power. Wire the first alarm in the series. Use a wire connector to connect the ground wires. Splice the black circuit wire with the alarm’s black lead and the black wire going to the next alarm in the series. Splice the white circuit wire with the alarm’s white wire and the white (neutral) wire going to the next alarm in the series. Splice the red traveler wire with the odd-colored alarm wire (in this case, also a red wire).

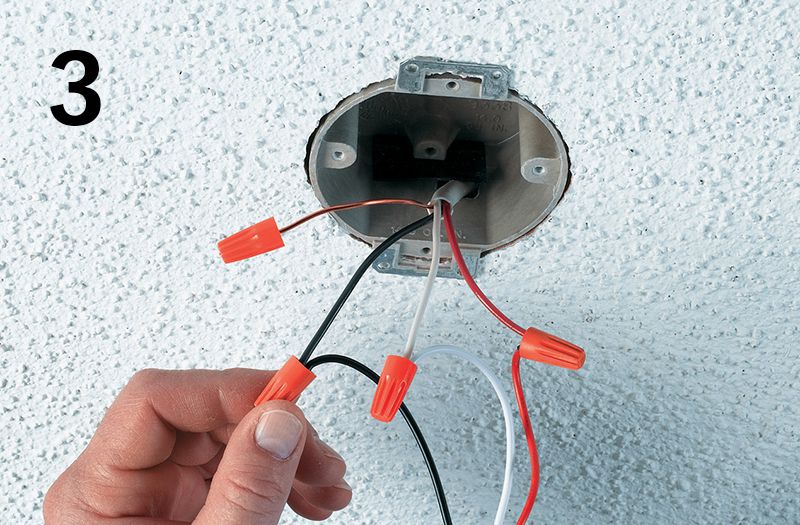
Wire the remaining alarms in the series by connecting the like-colored wires in each outlet box. Always connect the red traveler wire to the odd-colored (in this case, red) alarm wire. This red traveler wire connects all the alarms together so that when one alarm sounds, all the alarms sound. If the alarm doesn’t have a grounding wire, cap the ground with a wire connector. When all alarms are wired, install and connect the new 15-amp breaker.