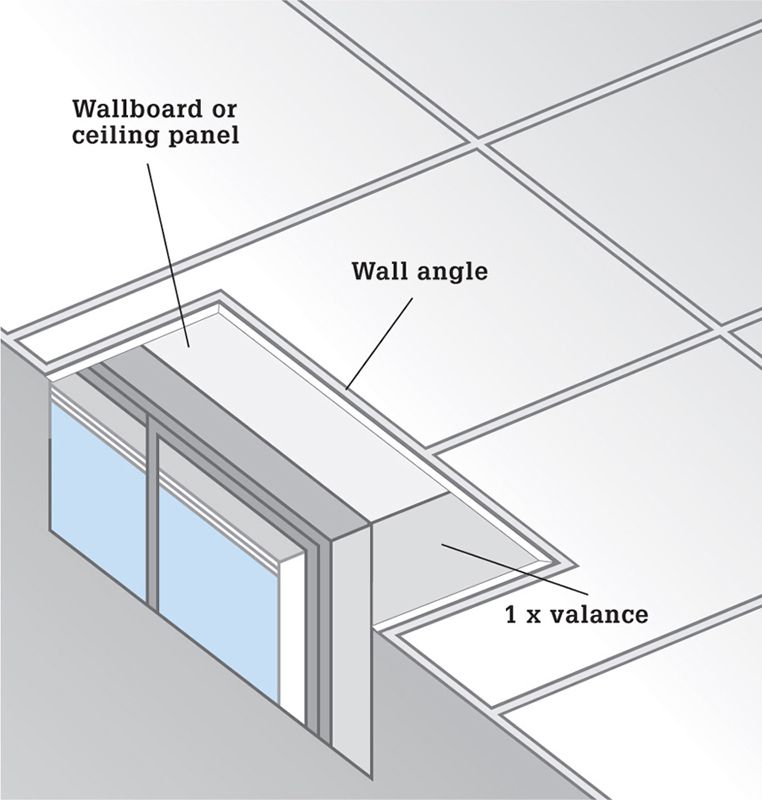
Build a valance around basement awning windows so they can be opened fully. Attach 1× lumber of an appropriate width to joists or blocking. Install drywall (or a suspended-ceiling panel trimmed to fit) to the joists inside the valance.
Suspended ceilings are traditionally popular ceiling finishes for basements because they hang below pipes and other mechanicals, providing easy access to them. Suspended ceiling tile manufacturers have a wide array of ceiling tiles to choose from. Popular styles mimic historical tin tiles and add depth to the ceiling while minimizing sound and vibration noise.
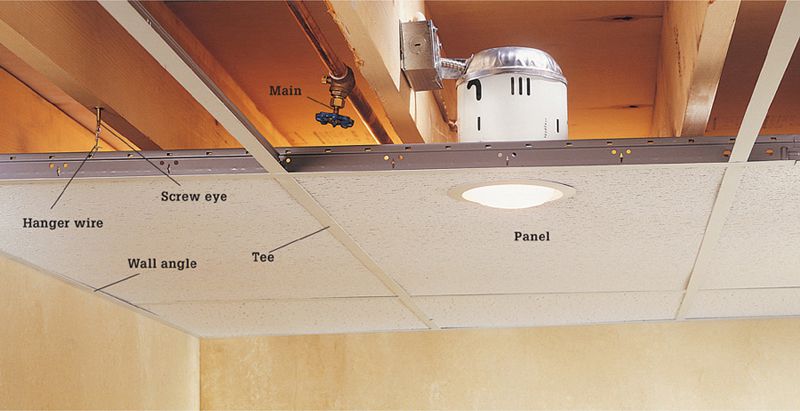
A suspended ceiling is a grid framework made of lightweight metal brackets hung on wires attached to ceiling or floor joists. The frame consists of T-shaped main beams (mains), cross tees (tees), and L-shaped wall angles. The grid supports ceiling panels, which rest on the flanges of the framing pieces. Panels are available in 2 × 2-ft. or 2 × 4-ft., in a variety of styles. Special options include insulated panels, acoustical panels that absorb sound, and light-diffuser screens for use with fluorescent lights. Generally, metal-frame ceiling systems are more durable than ones made of plastic.
To begin your ceiling project, devise the panel layout based on the size of the room, placing equally sized trimmed panels on opposite sides to create a balanced look. Your ceiling must also be level.
Build a valance around basement awning windows so they can be opened fully. Attach 1× lumber of an appropriate width to joists or blocking. Install drywall (or a suspended-ceiling panel trimmed to fit) to the joists inside the valance.
Suspended ceilings are very practical in basement rooms, and you can find them in many more design choices than you might expect.
 HOW TO INSTALL A SUSPENDED CEILING
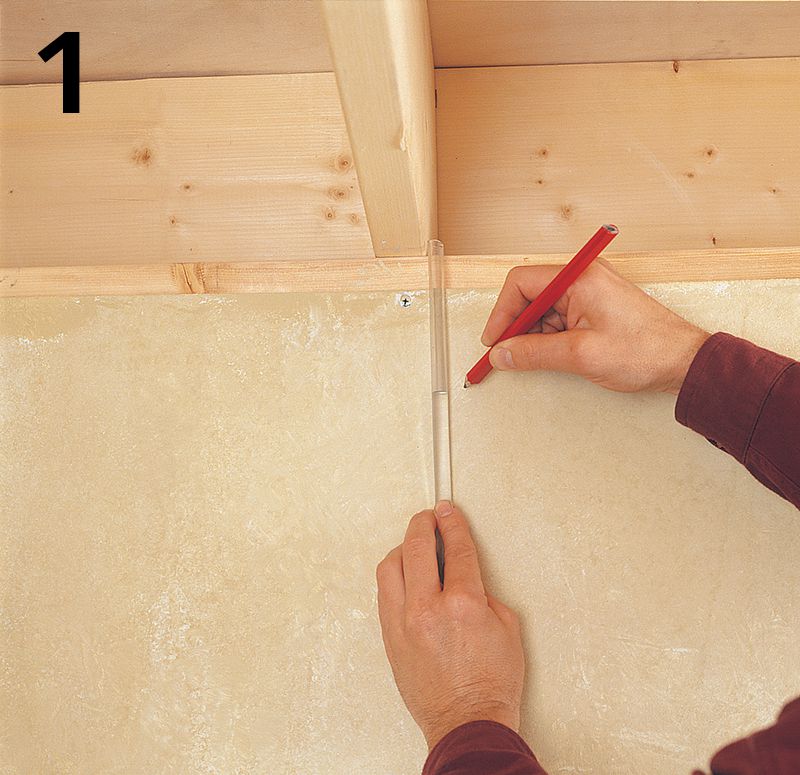
Make a mark on one wall that represents the ceiling height plus the height of the wall angle. Use a water level to transfer that height to both ends of each wall. Snap a chalk line to connect the marks. This line represents the top of the ceiling’s wall angle.
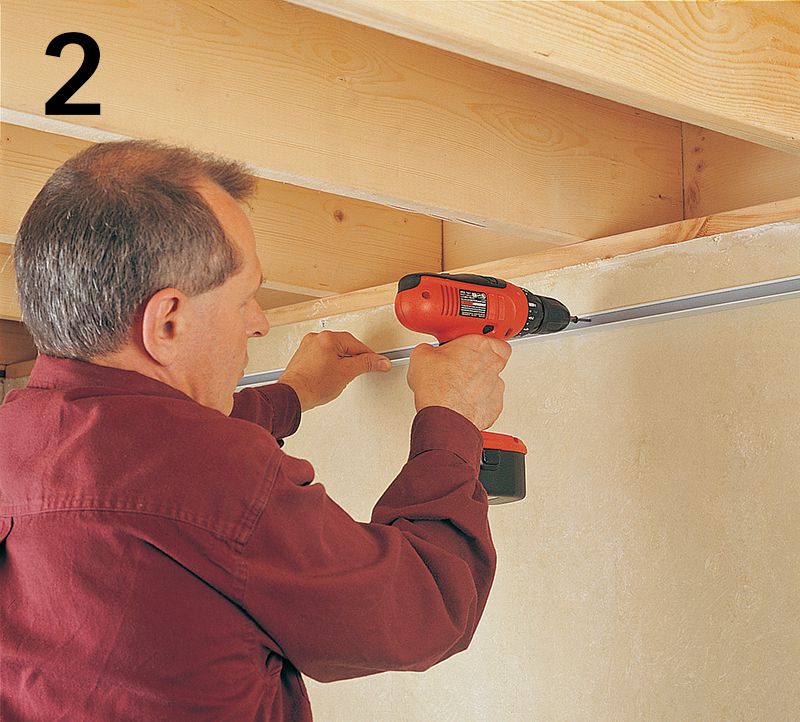
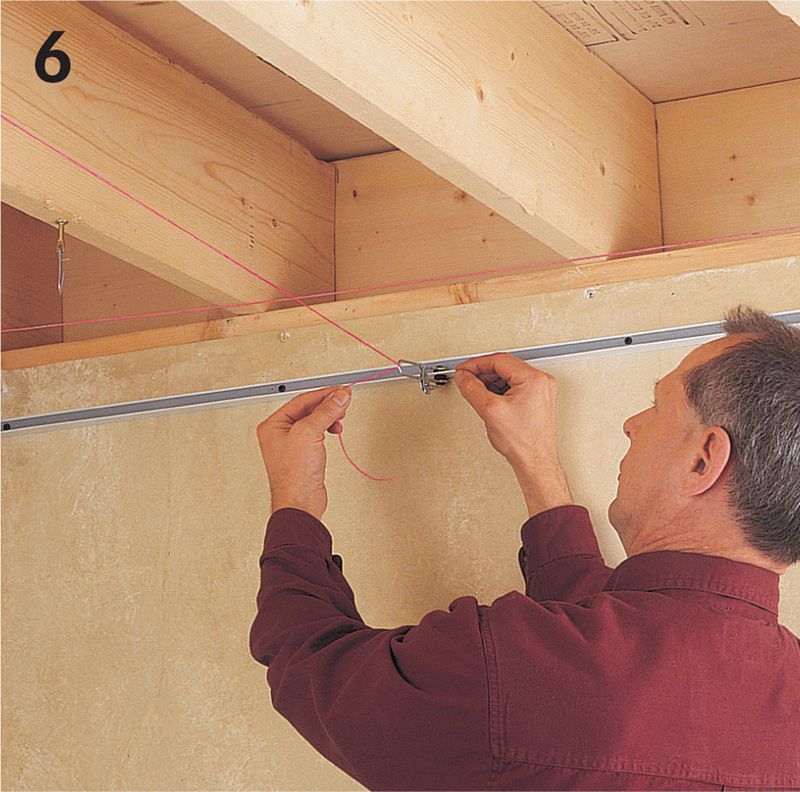
Attach wall angle pieces to the studs on all walls, positioning the top of the wall angle flush with the chalk line. Use 1 1/2" drywall screws (or short masonry nails driven into mortar joints on concrete block walls). Cut angle pieces using aviation snips.
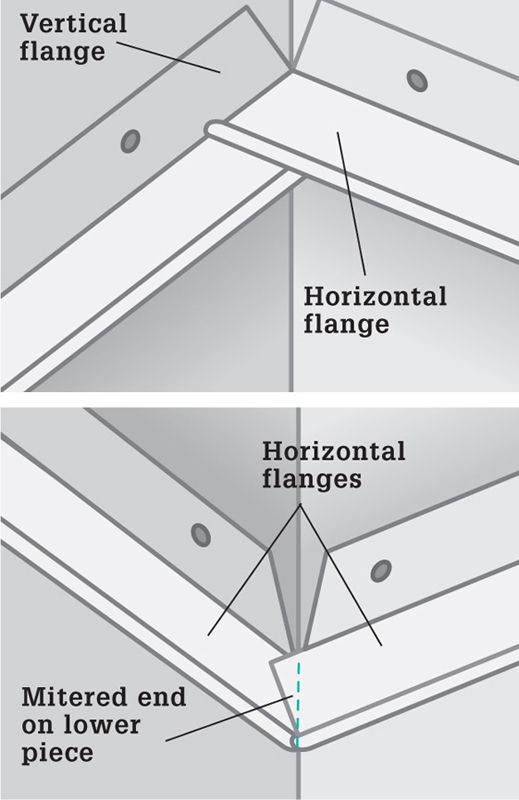
Tip: Trim wall angle pieces to fit around corners. At inside corners (top), back-cut the vertical flanges slightly, then overlap the horizontal flanges. At outside corners (bottom), miter-cut one horizontal flange, and overlap the flanges.
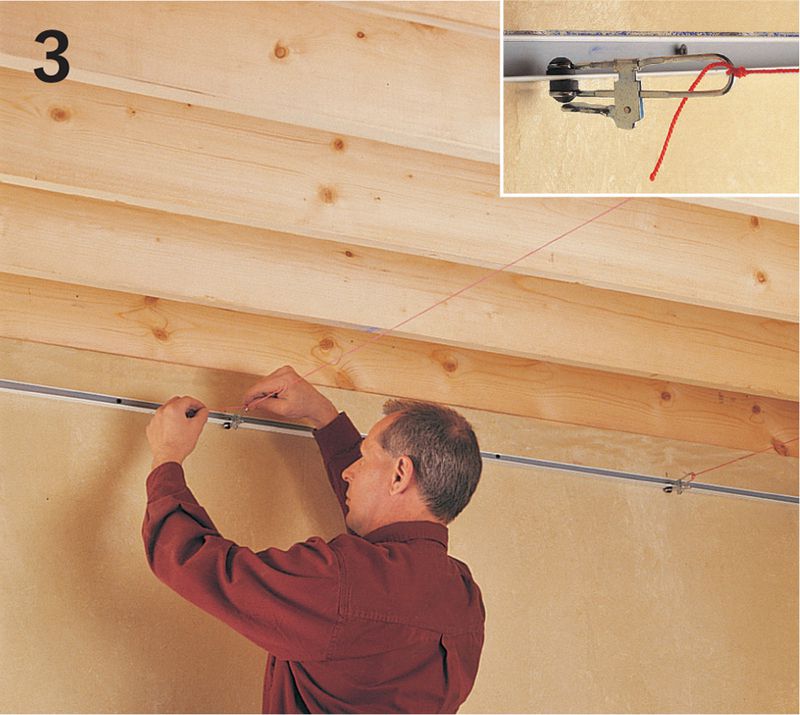
Mark the location of each main on the wall angles at the ends of the room. The mains must be parallel to each other and perpendicular to the ceiling joists. Set up a guide string for each main using a thin string and lock-type clamps (inset). Clamp the strings to the opposing wall angles, stretching them very taut so there’s no sagging.
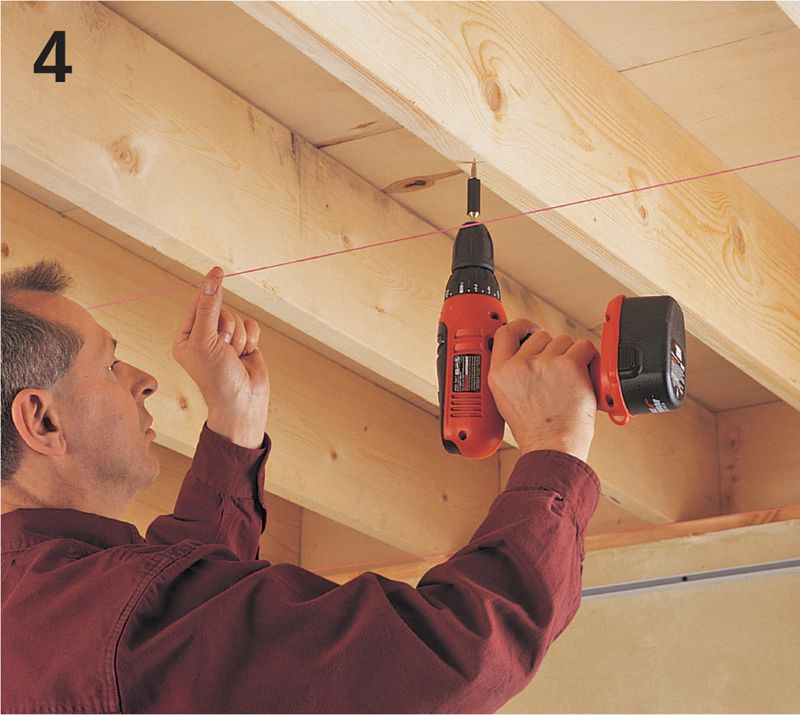
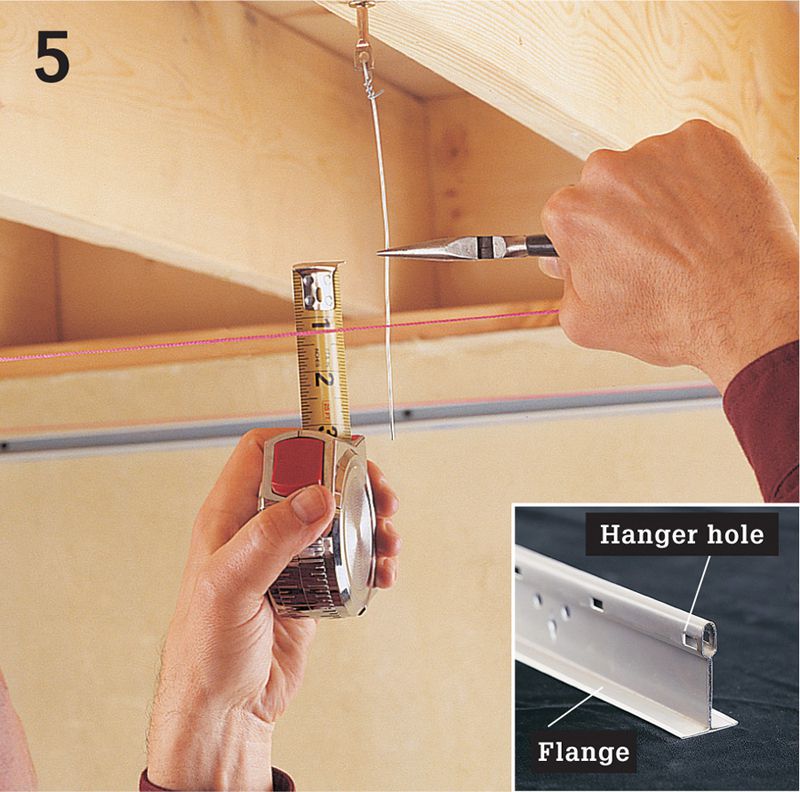
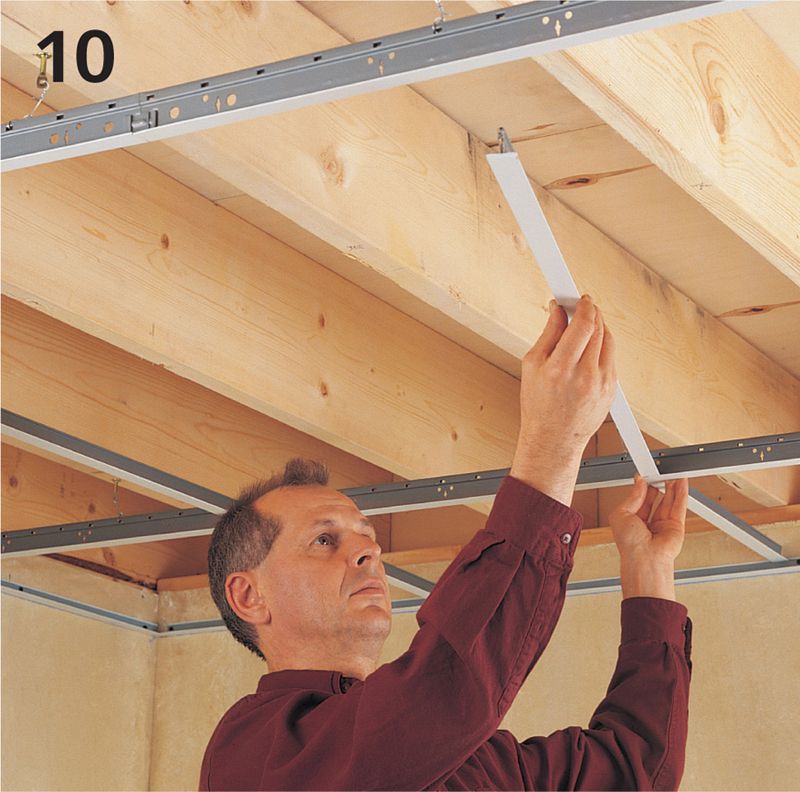
Install screw eyes for hanging the mains using a drill and screw eye driver. Drill pilot holes and drive the eyes into the joists every 4 ft., locating them directly above the guide strings. Attach hanger wire to the screw eyes by threading one end through the eye and twisting the wire on itself at least three times. Trim excess wire, leaving a few inches of wire hanging below the level of the guide string.
Measure the distance from the bottom of a main’s flange to the hanger hole in the web (inset). Use this measurement to prebend each hanger wire. Measure up from the guide string and make a 90° bend in the wire using pliers.
Following your ceiling plan, mark the placement of the first tee on opposite wall angles at one end of the room. Set up a guide string for the tee using a string and clamps, as before. This string must be perpendicular to the guide strings for the mains.
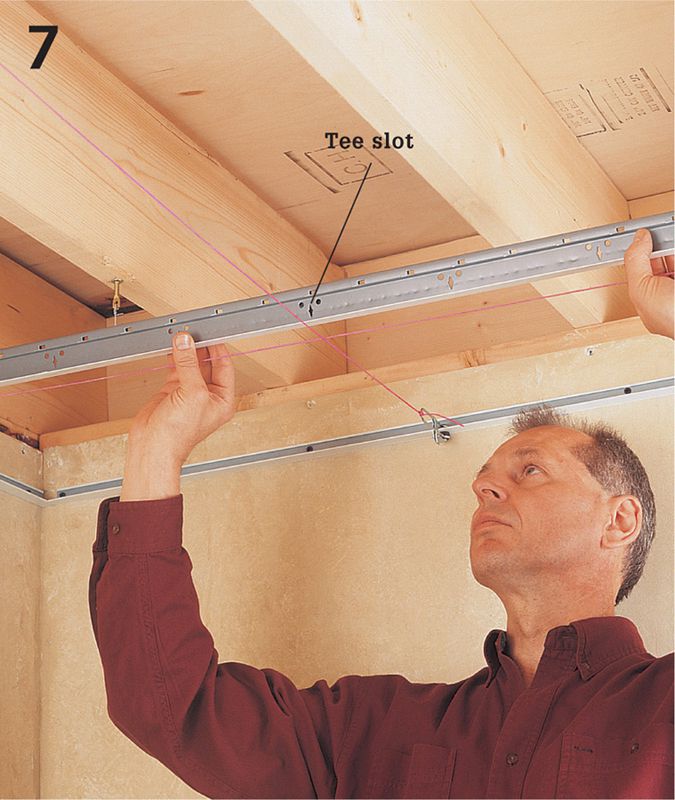
Trim one end of each main so that a tee slot in the main’s web is aligned with the tee guide string, and the end of the main bears fully on a wall angle. Set the main in place to check the alignment of the tee slot with the string.
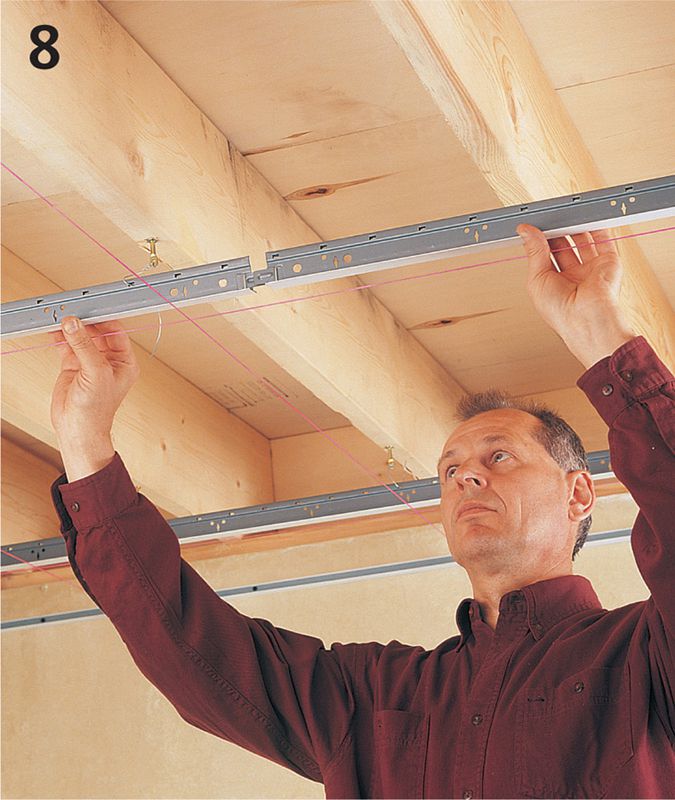
Cut the other end of each main to fit, so that it rests on the opposing wall angle. If a single main cannot span the room, splice two mains together end-to-end (the ends should be fashioned with male-female connectors). Make sure the tee slots remain aligned when splicing.
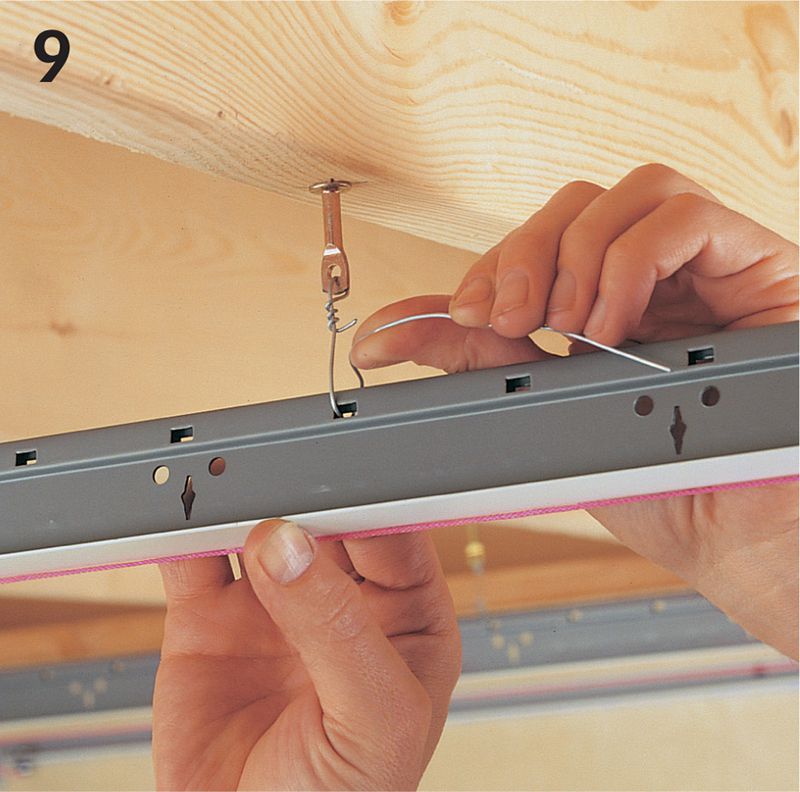
Install the mains by setting the ends on the wall angle and threading the hanger wires through the hanger holes in the webs. The wires should be as close to vertical as possible. Wrap each wire around itself three times, making sure the main’s flange is level with the main guide string. Also install a hanger near each main splice.
Attach tees to the mains, slipping the tabbed ends into the tee slots on the mains. Align the first row of tees with the tee guide string; install the remaining rows at 4-ft. intervals. If you’re using 2 × 2-ft. panels, install 2-ft. cross tees between the midpoints of the 4-ft. tees. Cut and install the border tees, setting the tee ends on the wall angles. Remove all guide strings and clamps.
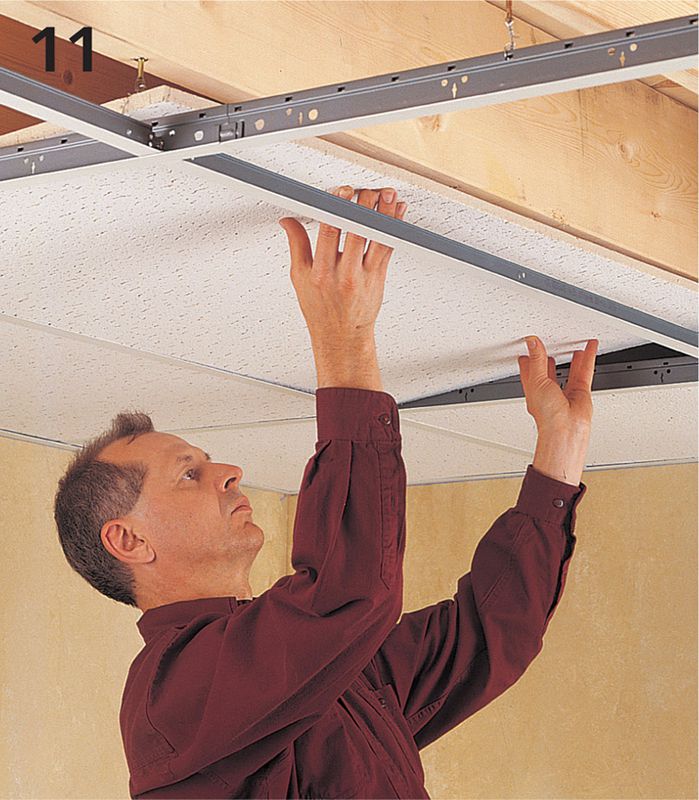
Place full ceiling panels into the grid first, then install the border panels. Lift the panels in at an angle, and position them so they rest on the frame’s flanges. Reach through adjacent openings to adjust the panels, if necessary.
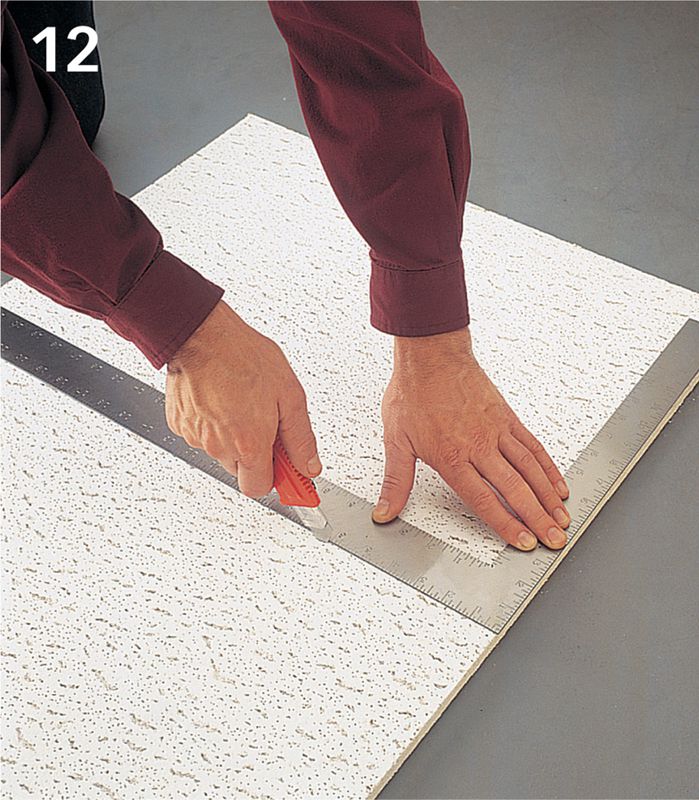
To trim the border panels to size, cut them face-up using a straightedge and utility knife.