WALLS & CEILINGS
TILING: BACKER BOARD
Use tile backer board as the substrate for tile walls in wet areas. Unlike drywall, tile backer won’t break down and cause damage if water gets behind the tile. The three basic types of tile backer are cementboard, fiber-cementboard, and Dens-Shield.
Though water cannot damage either cementboard or fiber-cementboard, it can pass through them. To protect the framing members, install a water barrier of 4-mil plastic or 15# building paper behind the backer.
Dens-Shield has a waterproof acrylic facing that provides the water barrier. It cuts and installs much like drywall, but requires galvanized screws to prevent corrosion and must be sealed with caulk at all untaped joints and penetrations.
Common tile backers are cementboard, fiber-cementboard, and Dens-Shield. Cementboard is made from Portland cement and sand reinforced by an outer layer of fiberglass mesh. Fiber-cementboard is made similarly, but with a fiber reinforcement integrated throughout the panel. Dens-Shield is a water-resistant gypsum board with a waterproof acrylic facing.
 HOW TO HANG CEMENTBOARD
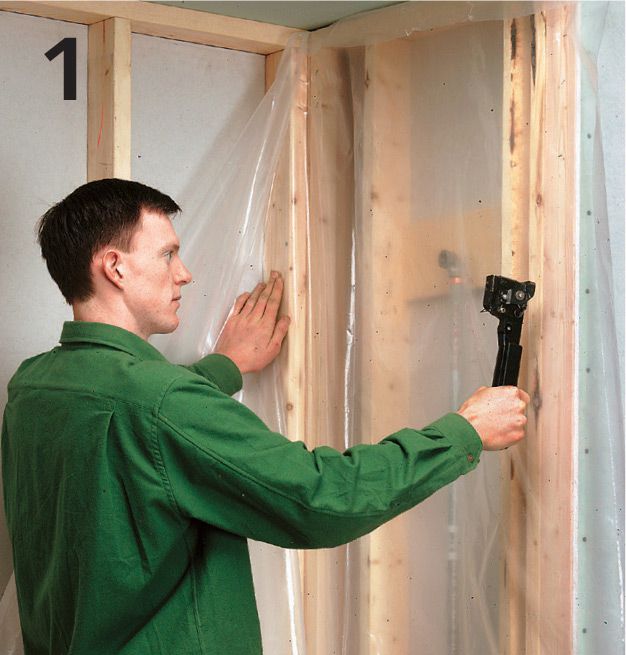
Staple a water barrier of 4-mil plastic sheeting or 15# building paper over the framing. Overlap seams by several inches, and leave the sheets long at the perimeter. Note: Framing for cementboard must be 16" on center; steel studs must be 20-gauge.
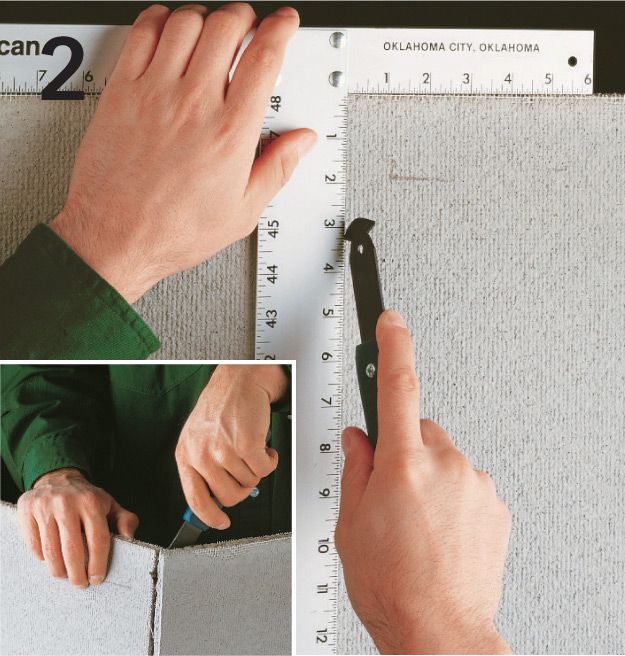
Cut cementboard by scoring through the mesh just below the surface with a utility knife or carbide-tipped cutter. Snap the panel back, then cut through the back-side mesh (inset). Note: For tile applications, the rough face of the board is the front.
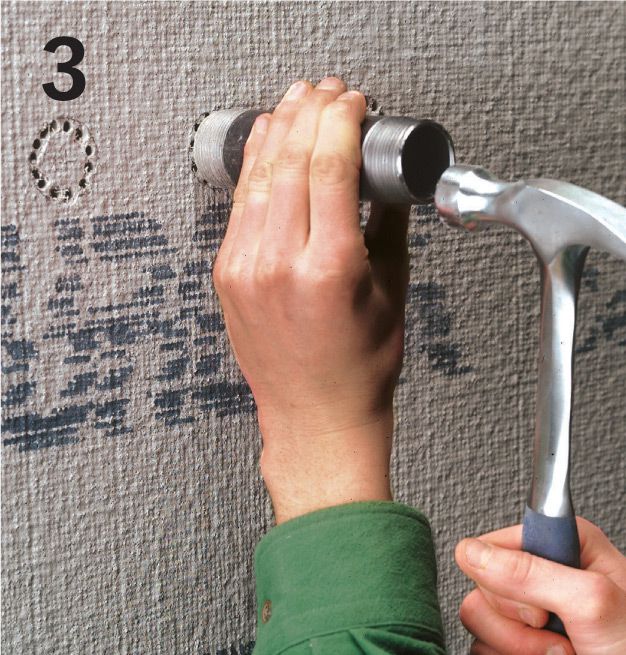
Make cutouts for pipes and other penetrations by drilling a series of holes through the board, using a small masonry bit. Tap the hole out with a hammer or a scrap of pipe. Cut holes along edges with a jigsaw and carbide grit blade.
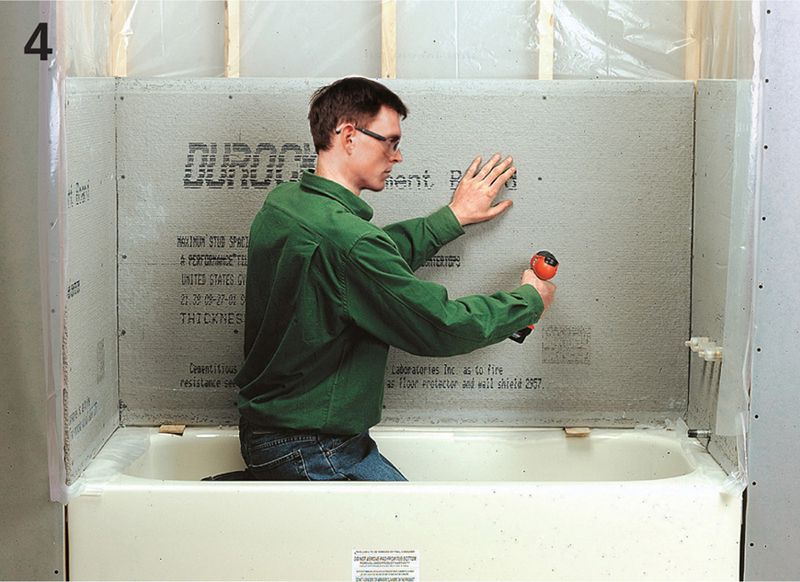
Install the sheets horizontally. Where possible, use full pieces to avoid butted seams, which are difficult to fasten. If there are vertical seams, stagger them between rows. Leave a 1/8" gap between sheets at vertical seams and corners. Use spacers to set the bottom row of panels 1/4" above the tub or shower base. Fasten the sheets with 1 1/4" cementboard screws, driven every 8" for walls and every 6" for ceilings. Drive the screws at least 1/2" from the edges to prevent crumbling. If the studs are steel, don’t fasten within 1" of the top track.
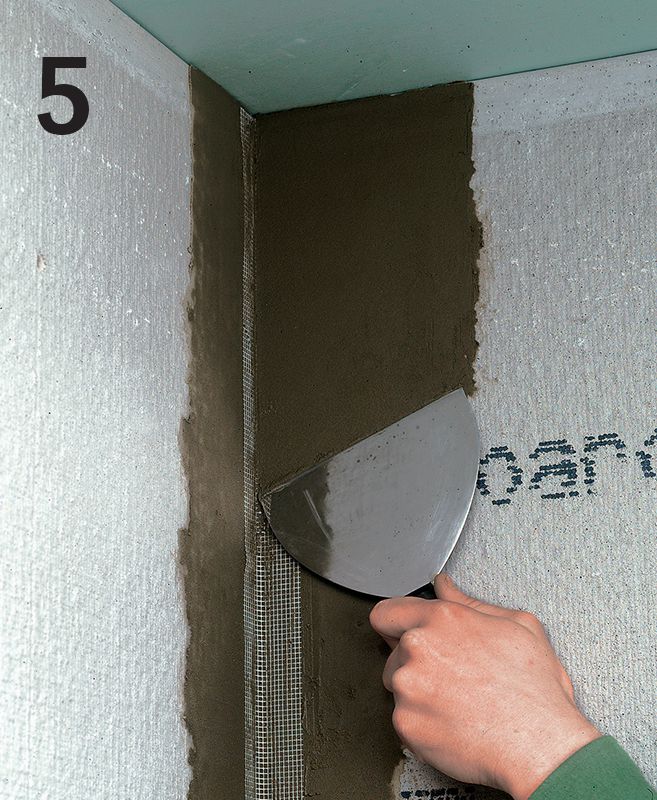
Cover the joints and corners with cementboard joint tape (alkali-resistant fiberglass mesh) and latex-Portland cement mortar (thin-set). Apply a layer of mortar with a taping knife, embed the tape into the mortar, then smooth and level the mortar.
FINISHING CEMENTBOARD
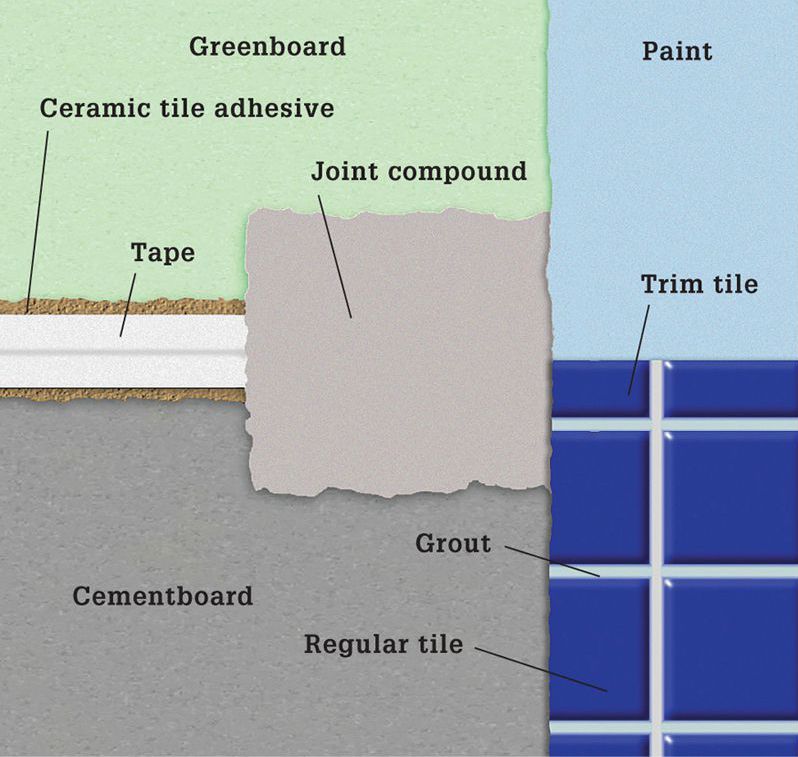
To finish a joint between cementboard and greenboard, seal the joint and exposed cementboard with ceramic tile adhesive, a mixture of four parts adhesive to one part water. Embed paper joint tape into the adhesive, smoothing the tape with a taping knife. Allow the adhesive to dry, then finish the joint with at least two coats of all-purpose drywall joint compound.
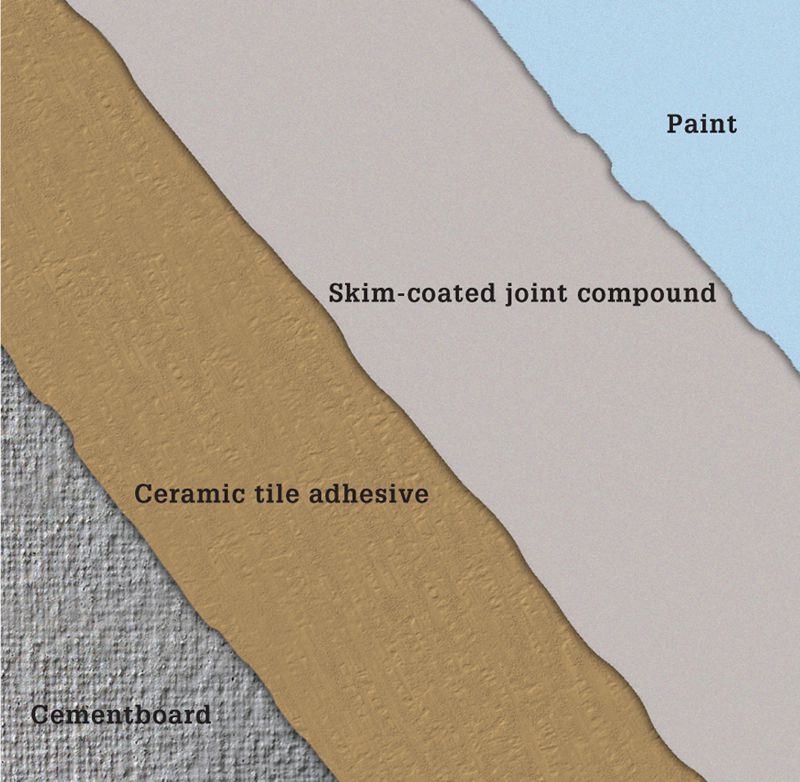
To finish small areas of cementboard that will not be tiled, seal the cementboard with ceramic tile adhesive, a mixture of four parts adhesive to one part water, then apply a skim-coat of all-purpose drywall joint compound using a 12" drywall knife. Then prime and paint the wall.