CABINETS & COUNTERTOPS
TILING: BACKSPLASH
There are few spaces in your home with as much potential for creativity and visual impact as the space between your kitchen countertop and your cupboards. A well-designed backsplash can transform the ordinary into the extraordinary. Tiles for the backsplash can be attached directly to wallboard or plaster and do not require backerboard. When purchasing the tile, order 10 percent extra to cover breakage and cutting. Remove the switch and receptacle coverplates and install box extenders to make up for the extra thickness of the tile. Protect the countertop from scratches by covering it with a drop cloth during the installation.
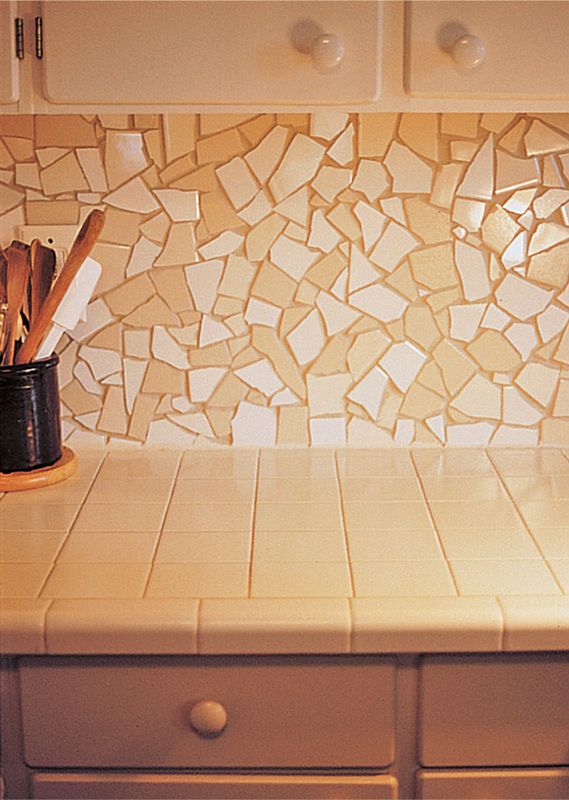
Contemporary glass mosaic sheets create a counter-to-cabinet backsplash for a waterproof, splash-proof wall with high visual impact.
 HOW TO INSTALL A TILE BACKSPLASH
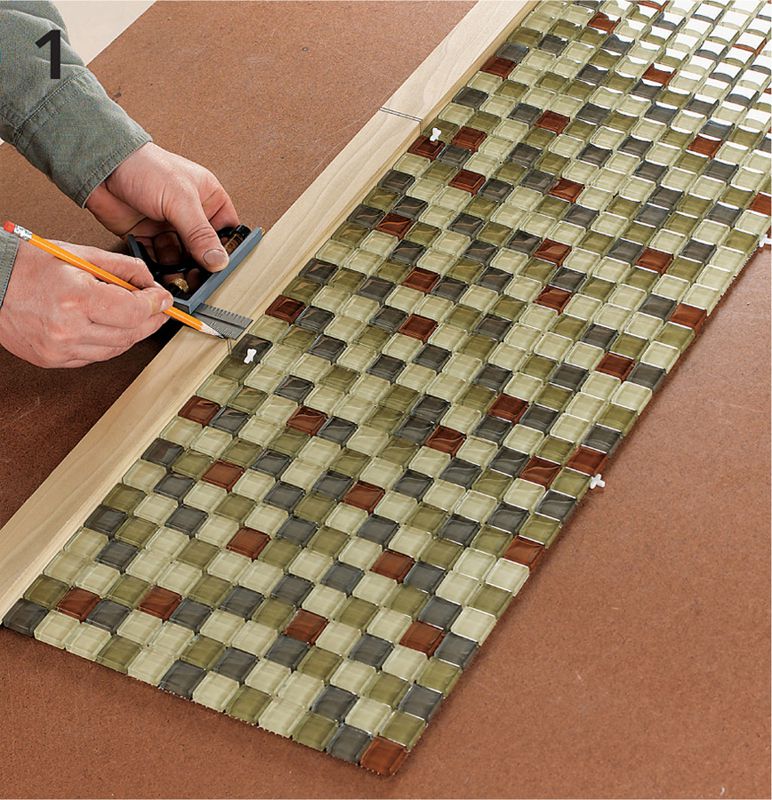
Make a story stick by marking a board at least half as long as the backsplash area to match the tile spacing.
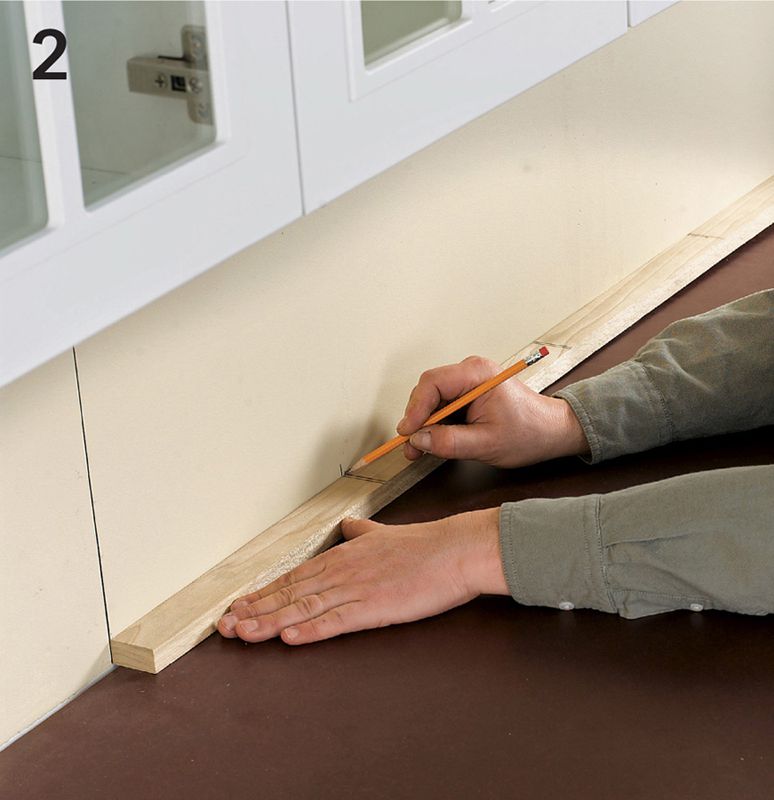
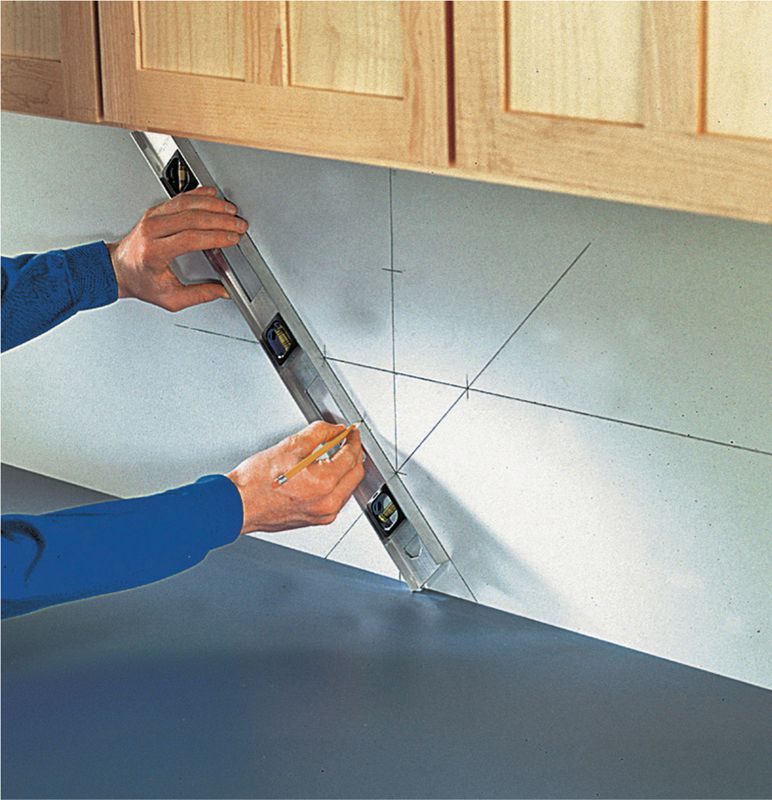
Starting at the midpoint of the installation area, use the story stick to make layout marks along the wall. If an end piece is too small (less than half a tile), adjust the midpoint to give you larger, more attractive end pieces. Use a level to mark this point with a vertical reference line.
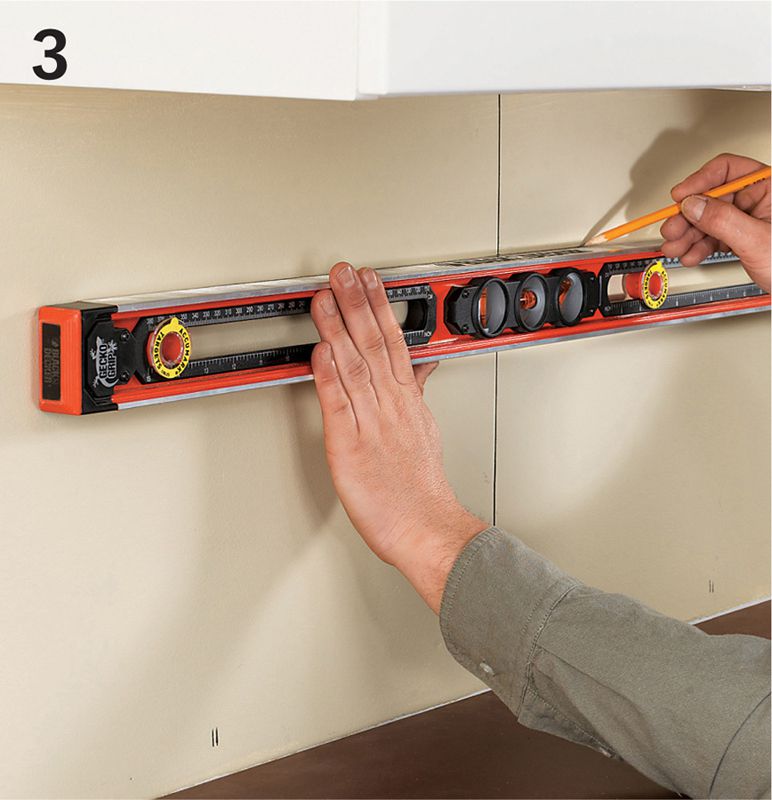
While it may appear straight, your countertop may not be level and therefore is not a reliable reference line. Run a level along the counter to find the lowest point on the countertop. Mark a point two tiles up from the low point and extend a level line across the entire work area.
Variation: Diagonal Layout. Mark vertical and horizontal reference lines, making sure the angle is 90°. To establish diagonal layout lines, measure out equal distances from the crosspoint, and then connect the points with a line. Additional layout lines can be extended from these as needed.
Apply mastic adhesive evenly to the area beneath the horizontal reference line using a notched trowel. Comb the adhesive horizontally with the notched edge.
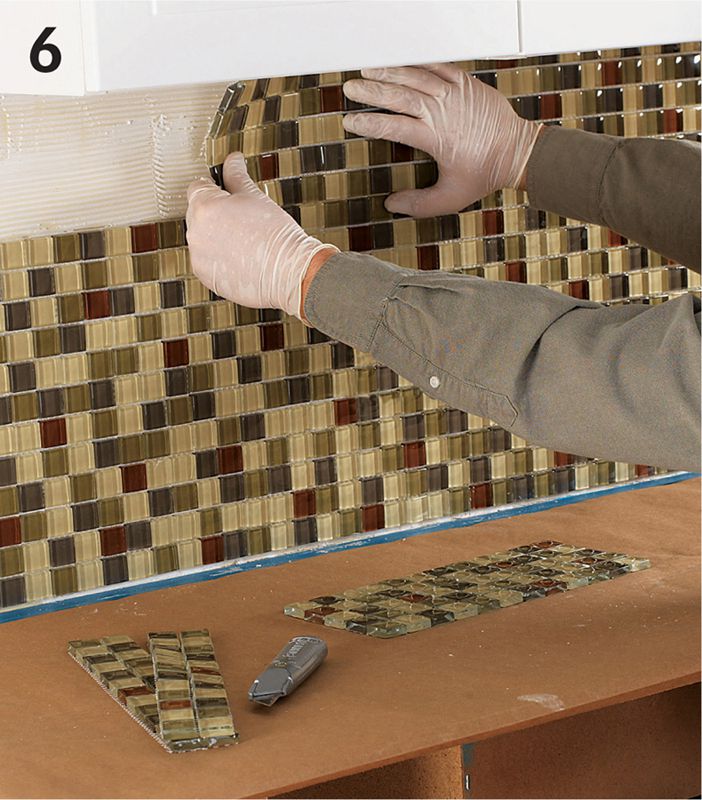
Press tiles into the adhesive with a slight twisting motion. If the tiles are not self-spacing, use plastic spacers to maintain even grout lines. If the tiles do not hang in place, use masking tape to hold them in place until the adhesive sets.
Install a whole row along the reference line, checking occasionally to make sure the tiles are level. Continue installing tiles below the first row, trimming tiles that butt against the countertop as needed.
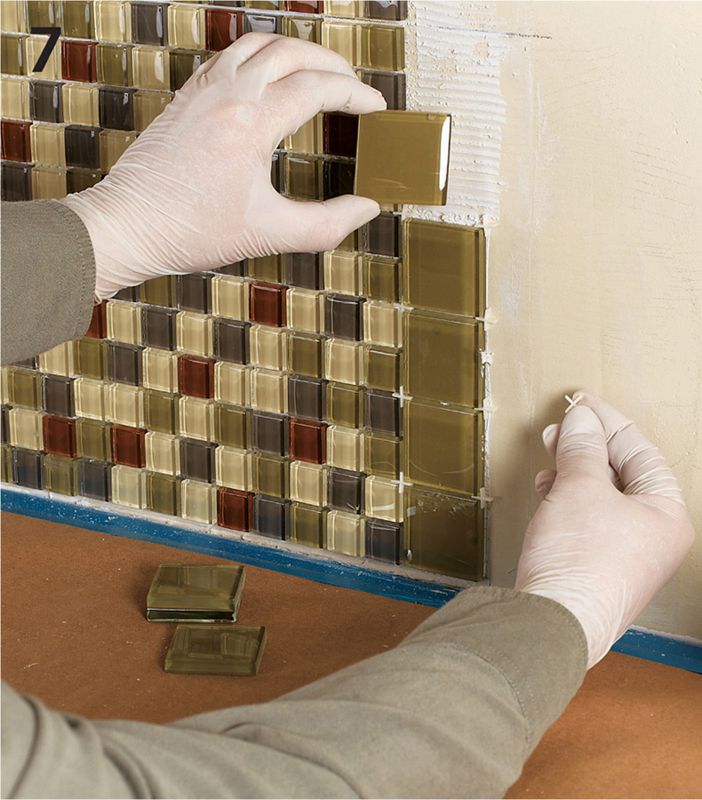
Install an edge border if it is needed in your layout. Mosaic sheets normally do not have bullnose tiles on the edges, so if you don’t wish to see the cut edges of the outer tiles, install a vertical column of edge tiles at the end of the backsplash area.
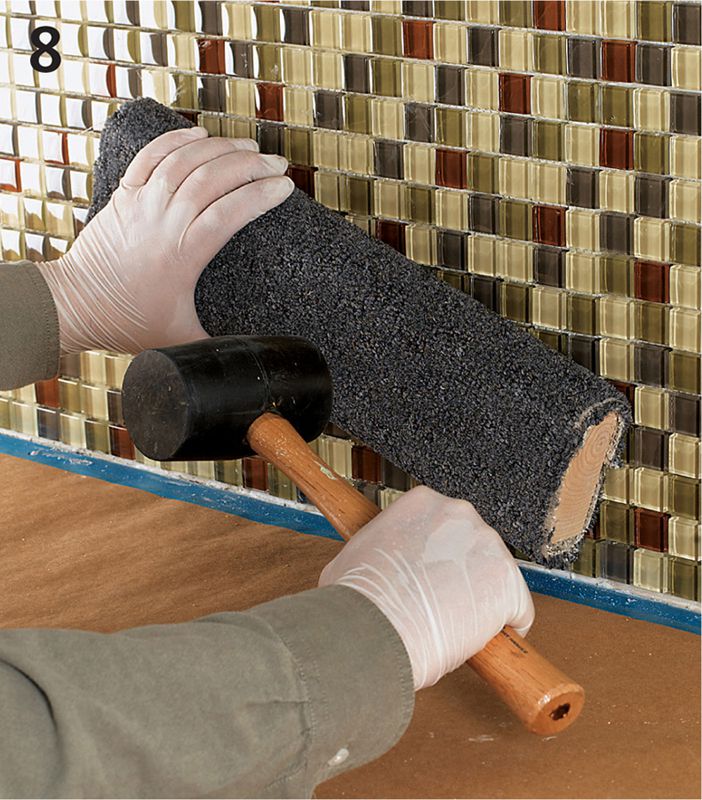
When the tiles are in place, make sure they are flat and firmly embedded by laying a beating block against the tile and rapping it lightly with a mallet. Remove the spacers. Allow the mastic to dry for at least 24 hours, or as directed by the manufacturer.
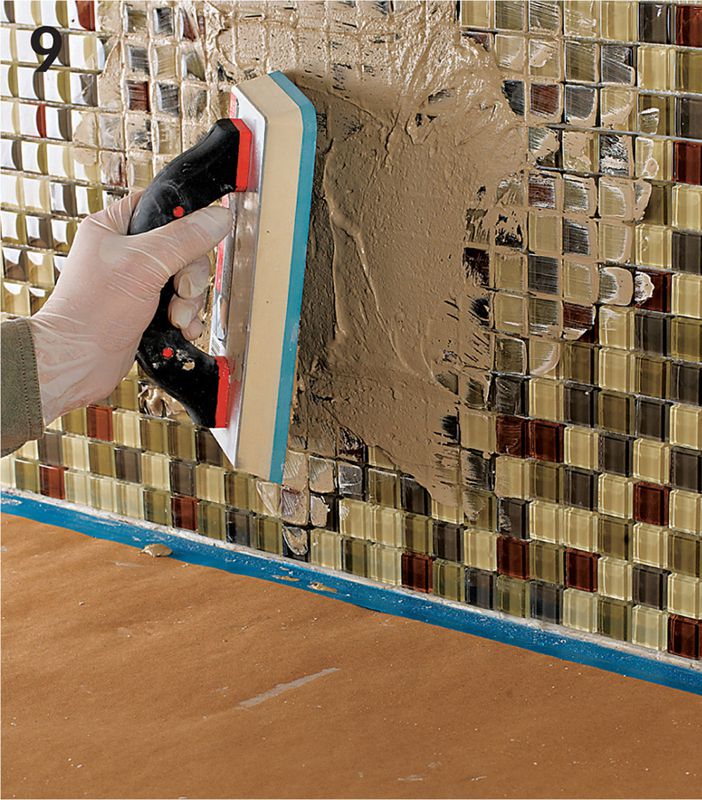
Mix the grout and apply it with a rubber grout float. Spread it over the tiles, keeping the float at a low 30° angle, pressing the grout deep into the joints. Note: For grout joints 1/8" and smaller, be sure to use a non-sanded grout.
Wipe off excess grout, holding the float at a right angle to the tile, working diagonally so as not to remove grout from the joints.
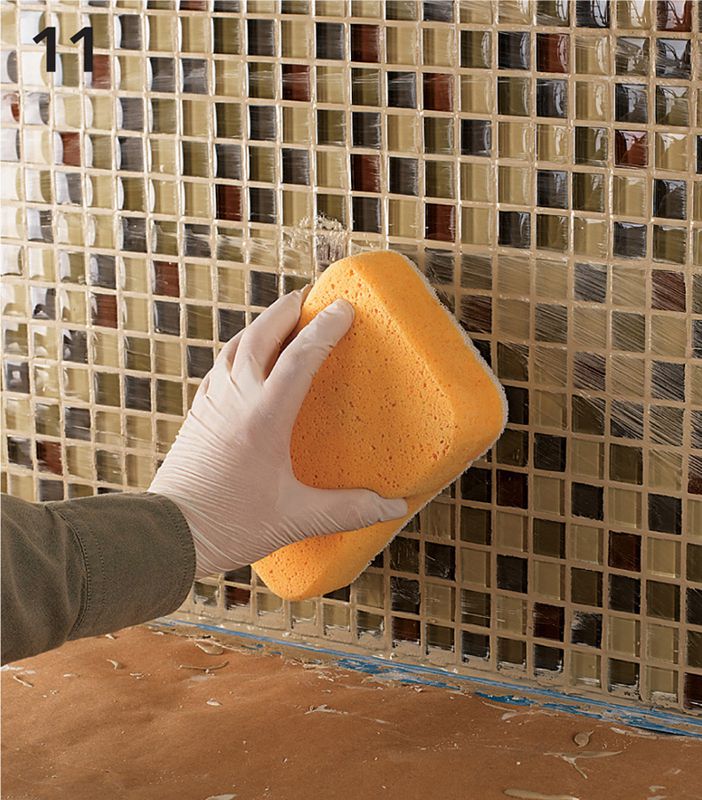
Clean excess grout with a damp sponge. When the grout has dried to a haze, buff the tile clean with a soft cloth. Apply a bead of caulk between the countertop and the tiles.