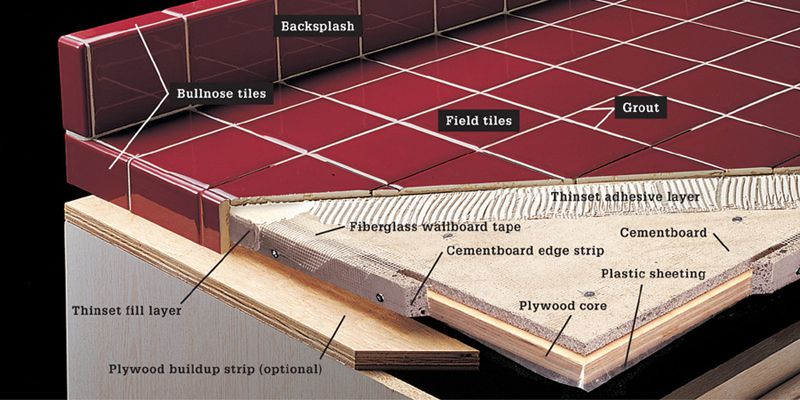
A ceramic tile countertop made with wall or floor tile starts with a core of 3/4" exterior-grade plywood that’s covered with a moisture barrier of 4-mil polyethylene sheeting. Half-inch cementboard is screwed to the plywood, and the edges are capped with cementboard and finished with fiberglass mesh tape and thinset mortar. Tiles for edging and backsplashes may be bullnose or trimmed from the factory edges of field tiles.
 OPTIONS FOR BACKSPLASHES & COUNTERTOP EDGES
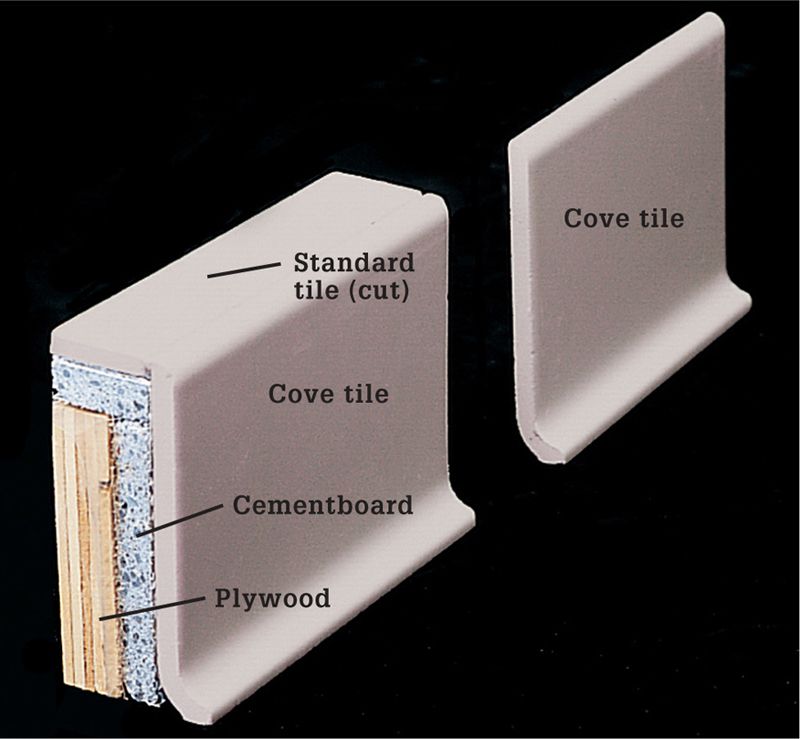
Backsplashes can be made from cove tile attached to the wall at the back of the countertop. You can use the tile alone or build a shelf-type backsplash using the same construction as for the countertop. Attach the plywood backsplash to the plywood core of the countertop. Wrap the front face and all edges of the plywood backsplash with cementboard before laying tile.
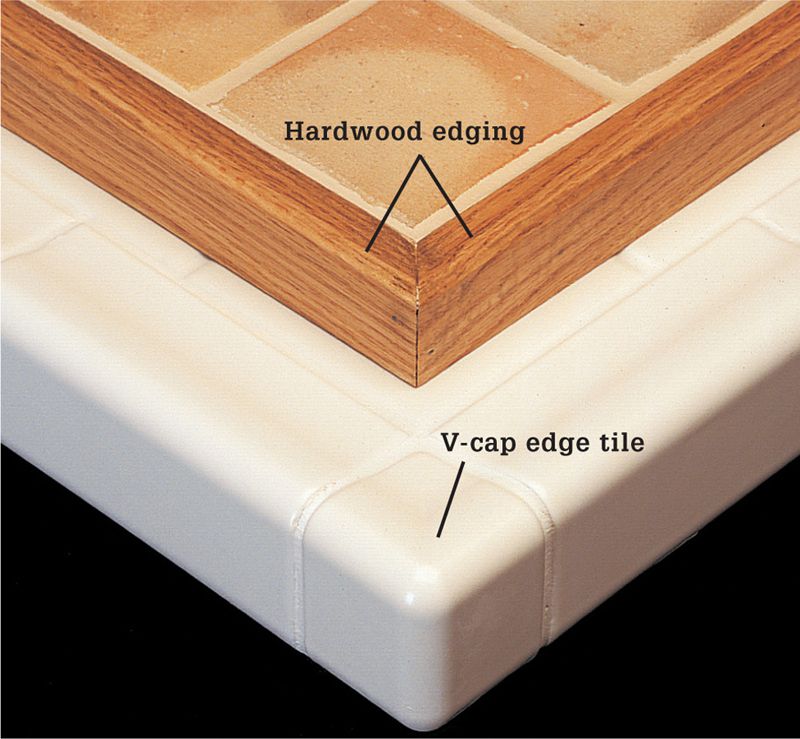
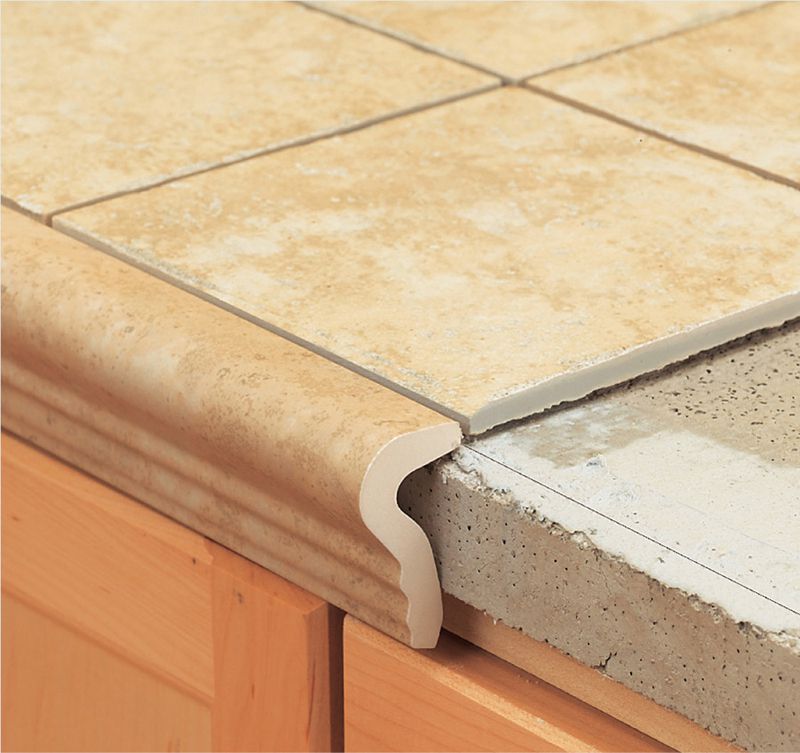
Edge options include V-cap edge tile and hardwood strip edging. V-cap tiles have raised and rounded corners that create a ridge around the countertop perimeter—good for containing spills and water. V-cap tiles must be cut with a wet saw. Hardwood strips should be prefinished with at least three coats of polyurethane finish. Attach the strips to the plywood core so the top of the wood will be flush with the faces of the tiles.
• You can lay tile over a laminate countertop that’s square, level, and structurally sound. Use a belt sander with 60- or 80-grit sandpaper to rough up the surface before setting the tiles. The laminate cannot have a no-drip edge.
If you’re using a new substrate and need to remove your existing countertop, make sure the base cabinets are level front to back, side to side, and with adjoining cabinets. Unscrew a cabinet from the wall and use shims on the floor or against the wall to level it, if necessary.
• Installing battens along the front edge of the countertop helps ensure the first row of tile is perfectly straight. For V-cap tiles, fasten a 1 × 2 batten along the reference line using screws. The first row of field tile is placed against this batten. For bullnose tiles, fasten a batten that’s the same thickness as the edging tile, plus 1/8" for mortar thickness, to the face of the countertop so the top is flush with the top of the counter. Bullnose tiles should be aligned with the outside edge of the batten. For wood edge trim, fasten a 1 × 2 batten to the face of the countertop so the top edge is above the top of the counter. The tiles are installed against the batten.
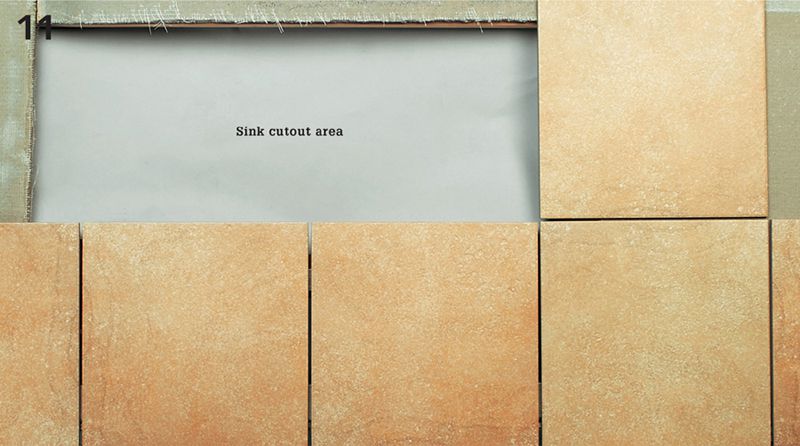
• Before installing any tile, lay out the tiles in a dry run using spacers. If your counter is L-shaped, start at the corner and work outward. Otherwise, start the layout at a sink to ensure equally sized cuts on both sides of the sink. If necessary, shift your starting point so you don’t end up cutting tile segments that are too narrow.
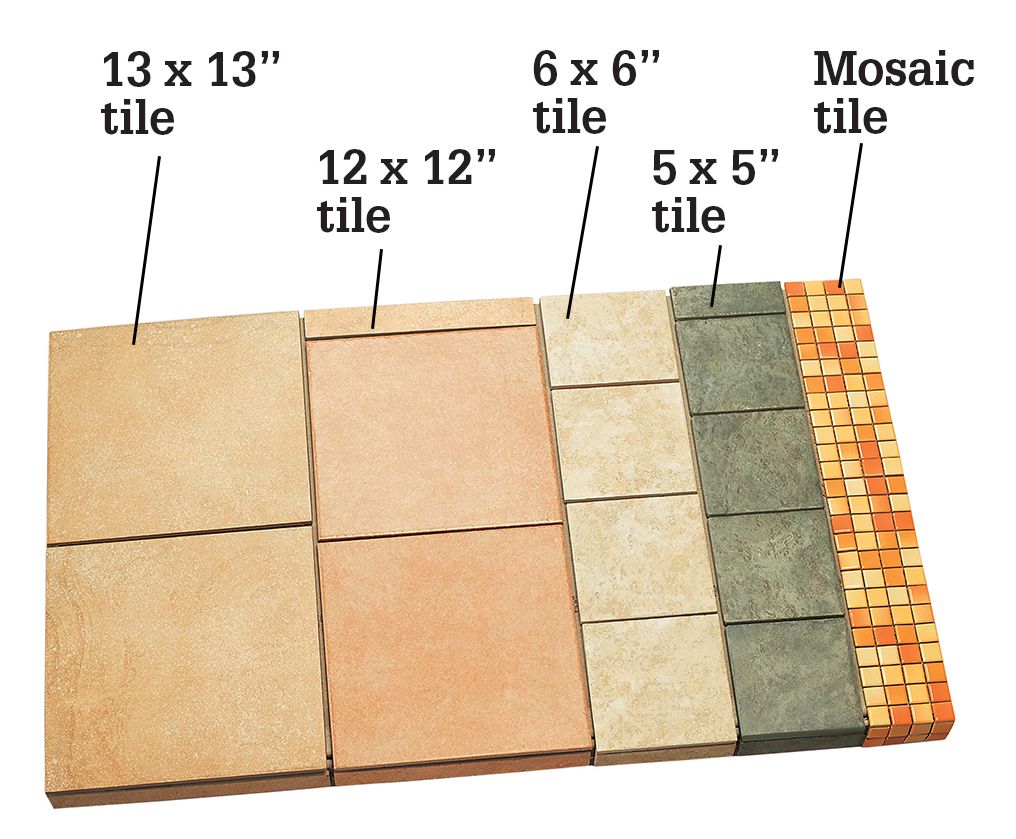
The bigger the tile the fewer the grout lines. If you want a standard 25"-deep countertop, the only way to get there without cutting tiles is to use mosaic strips or 1" tile. With 13 × 13" tile, you need to trim 1" off the back tile but have only one grout line front to back. As you decrease the size of your tiles, the number of grout lines increases.
HOW TO BUILD A TILE COUNTERTOP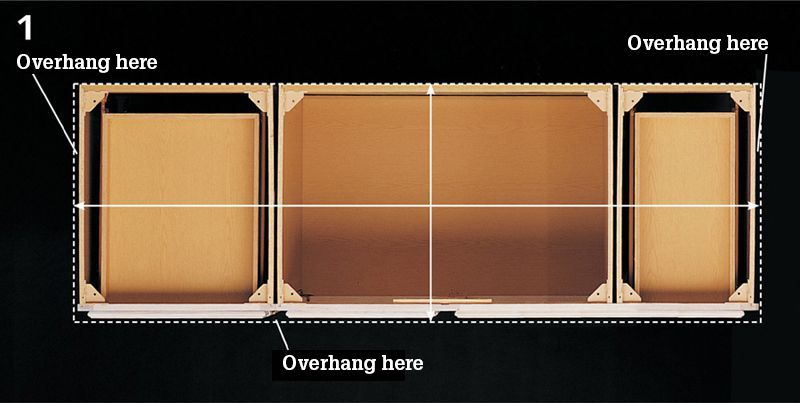
Determine the size of the plywood substrate by measuring across the top of the cabinets. The finished top should overhang the drawer fronts by at least 1/4". Be sure to account for the thickness of the cementboard, adhesive, and tile when deciding how large to make the overhang. Cut the substrate to size from 3/4" plywood using a circular saw. Also make any cutouts for sinks and other fixtures.
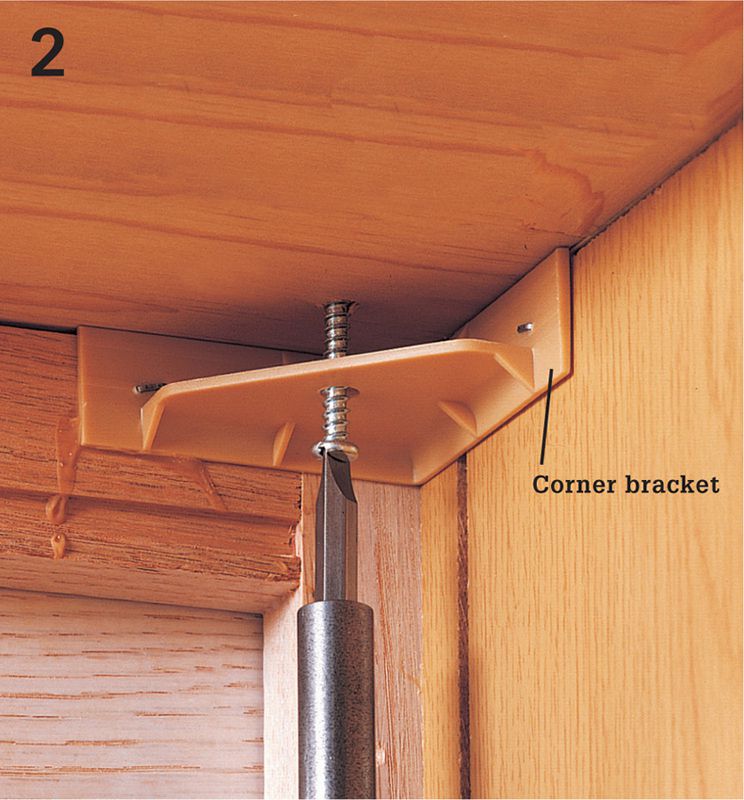
Set the plywood substrate on top of the cabinets, and attach it with screws driven through the cabinet corner brackets. The screws should not be long enough to go through the top of the substrate.
Cut pieces of cementboard to size, then mark and make the cutout for the sink. Dry-fit them on the plywood core with the rough sides of the panels facing up. Leave a 1/8" gap between the cementboard sheets and a 1/4" gap along the perimeter.
Option: Cut cementboard using a straightedge and utility knife or a cementboard cutter with a carbide tip. Hold the straightedge along the cutting line, and score the board several times with the knife. Bend the piece backward to break it along the scored line. Back-cut to finish.
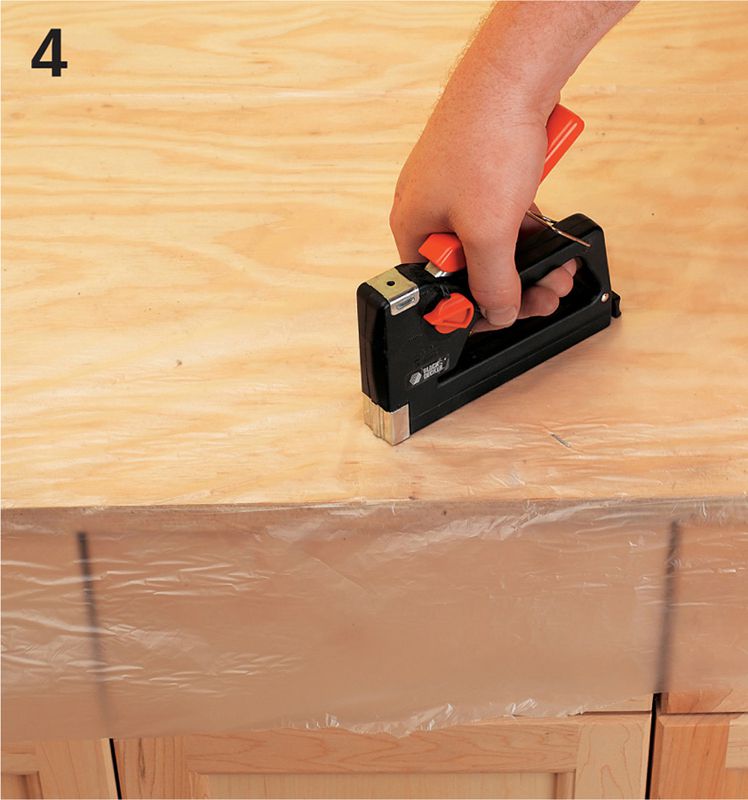
Lay the plastic moisture barrier over the plywood substrate, draping it over the edges. Tack it in place with a few staples. Overlap seams in the plastic by 6", and seal them with packing tape.
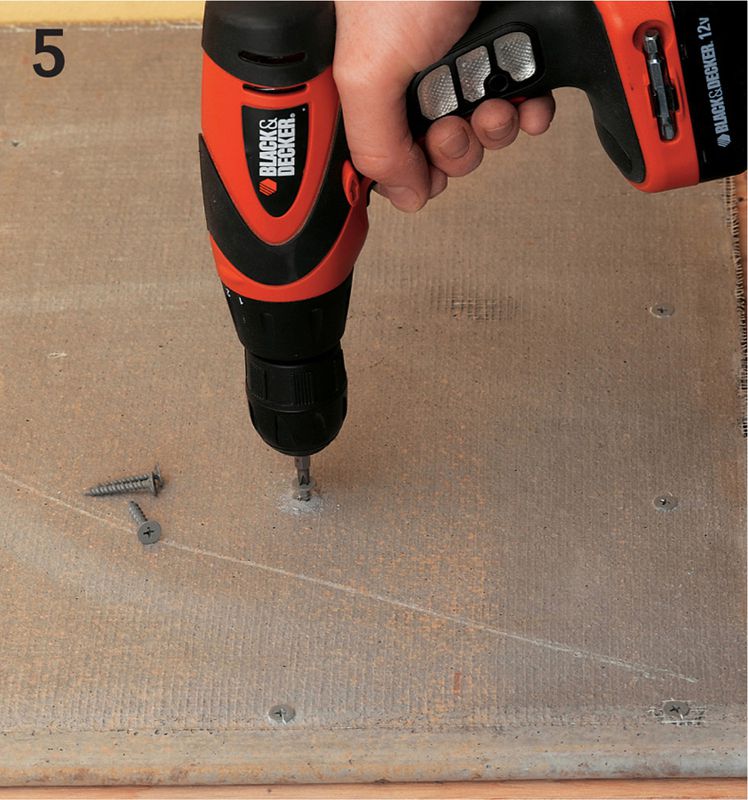
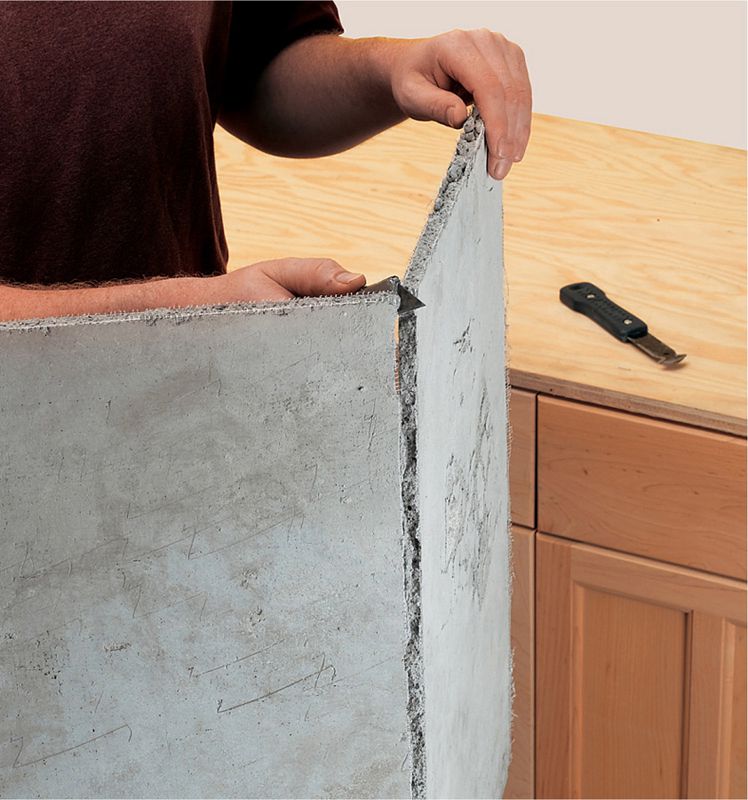
Lay the cementboard pieces rough-side up on top of the moisture barrier and attach them with cementboard screws driven every 6". Drill pilot holes using a masonry bit, and make sure all screw heads are flush with the surface. Wrap the countertop edges with 1 1/4"-wide cementboard strips, and attach them to the core with cementboard screws.
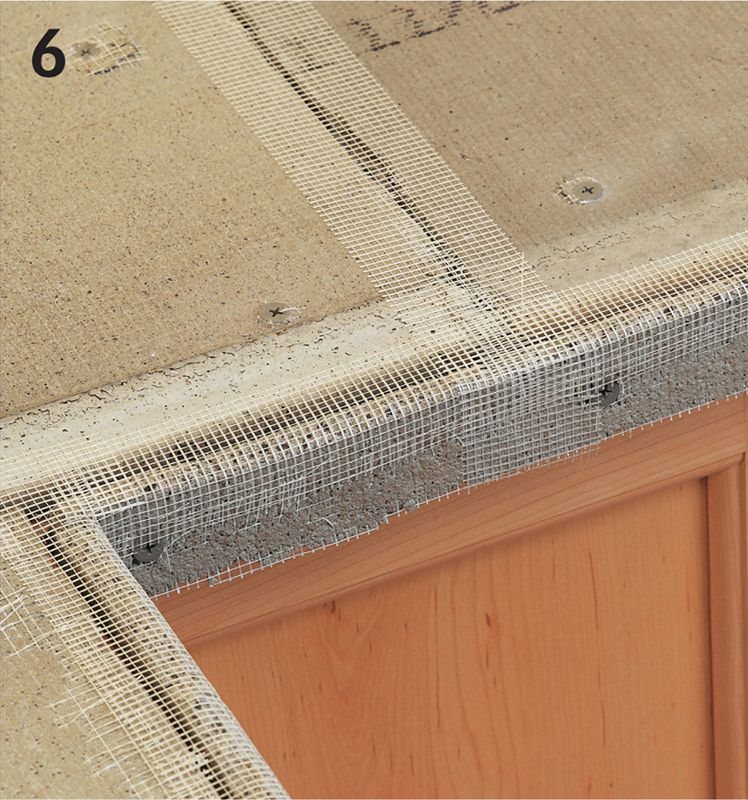
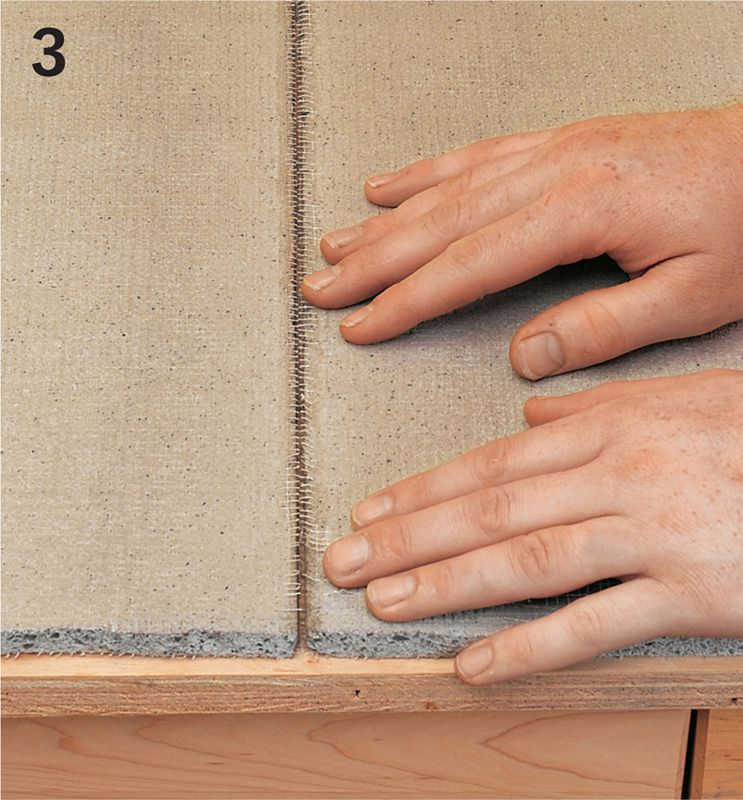
Tape all cementboard joints with fiberglass mesh tape. Apply three layers of tape along the front edge where the horizontal cementboard sheets meet the cementboard edging.
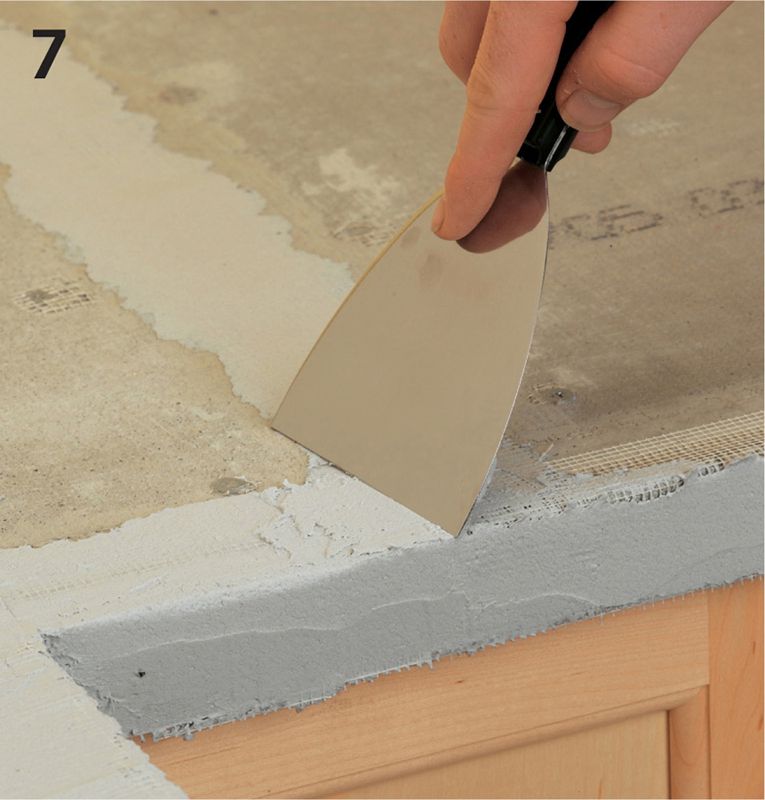
Fill all the gaps and cover all of the tape with a layer of thinset mortar. Feather out the mortar with a drywall knife to create a smooth, flat surface.
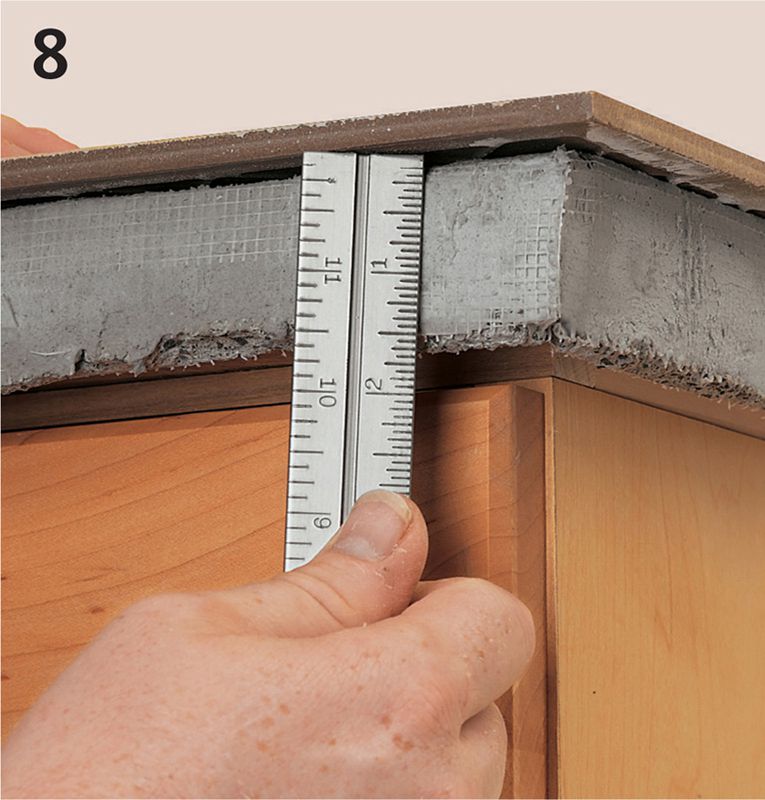
Determine the required width of the edge tiles. Lay a field tile onto the tile base so it overhangs the front edge by 1/2". Hold a metal ruler up to the underside of the tile and measure the distance from it to the bottom of the subbase. The edge tiles should be cut to this width (the gap for the grout line causes the edge tile to extend the subbase that conceals it completely).
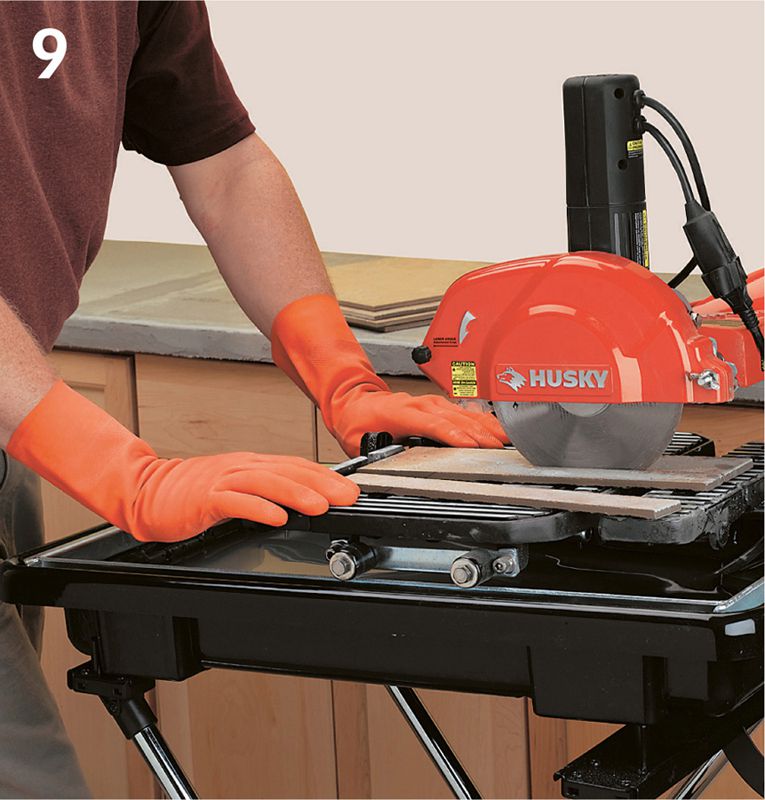
Cut edge tiles to the determined width using a wet saw. It’s worth renting a quality wet saw for tile if you don’t own one. Floor tile is thick and difficult to cut with a hand cutter (especially porcelain tiles).
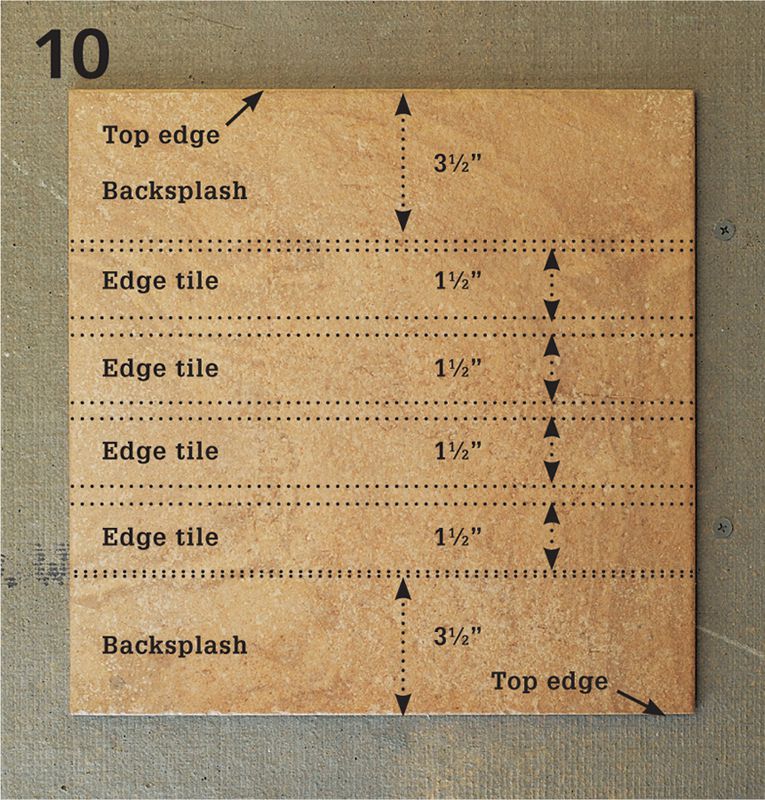
Cut tiles for the backsplash. The backsplash tiles (3 3/2" wide in our project) should be cut with a factory edge on each tile that will be oriented upward when they’re installed. You can make efficient use of your tiles by cutting edge tiles from the center area of the tiles you cut to make the backsplash.
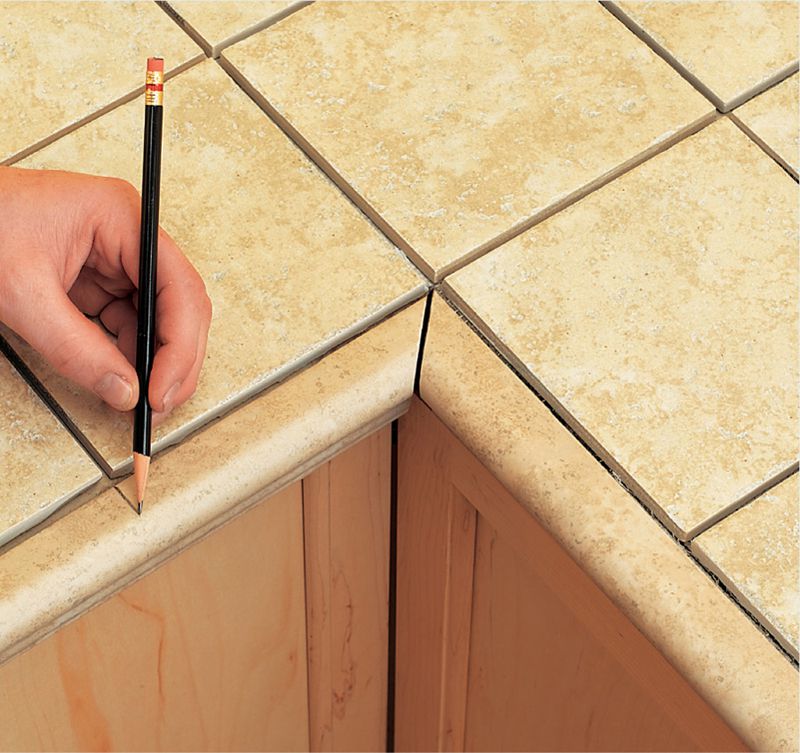
Dry-fit tiles on the countertop to find the layout that works best. Once the layout is established, make marks along the vertical and horizontal rows. Draw reference lines through the marks and use a framing square to make sure the lines are perpendicular.
Small Floor Tiles & Bullnose Edging 
Lay out tiles and spacers in a dry run. Adjust the starting lines, if necessary. If using battens, lay the field tile flush with the battens, then apply the edge tile. Otherwise, install the edging first. If the countertop has an inside corner, start there by installing a ready-made inside corner or by cutting a 45° miter in the edge tile to make your own inside corner.
Place the first row of field tile against the edge tile, separating the tile with spacers. Lay out the remaining rows of tile. Adjust the starting lines if necessary to create a layout using the smallest number of cut tiles.
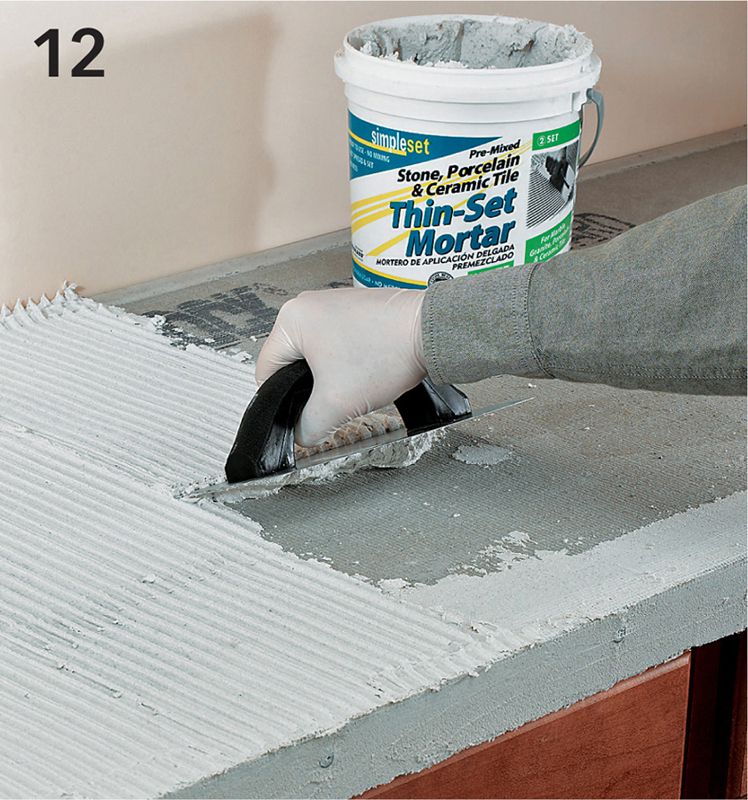
Use a 3/8" square notched trowel to apply a layer of thinset mortar to the cementboard. Apply enough for two or three tiles, starting at one end. Hold the trowel at roughly a 30° angle and try not to overwork the mortar or remove too much.
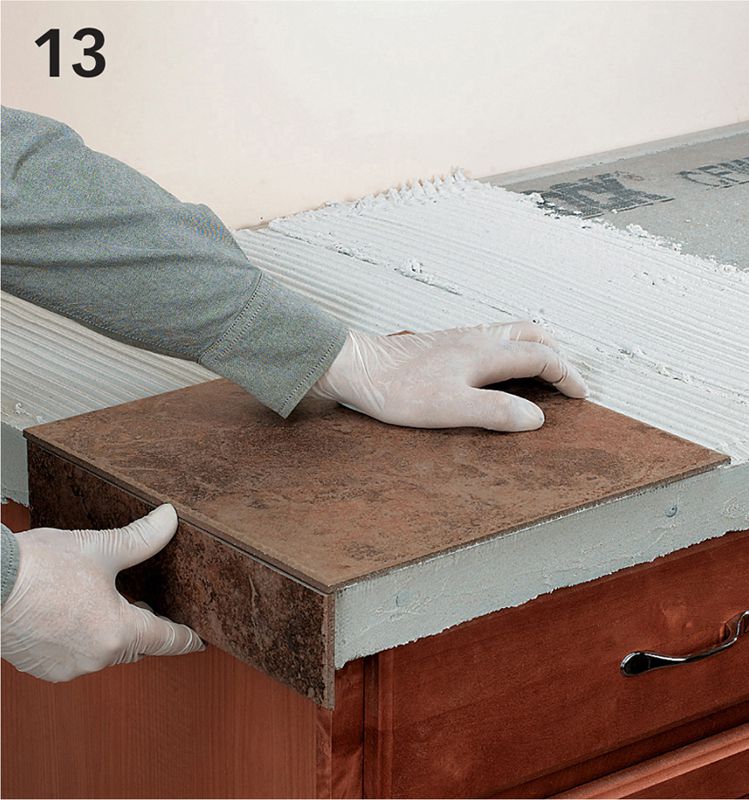
Set the first tile into the mortar. Hold a piece of the edge against the countertop edge as a guide to show you exactly how much the tile should overhang the edge.
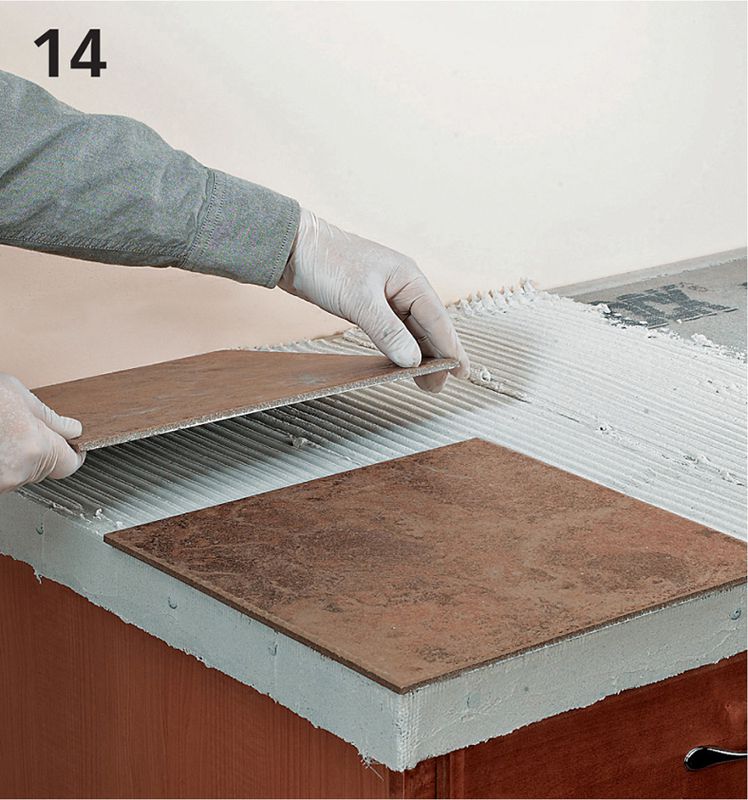
Cut all the back tiles for the layout to fit (you’ll need to remove about 1" of a 13 × 13" tile) before you begin the actual installation. Set the back tiles into the thinset, maintaining the gap for grout lines created by the small spacer nubs cast into the tiles. If your tiles have no spacer nubs, see the option.
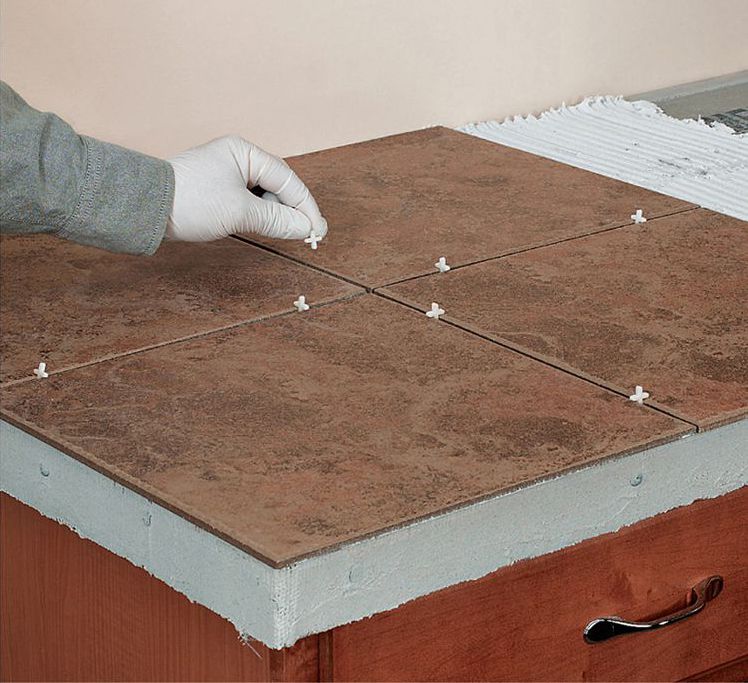
Option: To maintain even grout lines, some beginning tilers insert plus-sign-shaped plastic spacers at the joints. This is less likely to be useful with large tiles like those shown here, but it is effective. Many tiles today feature built-in spacing lugs, so the spacers are of no use. Make sure to remove the spacers before the thinset sets. If you leave them in place they will corrupt your grout lines.
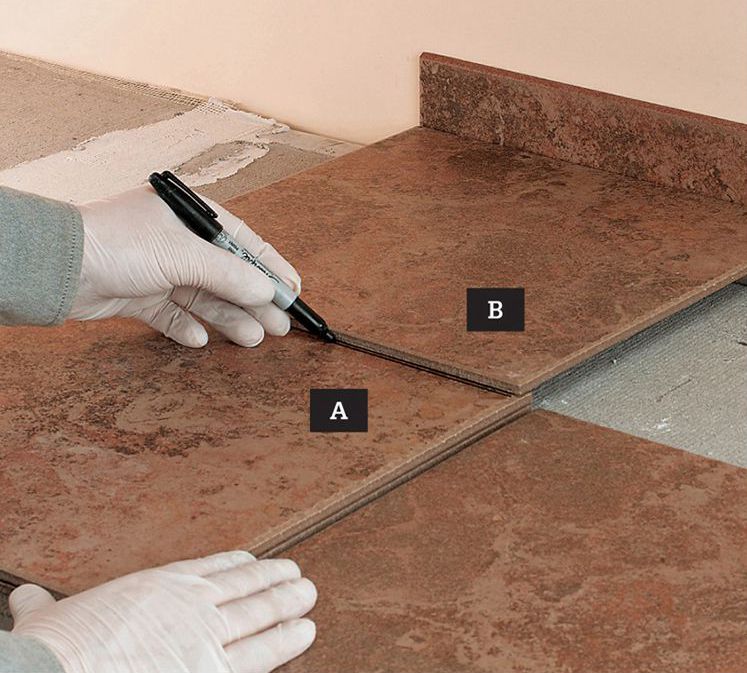
Tip: To mark border tiles for cutting, allow space for the backsplash tiles, grout, and mortar by placing a tile against the back wall. Set another tile (A) on top of the last full tile in the field, then place a third tile (B) over tile (A) and hold it against the upright tile. Mark and cut tile (A) and install it with the cut edge toward the wall. Finish filling in your field tiles.
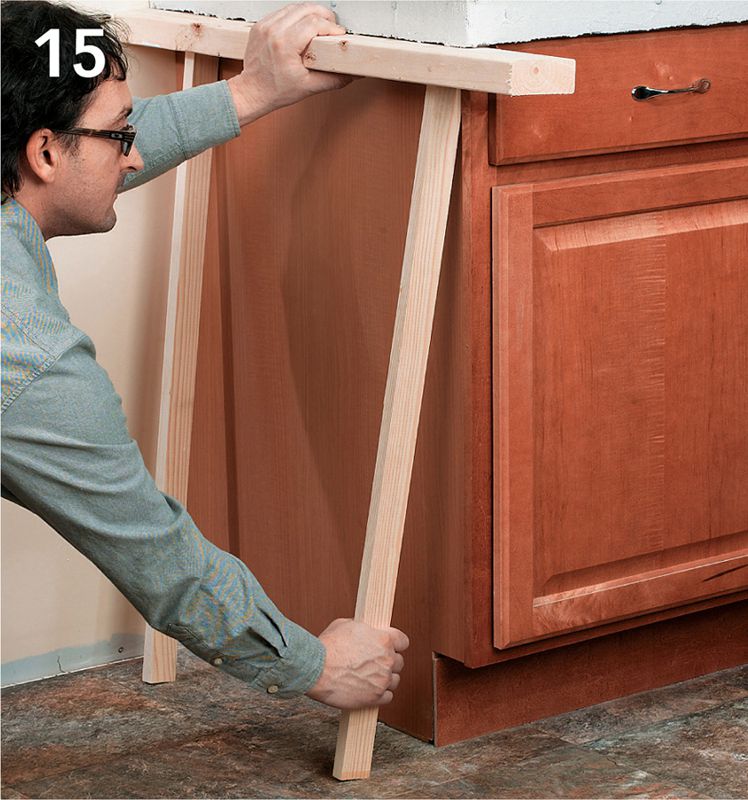
To create a support ledge for the edge tiles, prop pieces of 2 × 4 underneath the front edge of the substrate overhang using wood scraps to prop the ledge tightly up against the substrate.
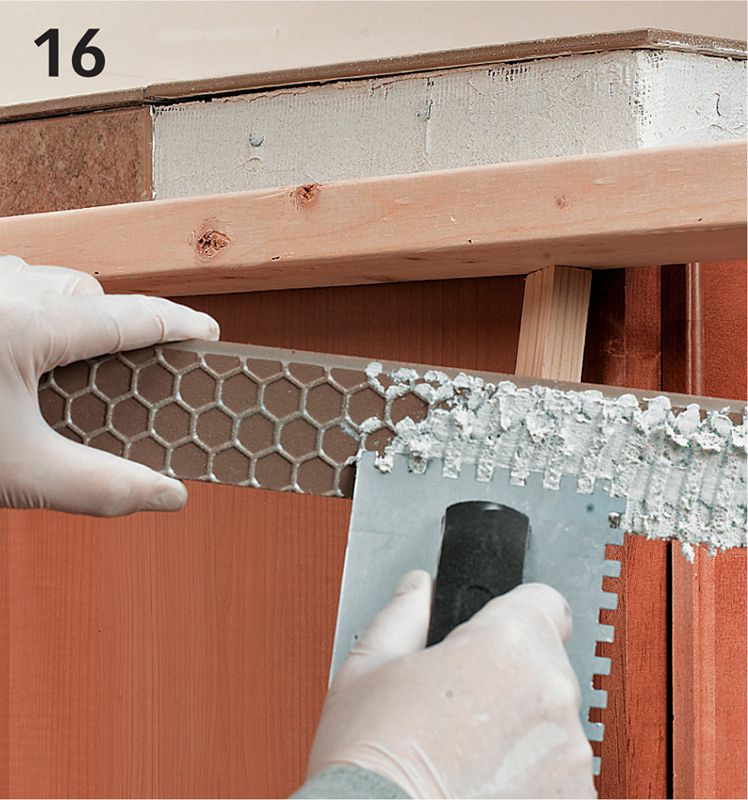
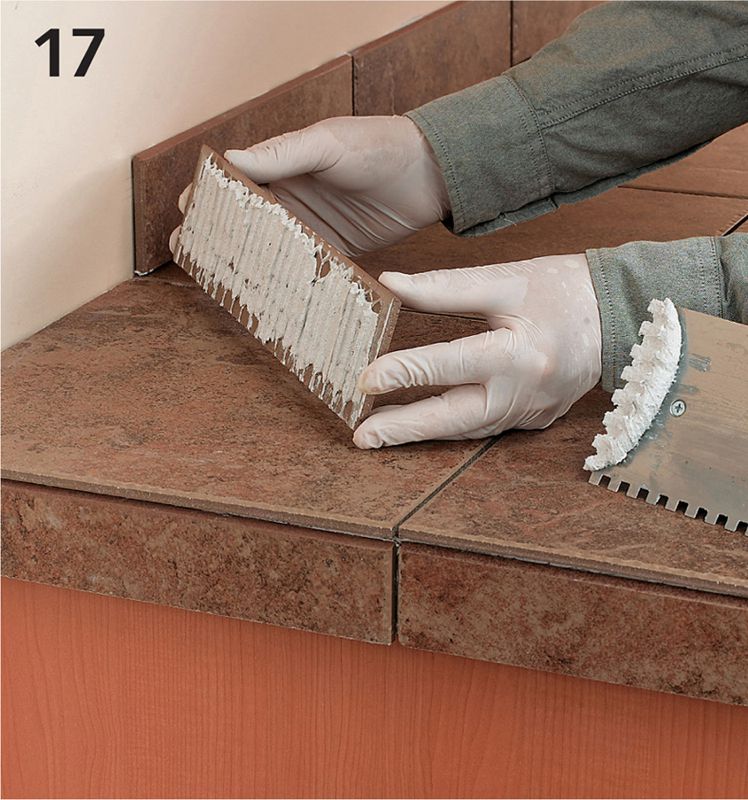
Apply a thick layer of thinset to the backside of the edge tile with your trowel. This is called “buttering” and it is easier and neater than attempting to trowel adhesive onto the countertop edge. Press the tiles into position so they are flush with the leading edges of the field tiles.
Butter each backsplash tile and press it into place, doing your best to keep all of the grout lines aligned. Allow the mortar to set according to the manufacturer’s recommendations.
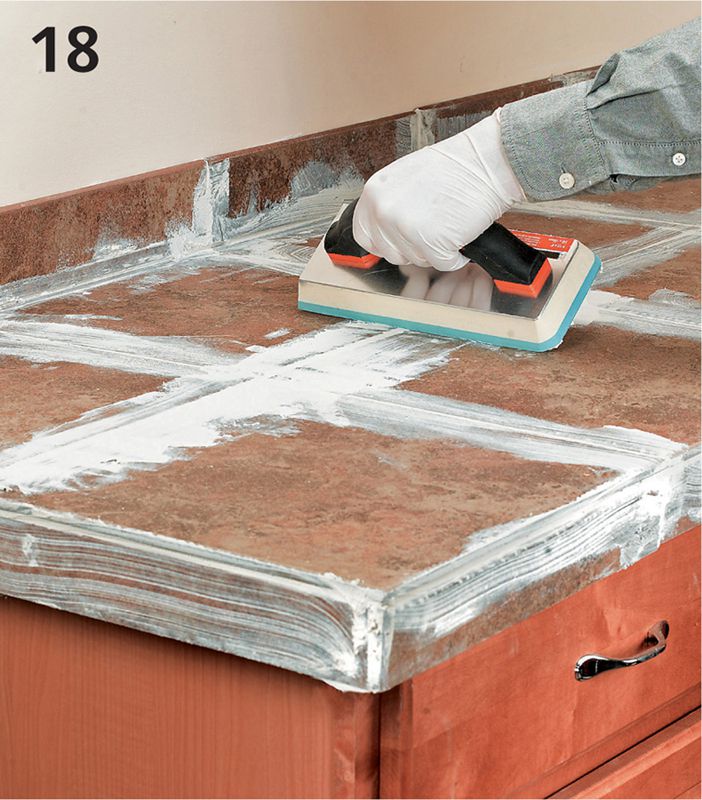
Mix a batch of grout to complement the tile (keeping in mind that darker grout won’t look dirty as quickly as lighter grout). Apply the grout with a grout float.
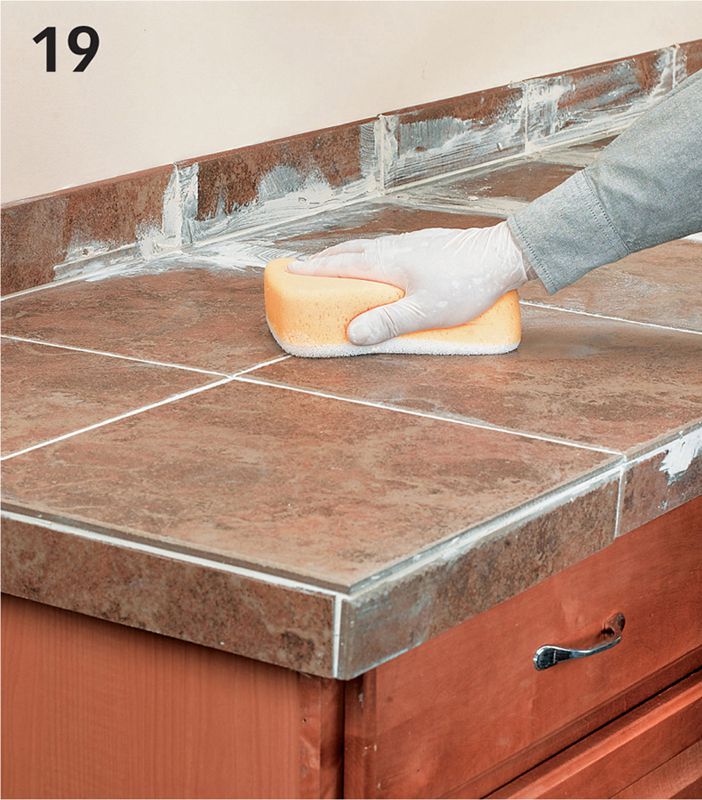
Let the grout dry until a light film is created on the countertop surface, then wipe the excess grout off with a sponge and warm, clean water. See grout manufacturer’s instructions on drying tiles and polishing.
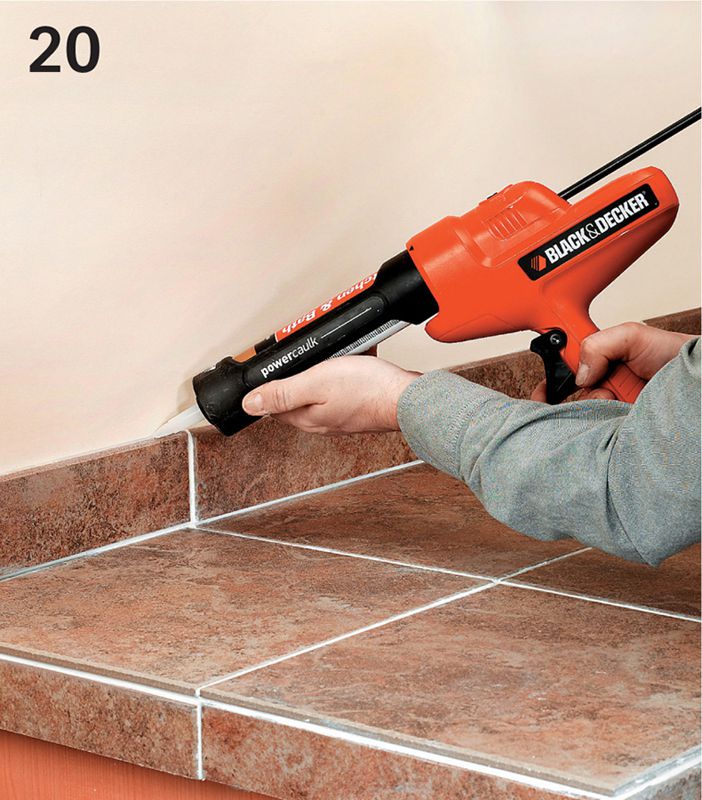
Run a bead of clear silicone caulk along the joint between the backsplash and the wall. Install your sink and faucet after the grout has dried (and before you use the sink, if possible).
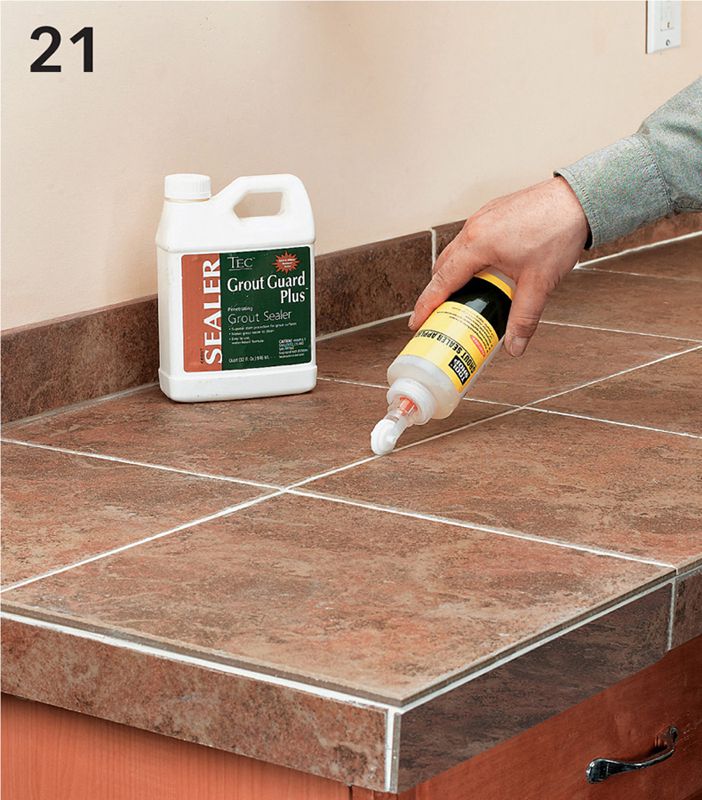
Wait at least one week and then seal the grout lines with a penetrating grout sealer. This is important to do. Sealing the tiles themselves is not a good idea unless you are using unglazed tiles (a poor choice for countertops, however).