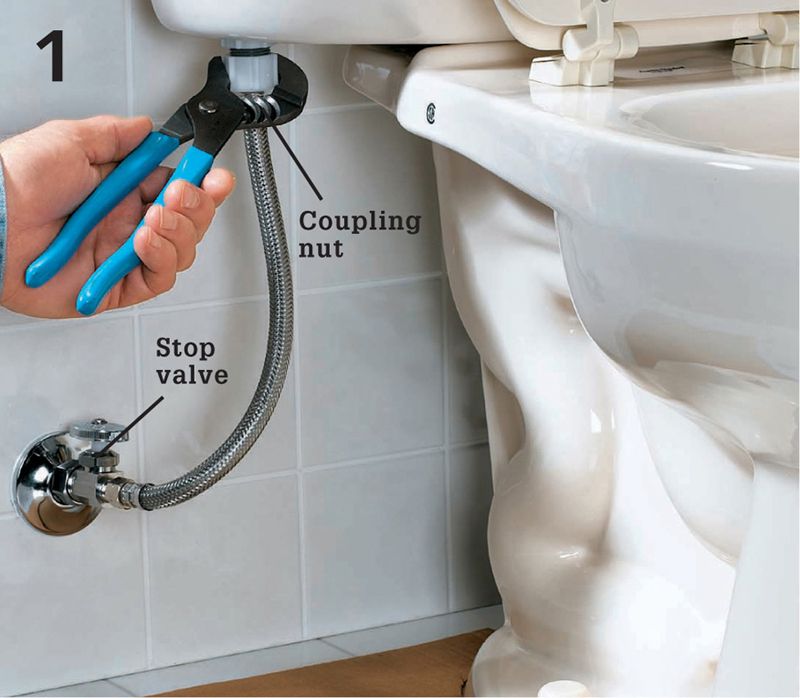
Remove the old supply tube. First, turn off the water at the stop valve. Flush the toilet, holding the handle down for a long flush, and sponge out the tank. Use a wet/dry vac to clear any remaining water out of the tank and bowl. Unthread the coupling nut for the water supply below the tank using channel-type pliers.
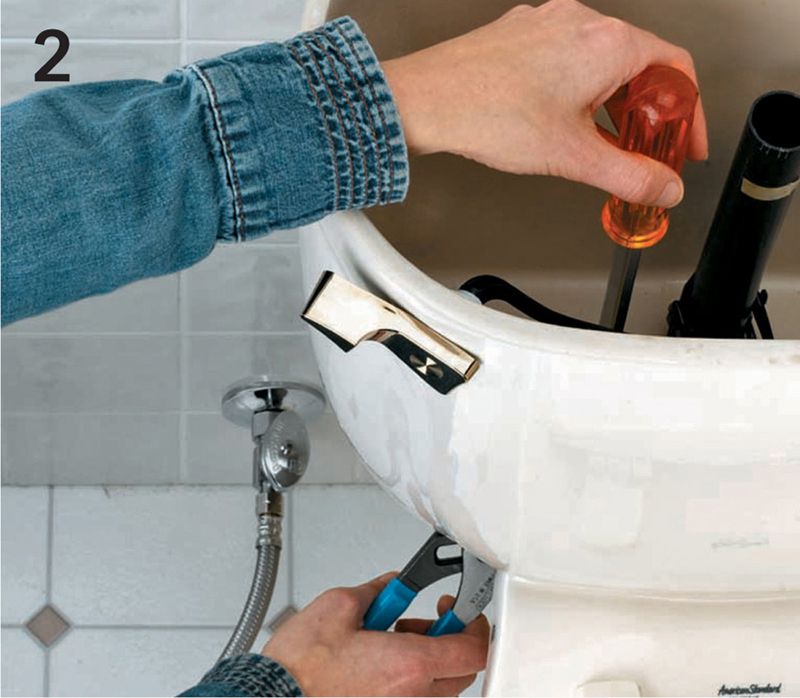
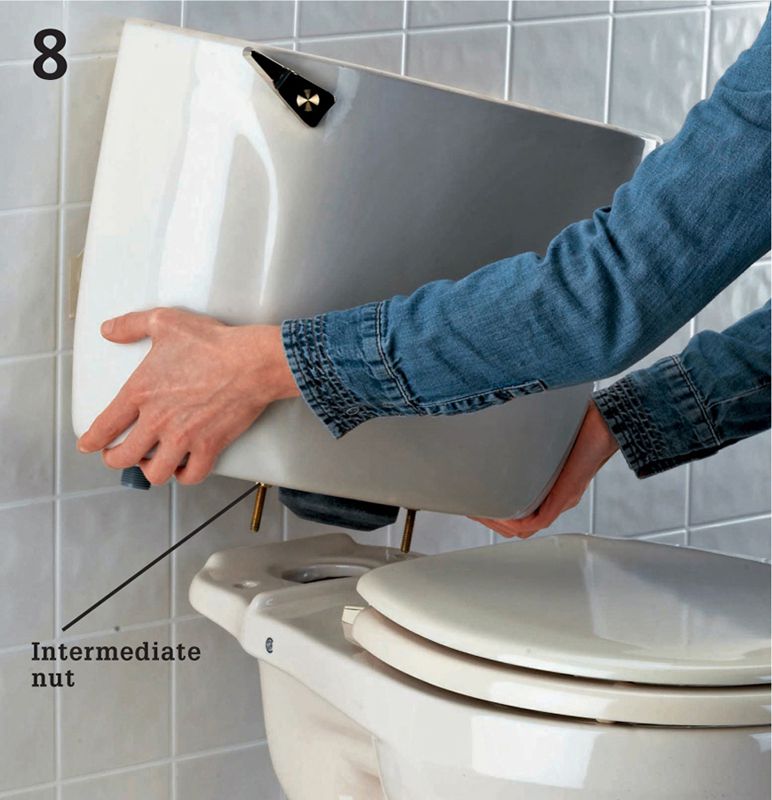
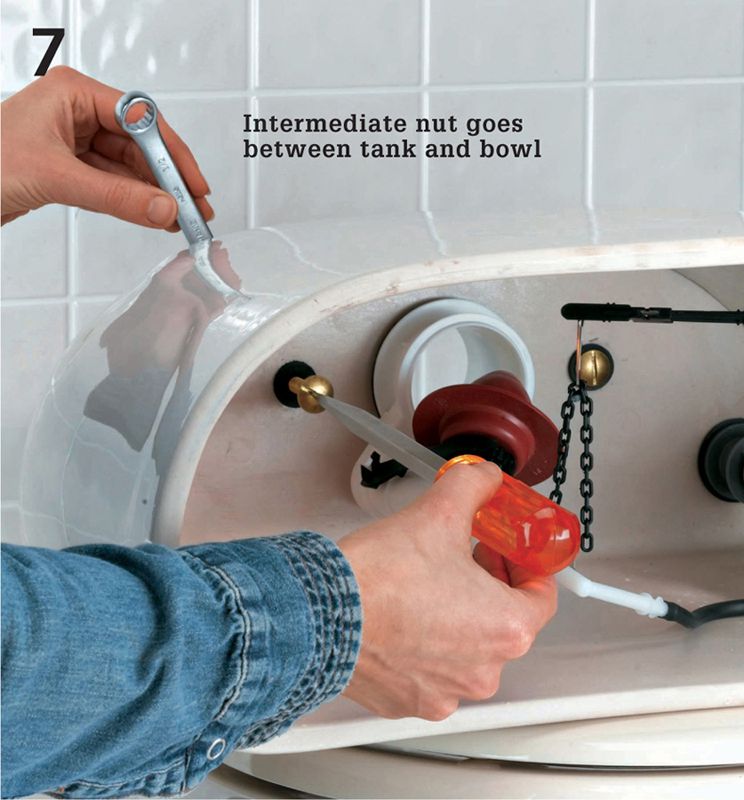
Grip each tank bolt nut with a box wrench or pliers and loosen it as you stabilize each tank bolt from inside the tank with a large slotted screwdriver. If the nuts are stuck, apply penetrating oil to the nut and let it sit before trying to remove them again. You may also cut the tank bolts between the tank and the bowl with an open-ended hacksaw. Remove and discard the tank.
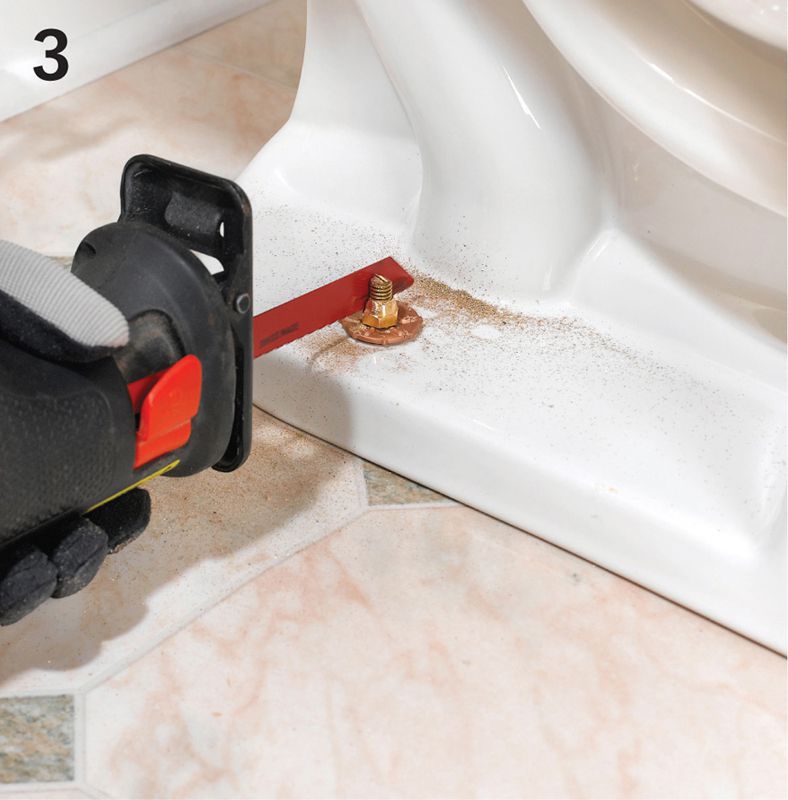
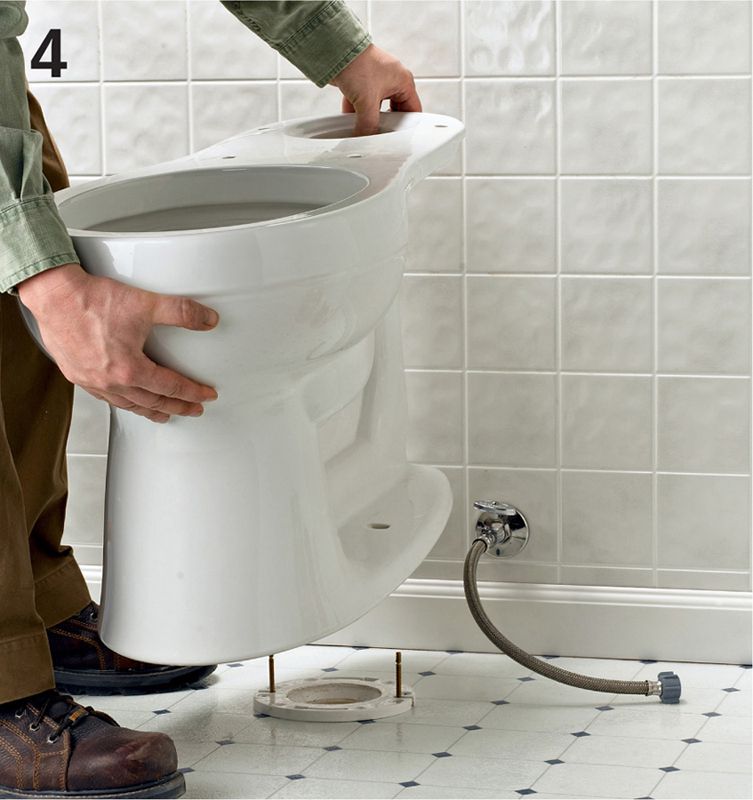
Remove the nuts that hold the bowl to the floor. First, pry off the bolt covers with a screwdriver. Use a socket wrench, locking pliers, or your channel-type pliers to loosen the nuts on the tank bolts. Apply penetrating oil and let it sit if the nuts are stuck, then take them off. As a last resort, cut the bolts off with a hacksaw by first cutting down through one side of the nut. Tilt the toilet bowl over and remove it.
Prying Up Wax Rings 
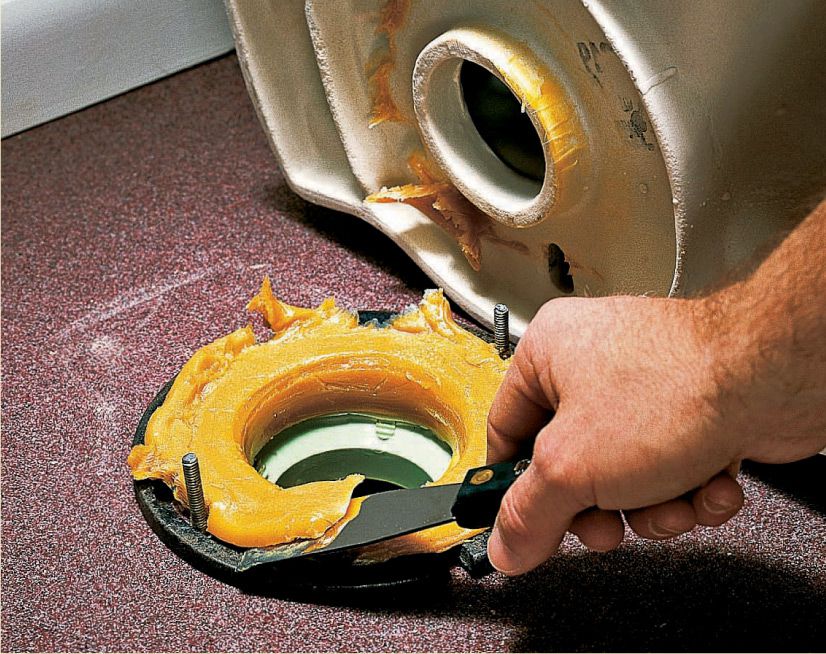
Removing an old wax ring is one of the more disgusting jobs you’ll encounter in the plumbing universe (the one you see here is actually in relatively good condition). Work a stiff putty knife underneath the plastic flange of the ring (if you can) and start scraping. In many cases the wax ring will come off in chunks. Discard each chunk right away—they stick to everything. If you’re left with a lot of residue, scrub with mineral spirits. Once clean, stuff a rag-in-a-bag in the drain opening to block sewer gas.
 HOW TO INSTALL A TOILET
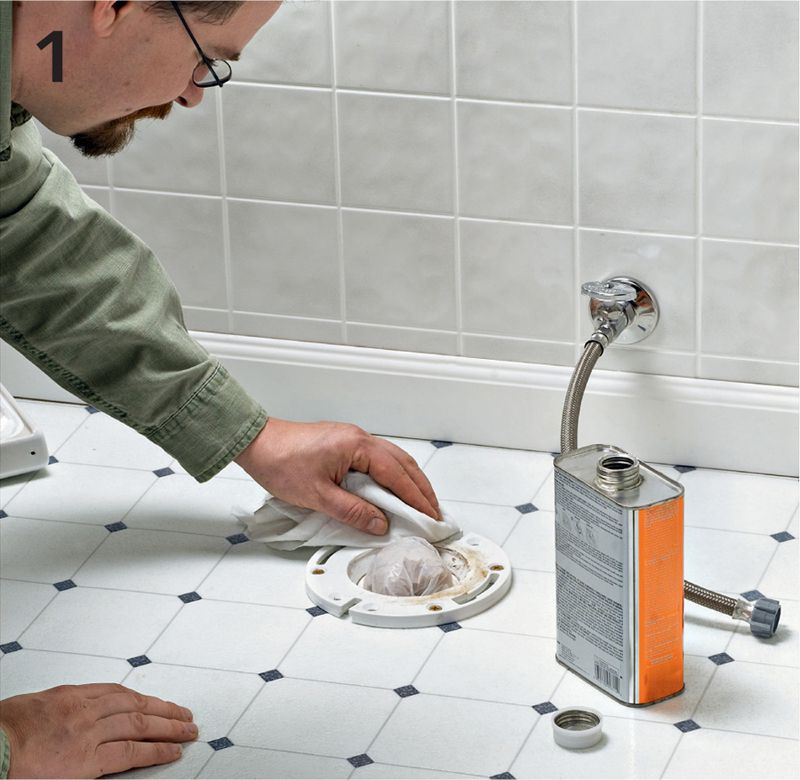
Clean and inspect the old closet flange. Look for breaks or wear. Also inspect the flooring around the flange. If either the flange or floor is worn or damaged, repair the damage. Use a rag and mineral spirits to completely remove residue from the old wax ring. Place a rag-in-a-bag into the opening to block odors.
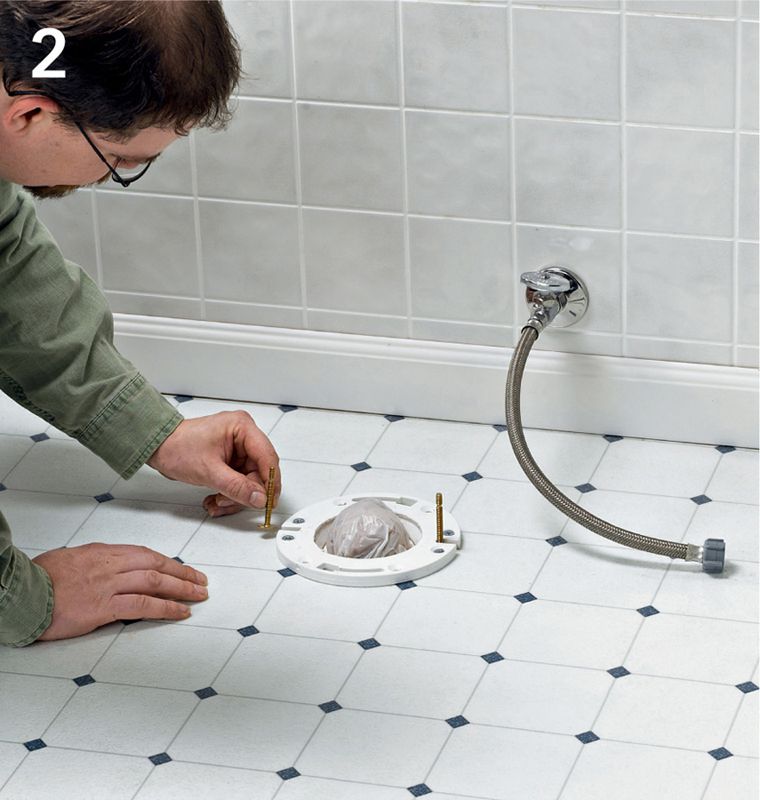
Insert new tank bolts (don’t reuse old ones) into the openings in the closet flange. Make sure the heads of the bolts are oriented to catch the maximum amount of flange material. To firmly hold the bolts upright, slide on the plastic washers and press them down.
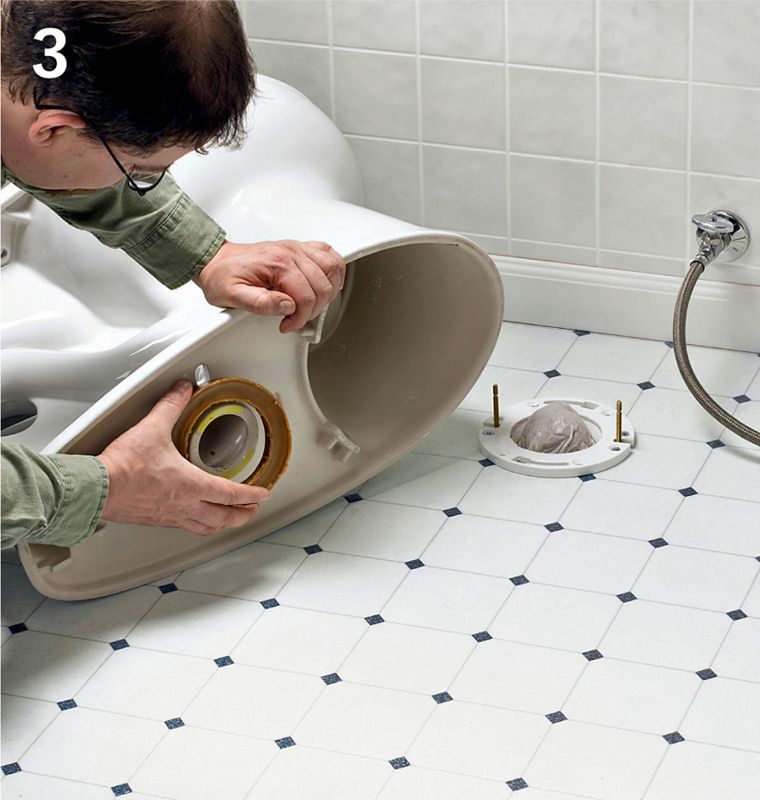
Remove the wax ring and apply it to the underside of the bowl, around the horn. Remove the protective covering. Do not touch the wax ring. It is very sticky. Remove the rag-in-a-bag. If you have an older 4" flange, place the ring on the flange rather than the toilet to make sure it is centered.
Installation Tip
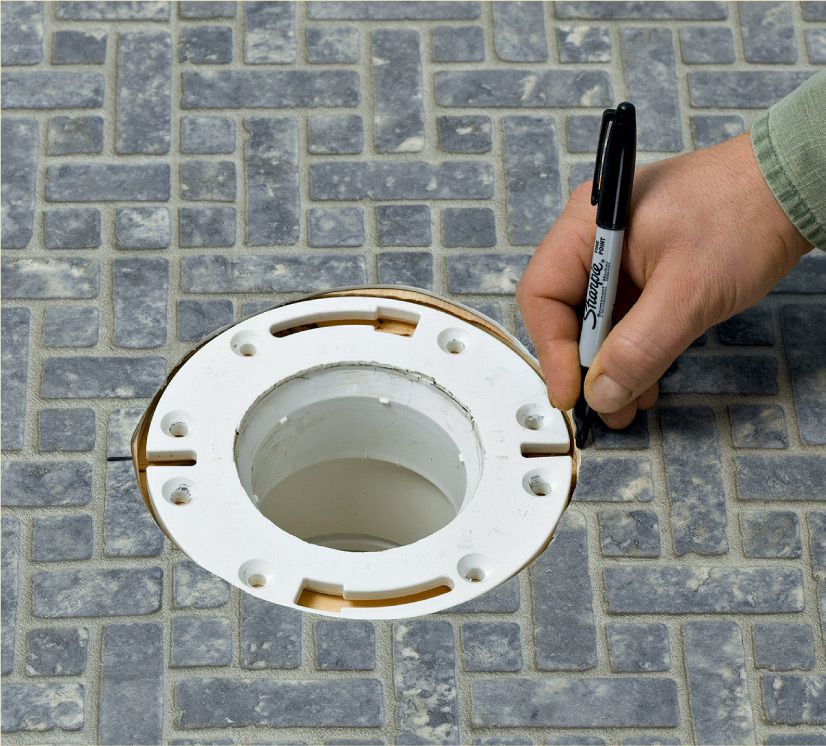
If you will be replacing your toilet flange or if your existing flange can be unscrewed and moved, orient the new flange so the slots are parallel to the wall. This allows you to insert bolts under the slotted areas, which are much stronger than the areas at the ends of the curved grooves.
Lower the bowl onto the flange, taking care not to disturb the wax ring. The holes in the bowl base should align perfectly with the tank bolts. Add a washer and tighten a nut on each bolt. Hand tighten each nut and then use channel-type pliers to further tighten the nuts. Alternate back and forth between nuts until the bowl is secure. Do not overtighten.
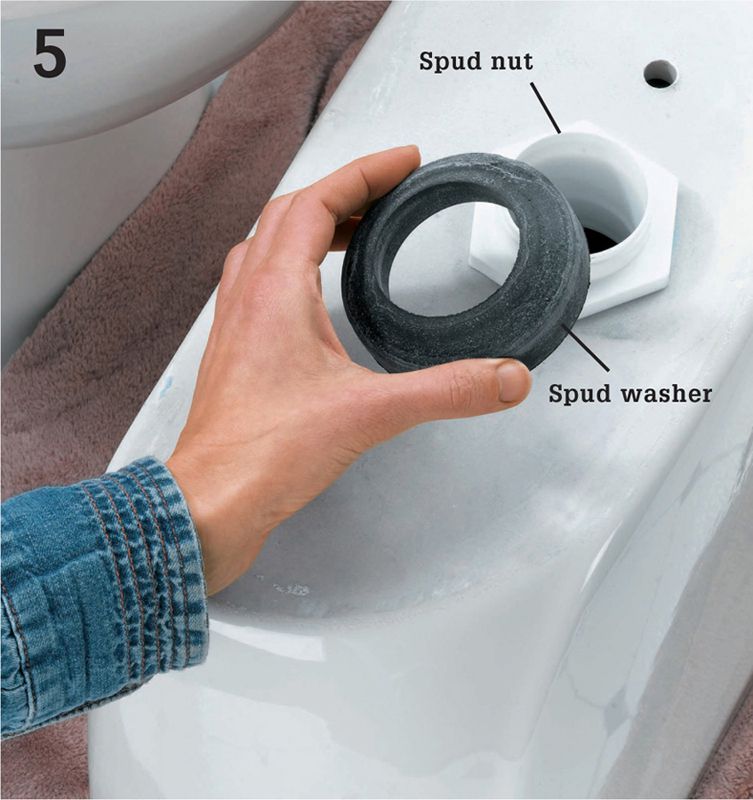
Install the flush valve. Some tanks come with a flush valve and a fill valve preinstalled. For models that do not have this, insert the flush valve through the tank opening and tighten a spud nut over the threaded end of the valve. Place a foam spud washer on top of the spud nut.
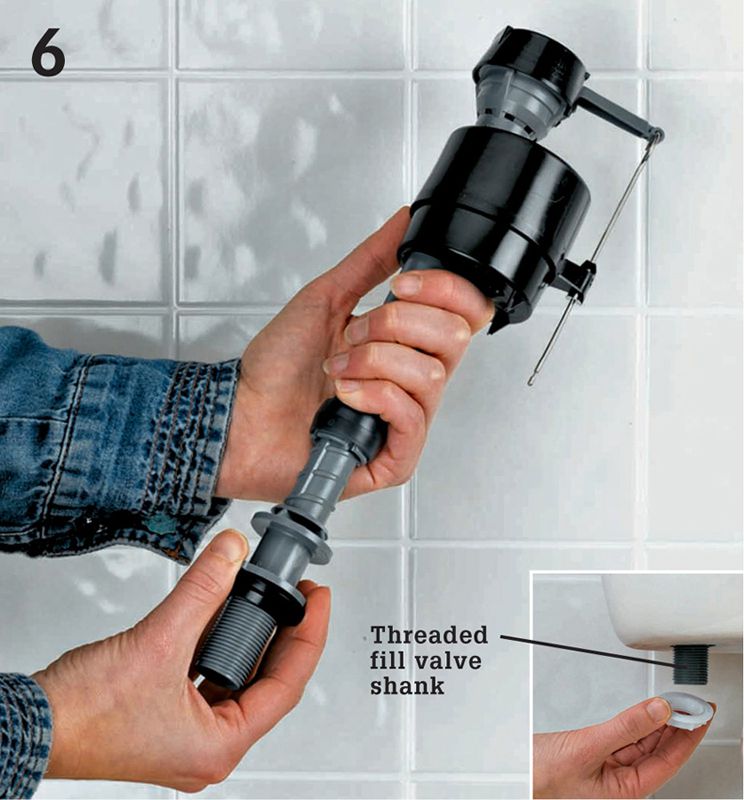
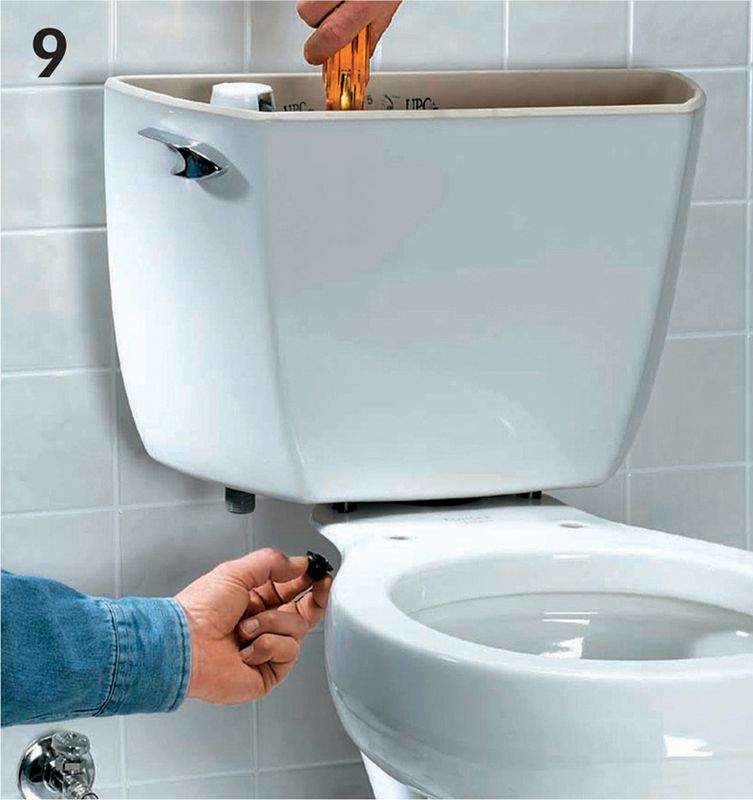
Adjust the fill valve as directed by the manufacturer to set the correct tank water level height and install the valve inside the tank. Hand tighten the nylon lock nut that secures the valve to the tank (inset photo) and then tighten it further with channel-type pliers.
With the tank lying on its back, thread a rubber washer onto each tank bolt and insert it into the bolt holes from inside the tank. Then, thread a brass washer and hex nut onto the tank bolts from below and tighten them to a quarter turn past hand tight. Do not overtighten.
Position the tank on the bowl, spud washer on the opening, and bolts through the bolt holes. Put a rubber washer, followed by a brass washer and a wing nut, on each bolt and tighten these up evenly.
You may stabilize the bolts with a large slotted screwdriver from inside the tank, but tighten the nuts, not the bolts. You may press down a little on a side, the front, or the rear of the tank to level it as you tighten the nuts by hand. Do not overtighten and crack the tank. The tank should be level and stable when you’re done. Do not overtighten.
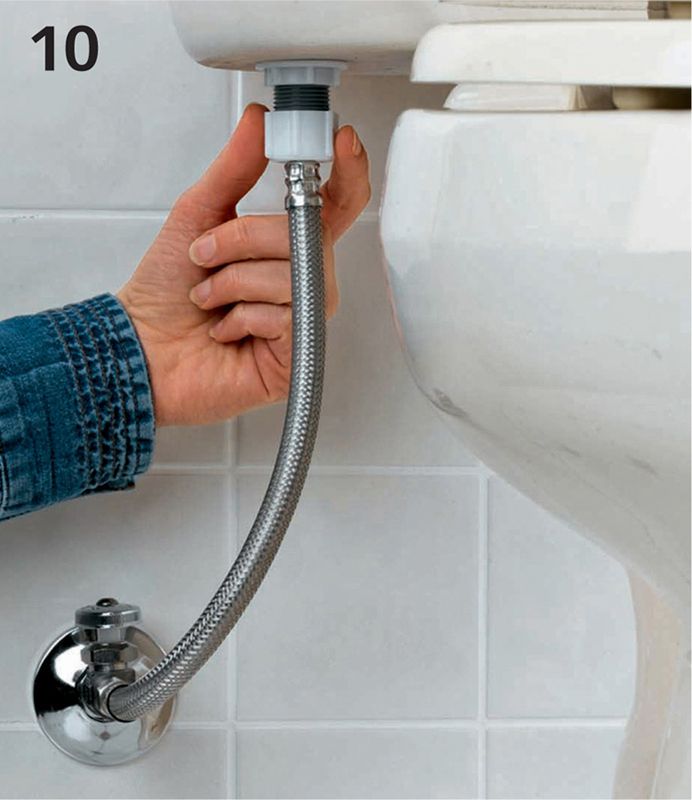
Hook up the water supply by connecting the supply tube to the threaded fill valve with the coupling nut provided. Turn on the water and test for leaks. Do not overtighten.
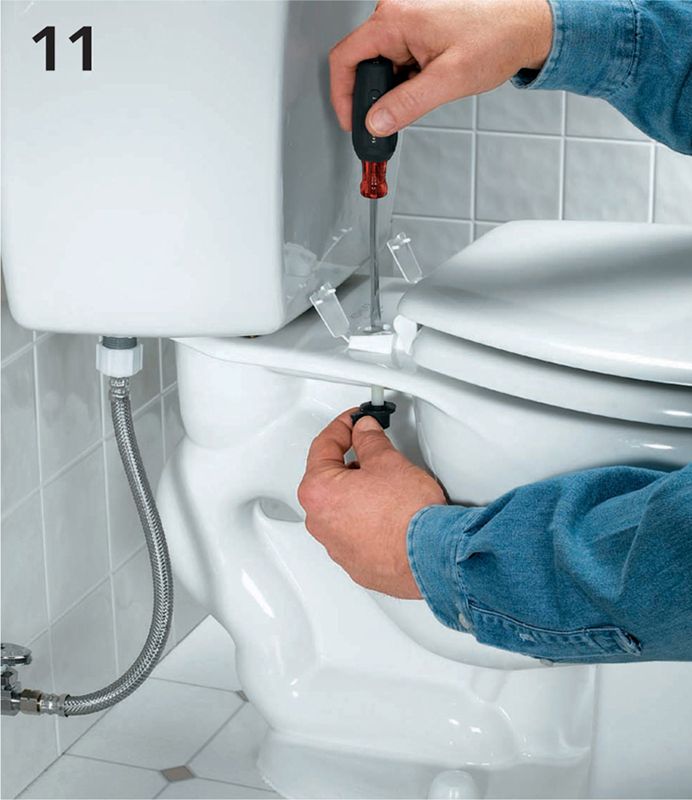
Attach the toilet seat by threading the plastic or brass bolts provided with the seat through the openings on the back of the rim and attaching nuts.