Prepare the site for the installation. Remove wall coverings in the installation area to expose bare studs. Provide a dedicated electrical circuit or circuits to the tub area according to the specifications in your installation manual (hire an electrician if you are not comfortable with wiring). This model plugs into a GFCI-protected receptacle on a dedicated 120-volt, 20-amp circuit.
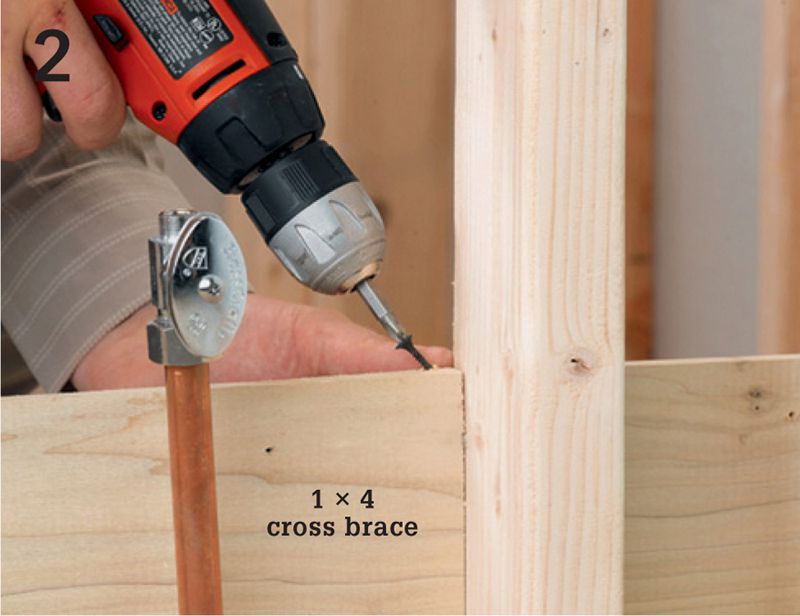
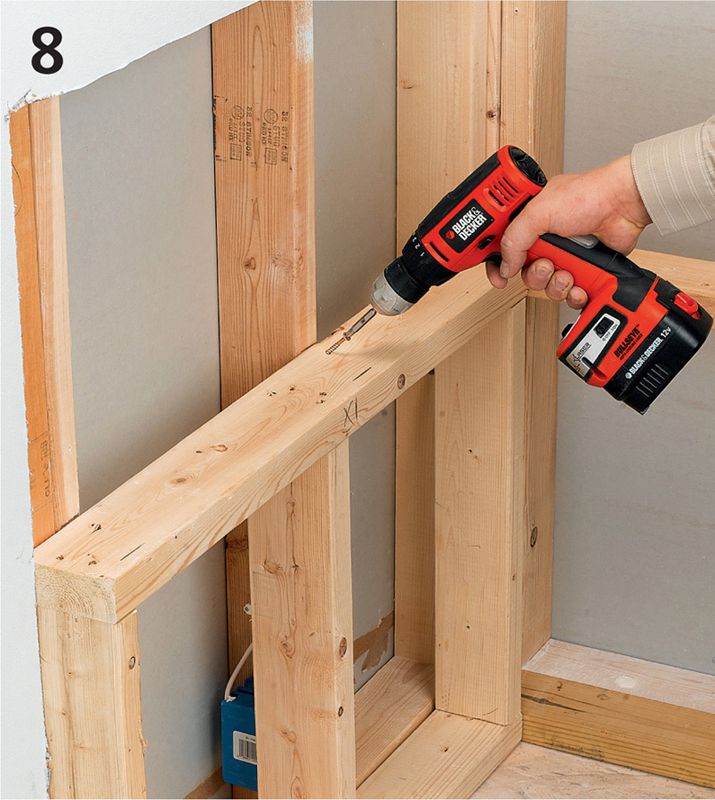
Make framing improvements such as adding 1 × 4 bracing at supply risers and the faucet body location. For drop-in tubs that do not have nailing flanges, you may need to add short stub walls to provide a stable resting point. Here, a short stub wall was installed at one end to serve as the tub wet wall.
Requirements for Making Electrical Hookups 
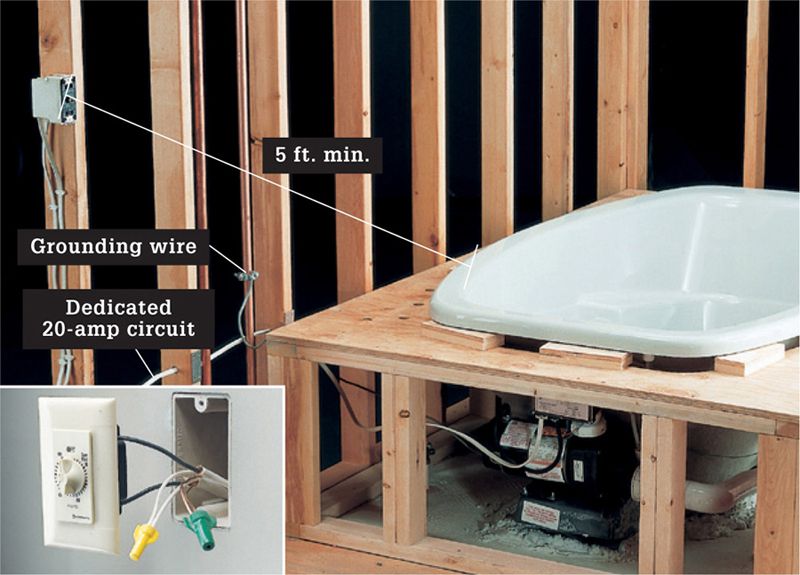
The electrical service for a whirlpool should be a dedicated 115-to 120-volt, 20-amp circuit. The pump motor should be grounded separately, normally to a metal cold water supply pipe. Most whirlpool motors are wired with 12/2 NM cable, but some local codes require the use of conduit. Remote timer switches (inset), located at least 5 ft. from the tub, are required by some codes, even for a tub with a built-in timer.

A GFCI circuit breaker at the main service panel is required with whirlpool installations. Hire an electrician to connect new circuits at your service panel if you are uncomfortable installing circuit cables on your own.
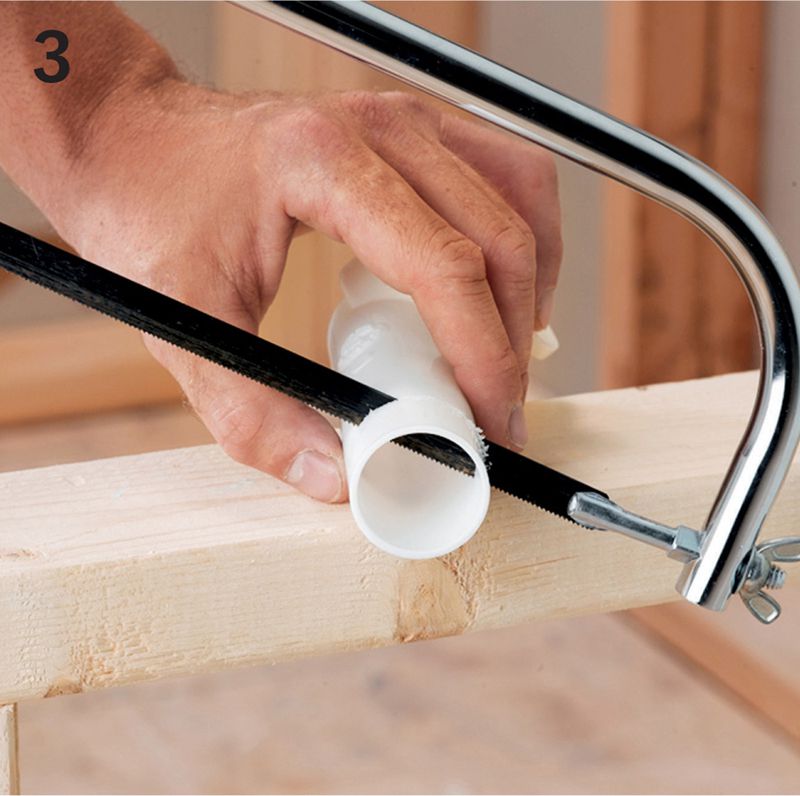
Cut the drain tailpiece to length depending on the distance you’ll need to span to the trap. Use a hacksaw or tubing cutter to make the cut.
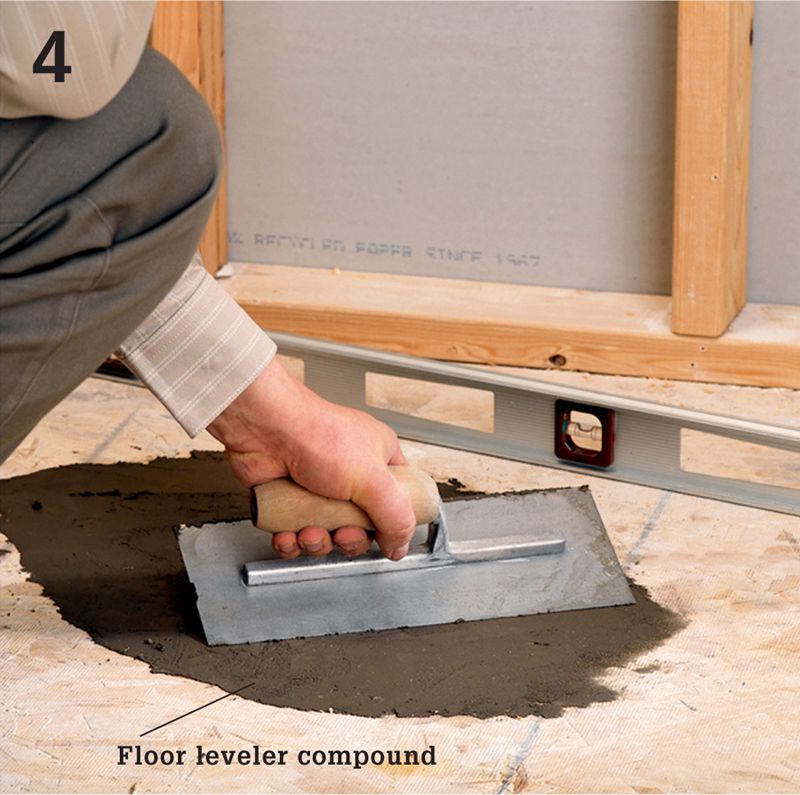
Prepare the floor or subfloor. Check with a level and fill any dips with floor leveling compound or mortar. If there is a joint in the subfloor in the installation area, make sure the sides are level. (The floor has to be level in order to support the weight of the tub, the water, and bathers.) Also make sure there is no rot or weakness in the structural elements.
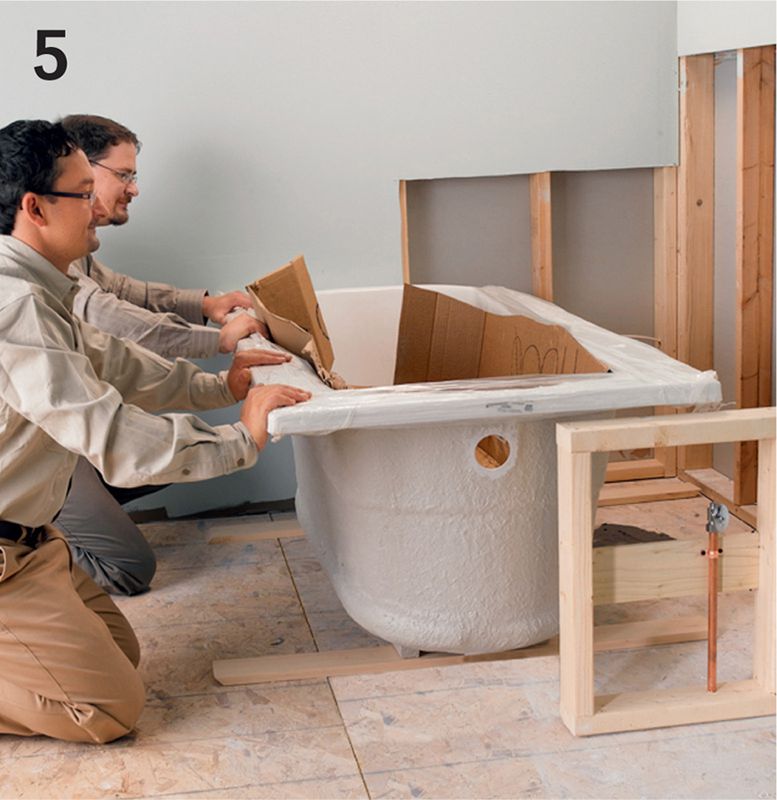
Test the tub fit. First, cut a piece of the shipping carton to fit inside the tub and protect its surface. Have someone help you slide the tub into the installation area, flush against the wall studs, so you can check the fit. Tip: Lay a pair of 1 × 4s perpendicular to the tub opening and use them as skids to make it easier to slide the tub in. Remove the skids and lower the tub on the floor.
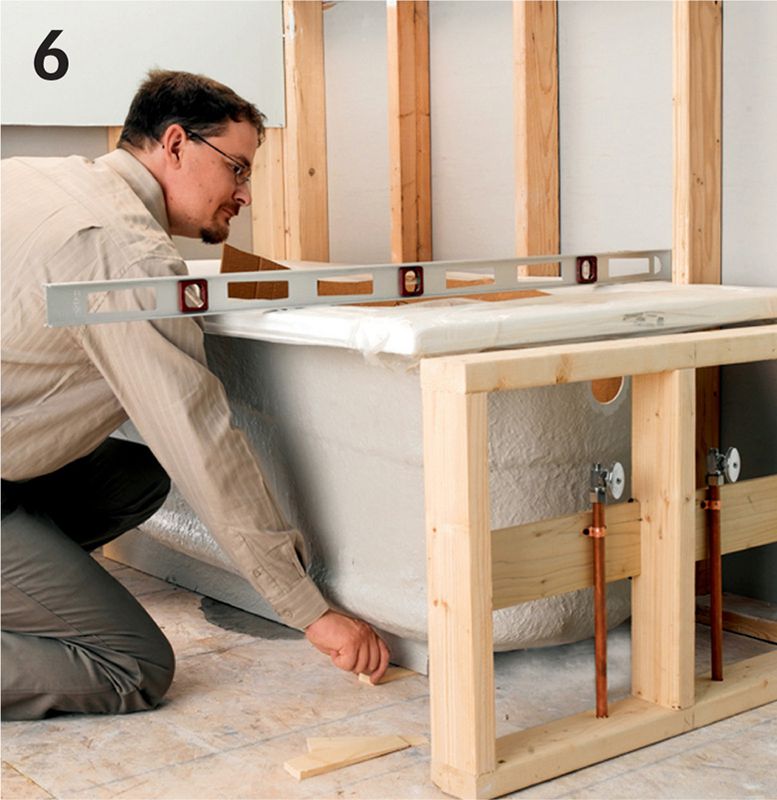
Set a 4-ft. level across the rim of the tub and check it for level. If it is not level, place shims under the tub until it is.
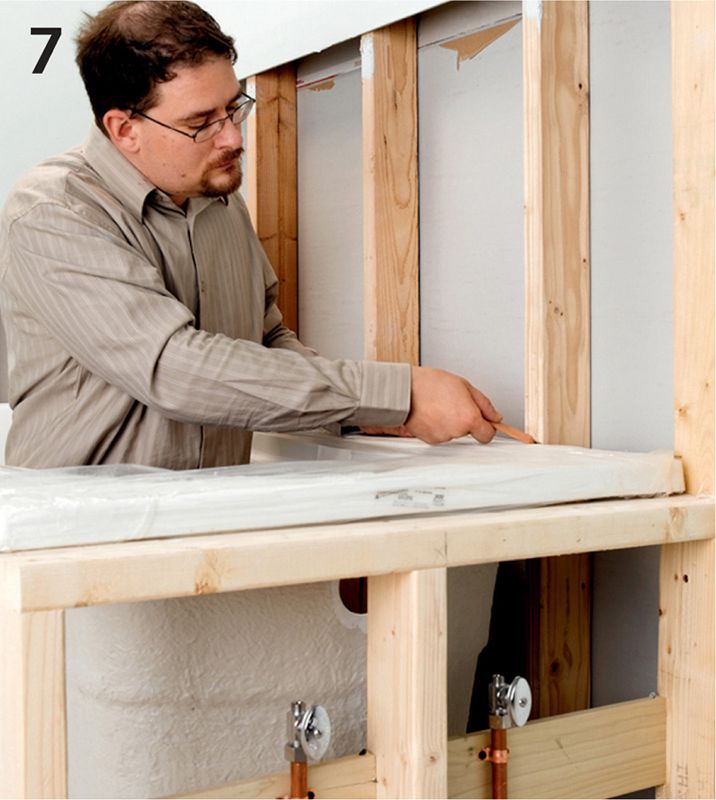
Mark the top of the tub’s rim or nailing flange at each stud as a reference for installing additional supports or ledgers. Remove the tub from the alcove.
Add support frames or ledgers as directed by the manufacturer and secure them in the installation area so the top of the tub or nailing flange will be at the height you scribed in Step 7.
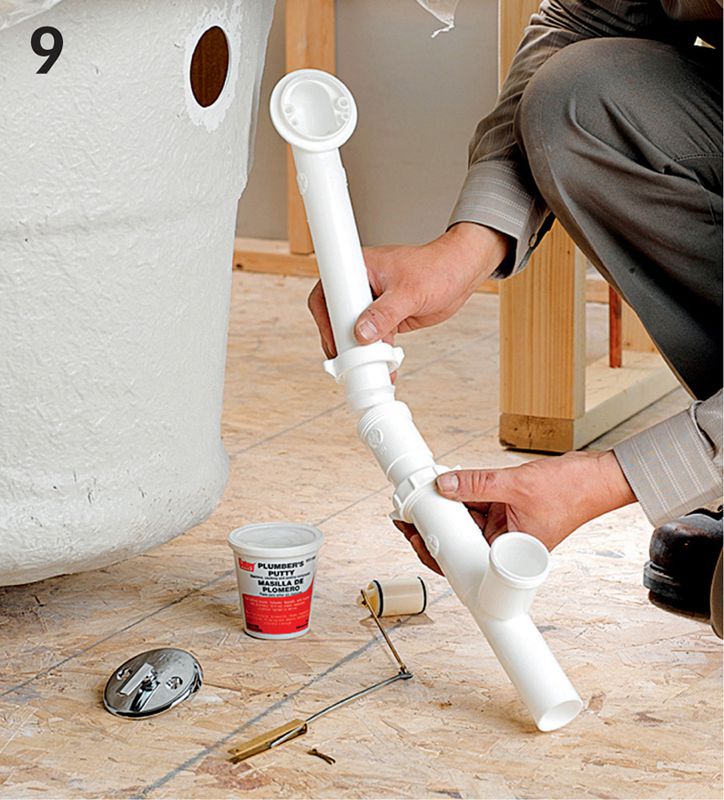
Assemble the drain-waste-overflow kit to fit the drain and overflow openings, following the tub manufacturer’s directions. Install the DWO kit (it is virtually impossible to attach it once the tub is in place).

Fasten the threaded parts of the drain assembly. A ring of plumber’s putty between the drain coverplate and the tub will help create a good seal. If you will be installing a pop-up drain, install it now as well.
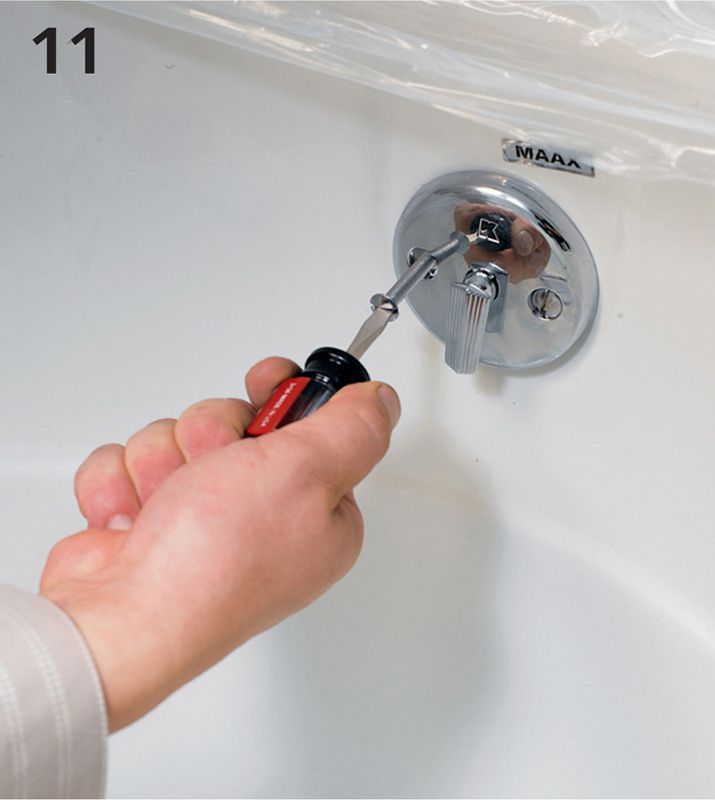
Attach the overflow coverplate so it conceals the overflow opening. Adjust the pop-up drain plug linkage as directed by the manufacturer.

Begin the actual installation. For some tubs, it is recommended that you trowel a layer of thinset mortar in the installation area. But read your instructions carefully. Many tubs feature integral feet that are meant to rest directly on the floor.
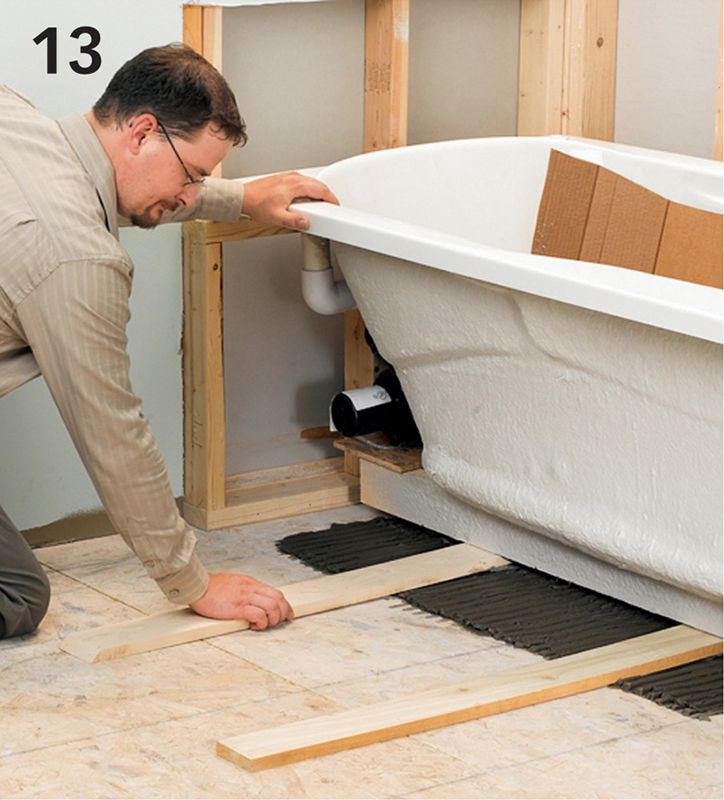
Slide the tub back into the opening. Remove the skids, if you are using them. Press down evenly on the tub rims until they make solid contact with the ledgers or frames.
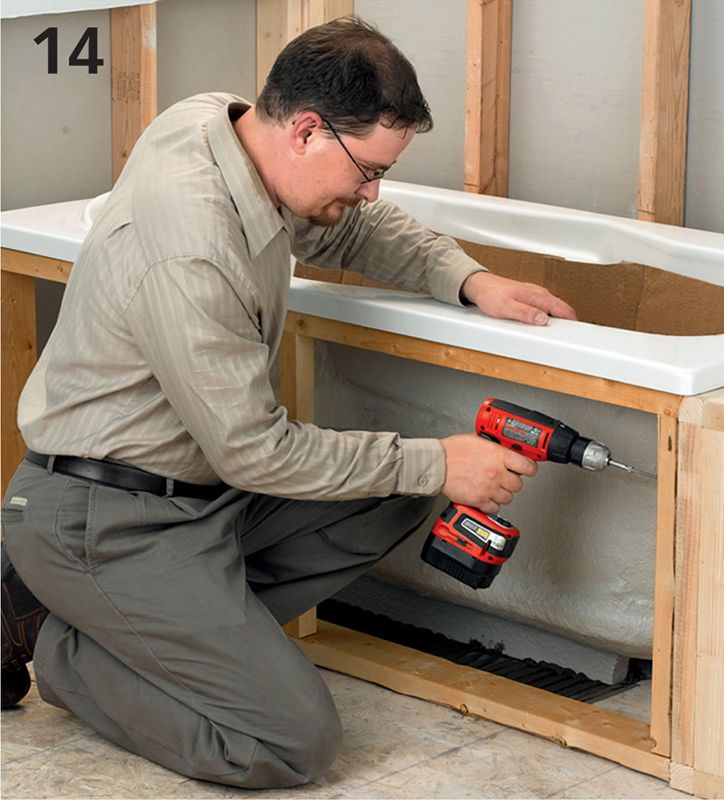
Provide support for the tub on the open side if it does not have a structural skirt. Here, a 2 × 4 stub wall is built to the exact height of the underside of the rim and then attached in place. Screw it to both end walls and to the floor.
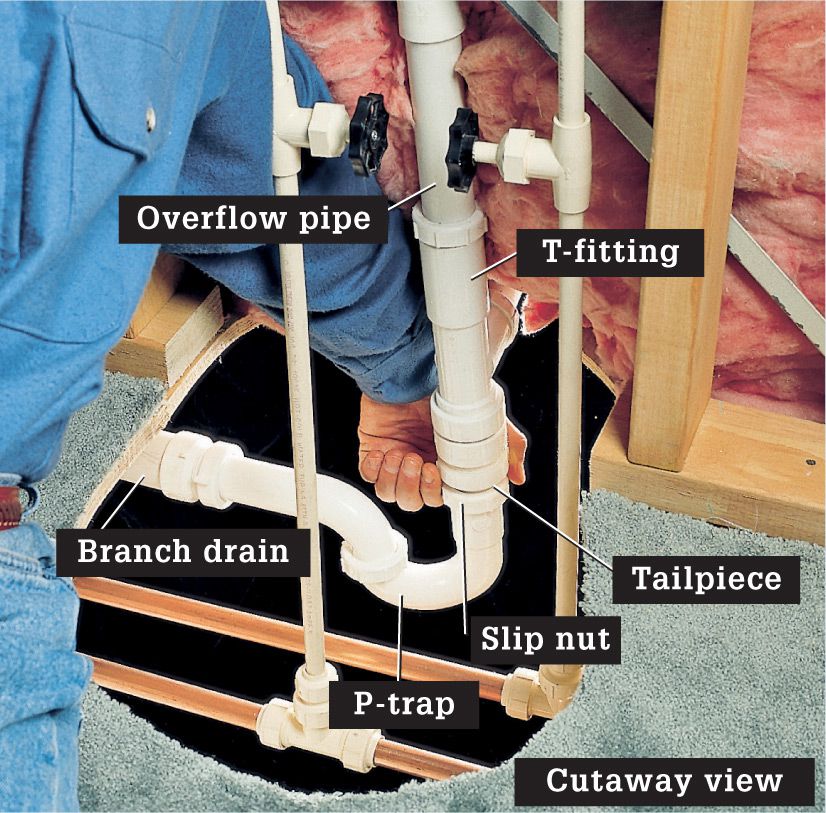
Make the plumbing drain connections before you proceed further. To connect the drain tailpiece to the trap you will need access either from below or from an access panel. The photo above shows a typical tub drain configuration seen cutaway through the floor.
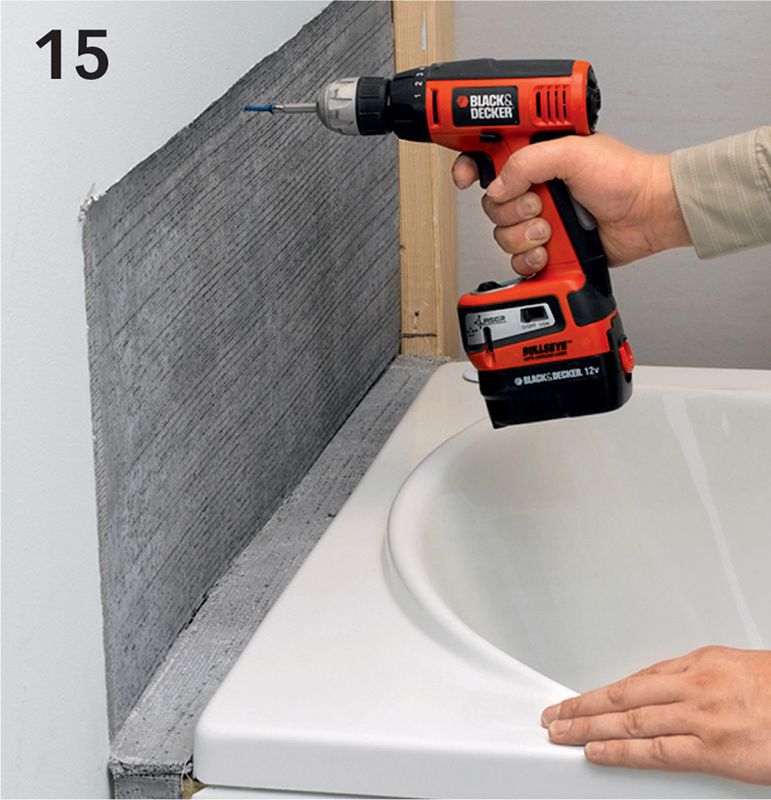
Cover the gaps in the wallcoverings around the tub. Here, cementboard is installed in preparation for a tile backsplash. If your tub has nailing flanges, attach strips of metal flashing to the wall so they extend down to within about 1/4" of the tub rim. If your tub has a removable apron, install it.
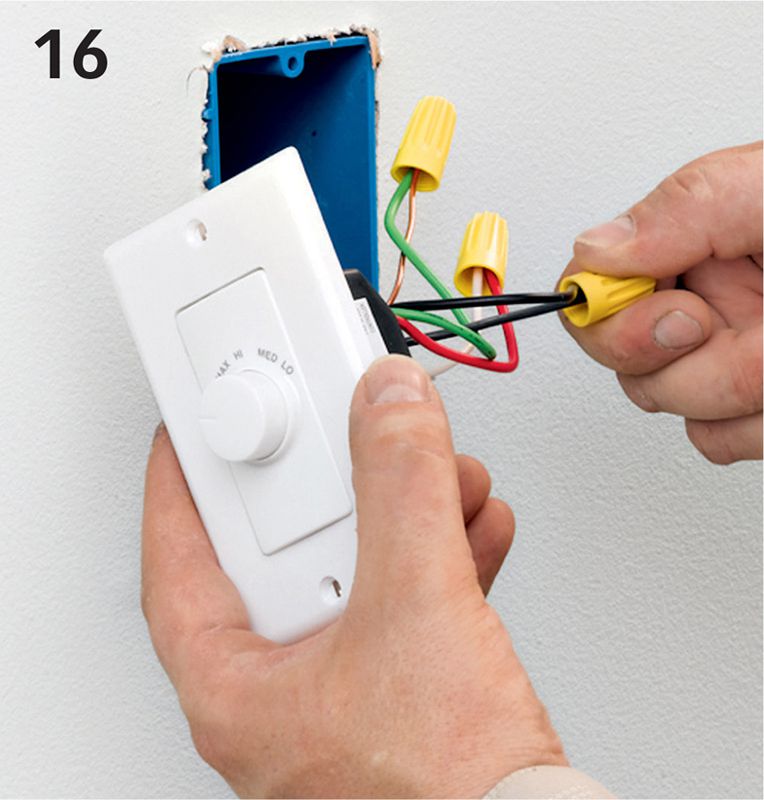
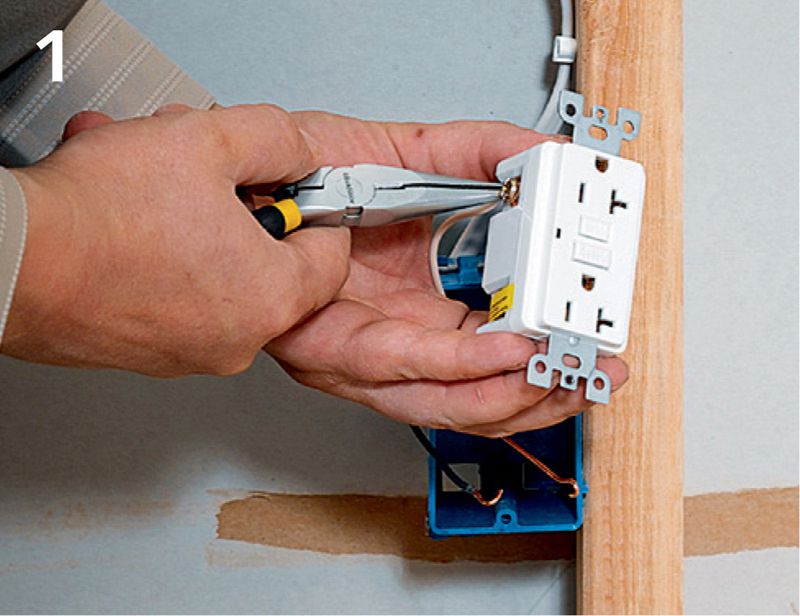
Make wiring connections according to the tub manufacturer’s instructions. The requirements vary greatly among jetted spas. Some municipalities may require that a licensed professional do this work. Here, the airflow regulator is being wired. Note that most codes have a safety requirement that the on/off switch must be located so it cannot be reached by a bather in the tub.
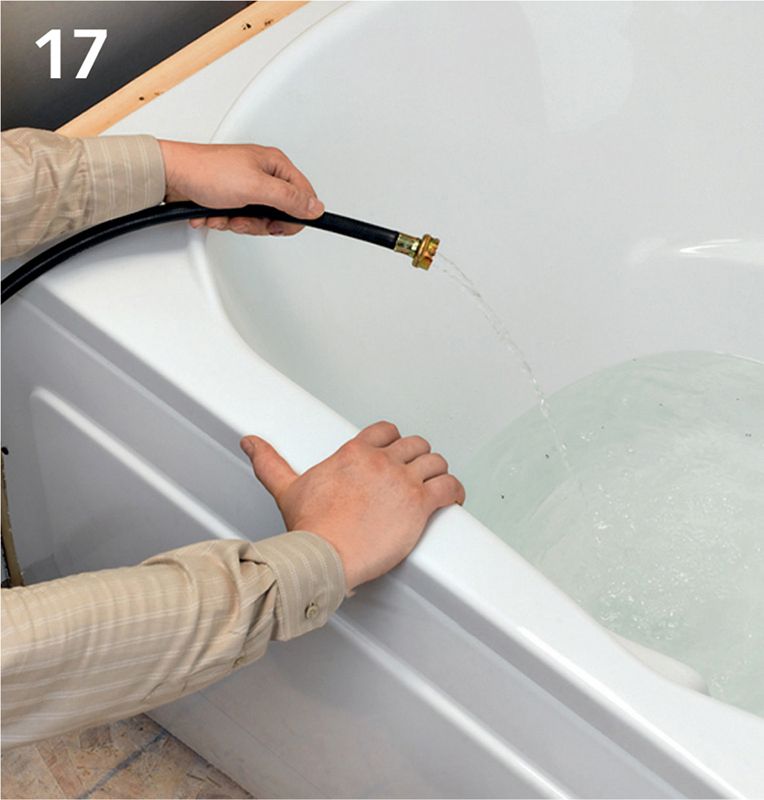
Test the operation of the jetted spa before you finish the walls or deck in case there is a hidden problem. Fill it with a hose if you have not installed the faucet (the faucet normally is installed after the wall surfaces, unless you are deck-mounting the faucet on the tub rim). Run the spa. If it works, go ahead and drain the water.
