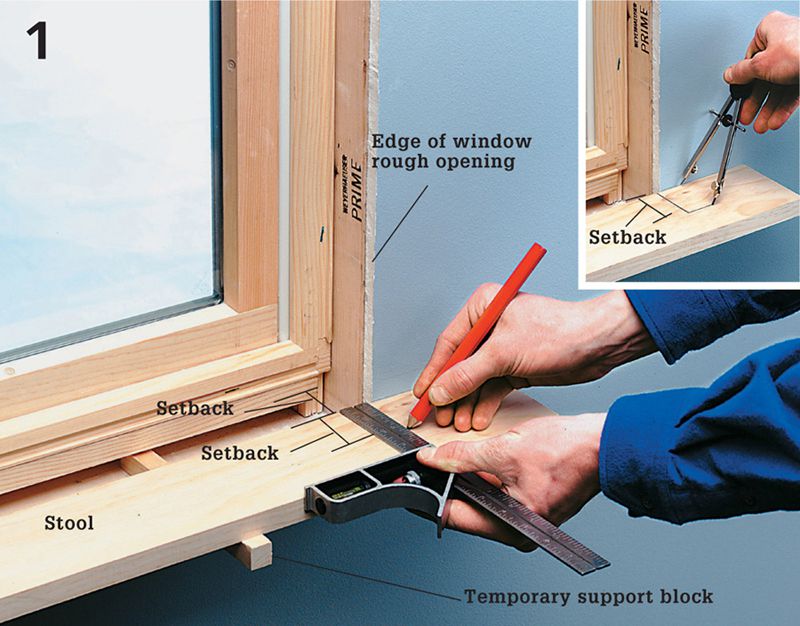
Cut the board for the stool to length, with several extra inches at each end for the horns. Temporarily position the stool in the window opening, pressed against the wall and centered on the window. Use a combination square to measure the setback distance from the window frame to the near edge of the stool. Mark the setback onto the stool at each edge of the window rough opening (if the measurements are different, use the greater setback distance for each end). Then use a compass and pencil to scribe the profile of the wall onto the stool to complete the cutting line for the horn (inset photo).
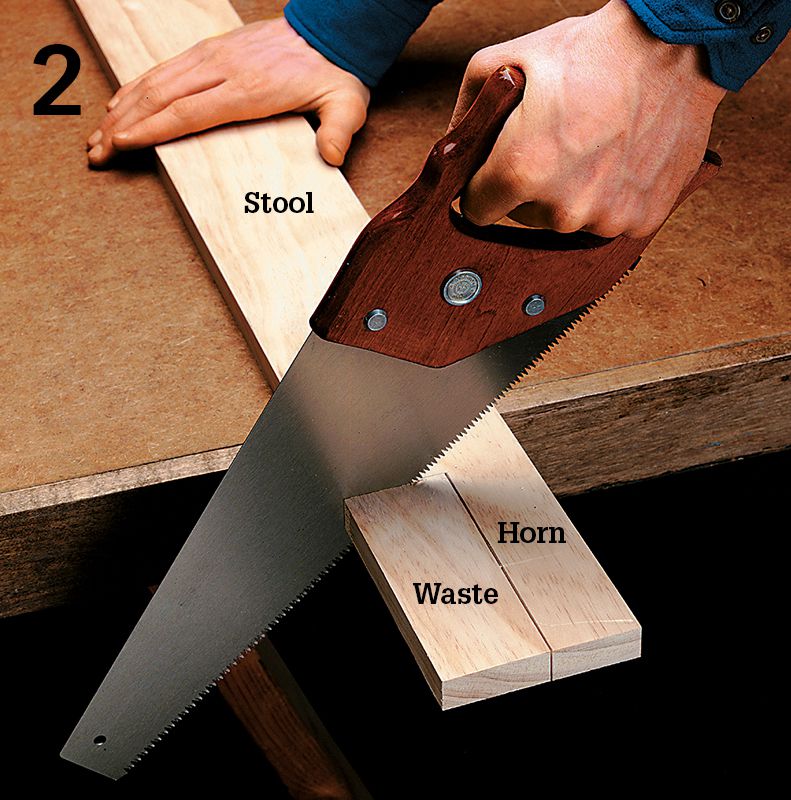
Cut out the notches to create the stool horns. For straight lines, you can use a large handsaw, but for the scribed line use a more maneuverable saw like the jigsaw or a coping saw. Test-fit the stool, making any minor adjustments with a plane or a rasp so it fits tightly to the window frame and flush against the walls.
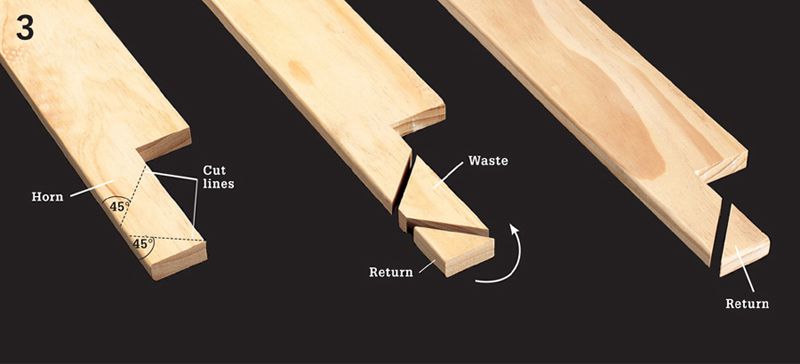
To create a return at the horn of the stool, miter-cut the return pieces at 45° angles. Mark the stool at its overall length and cut it to size with 45° miter cuts. Glue the return to the mitered end of the horn so the grain wraps around the corner. NOTE: Use this same technique to create the returns on the apron, but make the cuts with the apron held on edge, rather than flat.
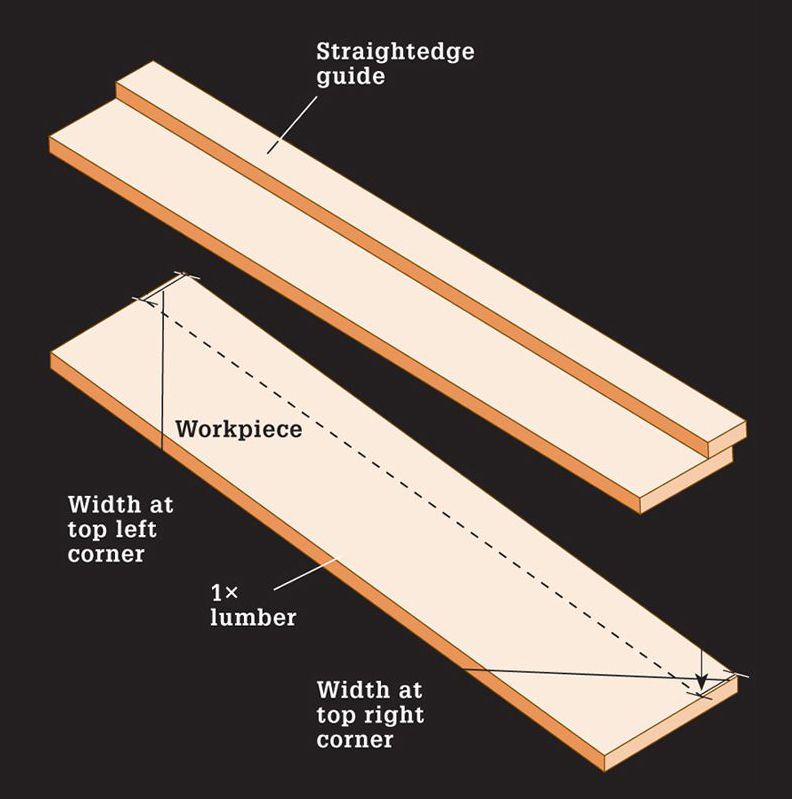
TIP: Where jamb extensions are needed, cut the head extension to its finished length—the distance between the window side jambs plus the thickness of both side extensions (typically 1× stock). For the width, measure the distance between the window jamb and the finished wall at each corner; then mark the measurements on the ends of the extension. Use a straightedge to draw a reference line connecting the points. Build a simple cutting jig, as shown.
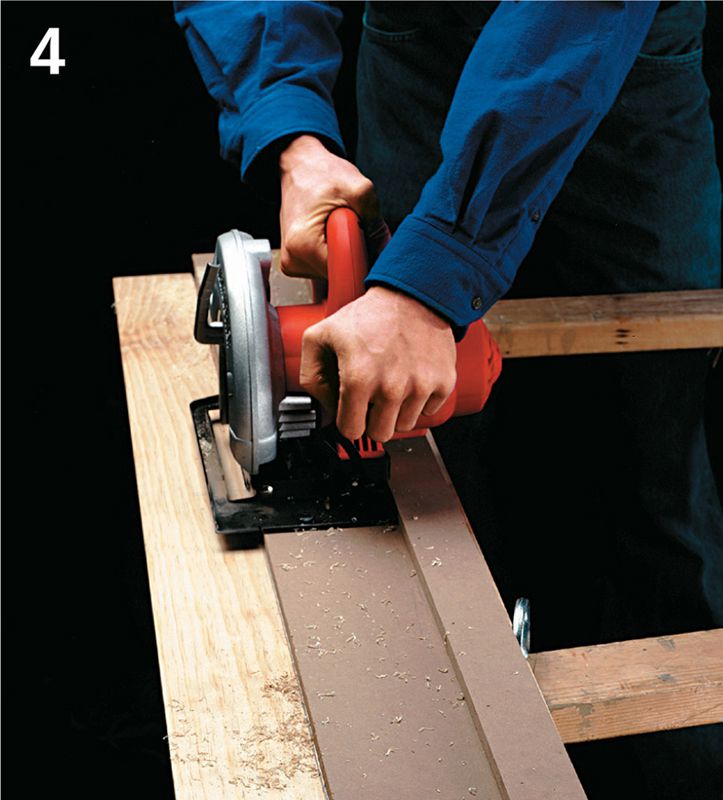
Clamp the jig on the reference line, and rip the extension to width. Using a circular saw; keep the baseplate tight against the jig and move the saw smoothly through the board. Reposition the clamp when you near the end of the cut. Cut both side extensions to length and width, using the same technique as for the head extension (see TIP at left).
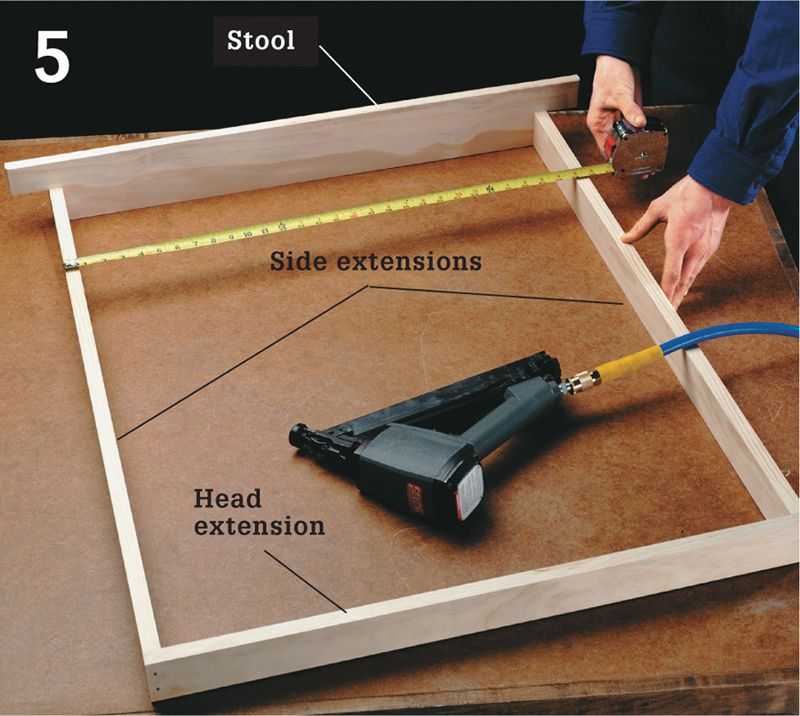
Build a box frame with the extensions and stool, using 6d finish nails and a pneumatic nailer. Measure to make sure the box has the same dimensions as the window jambs. Drive nails through the top of the head extension into the side extensions and through the bottom of the stool into side extensions.
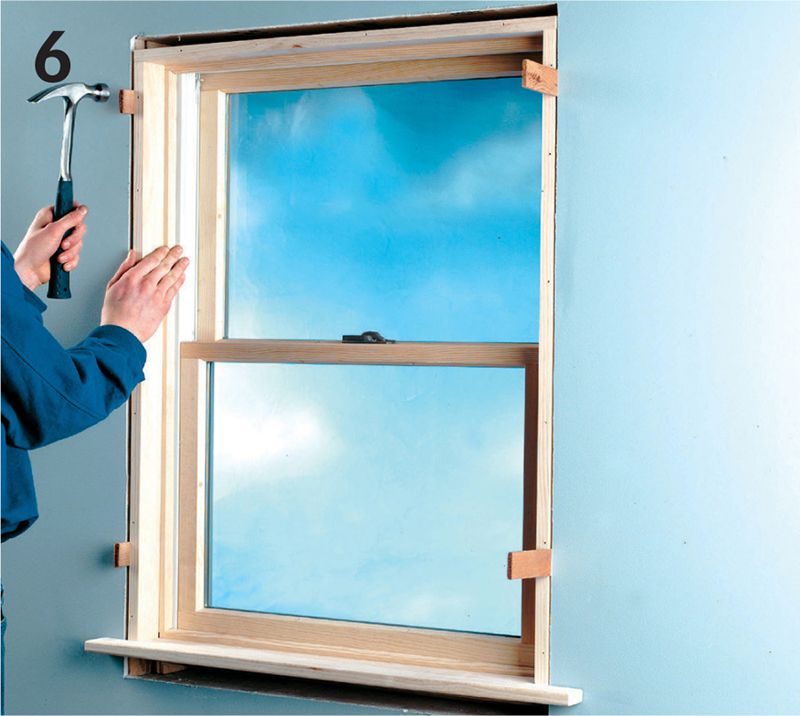
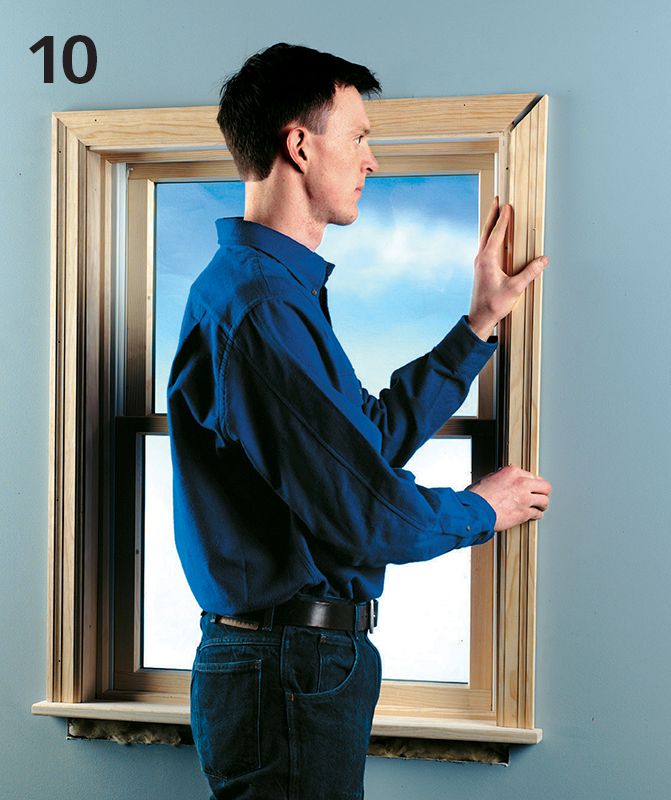
Apply wood glue to the back edge of the frame, and position it against the front edge of the window jambs. Use wood shims to adjust the frame, making sure the pieces are flush with the window jambs. Fasten the frame at each shim location, using 8d finish nails driven through pilot holes. Loosely pack insulation between the studs and the jambs, or use minimal-expanding spray foam.
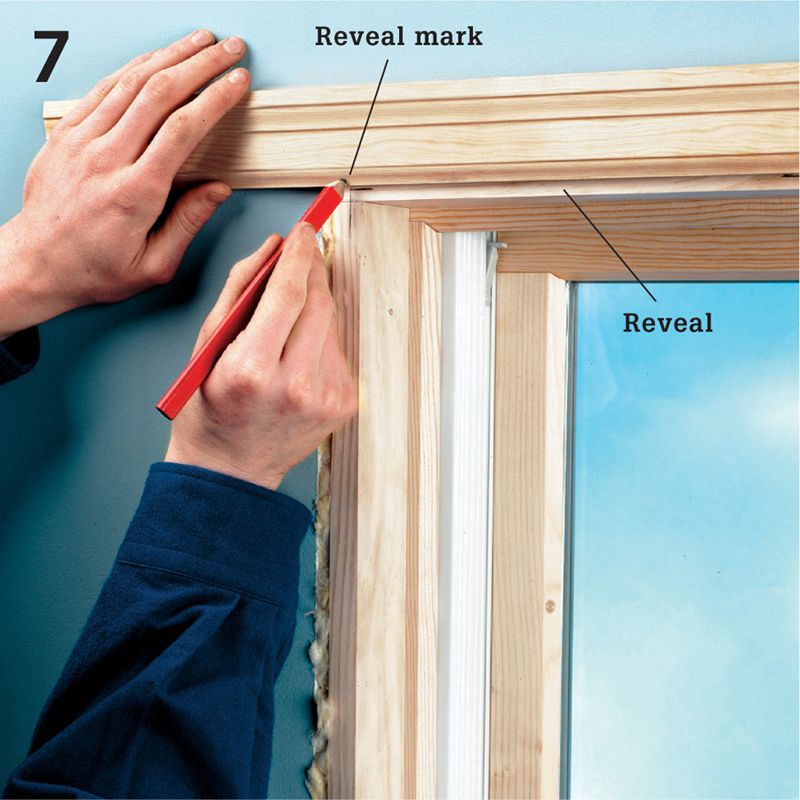
On the edge of each jamb or jamb extension, mark a 3/16" to 1/4" reveal. Place a length of casing along the head extension, aligned with the reveal marks at the corners. Mark where the reveal marks intersect; then make 45° miter cuts at each point. Reposition the casing at the head extension and attach, using 4d finish nails at the extensions and 6d finish nails at the framing members.

Cut the side casings to rough length, leaving the ends slightly long for final trimming. Miter one end at 45°. With the pointed end on the stool, mark the height of the side casing at the top edge of the head casing.
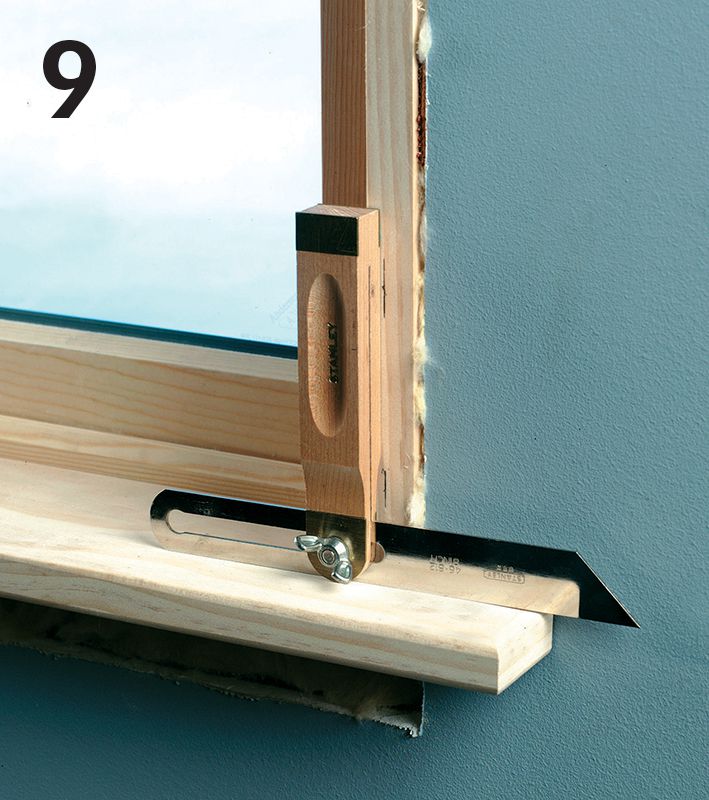
To get a tight fit for side casings, align one side of a T-bevel with the reveal, mark the side extension and position the other side flush against the horn. Transfer the angle from the T-bevel to the end of the casing, and cut the casing to length.
Test-fit the casings, making any final adjustments with a plane or rasp. Fasten the casing with 4d finish nails at the extensions and 6d finish nails at the framing members.
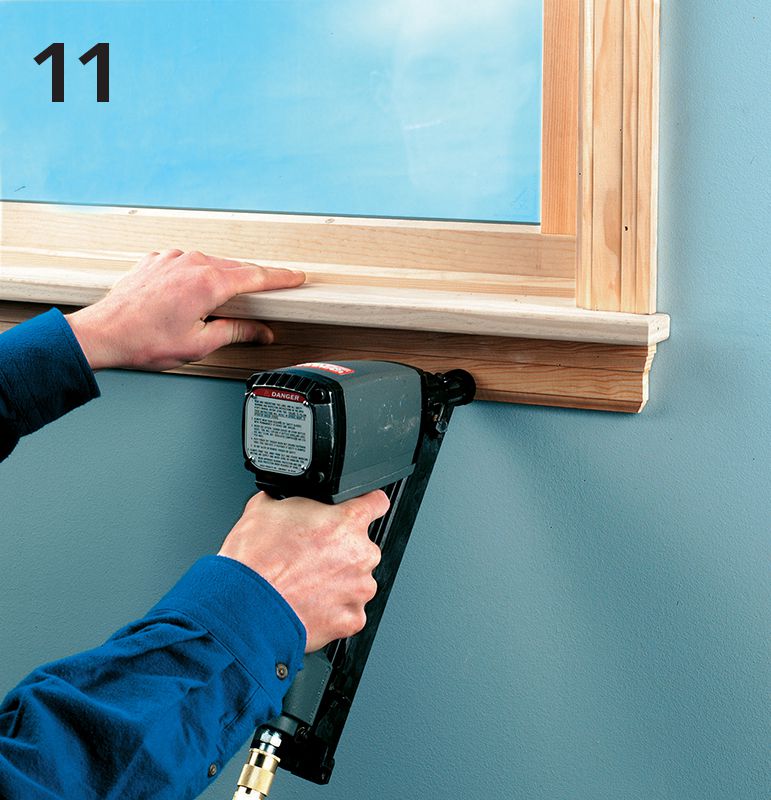
Cut the apron to length, leaving a few inches at each end for creating the returns (step 3). Position the apron tight against the bottom edge of the stool, and then attach it, using 6d finish nails driven every 12".