Chapter four
Accessorizing Your Bed
Creating raised beds is a satisfying project all on its own. To get the best from your beds, though, you may want to add a set of support hoops for row covers or netting, a watering system, and a variety of trellises. These accessories will help you produce more food with less work, prevent pest damage, and extend the growing season. You can also accessorize your bed with artistic touches for the fun of it, including flowers, garden artwork, or a place to sit.
Setting Up a Support System
A framework of plastic pipes or flexible metal hoop supports straddling a raised bed is handy for supporting shade cloth for hot-climate growing. A frame also works well for draping netting over a bed to keep out animal pests or to support floating row covers or plastic sheeting to protect crops from cold conditions and extend the growing season.
You can simply stick the ends of a 1/2-inch-diameter plastic pipe (available from home centers) into the soil to create semicircular hoops, but for a more secure frame, it works well to install anchors on the inside of the frame. Wire hoops (available from farm and garden suppliers) also work well when inserted directly into the soil.
Materials
- 1⁄2-inch-diameter plastic pipe or flexible metal hoop supports
- Rigid 1-inch-diameter pipe
- Tube straps
- Rocks, boards, or bags filled with soil for use as anchors
Tools
- Hacksaw
- Screwdriver or portable drill
Instructions
- 1. For the anchors, cut sections of the 1-inch-diameter pipe into lengths about equal to the height of the walls of your bed.
- 2. Install tube straps to fasten the pipes to the frame wall.
- 3. Once the anchors are in place, cut the 1/2-inch-diameter plastic pipe into sections of equal length. For a 4-foot-wide bed, cut hoops about 7 feet long (or longer if you want to grow taller crops in the bed).
- 4. Feed the ends of the hoops into the anchor posts, and then spread the covering of choice over the hoops. Anchor the covers.
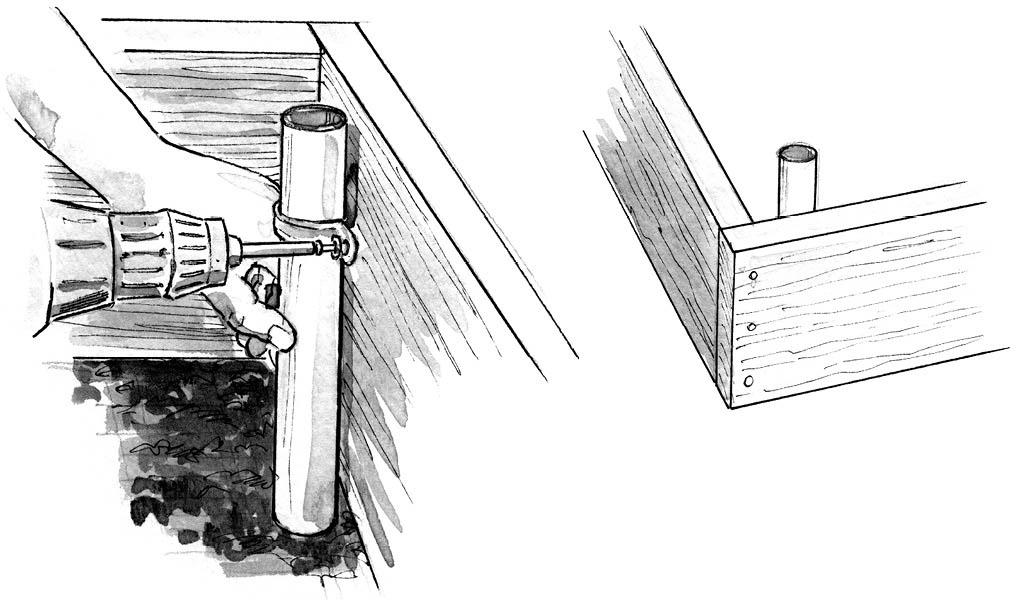
If you want to add a support system to an existing bed that’s already filled with soil, you can strap the anchor pipes to the outside of the frame boards rather than the inside. Or you can use pieces of rebar as anchors. You’ll need pieces about 18 inches long. Drive them into the soil so that a section about 6 inches long sticks up above the top of the frame. The ends of the hoops will slip right over the rebar. When the hoops aren’t in place, the exposed rebar can be a hazard; you could scratch your hands or arms on it while tending your plants. To avoid this, make slits in old tennis balls and slip a ball over each piece of rebar. Or paint the exposed rebar a bright color so you’ll be sure to notice and avoid it.
Installing a Watering System
Because raised beds are prone to drying out, it’s well worth the time and expense to install soaker hoses or a drip irrigation line. These systems deliver water directly to the soil, and there’s minimal run-off or evaporation. Foliage stays dry, which lessens the risk of disease problems.
Soaker hoses. Soaker hoses slowly weep drops of water through small pores all over the surface of the hose. Soaker hoses are the easiest and least expensive choice for a watering system. Simply lay out the soaker hose on the surface of the bed. Use U-shaped wire pins to hold the hose in place if it seems to have a mind of its own. Once the soaker hose is in place, spread a layer of straw or other coarse mulch over it. This will help hold moisture in the soil longer by reducing evaporation from the soil surface. Or you can bury hoses in the soil itself, up to 4 inches deep.
The amount of water delivered by a soaker hose varies depending on the water pressure from the source and the brand of soaker hose, so it’s a good idea to run a test to see how long it takes for your soaker hose setup to wet the soil. To do this, make sure the pressure regulator is in place and then turn on the water. About 45 minutes later, dig down into the soil with a trowel. The soil should be moist at least 6 inches deep. If it’s not, leave the water on and recheck again about 10 minutes later. Keep checking until the soil is moist 6 inches deep. Checking your system this way the first few times you use it will give you a good idea of how long it takes to provide a thorough watering. When you know how long it takes to water to a depth of 6 inches, simply turn on the hose, set a timer to remind yourself, and turn off the hose when the timer dings. Or use a watering hose timer (available from garden centers and home centers), which will automatically turn off the water after the allotted time.
It’s best to set up a separate soaker hose for each bed, because if water travels through more than 100 feet of soaker hose, the pressure drop at the end of the hose may be so great that the soil in that area won’t receive much water.
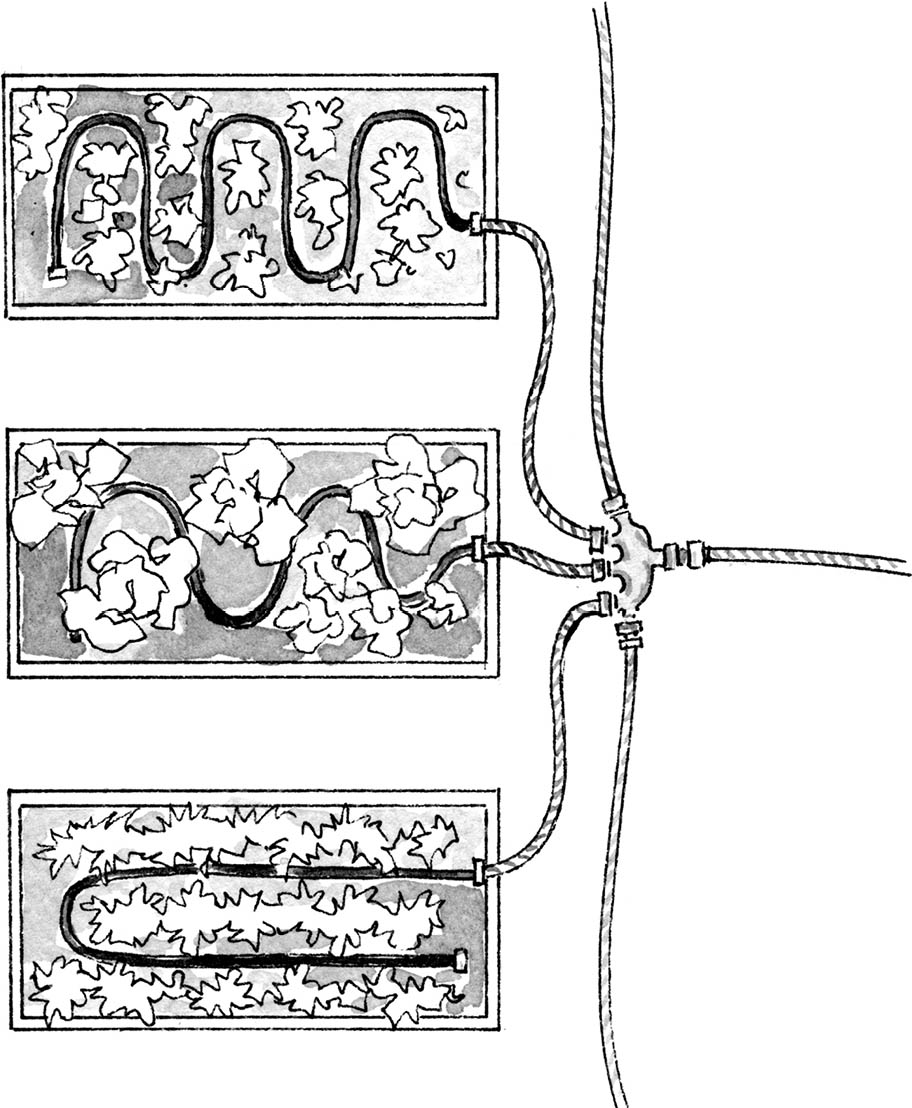
Drip irrigation. A drip irrigation system may consist of plastic tubes or a hose with built-in “drippers” (fittings that release water), or you may find a system that allows you to insert the drippers into the hose at the desired positions. If you are installing emitters yourself, space the emitters 6 to 12 inches apart. Keep in mind that a drip irrigation hose releases water only through the emitters, not from its entire surface the way a soaker hose does.
If you decide to use drip irrigation, you may find it convenient to use a kit. Drip irrigation kits often include a pressure regulator and angle couplings to allow the lines to change directions.
Sending Your Garden into Space
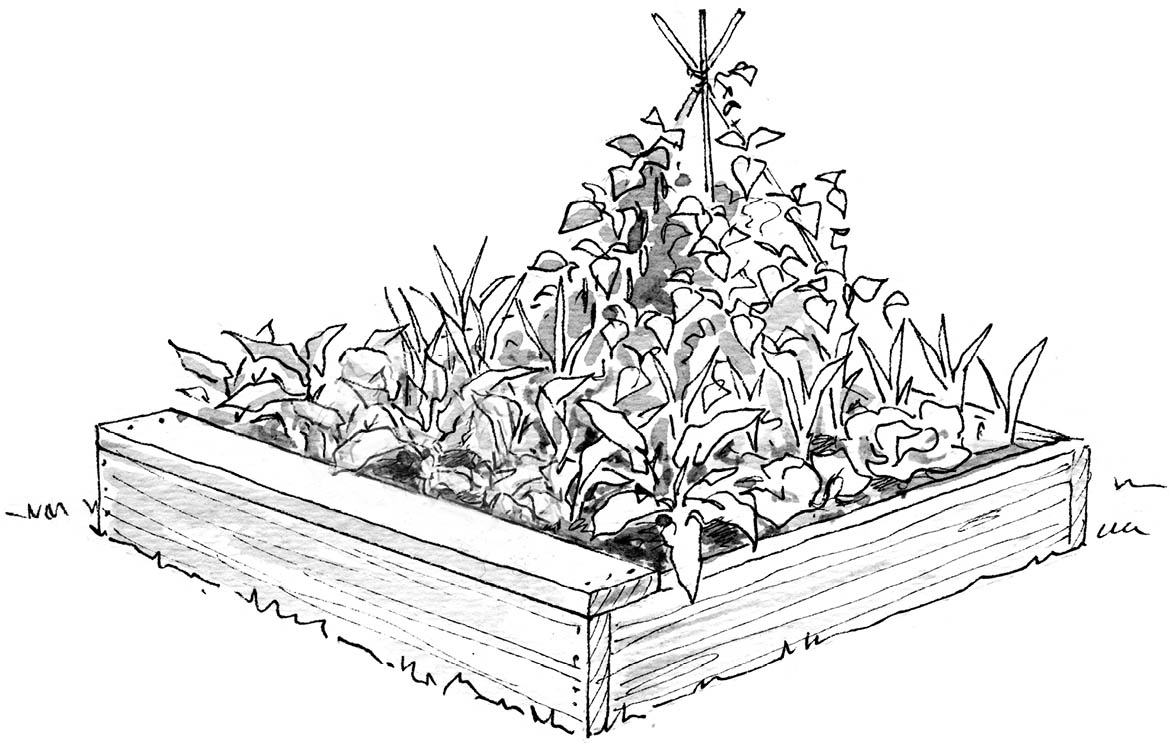
Since space is often at a premium in raised beds, make use of the vertical space above your beds, too, by training plants on trellises. Any type of trellis that works in a standard garden bed should also serve the purpose in a raised bed. The thing to keep in mind is how loose and light the soil in a raised bed is. Because of that, take extra care to anchor trellises. Once you set a trellis in place, hammer in 18-inch-long pieces of rebar at the base of the trellis and then lash the trellis tightly to the rebar.
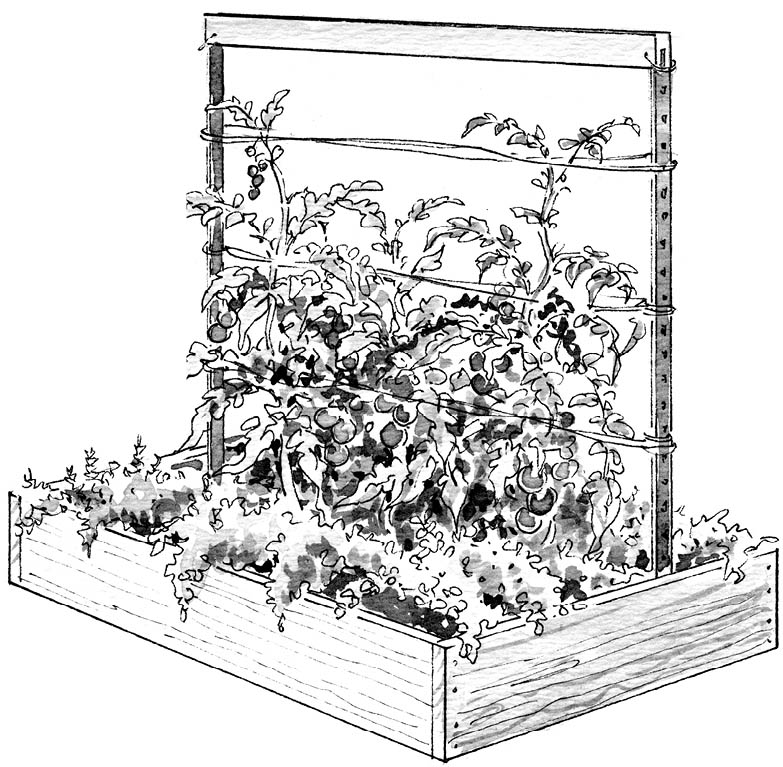
How to Build a Sturdy Vertical Trellis
If you’d like to make a vertical trellis along one edge of a bed for tomatoes or cucumbers, use tall metal fence posts for the end poles of the trellis.
Materials
- 2 metal fence posts, 8 feet tall
- 2×4 timber, cut to appropriate length
- 2 pieces of utility wire, about 12 inches long, plus additional wire for stringing the trellis
- 2-inch galvanized wood screws (optional)
Tools
- 1-pound sledge or fence-post driver
- Tape measure
- Handsaw or circular saw
- Power drill
Instructions
- 1. Use the sledge to pound one post into each end of the bed, sinking each post at least 8 inches into the undisturbed soil below the shallow raised bed.
- 2. Use the tape measure to measure the distance between the top of the posts, and cut a 2 × 4 to that length.
- 3. Use the saw to cut a notch in each end of the 2 × 4. Then use the power drill to drill one hole through the timber at each end, a few inches in from the end. Feed a long piece of sturdy wire through each of the holes.
- 4. Wedge the 2 × 4 between the posts, catching the wedge on the posts’ protruding tongues. Use the wires to fasten the 2 × 4 to the posts.
- 5. Run a few courses of wire between the posts, with wires spaced about 1 foot apart vertically. Or, if you want to use the trellis for pole beans, install screws at regular intervals along the wooden frame of the bed, leaving about 1/2 inch of each screw protruding. Run a length of twine from each screw up to the top bar of the trellis.
Adding Artistic Touches
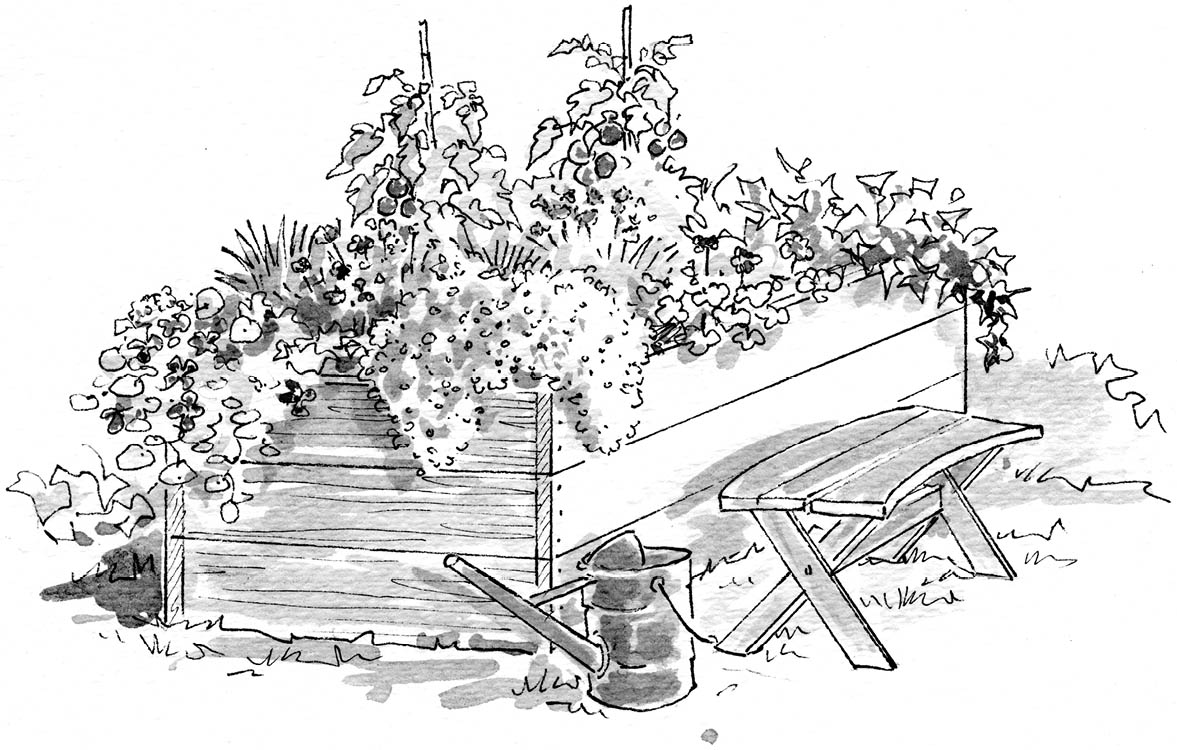
Gardening is a skill, but it’s also an art. With your raised beds as frames, you can create beautiful and unique living pictures that combine your vegetables and herbs with flowers, sculpture, and more.
There are good reasons to plant some flowers in every raised bed, even if your primary goal is to raise food crops. Why flowers? The most important reason is that they attract beneficial insects such as lacewings and lady beetles that prey on common pests, including aphids. They’re inexpensive, natural pest prevention. Let some flowers go to seed, too, and they’ll attract sweet songbirds such as goldfinches. Those finches will eat the seeds, but they’ll eat insects and weed seeds, too. Flowers also attract bees and other pollinators to gardens, which is very beneficial for crops such as squash and cucumbers that rely on insects for pollination.
Plus, flowers are a natural pick-me-up for people. What’s your reaction when you see a patch of bright zinnias or a cascading sweep of pretty petunias? You smile, right? Right! Flowers will improve the appearance of any garden, and that will add to your sense of success, which will lead you to spend more time in your garden, which will lead to even greater success!
Good choices for adding color or attracting pollinators are sweet alyssum, calendulas, cosmos, marigolds, violas, zinnias, and sunflowers. Plant cascading flowers such as alyssum and nasturtiums along the edges of a bed where they can cascade over the sides. Cluster flowers around the base of a trellis. You can even add perennial herbs such as thyme and rosemary at the corners of your beds, where they’ll come back year after year.
It’s fun to plan a color scheme for a mixed planting of flowers and vegetables. Purple and pink alyssum look lovely next to purple basil and eggplant or red-hued leaf lettuce. Try white alyssum or violas next to dark green kale or chard, or the reddish foliage of beets.
Artwork can add humor or elegance to a garden, too. Some art objects, such as a birdbath or an obelisk-style trellis, can be both useful and artistic. The picture you create in the framework of your raised beds will be your unique garden portrait that will provide you with daily pleasure and plenty of delicious produce. Enjoy it!