
Every home needs a DIY area, no matter how much is done around the house or what size projects are tackled. Whether there is an expert craftsman in the family, a weekend hobbyist or a busy Dad with some hand tools, a suitable work surface and basic storage will be needed. The dining room table just isn’t a good idea as the jigsaw blades tend to get mixed up in the children’s cornflakes and jars of nails just don’t go with the décor. In a previous workshop I had limited space so I designed this workbench to take up the full width of the small room I was using. Later, when I had a larger workshop, I set it up as a freestanding bench and again it proved useful for all types of DIY requirements. You will find this workbench a welcome addition to your garage or workshop and you can make it in just a few hours.
An important aspect of any work surface is ergonomics and how you will be positioned when you use it. Usually workbenches are for standing next to while desks are lower because we sit at them in one position for longer periods. To get the right height for my requirements, I built this workbench with a higher work surface than I needed and trimmed off the legs until it was comfortable to stand at for long periods of time. However, there are some tasks that will require sitting at the workbench, such as using the scroll saw, soldering and model work, in which case an ordinary stool will be useful to sit on while working. If you are sitting you can rest your feet on the lower surface of the workbench, which is also useful for storage of larger tools and materials. I mounted a bench vice on the left and installed a drawer on the right to hold a socket spanner set, but these are optional and can be omitted if preferred.

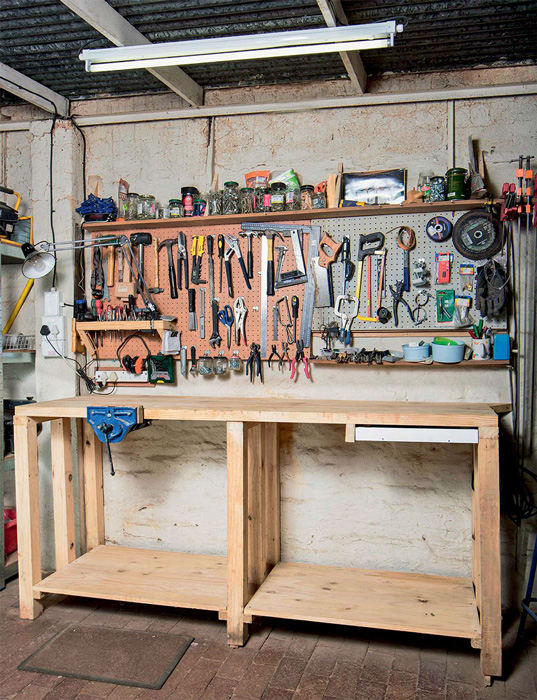
This sturdy workbench is easy to make and best positioned against a wall and fastened in place. Tools can be displayed above it and a second storage shelf could be added underneath the work surface, if required. It’s also quick to make so there’s no need to miss the game on Saturday afternoon!
WHAT I WOULD DO DIFFERENTLY NEXT TIME
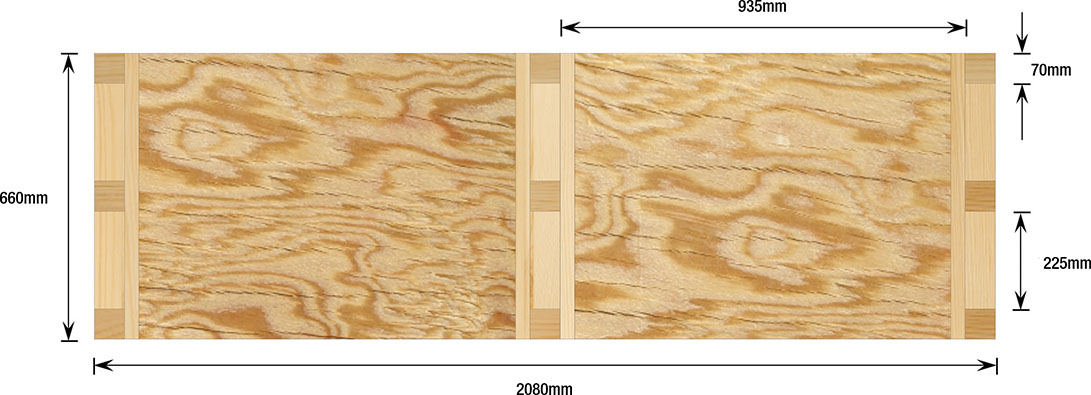
I used solid pine for the bottom shelves, but thick plywood is sufficient and much cheaper, which helps if you are on a tight budget. The illustrations in this chapter show a version with a plywood bottom shelf while the photos show the solid pine version that I actually built. You must fasten the back of the work surface to the wall, but for extra rigidity you can also fasten the lower portions of the three back legs. This will require simple right-angle brackets mounted with wood screws to the legs, and masonry screws and plugs to fasten onto the wall. A second storage shelf would also be useful; place it halfway down and make it half the width of the bottom shelf.
| PART | QUANTITY | THICKNESS | WIDTH | LENGTH | |
| A | Work surface | 3 | 45mm | 220mm | 2080mm |
| B | Bottom shelves | 2 | 20mm | 660mm | 935mm |
| C | Bottom shelf supports | 4 | 35mm | 35mm | 660mm |
| D | Work surface supports | 3 | 45mm | 70mm | 660mm |
| E | Legs | 9 | 70mm | 70mm | 900mm |
Project information
| Overall dimensions | 2080mm long x 660mm wide x 990mm high |
| Number of parts | 21 |
| Special equipment | None |
| Techniques | Basic assembly |
| Difficulty | Easy |
| Duration | 4 hours |
Family fun factor

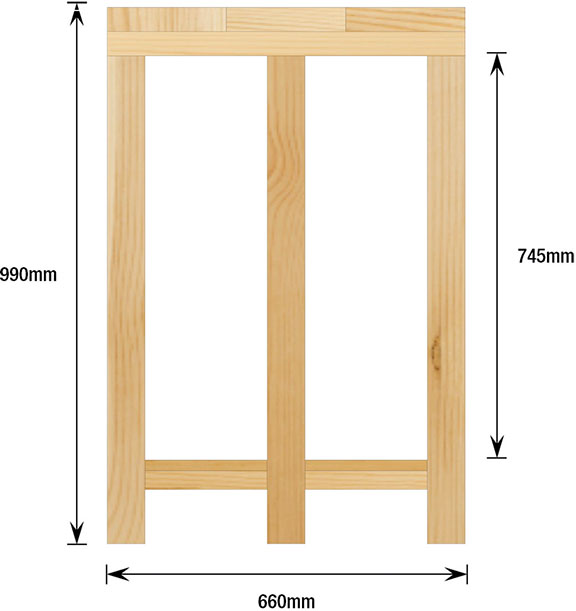
Side view of completed workbench

Safety gear is important when in the workshop or on a Wendy house construction site. James and Juliet make sure they are safe as they inspect Daddy’s progress.
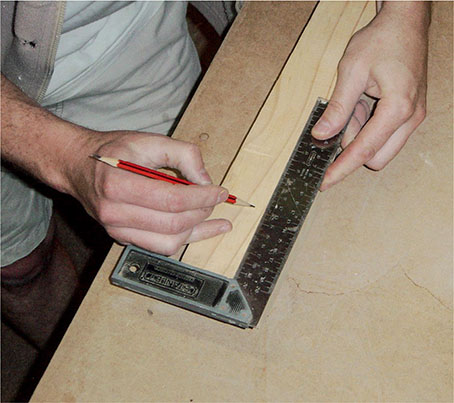
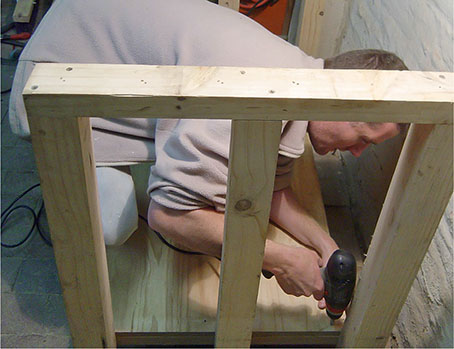
1 Lay out three of the legs (E x 3) in the configuration of the leg assembly and mark the position of the bottom shelf support (C).
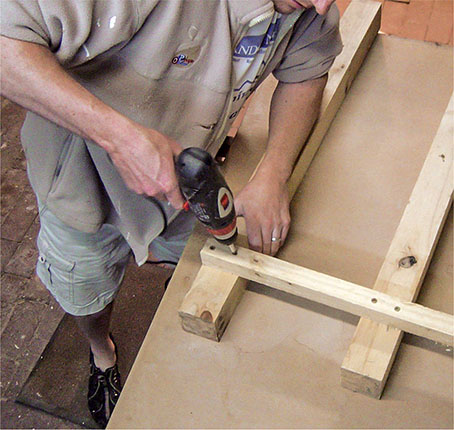
TIP: As shown in the photograph, use a try square to measure accurately from the base of the legs.
2 Fasten the bottom shelf support (C) to the bottom of the legs (E x 3) in the marked position using a power drill and two cut screws for each joint, as shown in the photograph. Repeat these two steps for all three leg assemblies.
3 Take one of the leg assemblies and fasten another bottom shelf support (C) to the opposite side using cut screws and a power drill, as shown in the photograph. This will be the leg assembly in the middle of the length of the bench, which has a bottom shelf support on both sides.

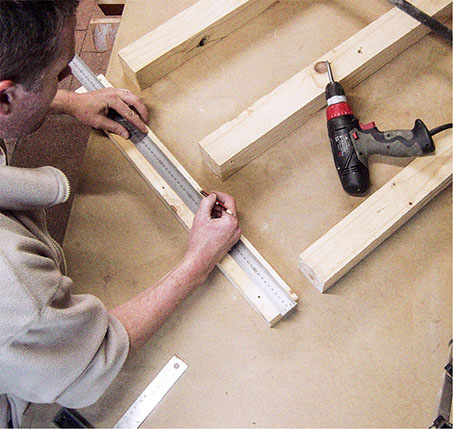
4 On the underside of one of the work surface supports (D), measure and mark off the position of the top of the middle leg (E) using a steel ruler and carpenter’s pencil.
TIP: The outer legs of each assembly will be positioned at the ends of the work surface support so their position does not need to be marked off.
5 Position, clamp and fasten the outer legs (E x 2) to complete the first leg assembly. Repeat the whole process for the other two leg assemblies.
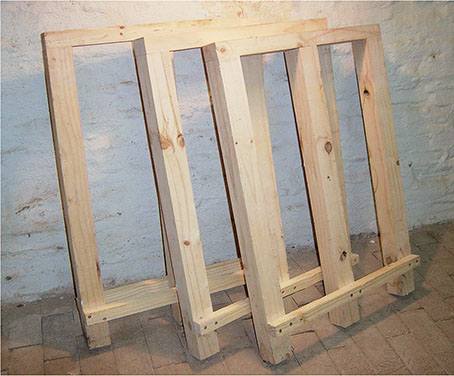
6 The three leg assemblies, as shown in the photograph, are now complete. Line them up and check that they are the same height, width and construction since they form the main structure of the workbench and need to be well built.
ASSEMBLE THE WORKBENCH
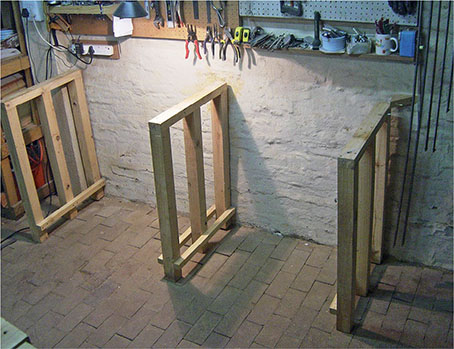
7 Choose the desired position of the workbench and place the three leg assemblies against the wall, as shown. The spacing between them must be equivalent to that of the length of the bottom shelves (B).
TIP: Ensure that the back legs are flush against the wall and compensate for an uneven floor with wedges under any of the legs (E), as needed.
8 Place each of the bottom shelves (B x 2) on the bottom shelf supports (C x 4) and fasten down with cut screws along all adjoining sides.
TIP: Accuracy and aesthetics are not important for constructing the workbench, but it’s still good practice to use pilot holes and space the cut screws evenly as this strengthens the joint.
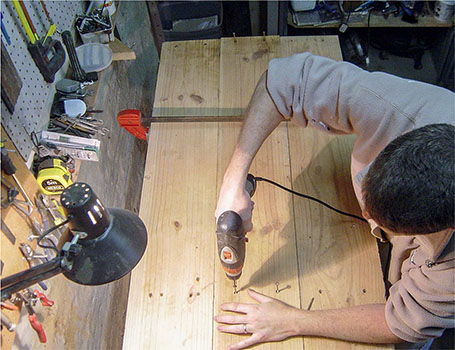
9 Starting at the back, successively position the work surface boards (A x 3) on the top of the work surface supports (D x 3), as shown in the photograph.
TIP: Ensure that major knots in the surface or corners of the wood are on the underside as they will weaken and erode the top surface after prolonged usage.
10 Move the assembly away from the wall and clamp the work surface boards (A x 3) to each other along the width of the assembled work surface, using sash clamps. This will ensure a tight fit and improve the integrity and strength of the work surface. In the clamped position, fasten the work surface boards (A x 3) with cut screws using a power drill to fasten along the top of the three leg assemblies, as shown in the photograph.
Front view of completed workbench

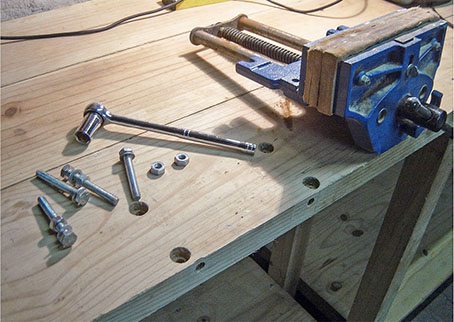
11 Drill the required holes in the workbench to accommodate the mounting bolts for the bench vice you wish to install. The position and size of the bolts will vary depending on the size and make of your bench vice. For this vice I chose to countersink the holes so that the head of the bolt does not protrude above the work surface.
See pages 18–20 of the Tools and Techniques chapter for demonstrations for using various power tools with this workbench and vice.
TIP: Generally, the vice goes on the side of the workbench which corresponds to your strongest hand, which would have been the right-hand side for me. The reason for this is that you would use this hand to tighten the vice; however, I prefer to use my strongest hand to position the work piece in the vice, which means the vice must be mounted on the left-hand side. Your needs may vary and you can always move the vice later on if required.
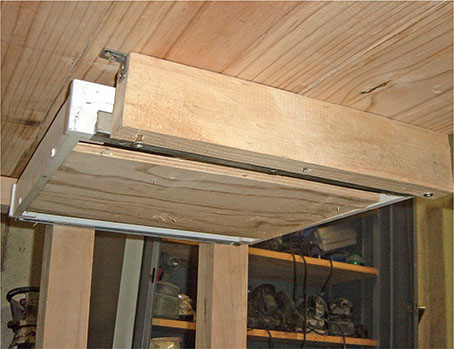
12 The bench vice in the photograph required four bolts in the positions shown. Mount the bench vice using a spanner and socket wrench and ensure the nuts and bolts are tightened well to withstand strenuous clamping. If the vice is new, you will need to mount small boards on each of the inside clamping faces of the vice. Use small bolts in the holes provided and ensure that these bolts are countersunk.
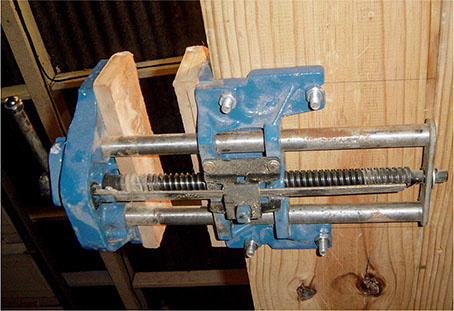
The photograph above shows the installed bench vice from underneath. Note the two small boards mounted on each of the inside clamping faces.
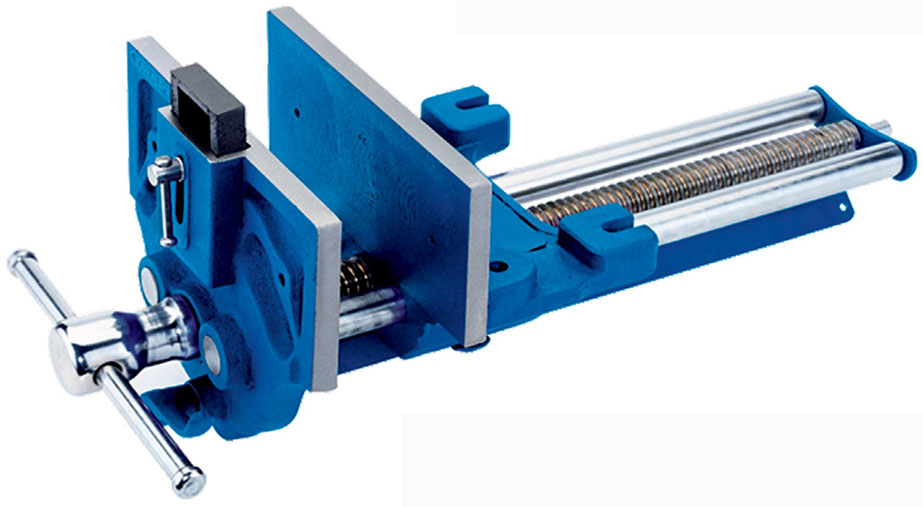
A bench vice is useful for clamping a work piece and consists of two parallel jaws which can be closed together using a screw.
13 I also mounted a drawer underneath the work surface on the right-hand side of the workbench. This photograph is taken from underneath the work surface and shows the back of the drawer, as well as one of the wooden side brackets on which the drawer railings were mounted.
14 I fitted a socket spanner set inside the drawer for handy access when using the workbench. Although the set is good quality, the case in which it is packed does not keep the different components in place when it is moved around. Now that the case is fixed in place and conveniently located, I can quickly access any component I need.

Bottom view of workbench