

Chapter 7
Compared to the weeks and months leading up to a thru-hike, I find life on the trail to be calm, refreshing, and a serious amount of fun. There is a simple peace to putting one foot in front of the other. I also find joy and security in knowing that for the next few months, my goal is singular and simple: safely get to Canada or Mexico or Mount Katahdin or wherever by power of my own feet. Every fiber of my being is dedicated to this cause.
There’s an honesty and authenticity that comes from putting my body and mind toward that goal and being in tune with the natural environment around me: a mind, body, place connection that gives me flashbacks to moments on the trail even when I’m at home. On the trail I am free to be me.
But that doesn’t mean that the day-to-day routine of a hike is a cakewalk either. Weather, injury, and mental challenges all adversely affect the hiker. In fact, although I’ve completed twenty long trails, I have quit three. I’ve had a lot of time to decompress and reflect on why that was. It’s one of the reasons I wrote this chapter—to prepare you for the on-trail challenges that no one talks about, and to give you all the tools I can to keep you on track to reach your goals.
When people quit trails, there’s usually not just one reason. The first time I hiked the AT, I thought about quitting, and it was for a combination of several smaller reasons—each fairly minor—including chafing on my feet and an awkward social situation. Each additional unpleasant thing—a wet campsite, dehydration, an unpleasant hitchhike—could’ve been the straw that broke this thru-hiker’s back. My biggest defense was a series of daily routines and rituals to keep my spirits and morale up.
By thinking through some worst-case scenarios from the comfort of your home now, you can prevent common thru-hiker errors and make your hike more fun. Learning about this ahead of time can make a huge difference in your success. In this chapter, we’ll learn about those day-to-day routines, how to stay motivated, and basic safety and medical care.
EATING AND DRINKING
Food and water are the gas in the tank of your thru-hiking machine—they’re the foundation of powering a hike. We eat and drink every day of our lives, so it should be simple, right? But it’s funny how the simplest things have the power to derail us if they get out of balance. Life on the trail requires keeping the gas tank full. While we covered a lot of nutrition information in chapter 5, here are some more practical tips for staying fueled during your long days on the trail.
AVOID HITTING THE WALL
The body can only digest roughly 300 calories and a liter of water per hour. So giving your body fuel frequently helps keep you from hitting the wall when you’re hiking. Most hikers like to eat something—an energy bar, a candy bar, or a calorie-containing drink—every 2 to 3 hours (or more often!) to prevent bonking. Once my hiker hunger gets going on a thru-hike, I eat three bars (at least 600 calories) every 2 to 3 hours.
The Danger of Hanger
Hanger: Anger caused or exacerbated by hunger.
Hanger makes you take a minor annoyance and turn it into an on-trail tantrum. Hanger breaks up relationships on the trail. Hanger plus exhaustion turns any mishap into a confrontation. Hanger destroys friendships. Hanger leads to poor decision making. Hanger causes fights between hikers and local businesses, ruining the trail for everyone else. So here’s the bottom line: Eat often. Eat regularly. Monitor your blood sugar. Avoid hanger.


It seems like it shouldn’t be hard to eat frequently, but you’d be surprised at how difficult it can be in practice. Maybe you’re trying to get through a hard section in the rain and don’t want to stop to eat. Or maybe being at altitude or intense exercise decreases your appetite. Or maybe you plan to stop to camp in 20 minutes, so you decide not to eat.
Delaying eating works fine if you really will stop in 20 minutes, or if the hard section will be over in a few minutes. But if the trail stays tough, that’s a bad time to forget to eat. You need the food to fuel your body and mind to make good decisions. Or if the place you intended to camp is full or doesn’t have good places to set up, you’re going to have an even harder time choosing a campsite on an empty stomach. Being hungry can make you less attentive to obstacles and dangers and make your footwork sloppy.
I’ve been in both these situations many times. One way I combat this problem is to stop, even if it doesn’t seem like a great time, and eat a very small (100 calories or less) snack to push me over until camp time or a good break spot. That way I can continue making good decisions.
STAYING HYDRATED
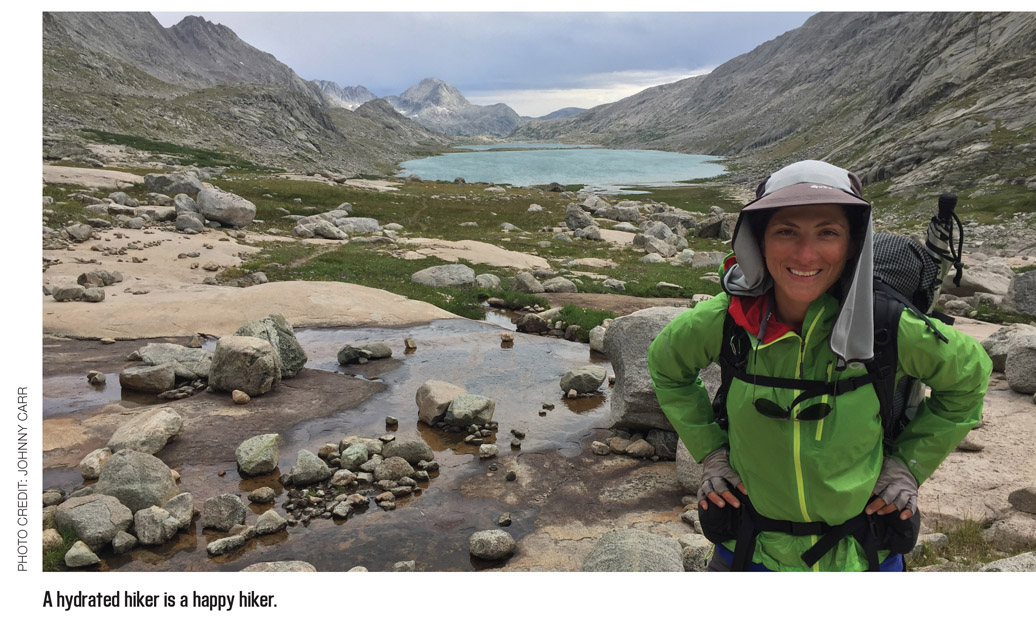
Staying well hydrated is another of the most important things you need to do every day to keep yourself healthy and strong. Dehydration is just as dangerous as hanger—worse, actually, because it’s a health risk. Here are my best tips for staying hydrated on a long hike.

□ Tip 1: Make water easily accessible and potable. I drink filtered water from a Platypus Hoser with an inline Sawyer Squeeze filter while I’m walking. If you don’t like to use a hydration reservoir, make sure you can reach your water-bottle side pockets easily without taking off your pack. Make sure that the water in those pockets is something you know is drinkable. “I don’t want to have to stop or take my pack off for water” and “I don’t want to stop to filter or treat my water” are both big reasons people end up dehydrated.
□ Tip 2: Time your breaks. If you’re in the desert or a dry area, take your break near a water source. Use this break to drink a few liters (also known as “cameling up”). Don’t overdo it—that can cause some really uncomfortable sloshing in your belly—but drink plenty. (It’ll take some trial and error to figure out how much you can comfortably chug.) Leave the water source feeling completely hydrated. That way you can avoid touching the water in your bottles for the next few miles.
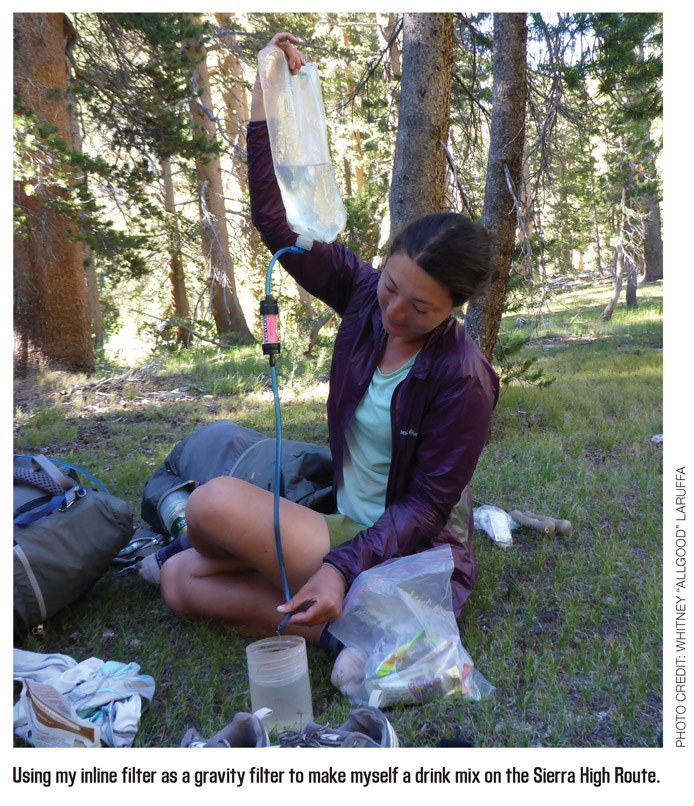
□ Tip 3: Use drink mixes. A pleasant taste helps you drink more. In addition, drinking a mix with salt helps you get enough of this essential mineral. Salt helps you retain the water you do drink instead of peeing it all out or getting water bloated. Find drink mixes with salt (plain old Gatorade mixed with some added salt works well enough for me). Otherwise, eat salty foods.

□ Tip 4: Camp near water—and use it. If possible, camp near water sources (but not too near—more on that later). That way you can make sure you are plenty hydrated at night, and also plenty hydrated in the morning.
□ Tip 5: Be hydrated at night. Night is when your body recovers and rebuilds itself, and those processes need water to work. Yes, peeing at night while you’re camping can be unpleasant, but getting dehydrated is worse in the long term. And you don’t need to go overboard; if you are hydrated enough to pee before going to sleep and need to pee when you wake up, you should still be getting some recovery benefits.
□ Tip 6: Always carry extra water capacity. You might only have a liter or two full at any given time, but even if you are hiking somewhere with plenty of water, you should have the option to tote more. I usually carry an extra Sawyer or Platypus bag because they weigh very little and can be condensed down to a small size. Sure, they ride in my pack empty most of the time, but this extra capacity gives me the flexibility to carry more water if there are fewer water sources than I had expected (e.g., many springs and streams have dried up for the season).
SIGNS OF DEHYDRATION
There’s a saying out there: “A happy hiker pees clear.” And it’s true; monitoring your urine is a great way to make sure you’re getting enough water. Your pee doesn’t need to be perfectly clear, but it should be pale yellow rather than the dark shade of apple juice. I also use the rule of thumb that I should pee at minimum four times a day, or at least once every 3 hours.
On the other hand, if you experience any of the following symptoms, you might not be getting enough to drink:
• Headache
• Loss of appetite
• Thirst
• Dry mouth
• Irritability
• Dizziness
• Loss of energy
If you think you might be dehydrated, increase your water intake and consider taking a break to mix up a drink mix.
Do be aware that there’s such a thing as being too hydrated. Or to be accurate, drinking too much water without getting enough salt can cause a condition called hyponatremia, where the level of salt in your blood gets dangerously low. If you’ve been drinking and peeing a ton and experience any of those dehydration symptoms (besides thirst), make sure to eat a salty snack and see if it resolves.
My ultramarathoning friends tipped me off to salt pills, which are for sale at running stores and REI. These provide a huge dose of salt. I think they improve my performance and focus when I feel like I’ve hit a wall, so I always keep a few in my med kit. Salt tabs are pricey, though. I’ve found a salt packet from a fast food joint seems to work almost as well.
MAKING CAMP
Making camp is another key everyday part of a hike. Luckily, making camp on a thru-hike isn’t much different from making camp on a shorter backpacking trip. You may be using lighter shelters than you’re used to, however, which requires more careful site selection.
Remember to plan your campsites ahead, not just during the route-planning phase but also while on the trail. The AT often goes straight up and down mountains, so there are limited flat spots. The PCT is designed to have many ridge walks, which means it also has limited flat spots at times. Each day (preferably in the morning), look at your maps and databook and plan where you hope to stay so that you don’t end up with a precarious camp on the edge of a cliff.
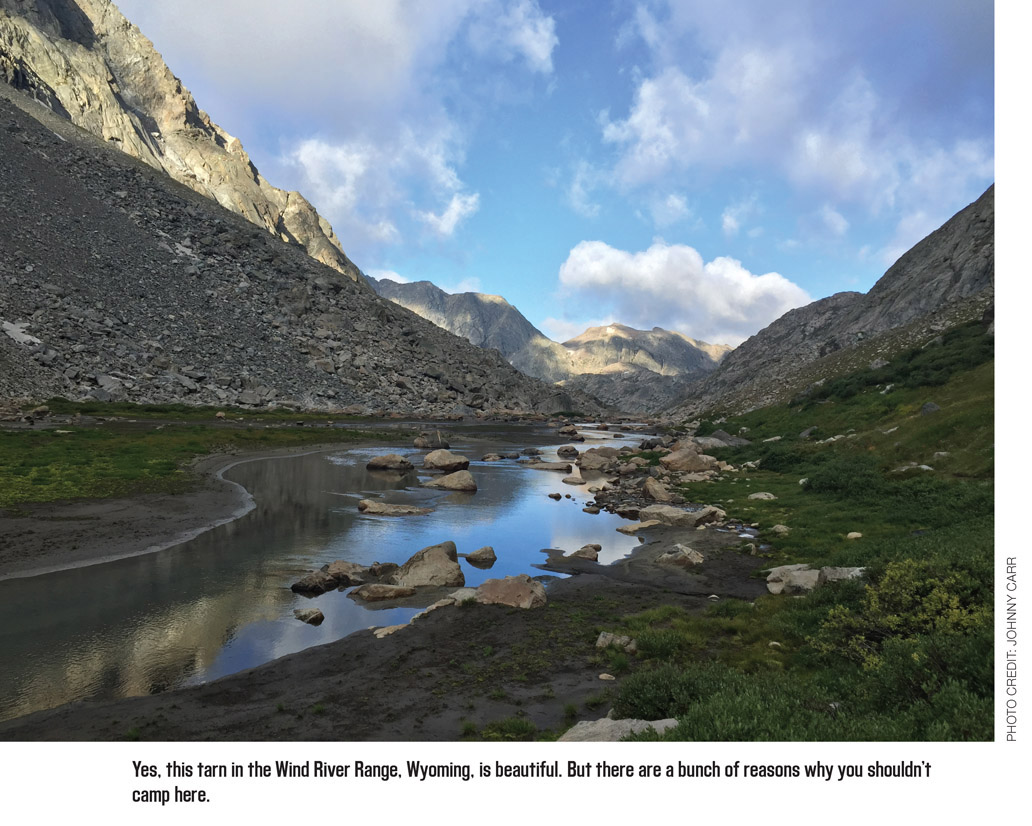
LOOK FOR SITES AWAY FROM WATER
Despite what every tent ad shows, camping right near water is a bad idea. Why? Well, for one, it’s against the Leave No Trace principles we’ll go over in chapter 8. But even more than that, lakes and rivers are usually in the low points of an area. Cold air settles to the lowest spot. That means you’ll be colder camping near the water than choosing a spot a bit higher. Also, moist air near water sources can lead to condensation in and around your tent. That makes you wet—which makes you colder.
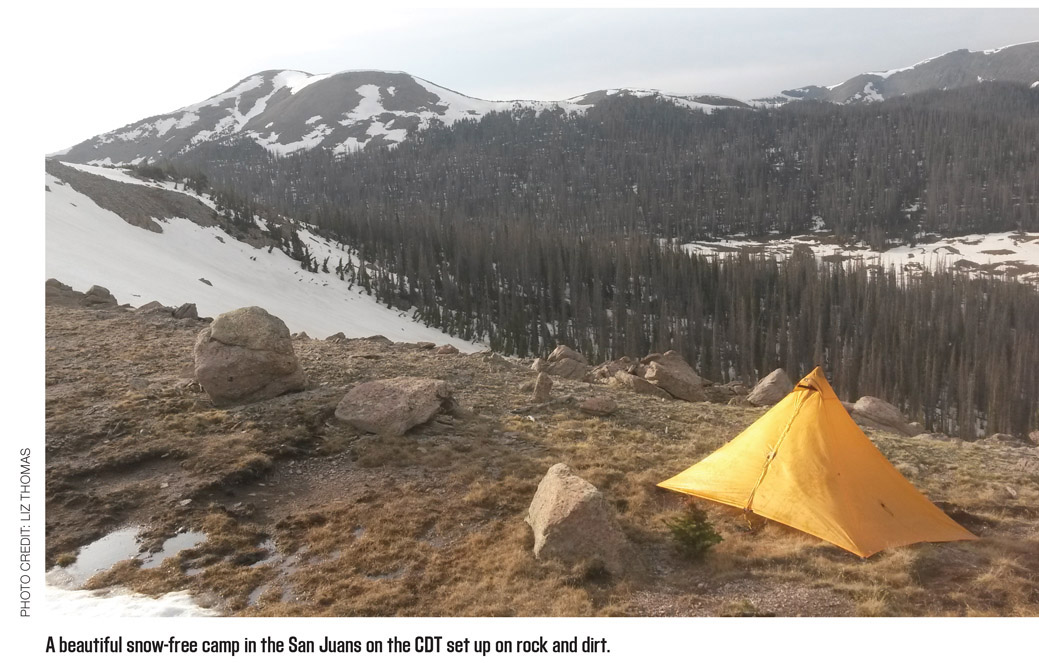
Find a spot at least 200 feet from water—that way wildlife will have plenty of room to get a drink without getting scared by you (or you getting scared by them!) and you’ll avoid the wet, cold terrain trap that water usually creates. The best campsite may be a dry camp. Eat near water, hike on a little bit, and sleep away from water.
PICK A DURABLE SURFACE
Pick a surface like sand, pine needle duff, or slickrock that won’t look any different after you camp on it. Not only can your tent cause damage to meadows, plants, and grass-like vegetation, but the plants lead to condensation. You and your gear get wet because plants undergo a water vapor exchange (aka “breathe”). Some plants can also cause damage to your tent or other gear: Think of pine needles puncturing holes into an almost see-through tarp, for example.

As grand as the views are from an alpine campsite, camps below treeline are more protected from the elements. If you camp under a tree, the tree acts like another roof over your head—keeping out water, blocking wind, and also keeping you slightly warmer. Caveat: Especially out West, be careful to look around and make sure the trees you’re camping under are all alive. Dead standing trees are called “widowmakers” for a reason.
STAY AWAY FROM TRAILS AND ROADS
There are two reasons I recommend this. First, it’s polite. We hike to get a wilderness experience, and seeing tents up and down the trail does not contribute to that. Camp out of sight from the trail to maintain that protected view for other hikers. Second, it’s arguably safer. If the first is not enough incentive, camp away from the trail for protection from wildlife and humans. Wildlife, including bears and big cats, use the trail at night because it is easier than walking off-trail. That’s one reason why it’s common to see scat from large wildlife on the trail. Second, if anyone were to mess with you and your camp, they would likely find and access your camp from the trail. By camping away from the trail, you’ll be harder to find. And the farther you are from a road, the fewer random troublemakers are likely to happen upon you. (That’s my theory, at least.) To avoid this issue, especially when I am solo, I camp at least a mile away from the road and plan my days to end so I am not near trailheads.

Cowboy Camp
Cowboy camp: To camp under the stars without a shelter.
Cowboy camping is the fastest way to set up and break down camp, which is why it’s a thru-hiker favorite. It’s not for everyone—especially for those who don’t like bugs—but it can be a liberating way to enjoy the wilderness.
TRY COWBOY CAMPING
Many hikers, especially on trails in the American West, opt not to use their shelter on dry nights and instead cowboy camp. If you are cowboy camping, pay extra attention to picking a good site as just described. You’ll have no protection from wind or condensation, so good campsite selection is even more important. Check the sky or forecast (if you can) before you decide to cowboy camp, and be prepared to set up your shelter if you start feeling raindrops. Cowboy campers are especially vulnerable to getting condensation on their sleeping bags, so tree coverage is key (unless you’re in the desert). Always use a groundsheet to give your sleeping bag and pad some protection from plants, rocks, and sand that could moisten or abrade your gear. Pick a site free of ant hills and watch for mosquitoes. Cowboy camping isn’t for everyone.
HOW TO STORE YOUR FOOD AT NIGHT
One of the biggest questions I get from potential hikers is what to do with your food when you’re at camp for the night. Let’s go over the options. Some sections of trail, like the PCT in the Sierra, require bear canisters. If so, then it’s simple to know what to do with your food. Land managers will even tell you which models are approved. But if a bear canister is not required, most hikers don’t carry them, because they’re heavy and bulky.
If your trail does require canisters, you’ll probably need to buy your own, unless you’re hiking a short-enough section that renting one from a gear store or ranger station makes sense logistically and economically. Several companies, like Wild Ideas Bearikade, offer canister rentals and will mail to your home or the trail town before you enter bear country.
Bear canisters aren’t very big, so pick calorie-dense food and food without a lot of dead space to maximize the room in your can. Remember to put all items with scent into your bear can, such as bug spray, sunscreen, lip balm, and of course, food. At night, put your bear can 100 feet from your camp. Choose a spot somewhere visible from your tent and where it can’t roll away or go downriver if a bear messes with it. Bright tape on your can makes it easier to find.
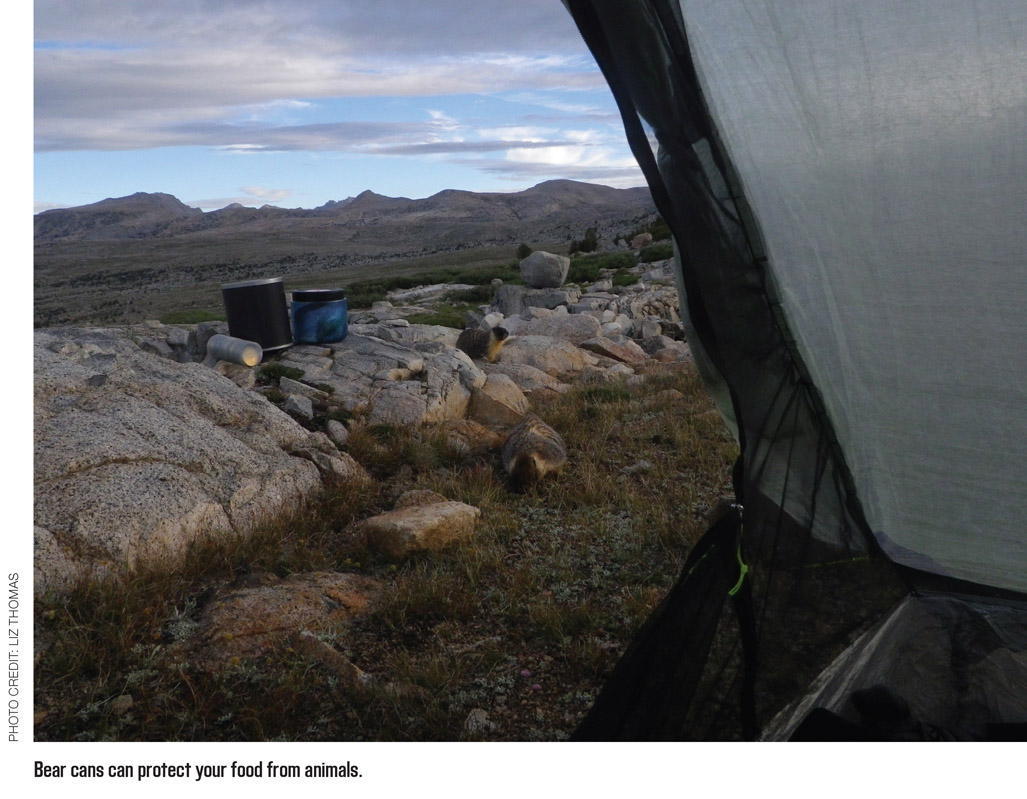
Besides a bear canister, the other main way to protect your food from bears is by hanging it in a bear bag. Hanging a bear bag is an involved process. In practice, most thru-hikers are selective about when to hang their food. They’ll carry bear canisters or hang where they are legally required to do so, or when they’re in grizzly habitat or areas with known bear activity. Otherwise, for better or worse, they usually don’t bother.
To bear bag, you’ll need 50 to 100 feet of rope, a stuff sack for your food, and a few carabiners. A smaller stuff sack and a rock are optional. (Note: Some companies like Mountain Laurel Designs sell ultralight bear bag setups that include all the parts you need.) Find a tree 100 feet from your camp, or up to 300 feet from camp in grizzly country. Make sure that tree has a branch that allows you to get your bag 12 feet off the ground, 6 feet from the trunk, and 6 feet below the branch. Here’s how to do a simple single-branch bear hang:
Put a rock or sand into a small stuff sack and attach it to one end of your rope. Attach the food stuff sack to the other end of the rope. Remember to put all items with scent into your bear bag. Throw the small stuff sack over your selected branch. Make sure your friends are out of the way when you throw in case your aim is off. Pull the rope to raise the food stuff sack to the appropriate height/distance from the tree.
To make your life easier, throw your rock stuff sack and get your rope up before dark. You can always attach your food bag and lift it after dark, but aiming and throwing at night is a pain.
The Ursack is a chew-proof bag made of material that is very hard for bears (or humans) to tear, chew, pierce, or cut. Ursacks save hikers from the pain of having to throw a rock over a tree branch while providing a bear-proof option that weighs less than half of the lightest weight bear canister. It also works in alpine areas where trees are too small to develop significant branching. There are a few downsides, though. The Ursack has not been approved for use in some areas, most notably Yosemite National Park and parts of the Sierra. It also requires special care to make sure you use it correctly, though I personally find it much easier to use correctly than it is to bear bag correctly. Some users are skeptical of the Ursack because bears can still crush your food, even if they won’t be able to steal it. Nonetheless, I personally find the Ursack to be one of hiking’s greatest inventions. Its light weight, lack of bulkiness, and ease of use make it ideal for thru-hikers when regulations allow for them.
To use the Ursack, put all your odorous and edible items into an odor-proof bag (more on that later). Place the odor-proof bag inside the Ursack. Tie the Ursack’s cord with a double overhand knot. Make sure not to overstuff your bag and to close off the bag completely so there is no opening. Then, use a strong knot like a figure 8 to attach the Ursack to a fixed object like a tree, preferably at least 100 feet from your tent. You can also hang your Ursack from a branch using the methods described in the previous section.
Even where bear canisters or hanging aren’t required, you still need to make sure you’re protecting your food from smaller critters. Mice, squirrels, chipmunks, and marmots are responsible for far more food and pack damage than bears. These animals love salt, so they’ll chew up your clothes, boots, even a hiking pole handle! Here’s how to protect your gear and food when you’re not in bear country.
Nightly Camp Chores Checklist
On the trail we have ultimate freedom to do what we want, when we want. With freedom comes responsibility for our bodies, the natural environment, the communities we walk through, and how we interact with others. Having a routine on the trail can take some of the guesswork out of “what to do next” and help you automate essential tasks. Here you’ll find my nightly camp chores checklist, which I developed so that I don’t forget any of the crucial tasks that make my hike more pleasant.
Personal clean-up:
□ Get water
□ Bathe
□ Change into dry clothes
Camp setup:
□ Clean camp
□ Set up shelter
□ Put down groundcloth
□ Set down sleeping bag and fluff
Dinner:
□ Cook
□ Eat
□ Wash pot
□ Brush teeth
□ Remove scented items from pack, including pockets
□ If necessary: tie up Ursack, stow bear canister, or hang bear bag
Foot care/gear prep:
□ Laundry (especially socks)
□ Remove insoles
□ Hang up wet clothes
□ Foot care/blister care
□ Journal
□ Sleep
If it will get below freezing at night:
□ Bring water bottles inside and flip them on their side so ice won’t prevent you from drinking in the morning
□ Put electronics inside sleeping bag or bivy
□ If carrying a water filter, put it inside a Ziploc bag and put inside sleeping bag or bivy
□ Put shoes and insoles inside a plastic bag and place inside sleeping bag or bivy
□ Take any wet clothes, especially socks, and put under sleeping pad but above groundsheet
I carry a Loksak OPSAK odor-proof sack as my food bag. These plastic bags look like oversize Ziplocs and, when used correctly, have been shown in studies to be able to prevent bears and other wildlife from finding food.
When regulations do not specify what to do with your food, besides hanging a bear bag or using a bear canister, here are your choices:
• Option 1: Leave it outside. Leaving food outside your tent increases the chances your food may get taken. You can hang your food bag from a low branch that you can reach easily, so at least it’s off the ground a little.
• Option 2: Keep your food inside your shelter. In the unlikely scenario that an animal wants your food enough to mess with you and come into your tent, then you’ll have to interact with the animal.
It’s ultimately a benefit-cost-risk analysis decision for each hiker to make. If you know you won’t be able to sleep at night having food in your tent and are worried about it, then by all means—hang your food. Remember your food storage decisions not only impact you but also the life of an animal.
DAILY ROUTINES
You can get a good overview of life on the trail just by learning what a typical daily routine looks like. Daily routines will change depending on sunrise/sunset, temperatures and climate, terrain including water and campsite availability, and your physical condition, skills, and personal preferences. Since there can be some major differences in routines, I’m sharing both mine and my friend Amanda “Zuul” Jameson’s.
This was my schedule for the Wasatch Range Traverse I did in September 2015. As I was solo and on a tight schedule, there wasn’t a lot of hanging-out time. This trail didn’t have a ton of water, so I stopped at almost every water source and drank and refilled bottles. A typical day on the trail obviously varies, but this is a good model for how I spend some of my more aggressive days on the trail:
Night before
If not in bear country, prepare a breakfast drink mix to be ready to down in the morning. If in bear country, prep a bottle of clean water ready to have drink mix added to it.
5:30 a.m. (sunrise)
Get up and start packing.
5:45 a.m.
Finish packing and down a drink mix plus water. Put a few energy bars or gels in my pocket and start walking.
6:30 a.m.
Start eating other parts of my breakfast (what’s in my pocket) as I’m walking.
7:00 a.m.
Short break to shed some layers, maybe poop.
7:30 a.m.
Start putting on sunscreen while walking.
8:00 a.m.
Eat another bar while walking.
10:00 a.m.
Eat another bar.
12:00 p.m. or whenever I reach a good spot or water source
Sit, take off shoes and socks, and remove shoe inserts from my shoes. Take out my shelter and sleeping bag and hang them somewhere where they won’t snag so the condensation from the night before can dry out. Drink a ton of water and drink mixes. Stretch, and wipe off sweat and dirt. Maybe make a cold meal. Eat. Pack back up and refill water bottles. Reapply sunscreen.
1:15 p.m.
Back on the trail.
3:15 p.m.
Eat another bar.
5:15 p.m.
Eat another bar.
Start soaking a dinner (I was stoveless on this trip.)
7:30 p.m.
Start looking for a campsite.
7:45 p.m. (sunset)
Hopefully have found something. Set up sleeping bag, shelter if needed, and get all my stuff organized.
8:00 p.m.
Get in my sleeping bag and start eating my soaked dinner and other bars.
8:10 p.m.
Prep my breakfast for the morning.
8:20 p.m.
Look at maps and prepare for the next morning.
8:45 p.m.
Go to sleep.
AMANDA’S DAILY SCHEDULE
Amanda’s first thru-hike was the Colorado Trail, which she walked from August to September 2015. While temperatures were cooler, she had great weather, which allowed her to be less strict with her schedule than she would have been with worse weather. Even though Amanda had done a ton of research and got advice from loads of experienced hikers, as it was her first long hike, and she was figuring many things out about herself and her hiking style. She discovered one big problem: She has a hard time eating on the trail.
6:30 a.m.
Alarm goes off for the first time. Evaluate the day in my head, see if I can sleep in a little longer.
6:45 a.m.
Alarm goes off for the second time. Start to gather the things I keep in my sleeping bag—external battery, cell phone, headlamp, SPOT device, hiking shorts, warm leggings. Start the morning dance of getting dressed in my sleeping bag.
6:50 a.m.
Trade top of sleeping bag for puffy, finally sit up. Inhale energy gummies (preferably with caffeine included). Pour drink mix plus dried fruit plus chia seeds into water bottle to mix for walking breakfast. Check maps for the last time this morning.
7:00 a.m.
Emerge from sleeping bag and tent; start packing. Pull out snacks—toaster pastries, energy bars, more gummies—and put in hipbelt pocket. Feel guilty for not eating much, so end up munching while packing.
7:15 a.m.
One last idiot check of the campsite to make sure I haven’t left anything. Bathroom break before walking.
7:20 a.m.
Start walking.
7:45 a.m.
Brief break to adjust layers, force more food/drink mix down my throat. Continue walking.
9:00 a.m. or on any big uphill
Start sucking on energy gummies for energy and to take my mind off the climb. Continue to shovel in food in between gummies and during short breaks to catch my breath.
11:00 a.m. or at a water source
Take wet stuff out of pack to dry and lay/hang out, if applicable. Prep whatever purification method I’m using. Finish drink mix and whichever water bottle is most empty; grab water to purify. Take off shoes and remove socks and inserts while purifying water. Get thoroughly disgusted thinking about eating; cook lunch anyway. Look over maps and elevation profiles while mindlessly chewing and swallowing; adjust day’s goals based on how I’ve been hiking and how I’m feeling. Prep more snacks in hipbelt pocket. Laze about until pot is clean or stuff is dry, whichever comes first.
12:10 p.m.
Start walking again.
2:00 p.m.
Dread eating something. Do so anyway.
4:30 p.m.
20-minute break. Shoes and socks off, inserts out. Grab another handful of something to eat, but only because calories are necessary for hiking. Do one last main check on day’s goals—decide to push or play it safe based on the miles I’ve already made, my target campsite/town day, and how worn out I’m feeling.
6:00 p.m. or last water source
10-minute break for water purification (I drink a lot of water) and more snacking.
7:00 p.m.
Start looking for camp. If I’ve done my planning right, I should reach a campsite noted on the maps around 7:30.
7:30 p.m.
After a little trouble actually finding the camp my maps were referring to, start settling in as it gets dark.
7:40 p.m.
Stare balefully at food. Eat probably less than I should, empty bladder, and retreat into tent when I can’t stand the cold anymore.
8:00 p.m.
Look over maps and such, recalibrate my projected days into town based on the miles I’ve made, mentally prepare myself for tomorrow. Take notes for the day’s blog, or actually blog if I’ve got enough battery between my phone and external battery.
9:00 p.m.
Stare at the tent ceiling thinking that, between my aching muscles and my mind racing ahead to tomorrow, I’ll never actually sleep.
9:15 p.m.
Eventually sleep.

TRICKS FOR THE LONG HAUL
Staying comfortable on the trail isn’t about avoiding everything that can make your trip hard. It will rain. It will get dark. You will get hungry. And you will make mistakes. But the key to succeeding as a thru-hiker is realizing that you have less room for error built in to your life on the trail than you do back home, or even on a shorter trip. Because of that, it takes vigilance and discipline to keep your margin of error as wide as possible and make sure that one mistake or hardship doesn’t snowball out of control.
What if it’s raining on your way to your city office? No big deal, let your pants get wet, even cotton ones. They’ll dry at your desk by lunchtime. Rain on a day hike? You’re fine letting yourself get soaked on the way to the car, then cranking the heater. Even on a shorter backpacking trip, you’ll probably recover from a night or two with a wet sleeping bag; you’ll have a bed, roof, and dryer soon enough. On a thru-hike though? Do all you can to keep your nighttime clothing and sleeping bag dry, because they’re the only things that stand between you and hypothermia. There’s not nearly as much room to screw up on a thru-hike, so it’s up to you to guard and maintain the buffers that stand between you and a dangerous situation.
As a thru-hiker, you need to stay vigilant, even though you may feel too tired to do things the “right way.” Take care of problems now, before that blister becomes infected or that scrape on your pack becomes a hole. Keep your key gear dry. Pack up carefully so you don’t lose anything. Store your food properly so critters don’t run away with it. If you’re feeling bad, sit down, take a break, eat and drink something. And every time you make a decision, keep that margin in mind, and make the choice that keeps it wide. You’re not out there to prove anything. You’re out there to have fun and be safe.
PACE YOURSELF
The most obvious unique feature of a long hike is that you’ll be hiking, well, a long time. Everything you do on any given day impacts what can happen the next day, the next week, and maybe even the next month. We’ve already discussed pacing in the fitness and route-planning chapters, but it’s so important, I want to talk about it again here.
The pace you choose each day should be a pace you can sustain for the length of the trip. If it is unsustainable, you can expect to take some zero days or deal with some painful consequences. I advise people to start their hikes at half to two-thirds of their physical ability. If you can day hike 20 miles, start your trip at 10 miles per day. Go at that pace for a week, and then ramp it up to 15. If you’re out for a six-month trip, your first two to three weeks are your training weeks. They help you get your “trail legs.”
Your physical capability isn’t just a matter of how many miles your muscles can go, but also how many miles your joints, ligaments, and tendons can take. Thru-hiking is not just about having chiseled thighs or ripped calves. It’s how strong your far-less-sexy and less noticeable foot and ankle muscles are. Foot and ankle injuries, more than any others, are the ones that take people off the trail. And injuries don’t just happen to your body; they affect your morale and psyche, too. Review how to train for a thru-hike (see chapter 2) for ways to strengthen your feet ahead of time.
If you’re only using half to two-thirds of your physical strength per day on the trail, you have a good margin of error if something unexpected happens. You have enough strength to bail out a buddy. You have enough strength to push it to town to avoid a big storm. You have enough strength to make good decisions in crises.
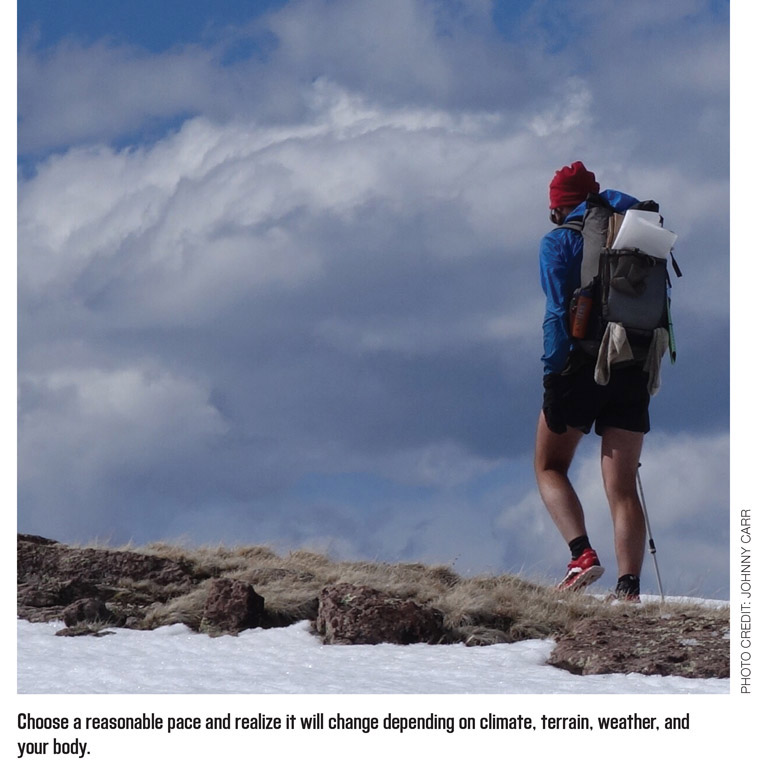
Take Amanda’s advice from the previous section: during breaktimes, evaluate whether you are on track to meet your day’s goals based on how you are feeling, the progress you’ve made so far, the weather, and the terrain ahead. Thru-hiking is about pushing yourself, but also knowing your limits. Finding the balance between the two is an art that takes a lifetime to master.
Staying within your limits doesn’t just mean keeping your daily mileage within reason. It also means keeping your overall mileage in reason. Some people find that their body holds up well on thru-hikes of 500 miles, but starts falling apart around 1,000 miles. Section hiking is the smart thing for many hikers’ bodies and minds (not to mention their jobs, relationships, and finances).
Pushing yourself past your limits—or close to the limit of your physical ability for many days—is one of the main reasons people quit their long trail. Why?
• No fun. Going past your limits sucks the joy out of a hike. It’s fun at first to see how much you can push, but after a few days, it quickly turns into a death march.
• Overuse injuries. Just a day or even a few hours of going past where your body is comfortable is enough to cause the kind of damage that will take you off the trail for a few weeks.
• Minor injuries. Pushing past your limits makes you more susceptible to blisters or other foot wounds. These can make your hike less comfortable (making your hike less fun). In extreme cases, these minor injuries can get infected, which will also take you off the trail.
• No energy to take care of yourself. I’ve met many hikers who push so hard they’re too tired to eat dinner at night. If you don’t eat, then you don’t get the benefit of recovery that food can provide (not to mention the morale boost food provides).
• No energy to make other smart decisions. If you’re exhausted, it’s going to be a lot harder to navigate. It’s going to be a lot harder to set up your shelter. Everything just becomes a lot more difficult when you are tired.
HIKE YOUR OWN HIKE
DON’T COMPARE YOUR PACE TO ANYONE ELSE’S
Here’s Amanda “Zuul” Jameson, who thru-hiked the Colorado Trail 2015 as her first thru-hike and the PCT in 2016.
As a newbie thru-hiker, I wish I had known not to compare myself to others on the trail. At the beginning of my CT thru-hike, I was doing 12 to 18 miles per day, but I was getting passed a fair bit, especially on the uphills. In towns, I heard from others that “normal” thru-hikers did 20 miles in a day—or more. I just wasn’t there. I kept mentally punishing myself for “not being good enough.” It took me about 340 miles on a 486-mile trail to realize that, even though I was walking fewer miles per day than others, I was still getting it done. That was an amazing accomplishment. I ended up cutting myself some slack. And to my amazement, I averaged 20-mile days for the last six days of my hike. It’s your hike. Don’t let comparisons diminish this awesome thing you’ve set out to achieve.
—Amanda “Zuul” Jameson
HIKE YOUR OWN HIKE
HOW MY PACE FOUND ME
Here’s Dean Krakel, the 63-year-old photojournalist from Denver, Colorado, who hiked the Colorado Trail in 2015 as his first thru-hike.
About halfway through my CT trip, I was looking back across the mountain, and I saw these two figures moving incredibly fast—faster than any people I’ve ever seen walk with a pack. They just floated over the landscape. They passed everyone else on the trail and would have passed me, except I was standing there waiting for them—I wanted to see who they were. They were a pair of women who did ultra-running but were backpacking, and they had light packs and were killing 30-mile days. They were knocking it out. They’d cover in a day what it would take me several days to cover.
I hung with them for about 5 miles and then said I needed to take a nap. We said goodbye, and I never saw them again, but I did talk with them after the trip. They said they had actually decided to slow down after they met me and, eventually, they quit the trail at the midpoint. I finished.
I admire people who can consistently walk 20-mile days. That was my goal when I started the CT. I trained hard. I cut my pack weight down to 24 pounds so I could knock out 20-mile days. But, as it turned out, I didn’t define the pace. The pace found me.
Every day on the trail was different. My mileage varied. But I turned out to be a pretty solid 10- to 12-mile-per-day guy. For me, the pace worked. I was able to study elk tracks and take pictures and journal and take naps. I found that the slower pace let me live the Colorado Trail instead of just move along it. To set pace, you need to figure out what the intent of your trip is. Is it something you are checking off the list? A physical challenge? What is it? For me, the entire trip was a journey. I even started enjoying hitching into town to get resupplies. Previously, I had considered it an obstacle to my time and mileage, but the towns became a part of my trip, as did everything. Take time to smell the flowers, study the tracks, drink from the springs, feel the environment around you, listen to the wind, and look at the clouds. Somebody’s got to do it.
—Dean “Ghost” Krakel
Remember: As a hiker, making miles is not your only job. Taking care of yourself is your job too. Scaling back to half the mileage you know you can do may seem drastic, but I’ve seen skilled and super-fit ultramarathoners and military professionals get off the trail from overuse. Those guys let their ego get in the way of making their goal, for a number of reasons:
• Needing to prove to themselves and others that they can do a particular task or pace.
• Trying to stay with a particular hiking group or partner who is faster than them.
• Setting an unreasonable deadline to finish the hike.
A thru-hike is a marathon, not a sprint. Even if you start out slow, you should not judge yourself. You will get faster and be able to hike more miles. But that’s only if you manage to stay on the trail that long.
CARE FOR YOUR GEAR ON THE TRAIL
Just like your body, your gear needs special love and attention to make it through a long hike. You need to take care of it to make it last. First, don’t ever throw your pack down. Most ultralight gear—heck, most gear—needs to be babied to survive a thru-hike. Don’t sit on your pack. Don’t throw it on the ground. Don’t set it on sharp rocks. Don’t drag it across rough surfaces. Take care when walking through brush.
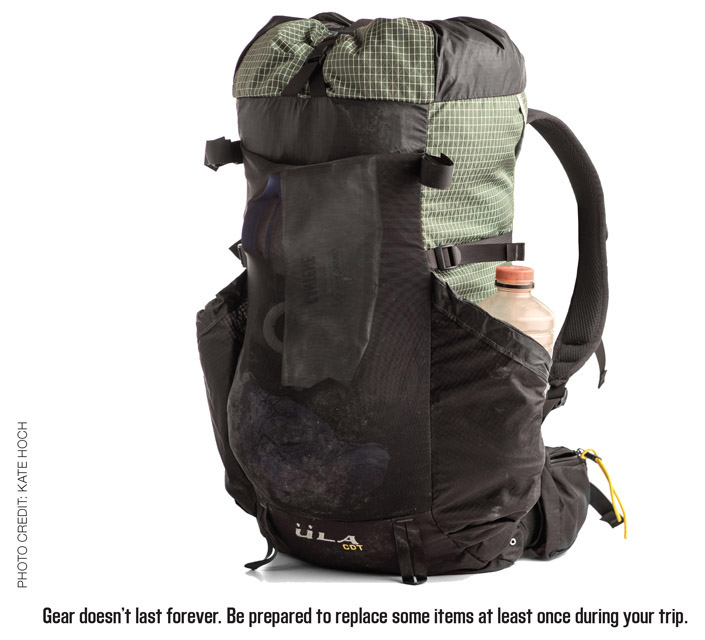
Dry your gear out every day. All shelters and sleeping bags will get a little condensation (dew) at night. Inside your shelter, your breath condenses and forms droplets on the walls. Don’t worry—your tent isn’t leaking (probably). It’s just condensation. Moisture can lead to mold and other wear on your shelter. It can also decrease the loft (puffiness) of your sleeping bag, which makes the bag less warm.
That’s actually how I got my trail name, “Snorkel.” During my first AT thru-hike, my down bag wasn’t as warm as I thought it should be. A guy at a gear store figured out it was because I was keeping my head in it every night and my breath was getting trapped in the down, decreasing the loft. “You need a snorkel,” he told me.
Bottom line: Get rid of that moisture! Thru-hikers need to be diligent about drying their gear at every opportunity. I dry my gear during lunch breaks. This is easier to do on a drier trail like the PCT. On a wetter trail, like the AT, I would plan my lunch around breaks in the clouds and rain.
Having dedicated sleeping clothes protects your sleeping bag from grit and dirt, which cause wear. It also reduces the amount of body oil and sweat that end up in your bag. Oil and sweat are associated with smelliness and reduced loft. Many hikers wear their mostly clean night clothes while they are in town resupplying. This makes them look more respectable when hitchhiking (easier to get a ride) and less offensive during the ride (not as smelly).
Consider a sleeping bag protector. You can protect the outside of your sleeping bag with a breathable bivy bag or sleeping bag cover—essentially, an extra layer of sleeping bag liner fabric that keeps condensation and dirt off your bag. You can protect the inside of your bag from the dirt on your body by using a liner bag. Both add additional warmth to your sleep system and extend the life of your bag.
Remember to wash your sleeping bag. I usually wash my bag at least once during a 2,000-plus-mile trip. I will take a zero (rest) day and either use a laundromat or hand wash it. Washing my sleeping bag at home after a long trail is a favorite end-of-hiking season ritual.
Use breaks wisely. How often you take breaks and how long those breaks are really depends on how you would like your day to go. It also depends on how long you can stand to be on your feet without needing to take the pressure off them. As you get stronger and more skilled in your hiking, you may find you need fewer breaks. Or you may find that becoming a stronger or faster hiker means that you can afford to take more breaks. Regardless, it’s good to maximize your time on a break. While there is no one right way to take breaks, I make sure I maximize my time off my feet by doing a few “chores” that help me care for myself and my gear.
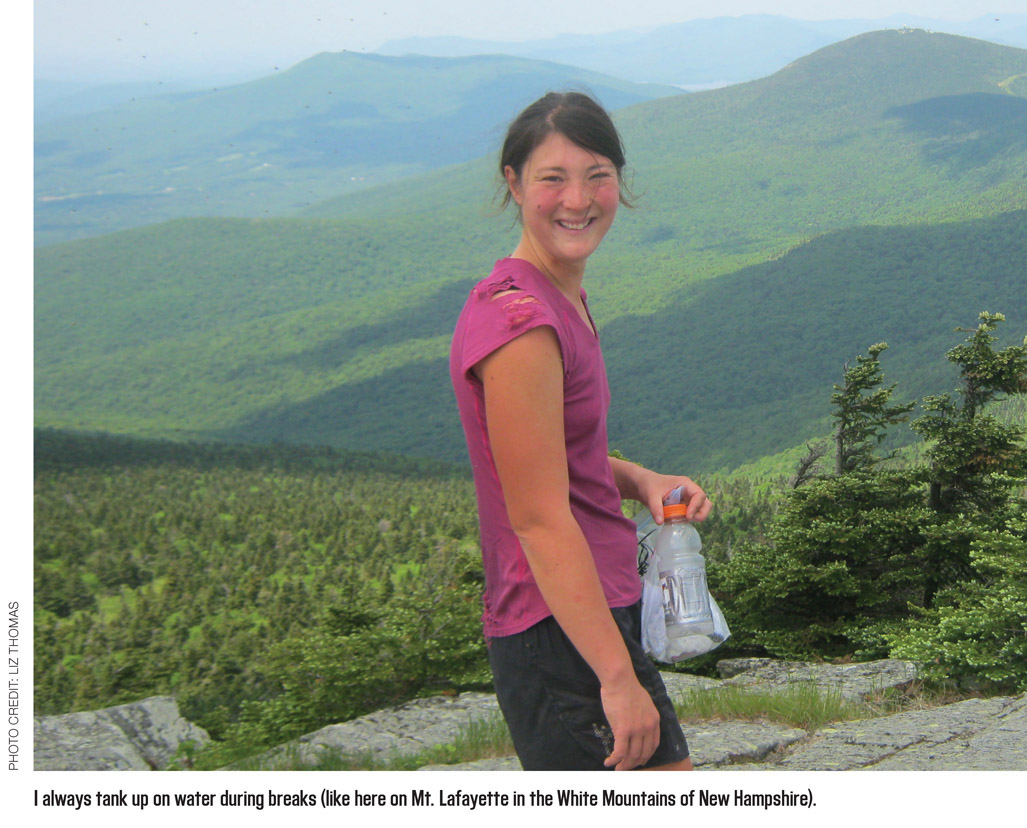
Here’s my typical lunch break routine:
• Find a nice spot, preferably out of sight from the trail, near water, and protected from wind.
• Get water (if it’s nearby).
• Put on another layer and hat immediately if it is cooler, to trap the heat from exercising before my body temp starts dropping.
• Hang up or lay out my sleeping bag, tent, and other gear to dry (if needed).
• Take off shoes and socks, take insoles out of shoes, and let them all dry (if it’s not too cold).
• Foot care (check for blisters, care for them, massage feet, elevate or cool feet down).
• Eat.
• Hydrate (may as well make up a drink mix here).
• Reapply sunscreen, bug spray, etc.
• Check maps, evaluate progress, identify important intersections or navigational challenges ahead, determine options for camping that night.
USE BREAKS TO DEAL WITH EXTREME CONDITIONS
Breaks aren’t just a good time to take care of yourself and your gear. Used wisely, they can actually help you be a smarter hiker. When and how you take your breaks will depend on weather conditions, climate, and your physical fitness and skill level. But when it comes to breaks, everyone can benefit from them.
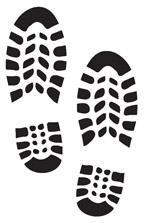
Posthole
Posthole: Sinking straight down into snow with each footstep, like a fence post into dirt.
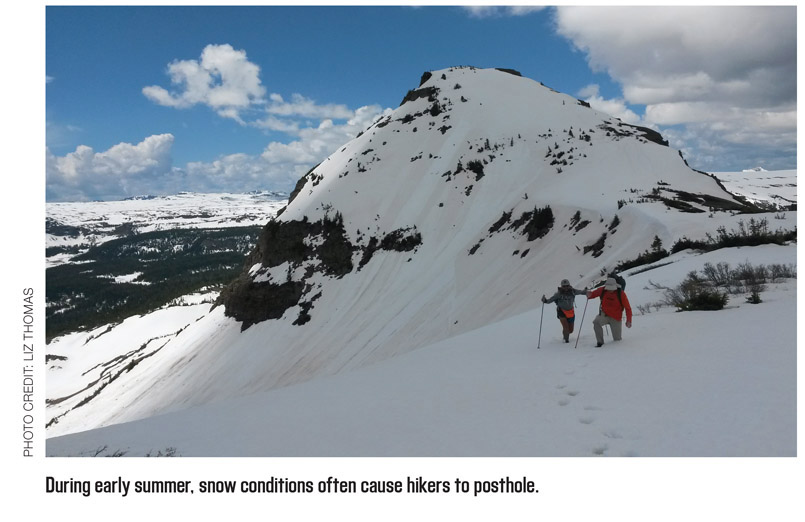
Postholing can happen even when the snow you’re encountering seems solid enough to hold your weight. Snow freezes and melts and refreezes, causing multiple layers to form. When you take a step on the surface, sometimes the layers under the crust are not as compact or solid as the top layer. Thus you posthole into the snow, sometimes up to your waist. This situation is even more common in areas with talus (large rocks), where holes can form between rocks and collect snow. You can minimize postholing by hiking early, when the snow is still frozen.
Many thru-hikers find that hiking during the heat of the day through desert sections isn’t the most productive use of their energy. To avoid heatstroke, sunburn, and dehydration, hikers wake up early and hike during the first light of the day. Then they take a nap in the shade during the hottest hours. Finally, they continue hiking as it becomes cooler toward evening.
Postholing in snow means that hiking takes more time, energy, and therefore food than normal—sometimes even twice as much for a given distance. To avoid the posthole slog, hikers often start early in the day—like midnight—and hike while the snow’s layers are still frozen. Then they’ll take a break in the middle of the day or end very early as the snow starts softening.
If it’s raining, don’t be afraid to set up your shelter and take a nap while you’re waiting for the storm to roll over. Some trails, most notably the Appalachian Trail, have three-sided shelters positioned on average every 10 miles along the trail. I’ve taken many lunch breaks out of the rain in these shelters.
If you see a storm rolling in and know you are headed above treeline, take your break below treeline and wait for the thunder and lightning to pass. If you can find a windbreak, shelter yourself from the elements and give your mind and nerves some time to settle before heading back into it.
A note about breaks: Many hikers find that when they take breaks longer than 15 minutes or so, their bodies become stiff from cooling down. You’ll have to warm up again, so you may notice a slight shuffle in your walk as you get up from your break. Don’t worry. The iconic “hiker hobble” is normal and usually goes away after 10 minutes of walking.