Basketry
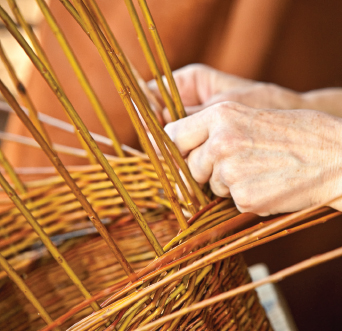
Basketweaving is one of the oldest, most common, and useful crafts. The materials used in making baskets are primarily reed or rattan, raffia, corn husks, splints, and natural grasses. Rattan grows in tropical forests, where it twines about the trees in great lengths. It is numbered according to its thickness, and numbers 2, 3, and 4 are the best sizes for small baskets. For scrap baskets, 3, 5, and 6 are the best sizes. Rattan should be thoroughly soaked before using. Raffia is the outer cuticle of a palm, and comes from Madagascar. Cattail reeds can also be excellent for baskets and may be more readily available, as they frequently grow near ponds or swampy areas. Most basket making materials can also be found at local craft stores.
Small Reed Basket
Most reed baskets have at least sixteen spokes, and for small baskets and where small reeds are used these spokes are often woven in pairs. You can vary the look of your reed basket by combining and interweaving two different colored reeds.
Materials Needed
Sixteen 16-inch spokes, No. 2 reed
Five weavers of No. 2 brown reed
Directions
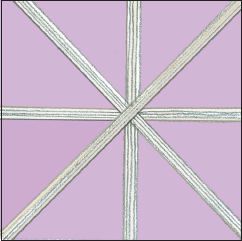
1. Separate the sixteen spokes into groups of four each. Mark the centers and lay the first group on the table in a vertical position. Across the center of this group place the second group horizontally. Place the third group diagonally across these, having the upper ends at the right of the vertical spokes. Lay the fourth group diagonally with the upper ends at the left of the vertical spokes.
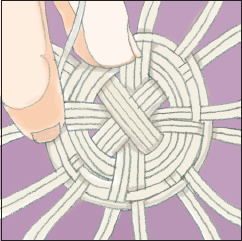
2. Soak the reeds well and then start the basket by laying the weaver’s end over the group to the left of the vertical group, just above the center; then bring it under the vertical group, over the horizontal and then under, and so on until it reaches the vertical group again. Repeat this weave three or four times. Then separate the spokes into twos and bring the weaver over the pair at the left of the upper vertical group, and so on, over and under until it comes around again, when it is necessary to pass under two groups of spokes and then continue weaving over and under alternate spokes. At the beginning of each new row the weaver passes under two groups of spokes, always under the last of the two under which it went before and the group at the right of it.
3. Weave the bottom until it is 4 inches in diameter; then wet and turn the spokes gradually up and weave 1 inch. After that, turn the spokes in sharply and draw them in with three rows of weaving. Now weave four rows, going over and under the same spokes, making an ornamental band; then weave three rows of over- and under-weaving, followed by four rows without changing the weave. Continue to draw the side in with four rows of over- and under-weaving, and then bind it all off. Finish with the following border:
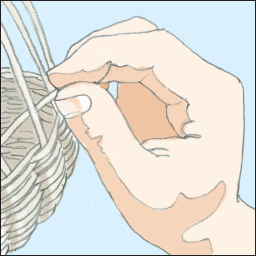
4. Always wet the spokes till they are pliable before starting the border. Bring each group under the first group at the right and over the next and inside the basket. Finally, cut the reeds long enough to allow them to rest on the group ahead.
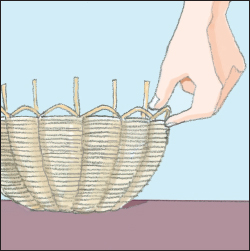
Note: Leave the first two groups a little loose so that the last ones can be easily woven into them.
Coiled Basket
Sweet grass, corn husks, or any pliable grasses can be used for this type of basket, and with a contrasting color for sewing, the basket can be very attractive.
Materials
A bunch of grasses
A bunch of raffia
Directions
1. Cut off the hard ends of the grasses and take only a small bunch for the center to start. Split the raffia very fine and use a sharp needle for extra help.
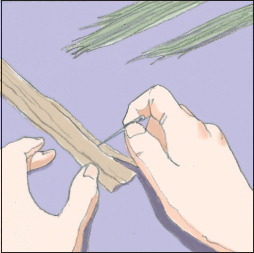
2. Hold the grasses and the end of raffia in your left hand, about 2 inches from the end of the coil, and wind the raffia around the coil to the end of the grasses.
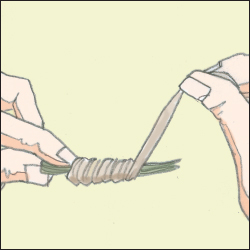
3. Bend the end of the coil into a small round center and sew over and under, binding the first two coils very firmly together. The next time around, leave a very small space between each stitch, and take the stitch only through the upper portion of the coil below. It is necessary that the spaces between the stitches be very small in the first few rows—this will determine the regularity of the spirals to come.
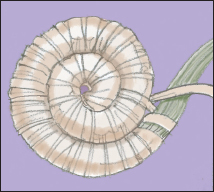
4. In sewing through the coil, place the needle diagonally from the right of the stitch through the coil to the left of the stitch.
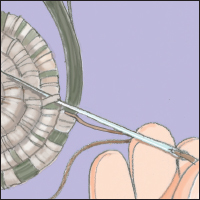
5. When the bottom measures 4 inches across, begin shaping the sides by raising the coil up slightly on the coil below and continue to bind the coils together as before. When the basket measures about 6 inches across, begin shaping the sides by pushing the coil slightly in toward the center.
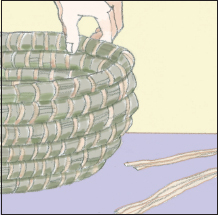
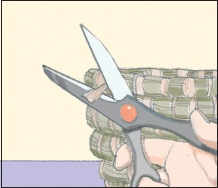
6. To finish, gradually decrease the size of the coil but do not increase the number of stitches. Fasten the raffia, after the last stitch, by running it through the coil and cut it off close to the border. If necessary, bind the ends more closely by sewing over and over with a thin thread of very fine raffia the same color as the grasses.
Bookbinding
Simple Homemade Book Covers
If you have loose papers that you want bound together, there is an easy way to make a book cover:
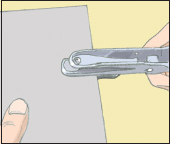
1. Take two pieces of heavy cardboard that are slightly larger than the pages of the book you wish to assemble. Make three holes near the edges of each cardboard piece with a hole-punch. Then, punch three holes (at the same distance from each other as in the cardboard pieces) in the papers that are to be in the interior of the book. Be sure that your book is not too thick or the cover won’t be as effective.
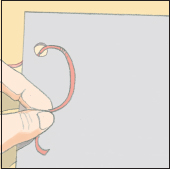
2. String a narrow ribbon through these holes and tie the ribbons in knots or bows. If the leaves of your book are thin, you can punch more than three holes into the paper and cardboard, and then lace strong string or cord between the holes, like shoelaces.
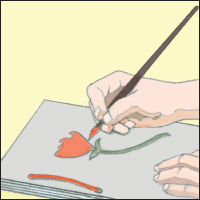
3. To decorate your covers, you can paint them with watercolors or you can simply use colored cardboard. You can also take some fabric, cut it so the fabric just folds over the inside edges of the cardboard pieces, and then hot glue (or use a special paste—see below) the fabric to the cardboard. Or, you can glue on photographs or cutouts from magazines and protect the cover with laminating paper.
To Make Flour Paste for Your Book Covers
Mix ½ cup of flour with enough cold water to make a very thin batter. This must be smooth and free of lumps. Put the batter on top of the stove in a tin saucepan and stir it continually until it boils. Remove the pan from the stove, add three drops of clove oil, and pour the paste into a cup or tumbler and cover.
Bind Your Own Book
Making your own blank book or journal takes careful measuring, folding, and gluing, but the end product will be something unique that you’ll treasure for ages. You can also rebind old, worn out books that you’d like to preserve for more years to come.
Before binding anything very special, practice by binding a “dummy” book, or a book full of blank pages—you could use this blank book as a journal if it comes out fairly well, so your efforts will not be wasted. In order to make a blank book, you need to plan out what you’ll need— how thick the book will be, what the dimensions are, the quality of the paper being used (at least a medium-grade paper in white or cream), and so on. Carefully fold and cut the paper to the appropriate size.
Materials
White or cream-colored paper (at least 32 sheets) or the pages you wish to rebind
Stapler or needle and thread
Binder clips or vise
Stiff cardboard
Cloth or leather
Silk or cloth cord
Glue
Scissors (or a metal ruler and craft knife)
1. Make four stacks of eight sheets of paper. These stacks, once folded, are called “folios,” Four stacks will make a 64-page book. If you wish to make it longer or shorter you can do more or fewer stacks of eight sheets. Carefully fold each stack in half.

2. Unfold the stacks and staple or sew along the crease. If stapling, only use two staples: one at the top of the fold and one at the bottom.
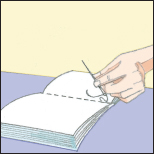
3. Refold all the stacks and pile them on top of each other. Use binder clips or a vise to hold them together. Cut a rectangular piece of fabric that is the same length as the spine of your book and about five times as wide. So if your stack of folded papers is 8 ½ inches long and one inch high, your fabric should be 8 ½ inches long and five inches wide.
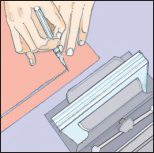
4. Using a hot glue gun or regular white glue, cover the spine with glue and stick on the fabric. The fabric should hang off either side of the spine.
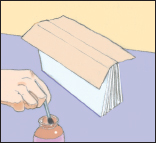
5. For the cover, cut two pieces of sturdy cardboard that are the same size as the pages of your book. Using a metal ruler and a craft knife will help you make the cuts straight and smooth. Place one piece of cardboard at the bottom of your stack of papers and another on the top. Cut another piece of cardboard that is the same height and width as the book’s spine, including the pages and both covers.
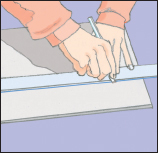
6. Select a piece of fabric (or leather) to cover your book and lay it flat on a table. Place the three pieces of cardboard on the fabric with the spine between the two cover pieces. Use a ruler to measure and mark a rectangle on the fabric that is 1 inch larger on all sides than the combined pieces of cardboard. Remove the cardboard pieces and cut out the rectangle.
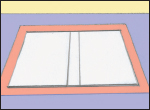
7. Lay the fabric on the table face down. Cover one side of the cardboard pieces with white glue or rubber cement. If using white glue, use a stiff brush, putty knife, or scrap piece of cardboard to spread the glue in an even thin layer so there are no lumps. Place the cardboard glue-side-down on the fabric so that all three pieces are aligned with the spine between the two covers. Leave a gap of about two thicknesses of the cardboard between the spine and the two covers.
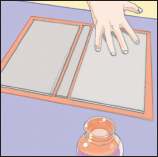
8. Smear glue on the top and bottom edges of the cardboard pieces and fold over the fabric. Then repeat with the outside edges.
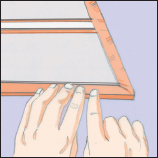
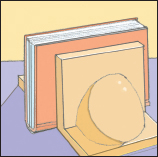
9. Smear glue on the inside edges of the cover boards. Don’t glue the spine. Place the stack of pages spine-side-down on top of the boards. The extra material that is hanging off of the spine should adhere to the glue on the cover boards. Place two solid bookends, rocks, or jars of food on either side of the papers to hold them upright until they dry thoroughly.
10. Select a decorative piece of paper to use for endpapers. This will cover the inside front and back covers so that you won’t see the folded material and cardboard. It can be a solid color or patterned, according to your preference. Cut it to be slightly wider than the pages you started with (before being folded) and not quite as tall.
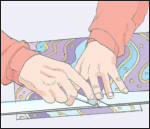
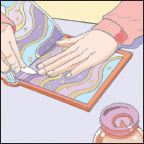
11. Open your book and cover the inside front cover and first page with glue or rubber cement. Fold your endpaper in half to create a crease, open it back up, and then stick it to the inside cover and first page, making sure the crease slides into the space between the spine and front cover slightly. Allow to dry and then repeat at the back of the book.
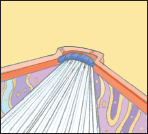
12. Cut two pieces of thin cord for the head and tail band, which will cover the top and bottom of the spine. They should be the same length as the width of the spine. Use a hot glue gun or white glue to adhere them to the top and bottom of the spine, where the pages are gathered together.
Candles
Making candles is a great activity for a fall afternoon. Simple beeswax candles can be completed in a few minutes, but give yourself several hours to make dipped candles. The process is fun, creative, and productive. Give your handmade candles to friends or family or burn them at home to create atmosphere and save on your electricity bill.
Tip
Rather than pouring leftover wax down the drain (which will clog your drain and is bad for the environment), dump it into a jar and set it aside. You can melt it again later for another project.
Tip
When making candles, keep a box of baking soda nearby. If wax lights on fire, it reacts similarly to a grease fire, which is aggravated by water. Douse a wax fire with baking soda and it will extinguish quickly.
Rolled Beeswax Candles
Beeswax candles are cheap, eco-friendly, non-allergenic, dripless, non-toxic, and they burn cleanly and beautifully. They’re also very simple and quick to make—perfect for a short afternoon project.
Materials
Sheets of beeswax (you can find these at your local arts and crafts store or from a local beekeeper)
Wick (you can purchase candle wicks at your local arts and crafts store)
Supplies
Scissors
Hair dryer (optional)
Directions
1. Fold one sheet of beeswax in half. Cut along the crease to make two separate pieces.
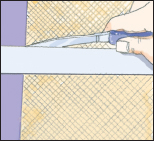
2. Cut your wick to about 2 inches longer than the length of the beeswax sheet.
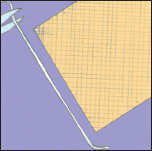
3. Lay the wick on the edge of the beeswax sheet, closest to you. Make sure the wick hangs off of each end of the sheet.
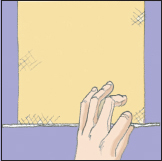
4. Start rolling the beeswax over the wick. Apply slight pressure as you roll to keep the wax tightly bound.
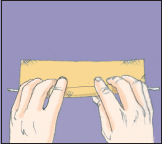
The tighter you roll the beeswax, the sturdier your candle will be and the better it will burn.
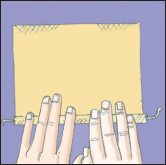
5. When you reach the end, seal off the candle by gently pressing the edge of the sheet into the rolled candle, letting your body heat melt the wax.
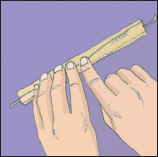
6. Trim the wick on the bottom (you may also want to slice off the bottom slightly to make it even so it will stand up straight) and then cut the wick to about ½ inch at the top.
Tip
If you are having trouble using the beeswax and want to facilitate the adhering process, you can use a hair dryer to soften the wax and to help you roll it. Start at the end with the wick and, moving the hair dryer over the wax, heat it up. Keep rolling until you reach a section that is not as warm, heat that up, and continue all the way to the end.
Taper Candles
Taper candles are perfect for candlesticks, and they can be made in a variety of sizes and colors.
Tip
Old crayons can be melted and used instead of paraffin for candle-making.
Materials
Wick (be sure to find a spool of wick that is made specifically for taper candles)
Wax (paraffin is best)
Candle fragrances and dyes (optional)
Supplies
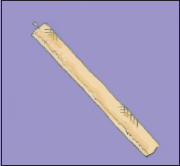
Pencil or chopstick (to wind the wick around to facilitate dipping and drying)
Weight (such as a fishing lure, bolt, or washer)
Dipping container (this should be tall and skinny. You can find these containers at your local arts and craft store, or you can substitute a spaghetti pot)
Materials
Stove
Large pot for boiling water
Small trivet or rack
Glass or candle thermometer
Newspaper
Drying rack
Directions
1. Cut the wick to the desired length of your candle, leaving about 5 additional inches that will be tied onto the pencil or chopstick for dipping and drying purposes. Attach a weight (a fishing lure, bolt, or heavy metal washer) to the dipping end of the wick to help with the first few dips into the wax.
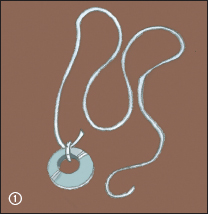
2. Ready your dipping container. Put the wax (preferably in smaller chunks—this will speed up the melting process) into the container and set aside.

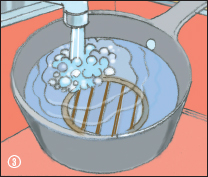
3. In a large pot, start to boil r. Before putting the dipping container full of wax into the larger pot, place a small trivet, rack, or other elevating device into the bottom of the larger pot.
This will keep the dipping container from touching the bottom of the larger pot and will prevent the wax from burning and possibly combusting.
4. Put the dipping container into the pot and start to melt the wax, keeping a thermometer in the wax at all times. The wax should be heated and melted between 150 and 165°F. Stir frequently in order to keep the chunks of paraffin from burning and to make sure all the wax is thoroughly melted. (If you want to add fragrance or dye, do so when the wax is completely melted and stir until the additives are dissolved.)
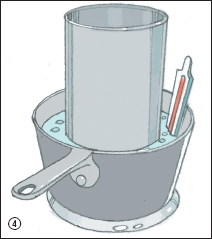
5. Once your wax is completely melted, start dipping. Removing the container from the stove, take your wick that’s tied onto a stick and dip it into the wax, leaving it there for a few minutes. Continue to lower the wick in and out of the dipping container, and by the eighth or ninth dip, cut off the weight from the bottom of the wick—the candle should be heavy enough now to dip well on its own.
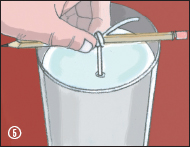
6. To speed up the cooling process—and to help the wax to continue to adhere and build up on the wick—blow on the hot wax each time you lift the candle out of the dipping pot. When the candle is at the desired length and thickness, you may want to lay it down on a very smooth surface (such as a countertop) and gently roll it into shape.
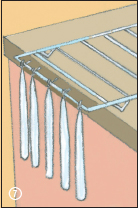
7. On a drying rack, carefully hang your taper candle to dry for a good 24 hours.
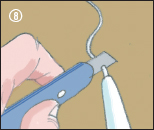
8. Once the candle is completely hardened, trim the wick to just above the wax.
Layered Taper Candles
For a more ornate candle, add different shades of food coloring to three or four separate pots of melted wax (or melt down old crayons). Alternate between the different colors of wax as you dip the wick, creating different layers of color. Once the candle is the desired thickness and is mostly cooled, use a paring knife to carefully peel away strips of the wax around the outside of the candle. Allow the wax strips to curl downward as you peel, revealing a rainbow of colors.
Gourd Votives
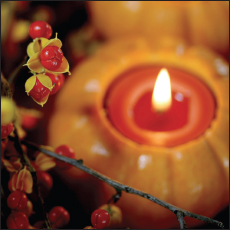
Small gourds make perfect votive candleholders. Carve a circle out of the top of the gourd, making it the same size as the circumference of the candle you intend to place in it. Gently pry off the top and set the candle in the indentation. If necessary, cut the hole slightly larger, but keep it small enough that the candle fits snugly.
Tip
To make floating candles, pour hot wax into a muffin tin until each muffin cup is about ⅓ full. Allow the wax to cool until a film forms over the tops of the candles. Insert a piece of wick into the center of each candle (use a toothpick to help poke the hole if necessary). Allow candles to finish hardening and then pop them out of the tin. Trim wicks to about ¼ inch.
Jarred Soy Candles
Soy candles are environmentally friendly and easy candles to make. You can find most of the ingredients and materials needed to make soy candles at your local arts and crafts store—or even in your own kitchen!
1 lb soy wax (either in bars or flakes)
1 ounce essential oil (for fragrance)
Natural dye (try using dried and powdered beets for red, turmeric for yellow, or blueberries for blue)
Supplies
Stove
Pan to heat wax (a double boiler is best)
Spoon
Glass thermometer
Candle wick (you can find this at your local arts and crafts store)
Metal washers
Pencils or chopsticks
Heatproof cup to pour your melted wax into the jar(s)
Jar to hold the candle (jelly jars or other glass jars work well)
Directions
1. Put the wax in a pan or a double boiler and heat it slowly over medium heat. Heat the wax to 130 to 140°F or until it’s completely melted.
2. Remove the wax from the heat. Add the essential oil and dye (optional) and stir into the melted wax until completely dissolved.
3. Allow the wax to cool slightly, until it becomes cloudy.
4. While the wax is cooling, prepare your wick in the glass container. It is best to have a wick with a metal disk on the end—this will help stabilize it while the candle is hardening. If your wick does not already have a metal disk at the end, you can easily attach a thin metal washer to the end of the wick. Position the wick in the glass container and wrap the excess wick around the middle of a pen or chopstick. Lay the pencil or chopstick on the rim of the container and position the wick so it falls in the center.
5. Using a heat proof cup or the container from the double boiler, carefully pour the wax into the glass container, being careful not to disturb the wick from the center.
6. Allow the candle to dry for at least 24 hours before cutting off the excess wick and using.
Tip
Add citronella essential oil and a few drops of any of the following other essential oils to make your candle a mosquito repellant:
• Catnip
• Cloves
• Cedarwood
• Lavender
• Lemongrass
• Eucalyptus
• Peppermint
• Rosemary
• Rose geranium
• Thyme
Dyeing Wool or Fabric
Materials to Dye
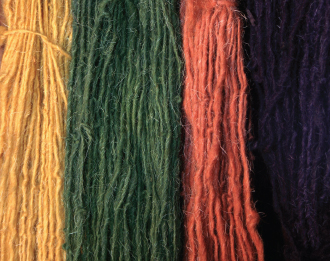
Natural materials, such as plant leaves, flowers, barks, roots, and nuts can all be used to dye yarns and cloth. Animal fibers, such as wool and silk, are very easy to dye, and take dye well. Vegetable materials such as cotton and linen, are a bit harder to dye, but with a little knowledge dyeing them can become easy as well.
Supplies
The water you use for dyeing should always be soft water. Most tap water is too hard, and you will have to add a softener to it. The best water to use for dyeing is rain water.
You will need several large pots for dyeing, ones that are able to easily hold four gallons. Make sure that these pots are solely dedicated to dyeing and never use them for cooking. Most people use either stainless steel or enamel pots when working with mordants and dyes.
A larger spoon or paddle will be needed to stir cloths that are being dyed. Wood is best for this. Make sure that it is kept separate and never used for food preparation.
Cheesecloth and string will be needed to make the bundle used to immerse the natural element into water to create the dyebath.
Rubber gloves are essential during the dyeing process. Not only are some of the mordants harmful, but you don’t want to end up dyeing your hands!
Mordants
In most cases a material will have to be treated with certain chemicals, called “mordants,” in order to set the dye and keep it from fading or washing out over time. Mordants are usually strong and sometimes caustic chemicals.
A yarn or cloth can be treated with a mordant either before or after being dyed, or the mordant can even be added to the dye. Several different colors can also be created using the same dye, if it is combined with different mordants. The overall harshness of the mordant and dye to be used will determine when you should use the mordant; if both are harsh it is best to use mordant either before or after the dyeing to prevent damaging the materials being dyed. The easiest way for a novice dyer to begin is to treat what they would like to dye with the mordant first; that way you will not worry about over- dyeing your fabric or exposing it to too much mordant (if the mordant were mixed in with the dye) and damaging the yarn or cloth.
To create a solution for soaking your yarn or cloth you must first choose the color you want to end up with; this will determine the dyestuff and the mordant you will use. Once you have chosen the mordant, dissolve the correct amount (seen below in “types of mordant”) for four gallons of hot water. It is often easiest to dissolve the mordant in a small amount of hot water first, and then add enough water to make four gallons. Four gallons will process one pound of wool. Slowly bring the mixture to a simmer or boil, depending on the directions for the type of mordant used.
To Dye
The first step is always to wash your fabrics—this will get rid of all the natural oils in the material and help the dye to really soak in and adhere. It is easiest to wash wool yarn when it is tied up in a skein.
For one pound of material use three to four gallons of water, enough to cover the material entirely. Add the material to a large pot with the water and a mild detergent or dish soap. Slowly bring the water temperature up and allow it to simmer; silk for 30 minutes, wool for 45 minutes. Allow the water to cool and then rinse it thoroughly. If you are washing cotton or linen add ½ cup sodium carbonate (washing soda) along with the detergent, and then bring the water to a boil. Boil it for an hour and then cool and rinse, the same way as you would with wool or silk.
It is easiest, and best for your material, to complete the dyeing process step-by-step, without allowing your material to dry in-between steps. While the material is being washed, prepare the mordant mixture, then introduce the material to it slowly. Prepare the dyebath while the material is in the mordant mixture. Make sure at each step the water you are taking the material from and the one you are introducing it to is a similar temperature; you do not want to shock the material with a sudden change.
Types of Mordant
For most dyeing jobs, alum (aluminum potassium sulfate) can be used as a mordant. A solution to be used on any wool, silk, or animal fiber should be made of one ounce alum per one gallon water. Simmer any material for one hour in the alum mixture. If you are dyeing plant materials such as cotton or linen, increase the amount of alum to 1 1/3 ounces per gallon of water and boil the material for one hour.
Chrome (potassium dichromate) can be used to brighten yellows, reds, and greens. Chrome is a highly caustic chemical; gloves should always be worn and it should not be inhaled. A solution can be made from 1/8 ounce of chrome per one gallon of water for animal fiber or ½ ounce for plant fibers. Simmer the animal fibers you want to dye- or boil the plant material- for one hour.
Keep the chrome mordant covered at all times- the fumes are dangerous and any exposure to light will turn your soaking material brown. Either dye chrome soaked materials immediately, or cover and store them in complete darkness. Make sure to dispose of a chrome mixture at a chemical waste facility.
Iron (also called iron sulfate or copperas) can be used to make colors darker, greyer, or duller. If dyeing animal fibers use 1/8 ounce per gallon of water and simmer for one hour. If you are dyeing plant fibers use one ounce of iron for each gallon and boil for one hour.
To dull a color some dyers will add 1/8 ounce of iron to a four gallon dyebath for the last few minutes—you should temporarily remove the fabric from the dyebath and then add the iron, making sure it is dissolved before re-introducing the fabric to be dyed. Use this method only on previously non-mordated material.
Tin (stannous chloride), like chrome, can be used to brighten colors such as reds, oranges, and yellows. It is less caustic than chrome, but can still damage fibers if left too long. For either animal or plant fibers use one ounce of tin per one gallon of water and simmer the materials for one hour. Be sure to thoroughly rinse the materials in clean water after mordanting to prevent damage to the fibers. Alternatively, you can add 1/8 ounce to the dyebath a few minutes before it is finished, making sure to remove and then re-introduce the fabric to make sure the tin properly dissolves into the dyebath. If this method is used the material should have been previously mordated in alum.
Preparing a Dyebath
Choose the color you want; this will determine the raw dyestuff you will need. Natural dyestuff is any plants, leaves, berries, nuts, flowers, roots, or bark. Flowers should be picked just after they bloom. Berries should be ripe and nuts should be fully formed and have just fallen to the ground (make sure not to use any nuts that have been sitting for awhile). All ingredients should be cleaned and checked over for any foreign particles.
Prepare the dyestuff by making sure as much of it as possible will be able to soak. This means shredding any leaves or flowers, cutting up any bark, roots, or branches into small pieces, and crushing any nuts. Wrap the dyestuff in cheesecloth to create a bundle and tie it securely closed with twine.
Cover the bundle in water and bring it to a boil. Cook it until the water is richly colored, adding water as needed to keep the bundle covered. Remove the bundle. You have now created a concentrated dye.
Pour the concentrated dye into a large pot and add enough cold water to make four gallons. Add whatever material you are going to dye and slowly bring the dyebath to a simmer or boil, depending on what material you are dyeing. Cook it until it is the desired shade of color. Cool the material, either inside or out of the dyebath, and then rinse it thoroughly. Alternatively you can cool your material faster and rinse at the same time by dipping it in successively cooler water baths. Gently squeeze out rinsed material and hang it to dry.
Both animal fibers like wool and silk, and plant fibers such as cotton and linen can be dyed in the same way. However, plant fibers do not absorb color as well as animal ones; the times given below are meant for dyeing wool. To dye cotton or linen the material must be boiled from one to two hours in the dyebath.
Types of Dye
Reds—Cochineal, the powder from the crushed cochineal insect, will make rich reds and scarlets. It can be purchased from any dye supplier. Unlike most other plant materials used in dyeing, cochineal can be dissolved directly into the water and does not need to be put into a cheesecloth bundle. It takes about 30 minutes to dissolve completely, after which the water should be boiled for 15 additional minutes to create the dyebath. Simmer any material for ½ hour.
Madder is a root, used since the Middle Ages, to create bright reds and deep oranges. To prepare madder, soak the dried root overnight, then simmer for ½ hour. Any material should first be mordated in alum, and then simmered in the dyebath for ½ hour.
Butterfly weed will produce a lighter reddish-orange. Pick one bushel of blooms and soak them for one hour, then boil them for an additional ½ hour. Simmer material pre-mordated in alum for ½ hour.
Yellows—Many things found in nature can produce yellow dyes.
The flower of the coreopsis will produce a bright yellow. Simmer two bushels of flower heads anywhere from ½ to one hour, until the desired color is reached. Simmer material that has been pre-mordated in alum for ½ hour.
Sophora flower makes a darker yellow. To create the dyebath boil one bushel of flowers for ½ hour. Simmer material pre-mordated in tin and cream of tartar for ½ hour.
Goldenrod, as its name suggests, creates a rich gold-colored dye. Take two pounds of blooming flowers, both the flowers and the stems, and simmer for ½ hour. Add material pre-mordated in alum and simmer for ½ hour more.
The dry, outer layers of onion skins can produce a yellow dye. Take two pounds of the outer skins and simmer them for twenty minutes, making sure not to over- cook them. Simmer material that has been pre-mordated in alum for twenty minutes in the dyebath.
Smartweed will produce a dark yellow. To make the dyebath boil two bushels of blooming plants, both flowers and stems, for ½ hour. Simmer material pre-mordated with tin for ½ hour in the dyebath.
The flowers of the marigold will produce a deep yellow, almost verging on tan. Simmer two bushels of flower heads in full bloom for one hour. Add material that has been pre-mordated in alum and simmer for ½ hour.
The berries of the pokeberry create a yellow dye with a red tinge. To prepare the dyebath add 16 quarts and one cup of vinegar to the water and boil for ½ hour. Add material that has been pre-mordated in alum and simmer for ½ hour more.
Greens—The leaves of the lily of the valley can create two different shades of green, depending on the mordant used. To create the dyebath simmer two pounds of fresh green leaves for one hour. For a soft green add material that has been pre-mordated in alum and simmer for twenty minutes. For a yellow-green color add 1/8 ounce chrome directly into the dyebath and allow it to dissolve, then add un-mordated wool and simmer for twenty minutes.
The privet shrub can create a light green when prepared. Simmer one pound of fresh leaves for ½ to one hour to make the dyebath. Add material pre-mordated in alum and simmer for twenty minutes.
“Shabby Chic” Dyeing
You don’t need to bother with mordants if you’re going for a washed out, faded look, and especially if you don’t plan to frequently wash whatever fabric you’re dyeing. Experiment with beets for a soft pink fabric. Bake the beets in the oven until tender (about an hour) and then peel and chop them into a bowl. Add some water, stir, and add your fabric. The longer you let the fabric soak, the brighter it will be. You can dump the whole mess in a sealable plastic bag and stick it in the fridge if you plan to let it soak for several hours. When you rinse the fabric, most of the dye will come out, but you’ll be left with a subtle tint. Onion skins can be boiled in a little water for a yellow dye, and tea or coffee with give an earthy brown. Never wash fabrics dyed this way with other fabrics that you don’t want dyed!
The white queen Anne’s lace flower will produce a bright green dye. Gather one bushel of fully bloomed flowers and simmer both the heads and the stems for ½ hour. Add the material that has been pre-mordated in alum, and simmer for ½ hour more.
The leaves of the rhododendron, like those of the lily of the valley, can create two different shades, depending on the mordant used. Prepare three pounds of fresh rhododendron leaves by soaking them overnight and then boiling them for one hour. To create a light green shade, simmer material that has been pre-mordated in alum for ½ hour. To make a very dark green-grey add ½ teaspoon of iron directly to the dyebath, dissolve, and then add un-mordated material and simmer for ½ hour.
Natural fabrics such as linen absorb dyes much better than synthetic fabrics.
Blues—Various shades of blue can be created using indigo. As indigo is not water soluble it needs to be prepared in a special way to produce a dyebath. You will need; sodium corbonate (also called washing soda), hydrosulfite, indigo paste, and water. Mix one ounce washing soda into four ounces water. Add one teaspoon indigo paste. Shake one ounce of hydrosulfite over the mixture and stir gently to combine everything. Add two quarts of warm water and slowly heat it to 350°F, then let it stand for twenty minutes. Shake another one ounce hydrosulfite over the mixture and gently stir it in. The dyebath is now ready; it will have a yellow-green color to it. Immerse your un-mordated material into the dyebath and let it simmer for 20 minutes. As soon as the material is removed and exposed to air it will turn blue.
Browns—Nature is full of things that can dye wool and cloth any shade of tan or brown. The lightest brown can be produced by placing un-mordated material into a dyebath made of tea. Cover ¼ pound dry tea leaves with boiling water and let them steep for 15 minutes. Simmer the material for 20 minutes more.
Another substance that dyes material without any need of mordating is coffee. Boil ½ pounds of unused coffee grounds for 15 minutes. Add your material and simmer for an additional ½ hour.
Tobacco leaves can produce a medium brown color. Add one ounce cream of tartar to your water and boil one pound of cured leaves for ½ hour. Simmer material that has been pre-mordated for ½ hour.
Acorns can create two different shades of brown, depending on the mordant used. To prepare the dyebath gather 7 pounds of just fallen nuts and soak them in water overnight. Boil the nuts for ½ hour and then after adding material simmer for one hour longer. For a tawny brown shade use material that has been pre-mordated with alum, for a darker brown shade use material premordated with iron.
The logwood, a flowering tree, can also be used to create two different shades of color. The easiest way to obtain logwood is to purchase chips from a dye supplier. Soak four ounces of chips in water overnight, and then boil them for 45 minutes. Add your material and simmer it for ½ hour. Material pre-mordated in iron will become a dark brown color, while material pre-mordated in alum will create a brown so dark it will appear almost black.
To Remember
Always gradually increase or decrease the temperature of water, mordant, or dyebaths when they contain cloths or yarns. It is important never to shock the materials by a sudden change in temperature. Material such as wool will shrink if temperatures change too rapidly.
Always treat materials being dyed gently. Do not twist or wring out cloths or yarn; gently squeeze them of excess water or dye. Do not over-agitate cloths while they are being dyed; gently turn them over in the water to make sure they are dyed evenly.
When dyeing wool it is easiest to create skeins. Tie the skeins loosely, so that the dye can get to all of the fibers. Do not add dry wool to mordant or a dyebath, dampen it first with clean water; this will help the wool absorb the dye evenly.
Knots
Knowing how to tie a variety of knots is invaluable, especially if you are involved in boating, rock climbing, fishing, or other outdoor activities.
Strong knots are typically those that are neat in appearance and are not bulky. If a knot is tied properly, it will almost never loosen and will still be easy to untie when necessary.
Qualities of a Good Knot
1. It can be tied quickly.
2. It will hold tightly.
3. It can be untied easily.
Three Parts of a Rope
1. The standing part: this is the long, unused part of the rope.
2. The bight: this is the loop formed whenever the rope is turned back.
3. The end: this is the part used in leading.
The best way to learn how to tie knots effectively is to sit down and practice with a piece of cord or rope. Listed below are a few common knots that are useful to know:
• Bowline knot: Fasten one end of the line to some object. After the loop is made, hold it in position with your left hand and pass the end of the line up through the loop, behind and over the line above, and through the loop once again. Pull it tightly and the knot is now complete.


• Clove hitch: This knot is particularly useful if you need the length of the running end to be adjustable.

• Halter: If you need to create a halter to lead a horse or pony, try this knot.
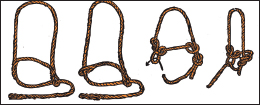
• Slip knot: Slip knots are adjustable, so that you can tighten them around an object after they’re tied.

• Square/reef knot: This is the most common knot for tying two ropes together.

• Timber hitch: If you need to secure a rope to a tree, this is the knot to use. It is easy to untie, too.

• Two half hitches: Use this knot to secure a rope to a pole, boat mooring, washer, tire, or similar object.

Paper Making
Instead of throwing away your old newspapers, office paper, or wrapping paper, use it to make your own unique paper! The paper will be much thicker and rougher than regular paper, but it makes great stationery, gift cards, and gift wrap.
Materials
Newspaper (without any color pictures or ads if at all possible), scrap paper, or wrapping paper (non-shiny paper is preferable)
2 cups hot water for every ½ cup shredded paper
2 tsp instant starch (optional)
Supplies
Blender or egg beater
Mixing bowl
Flat dish or pan (a 9 x 13-inch or larger pan will do nicely)
Rolling pin
8 x 12-inch piece of non-rust screen
4 pieces of cloth or felt to use as blotting paper, or at least 1 sheet of Formica
10 pieces of newspaper for blotting
Directions
1. Tear the newspaper, scrap paper, or wrapping paper into small scraps. Add hot water to the scraps in a blender or large mixing bowl.
2. Beat the paper and water in a blender or with an egg beater in a large bowl. If you want, mix in the instant starch (this will make the paper ready for ink). You can also add food coloring or natural dye, for colored paper. The paper pulp should be the consistency of a creamy soup when it is complete.
3. Pour the pulp into the flat pan or dish. Slide the screen into the bottom of the pan. Move the screen around in the pulp until it is evenly covered.
4. Carefully lift the screen out of the pan. Hold it level and let the excess water drip out of the pulp for a minute or two.
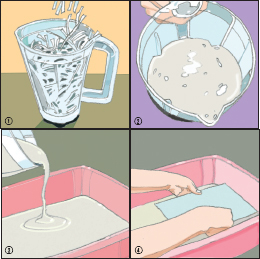
5. With the pulp side up, put the screen on a blotter (felt) that is situated on top of some newspaper. Put another blotter on the top of the pulp and put more newspaper on top of that.
6. Using the rolling pin, gently roll the pin over the blotters to squeeze out the excess water. If you find that the newspaper on the top and bottom is becoming completely saturated, add more (carefully) and keep rolling.
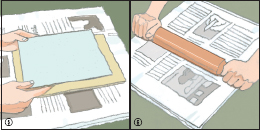
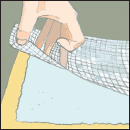
7. Remove the top level of newspaper. Gently flip the blotter and the screen over. Very carefully, pull the screen off of the paper. Leave the paper to dry on the blotter for at least 12 to 24 hours. Once dry, peel the paper off the blotter.
To add variety to your homemade paper:
• To make colored paper, add a little bit of food coloring or natural dye to the pulp while you are mixing in the blender or with the egg beater.

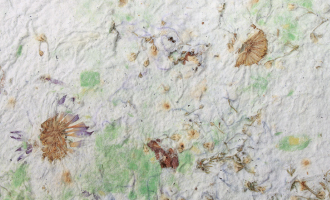
• You can also try adding dried flowers (the smoother and flatter, the better) and leaves or glitter to the pulp.

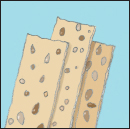
• To make unique bookmarks, add some small seeds to your pulp (hardy plant seeds are ideal), make the paper as in the directions, and then dry your paper quickly using a hairdryer. When the paper is completely dry, cut out bookmark shapes and give to your friends and family. After they are finished using the bookmarks, they can plant them and watch the seeds sprout.
Quilting
Crazy quilts first became popular in the 1800s and were often hung as decorative pieces or displayed as keepsakes, but they can also be warm and practical. They can be made out of scraps of fabric that are too small for almost any other use, and there is endless room for variation in colors, patterns, and texture.
Quilts are generally made up of many small squares that are sewn together into a large rectangle and layered with batting (a thick layer of fabric to add warmth—usually wool or cotton) and backing (the material that will show on the underside of the quilt).
Non-woven interfacing or lightweight muslin (prewashed)
Fabric pieces in a variety of colors and patterns Scissors
Ruler
Pencil
Needle or sewing machine
Pins
Thread
Iron
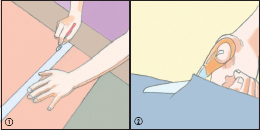
1. Make the foundation squares. If your foundation fabric (interfacing or muslin) is wrinkled, iron it carefully until it is completely flat. Then use a ruler to measure and draw a 13 x 13-inch square in one corner (your final square will be 12 x 12 inches, but it’s a good idea to leave yourself a little extra fabric to work with). Repeat until all of the foundation fabric is cut into squares.
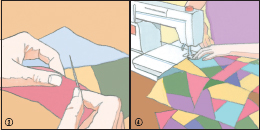
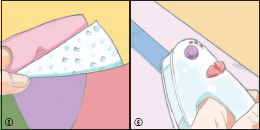
2. Cut a small piece of patterned fabric into a shape with three or five straight edges. Pin it right-side up on the center of one foundation square. Cut another small piece of fabric with straight edges and lay it right-side down on top of the first piece. Sew a ¼-inch seam along the edge where the two fabrics overlap. If the second piece is longer than the first piece, don’t sew beyond the edge of the first piece. Turn the second piece of fabric over so that it’s facing up and iron it. Trim the second piece to align with the first, so you have one larger shape with straight edges.
3. Continue with a third piece of fabric, making sure it is large enough to extend the length of the first two patches combined. Sew the seam, flip the fabric upright, iron, trim, and proceed with a fourth piece. Work clockwise, each piece getting larger as you move toward the edge of the foundation square. Once the square is filled, trim off any overhanging fabric so that you have one neat square. Repeat steps 2 and 3 until all foundation pieces are filled.
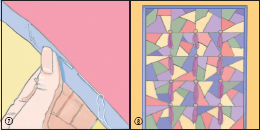
4. Sew all foundation squares together with a ¼- to ½-inch seam.
5. Sandwich the quilt by placing the backing face down, the batting on top of it, and then the foundation on top, with the patterned squares facing up. Baste around the quilt to hold the three layers together, using long stitches and staying about ¼-inch from the outside edge of the patterned fabric.
6. Binding your quilt covers the rough edges and creates an attractive border around the edges of the quilt. To make the binding, cut strips of fabric 2 ½ inches wide and as long as one side of your quilt plus 2 inches. Fold the fabric in half lengthwise and press.
7. Lay the strip along one edge of the quilt. The raw edges of the quilt and the binding should be stacked together. Leave a ½ inch extra hanging off the first corner. Sew along the length of the quilt, about ¼ inch from the raw edge. Trim the binding, leaving a ½ inch extra. Fold the fabric over the rough edges to the back of the quilt and slip-stitch the binding to the backside. Fold the loose ends of the binding over the edge of the quilt and stitch to the backside. Repeat with all sides of the quilt.
8. Finish your crazy quilt by adding decorative stitching between small pieces of fabric, sewing on buttons, tassels, or ribbons, or using stitching or fabric markers to record important names or dates.
Rag Rugs
The first rag rugs were made by homesteaders over two centuries ago who couldn’t afford to waste a scrap of fabric. Torn garments or scraps of leftover material could easily be turned into a sturdy rug to cover dirt floors or stave off the cold of a bare wooden floor in winter. Any material can be used for these rugs, but cotton or wool fabrics are traditional.
Materials
Rags or strips of fabric
Darning needle
Heavy thread
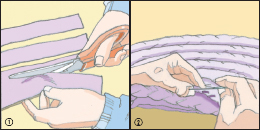
1. Cut long strips of material about 1 inch wide. Sew strips together end to end to make three very long strips (or you can start with shorter strips and sew on more pieces later). To make a clean seam between strips, hold the two pieces together at right angles to form a square corner. Sew diagonally across the square and trim off excess fabric.
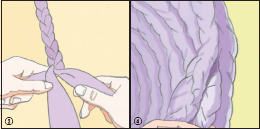
2. Braid the three strips together tightly, just as you would braid hair.
3. Start with one end of the braid and begin coiling it around itself, sewing each coil to the one before it with circular stitches. Keep the coil flat on the floor or on a table to keep it from bunching up.
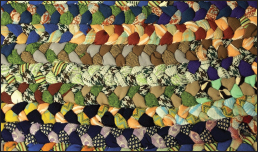
4. When the rug is as large as you want it to be, tack the end of the braid firmly to the edge of the rug.
Tip
Cut strips along the bias to keep them from unraveling.
Tip
Use thinner strips of fabric toward the end of your rug to make it easier to tack to the edge of the rug.
Sewing
Basic Hand Stitching
Supplies:
Several different sizes of needle
Straight pins
Sewing scissors
Thread in several different colors
A needle threader (not required, but useful)
Threading a Needle
Estimate the amount of thread a sewing job will need. Cut the end of the thread at a 45 degree angle. Hold up the needle so the eye of the needle is open toward you. Slip the thread into the needle. Knot one end of the thread, leaving one end loose to sew with one thread or knot them together to sew with two threads. Use one strand of thread for places that you do not want the stitching to show, such as hems, and use two strands for extra strength jobs like sewing on buttons. Straighten the threads and begin sewing.
You can also use a needle threader to help you get the end of the thread through the eye of the needle. A needle threader is basically a tool that creates a much larger eye of the needle and makes it easier to thread. Slip the wire loop on the needle threader through the eye of the needle you want threaded. Slip the thread through the metal loop on the threader. Pull the needle up and off the threader loop, taking the thread with it. The needle should now be correctly threaded. Tie a knot at one end of the thread.
Tying a Knot
Place the end of the thread on your pointer finger, holding it in place with your thumb. Loop the thread around the pointer finger and then slide the knot off your finger. Using the end of your pointer finger and thumb, gently slide the knot to the end of the thread.
Pinning a Seam
Correctly pinning a seam is essential in order to have your sewing come out right. To pin a seam take the two pieces of fabric you are going to sew together and lay them on a flat surface. Make sure the front side of the fabric pieces (with the pattern) are on the inside, against one another and the back of the fabric is on the outside, facing you. Brush all of the wrinkles out of the fabric and line up the pieces so their edges match. Look to see where your seam is going to be and pin the fabric near there to keep the two pieces together.
Straight Stitch
This type of stitch is used for very simple hems, sewing two pieces of fabric together, or gathering fabric. Prepare your fabric, if needed, by ironing it flat or by pinning together two pieces. Knot your thread to the fabric, and then simply weave the needle in and out of the fabric in a straight line. Try to keep the stitching as straight as possible. The length of your stitches can be short or long, depending on what you are working on but they should always be a consistent length. If you are gathering your fabric together, you might want to run a second straight stitch next to the first for stability.
Slip Stitch
Insert the needle in a seam allowance or hem edge to anchor the knot on the inside of the garment. Use the tip of the needle to pick up a few threads of the body of the garment, directly under where the thread knot was anchored. Pull the needle through the fabric toward the hem edge. Move the needle over and insert the needle into the hem edge. Repeat the stitch, picking up the threads of the garment fabric in the same direction on each stitch, keeping the stitch spacing as even as possible.
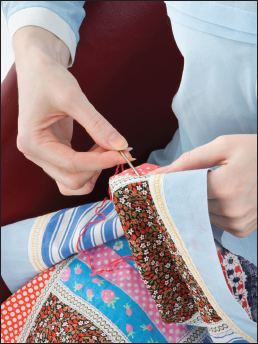
Back Stitch
A back stitch can be used when the stitches will not be seen on the outside of a garment or project. A back stitch is a strong stitch to join two pieces of fabric. Thread a needle a piece of thread that is no longer than a yard long. Longer pieces of thread tend to get knotted. Knot the ends of the threads. Anchor the knot in the inside fabric (usually a seam allowance) near where you need to start sewing. Push the needle into the fabric where you want to start the seam or joining two pieces of fabric. Bring the needle back through both layers of fabric just in front of the previous stitch for the strongest back stitch. Stitching in this fashion will resemble a machine sewn stitch. The length of the stitch sewn can be adjusted for the look or effect you want. Push the needle back into the fabric in between where the needle came in and out of the fabric to create the first stitch. Bring the needle up through the fabric the same distance you came forward in creating the first stitch. Continue on until you have finished the seam.
Overcast Stitch
This stitch is used to keep a fabric edge from fraying. Use a single knotted thread, and work from right to left. Insert the needle from the underside of your work. Pull the thread through to the knot, and insert the needle from the underside again, one eighth to one quarter inch to the left of the knot. Pull the thread through, but not too tightly or the fabric will curl. The more your fabric frays, the closer the stitches should be. Keep the depth of the stitches uniform, and make them as shallow as possible without pulling the fabric apart.
Sewing on a Button
Thread and knot your needle. Place the needle into the fabric so that the knot will end up on the back of the fabric (out of sight). Make a couple of stitches in the fabric where the button is to be located to anchor the thread. Lay the button on the place you will be attaching it. Bring the needle up through the button. Lay the straight pin, needle or toothpick on top of the button. Take the thread over top of the straight pin, needle or toothpick and bring your needle and thread back down through the button. Repeat to make about six stitches over the straight pin, needle or tooth picks to anchor your button. For a button with four holes, repeat the above steps for the other two holes. Bring the needle and thread to the back of the fabric and knot the thread in the threads that have sewn the button to the garment. Cut the thread. Remove the straight pin, needle or tooth pick and snug the button to the loops of thread by gently tugging the button.
Soap Making
When you make your own soap, you get to choose how you want it to look, feel, and smell. Adding dyes, essential oils, texture (with oatmeal, seeds, etc.), or pouring it into molds will make your soap unique. Making soap requires time, patience, and caution, as you’ll be using some caustic and potentially dangerous ingredients—especially lye (sodium hydroxide). Avoid coming into direct contact with the lye; wear goggles, rubber gloves, and long sleeves, and work in a well-ventilated area. Be careful not to breathe in the fumes produced by the lye and water mixture.
Soap is made up of three main ingredients: water, lye, and fats or oils. While lard and tallow were once used exclusively for making soaps, it is perfectly acceptable to use a combination of pure oils for the “fat” needed to make soap. Saponification is the process in which the mixture becomes completely blended and the chemical reactions between the lye and the oils, over time, turn the mixture into a hardened bar of usable soap.
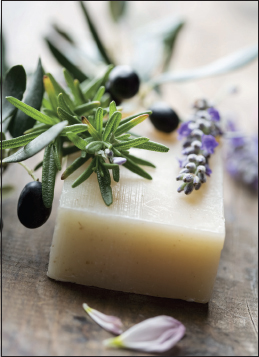
Cold-Pressed Soap
Ingredients
6.9 ounces lye (sodium hydroxide)
2 cups distilled water, cold (from the refrigerator is the best)
2 cups canola oil
2 cups coconut oil 2 cups palm oil
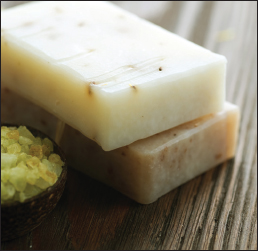
Goggles, gloves, and mask (optional) to wear while making the soap
Mold for the soap (a cake or bread loaf pan will work just fine; you can also find flexible plastic molds at your local arts and crafts store)
Plastic wrap or wax paper to line the molds
Glass bowl to mix the lye and water
Wooden spoon for mixing
2 thermometers (one for the lye and water mixture and one for the oil mixture)
Stainless steel or cast iron pot for heating oils and mixing in lye mixture
Handheld stick blender (optional)
Directions
1. Put on the goggles and gloves and make sure you are working in a well-ventilated room.
2. Ready your mold(s) by lining with plastic wrap or wax paper. Set them aside.
3. Slowly add the lye to the cold, distilled water in a glass bowl (never add the water to the lye) and stir continually for at least a minute, or until the lye is completely dissolved. Place one thermometer into the glass bowl and allow the mixture to cool to around 110°F (the chemical reaction of the lye mixing with the water will cause it to heat up quickly at first).
4. While the lye is cooling, combine the oils in a pot on medium heat and stir well until they are melted together. Place a thermometer into the pot and allow the mixture to cool to 110°F.
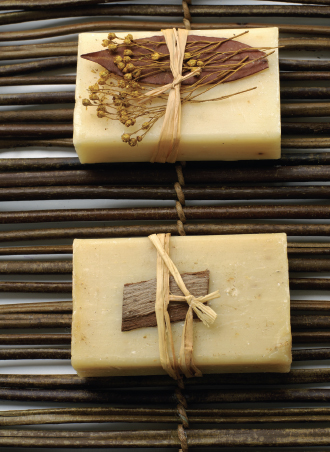
5. Carefully pour the lye mixture into the oil mixture in a small, consistent stream, stirring continuously to make sure the lye and oils mix properly. Continue stirring, either by hand (which can take a very long time) or with a handheld stick blender, until the mixture traces (has the consistency of thin pudding). This may take anywhere from 30 to 60 minutes or more, so be patient. It is well worth the time invested to make sure your mixture traces. If it doesn’t trace all the way, it will not saponify correctly and your soap will be ruined.
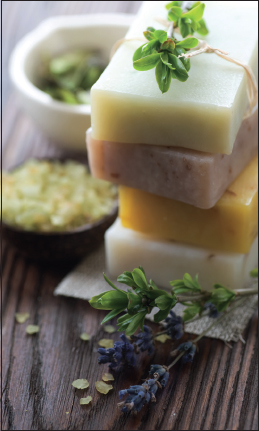
6. Once your mixture has traced, pour carefully into the mold(s) and let sit for a few hours. Then, when the mixture is still soft but congealed enough not to melt back into itself, cut the soap with a table knife into bars. Let sit for a few days, then take the bars out of the mold(s) and place on brown paper (grocery bags are perfect) in a dark area. Allow the bars to cure for another 4 weeks or so before using.
If you want your soap to be colored, add special soap-coloring dyes (you can find these at the local arts and crafts store) after the mixture has traced, stir them in. Or try making your own dyes using herbs, flowers, or spices.
If you are looking to have a yummy-smelling bar of soap, add a few drops of your favorite essential oils (such as lavender, lemon, or rose) after the tracing of the mixture and stir in. You can also add aloe and vitamin E at this point to make your soap softer and more moisturizing.
To add texture and exfoliating properties to your soap, you can stir some oats into the traced mixture, along with some almond essential oil or a dab of honey. This will not only give your soap a nice, pumice-like quality but it will also smell wonderful. Try adding bits of lavender, rose petals, or citrus peel to your soap for variety.
To make soap in different shapes, pour your mixture into molds instead of making them into bars. If you are looking to have round soaps, you can take a few bars of soap you’ve just made, place them into a resealable plastic bag, and warm them by putting the bag into hot water (120°F) for 30 minutes. Then, cut the bars up and roll them into balls. These soaps should set in about 1 hour or so.
Soap Oils
Almost any oil can be used to make soap, but different oils have different qualities; some oils create a creamier lather, some create a bubbly lather. Oils that are high in iodine will produce a softer soap, so be sure to mix with oils that are lower in iodine. Online soap calculators are very helpful when creating your own recipes.
| Oil | Qualities |
| Almond Butter | Conditioning, Creamy Lather. Moderate Iodine. |
| Almond Oil, sweet | Conditioning, Fragrant. High Iodine. |
| Apricot Kernel Oil | Conditioning, Fragrant. High Iodine. |
| Avocado Oil | Conditioning, Creamy Lather. High Iodine. |
| Babassu Oil | Cleansing, Bubbly. Very Low Iodine. |
| Canola Oil | Conditioning. Inexpensive. High Iodine. |
| Cocoa Butter | Creamy Lather. Low Iodine. |
| Coconut Oil | Bubbly Lather, Cleansing. Low Iodine. |
| Emu Oil | Conditioning. Creamy Lather. Moderate Iodine, |
| Evening Primrose Oil | Conditioning. Very High Iodine. |
| Flax Oil, Linseed | Conditioning. Very High Iodine. |
| Ghee | Cleansing, Bubbly Lather. Very Low Iodine. |
| Grapseed Oil | Conditioning. Very High Iodine. |
| Hemp Oil | Conditioning. Very High Iodine. |
| Lanolin Liquid Wax | Low Iodine. |
| Neem Tree Oil | Conditioning, Creamy Lather. High Iodine. |
| Olive Oil | Conditioning, Creamy Lather. High Iodine. |
| Palm Oil | Conditioning, Creamy Lather. Moderate Iodine. |
| Rapeseed Oil | High Iodine. |
| Safflower Oil | Conditioning. Very High Iodine. |
| Oil | Qualities |
| Sesame Oil | Conditioning. High Iodine. |
| Shea Butter | Conditioning, Creamy Lather. Moderate Iodine. |
| Ucuuba Butter | Conditioning. Creamy Lather. Low Iodine. |
The Junior Homesteader
How Soap Works
Teach kids how soap cleans with this simple experiment.
Half-fill two Mason jars with water and add a few drops of food coloring. Pour several tablespoons of oil into each jar (corn oil, olive oil, or whatever you have on hand will be fine). You will see that the oil and water form separate layers. This is because the molecules in oil are hydrophobic, meaning that they repel water.
Add a few drops of liquid soap to one of the jars. Close both jars securely and shake for about thirty seconds. The oil and water should be thoroughly mixed.
Let both jars rest undisturbed. The jar with the soap in it will stay mixed, whereas the jar without the soap will separate back into two distinct layers. Why? Soap is made up of long molecules, each with a hydrophobic end and a hydrophilic (water-loving) end. The water bonds with the hydrophilic end and the oil bonds with the hydrophobic end. The soap serves as a glue that sticks the oil and water together. When you rinse off the soap, it sticks to the water, and the oil sticks to the soap, pulling all the oil down the drain.
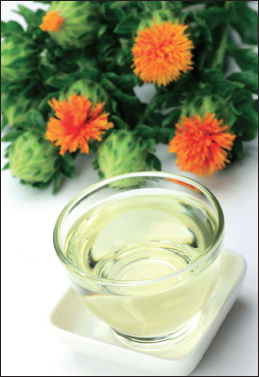
Natural Dyes for Soap or Candles
| Light/Dark Brown | Cinnamon, ground cloves, allspice, nutmeg, coffee |
| Yellow | Turmeric, saffron, calendula petals |
| Green | Liquid chlorophyll, alfalfa, cucumber, sage, nettles |
| Red | Annatto extract, beets, grapeskin extract |
| Blue | Red cabbage |
| Purple | Alkanet root |
Spinning
Wool Equipment Needed:
A spinning wheel or a drop spindle
A drum carder, hand carder, or metal comb for carding
A large tub
A Note on Wool Type
Each different breed of sheep has its own, unique type of wool. You will have to think about what type of wool yarn you want to make and what it will be used for before you get your fleece. Wool comes in many different colors, textures, curl types, and lengths. You can get fine grade, medium, crossbreed, or long wool.
Washing the Fleece
For a beginner it is easier to work with wool that has been washed. Experienced spinners often work with unwashed wool, because the natural grease helps then to spin finer yarn.
Start by inspecting your fleece. Remove any tags, grass, and any larger knots of fleece.
Fill a large tub with hot, steaming water. This first wash is like a pre-soak. Put the fleece in the hot water. Make sure not to agitate, rub, or squeeze your fleece as this will cause it to knot up or “felt.” Always treat fleece gently when picking it up or washing it. Let the fleece soak in the water. Dirt will become loosened and should fall to the bottom. If the fleece is very dirty pre-soak it twice.
Dump the dirty water from the tub and fill it with clean, hot water. Add dish soap (any kind you prefer) to the water and agitate it until the water is sudsy. Add the fleece, making sure to dunk it in the water gently so it is all wet, and let it sit for ten minutes. Rinse the fleece, letting water run through it until it comes out clear and without soap suds. If the wash water is very dirty and dark looking you may want to wash the fleece again. Let the fleece air-dry.
Carding the Fleece
The next step is to “card” your fleece. Carding is aligning the fibers of the fleece in a parallel direction, so that the little barbs on the wool fibers can catch easily. Hand cards are combs that are typically square or rectangular paddles. The working face of each paddle can be flat or cylindrically curved. If you are combing the wool, simply lay it out on a flat surface one lock at a time and brush down the locks. If you are drum carding, feed it in a small lock at a time while turning the carder. If you are going to be making a lot of wool yarn a drum carder is a good investment.
You can create several different types of wool bundles as you are carding. A rolag is a roll of fibers created by first carding the fleece, using hand-held combs, and then by gently rolling the fleece off the cards. A sliver is a long bundle of fibers, created by carding and then drawing the wool into long strips where the fibers are parallel. A roving is a long and narrow bundle of fibers, created by carding the fleece and then drawing it into long strips in the same way used to create slivers, except when making a roving draw on the fibers even more while slightly twisting them. A batt is a rectangular layer of carded wool taken off from a drum carder and is usually six to eight inches wide and about two feet long. What type of wool bundle you create is entirely up to you; whichever one would match your equipment, preferences, and the particular project you will use the wool for.
Spinning the Wool
Woolen yarn is made from carded wool. It is soft, light, stretchy, and full of air. Worsted yarn is more complicated to produce, and is created when the fleece is combed and the short fibers are removed. The combed fibers lie parallel to each other and produce a harder, strong yarn. Most spinners make a blend of a woolen and worsted yarn, using techniques from both categories.
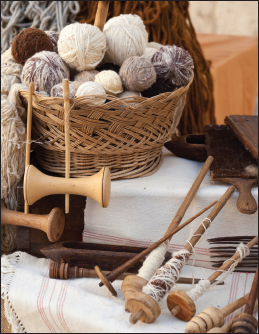
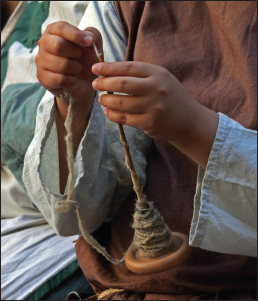
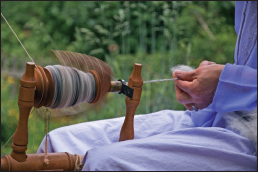
To begin spinning your carded wool first set up your drop spindle or spinning wheel with a “lead;” an already spun piece of yarn that you can attach your spinning to. Always spin the wheel or the drop spindle clockwise. Place your non-dominant hand closest to the wheel or spindle on the fleece, and your dominant further back and closer to you. Your dominant hand will “draw out” the wool, while your non-dominant holds the twist from escaping up the un-spun fiber. Overlap the un-spun and spun fiber about four to five inches, and hold it securely with your non-dominant hand. Turn the wheel clockwise, and your wool will naturally twist. Draw the wool out, and slowly move your hands toward your body (or upward in the case of a drop spindle.) Add more wool as you need it. If working on the drop spindle, after creating a stretch of yarn that is so long that it no longer feels comfortable, wind it onto the spindle. In the case of a wheel, allow the wheel to slowly take it up.
Once you have filled your spindle with new wool yarn, unwind the thread and make a ‘skein’ by wrapping it around your hand and your elbow- like you would a rope or cord. Tie the skein at intervals with a different yarn (not wool).
You have to set the twist on your yarn, or it will unravel. Thoroughly soak the skein in hot water, being careful not to twist or agitate it. Hang the skein through the top of a hanger to dry. Setting the twist is accomplished by hanging something heavy from the bottom of the skein while it is drying. You want the weight to pull down on the skein so that it is taut but you don’t want to break your threads. Once the skein has dried the twist you made should be set and you will have handmade wool yarn!
Tanning Leather
After you have butchered any animal, you have a skin left over. Don’t just throw it away! There are simple general tanning methods that will work with any hides you have, whether rabbit, deer, or cow.
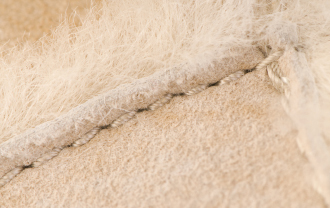
Preparing to Tan
The first step, known as “fleshing the hide,” is to remove any extra fat or flesh that has stuck to the hide as it was being pulled off the animal. This can be done by first soaking the hide overnight in a salt and water solution to loosen the stuck bits. Rinse the hide in clean water and then apply two layers of salt, waiting for the first to absorb before applying the second. Make sure not to get any salt on the fur side. Fold the hide in half, flesh sides together and then roll the hide up. Place it somewhere to drain and dry overnight.
Put the hide on a smooth surface, flesh side up. A tanners log would be best for this, but if you do not have one you can easily make one by splitting a log in half, smoothing the bark surface, and then placing the log, cut side down, in your workshop. Stretch the hide over the rounded surface. Scrape the flesh side of the hide of any fat and flesh stuck to it using the blunt side of a knife. When all the bits have been removed, wash the hide in soapy water and rinse thoroughly.
If you want to remove the fur from the hide it must be done at this stage, before the tanning begins. Soak the fur in a de-hairing solution, a mixture of one quart hydrated lime to every 5 gallons of water, for five to ten days in a large wooden container. Note that lime is caustic and will burn your skin, so wear gloves and goggles whenever you are working with it! Stir the hide around in the mixture once or twice a day. After five to ten days the hair should be ready to be removed. Rinse the hide, making sure that all the lime is gone; a de-liming agent may be used to make it easier. Put the hide fur-side up on your tanning log. Scrape it in the same way as you did for removing the flesh. At this point, you can simply allow the skin to dry and you’ll have rawhide, which is great for moccasins, lacing for snowshoes, cords, and many other uses.
Tanning
Before tanning, the skins must be unhaired, degreased, desalted, and soaked in water over a period of 6 hours to 2 days. Traditionally, tanning was accomplished by using tannic acid—a chemical derived from the bark of many different trees—to process hides. Today chemicals can be used to achieve the same thing.
Tanning begins with the hide being treated with a mixture of common salt and sulfuric acid, in case a chemical tanning is to be done. This is done to bring down the pH of collagen to a very low level so as to facilitate the absorption of mineral tanning agent. This process is known as “pickling.” The salt penetrates the hide twice as fast as the acid and checks the ill effect of sudden drop of pH.
For natural tanning, hides are stretched onto frames and immersed for several weeks in vats of increasing concentrations of tannin. This method produces very flexible leather.
For chemical tanning, use basic chromium sulfate. Once the desired level of penetration of chromium into the hide is achieved, the pH of the material is raised again to facilitate the process. This is known as “basification”. In the raw state chromium tanned skins are blue. Chemical tanning is faster than vegetable tanning, taking less than one day for this part of the process, and produces a stretchable leather.
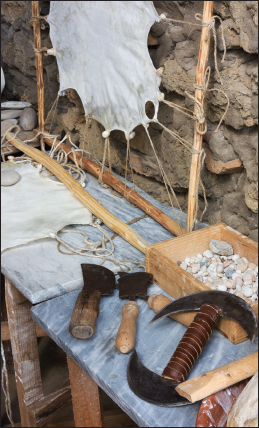
Alternately, in large plastic or wooden basin you can mix 5 pounds of salt with 10 gallons of warm water (soft water, such as rain water, is best) and 2 pounds of alum that has been mixed with just enough hot water to dissolve it. Though this solution does not have any toxic vapors, you should still wear gloves to protect your skin. Place the hide in the solution and stir with a big paddle or stick twice a day for 2 days to a week, depending on the type and size of the skin.
Finishing
After the hide has been tanned, remove it from the solution it was in. Rinse it thoroughly. Hang the hide in a cool ventilated place out of direct sunlight. If the fur is still present be sure to place the hide fur side up. The drying out process should take several days.
When the hide is very slightly damp, fold it in half, flesh side down, roll it up, and let it sit overnight. After this, unfold the hide and work it—pulling, stretching, and twisting it until it is pliable. Rub in finishing oil of choice (slightly warmed) with your hands. If there are rough patches in the fur they can be smoothed down with sandpaper. If the fur is still present, brush and comb it until it is clean and fluffed.