chapter six
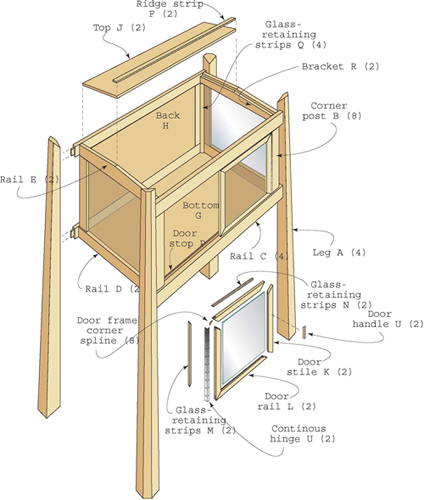
showcase cabinet
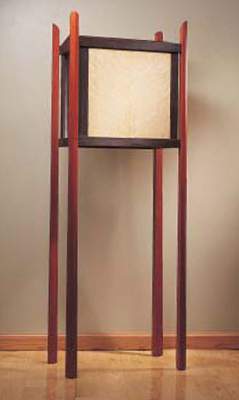
THIS SHOWCASE CABINET IS THE opposite of the game table in its concept and design. I decided to make all the lines straight. No curves or rounded edges. This led to a complex cabinet with every edge beveled, even if the bevel was only
 ″ wide.
The cabinet was constructed using mortise-and-tenon joinery. The cabinet box was constructed first, then the mortises were cut in the legs so they aligned with the tenons on the box.
The legs were tapered on the jointer, but they could have been tapered on the router table using an offset outfeed fence.
The cabinet is finished with three coats of rub-on polyurethane/oil finish.
MATERIALS LIST inches (millimeters)
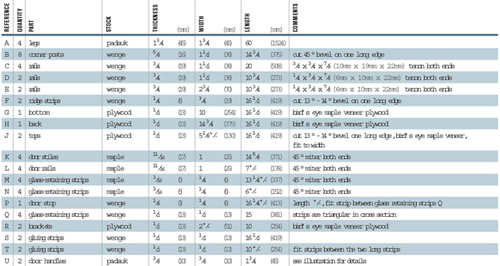
HARDWARE
2 1″×1 ½″ × 14 5/8″ (25mm × 38mm × 371mm) continuous hinges
2 1/8″×5 ¾″×13 1/8″ (3mm × 146mm × 333mm) glass panels
2 1/8″×9 7/8″×15
″ (3mm × 251mm × 383mm) glass panels
16 ¼″×¾″ (6mm × 19mm) gluing dowels
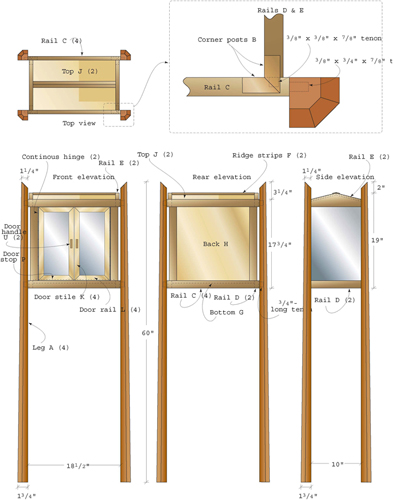
Side view assembly detail
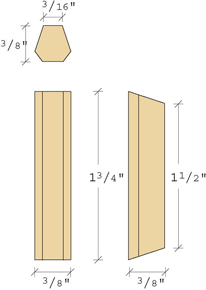
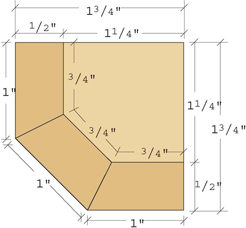
Full-scale door pull detail
Full-scale leg detail
tapering on the router table

tapering on the jointer

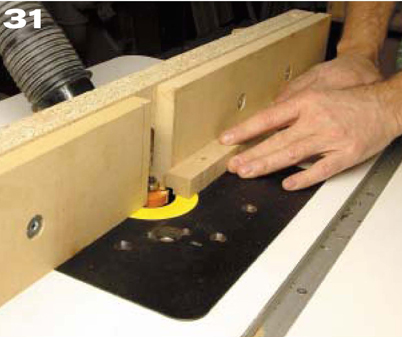
Mark the locations of the mortises on the legs. Make marks on the router table fence showing the location of the router bit. This will give you the start and stop points for cutting the mortise. Hold the back part of the leg on the router tabletop and hold the rest of the leg over the router bit. Lower the leg onto the router bit, making a plunge cut. Then, feed the leg until the marks on the legs lineup with the marks on the router table fence. Lift up the front part of the leg off the router bit. Flip the leg end for end and cut the other mortises in the opposite side of the leg. All the legs need to be marked right and left front and right and left back to help you keep the legs in their proper locations.
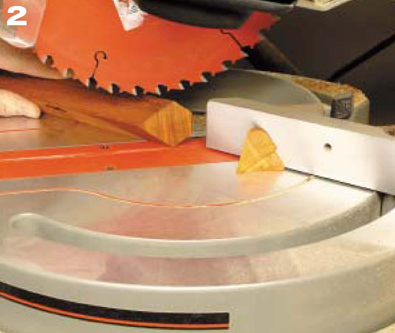
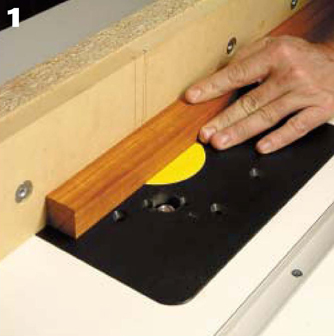
Cut the 45°bevel at the tops of the legs. Hold the 45°flattaper on the front of the leg against the saw's vertical fence when making this cut. This bevel will taper to the inside of the cabinet diagonally at a 45°angle, adding visual movement to the entire project.
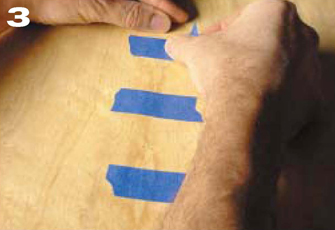
If you have some special wood you would like to use for the bottom, top and back panels, cut them as shown in the cutting list. If you are using veneer, start by jointing one edge of all the leaves of veneer. You can joint them all at one time by sandwiching them between two flat boards and running this setup on a jointer. You can also clamp the setup in a vise and plane the edges with a hand plane. Then, lay out the leaves in bookmatched patterns of your choice. Tape the butt-jointed edges of the veneer leaves together.
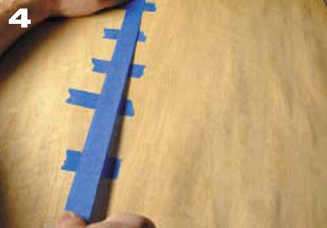
Run a piece of tape the length of the veneer joint. This will ensure the joint stays together during glue-up.
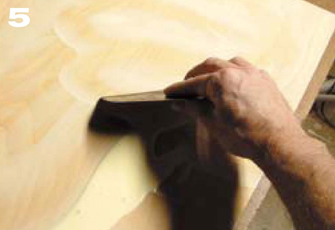
Use either a serrated trowel or a small paint roller to apply an even coat of glue to the substrate for the veneer. Do not apply any glue to the veneer or it will immediately start to curl and become difficult to place on the substrate.
Have all the clamps, clamping cauls and waxed paper ready to go when you start the veneer glue-up procedure. Put a sheet of waxed paper against each veneered surface to prevent the panels from sticking to the tabletop and to each other.
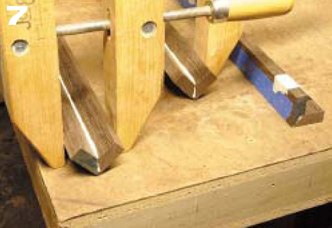
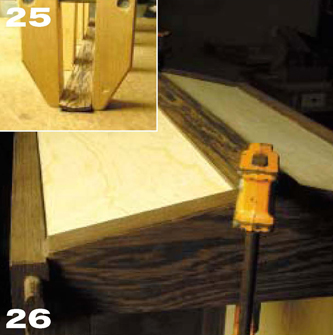
After cutting the 45°bevels on the corner posts, lay the parts faceup with the sharp edges of the miters touching. Tape this joint, turn the assembly over, apply glue to the joint and fold as shown in the photo. Hold the assembly together with light clamp pressure or wrap tape around it until the glue dries.
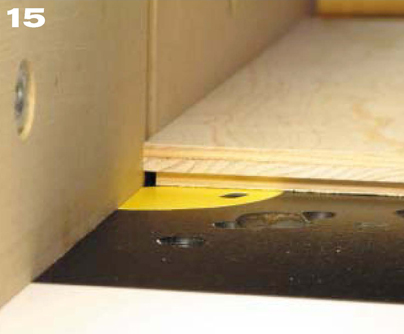
Using a straight-cutting bit set up in the router, cut the mortises in the front and back rails. Use the adjustable fences as limiting stops and a miter gauge as a guide to feed the work.
This method produces a clean mortise.

Set the straight-cutting bit to the proper height and cut the tenons on the side rails. Cut the tenon in two or three passes to nibble the material away. To cut the tenons on the top side rails, use the miter gauge on the straight side of the rail and make the cut.
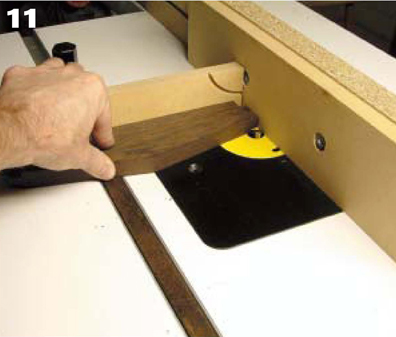
To make the other cut for the tenon on the top side rail, reverse the miter gauge, flip the rail over and make the second cut.

Cut the top shoulder on the top rails with a handsaw.
Make the second cut from the end of the tenon. Be careful not to cut into the shoulder.
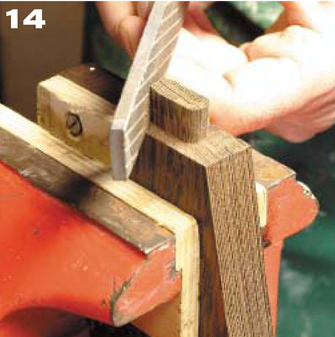
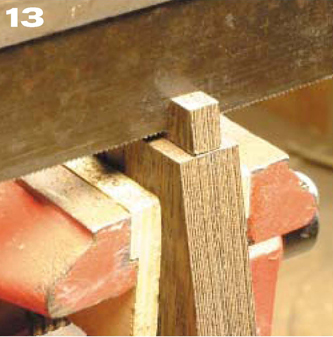
Use a file to round the tenons.
Cut the 1/8″× 1/8″ rabbet on the bottom panel, using a straight-cutting bit.
doweling jig
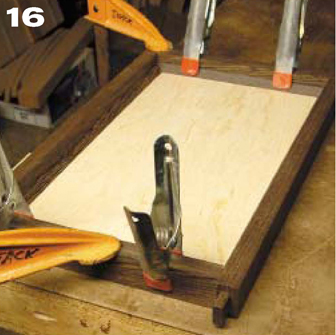
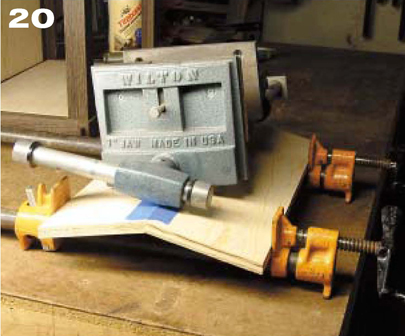
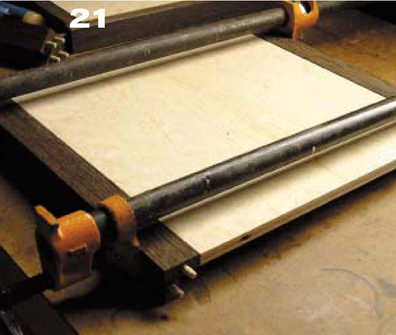
Set the bottom panel facedown on the work top and fit the bottom frame facedown around it. Use the beveled falloff strips left over from cutting the corner posts' bevels as glue blocks S and T. Glue them to the inside of the bottom. When the glue dries, the panel will be firmly in place. Then assemble the top frame.
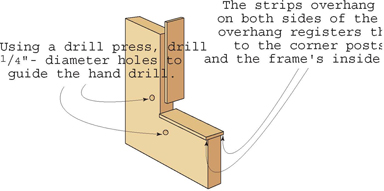

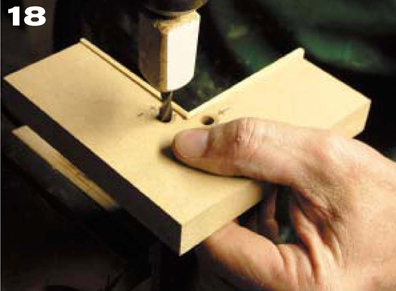
Use dowels to locate and attach the corner posts to the top and bottom frame assemblies. Make a doweling jig as shown in the photo (see the illustration for details).
The lips of the attached strips will register the jig on the inside of the corner posts.
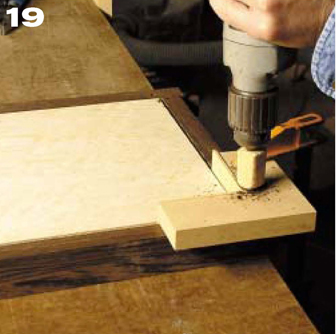
Use the doweling jig to drill holes in the top and bottom assemblies. The lip of the strips on the jig will register it on the inside corners of the frames. The lip will just fit into the rabbet in the bottom panel.
Cut the bevels on the top panels. Tape the miter joint, apply glue and fold it together. Lightly clamp the parts and counter the clamp pressure by putting some weight on the top of the joint.
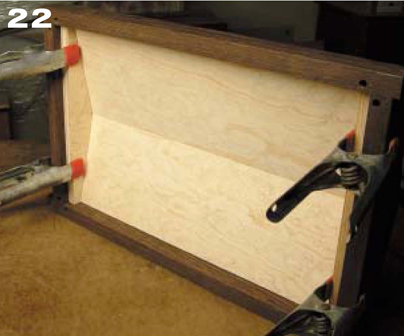
Glue two corner posts to the sides of the back panel.
Cut two brackets to fit on the inside of the top frame and glue them in place. Use the top panel assembly to help locate these brackets. After the glue sets, remove the top panel, add glue to the top edges of the brackets and reinsert the top panel assembly, gluing it in place.
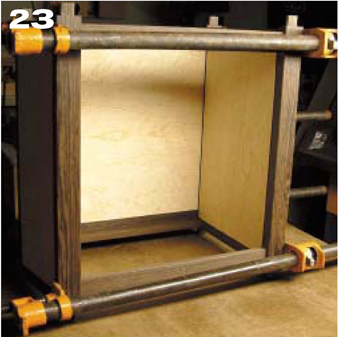
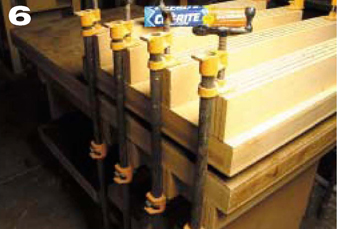
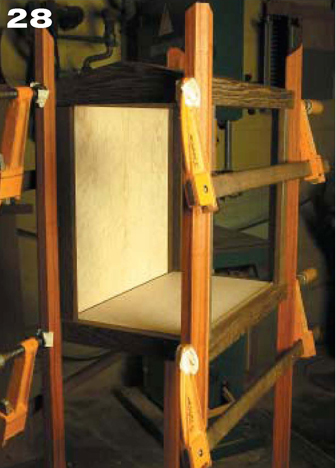
Dry fit all the parts before final assembly. Once you're sure it all fits together properly, add glue to the tenons and in the mortises. Using no more pressure than is needed, clamp the cabinet together. Double-check for squareness.

Glue the door stop into the front groove in the bottom of the cabinet.
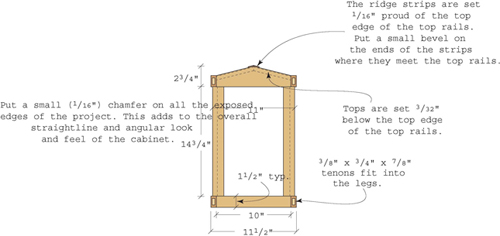
Cut the miters on the top ridge strips. Tape the miters, glue and clamp them together. After the glue dries, cut the ridge strip assembly to length. Bevel the outside top edges of the assembly, then glue it to the top of the cabinet. Be sure the top ridge of the assembly lines up with the peaks of each top side rail.
After the glass is put into the cabinet, it is held in place with four triangular strips that are attached to the cabinet with ¾″- long brass screws.
Sand the legs. Attach the legs to the cabinet using glue.

The photo shows the beveled ends of the top rails where they join the front rails. The ridge strip assembly is also beveled on its long edges and at the ends where they meet the top side rails.
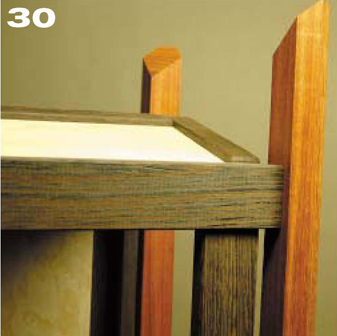
This photo shows the space between the leg and the side post and how the angles cut on the tops of the legs are oriented to the cabinet.
Machine the door frame parts to thickness and width. Leave the parts long. Cut the rabbets in the door frame parts using a rabbeting bit. This bit's cutter is ground to an angle that allows the cutter to shear the material. This makes a clean cut rabbet with no wood grain tear-out.
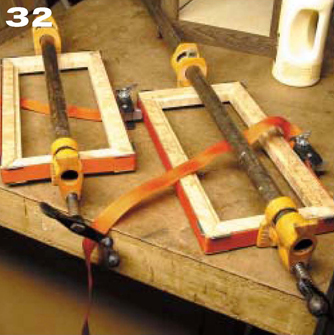
Measure the opening for the doors in the cabinet box. Cut the door parts accordingly. You want these doors to fit with a minimum amount of clearance on all sides. It gives the project a nice look. Using band clamps, glue the miter joints on each door. Don't use any fasteners in these joints. The glue will hold these doors together while you do the next machining operation.
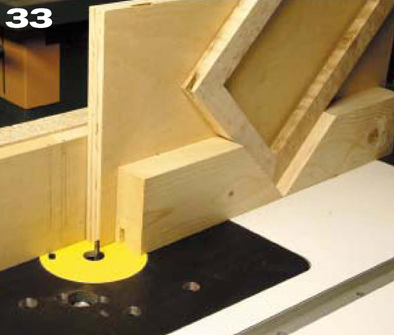
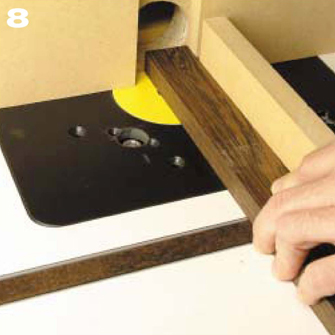
Using a slotting fixture, cut the slots in the corners of the door frames. Use a straight-cutting ¼″-diameter router bit.

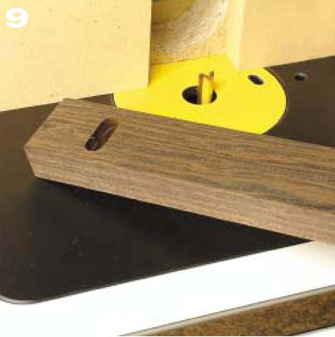
Cut hardwood splines from the same material as the cabinet box frame is made of and glue them into the slots in the corners of the doors. These splines add the necessary strength to keep the miter joints strong and secure while adding another decorative element to the project. Attach the continuous hinges to the doors and install them in the cabinet. Attach the door handles. When everything fits properly, remove the doors and finish the entire cabinet and the doors. Install the glass in the doors and the cabinet. Then reinstall the doors.