Chapter 6
Mastering Brine Pickling
Most people think of pickles as chunks of vegetables floating in vinegar, which is one type of pickle, but it’s not the only kind. Technically everything that we are talking about in this book is pickling. When we ferment and produce brine, we are generating the environment for an acidic solution that preserves.
For the purposes of this book, we will define pickles as vegetables that are either still whole or cut into larger pieces. Unlike shredded, thinly sliced, or finely diced veggies, these vegetables cannot create their own brine, so we add a prepared salt brine and submerge the vegetables in it. The vegetables suspended in the salt water begin to interact with the brine in the process of osmosis, which begins the lactic-acid fermentation process.
Remember the mantra: Submerge in brine and all will be fine. The rule is still the same: Keep those veggies submerged.
Understanding Brine
To make brine, always use the best water you can find, preferably unchlorinated spring water. Many books recommend boiling the water before making brine. When we are confident that our water source is pure, we skip this step.
You don’t want to use kosher pickling salt. It is refined and contains anti-caking agents, which do not help your pickles. We like to use salts that have a lower sodium chloride content and higher mineral content, because high-quality, unrefined salts that contain trace minerals and enzymes help your body maintain a proper balance (see chapter 3). The other benefit is the pickles taste less salty.
Pickle Facts to Impress Your Friends
- Pickling cucumbers began in India 4,000 years ago.
- Pickle comes from the Dutch word pekel, which actually means “brine.”
- Traditional pickling herbs like mustard seed and cinnamon are antimicrobial.
- Pickles are like kraut or kimchi: they introduce vitamin B into the food.
- George Washington is said to have had a collection of 476 varieties of pickles.
- When both salt concentration and temperature are low, the dominant bacteria at work are Leuconostoc mesenteroides. This strain produces a mix of acids, alcohol, and aroma compounds. At higher temperatures, we see Lactobacillus plantarum, a.k.a. lactic-acid bacteria. Many pickles start with Leuconostoc and change to Lactobacillus at a progressively higher level of acidity.
For cucumbers, the ratio of salt to water is different from what is appropriate for other vegetables; it is important for proper preservation and to achieve that deli taste. This has to do with the enzymes in cucumbers that are prone to break down and soften the vegetables. Cucumber brine is 3⁄4 cup salt to a gallon of water. If you want less salt, you can experiment with reducing the amount a little, but don’t go lower than 1⁄2 cup salt to a gallon of water. On other veggies, especially roots and more dense vegetables, you can use a more dilute brine solution, which we call the Basic Brine.
Unless otherwise indicated in a recipe, these are the two main brines you’ll need throughout the recipes in this book; for both, simply stir the salt into the water until it is dissolved.
Basic Brine
- 1 gallon water
- 1⁄2 cup salt
Cucumber Brine
- 1 gallon water
- 3⁄4 cup salt
kimchi Brine
- 1 gallon water
- 1 cup salt
We suggest making a little more brine than you will need because when fermenting your pickles (and even once they’re stored in the fridge), you often need to top up the jar or crock to keep the vegetables submerged; keep the extra brine in the fridge for about a week.
Fermentista’s Tip
A Note on Brine Solutions with Added Vinegar
There are as many family recipes for pickles as there are grandmothers who made them. In our classes we have been asked about brine solutions that contain both salt and vinegar for fermentation. It’s important to understand that fermentation takes place naturally and beautifully without the added acid of vinegar. It’s not a good idea to use both. The salt solution is ideal for promoting the succession of lactic-acid bacteria. While there is a bit of acetic acid (vinegar) that is created during the fermentation, the ratio works. When acetic acid is introduced from the outside, the balance is disrupted and this can stunt the development of the pickles. But what about that classic bread-and-butter pickle flavor — all vinegar and sweet? This cannot be achieved by fermentation alone. Instead, ferment your cucumbers fully, remove some of the brine, and replace with a 50:50 solution of raw vinegar and honey or sugar.
Leaves
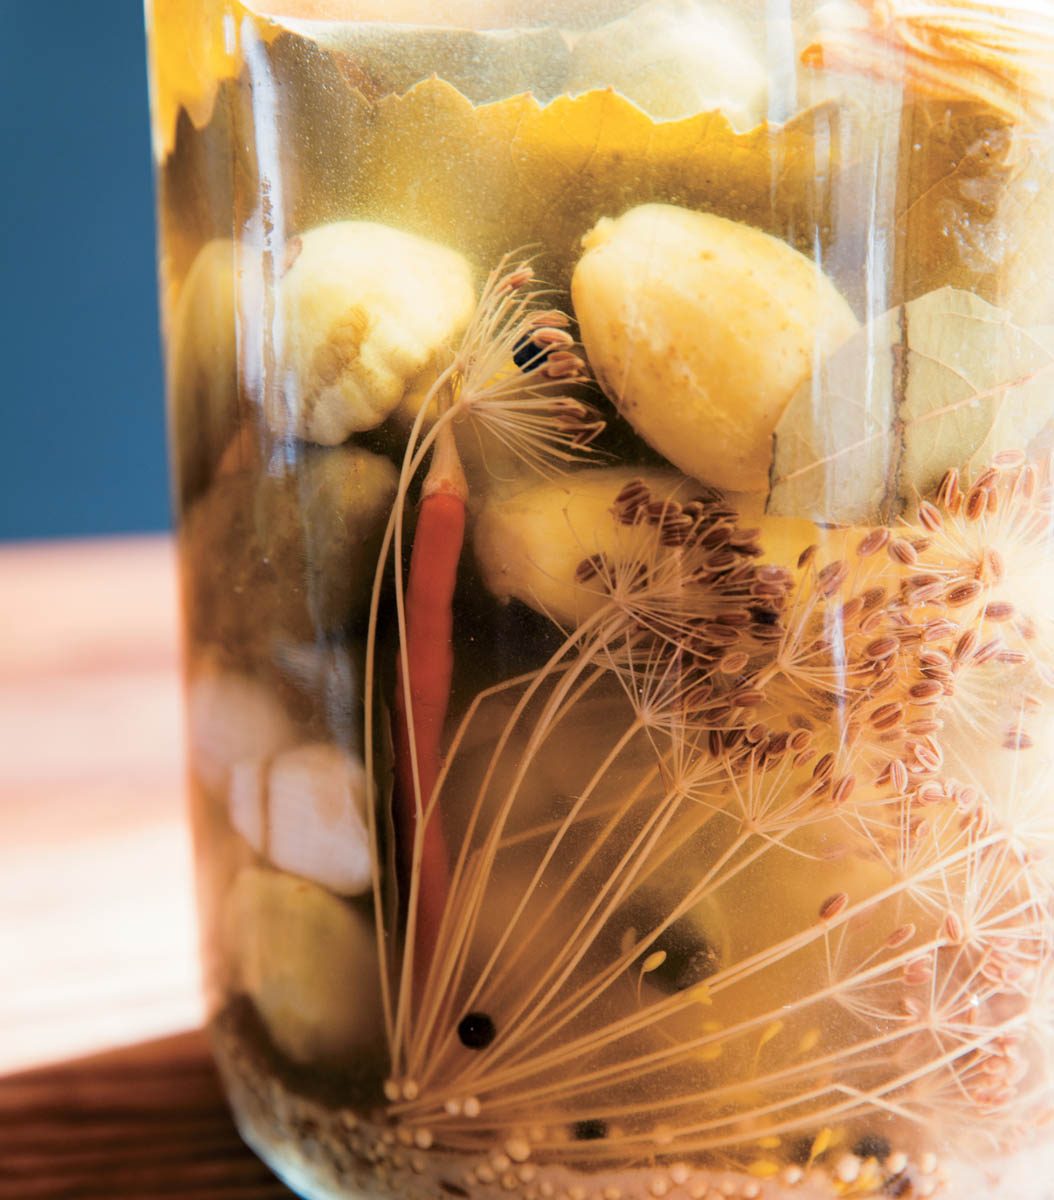
We add leaves to pickles for two reasons: to keep the veggies under the brine and to help keep veggies crisp. The leaves to use are those that contain tannins, which is what encourages crispness. We generally use horseradish or grape leaves for their size. The grape leaf is so conveniently shaped and just plain looks good. The horseradish adds a wonderful flavor; the large leaf also keeps your pickles from floating up. Other options include raspberry leaves, currant leaves, sour cherry leaves, and oak leaves. Oak leaves are high in tannins and can add a little more bitter than you are looking for, so use them sparingly. Find leaves that have not been sprayed.
These leaves all come from perennial shrubs, vines, and trees, so if you plan to pickle in the winter you might consider preserving some grape leaves just for this purpose.
About Pickle Medleys
You can use just about any vegetable to make brined pickles, just not necessarily together. There are some things to keep in mind when making medleys:
- Consider the type of vegetables. You want the textures to be similar; for example, you don’t want to use zucchini and beets in the same ferment, as the rate of fermentation is different.
- Alliums such as onions and garlic work well in any pickle.
- Sliced peppers tend to get very soft. If you want to add sweet or hot peppers, use the dried ones, or the small whole pickling varieties, such as pimientos.
Basic Steps for Making Brine Pickles
- Prepare a salt-water brine according to the recipe directions.
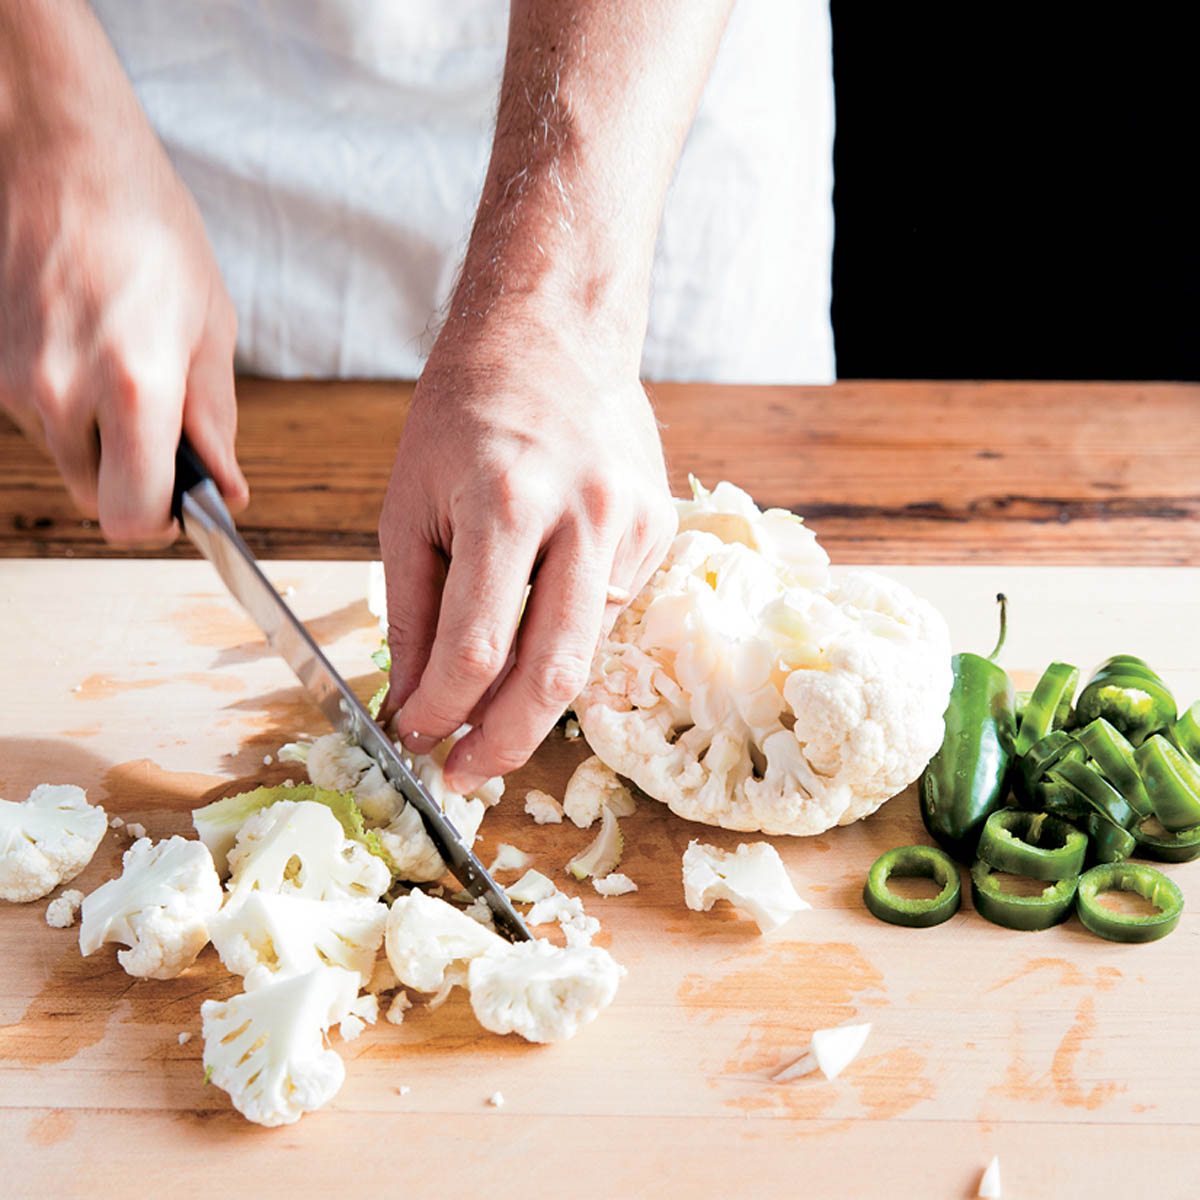
- Rinse the vegetables in cold water and prepare according to the recipe instructions.
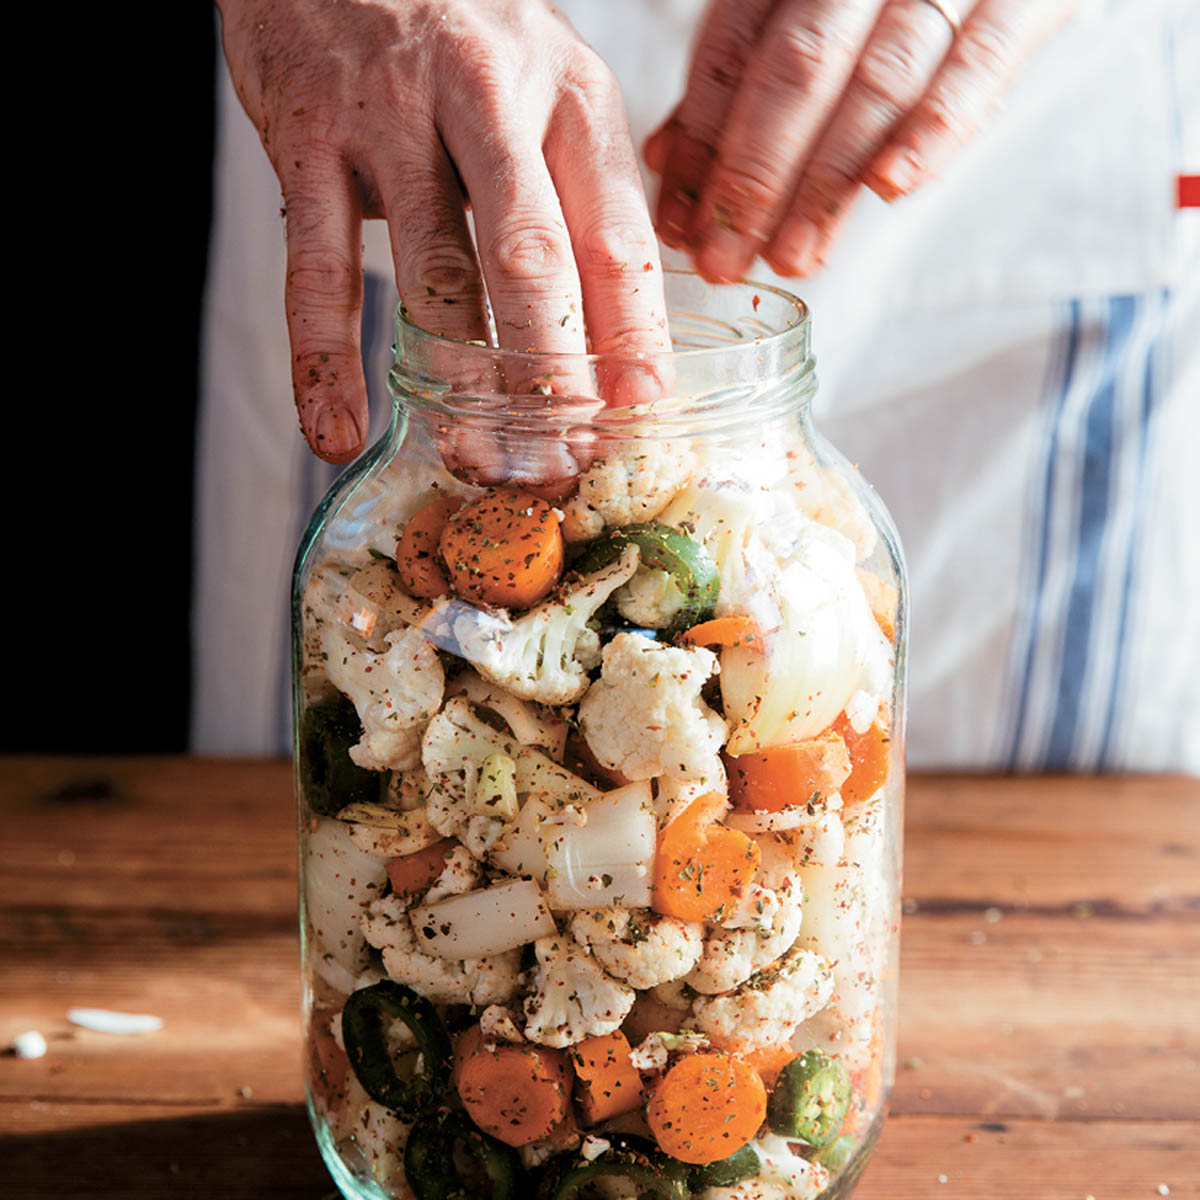
- Combine the vegetables (and any spices) in a large bowl and mix thoroughly.
- Pack the vegetables into a crock or jar, leaving 4 inches of headspace in a crock (headspace is the space between the vegetables and the top of the vessel) or wedging them under the shoulder of the jar (this will help keep them submerged in the brine).
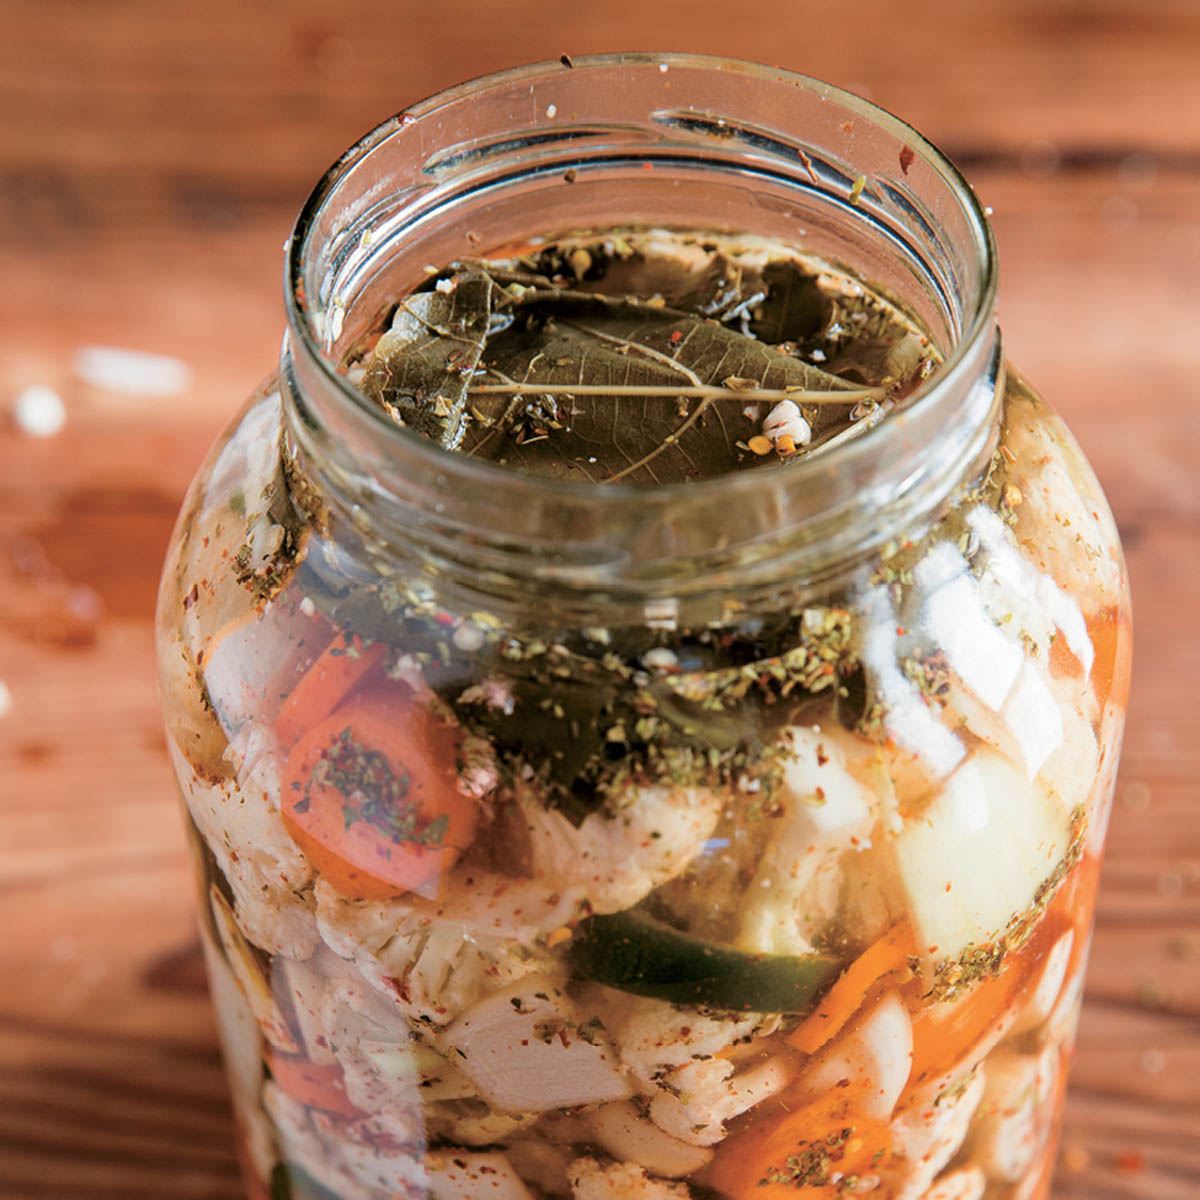
- Pour in enough brine to cover the vegetables completely. In a jar this may be quite close to the rim; in a crock you’ll need to leave room for the follower. (Remember the pickling mantra: Submerge in brine and all will be fine.) Reserve any leftover brine in the fridge (it will keep for a week; discard thereafter and make a new batch, if needed).
- Place grape or other tannin-rich leaves (oak, horseradish, sour cherry, currant, and so on), if using, over the vegetables as a primary follower.
- If using a crock, add a secondary follower, such as a plate that will rest atop the pickles, and a weight, such as a sealed water-filled jar, to keep things in place. If using a jar, the tightly wedged vegetables usually stay in place so you won’t need a secondary follower or weight. Just loosely cover the jar with the lid; that is, don’t clamp down a bail-style lid or tighten the band of a canning jar lid. This enables the ferment to release CO2. Then cover the crock or jar with a clean towel.
- Set aside the crock or jar on a baking sheet, somewhere nearby and out of direct sunlight, in a cool area (anywhere that is between 55 and 75°F will work, but the cooler the better). Ferment for the time indicated in the recipe. Note: The baking sheet will catch any brine that spills out; periodically discard the liquid.
- During the fermentation period, monitor the brine level and top off with the reserved brine solution, if needed, to cover. You may see scum on top; it is generally harmless, but if you see mold, scoop it out. Veggies peeking up out of the brine will quickly get soft and spoil. If you see anything even a tiny bit out of the brine, use a utensil to just poke it back under or, if it’s begun to soften or turn pinkish, pluck it out. Everything else should stay under the brine.
- As the vegetables ferment, they begin to lose their vibrant color and the brine will get cloudy. This is when you can start to test your pickles. Using a clean, nonreactive utensil, remove some of the vegetables and taste. They’re ready when:
- They’re pleasingly sour and pickle-y tasting, without the strong acidity of vinegar.
- The flavors have mingled.
- They’re softer than they were when fresh but retain some crispiness.
- The colors are muted, even dull.
- The brine is cloudy.
If they’re not sour enough for your palate, rinse the followers and weight (and replace the grape leaves with fresh ones, if using), put everything back in place, and continue monitoring the brine level and watching for scum or mold.
- When the pickled vegetables are ready, carefully skim off any scum on top, along with any stray bits of floating vegetables. Transfer the pickled vegetables into jars if you fermented in a crock. If you fermented in jars, you can store the vegetables in them. Pour in enough brine to completely submerge the vegetables. Cover with fresh grape leaves, if you have some, then screw on the lids and store in the refrigerator.
- After about 1 day check to be sure the pickles are still submerged, topping off with more brine, if necessary.
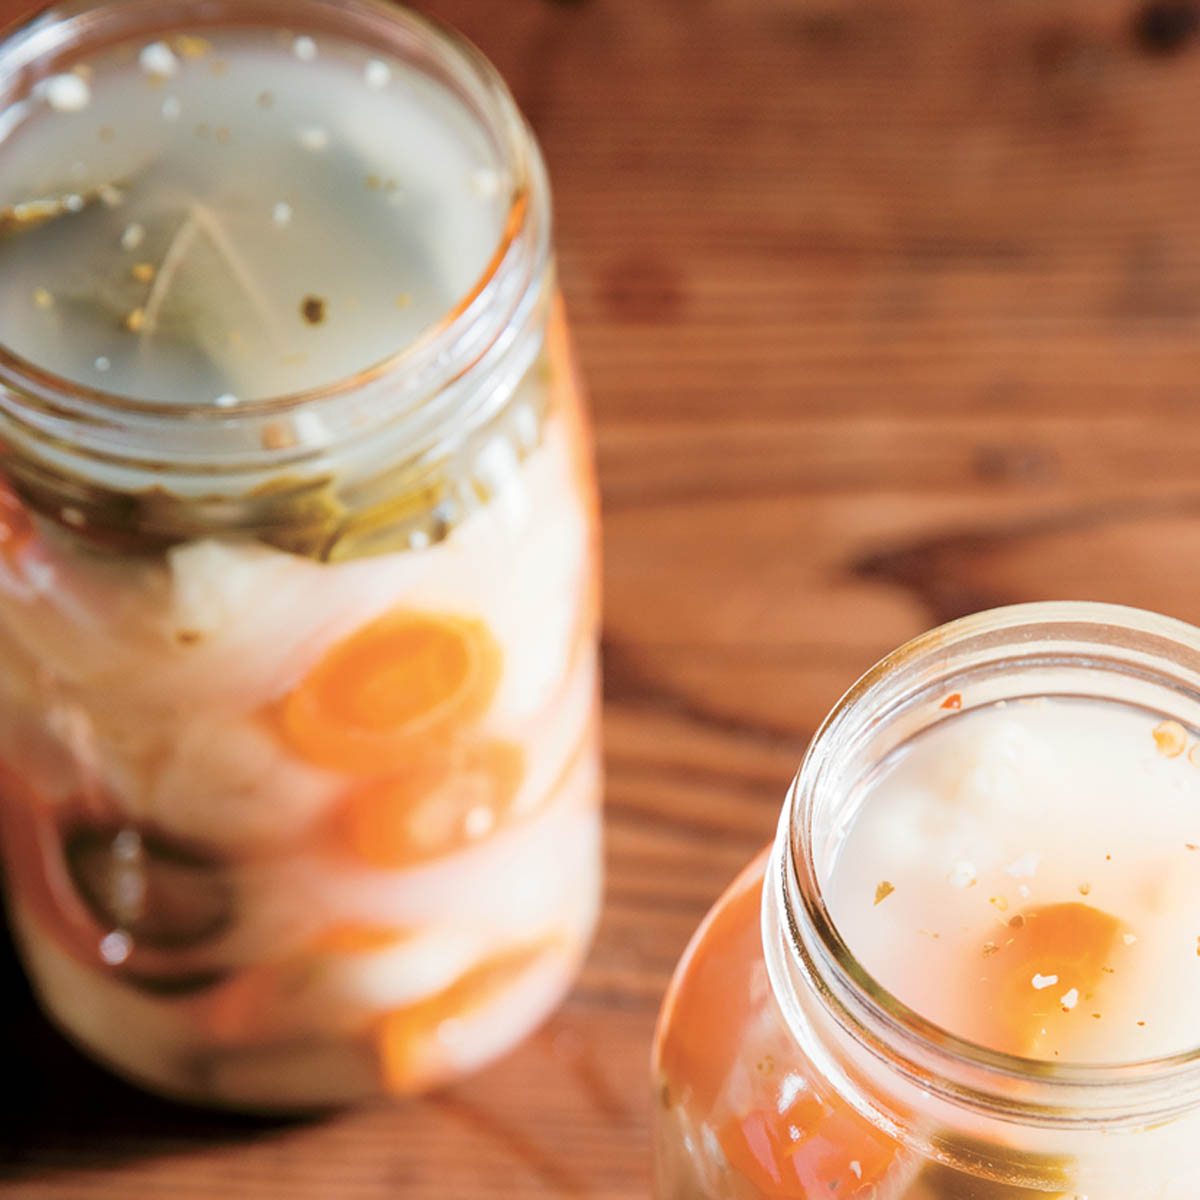
Brine Pickles Visual Guide
- 1. Make the brine.
- 2. Cut veggies into chunks.
- 3. Mix veggies and spices together to distribute evenly.
- 4. Pack the mixture into a jar.
- 5. Pour in brine until veggies are submerged.
- 6. Place a leaf or other follower on the surface.
- 7. The leaf is over the veggies and below the brine.
- 8. Cover with lid but do not tighten. You want CO2 to escape.
- 9. Cover with a cloth and set aside to ferment.
- 10. Taste the veggies when the brine begins to appear cloudy. Often spices will settle to the bottom.
- 11. Finished pickles.
- 12. Transfer to smaller jars for long-term storage.
- 13. For storage, pickles should be fully submerged.