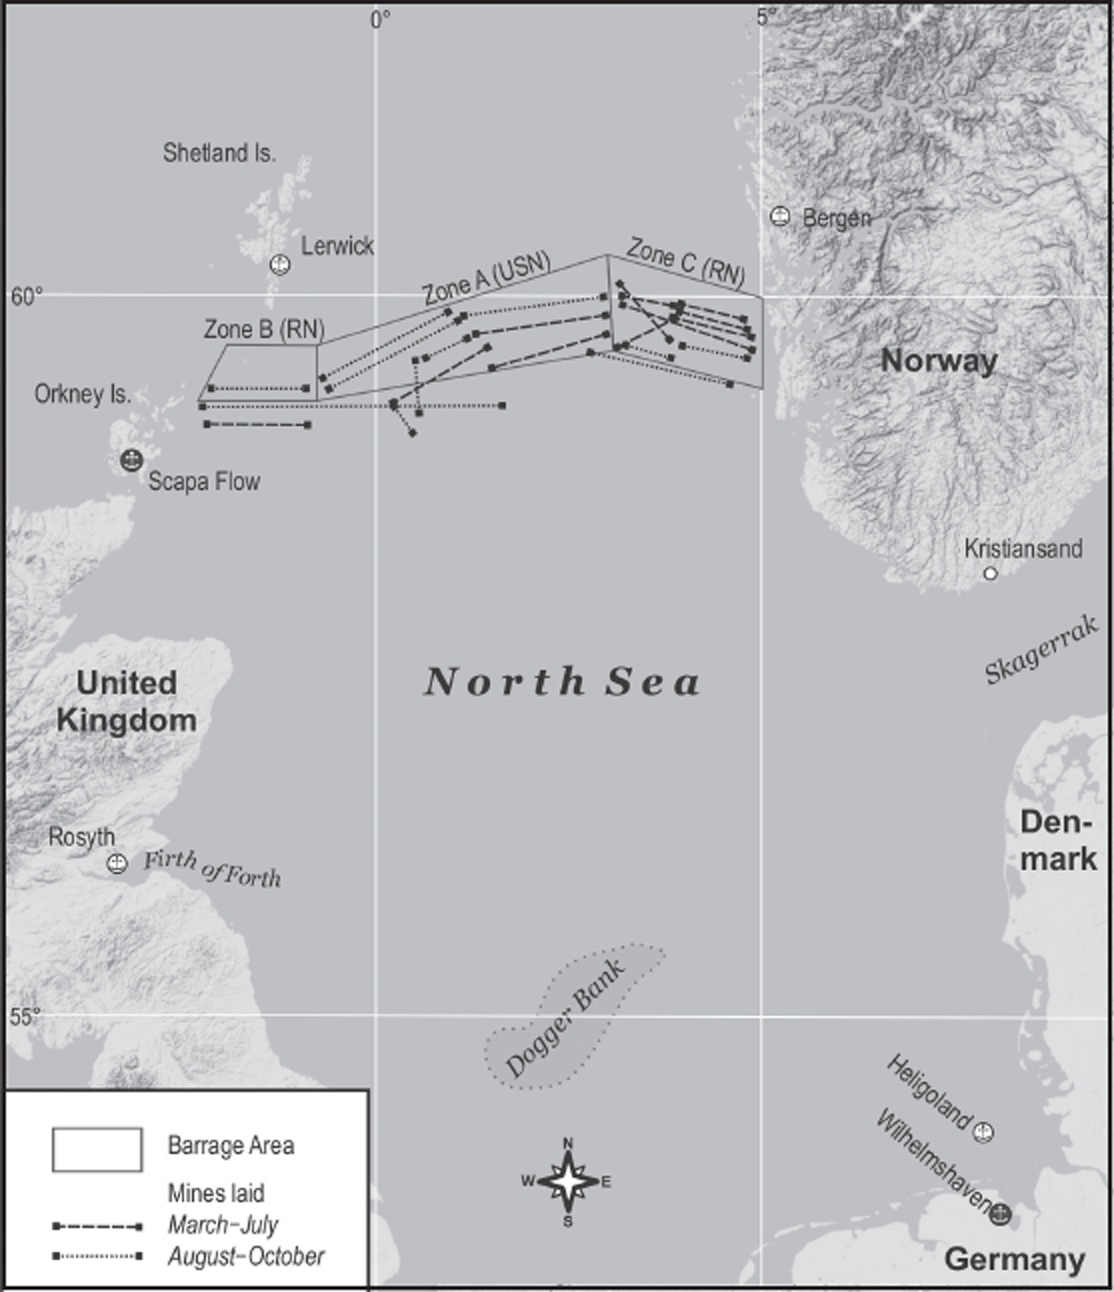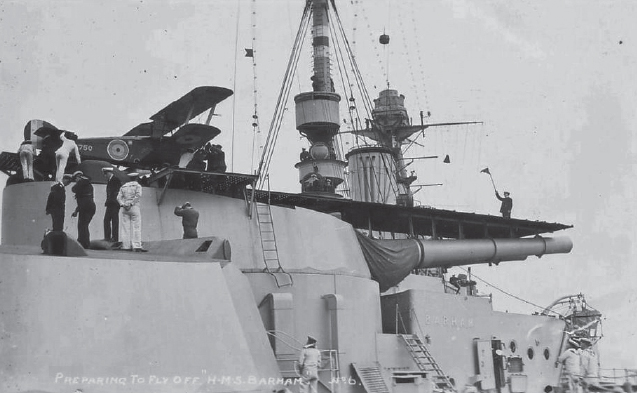
Photo 14.1 HMS Barham with aircraft Sea Power Centre, Australia
End Game in the North Sea
THE HIGH SEA FLEET DID NOT REPEAT the attempt against the Scandinavian convoy. Scheer later wrote “it was unfortunately the last which the Fleet was unable to undertake,” but he failed to explain further.1 Why the North Sea forces were so passive over the next six months had several causes. The opportunities opening in the Baltic with the Russian peace were one. The diversion of dreadnoughts and their escorts to occupying the Aland Islands and operations in the Baltic provinces was not huge, but still significant. Another factor was the two influenza pandemics that struck later in the year. The navy’s material state was an even greater concern. The fleet was accumulating defects that the repair system could not fix.2 A dearth of nonferrous metals combined with shortages of skilled manpower in the dockyards meant ships were either going without repair at all or the work was, at best, makeshift. Moltke’s shaft failure was the result of hull damage incurred entering Wilhelmshaven in December 1916, which caused cracking in the shaft tunnel.3 A two-week repair period followed, but the work was a temporary solution that had to answer “all requirements until it gave way in April 1918.”4 Moltke was not alone in her troubles on the April sortie. Apart from the poor coal quality, which affected other battle cruisers, Seydlitz suffered condenser problems that forced her to shut down both port and starboard engines at different times.5 Even if shortages of fuel were overcome, Scheer had to face the possibility his fleet was not fully seaworthy, let alone battle ready.
Another problem was the mine threat. Maintaining access to the North Sea for the U-boats was vital. The ability of the British to fuse intelligence of the German swept channels with deployment of their own mine fields was creating the prospect of a Heligoland Bight that was completely shut off from the open sea. By March, homeward-bound U-boats were returning through the Baltic and in June the battle cruisers conducted navigation exercises to familiarize them with using the Little Belt.6 Keeping even one channel open in the Heligoland Bight consumed much of the capacity of the minesweeping force and the scouting groups and battle squadrons that covered them. Contrary to the historical image, the High Sea Fleet in this period went to sea, just not very far. The battle cruisers did the most work, but even the battleships provided close or distant cover two or three times a month. Over the summer, there were variations on clearing a passage, including the creation of a new channel at the end of July. This involved nine half-flotillas of minesweepers, supported by the First Scouting Group and the Third Squadron, with substantial numbers of escorts. Only U96 was immediately present to proceed through the newly opened channel, but the passage remained useful until September. All this was better than nothing, but the essentially defensive strategy did not encourage high morale and left all offensive effort to the failing powers of the U-boats.
The British and the Americans, by comparison, were increasingly active. In addition to the antisubmarine campaign, there were four elements: convoy protection in the Atlantic, mining operations in the Heligoland Bight and Kattegat, creation of a northern mine barrage, and more ambitious efforts to employ aircraft and CMBs offensively. Each activity experienced setbacks, but there was an increasing sense as 1918 wore on that the initiative had shifted in the British and American favor. Only in one area did operational activity diminish. By the middle of the year, a battle squadron was no longer covering the Scandinavian convoy. This was delegated to light cruisers and then to armored cruisers, which—if close enough to the convoy—were certainly enough to deter a repeat effort by German light cruisers or destroyers. Whether armored cruisers would have followed the guidance to withdraw and report the appearance of superior forces is a moot point.
The American presence in the eastern Atlantic grew steadily throughout 1918. The High Sea Fleet’s April sortie raised the specter of other ventures, notably the possibility that German battle cruisers might be sent into the Atlantic. British cruisers and armed merchant cruisers and American units were already assigned to convoy protection west of the submarine danger zone in the eastern Atlantic and these were certainly enough to deal with disguised merchant raiders. A battle cruiser was something else again. There were lengthy discussions within the Admiralty, in Washington, and in the Allies’ consultative processes regarding how the transatlantic traffic should be protected—particularly the troops moving to Europe in increasing numbers. Much of the USN’s additional destroyer effort was devoted to escorting this shipping within the submarine zone, with the French port of Brest becoming an important base of operations. But it was reasonable to think that the less effective the U-boats were against the flow of American men and materials, the more likely the Germans would be to try an alternative. The solution finally adopted was the dispatch of Battleship Division Six, consisting of Nevada, Oklahoma, and Utah, to Berehaven in Ireland in August 1918. There they were immediately available to cover convoys already in the eastern Atlantic if the German battle cruisers broke out. There would only be one alert before the Armistice (it occurred in October), but the battleships and their destroyer escort from Queenstown were in company with the convoy concerned little more than forty-eight hours after the initial warning. The system worked.7
The 1918 flu pandemic had a profound effect on the operational readiness of both sides and is a key reason why that year saw extended periods of inactivity by the main fleets. The sickness occurred earlier in the Royal Navy and its allies than the German navy. The first variety brought many down, but its effects were relatively mild. The second was more severe and often deadly. One British battleship had 270 cases in the first period in May without any deaths, and only 62 cases in October, but 8 deaths. Each outbreak lasted 11 days.8 The Grand Fleet’s first epidemic started in April and reached its peak on 15 May with 2,568 cases. More than 10,000 of the fleet’s 90,000 personnel were struck down, although there were only 4 deaths in all. There were sporadic cases until September, when 5,381 were stricken, of whom 151 died.9 The Sixth Battle Squadron was severely affected, particularly during the second round. Arkansas suffered most, perhaps because the ship was newly arrived from the United States and its crew had not yet acquired resistance through exposure to the first variety. She had 259 cases and suffered 11 deaths. The Grand Fleet was never completely out of action, but it was a near-run thing. Several ships, including the battle cruiser Princess Royal, had so many sick they could not have sailed had the fleet been ordered out. The pandemic affected the remainder of the navy at different times. By the start of July, three cruisers of the Harwich Force could not sail, Concord being typical with 170 sick.10 The escort forces were hit hard as well. At least one destroyer had so many sick that replacement personnel had to embark at sea to bring her back into port. At one point Termagant, on standby at Dover, had only 26 out of 150 fit for duty.11 The pandemic struck the Germans in June. Seydlitz had 104 sick at its peak on board early in the month, while the numbers unfit for duty in the minesweepers found them struggling to meet their commitments in July.12 The German naval experience of the second wave that hit in September is less clear, but based on the experience of the army, it is likely that the pandemic contributed to the chaotic events of October and November 1918.13
The Mine War
British submarine minelayers continued their campaign along the German and Dutch coast, although losses mounted. E34 struck a mine off Vlieland during her twenty-fourth mission on 20 July, and the British authorities feared she had hit a mine laid by E51. The thirty-eight-day plugs often failed to dissolve, menacing attempts to re-seed an area with a new field. Surface efforts in the late winter and spring included the Kattegat, as the British accumulated evidence that U-boats were using the Baltic passages as an alternative to risking the Heligoland Bight. The first operation in February was covert, with a field successfully deployed southeast of the Skaw. A repeat effort planned for March turned back when it encountered thick fog, but another attempt on 15–16 April was much more successful. The minelayers were covered by the First Battle Cruiser Squadron and the Fifth Battle Squadron, in addition to three light cruiser squadrons and twenty-four destroyers. The light forces conducted their own sweep well into the Kattegat, sinking ten German trawlers. This was a clear signal of British interest in the Baltic approaches, heightening the High Sea Fleet’s concern about the Kattegat’s security.
Operations again focused on the Heligoland Bight as the days lengthened. The mining task, already taken away from light cruisers, shifted from the big converted minelayers, such as Princess Margaret, to the newly formed Twentieth Destroyer Flotilla. This was well into its stride by mid-year. Seven operations were conducted in the Heligoland Bight in July. Although the total included sorties off the Belgian coast, the captain of Telemachus estimated his ship took part in thirty-six operations between February and 31 August 1918 and laid 1,440 mines.14 The Flotilla’s score for the Bight would be forty-two sorties and 12,939 mines.15 Despite at least one near encounter in poor visibility, the destroyer minelayers initially went unscathed, oblivious that “much of the water … considered innocuous, and … gaily careered over at 25 knots, teemed with [mines].”16 On 28 March, the Twentieth Destroyer Flotilla captured and sank three armed trawlers. The flotilla’s luck ran out, however, on 2 August. An eight-ship formation was approaching its start position when at 2347, Vehement hit a mine. Her magazine went up, taking with it everything forward of the fore-funnel. Despite being blown four hundred yards clear by the explosion, the captain lived and managed to save one of his sailors from drowning. Abdiel took Vehement’s remains in tow and ordered the remainder of the flotilla out of the German minefield. Ariel did not get clear; at 0010 she also struck a mine forward, which blew her bows off, sinking her in less than an hour. There were hopes that Vehement could be saved, but the tow became unmanageable. Her survivors taken off, she was sunk by gunfire. There were ninety-seven dead from both ships.
This incident greatly slowed the minelaying campaign in the Heligoland Bight. The British had an idea the Germans had laid new fields from E51’s sighting a line of mines in April, but the fact that the Germans had laid such large fields had not been suspected—perhaps because little radio traffic was involved. Pure luck had allowed the Twentieth Destroyer Flotilla to avoid them on sorties in the previous few weeks. Although the flotilla was soon out again on operations off the Belgian coast, it only undertook four more sorties into the Heligoland Bight during the remainder of the war: one on 31 August, one in late September, and two in October (one on the night of 2–3 October and a final sortie on 27–28 October). All were just to the outer ends of the German channels. Until the British had a much better idea of the enemy fields, the Admiralty was unwilling to risk either destroyers or submarines far inside the Bight. Beatty accepted the step back only reluctantly; had the war continued, the effort would have been resumed. E45 was actually dispatched for a lay in the inner Bight in November but was recalled after the armistice, to her captain and flotilla commander’s great relief.17 As it was, the residue of the British campaign was sufficient to give the Germans continuing trouble. A German mine explosion destroyed M41 in September, M62 was sunk by a British mine on 9 August, and M22 would go down on 14 October. M42 survived striking a mine the day before, while M18 and M78 were both damaged on 27 October.18
With the first use of a magnetic mine, the minelaying effort off the Flanders coast foreshadowed the next war. The early magnetic mines were not particularly reliable, frequently exploding when the magnetic trigger reacted to a false signal, but the British successfully deployed a small field off Zeebrugge on 7 August. This soon claimed victims, V68 being sunk and G94 badly damaged the next day. The minesweepers, many of which were wooden, had not actuated the mines, but the torpedo boats did. The experience of detonating mines in water already swept was unnerving for the escort forces. Repeated sweeping efforts produced nothing, but G41 was badly damaged on 11 August. A58 fell victim on 15 August, breaking in two and partially blocking the channel after the attempt to bring her in failed. By this point, von Schröder was suspicious that the British had developed a new triggering system for their mines. It was another blow to the steadily diminishing ability of the Flanders forces to keep their access to the open sea, let alone pose any significant threat to the Allies.19
The Northern Barrage was a wholly different venture to the Heligoland Bight operations. An American idea, its acceptance by the British was largely to allay concerns of the U.S. administration and the USN over the apparently defensive policies of the Admiralty. Acquiescing to the American proposal helped maintain the relationship and encourage their commitment to other, more vital activities. The scheme was a barrier of mines to close off the North Sea between Scotland and Norway. The initial American estimate was that 72,000 mines would be required to cover the 250 miles in sufficient depth, with the barrage divided into three areas. The longest, central position was designated “Area A,” the flanking area off the coast of Scotland, “Area B,” and that off the coast of Norway, “Area C.” There were always problems, not least of which was the technology involved was still being developed while the barrage’s details were being worked out. To catch submerged U-boats, the American barrage mines were fitted with floating antennae above and below the mine casing. From the first, there were concerns with their lethality range. Another difficulty was that the barrage limited the Grand Fleet’s sea room. Beatty, who never liked the idea, objected most to the prospect of no passage on the eastern side of the Orkneys. His bid for a ten-mile channel was eventually reduced to three, but only after pleas by the First Sea Lord to accept the closure in the interest of Anglo-American amity.
The first field was laid by the newly formed British First Minelaying Squadron in March. This did not go well when the destruction of the sloop Gaillardia revealed that the mines—the effective new H2 model—were floating well above their intended depth of sixty-five feet and were thus a menace to surface ships. A total of 1,440 mines had to be swept and the operation begun again from scratch. The ten USN units assigned to the barrage arrived in Cromarty on 26 May. They were designated the Second Mine Laying Squadron (Mine Squadron One in the USN). Both British and American squadrons conducted laying operations at roughly fortnightly intervals over the next few months.20 The industrial-scale effort eventually resulted in more than 70,000 mines being laid, of which 56,570 were put down by USN units.21 Its results were mixed. The American mines proved prone to detonate soon after being laid. This problem was never really fixed. The Australia, providing cover for Operation M14 on 27 September, estimated that a detonation occurred every two minutes over a six-hour period, with some individual detonations resulting in three or four other explosions. During Operation M15 a week later, the Australia recorded another 287 detonations.22 On 26 October, the ships of Mine Squadron One themselves recorded an average of 140 explosions seen or heard that day, 28 believed to have caused countermining.23 Apart from the problems with the mines, the patrols that were essential in forcing the U-boats to transit the mine danger area submerged were never put in place. It remains uncertain whether any submarines were sunk by these mines, although a much later Admiralty study suggests that up to five may have been caught.24 Nevertheless, the barrage added to the U-boats’ burdens and represented a formidable demonstration of America’s resources and determination. It could certainly have become progressively more effective, particularly as the Norwegians, after much pressure, finally agreed in October 1918 to mine their own territorial sea to prevent its use by U-boats for covert transits.
British Offensive Operations
Tyrwhitt’s forces had acquired a new capability in the form of lighters, each carrying a single flying boat; they could be towed at high speed by destroyers. The Harwich Force hoped this would provide a combination of mobility and capability against zeppelins and other fixed-wing aircraft that the British had not enjoyed before. The first deployment was on 19 March, when three were taken into the Heligoland Bight. The Harwich Force repeated the operation at two-week intervals over the next two months. The lighters proved more weatherly than expected, but the aircraft were still constrained by wind, sea, and swell and frequently could not get into the air, much to the Harwich Force’s frustration (in August, Captain Domvile noted, “the seaplanes failed to fly, as usual”).25 Even so, a cat-and-mouse game was being played against the increasingly vulnerable zeppelins. A British flying boat operating from a shore base succeeded in damaging L56 on 19 May, but it was storm or perhaps sabotage that downed L62 the same day.26
The Harwich Force’s sweeps in May and June had the additional intent of securing a copy of the new German signal book. This was at the behest of the DNI, who sent Commander Vivien Brandon (imprisoned between 1910 and 1913 by the Germans for espionage) from NID’s German section on the first sortie. Operation F3, covered by the First Battle Cruiser Squadron and other formations, did not go well.27 No signal book was captured and on 31 May the Harwich Force found itself in a minefield. Although at least five mines were cut by cruisers, paravanes did not protect the destroyer leader Shakespeare, which struck a mine and was severely damaged.28 The operation was notable for one thing. The launch of a Sopwith Camel from the cruiser Sydney and its interception of a German seaplane, albeit without shooting its opponent down, was the first engagement by a ship-launched aircraft of another heavier-than-air machine.29 Two weeks later, on another of what Tyrwhitt’s flag captain described as “one of the fool expeditions,” the cruiser Centaur was damaged by a mine, going home stern first.30 As Conquest struck a mine near Harwich the same day, Tyrwhitt’s ships were feeling the pressure.
CMBs were another element of the Harwich Force sorties. Carried in the cruisers, they were taken southeast of the Dogger Bank, launched, and sent toward the Ems for overnight sorties. Their targets were the minesweepers operating off the German coast but they held the faint hope of finding larger prey in the form of covering forces. The CMBs were almost as weather limited as the flying boats and more than one sortie was canceled before it began. While there were interactions with the German sweepers, darkness and the CMBs’ limited horizon meant they often returned to their parent ships without having seen anything. Breakdowns were frequent and one crew was lucky to be picked up by a trawler after thirty-six hours adrift in open water.
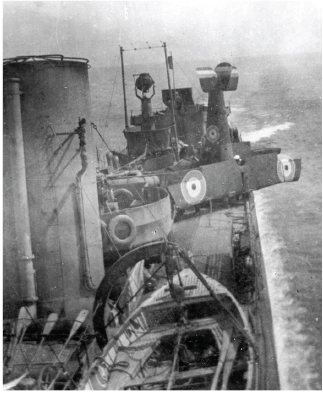
The first real success of mid-1918 was not achieved by the Harwich Force, but by the aircraft carrier Furious. The importance of the Grand Fleet’s air arm had been acknowledged by the appointment of Rear Admiral Phillimore as Admiral Commanding Aircraft in March at Beatty’s behest. The newly modified Furious wore his flag. Great hopes were held for the new aft landing deck in Furious, despite the turbulent airflows created by her superstructure. Although there were some initial successes, it was soon confirmed that landing on Furious was too hazardous. Nevertheless, Furious could carry and launch reasonable numbers of aircraft and keep up with the battle cruisers and light forces. During the early summer, she accompanied elements of the Grand Fleet on several sorties, her aircraft shooting down a German seaplane on 19 June. The supporting destroyers had developed procedures, subject to sea state, to recover ditched aircraft. These were sometimes collected in better condition than the pilots, who frequently suffered broken noses from the Camel’s tendency to pitch forward when ditching.
A more ambitious venture was in train. Furious was not the only advance in the fleet’s aviation capability. In addition to flying-off platforms fitted on capital ship gun turrets that could be rotated to launch aircraft into the wind without necessarily requiring an alteration of course, light cruisers were now fitted with rotating platforms offering the same advantage. Practically every major unit now had a fighter embarked. The zeppelins’ climbing ability, however, made them very difficult targets. Continuing sweeps into the southern North Sea in the hope of intercepting one seemed a waste of effort. The air staff of Furious proposed an alternative, a raid on the Tondern zeppelin base. The proposal was enthusiastically endorsed by Phillimore and Beatty. Seven Camels were equipped to carry 50-pound bombs and the pilots trained in low-level flying. The first attempt at the end of June was canceled when the weather worsened, but Furious and her escorts sailed on 17 July for a second try. Once again, poor weather forced postponement on the 18th, but the force remained at sea, hoping conditions would improve and sheltered from German air reconnaissance by the same bad weather. Notably, Admiral Phillimore delegated the decision to proceed to the air group commander. The weather cleared overnight and just before dawn, all seven aircraft were successfully launched, each carrying two bombs. The first three Camels to attack Tondern achieved surprise, successfully bombing “Toska” hangar and destroying the two zeppelins inside, L54 and L60. The other aircraft damaged another hangar and set fire to a balloon, although some bombs failed to detonate. Two Camels returned to Furious and ditched successfully, a third was lost at sea, while the remainder were forced to divert to Denmark.31 The Germans were fortunate in that the two zeppelins burned but did not explode, so damage to the hangar and base was relatively limited; still, it was a heavy blow that did not augur well for the future of the zeppelins. The Tondern raid marked another point in the airships’ decline. Exposed to further attacks, the base was reduced to the status of an emergency landing ground.32
The raid was an important success and showed the way ahead for British carrier capability. Plans were set in motion to raid the much more challenging target of Ahlhorn, farther inland than Tondern. This required different, longer-range aircraft and the scheme did not come to fruition before the end of the war. The Grand Fleet nursed even greater hopes for the first “real” aircraft carrier, Argus, and her Sopwith Cuckoo torpedo bombers. While some technical problems had still to be resolved, the flat-decked Argus was capable of both launching and recovering wheeled aircraft. From before her commissioning in October 1918, plans were in hand to attack the High Sea Fleet in its anchorages. The strike force would not have been large enough to strike a decisive blow at the Germans, but it would have hit the High Sea Fleet hard and created a whole new set of problems for its defenses (as the Battle of Taranto so dramatically demonstrated in 1940).
The British had other innovations. The unsatisfactory performance of the flying boat/lighter combination inspired the idea of using the lighters to launch fighter aircraft. Trial and error confirmed a lighter could be modified to allow a wheeled fighter to launch with enough wind. On 10 August, after the system had been proved with a live flight, the Harwich Force sailed for another CMB raid, the destroyer Redoubt towing the modified lighter with a Camel embarked. Tyrwhitt was after a zeppelin and had good reason to be. A sortie on 1 August had seen the Harwich Force shadowed by two zeppelins. L56 maintained her distance, but an inexperienced and aggressive captain in L70 bombed the British ships. If such a close—and low—approach was to be repeated when a fighter aircraft was available, the airship would be very vulnerable. What Tyrwhitt could not know was the new capability would place the final nail in a coffin that was nearly sealed. On 5 August, Strasser led a four-ship raid on England. His command unit, L70, was intercepted by an Airco DH.4 off Norfolk and shot down in flames, killing all on board. The death of the dynamic Strasser and the loss of one of the most capable airships meant the end of the zeppelins’ bombing campaign. The lead in this role had already passed to heavier-than-air aircraft, but the airships’ days as naval scouting units were also coming to an end.
The Harwich Force sailed in perfect weather, which continued when six CMBs were launched by Curacoa, Coventry, and Concord. There was some anxiety that the operation was already being observed by German seaplanes as the CMBs headed toward the coast. The three flying boats that flew from Yarmouth to provide them air cover did not see the German aircraft and were unable to locate the CMBs, which were thus without the protection intended—and necessary—for a daylight operation. In the meantime, the cruisers and destroyers remained in the area until L53 came in sight. Alerted by signals intelligence and the flying boats (which had at least spotted the zeppelin), Tyrwhitt was ready. He turned north and laid smoke to draw L53 on. The ploy was successful and the Camel was launched shortly afterward. Despite L53 operating at 19,000 feet, the Camel’s pilot was eventually able to get within 300 feet of his prey. One of his guns jammed, but the other poured bullets into L53’s belly. The zeppelin went down in flames—there were no survivors. The Harwich Force was repeatedly bombed by seaplanes, but it was pleasantly surprised when Lieutenant Stuart Culley reappeared from his mission, ditched, and was rescued.
The CMBs did not fare well, being caught off the Dutch coast by seaplanes. A running fight followed, during which additional aircraft joined the fray. The CMBs were bombed and strafed, the Germans making effective use of the sun. While they replied with light machine guns, shooting down one airplane, the CMBs eventually exhausted their ammunition and, forced to remain at maximum speed, ran low on fuel. They eventually turned toward the Dutch shore to find refuge, but although two damaged boats made it into Dutch territorial waters, four others were sunk or scuttled. An increasingly anxious Harwich Force called for aircraft from England to search for the CMBs, but nothing was found. The news that the crews were alive—albeit with one-third of them wounded—and in Dutch hands was a relief, but the affair confirmed that the fast motor boats could not operate in daylight without proper air cover. There would be no more CMB ventures into German waters without such support.
A New Approach to German Naval Command
The CMB affair occurred on the same day as a fundamental development in the command of the German navy. Scheer came ashore to replace von Holtzendorff at the head of the Admiralstab, but the change was much greater than that. Scheer insisted he be given full powers over naval policy and operations, receiving the designation of Chef der Seekreigsleitung (Chief of the Sea War Leadership). This stripped the kaiser of his authority and subjected the entire navy to Scheer, ending the compartmented arrangements that von Tirpitz had created to ensure his personal domination. Magnus von Levetzow was installed as Scheer’s chief of staff, while von Hipper replaced Scheer in command of the fleet and von Reuter took over direction of the scouting groups. The German navy’s new leadership had vast ambitions, incongruous in the context of the military collapse in progress on the western front and the navy’s own problems with sustaining the Handelskrieg and finding ways to erode the enemy’s growing supremacy at sea. The “Scheer Program” proposed a massive expansion in submarine construction, accelerating in 1919 and coming fully to fruition in 1920 with the monthly completion of thirty-three boats.33 The program had an air of unreality, even if the Oberste Heeresleitung (Supreme Army Command) was prepared to release manpower and reallocate material to the shipyards. Scheer may have intended the project largely for propaganda purposes, to provide convincing evidence to domestic and international audiences of the navy’s resolution, but it added immediately to the big ships’ morale problems. Scheer having “to draw to an even greater degree than before upon the existing personnel of the fleet,” could only be further confirmation of the High Sea Fleet’s strategic irrelevance.34 Scheer’s insistence on placing his own supporters in key staff positions as he brought the navy under control had other effects. Nearly half the commanding and executive officers changed in the High Sea Fleet’s capital ships, creating disruptions in the seagoing leadership that contributed to the collapse of discipline later in the year.
The End of Days for the Imperial German Navy
After the “Black Day” of the German army at the Battle of Amiens on 8 August 1918, the tide had fully turned in the Allies’ favor. Flanders Command made one last attempt at offensive operations. The German navy had followed the British in developing manned light craft and a flotilla arrived in Flanders earlier in 1918. Just after midnight on 23 August, six boats raided Dunkirk and attacked the destroyer l’Obusier and the torpedo boat 321. The French ships avoided the German torpedoes and believed they damaged at least one of the attacking boats. Terror was at anchor but she used her guns in the later stages of the exchange, after which the German boats withdrew. The French official history concluded its narrative laconically, “On ne les reverra plus” (We will not see them again).35 By late September, the German hold on Flanders was increasingly parlous and the British believed that their naval units’ departure was likely. The German army formally advised a withdrawal on 28 September and von Schröder was given approval to prepare for an evacuation. He immediately began to send ships home. The smallest units, with as much war material as they could tow in barges, were dispatched through the canal system to Antwerp, but the bigger torpedo craft had to go by sea.36 The British did what they could to stop this, but were aware of the German ability to remain under the protection of their coastal batteries before slipping into Dutch territorial waters. It is likely the experienced seagoing commanders did not expect to catch them. The Harwich Force sailed for a sweep along the Dutch coast on 30 September but found nothing and did not enjoy having to face gale-force weather. Sent out again the next day, after the Admiralty received additional intelligence of the evacuation, the Force “kept this up for a week, to all intents & purposes living at sea & waiting to catch the Hun leaving the Belgian coast.”37 The Twentieth Destroyer Flotilla placed minefields across possible escape routes, but as expected, both they and the Harwich Force failed to intercept their quarry. Eighteen German torpedo boats and two submarines sailed from Flanders on 1 October. Only a handful of serviceable units remained and these escaped over the next few days, with the last gone by 5 October. The unserviceable G41 and V74 together with four U-boats were sunk in the canals, while four more unseaworthy large torpedo boats were held in Ghent. Still unable to make the sea passage to Germany, S61, V47, V67, and V69 were scuttled in early November when Belgium was completely evacuated. There was one moment of British hope—mixed with fear—when a sighting by an unaccompanied pair of destroyers suggested a much more numerous and powerful German force was in the offing. Escorting a “Beef trip” on 4 October, Taurus and Mordaunt thought they had detected a formation of German torpedo boats. Despite disquiet regarding their prospects against a superior enemy, they went in chase, only to find the Dutch navy out conducting maneuvers.38
The most important encounter in this period was further north in the Heligoland Bight. On the morning of 3 October, German minesweeping escorts waiting for some of the last submarines from Flanders ran into a British minefield laid the previous night. Just after 0200, S33 struck two mines and went down, taking most of her crew with her. The torpedo boat’s flotilla mates found the survivors after daylight, but the rescue was watched by the new British submarine L10. The latter successfully torpedoed S34 after the German boat had picked up S33’s people. Unfortunately, perhaps because she was a new and untried design, L10 reverted to the submariners’ 1914 tendency of losing depth control after firing. She broached-to on the surface, at which V26 and V28 opened fire, damaging L10’s pressure hull and sinking her with all hands. This was some compensation for the Germans, particularly as attempts to tow S34 home failed and she had to be sunk with a torpedo. S122 was lost to a mine nearby on 5 October, confirming the western approaches to the Bight were still at hazard from the British effort.
Von Schröder’s dispatch of his forces was just in time. Dover Command’s bombardment ships spent most of August and September undergoing repairs and gun-barrel changes to ready themselves to support a new offensive by the allied northern armies. This began on 28 September. Over the following days the monitors conducted extensive bombardments for the forces ashore. The 18-inch gun carried by General Wolfe and the extended-range 9.2-inch guns of the newly completed Gorgon were indicative of growing material superiority. Although they had other targets in the following days, both could have made the German navy’s position in Bruges untenable. The offensive ground to a temporary halt in early October and the monitors were not required again until the attack resumed on 14 October, joined by a second unit fitted with 18-inch guns, Lord Clive. There would not be many more firings. By the 19th the Belgian coast was empty of the enemy. The significance of that achievement was immediately recognized—the refit of Prince Eugene to take the third and last 18-inch gun was halted on 22 October.39
The collapse of the Oberste Heeresleitung’s resolve to continue the war and the attempt to secure an armistice by appeal to President Wilson had almost immediate effects for the German navy. Suspension of the campaign against commerce was an essential precondition to ending hostilities. Scheer resisted the chancellor’s insistence that the U-boats be called off, but he eventually gave way. The concession put to the president on 20 October was that submarine commanders would not attack passenger ships, but this amounted to the effective end of unrestricted warfare and Scheer knew it. The submarines were recalled the next day. This withdrawal of the U-boats and their order to return to Germany crystallized thinking within the navy’s leadership about the need for a final effort to strike at the British. Justified in part as an attempt to strengthen Germany’s position, it was much more a scheme to restore the navy’s credibility and protect its political position in a postwar nation. Mixed with any rational motives was a curious muddle of emotion and wishful thinking that welcomed the prospect of a “death ride” but also harbored undefined hopes of achieving victory even in this final hour.
The chief of the Seekriegsleitung would not subject his plans to the approval of government or kaiser and Scheer’s directions were conveyed by word of mouth to von Hipper, who immediately set about organizing the new venture. Plans had been in preparation within the High Sea Fleet staff since early October. Operation Plan No. 19 was partly a revival of the scheme to strike at the British in the south, which had been canvassed in March but rejected in favor of the abortive attack on the Scandinavian convoy. Scheer returned to his last initiative with the idea that large numbers of U-boats would be deployed to the North Sea. On 22 October, returning U-boats with sufficient remaining endurance were ordered to concentrate off the Firth of Forth. By the 28th, seven had arrived. Other submarines were sent out, although a number suffered defects and others had difficulties finding a safe route out of the Heligoland Bight. By the end of the month, there were twenty-two boats in the North Sea. Cruisers and torpedo craft would attack shipping in the Thames estuary while other units bombarded the Flanders coast. The First Scouting Group would serve in close support; the battle fleet would follow. The aim was to draw the Grand Fleet south to force a confrontation off Terschelling, a position the Germans judged to be their most favorable battleground. The Fourth Scouting Group, the raider Möwe, and some torpedo boats would lay minefields across the expected advance, the idea being that these, in combination with the fields already laid by U-boats off Britain’s east coast and buttressed by attacks by the submarines themselves, would deplete the Grand Fleet’s strength before it made contact with the German battle squadrons. It remains unclear how far north the High Sea Fleet would have been willing to go to meet the Grand Fleet, or how long it could have remained off Terschelling to offer battle. Von Hipper conceived that the junction would take place in the late afternoon of 31 October—a significant time, because there would be little daylight remaining, allowing the German fleet the cover of darkness to withdraw, while the flotillas made a mass attack on the British line.
Beatty would have sought action, notwithstanding the cautious policy he had maintained for so long. The U-boats might have achieved something against the fleet, but they did not have the numbers to gain more than isolated successes. The greatest problem would have been the mine threat. Despite this, it is likely the Grand Fleet would have arrived off Terschelling largely unscathed and in formidable strength. It is also likely that advances in gunnery, particularly the British ability to concentrate the fire of two or more ships on a single target and their practice under demanding conditions, as well as their improved heavy shell would have had a devastating effect on the High Sea Fleet. The Germans had learned much from Jutland but had experienced nothing like the same rate of technological or tactical progress.
Orders for Operation Plan No. 19 went out on 24 October and the High Sea Fleet began to assemble over the next few days. There were cover stories about fleet maneuvers, but the reality could not be concealed. The secrecy within which the plan shrouded itself contributed to fomenting mutiny. Since commanding officers were briefed at the last moment, they and their officers could only conjecture as to the reason for the obvious preparations for a fleet sortie and that uncertainty rapidly flowed to the lower deck. The dispirited sailors were willing to fight in direct defense of their homeland but would not embark on a venture simply to maintain the honor of their officers at a time when Germany’s defeat was staring them in the face. The fleet was fully assembled on 29 October. By the next day it was apparent the crews of many capital ships would not take part in Operation Plan No. 19. Mass refusals of duty were occurring around the battle squadrons. Von Hipper was forced to delay the fleet’s departure and finally, a few hours later, he canceled it. He issued an appeal to the High Sea Fleet, denying that it was being sent out “frivolously to satisfy the enemy’s order for our destruction.”40 This did not wash. The men no longer believed their officers and the hitherto “hermetically sealed” executive officers had to accept they had lost the confidence of their crews.41 While the small ships and submarines generally remained loyal, the capital ships and many of the light cruisers did not. The C-in-C and his admirals agreed to disperse the squadrons in the hope that calm could be restored and the men returned to their duties. On the advice of the Third Squadron’s commander, von Hipper agreed these ships could go to Kiel. There they would be the trigger for revolution.
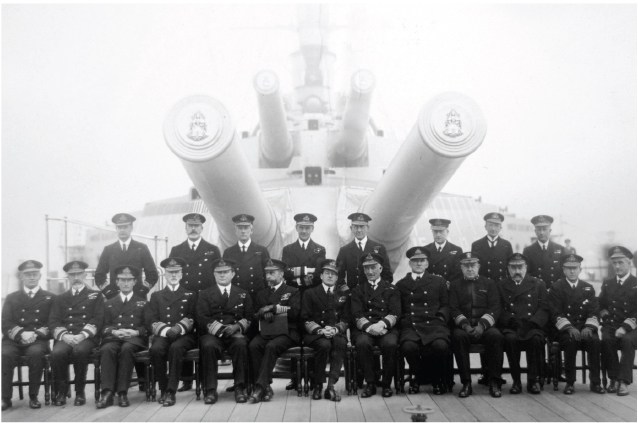
Photo 14.4 The admirals Of the Grand Fleet, 1918 Sea Power Centre, Australia Back row (left to right): Commodore Tweedie, Rear Admiral Everett, Rear Admiral Fergusson, Rear Admiral Halsey, Rear Admiral Goodenough, Rear Admiral D. R. L. Nicholson, Rear Admiral Bruen, Rear Admiral Brand Front row (left to right): Rear Admiral W. Nicholson, Rear Admiral Phillimore, Rear Admiral Cowan, Vice Admiral Pakenham, Vice Admiral Leveson, Admiral Madden, Admiral Beatty, Vice Admiral de Robeck, Vice Admiral Napier, Rear Admiral Rodman (USN), Rear Admiral Oliver, Vice Admiral Brock, Rear Admiral Borrett
Events moved rapidly from this point, yet the breakdown of discipline in the German navy was never complete. Units led by the Königsberg deployed into the Heligoland Bight as late as 9 November in response to a false report that a British sortie was under way. But it was fundamental to the downfall of the German regime and the final acceptance of Germany’s defeat. During negotiations for the armistice, the Royal Navy insisted on the internment of the U-boats and of the bulk of the High Sea Fleet. The First Sea Lord had to argue hard for such harsh conditions, particularly in relation to the surface forces, facing down generals who thought the battle fleets were an irrelevancy and politicians anxious not to make the terms so severe that Germany would refuse to accept them. Admiral Wemyss got his way, but the obvious collapse of the Imperial German Navy as a fighting force must have played a large part in the new German government’s willingness to accede.
The U-boats began to arrive in British ports on 20 November, British observers commenting that some were clean, serviceable and with disciplined crews, while others were dirty and ill conducted.42 The High Sea Fleet itself sailed for internment on 19 November, crews only being found for the ships by dint of a substantial bonus in pay. Early plans for sending the German ships to a neutral port proved impossible, because no country was willing to receive the fleet. They would go instead to the Firth of Forth, as a prelude to their final anchorage in Scapa Flow. One incident during the dismal passage of the German ships from Wilhelmshaven to Rosyth underlined the reality of how the war at sea had been fought: the torpedo boat V30 struck a mine and sank on 20 November as the fleet left the Heligoland Bight. A British minefield had done its last war work.
The Grand Fleet, in an operation designated ZZ and carefully orchestrated by Beatty, met the Germans outside the Firth of Forth on 21 November 1918. It was an encounter staged not only for maximum psychological effect, but to create a photographic record as unassailable evidence of the Grand Fleet’s final victory. A junior officer in the Queen Elizabeth recorded that his strongest impression of the day was of Beatty’s “complete amazement” that the Germans had given up without a fight.43 The admiral nevertheless produced some memorable quotations, saying to the crew of his flagship, “Didn’t I tell you they would have to come out?”44 The C-in-C’s final order was equally to the point: “The German flag will be hauled down at sunset today, Thursday, and will not be hoisted again without permission.” It would fly over the interned fleet only twice more, as a gesture of pride and defiance on the third anniversary of the Battle of Jutland and over the High Sea Fleet’s mass scuttling on 21 June 1919.