You’ve already mastered this little beauty, but here’s a reminder of the basic principles:

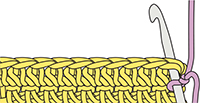
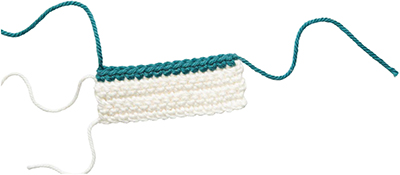
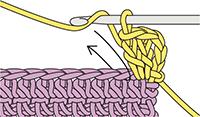
Double crochet row: dc across all stitches.
1. Have your work with right side (RS) facing you. Put the yarn onto your hook with a slipknot (see Making a slip knot) and decide where you are going to begin.

2. Insert your hook into the stitch of your choice and make the double crochet stitch in the usual way (see Stitch tutorial: Working through the chain and double crochet stitch).
3. Continue working across, making a double crochet stitch in every stitch and around your piece from right to left, or anticlockwise if you are working around.

4. If you are negotiating a corner, then make three double crochets in the corner stitch.
5. Once you’ve completed the row or round, fasten off (see Fastening off) and weave in the ends (see Weaving in ends).

You can make this edging just the once, or repeat with several rows or rounds.
A picot stitch is based on a chain stitch. Picot stitches are added to the top of a stitch:

Picot row: dc 2, picot, *dc 3, picot* across, dc 1 in final st
1. Have your work with RS facing you. Put the yarn onto your hook with a slipknot and decide where you are going to begin. Insert your hook into the stitch of your choice and make two double crochet stitches.
2. Now for the picot. Chain three and insert your hook through the third chain from the hook.

3. Yarn over and pull the yarn through all the stitch. One picot stitch made!

4. Follow the picot stitch with three double crochet stitches, then another picot. Continue this pattern across, ending with one double crochet in the last stitch.

Picot stitch is another fiddly manoeuvre. Try rolling your hook gently from side to side to ease through the stitches.
The scallop shape is achieved by making lots of treble crochet stitches in one stitch, with a short double crochet stitch either side to achieve the shaping. It works best when worked into a row of existing double crochet stitches. Make sure the wrong side (WS) of your work is facing you, and then make a row of double crochet. Turn your work so the RS is facing you to make the scallop stitches:

Scallop row: dc 2, *sk st, 4tr in next st, sk st, dc 1* repeat across, dc 1 in final st
1. Have your work with RS facing you. Put the yarn onto your hook with a slipknot and decide where you are going to begin. Insert your hook into the stitch of your choice and make one double crochet stitch, then another.
2. Now skip a stitch and make four treble crochet stitches (the scallop) in the next stitch.
3. Skip a stitch and make one double crochet in the next stitch. Repeat from step 2 across the row, ending with one double crochet in the last stitch.


Scallop stitches create a pretty edging and can vary in the number of treble crochets they contain, as well as the number of stitches skipped between them.
Ruffles can add a bit of volume to the edges of a blanket or cushion. They are ridiculously easy, just several tall stitches in every stitch.

Ruffle Row: ch 3 (counts as tr), 2tr in same st, 3tr in every stitch.
1. Have your work with RS facing you. Put the yarn onto your hook with a slipknot and decide where you are going to begin. Insert your hook into the stitch of your choice and make a chain of three. This counts as the first treble crochet stitch.
2. Put two more treble crochet stitches in the same stitch to make three in total.
3. Make three treble crochet stitches in each stitch across the row.


This edging can be made as ruffle-tastic as you like, depending on how many treble crochet stitches you want to squeeze into each stitch; more trebles equals a more voluptuous ruffle.