Chapter 28: Bulletproofing Access Applications
One of my favorite old movies is Desk Set, starring Spencer Tracy and Katharine Hepburn. In this movie (produced in 1957), Spencer Tracy plays a computer consultant responsible for installing a large computer system in Katharine Hepburn’s office. Typical of computers in older movies, the massive wall-to-wall mainframe featured in Desk Set understands plain-English queries (“How many ounces of gold were mined in South Africa in the last ten years?”) and is equipped with a galaxy of flashing lights that indicate when the machine is “thinking.” And of course, the machine and its software work flawlessly, delivering the requested information in seconds (after much clicking, clacking, and spinning of the huge tape drives, of course).
As we all know, Hollywood’s vision of computer systems has always been far from reality. Even now, in the 21st century, computers still can’t “understand” plain-English commands, hardware still doesn’t perform flawlessly, and users still have trouble getting their applications to do what they want and need them to do. Most important, software cannot be made to anticipate what the user wants. How many times have you heard people complain that they know the computer can do what they want but they just can’t get it to happen?

In this chapter, the expressions end user, user, client, and customer all mean the same thing: the person or group of people using the application you’ve created. Although the terms client and customer are normally applied to the parties who pay to have the application produced, thinking of all users as clients should be your first step toward producing bulletproof applications. Always think of your users as the important people they are, and your work will reflect a conscientious attitude and a professional approach.
What Is Bulletproofing?
Advanced database systems like Access bring valuable data and information directly to the user’s desktop. Unlike traditional mainframe and midrange databases, very often the data contained in an Access database resides on the user’s computer or is only slightly removed by being connected to a file server on a LAN. In either case, the valuable data contained in an Access database is exposed to potential loss or corruption by a well-meaning user.
For instance, unless you have added appropriate data validation to the applications you build, it’s far too easy for a user to enter “bad” data into the database, causing errors later on. Or if you haven’t applied adequate levels of security, an unauthorized user may accidentally (or intentionally) change sensitive data. At the very least, security prevents unauthorized users from viewing confidential information. When applied to their fullest, the Access security features will ensure that valuable data is not accessed by any but the most trusted and reliable users.
By one definition, bulletproofing an application means that you trap all errors, preventing crashes and unexpected behavior. This book assumes that you’re already a good programmer who understands that properly handling errors is a required part of any database development project.

Chapters 15 and 25 explain how to “crash-proof” Access applications and how to remove errors that may silently and perniciously mangle the data entrusted to the databases you build.
In this chapter, the term bulletproofing means applying safeguards to the data in an application through various techniques and methods. The objective of this chapter is to explain a development philosophy that leads to highly reliable and secure databases that protect the valuable data entrusted to them.
As you’ll see, protecting the data very often means limiting the user’s interaction with the Access environment. Data must be validated as it is input by the user to prevent inappropriate values from distorting the user’s interpretation of the information contained in the database. Other techniques described in this chapter make Access applications easier to learn and use, reducing the possibility that a simple misunderstanding harms the data.
Characteristics of Bulletproof Applications
Although, as a developer, you want to provide users with maximum flexibility, you simply can’t allow full access to the entire database environment. If users have unrestricted access to tables, queries, forms, and other database objects, chaos will inevitably ensue. Through mischief or ignorance, damaging changes to the database’s structure and logic will occur. Only the most disinterested and unimaginative user will resist the temptation to “improve” the forms and reports you’ve carefully crafted.
Perhaps the most important step to bulletproofing applications is to provide end users with the Access runtime environment, described in Chapter 35. As you’ll see in Chapter 35, the Access runtime provides full support (well, almost full support) of all the features you build into Access databases without giving end users the tools needed to change the underlying database structures. Chapter 35 also explains how to add context-sensitive help to Access databases, an important part of adding documentation to an application.
Unrestricted access to tables could mean deletion or modification of multiple records. Even though Access warns of most changes to data, an untrained user may ignore these warnings and proceed with the changes.
Applications that have been bulletproofed protect the data through a number of techniques:
• Rock-solid construction: No database exhibiting unexplained crashes, general protection faults (GPFs), or other instabilities can be considered bulletproof. First and foremost, an Access application must be reliable and free from programming bugs that lead to crashes or other undesirable behavior.
Chapter 15 explains how to use the built-in debugging tools and how to test a database to improve its reliability.
• Self-documenting behavior: Built-in security features—helpful text on the screen, warning messages that caution the user when something dangerous is about to happen, and context-sensitive help to explain how the application should be used—guide the user.
• Controlling the flow through the application: Controlling an application’s flow channels the user through the application in a logical sequence that’s best suited to the application’s purposes.
• Error handling that stops otherwise damaging actions on the part of the user: You shouldn’t let a user destroy, delete, or modify data without understanding what’s happening. Whenever possible, warn the user before he performs an irreversible action.
• Providing feedback so that the user is never left in the dark about the database status: Long operations are indicated by progress meters, an hourglass cursor, or other visual indicators.
Some of these concepts are covered in this chapter, while others are explained in chapters elsewhere in this book.
Bulletproofing Goes Beyond Code
Bulletproofing means much more than simply writing the right VBA code in your Access programs. You must adopt a certain attitude that leads to the careful, methodical approach necessary to succeed in bulletproofing applications. This means taking a professional approach to your development activities. Here are some guidelines. (If you’re already employing these procedures in your applications, the following will serve as reminders.)
Document the code you write
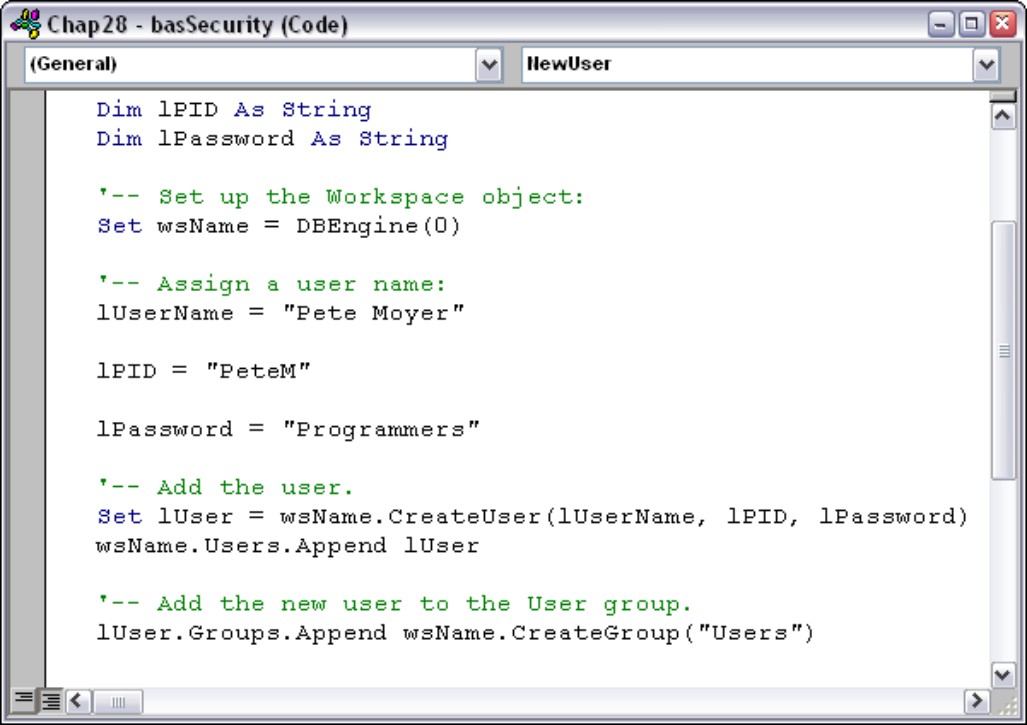
Include comments, use naming conventions, and name your procedures and variables logically. Don’t, for instance, accept the default names Access provides for database objects such as forms and controls. The default names are simply a convenience for simple applications and should not be used in professional-quality work. Figure 28-1 is an example of clear commenting and documenting. Imagine even this small section of code without comments and it’s easy to see how important documentation is.
The chapters in Part II describe many valuable Access programming techniques.
Figure 28-1
Well-documented code is easier to maintain and is less likely to lead to coding errors.
Build to a specification
All of your serious development work should be done to specification. A written specification is your best guarantee that you’re creating what the users expect. (We discuss specifications in the “Develop to a Specification” section later in this chapter.)
Document the application
The applications you deliver to end users should be accompanied by printed documentation that explains how the applications are meant to be used. End-user documentation doesn’t have to include descriptions of the internal structure or logic behind the user interface. It should, however, explain how the forms and reports work, describe things the users should be wary of (for instance, changing existing data), and include printouts of sample reports. Use screenshots to illustrate the documentation. Be sure the documentation includes the exact version number in the title or footer so that users can verify that the documentation is the right version for the software they’re using.
The users of your applications will benefit from the online Help you build into the database. Online Help, of course, means everything from the ToolTips you attach to the controls on a form to status-bar text, to sophisticated context-sensitive and “What’s This” Help you build with the Microsoft Office Developer Extension tools.
Use professional installation tools
The days of distributing an application as zipped files on a floppy disk are long gone. Microsoft Windows has become so popular that every possible type of user is working with applications running under this operating system. This means that many end users are people with virtually no computer experience, and you can’t expect them to create directories, unzip files, and create program icons on their own.
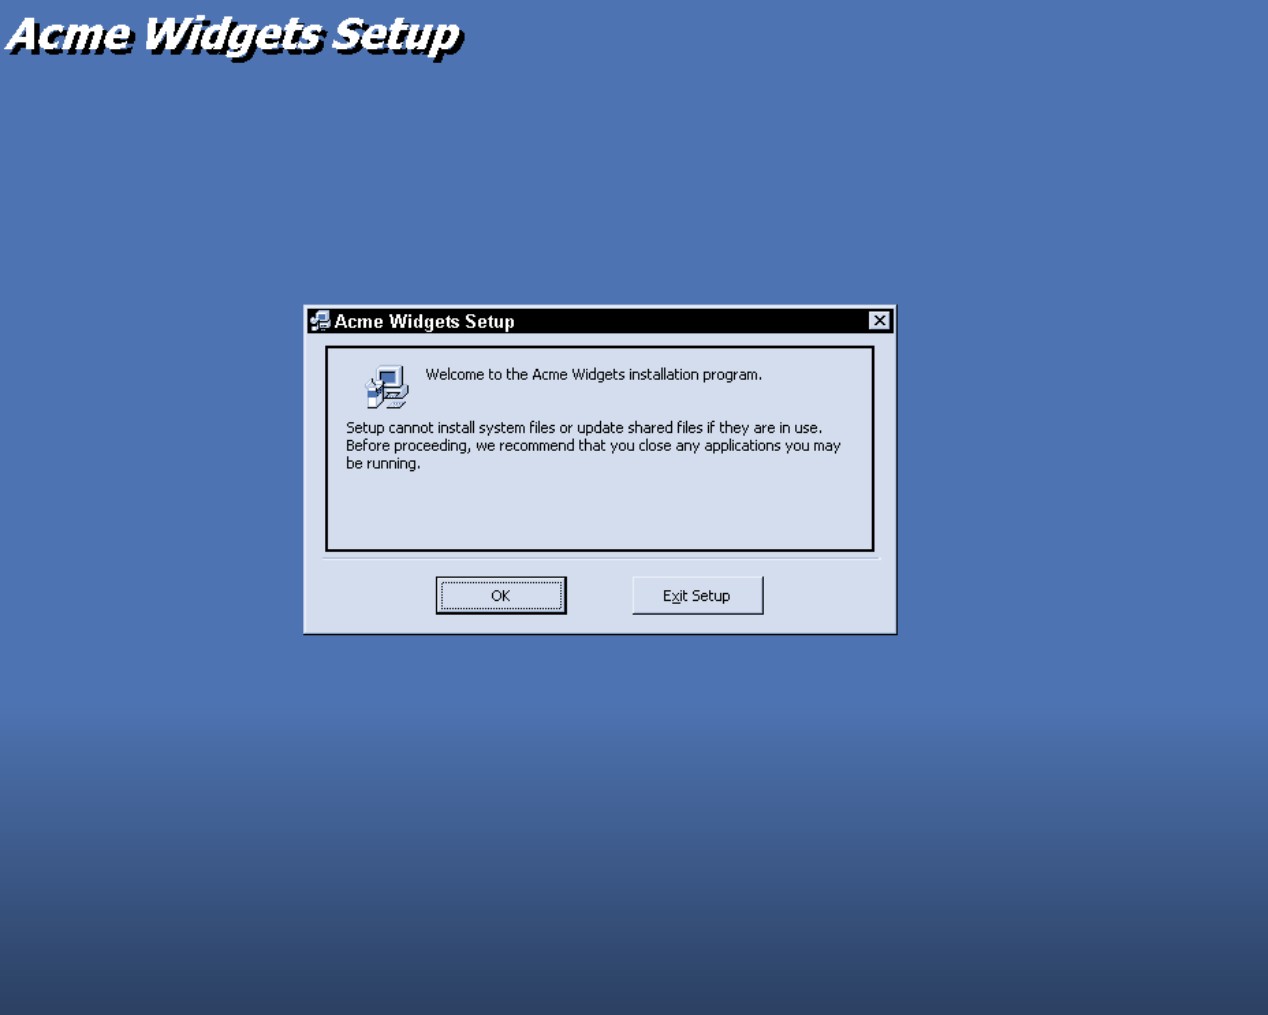
In many cases, an Access application is simply copied across a network or copied to a CD-ROM or DVD. Other times, a more formal distribution package is needed by users. Chapter 35 explains the process of preparing Access applications for distribution to remote users. The Microsoft Office Developer Extensions include a very nice deployment wizard that walks you through all the steps necessary to build an effective distribution package. Figure 28-2 is an example of an application setup screen that will guide the user through the applications installation.
Figure 28-2
A professional-quality installation program adds a welcome touch to most applications.
Remember that the user’s first impression of your work is often based on how easily the application installs. If the user encounters problems or can’t understand how to get the program installed on his computer, you’re off to a bad start with the very people you’ve worked so hard to please.
Provide the Access runtime module to users
Although Access 2007 is included in the Microsoft Office Professional package, it’s probably not a good idea to give the full development environment wide distribution in your organization. The most direct approach to preventing users from modifying the design of tables, forms, and other database objects is to only give them the Access runtime version. Although the runtime program requires the same memory and disk space as the full development environment, all of the menu options required to modify database objects have been removed and are not accessible to users. In the runtime environment, even the Database window is hidden.
As a registered owner of the Visual Studio Tools for the Microsoft Office System, you are permitted to distribute as many copies of the Access runtime and its support files as you want. The ActiveX custom controls, the Replication Manager (described in Chapter 31), and other utilities may also be distributed as necessary.
When you follow Microsoft’s guidelines as you prepare a distributable application, your users may not even be aware that they’re using Microsoft Access. You can modify or hide the runtime’s title bar, menus, toolbars, dialog boxes, and other components to create a highly customized environment for your application.
Consider the user’s skill and training requirements
If you know in advance that the majority of your users are relatively unskilled or untrained, or if they won’t have a lot of on-site support, you should “overengineer” the messaging and Help file in the application. On the other hand, if the users are relatively experienced in computing, less hand-holding will be necessary.
One valuable technique used by many developers is to keep messages such as you see in Figure 28-3 in a table within the database. Figure 28-4 shows such a table and a message box displaying the first message in this table.

This table and the accompanying form (frmMessageDemo) are included in this chapter’s example database (Chapter28.accdb) on this book’s CD-ROM.
Figure 28-3
The messages you provide your users don’t have to be extensive or sophisticated.
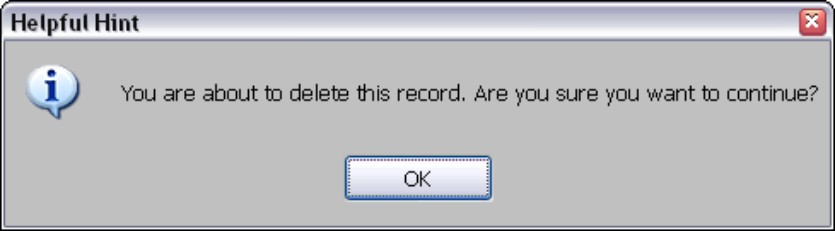
Figure 28-4
A simple message table and message box containing Help text
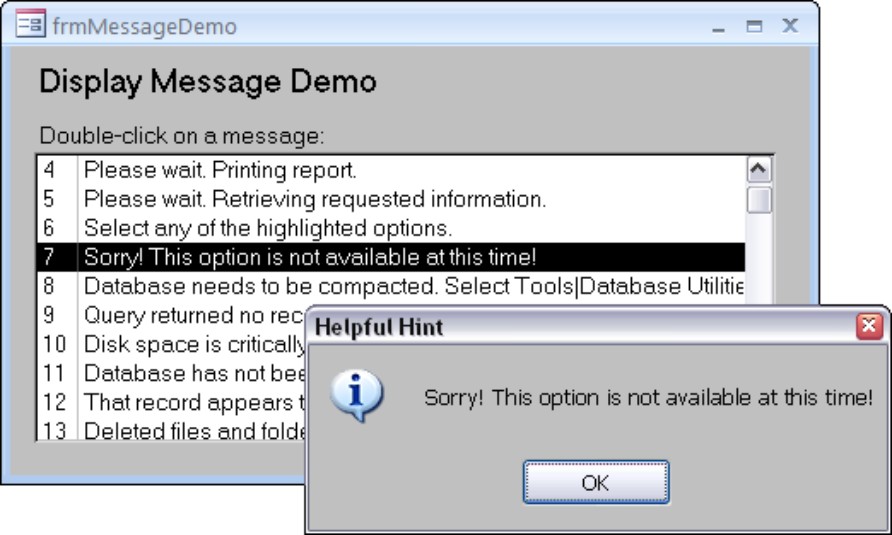
In practice, the MessageID is used to reference a particular message in this table. You could store the MessageID in the Tag field of a control or form and invoke the message when some error has occurred or when the user presses a button on a form. The message could also be displayed in the Access status bar or in a designated message area on a form. The code required to display a message stored in this table is quite simple:
Public Function DisplayMessage(iMsgNumber As Long)
Dim sMsg As String
Dim sSQL As String
Dim db As DAO.Database
Dim rs As DAO.Recordset
Set db = CurrentDb()
sSQL = “SELECT * FROM tblMessages WHERE “ & _
“MessageID = “ & iMsgNumber & “;”
Set rs = db.OpenRecordset(sSQL)
MsgBox rs(“Message”), vbInformation, “Helpful Hint”
End Function
The beauty of this little messaging system is that you could easily add a form to the application that permits users to add to the message list or change the existing text messages. Because the MessageID field is an AutoNumber, new messages are sequentially numbered without dealing with primary-key collisions. You’ll also have to provide a form that sets a control or form’s Tag property whenever a new message has been added to the database.
You could extend the messaging concept a bit and provide multiple levels of help. For instance, a novice user receives more extensive help than a more experienced user, while an expert should be able to turn off help completely.
Why Not Just Use Windows Help?
The messaging system described in this section is not intended to replace the Help files built with the Microsoft Office Developer Extension’s Help authoring system (called the Microsoft Help Workshop). There are many things that can be done in a Windows Help file (such as displaying a graphic) that are difficult or impossible to do in an Access message box. But if your applications make frequent use of the Access status bar to display Help or error text, or if you want to provide your users with the flexibility of changing the messages themselves, a “home-grown” messaging system might be an appropriate solution.
Understand the user’s motivations
The people using your applications have a number of basic needs that must be met. The applications you produce are expected to save time and/or money, produce new business, replace obsolete paper methods, reduce staffing requirements, or improve data reliability. Your applications may be expected to meet several or all of these objectives. Whatever the situation, you should have a firm understanding of what is needed. The better you understand the client’s goals, the more you can concentrate on the most important aspects of the application.
Check for obvious hardware errors
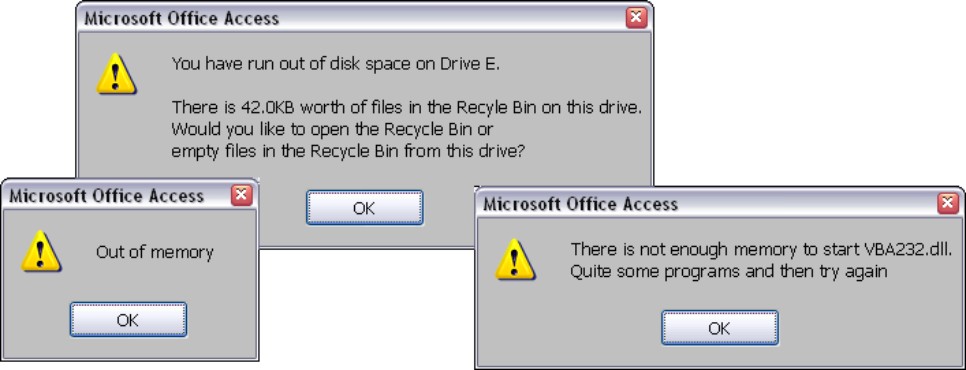
Whenever possible, you should monitor how much disk space, memory, and other resources are available to the application. Many problems users encounter are avoided by simply testing to confirm that adequate disk space exists. As you’ll read in Chapter 31, the databases in a replica set grow every time they are replicated, even if there are no data changes (replication events are logged in each database in the replica set). It is possible, therefore, for an Access data file to completely fill up a small hard drive over time, causing the application (and Windows itself) to fail. All of the error messages you see in Figure 28-5 were caused by running out of disk space on the computer.
Figure 28-5
Careful planning will help to avoid the unpleasant events that trigger these error messages.
Unfortunately, the VBA language built into Access does not provide functions for checking free disk space or available memory. You must resort to Windows API calls to interrogate the system for this information. Chapter 15 explains how to call Windows API functions from your databases.
What Does Disk Space Have to do With Memory Errors?
You may be wondering why inadequate disk space leads to the memory errors you see in Figure 28-5. Windows uses disk space as virtual memory when all of the physical memory (RAM) on the machine has been used. Windows creates virtual memory by allocating disk space to use as a swap file to temporarily store things that otherwise must be stored in memory. Windows continues allocating available disk space until nothing is left, leading to the “memory” error messages in Figure 28-5. To the application there is no difference between running out of physical memory or swap space—a memory error is a memory error, regardless of the cause.
Continue to improve the product
A developer’s work is never done. Surely you came up with new ideas as you built the basic application, or your clients pestered you with improvement requests as they beta-tested the interim builds. Although not allowing “off-spec” changes to interfere with the main development effort is important, you should record these ideas and use them as starting points for the next iteration of the product.
In many cases, improvements to the application consist of enhancements to the user interface. If you discover that users misunderstand how to enter data, perhaps you need to add more label text to the forms to serve as guidance. Or, if people complain that the application is hard to use, you might have to add more menu options or liberally use “plain English” throughout the program.
In the “Add Logging to your applications” section, later in this chapter, you’ll read about building usage logs into your applications. A properly designed and maintained usage log provides invaluable information about how the database is being used. You may be surprised at how often errors occur, or how rarely a particular form or report is used. Any feedback you get from your users or the application itself will help you as you begin the next phase of what might turn out to be an endless project.
Principles of Bulletproofing
A few simple rules go a long way toward bulletproofing your applications. The following principles are easily applied to most any Access application, and once you’ve implemented them, the techniques and objects you’ve built are easily exported to future databases.
Make the application easy to start
You shouldn’t expect users to locate the Access data file (.accdb or .mdb) or to use the File Open dialog box in Access to invoke the application. Adding items to the Windows Start menu or to a program group isn’t difficult. When properly implemented, a program icon creates the impression that the application exists as an entity separate from Access and endows it with a status equivalent to Word, Excel, or other task-oriented programs.
Creating a program icon is not difficult. Many freeware and shareware versions of icon editors are available online. The Chap28.accdb example database comes with its own program icon (Earth.ico) for you to experiment with. You designate the program icon in the Access 2007 startup options (see the next section) or by setting a program icon in Windows Explorer.
Follow these steps to establish a program icon for an Access database:
1. Hold down the Ctrl key as you drag the Access 2007 program icon to a new position in the Office 2007 program folder.
This copies the existing Access 2007 icon.
2. Press F2 while the icon is highlighted and type in the new caption for the icon.
3. Press Alt+Enter. (Alternatively, right-click on the icon and select Properties from the shortcut menu.)
The Properties dialog box for the icon opens.
4. Select the Shortcut tab in the Properties dialog box and add a complete path reference to the application’s .accdb or .mdb file to the Target text box.
In Figure 28-6 the application database’s path is C:\Apps\Contacts.mdb. Notice that the Target text box contains the path to the Access 2007 executable.
5. The icon properties dialog lets you specify an icon to use in the application folder or Windows desktop (see Figure 28-7). Click on the Change Icon button and use the Browse button in the Change Icon dialog to locate the icon file (.ico extension) you want to use.
Use startup options
When properly designed, users should not even be aware that they’re working with Microsoft Access. Use the Access 2007 Application Options (see Figure 28-8) to hide the Navigation pane, and replace the default menus and ribbons with application-specific menus and ribbons. These options give the application control from the start, instead of having to wrest it away from the user once things are under way.
Figure 28-6
It’s easy to get Access to automatically open a database from a program icon.
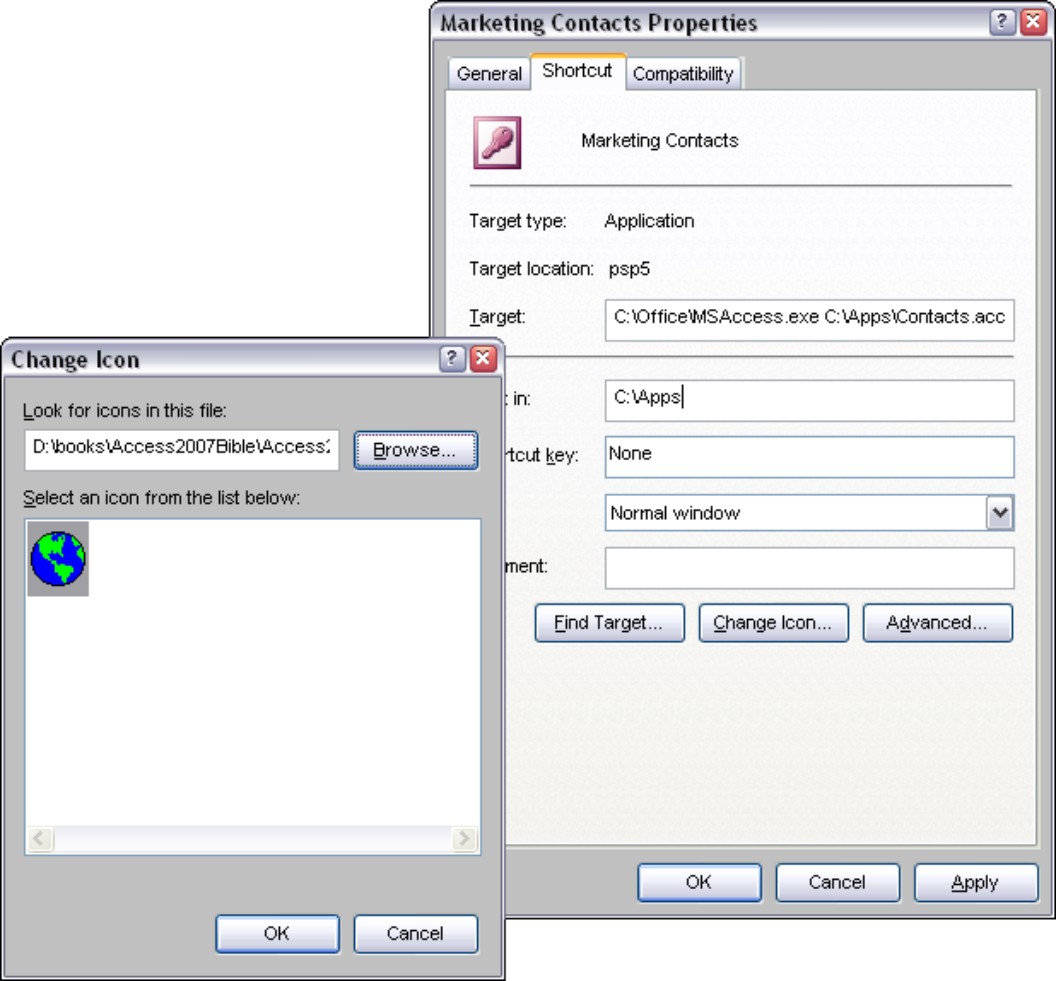
Figure 28-7
A colorful icon can make an application easy to find in a crowded folder or desktop.
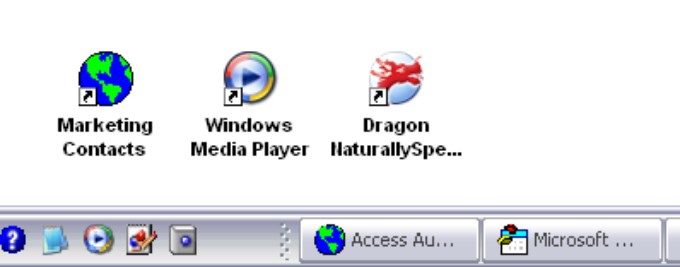
Figure 28-8
The Access Application Options help you simplify the user interface.

Figure 28-8 illustrates the first step to simplifying the user interface. The Current Database dialog box (File⇒Access Options) includes options for hiding the Navigation pane, disabling the default ribbons, and trapping the built-in “special keys” (like Ctrl+F6) that may otherwise confuse users.
For example, notice the Application Icon option in the Application Options dialog box in Figure 28-8. The icon file (.ico) that you specify in this text box is used in the Access title bar, replacing the default form icon you see in Figure 28-9. The same icon appears at the top of reports displayed in Print Preview.
The icon you specify using the Windows properties (described in the “Make the application easy to start” section, later in this chapter) do not affect the Access application itself. For instance, the icon you assign to the application icon on the Windows desktop or in a program folder does not show up in the Access title bar and does not appear on the Windows taskbar. You must specify an icon in the .database’s Startup dialog box to see the icon in the Access title bar.
Figure 28-9
The application icon you specify in the Startup dialog box replaces the default icons in form and report title bars.
The user can bypass all of the startup options by holding down the Shift key as the database opens. See the “Disable Startup Bypass” section, later in this chapter, to see how you can disable this Access feature. Once you’ve disabled the startup bypass, only the most sophisticated user will be able to reinstate the bypass feature.
Use a login form
The user’s name or ID can be valuable information, even if not part of a security scheme. In the “Maintain usage logs” section, later in this chapter, you’ll read about logging activity during a database session to provide an audit trail that helps determine what went wrong and who was responsible when failures occur as people work with the database. The login information you see in Figure 28-10 can be an invaluable aid to deciphering the audit trail.
Figure 28-10
Capture useful information on the login form.
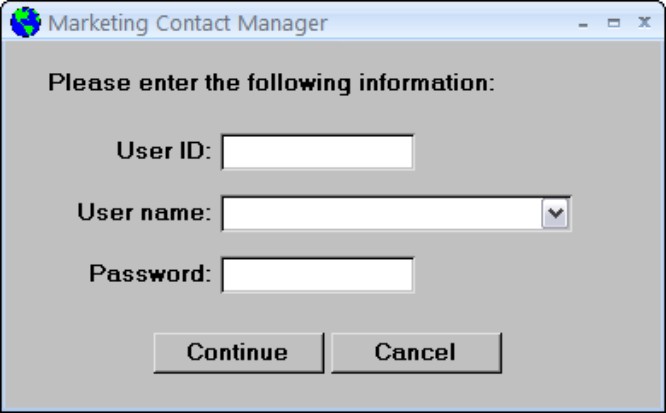
The login information should also include the date and time the user logged in to the application. You shouldn’t make the user enter this information, however. The built-in Now() function returns the current system time and date and can be used in any logging features you build into the application.
Confirm the user ID and password from the login form with data stored in a hidden table. You could even include code to temporarily link to the password table in an “administration” database that resides in another location on the network. Store the user ID from the login form in a global variable to use in error logs, send e-mail messages, or stamp records with the user’s identification.
In any case, set the Modal property of the login form to Yes (True) to prevent the user from accessing any other part of the application until the user ID, username, and password have been verified.
Use the predefined Password value for the Password text box’s InputMask property to display an asterisk for each character entered into this box.
Although a simple login form such as you see in Figure 28-10 does not deter a determined hacker or sophisticated user, the average user will comply with the request for the user information on this form. When used in conjunction with the BypassSetupKey property (which prevents the user from using the Shift key to bypass the startup options) described later in this chapter, a startup form such as you see in Figure 28-10 provides a reliable login procedure for most applications.
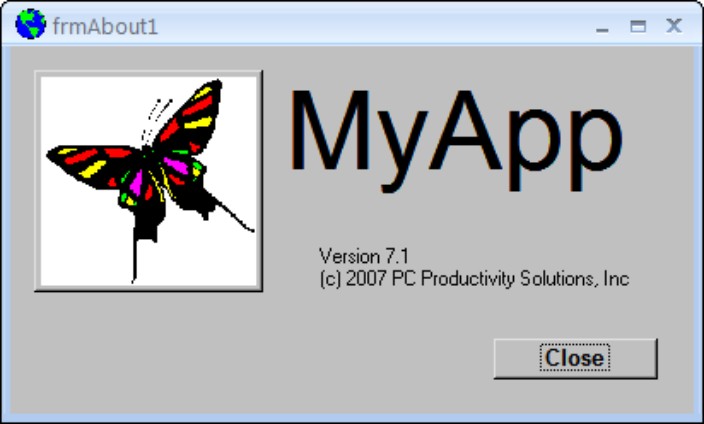
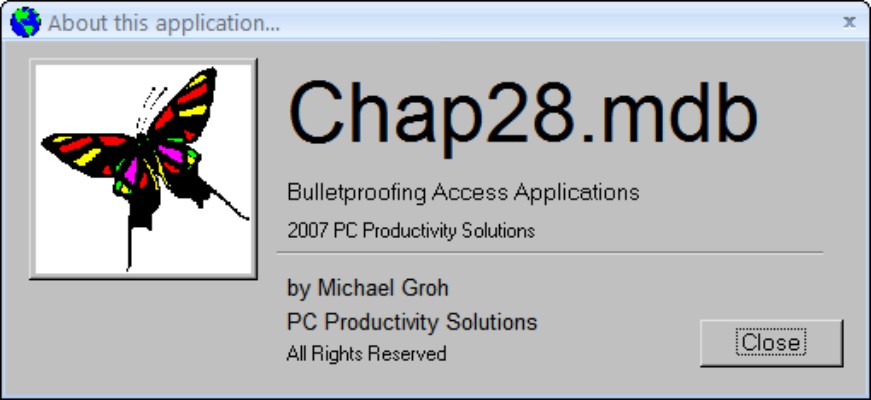
Use a splash screen
Although a splash screen (also called a startup form) might not sound like a bulletproofing technique, one aspect of professional application development is providing high-quality information to the user in a timely fashion. An appropriately designed splash screen gives the user such valuable information as the version number of the database application, the user name (or login ID), the date the database was most recently replicated, and so on. A simple splash screen is shown in Figure 28-11.
Chapter 26 describes adding splash screens to Access applications and how to add valuable data to the splash screen.
Figure 28-11
A splash screen confirms the application name and version number.
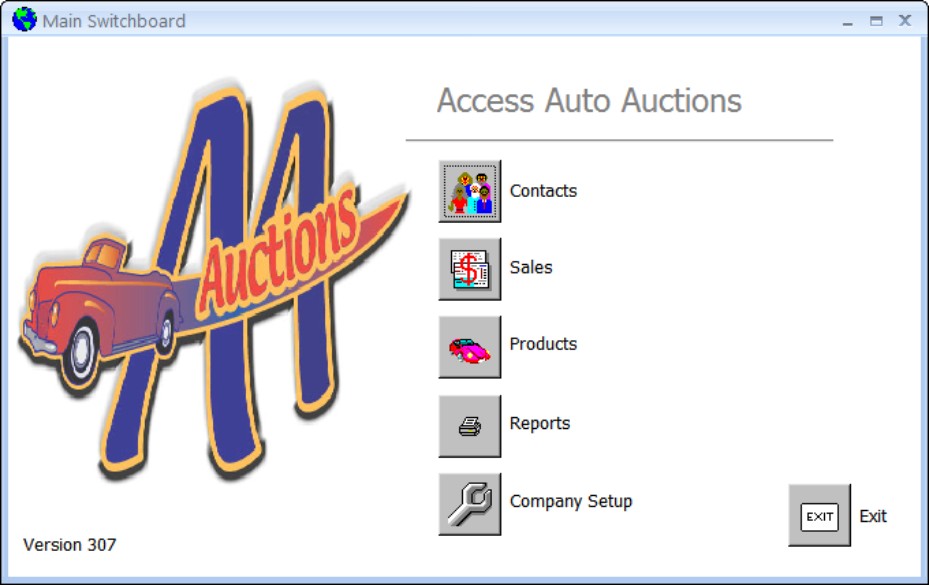
Add switchboards to the application
Switchboard forms are an invaluable way to keep users focused on using the database as intended. A switchboard form presents the user with a limited number of choices for working with the application and makes the application easier to use. You could use the user’s login information to determine which of a number of switchboard forms to use. For instance, a manager with a higher level of privileges may be given a form with more options than a clerical worker would be given.
Figure 28-12 shows the switchboard form from the Access Auto Auctions database. Each button in this switchboard triggers some action within the database or leads to another switchboard form.
Figure 28-12
Switchboard forms control a user’s access to the application.
Control the ribbons
In most applications, you don’t want the user to have access to dangerous ribbon commands. If, for instance, users are able to access the export or import commands in the External Data ribbon, they may be tempted to experiment with exporting and importing data. This could have serious repercussions on the security and integrity of the data stored in the database.
Removing default ribbon command options requires a bit of work, but is worth the trouble. Actually, you don’t remove ribbon items as much as you replace the built-in ribbons with custom ribbons that become part of the database.
Chapter 34 explains how to create custom ribbons containing virtually any built-in or custom commands or functions.
In addition, Access 2007 allows you to easily modify the Quick Access bar in the upper-left corner of the Access environment. Figure 28-13 shows the Quick Access toolbar customization dialog box. You open this dialog from the File menu.
Figure 28-13
Creating a custom Quick Access bar in Access 2007 isn’t too difficult.
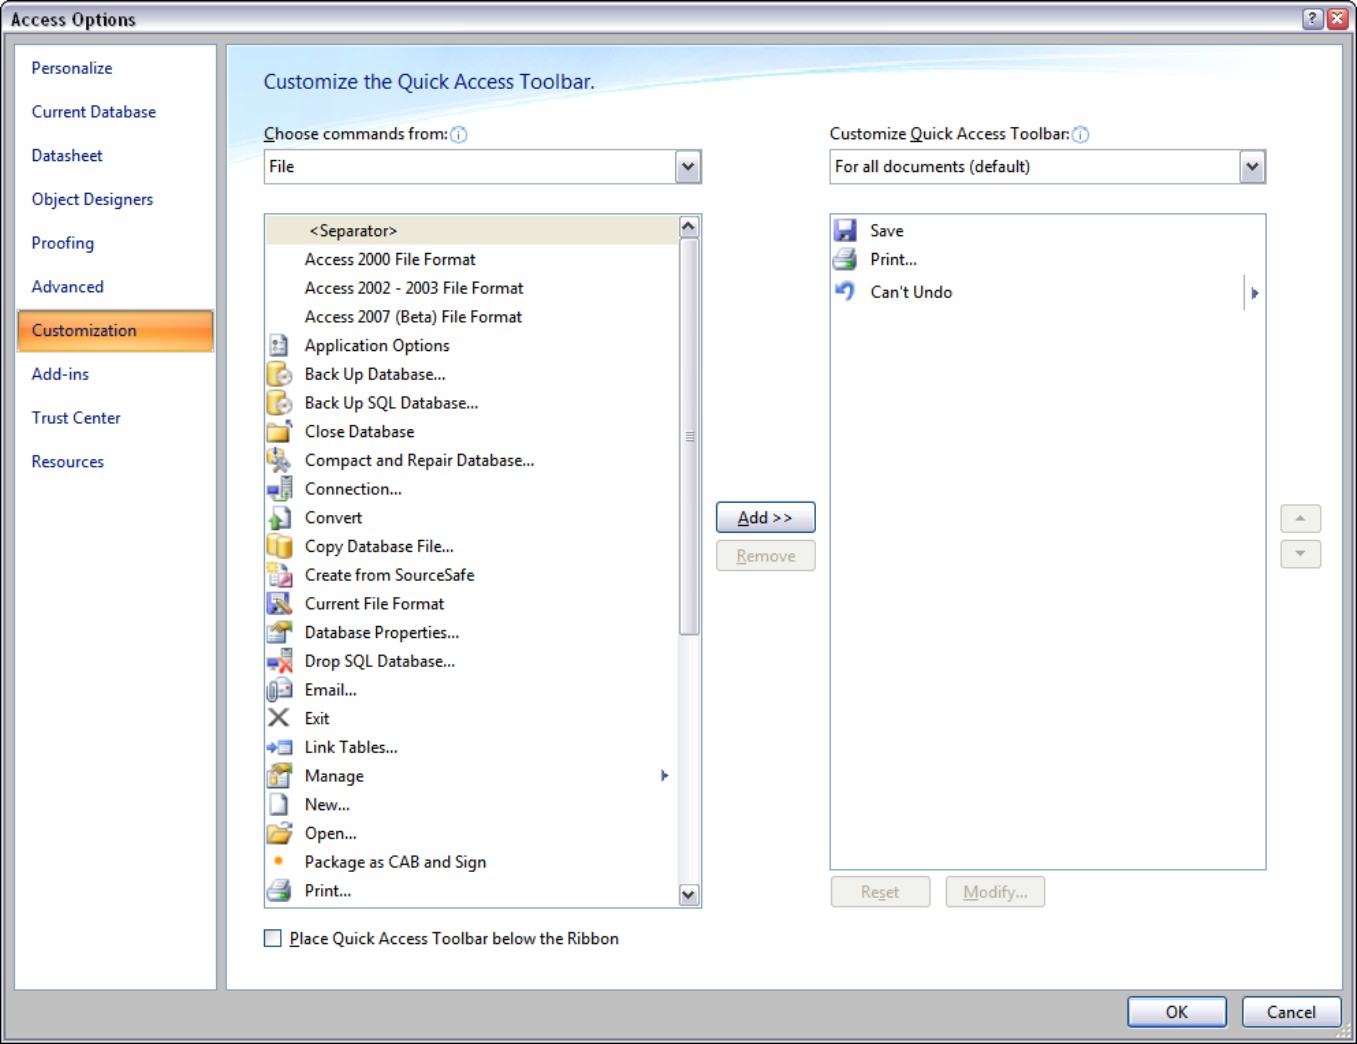
Figure 28-14 shows a Quick Access toolbar after adding several new commands. The two File menus you see in this figure are equivalent except that the one on the right has had certain commands removed with the Menu Builder.
Figure 28-14
The Quick Access toolbar is easy to customize.
Hide the Navigation Pane and remove menus
Notice the Display Navigation Pane check box, the Allow Full Menus check box, and the Allow Built-in Toolbars check box in the startup dialog box in Figure 28-8. When not selected, these check boxes hide the Navigation Pane and remove the built-in menus from the Access environment. This means, of course, that your application will be totally reliant on the switchboard forms and toolbars you create, but it is a good way to control the user’s access to the environment.
Display one form at a time
If appropriate for the application, you’ll probably want to restrict the user to a single form to avoid problems. Many inexperienced users are confused by the multiple document interface (MDI) paradigm used by Access. Having too many forms open on the screen can lead the user to jump from task to task in no particular order.
As an alternative to displaying a single form at a time, you can also use the Modal property to force a form to retain the focus during some operation. A good example is selecting from a number of reports to print. Once the user has decided to print a report, you might want to keep him focused on that task, instead of allowing him to jump back to the data-entry form. With access to both printing and data entry, the user might start a print job, jump back to data entry as the print job begins (to make changes to the data), and then wonder why the printout doesn’t include the changes made after the printing has begun. Or Access may lock the records the user is trying to change during the print event.
Trap unwanted keystrokes
Many simple keystrokes (like pressing the Delete key) can lead to data loss. The easiest way to capture keystrokes is to create an AutoKeys macro that simply remaps dangerous keystrokes to harmless equivalents. The problem with AutoKeys, however, is that the remapped keystrokes are applied globally, rather than locally on a particular form. You can set up any number of keystroke macros, however, and enable or disable keys as the user enters and leaves forms.
Build bulletproof forms
You can take several steps to make each form in an application virtually bulletproof:
• Remove the Control Box, Min, Max, and Close buttons from the form at design time. Your users will be forced to use the navigation aids you’ve built into the application to close the form, ensuring that your application is able to test and verify the user’s input.
• Always put a Close or Return button on forms to return the user to a previous form in the application. The buttons should appear in the same general location on every form and should be consistently labeled. Don’t use “Close” on one form, “Return” on another, and “Exit” on a third.
• Set the ViewsAllowed property of the form to Form at design time. This will prevent the user from ever seeing a form as a datasheet.
• Use modal forms where appropriate. Keep in mind that modal forms force the user to respond to the controls on the form—the user can’t access any other part of the application while a modal form is open.
• Use your own navigation buttons that check for EOF (End of File) and BOF (Beginning of File) conditions. Use the OnCurrent event to verify information or set up the form as the user moves from record to record.
• Use the StatusBarText property on every control, to let the user know what’s expected in each control. The Control TipText property should also be set on all relevant controls.
• Disable the Del key or trap the OnDelete event to confirm deletions.
Validate user input
One of the most important bulletproofing techniques is to simply validate everything the user enters into the database. Capturing erroneous data input during data entry is one of the most import safeguards you can build into your applications. In many cases, you can use the table-level validation (determined by each field’s ValidationRule and ValidationText properties) provided by Jet, but in many other cases you’ll want more control over the message the user receives or the actions taken by the database in response to erroneous input.
One of the major problems with the ValidationRule property is that it isn’t checked until the user actually tabs to the next control, making it impossible to capture erroneous null values. You’re much better off in many cases validating entries in code. Very often you’ll want to validate all controls on a form from the BeforeUpdate event instead of checking each and every control on the form.
Keep the user informed
An uninformed user is a dangerous user. Keep the user informed of the database status through the hourglass mouse cursor, message boxes, status-bar text, and progress meters. A simple progress meter (see the “Creating and using a progress meter” section, later in this chapter) can keep a user from frustration during long queries or printouts. The last thing you want a user doing is hitting keys in a panic, thinking the application has crashed or is hung up.
Also, always warn the user when something dangerous (like a delete query that removes data from the database) is about to happen. You don’t have to inform users of trivial or expected actions, but make them aware when irreversible changes are being made.
Maintain usage logs
In the “Adding Logging to Applications” section, later in this chapter, you’ll read about adding usage logs to your applications. These logs—which capture information such as the user’s name or ID, the date, and the time—provide valuable information, especially in the event that an error occurs. Although you can easily record too much information, a properly designed usage log will permit you to pinpoint whether a certain type of error always seems to occur when a particular user is working with the system or when a certain query is run.
The logging information you add to a database might include updating a time stamp on records in a table when changes are made. Be aware, however, that the more logging you do, the slower the application becomes. The log information will cause the database to grow as well, unless the log information is stored in another location.
You can even tailor the level of logging to suit particular users or user groups. Using the information captured on a login form, the application can determine at startup what level of logging to impose during the session. To make reviewing the logs much easier, you can even log to a table located in an external database in a different location on the network.
Develop to a Specification
All databases are meant to solve some problem experienced by users. The problem might be some inefficiency in their current methods or an inability to view or retrieve data in a format they need. Or you may simply be converting an obsolete database to a more modern equivalent. The effectiveness of the solution you build will be judged by how well it resolves the problem the users are having. Your best guarantee of success is to carefully plan the application before building any table, query, or form. Only by working to a plan will you know how well the application will solve the user’s problem.
Most Access development projects follow this general sequence of events:
1. Define the problem.
Something is wrong or inadequate with the current methods—a better system is needed and Access appears to be a good candidate to produce the new system.
2. Determine the requirements.
Interviews with the client yield a description of the basic features the program should provide. The product of these discussions is the design specification, a written document that outlines and details the application.
3. Design the application.
The developer uses the initial design specification to design the basic structure of the database and its user interface.
4. Develop the application.
This is where most developers spend most of their time. You spend a great deal of time building the tables, queries, forms, and other database objects needed to meet the specification produced in Step 2.
5. Test.
The developer and client exercise the application to verify that it performs as expected. The application is tested against the requirements defined in the design specification, and discrepancies are noted and corrected for Step 6.
6. Distribute and roll out.
After the application’s performance has been verified, it is distributed to its users. If necessary, users are trained in the application’s use and instructed on how to report problems or make suggestions for future versions.
Many inexperienced Access developers dive right into development without adequately defining the application’s objectives or designing the database’s structure. Unless the application is incredibly simple, a developer who does not work to a specification will surely end up with a buggy, unreliable, and trouble-prone database.
Another major error is allowing the database to stray too far from the initial design specification. Adding lots of bells and whistles to an otherwise simple and straight-forward database is all too tempting. If implementation digresses too far from the design specification, the project may fail because too much time is spent on features that do not directly address the user’s problem.
Before any work begins, most professional application developers demand that the client submit a written document describing the intended application and specifying what the program is expected to do. A well-written design specification includes the following information:
• Expected inputs: What kind of data (text, numeric, binary) will the database have to handle? Will the data be shared with other applications like Excel or another database system? Does the data exist in a format that is easily imported into an Access database, or will the data have to be re-keyed at runtime?
• User interface: Will the users be comfortable with simple forms, or will they need custom menus, ribbons, and other user-interface components? Is context-sensitive online help required?
• Expected outputs: What kind of reports are needed by the user? Will simple select queries be adequate to produce the desired results, or are totals, crosstabs, and other advanced queries necessary as well?
The whole point of a design specification is to avoid adding unplanned features that decrease the database’s reliability without contributing to its utility. Writing a design specification before beginning the actual implementation will consistently yield the following benefits:
• A guide to development effort: Without some kind of design specification, how can you possibly know whether you’re building an application that truly meets the client’s expectations? As you work through the development phase, you can avoid adding features that don’t contribute to the application’s objectives and concentrate on those items that the client has identified as having priority.
• Verification that the application meets expectations: All aspects of the application must be tested to verify its operation. The best way to conduct testing is to confirm that all design objectives have been met and that no unexpected behavior is observed during the testing phase.
• Minimization of design changes during implementation: Many problems can be avoided by sticking to the specification. One of the easiest ways to break an application is to add new features not included in the original design. If the application was properly planned, the specified features will have been designed to work together. Introducing new features once development has begun will most likely result in a less reliable system.
Overall, a well-written design specification provides the basis for creating tight, bulletproof applications that fulfill the user’s requirements. At the conclusion of the project, the finished database can be compared to the design specification, and its effectiveness in addressing the original problem can be objectively evaluated. Without the design specification written at the beginning of a project, there is no valid measure of how well the application resolves the problem that inspired the project in the first place.
Securing the Environment
Obviously a serious Access application must be secured from unauthorized users. The built-in security system (enforced by the Jet database engine, not by Access) provides multiple levels of security. You can, for instance, secure a single database object (form, table, report) from individuals, groups, or individuals within groups. A user can even have multiple levels of security (provided the user has been assigned multiple login names). All of the Access security objects, their properties, and methods are accessible throughout Access Visual Basic code.
The Access security system is described in detail in Chapter 29. As you’ll see in Chapter 29, it is possible to use code to add any level of security into an Access application required by the users.
Setting Startup Options in Code
The options you set in the Current Database dialog box (refer to Figure 28-8) apply globally to every user who logs into the database. There are times when you want to control these options through startup code instead of allowing the global settings to control the application. For instance, a database administrator ought to have access to more of the database controls (menus, the Navigation Pane) than a data-entry clerk has.
Every option you see in the Options dialog box, except for options on the Module tab, can be set through code. You are able to use Access VBA to control the settings of the Application object properties listed in Table 28-1.
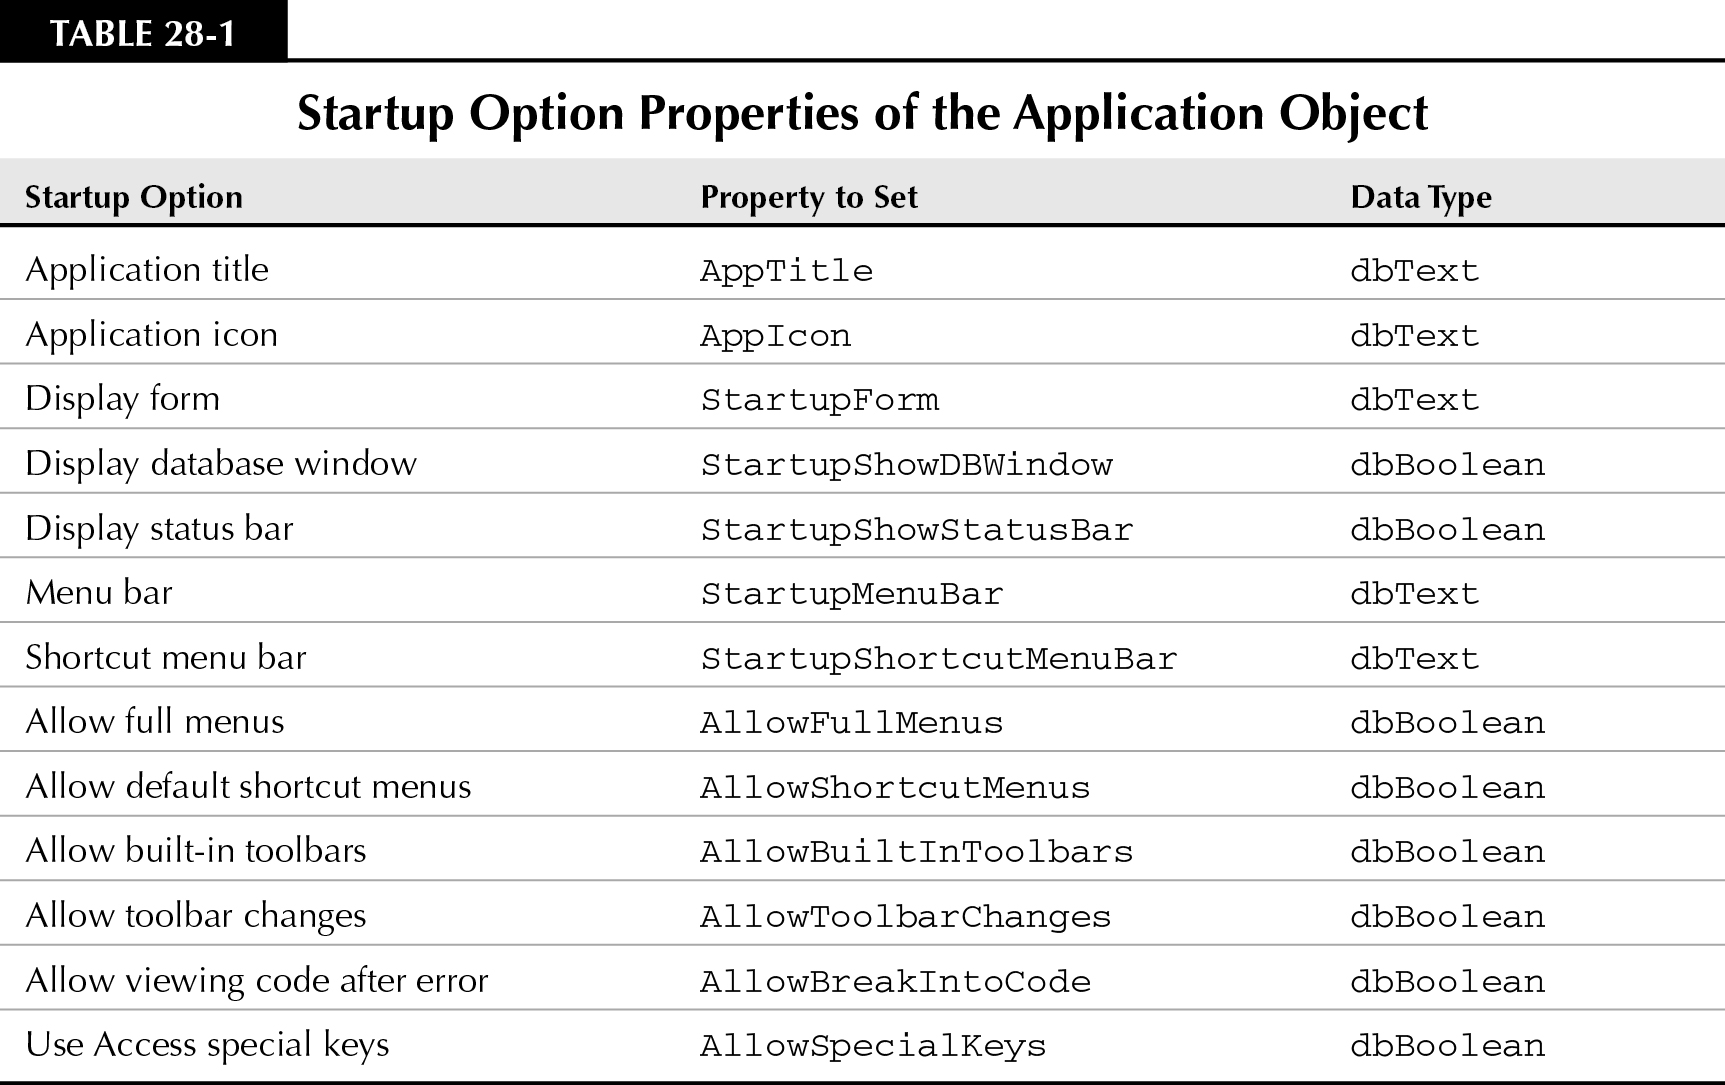
Depending on the username (and password) provided on the login form, you can use VBA code in the splash screen or switchboard form to set or reset any of these properties. Clearly these properties have much to do with controlling the Access environment at startup.
Disable Startup Bypass
In old versions of Access, developers used the AutoExec macro to do things like hide the database container, open a startup form, and execute some startup code. The problem was that any user could easily bypass the AutoExec macro by holding down the Shift key while opening the database.
The Access startup properties provide some relief from reliance on startup macros and other routines. Unfortunately the user is still able to bypass your carefully designed startup options by holding down the Shift key as the application starts. This action, of course, will reveal the application’s design and objects that you’ve hidden behind the user interface.
Fortunately, the Access designers anticipated the need for bulletproofing an application’s startup by providing a database property named AllowBypassKey. This property, which accepts True or False values, disables (or enables) the Shift key bypass at application startup.
Because AllowBypassKey is a developer-only property, it is not built into Access databases. You must create, append, and set this property sometime during the development process. Once appended to the database’s Properties collection, you can set and reset it as needed.
Here is the code you need to implement the AllowBypassKey property:
Function SetBypass(BypassFlag As Boolean) As Boolean
‘Returns True if value of AllowBypassKey
‘is successfully set to BypassFlag.
On Error GoTo SetBypass_Error
Dim db As DAO.Database
Set db = CurrentDb
db.Properties!AllowBypassKey = BypassFlag
SetBypass_Exit:
Exit Function
SetBypass_Error:
If Err = 3270 Then
‘AllowBypassKey property does not exist
MsgBox “Appending AllowBypassKey property”
db.Properties.Append _
db.CreateProperty(“AllowBypassKey”, _
dbBoolean, BypassFlag)
SetBypass = True
Resume Next
Else
‘Some other error
MsgBox “Unexpected error: “ & Error$ _
& “ (“ & Err & “)”
SetBypass = False
Resume SetBypass_Exit
End If
End Function
This function first tries to set the AllowBypassKey property to whatever value is passed in as BypassFlag. If the attempt to set the property generates an error, indicating that the AllowBypassKey property doesn’t exist, the error trap checks to see if the error value is 3270. If it is, the AllowBypassKey property is created and appended to the database’s Properties collection after being set to the BypassFlag value.
If the error is anything other than 3270, the function simply exits and doesn’t try to resolve the problem.
The AllowBypassKeyDemo objects (frmAllowBypassKeyDemo and modAllowBypassKey) in the Chap26.accdb sample file on this book’s companion CD-ROM demonstrate how to set and use the AllowBypassKey property. The frmAllowBypassKeyDemo form contains two toggle buttons that alternately enable or disable the bypass feature.
Setting property values
You use the Application object’s SetOption method to set each of these properties, and the GetOption method to retrieve the current value. The syntax of the SetOption method is:
Application.SetOption OptionName, Setting
where OptionName is the name of an option in Table 28-1, and Setting is one of a number of different data types, depending on the option being manipulated with SetOption.
In most cases, unless the property has already been set in the Access Options dialog box, the property has not been appended to the Application object’s properties collection. You must make sure the property exists before trying to set its value in code. The following function sets the value of a startup property, creating and appending the property to the Application object’s Properties collection if the property does not exist:
Function AddStartupProperty(PropName As String, _
PropType As Variant, PropValue As Variant) _
As Integer
‘Consult the Access online help for the PropName
‘and PropType for each of the startup options.
‘Adding a property requires the appropriate
‘PropType variable or the property creation fails.
Dim MyDB As DAO.Database
Dim MyProperty As Property
Const _PropNotFoundError = 3270
Set MyDB = CurrentDB
On Error GoTo AddStartupProp_Err
‘The following statement will fail if the
‘ property named PropName doesn’t exist.
MyDB.Properties(PropName) = PropValue
AddStartupProperty = True
AddStartupProp_OK:
Exit Function
AddStartupProp_Err:
‘Get here if property doesn’t exist.
If Err = _PropNotFoundError Then
‘Create the new property and set it to PropValue
Set MyProperty = MyDB.CreateProperty(PropName, _
PropType, PropValue)
‘You must append the new property
‘to the Properties collection.
MyDB.Properties.Append MyProperty
Resume
Else
‘Can’t add new property, so quit
AddStartupProperty = False
Resume AddStartupProp_OK
End If
End Function ‘AddStartupProperty
Using AddStartupProperty() is quite easy. You must know the exact property name and data type of the property before invoking AddStartupProperty(). The following subroutine demonstrates how to set a startup property with AddStartupProperty():
Sub cmdAddProperty_Click()
Dim iRetVal As Integer
iRetVal = AddStartupProperty(“AppTitle”, dbText,
“Marketing Contact Management”)
iRetVal = AddStartupProperty(“AppIcon”, dbText,
“C:\My Documents\World.ico”)
End Sub
Notice that both the AppTitle and AppIcon properties are string data types (dbText).
Use the RefreshTitleBar method to see the changes made by setting either the AppTitle or AppIcon property. The syntax of RefreshTitleBar is simple:
Application.RefreshTitleBar
Getting property values
Getting the value of a property is much easier than setting a property’s value. The GetOption method returns the value of a property. The syntax of GetOption is as follows:
vRetVal = GetOption(PropertyName)
where vRetVal is a variant and PropertyName is the name of a property in Table 28-1. The following code fragment shows how to use the GetOption method to read an option property:
Dim vRetVal As Variant
‘ Get the current setting.
vRetVal = Application.GetOption(“AppTitle”)
A variant is used to capture the return value because of the different data types used for startup properties. Also, a property that has not yet been set may be null, and the variant is the only type of variable that can accept null values without error.
GetOption works for any of the options you see in the Options dialog box (Tools⇒Options). For instance, the following statement returns the current setting of the Hidden Objects check box in the View tab of the Options dialog box:
vRetVal = Application.GetOption(“Hidden Objects”).
Providing User Feedback
You can use any of numerous techniques to provide feedback to the user. One of the easiest ways to communicate (but sometimes the most annoying to the user) is with the MsgBox function. Although message boxes are easy to add to applications, they’re always modal and require the user to acknowledge the message before it’s dismissed. Message boxes can disrupt the workflow if the user is constantly required to dismiss multiple message boxes containing low-value information. In fact, flooding a user with silly message boxes containing unimportant information may cause a user to ignore truly important messages.
In many situations, message boxes are invaluable. A message box can be used to obtain confirmation before performing an irreversible action, or to deliver important information.
The MsgBox function accepts a number of parameters that specify the message text, which buttons to display on the message box, and the text to display in the message box title bar. The MsgBox function returns a value indicating which button displayed on the message box has been clicked by the user. The syntax of MsgBox is as follows:
MsgBox(Prompt[, Buttons][, Title][, HelpFile, Context])
where the function parameters are:
• Prompt: The message displayed in the message box. Prompt can be a maximum of approximately 1,024 characters. Separate lines in Prompt with a carriage return character (Chr(13)), a linefeed character (Chr(10)), or a carriage return-linefeed character combination (Chr(13) & Chr(10)) between the lines.
• Buttons: A numeric expression that defines the number and type of buttons to display in the message box, the icon style to use, which button to use as the default button, and the modality of the message box. The Buttons parameter completely defines the nature of the message box; therefore, there are many different values for this parameter. Table 28-2 contains all of the possible values. If omitted, the default value for Buttons is 0.
• Title: The text to display in the title bar of the message box. If you omit the title, the name of the application is used in the title bar.
• HelpFile: A string that is the name of the Help file to use to provide help for the dialog box. If the HelpFile parameter is provided, the Context parameter must also be provided.
• Context: The help context number assigned to the message-box Help topic. If the Context parameter is provided, HelpFile must also be provided.
Table 28-2 lists the valid values for the Buttons parameter. When more than one button or setting is required, sum the Constant values and pass the total to the MsgBox() function.
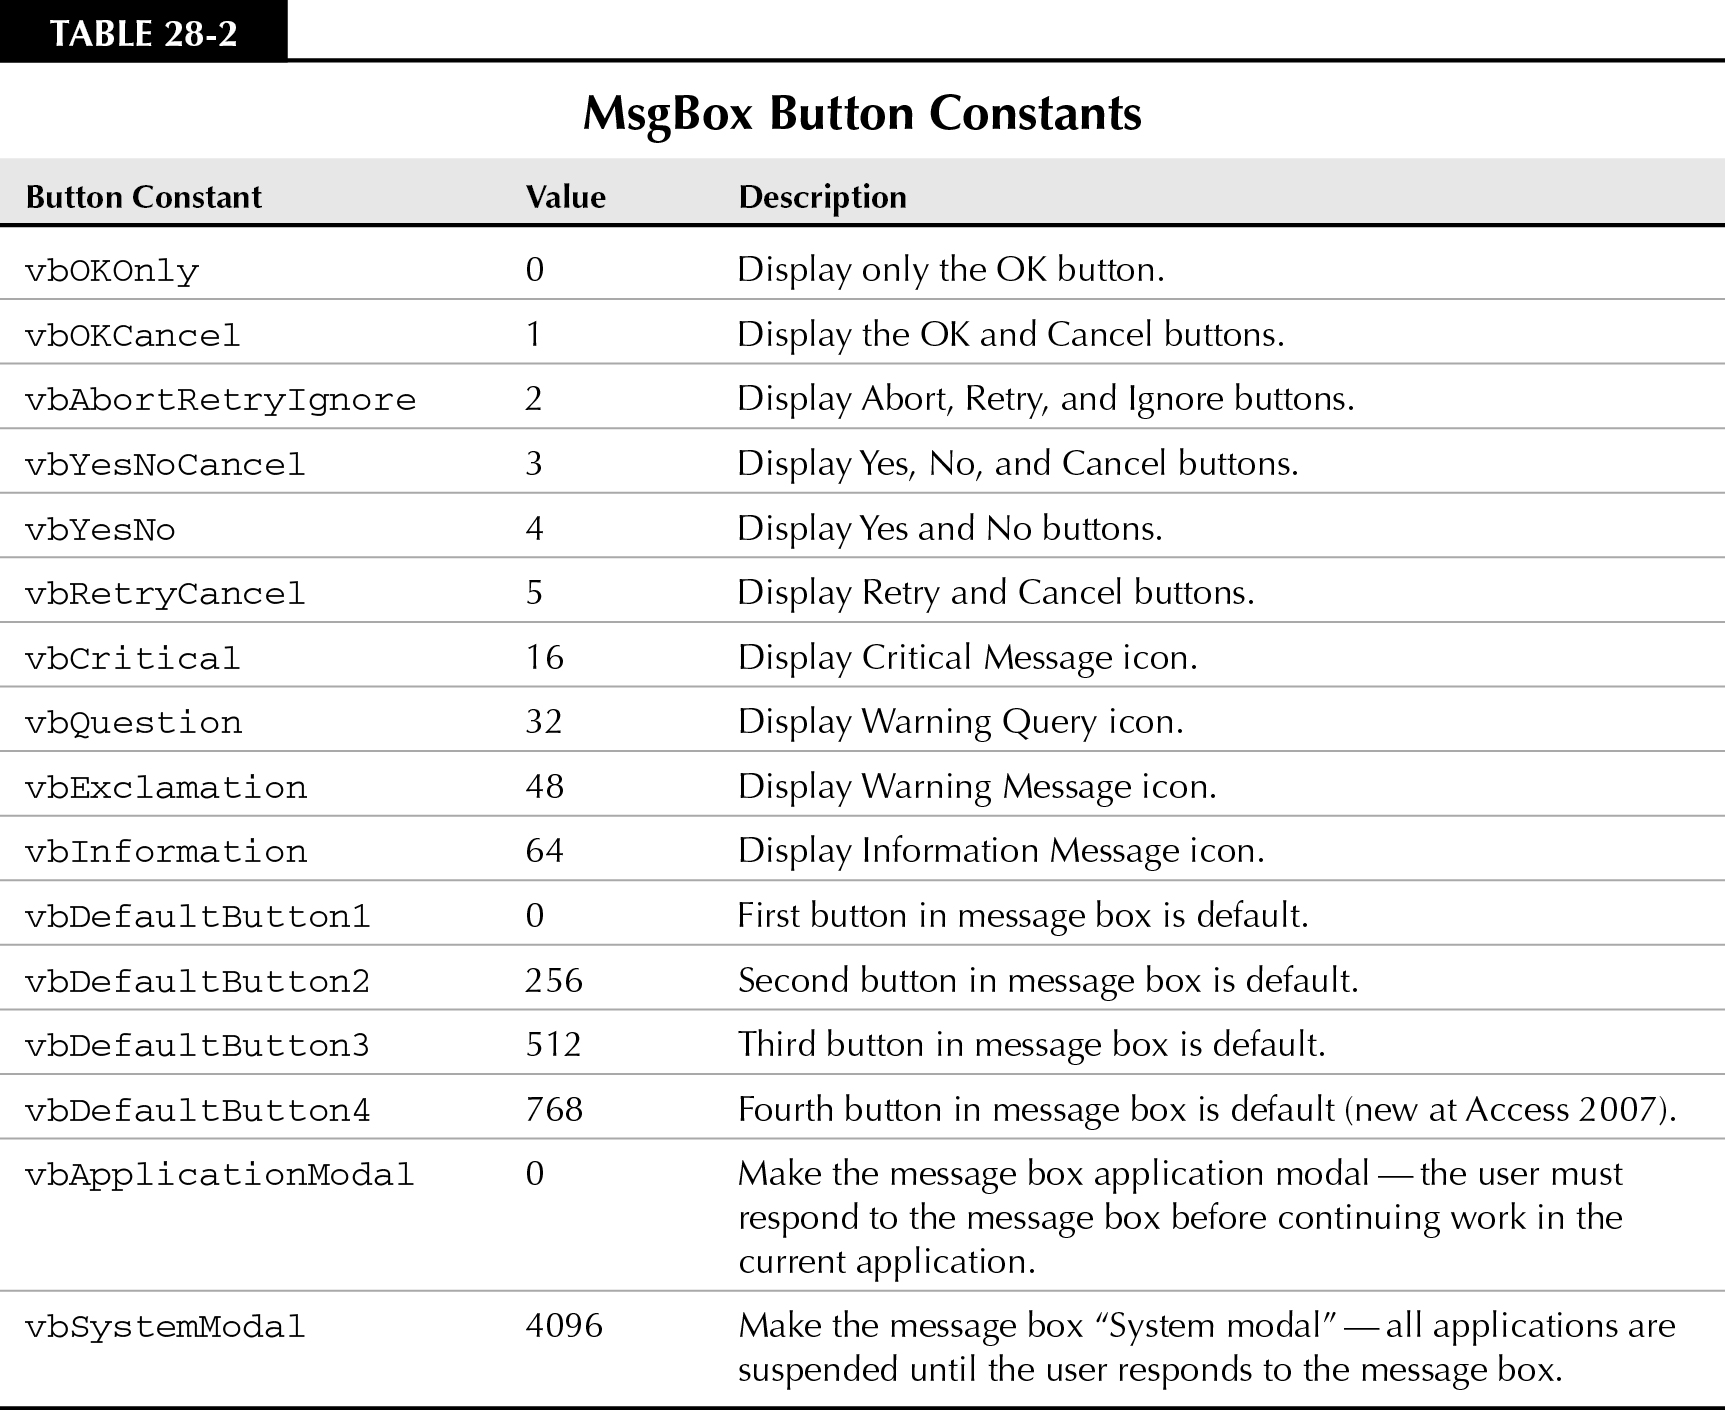
The Button value you provide MsgBox can be a combination of several options. For instance, the following command pops up a message box containing the famous Are you sure? message seen in many Windows applications. The message box contains Yes, No, and Cancel buttons:
iRetVal = MsgBox(“Are you sure?”, _
vbQuestion + vbYesNoCancel, “Confirm, please”)
Alternatively, a number can be used in place of the VBA intrinsic constants. The following statement is equivalent to the previous example:
iRetVal = MsgBox(“Are you sure”, 35, “Confirm, please”)
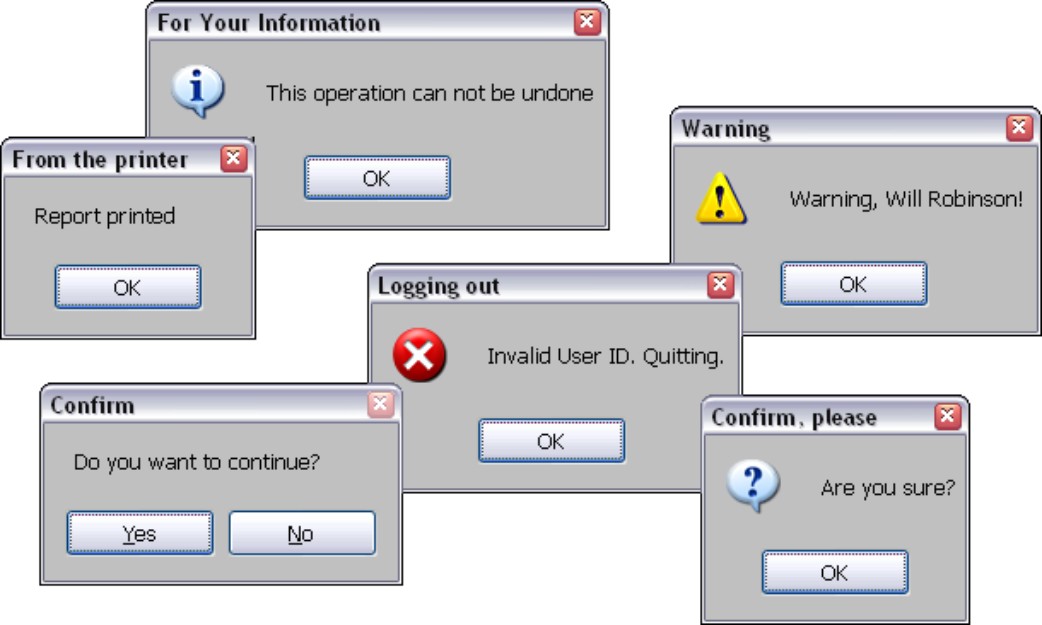
The 35 is the sum of vbQuestion (value = 32) and vbYesNoCancel (value = 3). You’ll find using the VBA intrinsic constants is more self-explanatory. Figure 28-15 is an example of different message boxes.
Figure 28-15
Message boxes come in a variety of sizes and display a number of different icons.
MsgBox(), like all VBA functions, returns a value. The value returned depends on which button displayed on the message box is clicked by the user. By default, a message box contains a single OK button, and the return value of the MsgBox() function is 1 when the OK button is clicked. The return values of the different message box buttons are shown in Table 28-3.
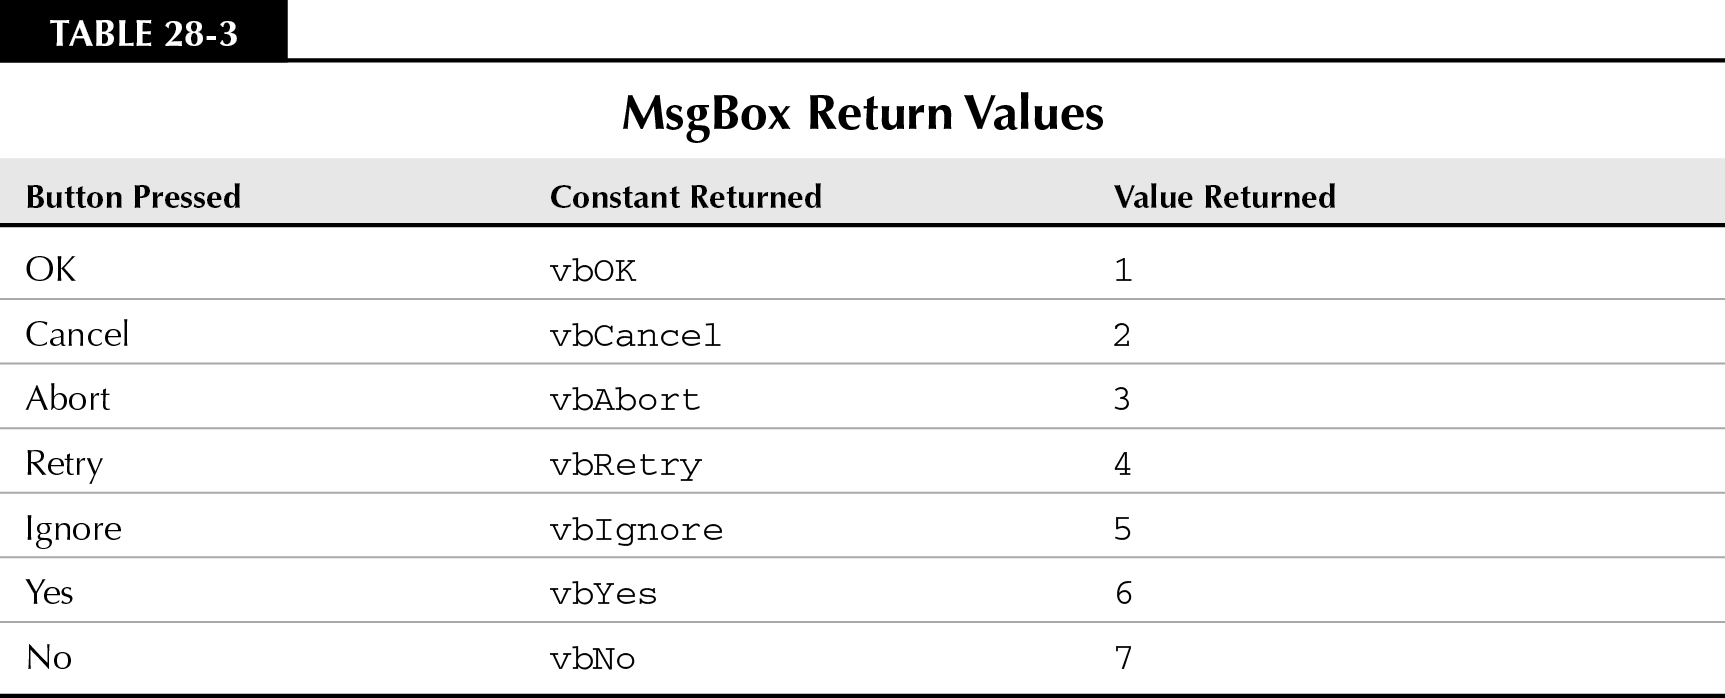
The form named frmMsgBoxDemo in the Chap28.mdb example database contains a number of different varieties of message boxes and command buttons. You’ll see how the different VBA constants influence the command buttons displayed in message boxes and how each command button returns a different value.
Creating and using a progress meter
Setting up and using a progress meter requires an initializing step, then incrementing the meter to its next value. As you increment, you don’t just increment a counter that is managed by SysCmd. You must explicitly set the meter’s value to a value between 0 and the maximum you set at initialization.
The following code and demonstration is contained in a form named frmSysCmdDemo in the Chapter28.accdb database.
Use the acSysCmdInitMeter constant to initialize the meter. You must pass some text that is used to label the meter as well as the meter’s maximum value:
Private Sub cmdInitMeter_Click()
Dim vRetVal As Variant
MeterMax = 100
vRetVal = SysCmd(acSysCmdInitMeter, _
“Reading Data”, MeterMax)
End Sub
When this subroutine is run, the Access status bar appears, as shown in Figure 28-16.
Figure 28-16
The progress meter after initialization

Incrementing the meter is a little tricky. In the following subroutine, the global variable MeterInc is incremented by 10 and the meter’s position is set to the value of MeterInc.
Private Sub cmdIncrementMeter_Click()
Dim vRetVal As Variant
MeterInc = MeterInc + 10
vRetVal = SysCmd(acSysCmdUpdateMeter, MeterInc)
End Sub
Figure 28-17 shows the progress meter after five increments. It’s easy to see that the meter has moved a distance proportional to the value of MeterInc after being incremented five times.
Figure 28-17
The progress meter midway in its movement

A meter is a valuable way to keep the user informed of the progress of a lengthy process. Because you control its initial value and the rate at which it increments, you are able to fairly precisely report the application’s progress to its users.
Adding Logging to Applications
Throughout this chapter you’ve seen multiple references to logging errors. An error log provides an excellent way to perform a postmortem on an application that does not operate properly. By adding error logging to each subroutine and function that might fail at runtime, you can see exactly what happened at the time an error occurred, instead of relying on the user’s description of the error.
Error logging can produce undesirable results at times. For instance, an error that causes an endless loop can easily consume all available disk space on the user’s computer if each iteration of the loop adds a message to an error log. Use error logging wisely. You may want to add error logging to every procedure in an application during the beta-test process, and reduce the number of calls to the logging procedure just before distributing the application to its users. You may even provide some way that users can turn on error logging if they encounter a reproducible problem in a database application.
You can easily activate or deactivate the calls to logging before distributing the application to users using the compiler directives described in Chapters 8 and 11. For instance, the following call to the Logger() function will be ignored if the DEVELOPMENT constant has not been defined in the application.
#If DEVELOPMENT Then
Logger(“Begin function TestuserInput() “, Now())
#End If
During the development cycle, include the following statement in the Declarations section of the form module, and calls to Logger() will be enabled. Before compiling and distributing to the user, either comment out this statement or set the DEVELOPMENT constant to 0.
#Const DEVELOPMENT = 1
The function shown in the following listing provides an elementary form of error logging. LogError() writes the following information to a table named tblErrorLog:
• The current date and time
• The procedure name that produced the error
• The error number
• The error description
• The form that was active at the time the error occurred (may be null if no form is open)
• The name of the control that was active at the time the error occurred (may be null if no control is selected)
Function LogError (ProcName As String, _
ErrNum As Integer, ErrDescription) As Integer
Dim MyDB As DAO.Database
Dim tblErr As Table
Set MyDB = CurrentDB()
Set tblErr = MyDB.OpenTable(“tblErrorLog”)
tblErr.AddNew
tblErr(“TimeDateStamp”) = Now
tblErr(“ErrorNumber”) = ErrNum
tblErr(“ErrorDescription”) = ErrDescription
tblErr(“ProcedureName”) = ProcName
‘ The following may be null if no form
‘ or control is currently active.
tblErr(“FormName”) = Screen.ActiveForm.FormName
tblErr(“ControlName”) = Screen.ActiveControl.ControlName
tblErr.Update
tblErr.Close
End Function
This simple subroutine adds to an existing table named tblErrorLog. What you do with the data in this table is up to you. You may, for instance, trigger a hard copy of the error log’s report at the end of a session, or e-mail the report to a database administrator. A sophisticated application would create tblErrorLog at the first instance of a logged error, and then check for the existence of tblErrorLog at the end of the session.
tblErrorLog contains the fields listed in Table 28-4.
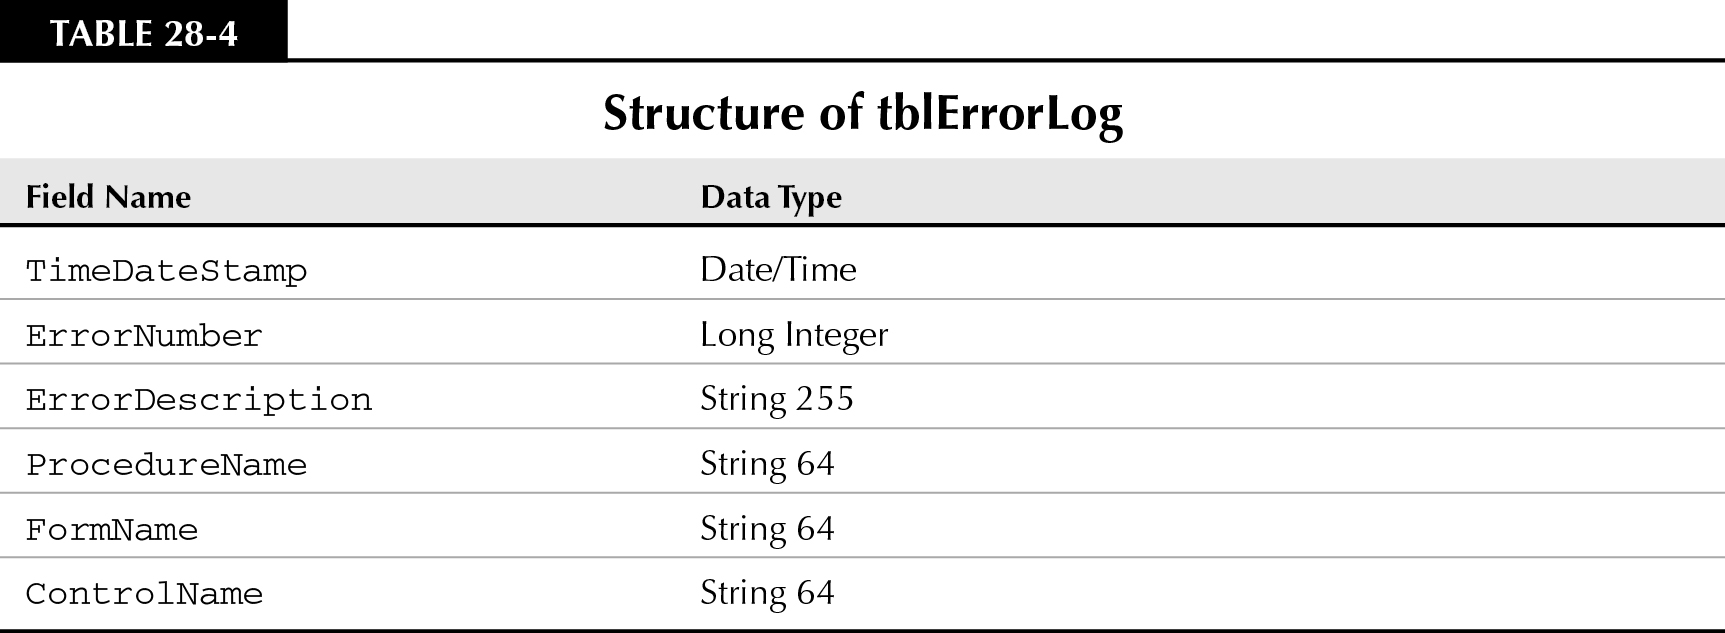
The ProcedureName, FormName, and ControlName fields are 64 characters in length—long enough to accommodate the longest possible names for these Access database objects. Error descriptions are usually short, but you want to provide as much space as possible to hold them.
A prototype of using LogError() is shown in the following subroutine. Notice that the LogError() function is triggered by the subroutine’s error handler. After the error is logged, you handle the error by other code that may be needed.
Sub MySubroutine
On Error GoTo MyErrorHandler
<Your code goes here>
Exit Sub
MyErrorHandler:
LogError(“MySubroutine”, Err.Number, Err.Description)
<Handle error here>
Resume
End Sub
The most critical items in the error log are the date and time, the error number, and the error description. The procedure name is useful, but it has to be hard-coded for each procedure (subroutine or function) you log with LogError().
Summary
This chapter has taken a quick look at the steps required to bulletproof Access applications. Although it’s true that entire books could be written on this important subject, the concepts presented in this chapter will be adequate for most Access applications.
Obviously, bulletproofing a database application takes a lot of time. Validating all of the data entry on every form or adding status bar messages to every control in an application isn’t easy. But the time you spend bulletproofing your databases will be paid back many times over in reduced support calls and happier users.