The Digital Environment Part II
The Imaging Processor
A DSLR’s imaging processor works behind the scenes, turning the data received from the sensor into a viewable digital image. As such, it is responsible for all the computation of the data from the sensor, from the signal received by the ADC (Analog-to-Digital Converter) to the transfer of a completed image to the memory card.
There is a great deal of hidden work going on here, not only because you have no direct access to it (other than through the menu settings), but because the proprietary algorithms that are at the heart of the processor are kept secret. As with software applications used on desktop computers, algorithms are the mathematical procedures for performing actions, and those for imaging are complex. Not only that, but there are differences in the quality of the programming—which can only be judged in the appearance of the final image. There is more to do with image quality, in all its aspects, than the simple specifications of the sensor.
In high-end cameras, the design of the sensor and the imaging engine proceed in tandem. Major camera manufacturers develop their own sensors and processors, and this alone helps to improve imaging performance. For example, Canon, and more recently some Nikon cameras, currently use CMOS sensors for their advantages in speed, power consumption, and cost, and address the known higher noise level in two ways: through on-chip noise-reduction circuitry, and through noise-reducing algorithms in the processor. In another example, Nikon’s high-end models use the processor to carry some of the burden of suppressing color aliasing (false coloration), which is normally the job of the optical low-pass filter immediately in front of the sensor. Increasing the birefringent index of this filter suppresses the color artifacts better, but it also lowers resolution. The Nikon filter has a lower birefringent index because the imaging engine takes on some of the task.
A great deal of sensor technology involves compromise, and the imaging engine can solve many of the problems. You can experience something of this (in a much more limited way) by shooting in Raw format and optimizing your images later. It’s important not to try to make comparisons between DSLRs based on the specifications that are usually published. Properly designed, a sensor and processor combination with a modest megapixel size can ultimately produce images that have a higher resolution and better sharpness than a larger, more primitive sensor.
The processor is primarily responsible for the following tasks:
The memory buffer
As frames are captured they are moved immediately to the buffer, from where they are transferred one at a time for processing. Buffer size has an impact on the shooting speed (capture rate).
Creating color
Pixels are sampled in relation to their neighbors, taking into account the color array pattern, to fill in the missing color information. Color gradation across the image needs to be smoothed, and color artifacts (false colors and fringing) removed.
Resolution and sharpness
A number of aspects affect sharpness and resolution, including noise, aliasing (jaggies), and color artifacts.
Reducing noise
An extremely important operation, as the various kinds of noise are obstacles to capturing a clean image from a sensor.
User settings
Applying the choices offered in the menu to the image.
Image creation
Combining all of the sensor data and processing to produce a readable image in one of several formats.
Compression
In the case of JPEG and some Raw images, applying compression algorithms.

A processor engine
Your camera’s onboard electronics can make decisions for you, should you choose, but it will only ever be able to see the scene from the point of view of “averages” or “most people.”
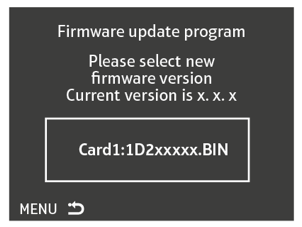
Updating firmware
Firmware is the term used to describe various programs already encoded in the camera, and it will occasionally need updating as the manufacturer makes new versions available. There will be an option in the camera menu that lets you check the firmware version installed; make a note of this and every few months check the manufacturer’s website to see if there are updates. If so, you may be able to perform the operation yourself, depending on the make of your camera (with some makes this must be done by an authorized service center). With user-installed updates, pay careful attention to the instructions as this is an operation that can damage the processor if it goes wrong. In principle, the sequence is:
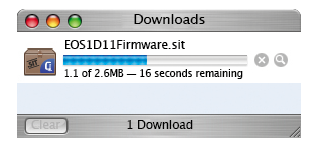
1 Download the firmware update installer to your computer from the manufacturer’s website.

2 Copy the installer to a blank memory card, using either a card reader or the camera.
3 Run the install operation from the memory card. This takes several minutes, and during this time the camera must under no circumstances be powered down.
4 Erase the installer from the memory card.
Camera Menus
Because a digital camera can be set up with an often bewildering number of user preferences, from significant shooting settings such as ISO sensitivity to convenience options such as how files are numbered, all cameras need a comprehensive menu.
The options are grouped more or less logically, and a typical division is into set up, shooting, and playback, with an extra sub-menu for custom settings in some instances.
Some of the settings can be accessed via dial and button controls on the camera body for ease and speed of operation—this may be instead of being on the menu or in addition. The menu structure varies from brand to brand, but is likely to cover the following:
| Standard Options | ||
| Set Up (May be Subdivided) | Shooting | Playback |
| LCD Brightness, time on | File format | Image size on screen |
| Date and time | Image size | Data displayed |
| Language | White balance | Zoom |
| Folder creation, assignment | ISO | Delete |
| Add information | Contrast | Image protection |
| Mirror lock-up | Hue adjustment | Hide image |
| Format card | Color mode | folder selection |
| Video output | Sharpen | Slide show |
| Cable connection protocol | Print specification |
|
| File numbering |
|
|
| Noise reduction |
|
|
| Auto features on/off |
|
|
| EV steps |
|
|
| Bracket steps |
|
|
| Focus settings |
|
|
| Grid Display |
|
|
| Flash mode |
|
|
| Assign dials and buttons |
|
|
| Shoot to computer |
|
|
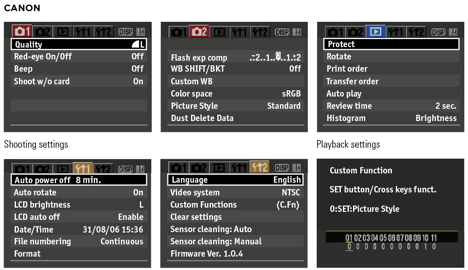

Image Resolution
In the digital environment, an image’s resolution is governed simply by the number of photosites or pixels sited on the sensor: the greater the number of pixels, the more detail the sensor is capable of capturing.
However, it’s important not to think of resolution as the defining factor in image quality, as more pixels don’t necessarily make for a better image. It’s the quality of the pixels that count, and not the quantity.
Camera sensor technology has evolved to such a point that today, most DSLRs are capable of producing high-quality tabloid- or A3-sized prints; and for the vast majority of us this is quite sufficient. However, for some this is still not quite enough, and so we need to be aware of what the limits are—and which techniques are available to help push the envelope.
The way to deal with resolution is to work backward from the end use. What looks good on a 22-in monitor will not necessarily look good as a normal print, but if the screen view is all you need, that doesn’t matter. Professionally, the main uses for images are prepress, display prints, and the Web. For both prepress and display prints, digital files should be at twice the resolution at which they will be printed. A high-quality web offset press, for example, has a line-screen resolution of 133 and 150, so the digital file should be 300 ppi. This is the standard, default resolution for printing.
What ultimately counts, of course, is the number of pixels that goes into making the image. Simply expressed, you need a 22MB file for an 8 × 10 in print, and about the same for a full page in most magazines. Each camera megapixel gives 3MB of image (that is ×3 for the three RGB channels), which means that 7 megapixels will do the job perfectly and a 6-megapixel camera will be adequate. In terms of use, a full page is one of the most basic professional units, while a double-page spread—twice the size—takes care of any possible use that an editorial client might want to make. Stock libraries are in the best position to know the demands of the market, and Corbis, for instance, set the following specifications for their own images: 40MB for editorial sales, 50MB for commercial. These are, naturally, high professional specifications, but the principle is the same as for less demanding uses—calculate backward from the end-use.
All this is without attempting to improve resolution by upscaling. How successful this is depends on the algorithm used, and this is highly technical. It also depends on how much deterioration you are prepared to accept. No interpolation method, however sophisticated, can equal a higher resolution original, but on the other hand the differences can be surprisingly small. Resolution, together with sharpness and noise, are also matters of judgment. If you have a unique or important photograph by virtue of its content, image quality takes second place. This regularly happens in news journalism and in art, too, and always has. Compare, for example, an early Bill Brandt print (many are technically sub-standard) with an Edward Weston print from an 8 × 10 in negative (Weston was known for his technical perfection).


Digital vs. film
This view (left) of an old windmill on the beautiful Greek island of Mykonos was shot using a digital camera with a 6-megapixel resolution. The shot on the right was taken immediately after (in the same conditions) with a traditional film camera. Film is believed to be equivalent to about 20 megapixels of detail.
Resolution: digital vs. film
Although it’s a question often asked, it’s almost impossible to compare resolution between digital and film because the measurement systems are different, and because digital images are in principle “cleaner” than film images. Digital images can be measured by the density of pixels, but other factors creep in, particularly the quality of the lens. The usual measurement is pixels per inch or per centimeter along a straight line. A full-frame 36 × 24mm sensor with 12 megapixels would have a resolution of 4048 × 3040 pixels.
| Digital resolution vs film resolution | |||
| Prepress and display prints | Millimetres (w x h) | Inches (w x h) | MB @ 300ppi |
| A5 | 148 x 210 | 5.83 x 8.27 | 12.7 |
| Magazine full page | 190 x 260 | 7.5 x 10.1 | 19.5 |
| US Letter | 216 x 279 | 8.5 x 11 | 21.2 |
| A4 | 210 x 297 | 8.27 x 11.69 | 25.5 |
| 8 x 10 print | 203 x 254 | 8 x 10 | 21.1 |
| A3 | 297 x 420 | 11.69 x 16.54 | 51.0 |
| A3 + | 329 x 483 | 13 x 19 | 63.4 |
| Magazine double spread | 380 x 260 | 15 x 20.2 | 78 |
| Monitor Display (pixels) | Millimeters (w x h) | Inches (w x h) | MB @ ppi |
| 15-in full screen (800x600) | 305x229 | 12x9 | 1.4 @ 66ppi |
| 17-in full screen (1024x768) | 345x259 | 13.6x10.2 | 2.3 @ 75ppi |
| 20-in full screen (1280x960) | 406x305 | 16x12 | 3.5 @ 80ppi |
| 20-in cinema display (1680x1050) | 432x269 | 17x10.6 | 5.1 @ 100ppi |
| 23-in cinema display (1920x1200) | 495x310 | 19.5x12.2 | 6.6 @ 100ppi |
File Formats
Digital photography can be seen as just one branch or one element of the larger subject of digital imaging. Images have been created digitally, without digital cameras, for many, many years, and for this reason a number of different ways of organizing and storing digital images, known as file formats, has evolved, each with a particular specialty.
Some formats are better suited to one kind of image than another—for example, graphic illustration with solid color and hard edges as opposed to photographs containing complex detail and shading. Some formats are aimed at delivery—such as for the Web. By now, a few standard formats are accepted as useful for photographic images, primarily TIFF (Tagged Image File Format) and JPEG (Joint Photographic Experts Group). These two are readable and interchangeable by all imaging software that deals with photographs. In addition, there is the native application format that each software program uses for its own internal workings, such as Photoshop's .psd files. These may or may not be readable by other applications.
Most SLRs offer two kinds of format: JPEG and Raw. JPEG, pronounced “jay-peg,” is computing’s longest-established system for writing images. It has two powerful advantages: it is optimized for transmitting images, and so is the universal format for the Web, and also compresses images so that they occupy less digital space. The amount of compression is chosen by the user—to more than 90%—and typical compression ratios are between 4:1 and 40:1. The compression method used is Discrete Cosine Transformation, which works on blocks of eight pixels per side and is “lossy,” meaning that some of the image information is thrown away. This results in some degradation, but this is quite often undetectable in normal image reproduction. It’s important to run tests to assess what compression levels are acceptable to you for different purposes.
For the best image quality, and the ability to re-adjust all the camera settings after the event, there is Raw format. This is a file format that is unique to each make of camera, but what they all have in common is that settings such as white balance, hue adjustment, sharpening, and so on, are recorded and kept separately from the image data. The great advantage of this is that any of these settings can be altered during image editing, with no penalty in image quality. Another benefit is that the images are available at a higher bit-depth—typically 12- or 14-bit. The disadvantage is that Raw images need extra work when opening them in your editing program, which means spending time working on them.
Bits and colors
One bit (a contraction of binary digit) is the basic unit of computing, and has two states, on or off—black or white. A byte is a group of 8 bits, and as each of these has two states, one byte has a possible 256 combinations—that is, 256 values from black to white. An RGB image has three channels, so at 8 bits per channel has a color accuracy of 256 x 256 x 256—that is, 16.7 million possible colors. This is well beyond the ability of the human eye to discriminate, and is standard. Why then, do higher-end scanners and cameras make much of higher bit-depths, such as 12-, 14-, and 16-bit? This is because, first, it makes smoother and better graduated tones in a gradient (such as a clear, blue sky), and second, it improves the accuracy of interpolation when images are altered or manipulated during post-production.
Note that it is usual to refer to bit-depth (that is the number of bits) by channel, but occasionally you’ll see it described as the total, all-channel bit-depth—24-bit meaning 8 bits per channel and 36-bit meaning 12 bits per channel.

Raw files
“Raw” is a generic name for the proprietary files produced by all DSLR cameras. Here, a .CR2 file (Canon's Raw file format) is adjusted using Canon’s software, supplied with the camera. The alternative to Raw is to have the camera output a JPEG file instead. This will embed the camera settings in the image, reducing the ability to make changes to the white balance as easily, although less work is subsequently needed to view or print the image.
Compression vs. Image Quality
Although storage space, primarily in the form of memory cards, is becoming less expensive, there are still advantages in being able to compress the data for a photograph, provided that the image is not noticeably degraded. The key word here is “noticeably.”
The raison d’être for JPEG in the camera’s menu is that it is both a compression method and a file format, and this is usually the format to choose when it is important to squeeze the maximum number of images onto a memory card. In addition, the recording time will usually be less than it is for a Raw file, and so the images will move through the frame buffer more quickly—all good for shooting large numbers of images continuously.
Compressing a Raw image is a different matter. The space saving is in the order of 50%, but there is a time penalty, and this becomes important once the buffer has filled. This creates a potential problem when choosing whether or not to begin with compressed files—you will need to wait for the image(s) to be processed before you can change to uncompressed on the menu.
Compression and degradation
Most cameras offer a number of compression levels, ranging from high to low, and usually expressed along the lines of Basic, Normal, and Fine, with Basic offering the highest compression/lowest image quality, and Fine the lowest compression/highest image quality. However, the resulting file sizes depend on the image content. If you are going to make significant use of JPEG format, it is essential to run your own tests and judge what degradation you are happy to accept. The images will all be degraded slightly, but the key is to choose a setting that makes no visible difference. In practice, most people can detect no quality loss at normal viewing distances.

Compression: lossless vs. lossy
Compression can be applied in one of two forms—lossless or lossy. As their names imply, one compresses the file size without discarding any data (working instead by writing the data in a more succinct way), while the other throws away some of the information. Compression is sometimes described as a ratio (e.g. 1:4), as a percentage of reduction (e.g. 80%), or as a percentage of the original file size (e.g. 20%). The last two are easily confused.
The leading lossless compression system is LZW (named after its inventors Lempel-Ziv-Welch), used with TIFF images, and the amount of space saved depends on the image content. Typically, file sizes are reduced to about 40% to 50%, though less in high bit-depths. Raw formats can also be compressed without loss, using camera manufacturers’ proprietary methods. One disadvantage of lossless compression is that it can add substantially to the recording time.
Lossy compression does degrade the image, but not necessarily to the point where it can be seen. The leading compression system is JPEG, and the amount of compression can be selected by the user. In-camera compression is normally limited to a choice of three settings, which vary among camera makes, but are typically 1:4, 1:8, and 1:16.

Raw vs. JPEG
The photograph on the left is the original image as photographed in Raw format. On the right is the same image compressed at the highest-quality level in JPEG format. At this size the two images are indistinguishable.
Measuring Exposure
The ability to review your images instantly using the camera’s rear LCD screen has meant that getting accurate exposure has never been so easy.
Even if you insist on using Manual rather than Auto exposure, it is still quicker to guess the settings, shoot, and check the result than to work them out carefully.
If this sounds less than conscientious, remember that another set of skills is required—judging good exposure by means of the histogram and clipped highlight warning. As with film SLRs, most cameras offer a choice of matrix/multi-pattern metering, center-weighted, and spot readings. Each has its use, but again, it is the result on the LCD display that really demands your attention.
The metering principles are largely the same as for film cameras, with the possibilities of extra precision because each pixel can be measured. There are three principal metering systems used in DSLRs, and different modes that allow you to prioritize shutter speed or aperture and create custom combinations of both. Exposure compensation and exposure bracketing (in which bursts of consecutive frames are exposed at changing increments over and under the metered reading) are standard. Advanced measurement in high-end cameras takes account not just of brightness, but also color, contrast, and the area focused on, all in an effort to second-guess which parts of the scene you are likely to want accurately exposed.
Although instant review means that you can retake the shot if you’re not happy with the exposure, there may be times when you don’t have a second chance, so getting it right first time is always an important consideration.
Spot
The spot metering mode in most DSLRs allows you to make readings from a very small central area—often little more than 2% of the image area. This is the in-camera equivalent of a spot meter, in which you can measure very small parts of the scene. This is especially useful if you want to base the exposure on a particular precise tone.
For this scene, taking a spot reading from the brick building prevents the shaded foreground or bright sky from influencing the overall exposure.
Center-weighted
Center-weighted metering gives priority to the central area of the frame, on the reasonable assumption that most images are composed that way. Less attention is paid to the corners and edges. The precise pattern of weighting varies with the make of camera, and some models allow you to choose different weightings.

A center-weighted meter reading eliminates much of the sky and foreground, giving a good tonal range. Note that overall, the exposure is lighter than the spot meter reading on the previous page.
Center-circle metering
The center-circle metering mode can be seen as a more concentrated variant of center-weighted metering, using a defined circle in the center of the frame. This is a great solution to shots where the subject takes up much of the frame, though you might find it more appropriate to use spot metering when composing a different kind of image. If you were placing a figure according to the rule of thirds, for example, this would be less than ideal.

Here the subject takes up much of the center of the image, so a larger circle than spot metering is appropriate.
Matrix or Evaluative metering
The matrix, segment or evaluative metering mode found in DSLRs is a highly sophisticated metering system that has two components. One is the division of the frame into segments, which are each individually measured. The second is a database of many thousands of picture-taking situations based on either actual shot images or (less accurate), theoretically derived scenes. The pattern of exposure readings is compared with those in the database and the appropriate algorithm is applied. At its simplest, if there is a much brighter strip across the top of a horizontal frame, this will be assumed to be the sky and the exposure will be weighted more to the darker area below. Equally, a compact dark area close to the center of an otherwise light scene will be assumed to be the important subject, and the exposure will be adjusted for that.

The matrix records an average from areas of the image. Here the dark areas in the top of the image and light ones in the foreground are clearly shown in the matrix.
Controlling Dynamic Range
Compared to film, digital sensors are much more sensitive to light. This sensitivity can lead to problems when there is a wide tonal variation in the scene—in these contrasting instances it’s often difficult for the sensor to record detail in the highlight areas.
The larger the photodiode, the greater the sensitivity and the wider the dynamic range, but this is in conflict with the need for smaller photosites on the sensor to increase the resolution. The photodiode must fit within the total photosite area, and still leave sufficient room for other components. Moreover, typical photodiodes still reach saturation (that is, a full tonal range) faster than is ideal.
Blocked highlights
In highlight areas, digital sensors tend to compare unfavorably with film because of their linear response. The typical film response to exposure shades off at both ends of the scale, hence the familiar S-shape of the characteristic curve.
Practically, this means that film has some latitude in the highlights and the shadows as its response is not linear. Digital sensors, however, have a linear, straight-line response, and this results in easily blocked highlights. Anyone familiar with film is used to there being some hint of detail in most highlights, but this is not so when using digital. Once the charge in the photodiode “well” is filled up, the highlights are blocked, and it is as if you have a hole in the image—or “triple 255” when measured in RGB.
Dynamic range: film vs. sensor
The shape of the red curve shown here, gives us a visual clue as to why film appears to have a greater dynamic range when compared with a sensor. The curve plots the brightness of the image (on a vertical scale) against the brightness of the light striking it (on a horizontal scale). With both film and sensors, most of the middle tones in a scene fall on a straight line—not surprisingly called the “straight-line section”—meaning that the image brightness marches in step with the subject brightness. At either end, however, film reacts in a special way. It falls off in a gentle curve in the shadows (lower left) and highlights (upper right). For example, in the highlights, twice the exposure results in less than twice the brightness, which is very useful, because it tends to hold highlight detail. The same applies to shadow detail. Sensors, however, inherently lack this smoothing out of the curve.
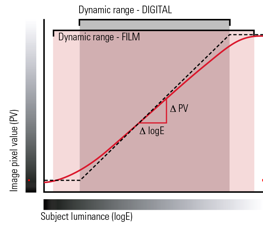
In a normal photograph of a normal scene, the shadows are at the lower left (the “toe”) and the highlights at the upper right (the “shoulder”), with most of the tones in the middle, the “straight-line portion” of the curve. Significantly, this means that with film, highlights do not easily blow out—increasing exposure has less and less effect on the density. In other words, with increasing exposure to light, film response starts slowly (shadows) and finishes slowly (highlights). Photodiodes on a sensor, however, lack this cushioning effect. They reach saturation steadily, at which point there is no highlight detail whatsoever. In other words, film tends to be more forgiving of under- and overexposure, particularly the latter.
Histograms and dynamic range

This image is overexposed, which has led to clipped highlights. The histogram reveals these in the form of a tall spike spilling out of the range at the far right—too much of the image, in other words, is white.

In this alternative exposure, the histogram shows the highlights now fall within the range of the histogram, so there are no areas in the image in which detail has been clipped.