Figure 39.1
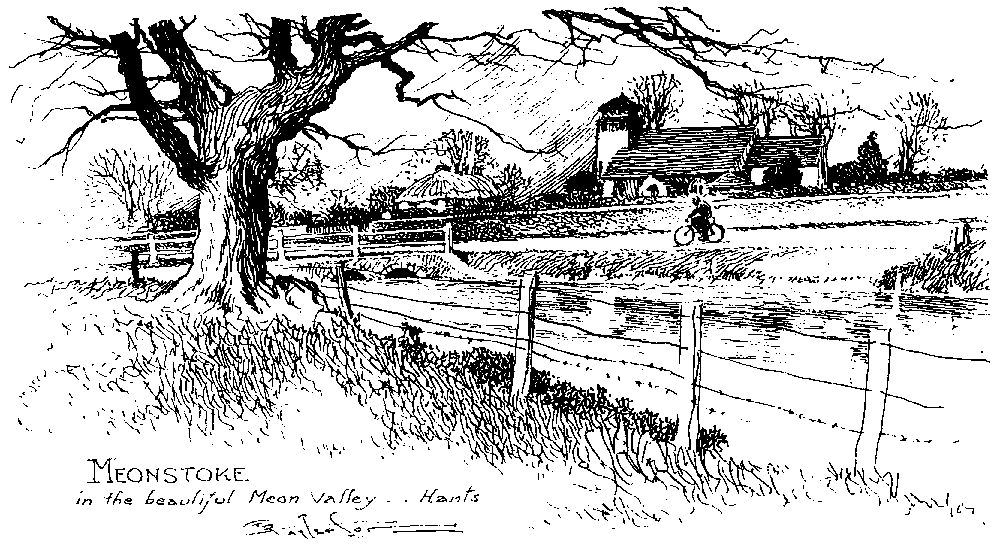
The joys of touring. A sketch by Frank Patterson published in the Cyclists’ Touring Gazette. In memory of his artistry and contributions over many years. Reproduced by kind permission of the Cyclists’ Touring Club.
39
Touring
The Joy of Touring
New roads, new places, and new traveling companions are a joy to every cyclist. Humans are traveling creatures, and cycling suits us well. It is not the distance traveled, but the sensations of traveling that we need, and cycling provides those in abundance. Just so long as the picture changes with every bend in the road, just so long as your legs feel the road and the hills, just so long as an unknown road invites you to come another mile, and just so long as the promise of food, talk, laughter, and rest at the evening stop are before you, so long shall the joys of cycle touring be with you, as portrayed by Frank Patterson in so many line drawings (figure 39.1). Cycle touring is not what other people think—hard-muscled athletes grinding out the miles each day in a state of exhaustion. If you must travel to a particular place on a particular day, that trip is like any other form of necessary travel and you may find it arduous, although you may enjoy it. There is all the difference in the world between touring at your own pace and meeting an arduous schedule, just as the guided tour of Europe in two weeks is more like business travel than touring. Cycle touring is leisurely travel at your own pace wherever you want to go. If a hard-riding club schedules a tour of 800 miles and seven major passes in eight days, you can be sure that that is the kind of trip its members want. That was one of the best trips I have ever been on: I enjoyed every minute of it. If another group schedules an average of 30 miles a day with lots of rest and sightseeing, that is what they want to do. Cycle touring sounds arduous to noncyclists and novices because they don’t realize how far you want to travel once your body is in condition.
Figure 39.1
The joys of touring. A sketch by Frank Patterson published in the Cyclists’ Touring Gazette. In memory of his artistry and contributions over many years. Reproduced by kind permission of the Cyclists’ Touring Club.
Once your condition has been rebuilt by regular cycling, your body wants to travel. Before starting that mountain tour, there was considerable concern about the arrangements for those who became worn out. We had many predictions that the tour would not finish, or that there would be very few finishers. Instead we got stronger day by day, at least until the seventh day over Sonora Pass, where we started the day with an easy 65 miles and 5,900 feet of climb before climbing 3,500 feet on 13 to 20 percent grades. The effects of that gave some of us some painful miles at the end of the eighth day, but the day after my return, I was out with my daughters on one of their training rides. So by and large, don’t worry about progressive deterioration on a tour—you will probably get better and better.
Good cycle touring routes give you a variety of experience within your daily distance. Main highways do not do this—they are generally too straight, the grades are too consistent, the distance between interesting places or between changes in the view are too long. Riding on main roads is therefore often boring. Riding in flat country is also dull—nothing but the unreachable horizon before you, the wind in your face, every mile like every other mile. These are places of necessary travel only, the places you grind out the miles and cheer when you complete them. Generally, cyclists who ride in such country stay in groups for sociability and wind protection.
The places that are fun are the small-scale places, where the road twists and winds, where there are many small roads to choose from, where there are hills to climb and to coast down, where little creeks and ponds hide round every bend, where there are funny-shaped rocks or interesting trees, and where every house and farm is different from the others. This is why cyclists prefer the secondary and tertiary road networks. These are the places you should find in your touring. Strong cyclists who can ride many miles quickly may not get bored by the enormous distances of the big sky country, but even they prefer those roads that break up the stretches into greater variety. For instance, in California, cyclists ride the coast, the coastal mountains and valleys, and the Sierra passes (even though these are all major mountain areas by most standards), but they avoid the level Central Valley and the deserts. New England and the Atlantic Coastal regions are also good touring country because the closely spaced small towns and villages in rolling country make the minor roads interesting. Find areas like these near your home, or travel to them for your touring trips.
You like to ride—that is why you are reading this. Touring is just riding every day, with the disadvantage of carrying your necessary equipment but the supreme advantage of making your journey over new roads, visiting new places, and meeting new people who also enjoy those activities. Touring is easy to enjoy once cycling has become natural to you, so go to it.
Touring Styles
You choose your touring style by deciding how much you will carry on your bike, how much you will do for yourself, and how much you will depend upon other people. Touring can be just a succession of day rides, or it can be completely self-contained travel.
Fixed-Base Touring
Taking your bike to a holiday resort and riding each day on different roads is the simplest form of touring. The only change from home is that you must be sure to bring sufficient tools and spares to keep your bike going without having to buy anything—because you won’t be able to buy what you need at a holiday resort. This is simplest because you don’t need to carry anything extra on your bike, so your clothing and equipment are just what you use at home, and are carried to your base in a suitcase.
Commercial Tours
In the last decade, there has been an enormous growth in commercial group cycling tours. The typical cycling tour company decides the route, arranges the meals and accommodations, supplies the tour staff of several persons, provides a van to carry the baggage and tired cyclists, and rents bicycles to those without. The cost is very high, but the accommodations are generally at least very comfortable and the food excellent. Most tours are designed for average cyclists and some for beginning cyclists. Distances run from 20 to 70 miles per day. The participants need to carry nothing more than day cycling equipment because everything else is carried in the van. The written bike-safety rules are often peculiar, such as walking your bicycle through left turns, but I hear that these are honored more in the breach than in the performance.
Hoteling
The next level of touring is to ride to a new base every day or every few days, eating at restaurants and sleeping at hotels. You have to carry your tools and spares, and sufficient clothes for the trip. If you travel in a group, the group might even save carrying anything extra by having a car along to carry the gear. Touring like this can be luxurious or plain, but is never cheap. The International Bicycling Touring Society does this in style, staying at reasonable small hotels and eating in tasty restaurants.
Bed and Breakfast Houses
“Bed and breakfast” houses originally were homes in which the cyclist sleeps in a spare bedroom and breakfasts with the family in the morning. Nowadays the accommodation ranges from domestic to posh, and the guests often have their own breakfast apart from the family. In Europe, the cycling clubs have nationwide lists of such accommodations, both “professional” (public) and “amateur” (for cyclists only). The League of American Wheelmen once had an American directory of amateur “cyclist only” bed and breakfast homes, and the increasing cost of hotels has encouraged public bed and breakfast accommodations listed in various subscription lists.
Hosteling
Hosteling is poor man’s hoteling. Members of hostel organizations may stay at hostels, which are cooperative dormitories. Travelers carry their sheets (a sleeping sack) but no other bedding, and a few utensils. The hostel furnishes cooking equipment, washing facilities, sleeping space, and blankets. The travelers arrive, purchase food for cooking at a nearby store, cook and eat in either small or large groups, sleep in the dormitories, and clean up before they leave. Hosteling provides sociability among cyclists as well as economical travel. Hotel-trip clothes or hosteling equipment can be carried in a large saddlebag—that is why such a bag is called a “touring bag,” as opposed to the smaller “day bag”.
Sleeping by the Road
The lightest, cheapest form of touring is to eat from grocery stores and sleep beside the road. This tourist carries a sleeping bag and a lightweight plastic sheet to keep off the rain (a “tube tent”), tools, spares, and clothing. In summer in a reasonable climate, this approach is quite adequate for a few days. The lightest down sleeping bag, a swimsuit, extra warm clothes to be added for morning and evening, tools, and spares will all fit into a large touring bag and suffice for a two- or three-day summer weekend.
Cycle-Camping
Cycle-camping is self-contained travel. The cycle-camper carries practically everything needed, including one day’s food. The equipment therefore adds cooking and eating equipment, sleeping bag, and lightweight tent. Food is bought daily, usually at the last store before the campsite, and the camper is dependent upon drinking water at the campsite. Preferably, the camper should camp where washing and sanitary facilities are available, but in lonely country these are not requirements. Cycle-camping is practical only with the best lightweight camping equipment and a bicycle properly fitted to carry it. With lightweight dried foods, the cycle-camper can carry up to four days’ worth if necessary to cross lonely stretches without stores, although there are few such distances in civilized areas.
Types of Cycling Terrain
There are basically four different types of cycling terrain: flat, rolling, ridged, and mountainous.
Flat country is obvious—grades are minor even when you cross the river pattern, roads are straight, and the main problems are winds and boredom. There may be lots of creeks and lakes, or flat fields or desert. Flat country lakes appear rounded on the maps.
Rolling country has sufficient rise and fall to affect cyclists, but not enough to alter the road pattern very much, so its pattern doesn’t show on road maps. Lakes in rolling country may be either round shallow ones or long narrow ones. The grades are steepest nearest the creeks, and level off toward their tops in an even curve. Between creeks, it is fairly flat even if you ride across the stream pattern. This kind of cycling doesn’t slow you very much, because the hills are short and don’t constitute a great portion of the total miles.
Ridged country has sharp-pointed ridges between creeks, so the grades are steep all the way up to the top. Lakes in ridged country show as long narrow ones, some with many fingers, to fit the shape of the valleys. Traveling across the river pattern in this country really slows you down because half of your miles are uphill. It is as bad as mountain climbing—maybe worse because you don’t have that sense of satisfaction at the top. Generally, there will be more roads along the river pattern than across it, because of the difficulties of road construction over the ridges. In built-up areas, this effect disappears because streets can be built there. In both rolling and ridged country, traveling along the river pattern is much less steep because the river valleys are not steep and there is usually room for roads near the water level.
In mountainous country the shape of the land controls the road pattern (figure 39.2). Roads cannot go directly to their destinations, but must follow the river valleys or wind back and forth to climb the valley side. These climbs are long but well defined, because unnecessary climbs are deliberately avoided, and reaching the top brings both satisfaction and a long downhill.
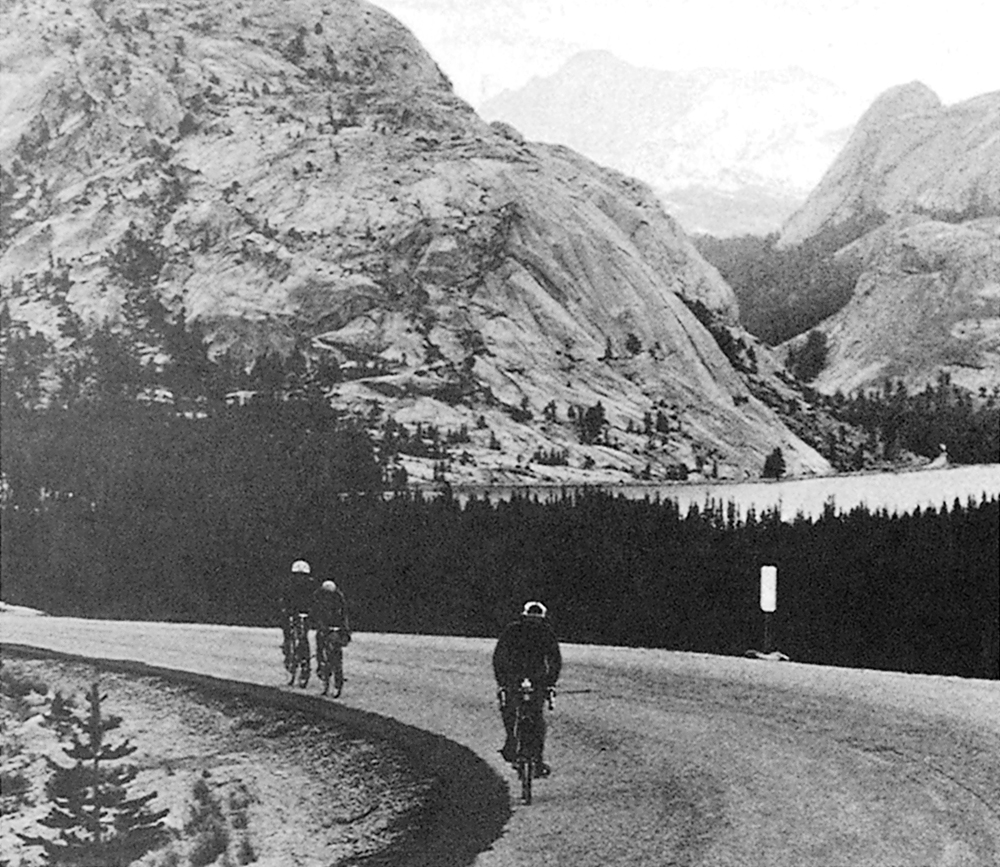
Figure 39.2
Magnificent touring scenery: Tioga Pass Road at Lake Tenaya. Photo by John F. Scott.
Maps
Scale
Every map user and mapmaker must face the scale problem—the fact that a large-scale map shows more detail but takes more space and weight. A cyclist can ride clear across a detailed topographic map in an hour or so, but the state-sized map does not show the desirable roads (figures 39.3–39.5).
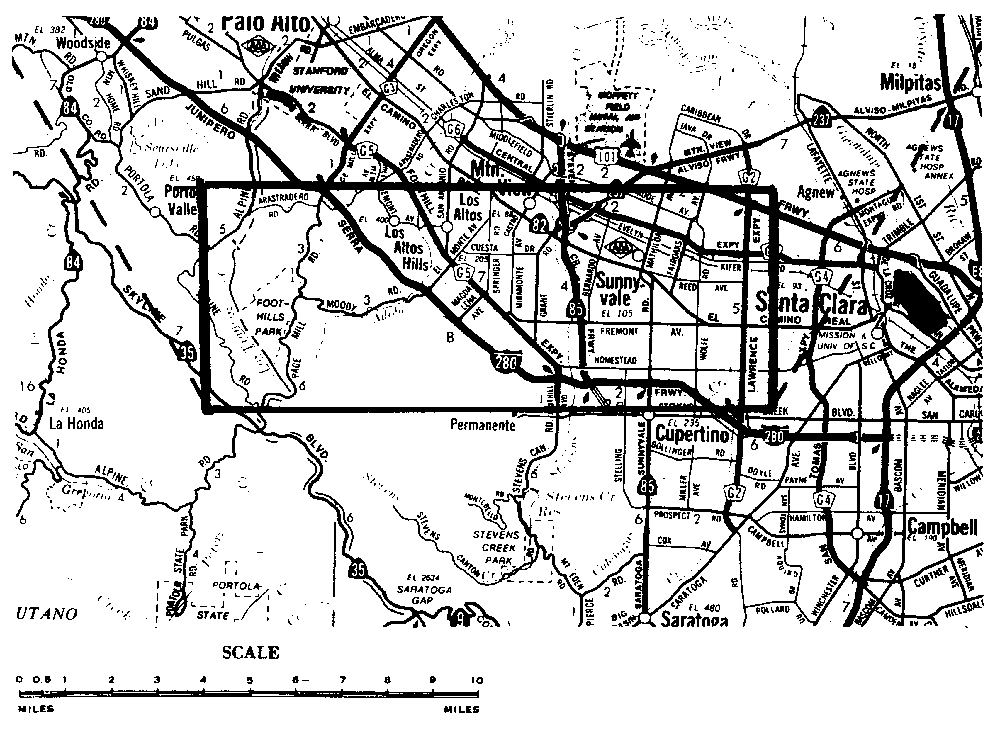
Figure 39.3
Details shown on maps of differing scales. The scale of this map is 1:250,000 or ¼ inch per mile. The marked rectangle is the area of the next map. All maps © California State Automobile Association. Reproduced by permission.
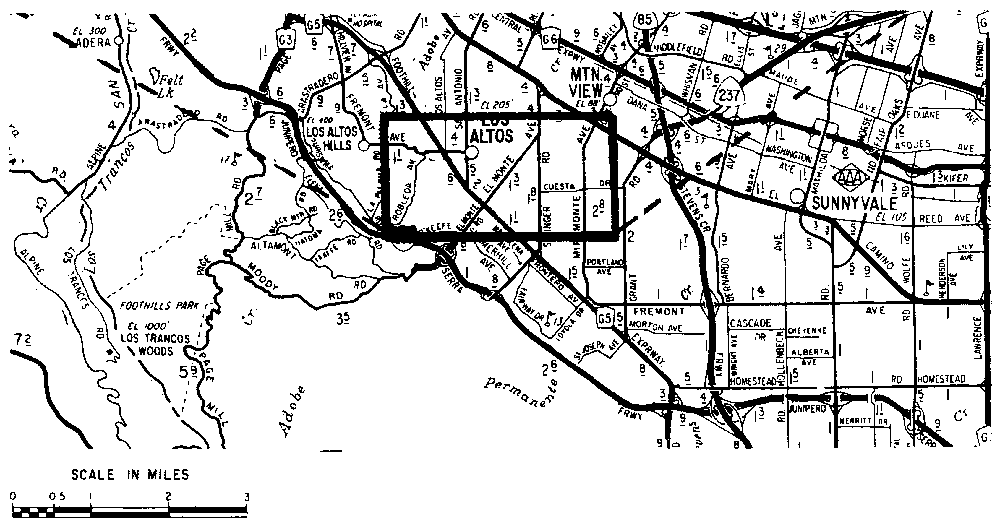
Figure 39.4
The scale here is 1:125,000 or ½ inch per mile. The marked rectangle is the area of the next map.
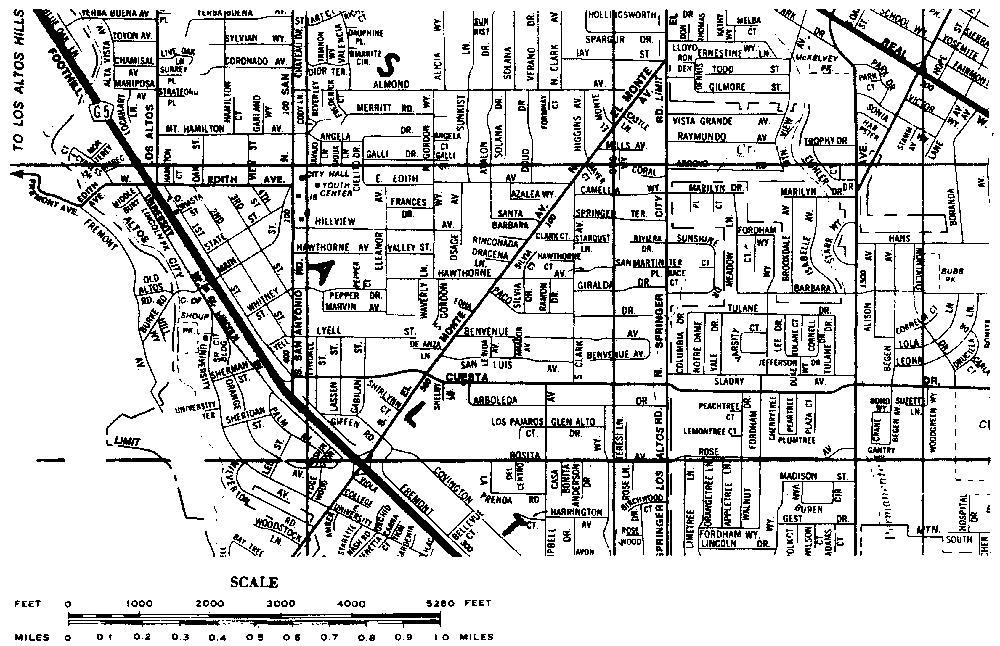
Figure 39.5
The scale here is 1:30,000 or 2 inches per mile.
Maps with scales between 2 inches and ¼ inch per mile are good. That is also stated as 1:30,000 (2 inches per mile) and 1:250,000 (¼ inch per mile). Maps with 2 inches per mile are local street maps that are perfect for finding your way through metropolitan areas. They show every roadway, including the frontage roads along freeways that are sometimes vital for cyclists. Maps with ¼ inch per mile (1:250,000) can show all roads in country areas, but they degenerate into main-road-only diagrams near every built-up area. The typical map of this scale covers about 100 by 80 miles. Probably the best compromise is the ½-inch-per-mile scale, 1:125,000, which shows the same roads as the ¼-inch map but allows more detail of interest to cyclists, particularly the names and mileages on the minor roads. The typical map in 1:125,000 covers about 50 miles by 40, so it is quite usable for day and weekend trips; you have to carry only two or three at most. The world-renowned French Michelin maps are in 1:200,000 scale. They appear cluttered, but repay close attention with numerous details that guide tourists. The U.S. Geological Survey has started a new series of 1:100,000 maps that, when available for your area, are very good for cyclists.
The U.S. Geological Survey 1:100,000 maps show (but do not name) every road and give contours with intervals of about 50 meters, which is legible, although not as detailed as cyclists would like. These are good maps for planning when you have some other map with named roads to carry with you.
The maps with greatest detail are the U.S. Geological Survey 7.5- and 15-quadrangle topographic maps, published in several scales between 1 inch per mile and 3 inch per mile (1:60,000 to 1:20,000). These are useful for home reference and for detailed trip planning, but are much too bulky to carry. They are the maps upon which all other maps are based and are the only ones that give you the exact elevations all along the route. Cycling clubs should own a set for their area, but because most individual cyclists neither own nor carry topo maps, they are not described in detail here.
Types
The best maps that are generally available are the “metropolis and vicinity,” “regional,” or “county” (out West where the counties are larger) maps published by the auto clubs and by commercial map publishers in scales between 1 inch per mile and ¼ inch per mile (1:60,000 to 1:250,000). To the cyclist who needs maps, an auto club membership is well worth its cost.
Practically every county publishes a county road map, but these are basically engineers’ maps that are hard to read. They may be obtained from the county engineer. Close copies of these are also available from private firms—look up “maps” in the classified directory for sales outlets.
State highway departments publish maps of varying usefulness. Many are on too small a scale to show every road, but in smaller states they may be adequate.
Now that gasoline companies don’t give away free maps, commercial publishers are selling better maps through more outlets.
Maps that show only one tour, of which there are many, are useless. Even if you are taking that particular tour, if you get off the route you may find yourself at the intersection of two roads, neither of which is named on your map. You are lost and will stay lost. The only use for a tour map is to enable you to transfer the route to a real map, after which you throw it away.
Special bicycling maps are often available, but they are generally worse than standard maps. Maps are very difficult and expensive to produce, and bicycle organizations haven’t the skill or money to produce them. Besides, many bicycling maps are based upon unusual cartographic principles. A map is supposed to be an image of the real world; features that are large in the real world should be large on the map. Special bicycling maps often violate this rule by showing small roads as large and large roads as small, or showing only the roads that the publishers think suitable for cycling, or showing only the bike paths, bike lanes, and official bike routes. This is part of the superstition that most roads are too dangerous for cycling. Such maps are difficult to use and are useless for general use. Rely on good standard maps instead.
Using Maps
Maps have four uses: preparing a route plan, following that route, guiding you over an unplanned route or route change, and locating you when you are lost.
Maps are something between a picture of the country and a diagram of the road system. The smaller the scale, the less they are like a picture and the more like a diagram. But even a perfect picture is useless, because it conceals what you need to know in a clutter of detail. So the virtue of a map is its ability to create a picture in your mind of the kind of country it represents and how the roads traverse it. The final result combines the mapmaker’s and the map reader’s skills—both have to contribute for the map reader to acquire a feeling for the country.
The items of primary interest to cyclists are the road diagram itself, the climbs, distances between rest stops, distances between recognizable points, and the amount of traffic (both relative to road size and by itself). Motorists are most interested in the road diagram and the connections between roads, so they can make the correct turns; they are less interested in the others. So any map intended for motorists that is lower than the highest quality tends to skimp on the details that are important to cyclists. Because maps vary so much in detail and quality, and are not designed for cyclists, map reading to obtain this picture of the country is more of an art than a science. Even an experienced map-reading cyclist, placed in a strange area with an average map, can make wrong guesses about the kind of country being faced on a trip. In really mountainous country, the river valleys control the road location, so that climbs and descents are well defined, and elevations are often listed. But road maps for nonmountainous country often do not distinguish between flat, rolling, and ridged country. The cyclist knows there are creeks and rivers to be crossed, but has no indication of the severity of the climbs between. Similarly, in areas with low population, places are named that would never appear on the map of a more populated area. Some of these places don’t even have a store at which you can buy food. Generally, you can count on main roads having heavy traffic, but that does not mean that the secondary roads have little traffic. Equally, the amount of traffic does not indicate road congestion, because heavy traffic on a four-lane highway is better than medium traffic on a two-lane highway. Therefore, in planning a new route you always take a chance. It is an adventure.
The second function of your map is to show you where you are as you follow the route. Needing to know where you are doesn’t necessarily mean that you are lost. You may know perfectly well that you are on State 35 north of Essex, but that doesn’t tell you how far it is to the next food stop or turn-off. So keep track of your progress on your map. Study your map to learn the major landmarks, and know when you pass each one, be it a river crossing, town, major intersection, or whatever. Particularly if you are tired, know how far you have come and how far it is to the next landmark or possible stopping place. Compare your recent progress with how far you must go, and decide whether to change plans for the overnight location. Decide what your next turn will be: for instance, over that pass, halfway down the other side, and turn right on 236, which will probably have a sign for Big Basin. Now you are prepared to look for that turn. This way, you will stay on your route, know your progress, and be able to tell whether you should change plans.
When you are riding a route that you have planned, but you don’t like how it has turned out, look at both the map and the country to see what might be better. For instance, you are on a main road in a river valley in heavy traffic. But there are side roads with little traffic, and room enough in the valley for another road. Look to see if the road is shown on the map, and how to get to it. Or you may be ahead of schedule and feel strong and want a more interesting route. What other roads will reach your destination? Look to see. Or you cross a bridge over a river, and there below running along the shore is a forgotten narrow road. Does it also reach your destination? Look on the map to see where it goes. Your map can be a guide to new adventures. It may lead you to pretty roads, or over terrible climbs, but you always know that the trip is possible if the map shows it as a through route.
The fourth function of your map is to show you where you are if you get off the route and get lost. If you do get off the route, and find yourself on an unknown road that doesn’t go where you thought it went, you must find out the name or number of the road, the approximate direction in which you are traveling, and, if you can, the name or number of an intersecting road. With this information and a complete map, you know immediately where you are. The trouble is that your map may not show your road by name, or even at all. If it does, you can decide intelligently whether to go forward to your destination by a different route, sideways to your original route, or backward to the place where you turned off the route. If you can’t identify your location, but are going in the right general direction, check your map to see if there are many roads that could lead you to your destination. If so, continue until you reach a road you can identify. Practically as good as identifying a road is finding directional signs. Maybe none of the places listed is where you want to go, but there aren’t many places where a particular combination of destinations and distances could exist. Study the map a minute to see how many places it could be, and you know then that you are at one of them.
For all these reasons, your map should be easy to get to when on the road. Pack it on top of everything else, or tuck it down right by the bag opening, or better yet have it in a transparent pocket on the top flap of your bag.
Never throw good maps away. Always file them at home after use for reference in case you ever go back or wish to advise others on where to go or where not to go. You may want to add information to, or correct an error in, a map. Be sure that your information is accurate and is accurately drawn. Otherwise, when you study the map later, you may rely on the part that was guesswork. Use only information from what you see (cartographers call this “field-checking”) or from maps of greater accuracy and scale.
Clothing
The amount and type of clothing you take depends upon climate, intended noncycling activities, and carrying capacity. The principles are the same for all types of clothing: never carry clothing you could do without; every article should have multiple functions; every article should be easily washed and wrinkle-free.
You must wear cycling clothing. Start with cycling shorts, jersey, socks, cycling shoes, and arm and leg warmers. Expect that these will be your normal wear most of the time. Shorts may be either cycling tights or dark-colored walking shorts with a cycling crotch lining. If, like me, you much prefer riding in shoes with cleats, carry a pair of light, squashable shoes for times when you must walk. You can’t always wear cycling shorts, and you need something to wear while they are being washed, so men should carry permanent-press slacks and perhaps a permanent-press shirt; women should carry a permanent-press skirt or slacks and blouse. You need extra warmth for morning and evening, so carry a sweater you can wear either on the road or for fashion; if you expect cold weather, take an unfashionable down jacket instead. You need to supplement the sweater or down jacket in case of wind, so carry a windproof, lightweight nylon shell jacket for both the road and sightseeing. You also need a minimum cover-up to wear while washing clothes or while washing yourself if a bathroom is not available. Your swimsuit is suitable for this use. With this assortment, you can dress for practically anything except evening fashion, which is not a common need on a cycling tour.
On a cycling tour, the clothing problems are dirt and sweat. Because sweat is easy to remove while it is still fresh, rinse out your cycling clothes soon after you stop riding whenever possible. Carry 10 feet of string to hang clothes on to dry. After rinsing shorts, wrap them in a towel and stand on them, or wring out the towel around them, to get them as dry as possible before hanging them up inside out. If you are sleeping beside the road and cannot rinse your clothes at dusk because it is too cold, or there is no extra water, try rinsing them in a stream at lunchtime and putting them back on damp—in the heat of the day, they will dry soon enough. Use a waterproof saddle cover if you ride with wet shorts on a leather saddle. However, in a hot humid climate where your shorts are damp whenever you have them on, carry two pair so that you can dry one pair thoroughly before putting them on again, to avoid unpleasant itchy crotch sores. Dry them by carrying them on the outside of your bag during the day. If on the other hand the weather is cold all day, you will have little need to rinse your clothes every day—and little inclination to do so.
Dirt, particularly chain oil, requires real washing with soap and hot water, so when the dirt shows, plan to do a good job. If necessary, find a laundromat, put on your swimsuit, and wash everything else.
Touring Bicycles and Equipment
Most Americans tour on racing bikes or on imitation racing bikes because these are the types most commonly available. As long as you don’t carry much weight and ride in dry weather, this is no problem, but these bicycles are unsuited for serious touring. Here is what you need for serious touring—decide how far you want to get into it, and then decide what you need.
You will be riding long days and several days in a row. Make sure that you are comfortable on your saddle for long rides; if you are not, switch to a comfortable saddle long before the tour.
Your saddle should be able to carry a saddlebag. It must have integral bag loops, added bag loops, or an added saddlebag attachment.
You will be away from the repair facilities you enjoy at home, will be carrying more weight, will be riding a lot, and will have lots of other things to do. So, to reduce the repair hassle, ride wired-on tires, instead of tubulars.
You will be tired and will find unexpected hills and winds. So you need lower low gears than you do for planned local riding, unless you already live in a mountainous area. (See chapters 5 and 37.)
You will be riding at night—sometimes to reach the overnight stop, sometimes to enjoy evening activities—so carry an adequate headlamp and reflector.
You will ride in the rain, rather than hole up in camp or a hotel, so you need mudguards, spats, cape, and hat. (See chapter 34.)
You will probably carry heavier loads than usual, so you should use a bike that does not wobble at speed under load. Light criterium racing bikes are particularly susceptible, because they combine steering sensitivity with flexibility. I have had the best success with bikes with a long wheelbase (42 inch), stiff frame, and long trail. (See chapter 3.)
You will probably need a carrier rack. The best kind is the custom-made tubular-steel carrier that bolts directly to separate lugs brazed onto the seatstays. The next best kind is the rigid steel or tough light-alloy kind that bolts to the mudguard eyes and the brake bolt. The popular and inexpensive fold-flat light-alloy carrier has been recently improved by making both legs out of one piece and by attaching it to a permanent bracket bolted to the brake bolt, so it is now useful for touring. If you use the unimproved type, which clamps to the seatstays, make sure that you support the front end either by a bracket to the brake bolt, or a wire around the seat post, so that the rack doesn’t slip down onto the rear brake and immobilize it.
The equipment for carrying touring gear depends on how much you intend to carry. For carrying the least practicable amount, the large touring saddlebag is suitable. The older British Brooks and Carradice bags were rectangular, about 16 × 8 × 6 inches. The best of the newer American bags are larger, about 16 × 10 × 8 inches, but are carefully shaped to avoid rubbing against the cyclist’s legs or sagging onto the tire. These are adequate for hostelling but not for cycle camping, and not if you intend to carry cameras and other such extras. The next increment in capacity is adding a handlebar bag, which is often used for items needed during the day.
Some people love handlebar bags; others detest them.
The bags that carry the most are pannier bags that fit on each side of the carrier. The best have metal frames that support the side near the wheel and the bottom so that the frame doesn’t bulge into the wheel or sag when carrying a chunky load like a cook-stove. The next best is the smaller pannier with adjustable lacing on the side so that it can be adjusted to fit its load. The least satisfactory is the large bag with neither full frame nor lacing adjustment—it sags unless jammed full.
The fully loaded camping cyclist uses a pair of panniers, carries a sleeping bag in a waterproof cover on the top of the carrier, has a medium saddlebag for tools and for one-day side trips, and may have a handlebar bag also. French tourists particularly use front panniers mounted on a small carrier attached to the front fork. Total added weight is best held to 20 pounds, with 30 pounds maximum. People have toured with more, but in my opinion that is not worthwhile unless you cannot complete the trip without all that equipment.
Remember, it is not how much you succeed in carrying that counts, but how much you can do without. You actually have less carrying capacity than a backpacker, and you must carry tools and spares to keep your bicycle alive as well.
Touring Tools
A fixed list of tools is inappropriate because different bikes require different tools. You must carry more tools than are required for those troubles likely to happen, but you cannot carry tools for everything that can happen. So you compromise. Here is a useful list of the operations you should be able to perform:
• For tightening and adjusting everything small: wrench, Allen key, or screwdriver for everything on your bike. Check each component to be sure that you have a tool for it. Don’t bother to carry big wrenches for the headset or bottom bracket. If these get loose, you stumble along until you reach a place where you can borrow the tools. The light alloy freewheel remover wrench that has two prongs to fit over a handlebar or a drain grate bar is a lightweight solution to a long-standing problem. Remember that some items, like centerpull brake hooks, need two wrenches, one on each end.
• For wheel repair: spokes, nipples, freewheel remover with the light alloy two-pronged wrench, spoke wrench, miniature file for spoke ends (if necessary with your wheels), ½-inch adhesive tape for rim tape. Tape spokes to frame, or carry inside pump handle or bag.
• For tire repair: complete tire kit including boot material and contact cement for repairing casings. If you are going on a long tour, or where tires will be hard to find, carry a spare casing, folded into a three-ring coil.
• For chain repair: chain tool and eight links of new chain, same brand.
• For hub repair: cone wrenches to fit your hubs.
• For cotterless cranks: wrench for tightening crank bolt.
• Lubricant: SAE 90 oil in closed-cap oil can. (This is hard to find now, so use a squeeze bottle with a swiveling tip, like for sun tan lotion. These are oil-tight.)
• For cleanup: wiping rags to clean your bike, any parts you have to work on, and your hands.
Cycle Camping Equipment
Cycle camping equipment is the same as backpacking equipment, and the boom in backpacking has produced greatly improved equipment. Figure 39.6 shows my family ready for a cycle-camping trip.
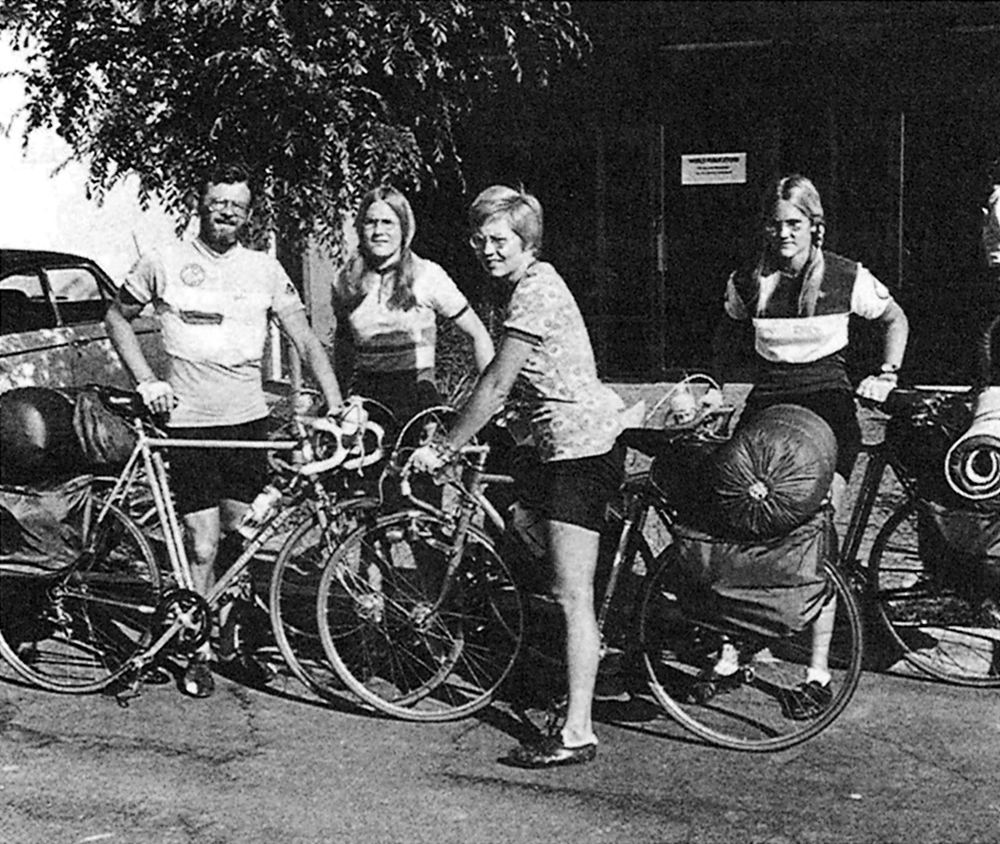
Figure 39.6
On a cycle-camping tour. That’s me, with Dorris Taylor and her daughters Lynn and Laurie.
Here is the basic necessary equipment:
• For sleeping: sleeping bag of lightest-weight down for the temperature expected, with pad or air mattress because you will often sleep on rough ground.
• For cooking: lightweight kerosene-burning stove (gasoline is dangerous in tents, and LPG cans can’t be refilled when partly empty), matches in waterproof plastic jar, nesting saucepans, can opener, sharp knife, mess kit, flexible water bucket, small ground cloth, dish detergent, pot scrubber.
• For rain protection: mudguards, cape, spats, lightest available one- or two-man tent with mosquito mesh closures (protects against rain, mosquitoes, and provides privacy if you need it in a crowded campsite).
• For yourself: toilet articles, soap, towel, string for drying clothes, miniature flashlight.
Pack each group of items in its own lightweight cloth bag with a drawstring closure. Pack things that must stay dry in waterproof bags and things that you want to dry out in porous bags. Carry a couple of spare bags, and the lightest of backpacks, for food and items bought in the late afternoon before camping. Use lightweight plastic containers for most food items.
Carry staples like pancake mix, granola, sugar, tea, salt, butter, dried peas, powdered milk, and rice, and replenish as necessary. Purchase fruit, meat, eggs, bread, cheese, and milk shortly before use so that you don’t carry them too far.
Remember that traveling as a small group requires less weight per person, because tents, stoves, pans, and staple foods can be shared.
Riding with a Load
Riding with a load feels different and requires slightly different technique. The weight slows you down on hills and when accelerating. You have to use lower gears on hills and to allow a longer gap in traffic when starting from a stop sign. If possible, adjust your speed so you don’t have to stop and speed up as frequently at signs and signals and in traffic.
The load makes your bike sway uncomfortably if you lean it from side to side when you stand on the pedals, so learn a smooth pedaling style that does not push the bike from side to side.
The load causes the bike to sway more, which activates the bike’s self-steering action. The bike responds equally well to your body, telling it to turn and to the sway of the load, so bikes with specially sensitive steering are unsuitable for load carrying. Many bikes often used for touring are so sensitive in steering and flexible in frame that their front wheels shimmy at high speed under a load. If your bike does this, damp out the shimmy by gripping the bars firmly, gripping the top tube between your knees, and slowing down below the critical speed. Thereafter, do not exceed the critical speed with a load.
Heavy loads upset the bike’s handling most when you aren’t on it. Walking a loaded bike over soft ground or carrying it up steps is just plain misery. The bike feels like it is squirming out of your hands. When you carry a load, try to remain on paved rideable surfaces.
Bikes on Airplanes
There are at least three reasons for traveling with your bike by airplane. You can ride in faraway places when you cannot afford the time to ride to them. You may have to go far away and want to continue cycling while there. Cycling is much better than public transportation and better and cheaper than rented cars. Except for trips that precluded cycling, I didn’t rent a car at an airport for years—I always had my bike and away I went. Freedom—that’s what a bike gives you.
Once, on my way to speak at UCLA, I flew into LAX on a 727, the plane with its built-in rear stairway. We stopped in the open, not at a gate, and passengers and baggage were unloaded there. “That’s my bicycle!” I cried, and after a bit of preparation I rode directly away from the plane and reached UCLA in about 20 minutes, faster than I could have exited the airport by normal means.
However, carrying bicycles by air has its problems: one being the excessive rate of major damage, the other the recent imposition of excessive charges. I used to give two pages of detailed instructions for preparing a bicycle for carriage by airline, but I think nobody will now use them. Instead, here is the advice provided by my friend Bill Hoffman:
Since 2002, when taking a bike on a plane I have exclusively used my Bike Friday with its suitcase that doubles as a trailer by means of a connecting fitting brazed onto the left chainstay and a set of axles and wheels that Friday sells. So I avoid the risk of damage to a bike in a carton or plastic bag as well as the exorbitant cost now imposed by most airlines (I hear United charges $175 one way). The suitcase with its hard plastic shell virtually eliminates the risk of damage to the bike, and it requires no special handling. In about 8 round trips with my Friday, I have never had the suitcase opened by TSA people; their “MRI” machine can see that there’s a bicycle inside and no explosives. Whatever doesn’t fit in the suitcase goes into a large soft-covered bag, also sold by Friday. That bag was opened once for inspection but nothing was lost or damaged.
I have never been charged for the suitcase, as it’s within the size and weight limits of the airline. On some airlines, now, of course, there is a charge for all checked luggage, so I could face a fee, but I’ve been flying Southwest almost exclusively, which so far does not charge for the first two bags. I have to pack carefully, though, to stay within the weight limit per bag.
I can still ride to and from the airport and disassemble and reassemble the bike there. I try to do this out of sight of the ticket counter people, who might try to charge me if they see me put a bike in the suitcase.
Other than the change of bikes and method of packaging, I have not changed my habits vis-à-vis air travel in the 37 years I’ve been taking a bike with me. But having had one frame wrecked despite being in an airline-provided carton, and having had minor, repairable damage done on two other occasions (out of about 100 flights), I will never again carry a bike in anything but a hard-shell suitcase.
I have not had any trips where I return from a different airport than I arrived, so I’ve not had an issue with what to do with the suitcase in between. Some Friday owners travel with their suitcase/trailer in lieu of panniers, but I don’t like that arrangement. The trailer is cumbersome and makes it harder to park the bike. I would prefer to carry the same amount of weight on the bike. If I am ever in a situation where I begin and end a trip at different airports, I would make arrangements to ship the trailer to the end point so I don’t have to drag it along. Traveling with the trailer means taking an extra tube and possibly a spare tire just for the trailer. The longest distance I have towed the suitcase is 30 miles.
Cycling into and out of some large airports can be very daunting, if not illegal, because some airports can only be reached by freeways. That has never stopped me, but I know that I could be arrested for riding on the freeway. Most cyclists, however, would be intimidated not only by the prospect of arrest (especially critical when catching a plane, less so after disembarking) but also the traffic conditions around the airport. I have biked to and/or from all the major airports in the U.S., except Houston (G. W. Bush), Dulles, Atlanta, Detroit, and Kansas City. (Personal correspondence)
Besides the mechanics of packing your bicycle, there are several other matters you should attend to. You have to plan for whatever weather or time of day you may find at your destination. Because an unexpected delay may make you arrive in the dark, carry a lamp and a reflector. For most destinations, fit mudguards and carry raingear. Research the average weather for your destination, and before leaving, check the national weather reports for the current weather and predictions. Pack clothes accordingly, and make sure that you can carry everything you plan to take. If you need bulky or heavy items at your destination, it may be possible to ship them ahead.
It is frequently difficult to discover the cycling routes into or out of airports that are served by controlled-access highways, as so many are. Even when you have flown into an airport, it does no good to ask people; the only people who know the nonfreeway routes don’t work in the passenger areas. Furthermore, the nonfreeway routes aren’t marked, and they wind about in unpredictable ways. For example, the bicycle route to the Seattle-Tacoma airport is south on Twenty-Fourth Avenue. After entering the airport, you come to signs pointing left that say “Departing Flights” and “Bicycles Prohibited,” with no other indication. Because “Departing Flights” is where you want to go, you follow the signs that take you there. To avoid as many of these problems as possible, get street maps for the areas around the airports before you leave. Also, carry a simple compass, because if you arrive in the dark or on a cloudy day, you may have no idea of which way is north.
Arrange a reasonable schedule. I have flown all night and started out at sunrise with a hundred miles to go to an appointment, but that is no fun. Also, allow a safe margin of time between completing your business and your return flight, depending on the distance between the two. I have had unreliable results from efforts to find out in advance the bicycle carriage policies of airlines. Even experienced travel agents have problems getting reliable information on this subject. Generally, your bicycle will be accepted, even though you might find that the airline refuses to accept liability for damage. However, I will not travel on the few airlines that absolutely require boxes but refuse to supply them. If you are flying to or from a small city, check the type of plane before selecting a flight. Planes with six-across seating, the smallest of which are the twin-engine DC-9 and B-737, can accept bicycles in full-sized boxes. Smaller planes may accept bicycles only if both wheels are removed, with increased probability of damage, or not at all. To allow for packing, plan to arrive at the airport an hour before flight time, and allow a bit more margin for the possible flat.
When you arrive at the airport, walk your bike directly to the check-in counter and ask how they want you to pack your bike. There may be murmurs about never having carried a bike on this airline, or knowing nothing about it. “Okay,” you say, “I know how to pack it best, and it will go just fine.” Just smile, be persistent, and stay confident; they will finally accept it.
You may not like traveling in cycling clothes. (I have stopped worrying about that.) If so, pack cover-ups in a separate stuff bag where they are easy to get, and change into them after checking your bicycle. Either half an hour before landing, or in the airport before you collect your bicycle, change back to cycling clothes and use the toilet. Before landing, refresh your memory from the map, look outside to see if you can see any landmarks, and locate the city with respect to the airport. After receiving your bicycle, reassemble it right in the baggage claim area to check that nothing is missing or damaged. Shift the derailleur into low gear to see that it has not been bent closer to the wheel. Put on your cycling shoes and wheel your bike to the door. Hand in your baggage checks and you are ready to ride.
Bikes on Buses and Trains
Carrying bicycles on American trains and buses is much less satisfactory than on airlines. Both Amtrak and the bus lines require boxes, but the bus lines don’t supply any. Therefore, for bus travel you have to find a box—usually from a bike shop—and get the box to the bus station. Because you can’t ride with a box, this means walking or driving.
Traveling with your bicycle by train used to be easy. You wheeled your bicycle to the baggage car, handed it up before leaving, and received it from the baggage car attendant upon arrival. Now Amtrak requires boxes, which they supply. However, there is another problem. Not all trains carry baggage and not all stations handle it, and they do so only at certain times. Therefore you have to select trains and stations so that the train you take will accept baggage at your origin and leave it at your destination. Baggage problems have prevented me from taking the train from Providence, Rhode Island, to Stamford, Connecticut, and a friend of mine, planning to ride partway home from the 1983 LAW convention in Seattle, discovered that the first stop east of Seattle that handled bicycles was Billings, Montana—more than 900 miles away.
A British Cycling Tour
In 1985, my friend Dorris and I spent five weeks touring in England. We intended to pursue several interests on that tour. I intended to show Dorris the six houses in which I had lived and the three schools I had attended. Dorris was interested in famous gardens. I was interested in industrial relics from early steam engines and locomotives to the first military tanks. We were both interested in castles and stately homes from the Iron Age to the twentieth century. I had relatives and family friends whom I hadn’t seen for a long time. I wanted to show Dorris places that I had been, beaches I had swum at, hills I had climbed, canals I had navigated and the like. In addition, we wanted to visit the Cyclists’ Touring Club (CTC) office near London and attend the CTC York rally, and I had some appointments at the British Transport and Road Research Laboratory.
Aside from personal recollections, our main source of information was The Intelligent Traveler’s Guide to Historic Britain, by Philip A. Crowl (Congdon and Weed, 1990). We bought two copies, keeping one intact at home while we tore the relevant pages out of the other to make into a traveling gazetteer. For maps we used the Ordnance Survey 1:250,000 (¼ inch per mile) series. Outside the built-up areas, these showed all the roads that existed. Four large sheets covered all the areas in which we traveled. I also had a street map of London in paperback book form.
For a small part of the time, we stayed with relatives or friends of mine; for most of the time, we stayed at bed and breakfast places (B&Bs) that were listed in the Cyclists’ Touring Club bed and breakfast list. We obtained the maps and the CTC B&B list directly from the CTC many months before the trip.
We each carried two sets of cycling clothes, one pair of cycling shoes, and one pair of walking shoes. For lunch beside the road, we carried a minimum picnic kit. For rain, we installed mudguards and carried rain capes, spats, and helmet covers. For night, we carried a generator, rear reflector, and rear lamp (British law) as described in chapter 33. For respectable wear, I carried one pair of dark trousers, socks, two permanent-press shirts, a tie, and a dark formal sweater. Dorris carried two skirts with blouses and a sweater. With tools, spare parts, patch kit, wiping rags, maps, route instructions, small camera, and lunch supplies, it all fit into two saddle bags and two pairs of panniers.
We decided on our route by listing on file cards all the places we might want to see, together with the few fixed places and dates. Each card listed the name of the place, a map reference, directions for reaching it by road, and the book and page that contained the full description. We separated the cards by area and made many trial routes by placing the cards in the sequences represented by reasonable cycling routes. We allowed approximately 40 miles per day with three sites or 30 miles with four sites. After many tries and much winnowing down of the sites we wanted to see, we produced a workable route and wrote it up on regular paper with plenty of space for later notes and changes. Because of the known shortage and expense of accommodations in London in August, we planned to visit London by daily commuter train from my cousin’s house in the suburbs. However, we still did some London cycling. The longest day was 80 miles from my cousin’s house to the area where I was born, to my houses and schools, and return, but we were able to do this without carrying panniers.
How did we decide what were reasonable cycling routes? By looking at the map. The only roads in England from which cyclists are prohibited are the motorways, named as M1, M4, and so on. All other roads are available and are coded as A27, B2150, and C (which are unnumbered) in decreasing order of importance. Many of the places we wished to see are on C roads, but going to Portsmouth to see HMS Victory required riding on the A27, which is an eight-lane superhighway with 70 mph traffic; it’s noisy. Some new business suburbs of London were both noisy and smoggy. But most of the time, we rode on B and C roads in lovely country. True, British A and B roads are much more crowded and are narrower than are American roads, but that doesn’t matter because everybody treated us properly. There is no need to seek out and limit your traveling to particular roads. The country lanes are very narrow but very pretty, and on many you don’t see four cars an hour.
We had selected our route to see particular sites and people. Cycling one day between London and the south coast, I was astonished to recognize the place names on the signposts, astonished because I did not remember cycling there before. Then I remembered. We were cycling the same roads that Hoopdriver cycled in The Wheels of Chance, H. G. Wells’ cycling novel (J. M. Dent & Co., 1896). From Ripley to Godalming, and from Portsmouth Down to Winchester—the same roads that cyclists chose in 1895, we had chosen today.
The funniest sight we met was an AYH trip from Concord, Massachusetts. We first saw them leaving an AYH hostel when we stopped to look around a village and locate a garden that was on our list. After seeing the garden, we caught up with them on the outskirts of a town of about 20,000 people. The AYH riders were walking their bicycles on the sidewalk. Suspecting their motive, I inquired, and was informed that for safety they walked through every town along their route. That’s no way to tour by bicycle.
We made no reservations along the route because we wanted to be able to alter our plans to accommodate the unexpected: an unusually interesting site, bad weather, new friends met along the way. Wherever we stayed, each evening and each morning we tried to get the weather report for the day. On the screen, we would see the icons of thunderstorms marching across the map of Britain, referred to as “Thorms” by the weather prophets. We would plan our day, and sometime in the morning would telephone ahead to a bed and breakfast selected from the CTC list. On several days, the accommodation was full and we had to try a second place, either not so nice or less convenient, but we were never without accommodation. Only once in five weeks were we disappointed, by a B&B that was incompetently trying to be a hotel. Some B&Bs were just a spare bedroom in the house of a working-class widow; others were in nice country homes. Some hosts were people of limited education and sophistication; others were educated cosmopolitans. You never knew who you might find, and they were all interesting. At one B&B, we listened tensely to the radio reports of troubles in Saudi Arabia, where the hostess’ husband was then working. At another, I saw a big book titled The Engine Driver’s Handbook and discovered that the son of the house was spending his summer vacation helping to restore the local steam railway, which of course we visited.
On a smooth road just south of Stonehenge, Dorris broke four rear-wheel spokes for no apparent reason. That used up half of our supply of spare spokes. Because I had previously written down the address and phone number of Holdsworth, the bicycle manufacturer in London, I telephoned the company, gave my credit card number, and ordered a new supply of spokes sent to the post office of a city we would pass through two days later. They were there on time, but it turned out that we never needed any more.
B&Bs supply only breakfast. At one place, the hostess supplied dinner because the local pub had been shut down; the barkeeper had been selling beer that had not been brewed by the pub’s owner and had been kicked out. While eating dinner at a roadside restaurant, Dorris and I started conversation with another couple, who commented on our route and suggested that we stay one night with them when we passed near their home. We did so, riding across the spine of England into a gathering storm, finally joining a great family party of ten or twelve people. The next day, the weather was appalling: 50 mph winds with intense rain. Our hosts suggested that we stay to explore their city, the eighteenth-century resort of Buxton, listing its architectural treasures for us. Five years later, we showed our Buxton hosts around the San Francisco Bay area, and it rained again, this time among redwood trees.
Often while eating at roadside pubs, we talked to other diners and naturally the subject of cycling arose. Ordinary Britons think about cycling as only experienced American cyclists think. They say that cyclists must act just like everybody else on the road or otherwise there will be collisions; what could be more obvious? When I described official American cycling policy, they couldn’t understand how Americans could have got themselves into such a mess. When I visited the Transport and Road Research Laboratory to discuss cycling knowledge, the officials assured me that there was no possibility whatever that they would institute any items of American cycling policy.
We made several long jumps using the 125-mph intercity trains. You just roll your bike up to the baggage car (“guard’s van” in English) and inside. Lean it against the side or alongside the others and then go forward to your seat. Upon approaching your station, just walk back to the guard’s van and get ready to unhitch your bike. When you come to a stop, just roll it out the door. No trouble at all; not like Amtrak.
I was able to repay the historical instruction with some of my own. At two of the houses in which I had lived, the present inhabitants asked me to tell them what the houses had been like fifty years before and what changes had been made.