
There’s nothing quite like the feeling of making something nice for your home. You’ll feel even better when you make something that helps you along in your goal of green and healthy living. Try making a reusable lap cloth for your messy toddler or a set of beautiful organic cotton pillowcases for your bed. These projects are beginner level and are guaranteed to improve your “eco-ego.”
Why use disposable paper napkins when cloth is so much nicer? Cloth napkins are super simple to make, and half the fun is picking out the fabrics.
Fabric quarters (also known as fat quarters) for quilting are a great way to buy a variety of prints without a huge investment and are available at many sewing and craft stores. Or dig through your scrap pile from previous projects—you never know what great napkin material you might find.
18" x 18" (46cm x 46cm) piece of fabric for each napkin
coordinating thread
To make napkins of any other size, simply add 11⁄2" (3cm) (5⁄8" [16mm] per side) to the desired finished size.
Step 1: Cut out fabric for napkin.
Step 2: Fold over 1⁄4" (6mm) on all sides and iron. Fold another 3⁄8" (10mm) and iron again. Pin to secure.
Step 3: Machine stitch close to edge on all four sides.
If you have a little one who won’t wear a bib but still knows how to make a supreme mess, this project is for you! Instead of using wasteful paper towels, make your child his very own lap cloth that he can learn to use himself. It is the perfect transition between a bib and a regular napkin.
All you need is a washcloth and a scrap of pretty fabric to get started. And if you want to be really green about it, recycle an old tablecloth, a vintage apron or even use fabric from an outfit your child has outgrown.
washcloth
piece of fabric 11⁄2 (4cm) larger than washcloth on all sides
coordinating thread
Step 1: Place fabric on table, right-side down. Place washcloth on top of fabric. Trace a 11⁄2 (4cm) border around the washcloth with a fabric marking pencil. Cut fabric.
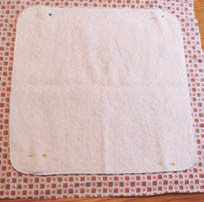
Step 2: Turn fabric under 1⁄2 (1cm) on all sides and press.

Step 3: Fold fabric over edges of washcloth on all sides. Pin and press.

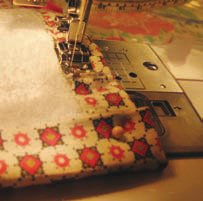
Step 4: Stitch along inside edge of fabric on all sides, as shown.
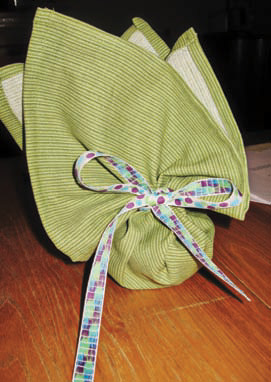
It’s hard to leave the house without snacks when you have kids. These snack sacks are a great alternative to the wasteful plastic baggy because they can be used over and over again. Place snacks directly in the sack or, for more structure, tuck a small plastic or stainless steel bowl inside.
finished cloth napkin made from the pattern in this chapter (see Cloth Napkins); for extra durability, use a canvas material.
30" (76cm) piece of coordinating ribbon
coordinating thread
Step 1: On right side of fabric, pin ribbon 2" (5cm) down from the top of the napkin.

Step 2: Machine stitch center of ribbon onto fabric in three places about 1⁄8" (3mm) apart.

Step 3: With fabric right side-down, place snacks in the center (use bowl if you prefer), pull fabric up around snacks and tie a bow to close.
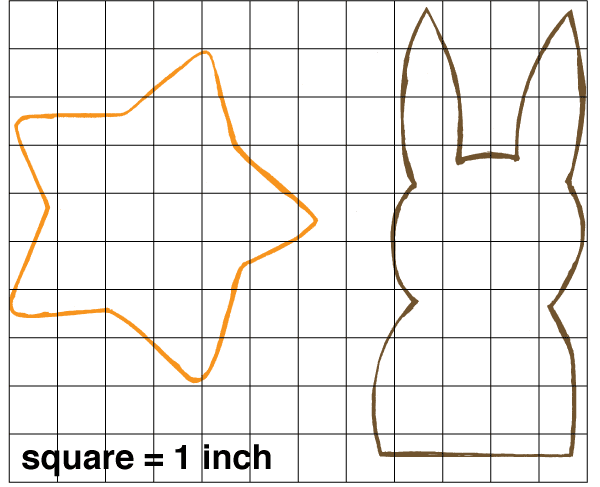
Next time you need a gift for a baby or young child, try making a homemade toy using old sweaters that have been felted in the washing machine. Kids love anything soft and squishy, and parents appreciate a gift handmade with love. Try the lovable bunny or the cheerful star pattern, or make up a pattern of your own.
felted sweater material
coordinating thread
natural fiberfill stuffing
buttons, ribbon, fabric scraps or embroidery thread for decoration
Step 1: Cut top and bottom pattern pieces out of felted material.
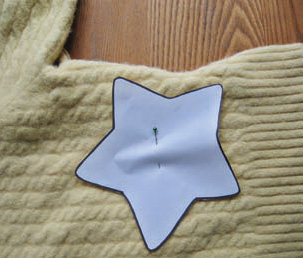
Step 2: Stitch three-fourths of the way around the project by machine or hand stitching. A blanket or whipstitch, using embroidery thread, creates a pretty edge.

Step 3: Insert stuffing.
Step 4: Stitch the project closed.
Step 5: Decorate with buttons, ribbon, contrasting felt pieces or embroidery thread.
Note: Do not use buttons on projects meant for children under 3 years old. Small circles of contrasting fabric will make nice eyes for the rabbit.
If you ever have accidentally put a wool sweater in the wash, you know how easily it shrinks. The wool turns into thick felt that is super soft and easy to work with because you can cut it and it will not fray. If you don’t have any old wool sweaters at home, pick up a few at a thrift store or garage sale and shrink away! Use these tips for felting sweaters in your home washing machine.
Whether you invest in a certified sustainable wood coffee table or just want to protect your grandma’s antique, do it with felted wool coasters made from recycled sweaters. Use the simple circle appliqué, or get creative and make up your own design. (Use this same technique to make felted pot holders. Wool is naturally fire retardant.)
felted sweater material in two coordinating colors—one color for the bottom of the coaster and the appliqué and a different color for the top of the coaster contrasting or coordinating thread
Step 1: Cut two 5" (3cm) squares of felt for the bottom and top of the coaster.
Step 2: Match both squares (right sides facing out) and sew together, using a zigzag stitch with contrasting color thread, around all four edges.
Step 3: Cut appliqué piece into desired shape.
Step 4: Using coordinating thread, zigzag stitch around all edges of the appliqué to attach.

A set of homemade, organic cotton pillowcases would make a wonderful gift for a friend or a nice little indulgence for yourself. Most fabric stores carry a small selection of organic cotton fabrics. Find a wider selection online at Mod Green Pod (www.modgreenpod.com) or NearSea Naturals (www.nearseanaturals.com). Makes two standard-sized pillowcases, 20" x 30" (51cm x 76cm) each.
two 41" x 35" (89cm x 104cm) pieces of prewashed, organic cotton fabric
Coordinating thread
24" (61cm) piece of coordinating trim (optional)
Step 1: Fold fabric lengthwise with right sides together. Stitch across one end and the one long side. Zigzag (or serge) the seams together.
Step 2: Zigzag (or serge) around the open end of the case.
Step 3: Fold top edge over 1⁄2 (1cm) and press.
Step 4: Fold top edge over 4" (10cm). Press and pin down in a few places.

Step 5: Stitch hem in place, staying close to the edge of the hem.
Step 6: If desired, attach decorative trim.
To do this, turn the pillowcase right-side out and attach the trim over the top-stitched hemline.
Next time your kids complain they’re bored, whip up a batch of homemade play dough for some nontoxic entertainment. This version is super easy to make, and you probably have all the ingredients in your kitchen cupboards.
11⁄4 cup (286g) flour
1⁄4 cup (57g) salt
1 tsp. (5ml) vegetable oil
T (14g) cream of tartar
1 cup (235ml) water natural food coloring
Mix all ingredients together in a saucepan. Cook over low heat, stirring constantly until all liquid has disappeared and dough becomes stiff. Turn out onto a table or cutting board and let it cool. Knead the dough until it reaches a smooth consistency. Divide into two balls and add a couple drops of coloring to each. Knead until the color is mixed well.
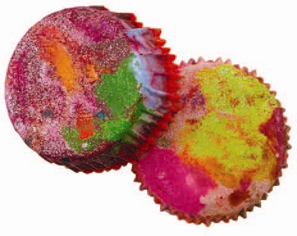
Save up your broken crayons to make colorful crayon cupcakes that are easy to grip and fun to use.
broken crayons
newspaper
wooden mallet or hammer
foil cupcake liners
muffin tin
Preheat oven to 250 degrees.
Separate broken crayons by similar colors. Place crayons between two pieces of newspaper and use a mallet or hammer to break them into smaller pieces. Chunks should be about 1⁄2 (1cm) long and not completely smashed.
Place foil cupcake liners into your muffin tin and fill with crayon pieces. Bake for 10–12 minutes. Crayons should be melted but with separate colors still visible.
Let cool for at least an hour before turning crayon cupcakes out of the liners.
