Unlike regular Tunisian crochet, with the double-ended hook, you aren’t limited to the size of the hook. Because you are working from both ends of the hook, the width of your project can be as long as you like. And, more importantly, you can also work in the round to make tubular and moebius projects.
All projects in this book can be made on a 6-inch or a 10-inch double-ended hook. A cable is unnecessary. However, if you prefer to use a cabled hook for convenience, use care to only work into stitches which have been closed with a closing chain, otherwise you’ll be knitting!
The Techniques section introduces you to using the double-ended hook in flat projects, then progresses to tubular in-the-round projects. Once you learn to work in the round, move to the next level with a moebius join.
Use these new techniques in the projects featured in this book, which include several different looks and skill levels.
If you are unfamiliar with Tunisian crochet or need to brush up on the stitches, use the Stitch Glossary at the end of the book to learn each individual stitch.
You’ll want to learn the basics and practice using a double-ended hook before you begin working in the round. When practicing, use two skeins of yarn in two different colors. The steps below will demonstrate working in Tunisian Simple Stitch, and you’ll want to be comfortable with it before moving on to the other techniques. The Ribbed Headband With Bow is a perfect starter project for this technique. Note that the following practice piece will be in Tunisian Simple Stitch, which is easier to use when learning. However, with the headband you’ll use Tunisian Knit Stitch.
Chain the indicated number. To practice, chain 10 (see Photo 1).

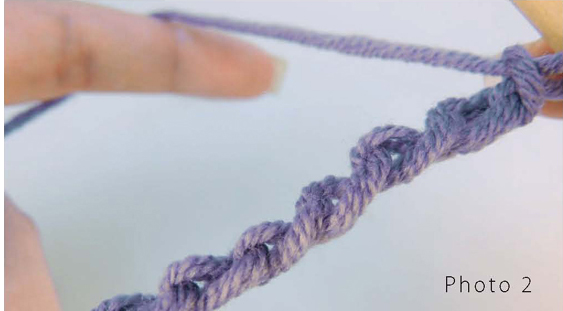
Turn the chain so that the back horizontal bars are facing you (see Photo 2).
Skip the first chain and insert hook in the back horizontal bar of the next chain (see Photo 3).

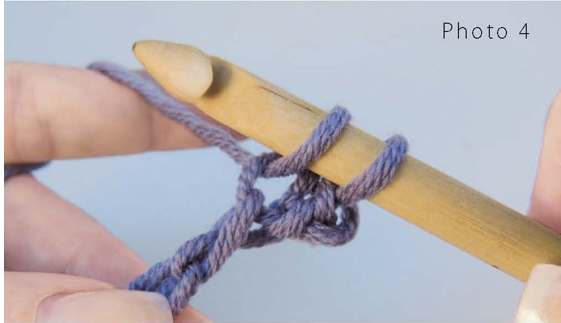
Yarn over and pull a loop through leaving it on the hook (see Photo 4).
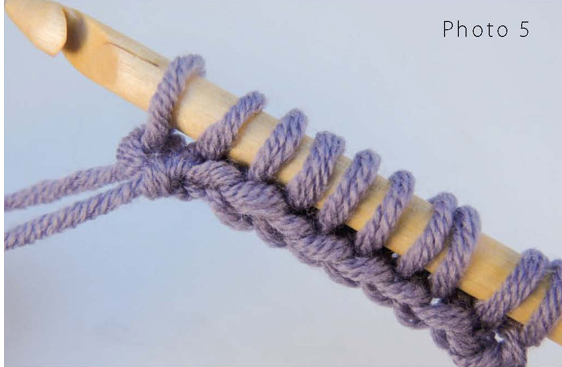
Continue pulling up loops in the same manner across (see Photo 5). When learning, count all the loops of every row until you are comfortable with the technique. You will have the same number of loops as the starting chain; in this case, you should have 10 loops on your hook.
Turn the hook over so the back of the work is facing you. Push the loops close to the opposite hook. Leaving about a 6-inch length, pull the second color close to your work (see Photo 6).
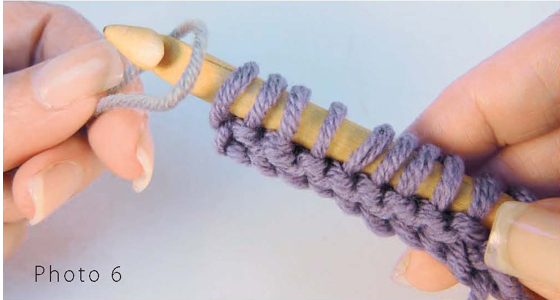
Pull the second color through one loop on your hook (see Photo 7).
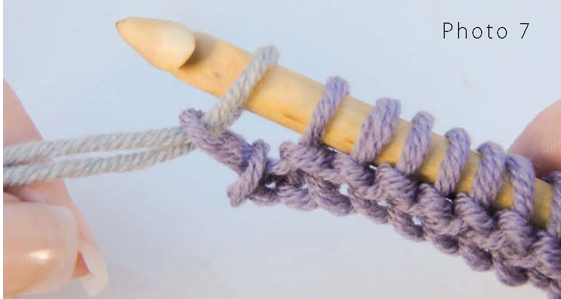
Yarn over and pull the second color through two loops on your hook (see Photo 8).
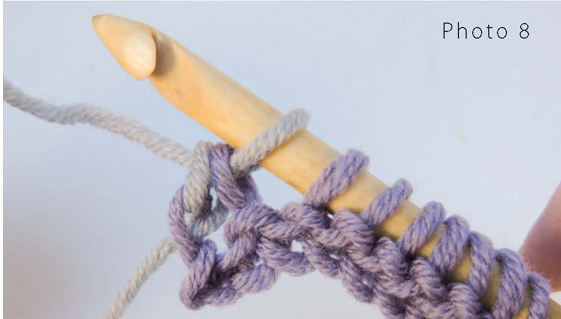
Continue to yarn over and pull through two loops until one loop remains on the hook. Do not turn. You will only turn when the hook is full of loops, never when there is only one loop on the hook (see Photo 9).

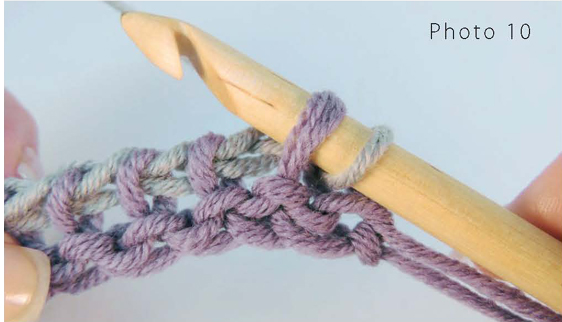
Skip the first stitch and insert the hook in the next stitch (see Photo 10) as you would for Tunisian Simple Stitch (see Stitch Glossary on page 31).
Yarn over and pull a loop through leaving it on the hook (see Photo 11).
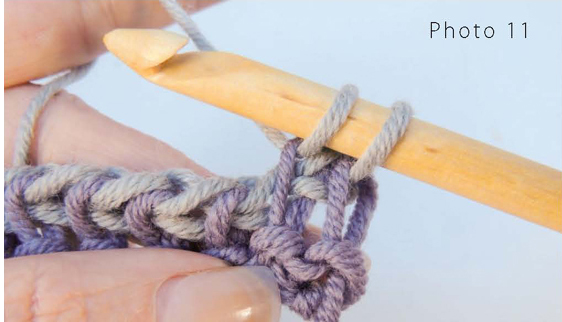
Continue pulling up loops in Tunisian Simple Stitch across (see Photo 12). Remember to count them!
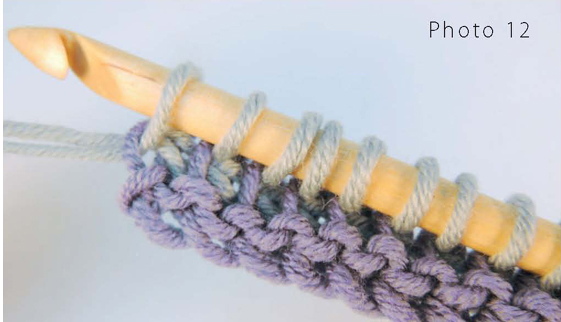
Remember to turn the work only when multiple loops are on the hook (see Photo 13).
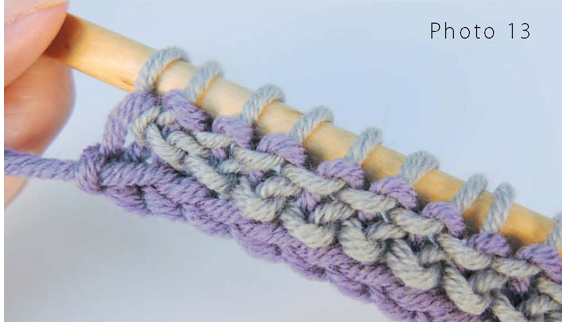
Yarn over and pull through one loop on the hook (see Photo 14).
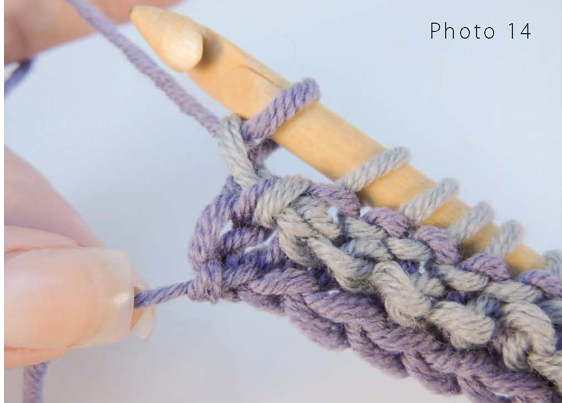
Yarn over and pull through two loops on the hook (see Photo 15). Continue to yarn over and pull through two loops until one loop remains on the hook. Do not turn. Repeat each row as established.

Now that you understand the basics, move on to working in the round and you’ll be ready to start the Rolled Brim Beanie. When practicing, use two skeins of yarn in two different colors.
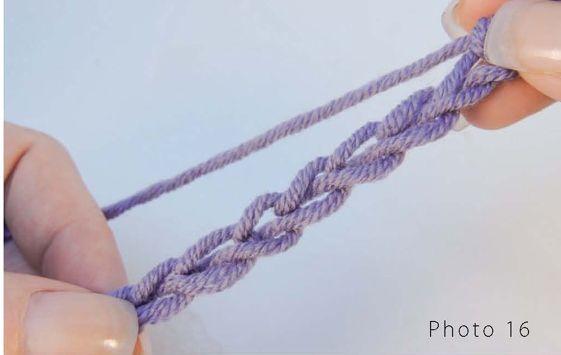
Chain the indicated number. To practice, chain 30 (see Photo 16).
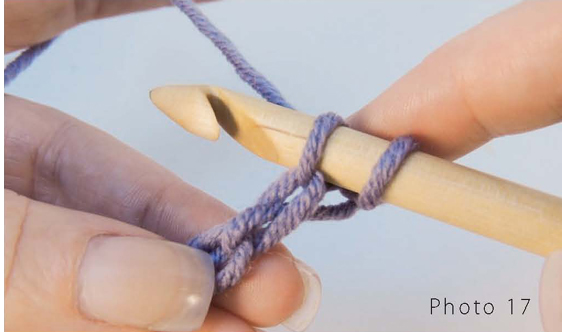
Skip the first chain and insert hook in back horizontal bar of next chain (see Photo 17).
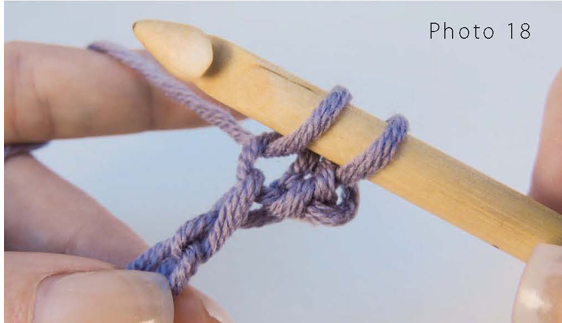
Yarn over and pull a loop through, leaving it on the hook (see Photo 18).
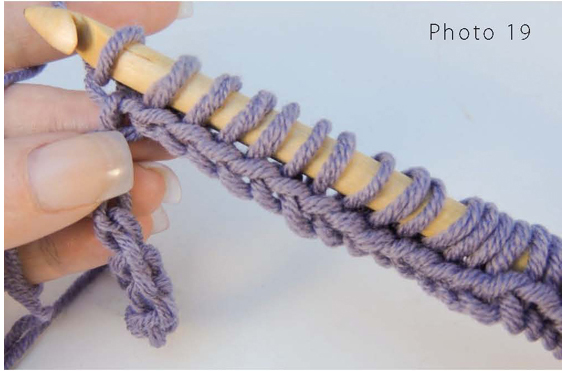
Continue pulling up loops in the same manner until the hook is full, but loops aren’t slipping off the end (see Photo 19). Don’t worry about the remaining chains for the moment.
Turn the hook over so the back of the work is facing you. Push the loops close to the opposite hook (see Photo 20).

Leaving about a 6-inch length, pull the second color close to your work (see Photo 21).
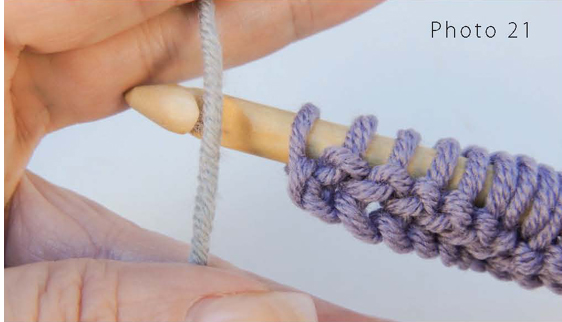
Pull the second color through one loop on your hook (see Photo 22).
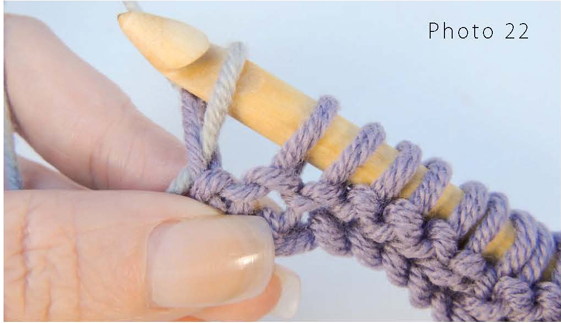
Yarn over and pull the second color through two loops on your hook (see Photo 23).
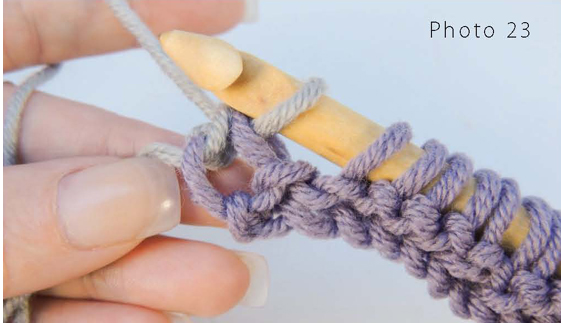
Continue to yarn over and pull through two loops until only three or four loops remain on your hook (see Photo 24).
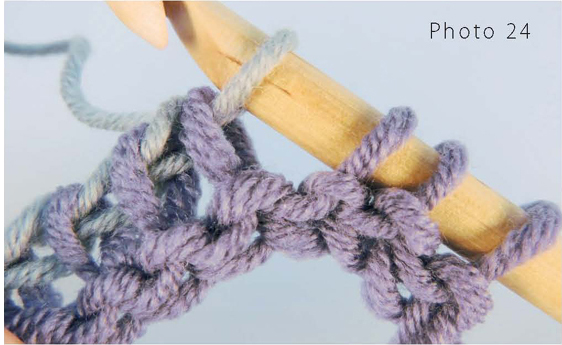
Turn the hook back around to the front side and push the loops to the other hook (see Photo 25).

Continue to pull up loops. For a short piece, such as 30 chains, you should be able to complete the row, but you will need to repeat pulling up loops and closing them several times if you have a significant number (see Photo 26).

Turn the hook over so the back of the work is facing you, push the loops close to the opposite hook and continue to yarn over and pull through two loops, until three or four loops remain on your hook (see Photo 27).
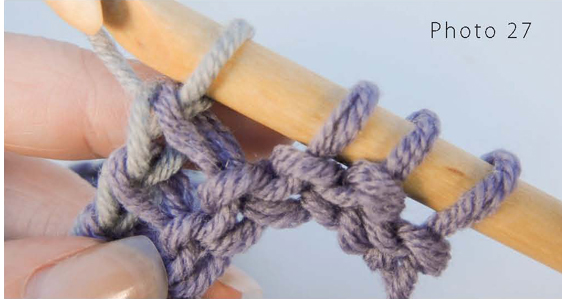
Now you will join the ends to form a tube. Turn your hook so the front of your work is facing you. Without twisting the foundation chain, bring the first stitch close to the last stitch (see Photo 28).
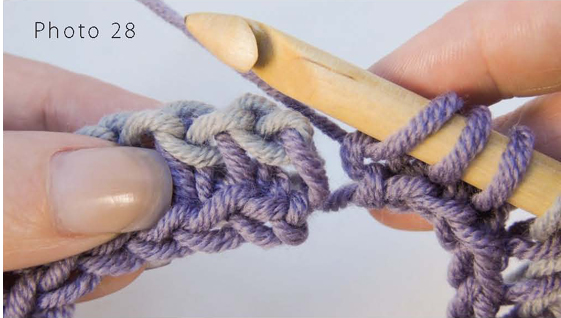
Insert your hook into the first stitch (see Photo 29) as you would for Tunisian Simple Stitch (see Stitch Glossary), yarn over and pull up a loop.
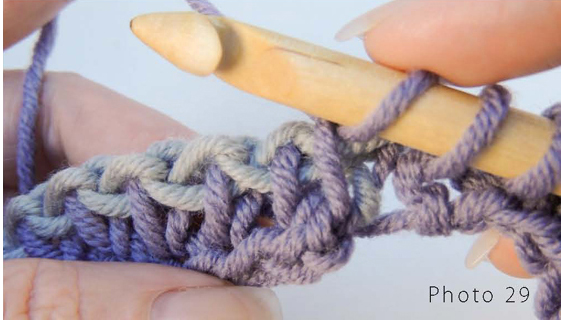
Continue with a few more Tunisian Simple Stitches (see Photo 30).
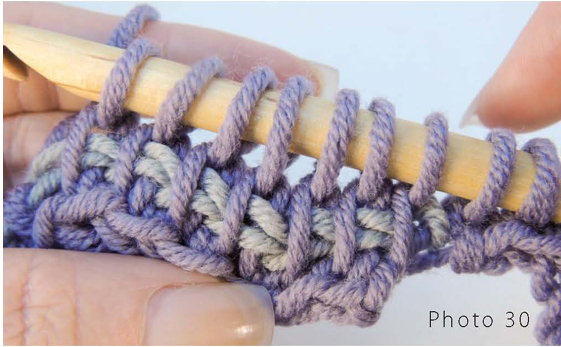
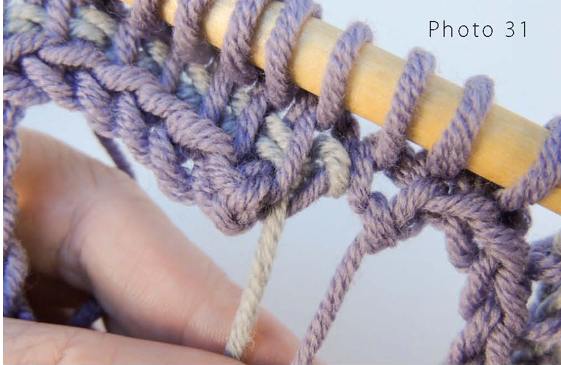
Notice that there is a slight difference in height between the first stitch and the join (see Photo 31). This is normal for the spiraling technique in both regular crochet and Tunisian crochet. Ignore it for now. You’ll seam it together later.
Place a stitch marker in the first stitch so that you don’t lose your place (see Photo 32). Continue with Tunisian Simple Stitch, again only pulling up loops to cover the hook but not so many that they’re slipping off the end of the hook.

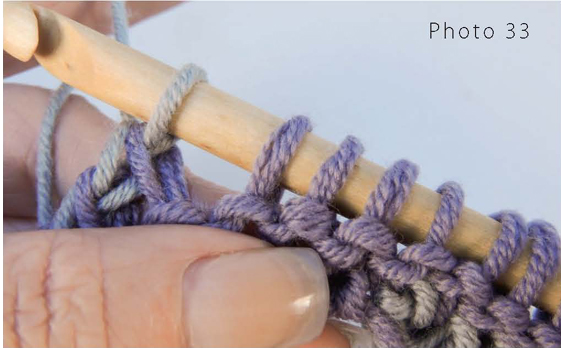
Turn so the back is facing you and continue to yarn over and pull through two (see Photo 33).
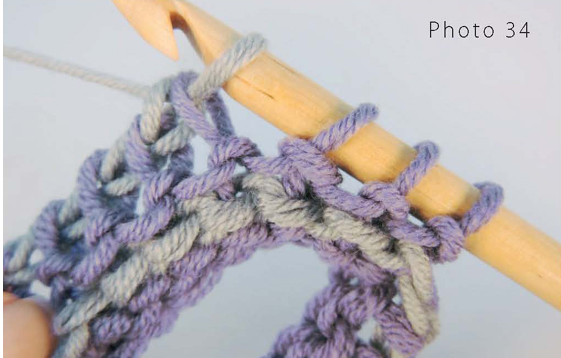
Remember to always close up to the last three or four stitches (see Photo 34). Never close all of them before turning. This ensures stability in the loop size.
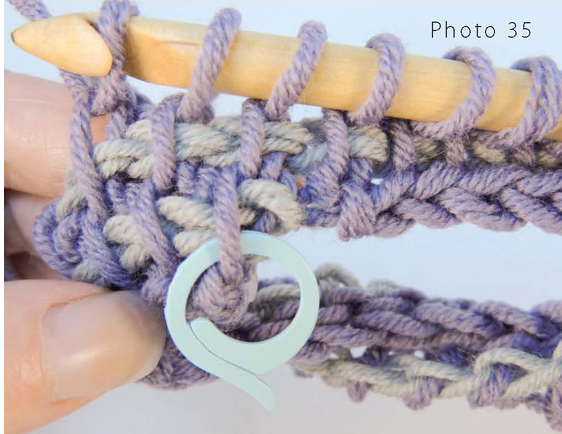
Once you reach the stitch marker, you have completed the round (see Photo 35).
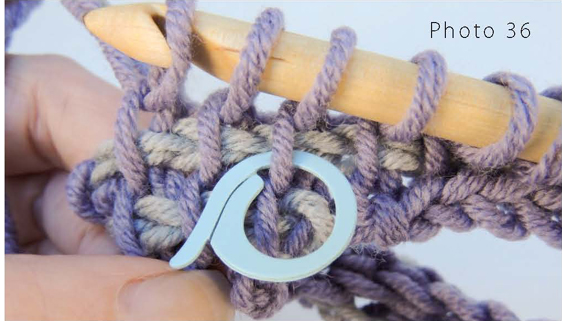
Move the stitch marker up so you can complete the next round (see Photo 36). Repeat the entire process, always working around and around in a spiral.
I’ve saved this one for last because you’ll want to practice working in the round before you add the moebius join. When practicing, use two skeins of yarn in two different colors. The moebius join is the most challenging technique in the book, so be sure you really understand it before moving on. Once you’ve had a chance to practice, try it out with the Bling Moebius Wrap on page 19.
Chain the indicated number. To practice, chain 30 (see Photo 37).

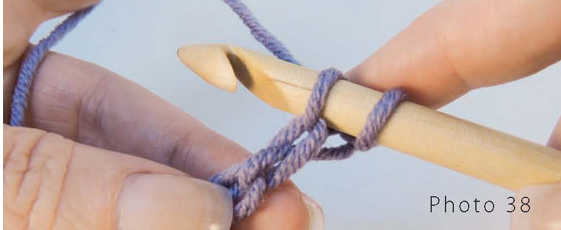
Skip the first chain and insert hook in the back horizontal bar of the next chain (see Photo 38).
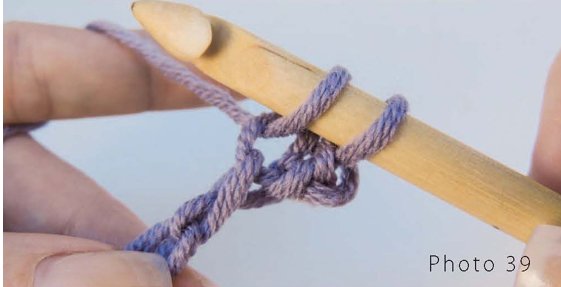
Yarn over and pull a loop through leaving it on the hook (see Photo 39).
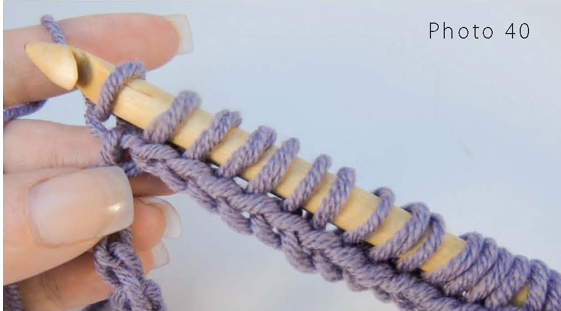
Continue pulling up loops in the same manner until the hook is full, but loops aren’t slipping off the end (see Photo 40). Don’t worry about the remaining chains for the moment.
Turn the hook over so the back of the work is facing you. Push the loops close to the opposite hook (see Photo 41).
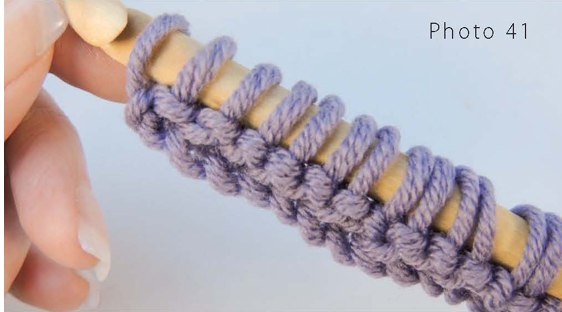
Leaving about a 6-inch length, pull the second color close to your work (see Photo 42).
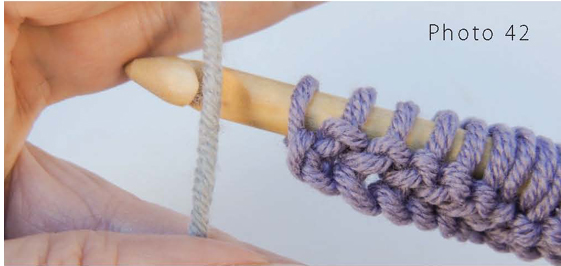
Pull the second color through one loop on your hook (see Photo 43).

Yarn over and pull the second color through two loops on your hook (see Photo 44).
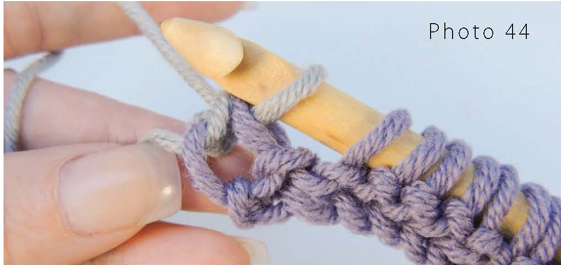
Continue to yarn over and pull through two loops until only three or four loops remain on your hook (see Photo 45).
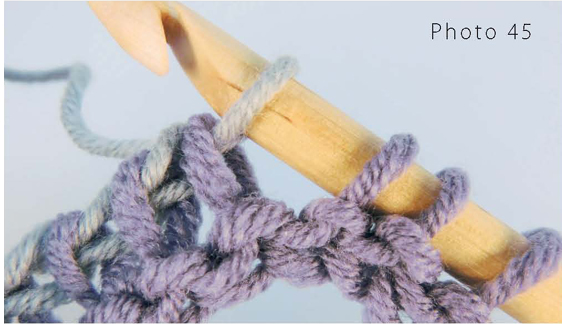
Turn the hook back around to the front side and push the loops to the other hook (see Photo 46).
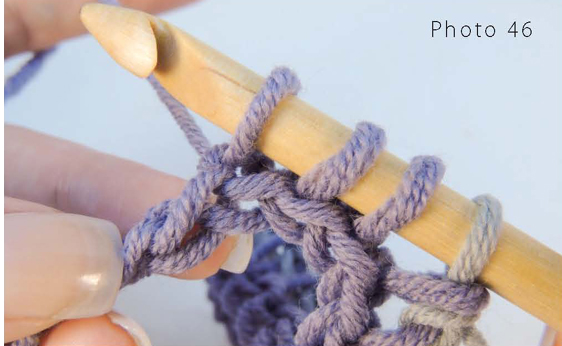
Continue to pull up loops. For a short piece, like 30 chains, you should be able to complete the row, but you will need to repeat pulling up loops and closing them several times if you have a significant number (see Photo 47).
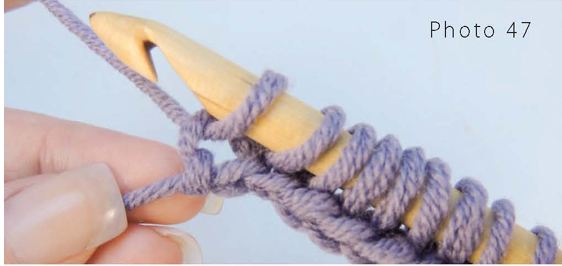
Turn the hook over so the back of the work is facing you, push the loops close to the opposite hook and continue to yarn over and pull through two loops until three or four loops remain on your hook (see Photo 48).
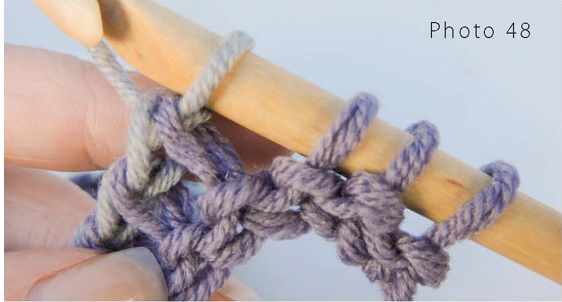
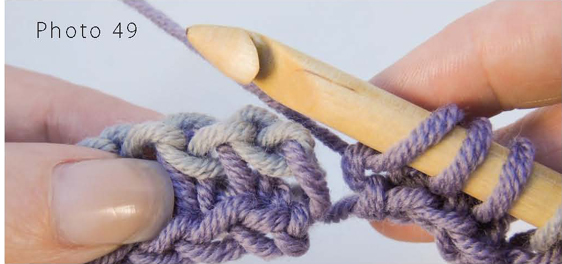
Now you will join the ends to form a tube. Turn your hook so the front of your work is facing you. Without twisting the foundation, bring the first stitch close to the last stitch (see Photo 49).
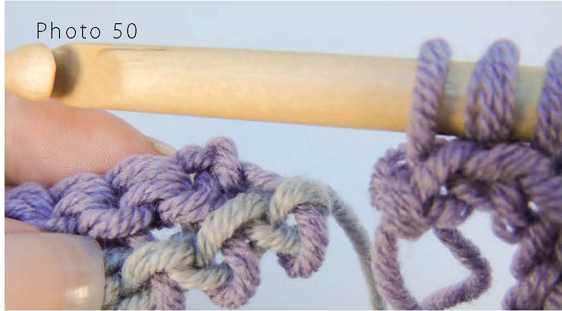
Carefully twist the end of the piece in the hand that’s not holding your hook 180 degrees so the back is facing you on that end. The closing chain will now be on the bottom (see Photo 50).
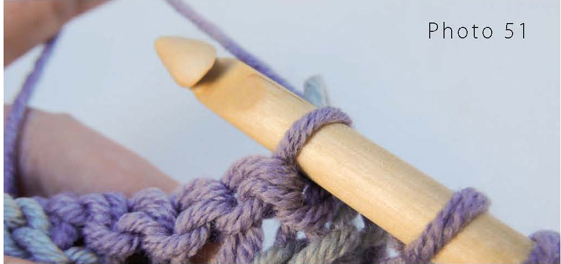
Insert hook into the top unused loop of the beginning foundation chain (see Photo 51).
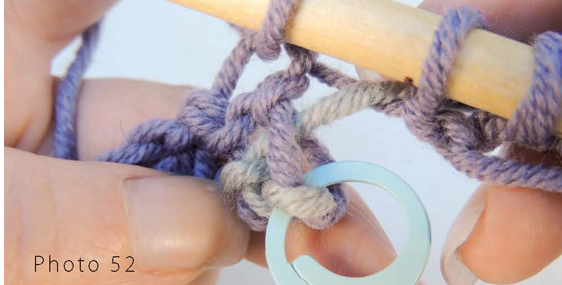
Yarn over and pull a loop through. Use a stitch marker to mark the bottom closing chain. Notice that the stitch marker is currently on the bottom of the round (see Photo 52).
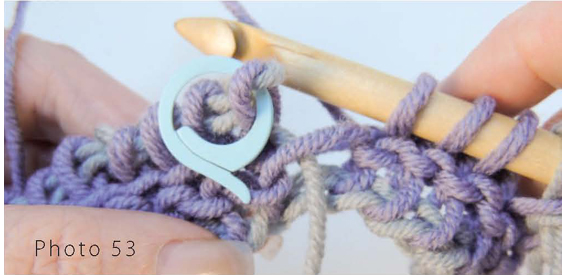
Continue pulling up loops and closing them as you would for working in the round. When you reach the stitch marker, notice that it is now on top. You have now completed the moebius join (see Photo 53).
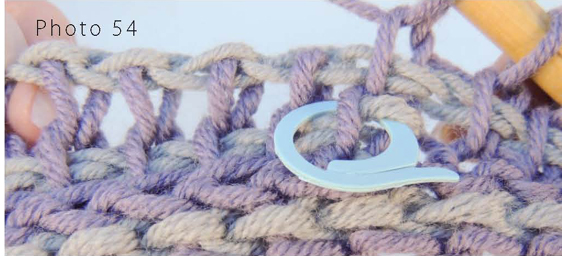
Continue to work around and around. Each full rotation will actually be completing two rounds because you are working on the top and bottom simultaneously (see Photo 54). Move your stitch marker up as work progresses. You can also leave the first stitch marker in place to note your beginning round and use a second stitch marker to mark the rounds afterward. ![]()
