Chapter 1
Pastry and Cookie Crusts
The best foundation for a not-so-humble pie is a not-so-humble pie crust, which will help fill your pie with flavor from the bottom up. After all, most pies and tarts begin with the crust, and you want yours to be as upscale and unique as your carefully crafted fillings. In this chapter, you’ll learn how to bring the gourmet flavor profiles of lemon and lavender, cinnamon and chocolate, and parmesan and pepper jack into your crusts.
While the idea of making a good crust from scratch may seem intimidating (thus the proliferation of those ready-to-buy, refrigerated versions), whipping up the perfect pedestal for your pie is really quite easy. Remember to use a light touch, and work with your hands. Mix until the dough just begins to cling together and then knead it until it just comes together. After you make up the dough, cover it up and let it rest in your refrigerator for at least thirty minutes; this will relax the gluten and make rolling out much easier. Coat your work surface with a light but even dusting of flour and don’t be afraid to add more flour as needed while rolling. If at any time your crust starts to snap back while rolling, chill it again. Giving your crust—and yourself—ten minutes to cool off can make all the difference.
So, make your crust as upscale as the pie filling you’ll put in it—you’ll be glad you did.
Flaky Pie Crust
A perfectly tender and flaky pie crust is a thing of beauty. The flaky layers are created during baking when the water in the melting fat evaporates, causing steam. This steam expands and causes the crisp, flaky layers. Because of the delicate layers, flaky pie crusts are best used for the top of a pie, either as a full top crust or cut into strips and woven into a lattice crust.
YIELDS 1 (9”) CRUST
1¼ cups all-purpose flour
2 tablespoons sugar
½ teaspoon salt
6 tablespoons butter, cubed and chilled
2 tablespoons lard or vegetable shortening, chilled
2–4 tablespoons ice water
In a large bowl, sift together the flour, sugar, and salt.
Add the chilled fats; rub them into the flour mixture with your fingers until 30 percent of the fat is between pea and hazelnut sized, while the rest is blended in well.
Add 2 tablespoons of water; mix until the dough forms a rough ball. Add more water, 1 tablespoon at a time, if needed.
Turn the dough out onto a lightly floured surface and form a disk. Wrap in plastic; chill for at least 30 minutes, or up to 3 days.
Remove the dough from the refrigerator about 10 minutes before rolling out. Roll out on a lightly floured surface to an ⅛” thick, 12circle, turning the dough often to make sure it does not stick. Dust the surface with additional flour, if needed.
Place the crust on a baking sheet and chill for 30 minutes before baking.
Mealy Pie Crust
A crisp, yet tender, bottom crust elevates a good pie into a spectacular pie. Fortunately, there is an easy way to achieve bottom crust perfection: a mealy pie crust. In this recipe the fat is worked into the crust more finely, creating a crust that resists sogginess and makes a delicious base for your pie.
YIELDS 1 (9”) CRUST
¼ cups all-purpose flour
2 tablespoons sugar
½ teaspoon salt
4 tablespoons butter, cubed and chilled
¼ cup lard or vegetable shortening, chilled
2–4 tablespoons ice water
In a large bowl, sift together the flour, sugar, and salt.
Add the butter and shortening to the bowl; with your fingers, rub the fat into the flour until the mixture looks like coarse sand with no large pieces of fat remaining.
Add 2 tablespoons of water and mix until the dough forms a rough ball. Add more water, 1 tablespoon at a time, if needed.
Turn the dough out onto a lightly floured surface and form a disk. Wrap in plastic; chill for at least 30 minutes, or up to 3 days.
Remove the dough from the refrigerator about 10 minutes before rolling out. Roll out on a lightly floured surface to an ⅛” thick, 12 circle, turning the dough often to make sure it does not stick. Dust the surface with additional flour, if needed.
Fold the dough in half and place it into a 9 pie plate. Unfold and carefully push the dough into the pan. Use kitchen scissors or a paring knife to trim the dough to within 1 of the pan’s edge.
Cover with plastic and chill until ready to bake. Covered, the crust will keep for up to three days in the refrigerator.
Cream Cheese Pastry Crust
The cream cheese in this recipe adds a slight tangy flavor to the crust—along with a luxurious mouth feel. With its bold flavor, this Cream Cheese Pastry Crust is allowed to shine when it’s paired with fruit fillings that won’t overpower its decadent flavors. This crust is good for either the bottom or the top of the pie.
YIELDS 1 (9”) CRUST
½ cup cream cheese, room temperature
½ cup butter, room temperature
1 teaspoon lemon zest
1½ cups all-purpose flour
¼ cup sugar
½ teaspoon salt
¼ teaspoon baking powder
In a large bowl, cream together the cream cheese, butter, and lemon zest until smooth.
In a separate bowl, sift together the flour, sugar, salt, and baking powder.
Add the sifted dry ingredients into the cream cheese mixture and stir until it forms a soft dough. If the mixture feels sticky, add more flour, 1 tablespoon at a time, until it is smooth and no longer sticky.
Turn the dough out onto a lightly floured surface and form a disk. Wrap in plastic and chill for at least 1 hour, or up to 3 days.
Remove the dough from the refrigerator for 10 minutes to warm up. Roll out on a lightly floured surface to an ⅛” thick, 12 circle, turning the dough often to make sure it does not stick. Dust the surface with additional flour, if needed.
Fold the dough in half and place it into a 9 pie plate. Unfold and carefully press the dough into the pan. Use kitchen scissors or a paring knife to trim the dough to within 1 of the pan’s edge.
Cover with plastic and chill until ready to bake. Covered, the crust will keep for up to three days in the refrigerator.
All-Butter Pie Crust
All-butter crusts have a lovely melt-in-the-mouth texture that makes them perfect for any type of upscale pie or tart. That said, butter can be tricky to work with since it melts at around 90°F. When making an all-butter pie crust, use very cold butter that is cut into ½ cubes; chilling the butter in the freezer for 10 minutes before rubbing it into the flour will make things a lot easier.
YIELDS 1 (9”) CRUST
¼ cups all-purpose flour
1 tablespoon sugar
½ teaspoon salt
8 tablespoons unsalted butter, cubed and chilled
3–4 tablespoons ice water
In a large bowl, sift together the flour, sugar, and salt.
Add the butter to the bowl; with your fingers, rub it into the flour until the mixture looks like coarse sand studded with pea-sized pieces of butter.
Add 2 tablespoons of water; mix until the dough forms a rough ball. Add more water, 1 tablespoon at a time, if needed.
Turn the dough out onto a lightly floured surface and form a disk. Wrap in plastic and chill for at least 30 minutes, or up to 3 days.
Remove the dough from the refrigerator for 10 minutes before rolling out. Roll out on a lightly floured surface to an ⅛” thick, 12 circle, turning the dough often to make sure it does not stick. Dust the surface with additional flour, if needed.
Fold the dough in half and place it into a 9 pie plate. Unfold and carefully press the dough into the pan. Use kitchen scissors or a paring knife to trim the dough to within 1 of the pan’s edge.
Cover with plastic and chill until ready to bake. Covered, the crust will keep for up to three days in the refrigerator.
Pepper Jack Pastry Crust
To imbue your pies with a spicy kick, pair them with this festive pepper jack cheese–laced crust. This crust is delicious when used for savory pies, but think about using it for your favorite fruit pies, too. Apples, pears, apricots, cherries, and even peaches would pair beautifully with the earthy, spicy cheese in this crust.
YIELDS 1 (9”) CRUST
¼ cups all-purpose flour
½ teaspoon salt
¼ teaspoon paprika
½ cup butter, cubed and chilled
1 cup shredded pepper jack cheese
3–4 tablespoons ice water
In a large bowl, sift together the flour, salt, and paprika.
Add the chilled butter; rub into the flour mixture with your fingers until 30 percent of the fat is between pea and hazelnut sized, while the rest is blended in well.
Add the pepper jack cheese; mix until evenly incorporated.
Add 3 tablespoons of water; mix until the dough forms a rough ball. Add more water, 1 tablespoon at a time, as needed.
Turn the dough out onto a lightly floured surface and form the dough into a disk. Wrap in plastic and chill for at least 1 hour, or up to 3 days.
Remove the disk from the refrigerator for 10 minutes to warm up. Once warm, knead the dough 10 times on a well-floured surface. Roll out to an ⅛” thick, 12” circle, turning the dough often to make sure it does not stick. Dust the surface with additional flour, if needed.
Fold the dough in half and place it into a 9” pie plate. Unfold and carefully push the dough into the pan. Use kitchen scissors or a paring knife to trim the dough to within 1” of the pan’s edge.
Cover with plastic and place in the refrigerator to chill until ready to bake. Covered, the crust will keep for up to three days in the refrigerator.
Almond Pastry Crust
The sweet nutty flavor of almonds gives this crust an extra pop of flavor and, since almonds complement so many flavors, this recipe can add a nuanced flavor to your next pie. Ground almonds can be purchased at most natural food stores and in the gluten-free section of some grocery stores, but if you can’t find them you can make them very easily at home. Grind whole, blanched almonds in a food processor until they are the texture of coarse sand.
YIELD 1 (9”) CRUST
1 cup plus 2 tablespoons all-purpose flour
¼ cup ground almonds
2 tablespoons sugar
½ teaspoon salt
4 tablespoons butter, cubed and chilled
4 tablespoons vegetable shortening, chilled
¼ teaspoon almond extract
2–4 tablespoons ice water
In a large bowl, whisk together the flour, almonds, sugar, and salt.
Add the butter and shortening; with your fingers, rub it into the flour until the mixture looks like coarse sand studded with pea-sized pieces of butter.
Add the almond extract and 2 tablespoons of water; mix until the dough forms a rough ball. Add more water, 1 tablespoon at a time, if needed.
Turn the dough out onto a lightly floured surface and form a disk. Wrap in plastic and chill for at least 30 minutes, or up to 3 days.
Remove the dough from the refrigerator for 10 minutes to warm up. Roll out on a lightly floured surface to an ⅛” thick, 12” circle, turning the dough often to make sure it does not stick. Dust the surface with additional flour, if needed.
Fold the dough in half and place it into a 9” pie plate. Unfold and carefully press the dough into the pan. Use kitchen scissors or a paring knife to trim the dough to within 1” of the pan’s edge.
Cover with plastic and chill until ready to bake. Covered, the crust will keep for up to three days in the refrigerator.
Lard Crust
Lard, widely used in baking and cooking until vegetable shortening came onto the market, produces pie crusts that have a refined flavor and texture. Compared to shortening and butter, lard offers a clean flavor, retains a melt-in-the-mouth richness on your palate, and just crisps up beautifully once baked. Because lard melts at a higher temperature than butter—and is more forgiving to work with—this crust allows the filling in your pie to shine.
YIELDS 1 (9”) CRUST
¼ cups all-purpose flour
½ teaspoon salt
½ cup lard, chilled
1 egg yolk
1 teaspoon white distilled vinegar
2 tablespoons ice water
In a large bowl, sift together the flour and salt.
Add the lard; with your fingers, rub it into the flour until the mixture looks like coarse sand studded with pea-sized pieces of fat.
In a separate bowl, whisk together the egg yolk, vinegar, and water.
Add 2 tablespoons of the liquid to the dry ingredients; mix until the dough forms a rough ball. Add more liquid, 1 tablespoon at a time, if needed.
Turn the dough out onto a lightly floured surface and form a disk. Wrap in plastic and chill for at least 30 minutes, or up to 3 days.
Remove the dough from the refrigerator for 10 minutes to warm up. Roll out on a lightly floured surface to an ⅛” thick, 12” circle, turning the dough often to make sure it does not stick. Dust the surface with additional flour, if needed.
Fold the dough in half and place it into a 9” pie plate. Unfold and carefully press the dough into the pan. Use kitchen scissors or a paring knife to trim the dough to within 1” of the pan’s edge.
Cover with plastic and chill until ready to bake. Covered, the crust will keep for up to three days in the refrigerator.
Traditional Graham Cracker Crust
This cookie crust brings a lot to the table. Not only does it taste fantastic, it offers a crispy, crumbly texture and a rustic appeal that makes even an upscale soiree feel like home. Use cookie crusts for pies that are not baked in the oven—like cream pies—or with fruit fillings that are cooked on the stovetop.
YIELDS 1 (9”) CRUST
1⅓ cups graham cracker crumbs
3 tablespoons sugar
6 tablespoons unsalted butter, melted
Preheat the oven to 350°F.
In a medium bowl, combine the graham cracker crumbs, sugar, and butter until well combined. Press the mixture evenly into a 9” pie pan.
Bake for 10–12 minutes, or until the crust is golden brown and the center is firm when pressed lightly. Cool completely before filling.
Pretzel Crust
Salty and crunchy, a pretzel crust is an easy way to give your favorite pie an unexpected twist. The salty crunch of pretzels helps spark the sweetness of the filling, and the naturally hearty flavor of pretzels adds a mouthwatering layer of flavor to your pie. But be careful: Large pieces of pretzel will make the crust fragile and it will fall apart when sliced. Use a food processor to process the pretzels until they have the texture of sand.
YIELDS 1 (9”) CRUST
¼ cups finely crushed pretzels
¼ cup sugar
¼ cup unsalted butter, melted
Preheat the oven to 350°F.
In a medium bowl, combine the pretzel crumbs, sugar, and butter until well combined. Press the mixture evenly into a 9” pie pan.
Bake for 10–12 minutes, or until the crust is golden brown and the center is firm when pressed lightly. Cool completely before filling.
Short Crust for Tarts
This recipe produces a sturdy dough that is very easy to work with. The pastry holds its shape well while baking, unmolds easily from the tart pan, and produces clean, pretty slices. This crust, similar in texture and flavor to a shortbread cookie, is particularly nice when combined with fresh fruit or custards.
YIELDS 1 (9”) CRUST
¼ cup sugar
1 stick unsalted butter, slightly softened
1 egg
½ teaspoon vanilla
1⅓ cups all-purpose flour
Cream together the sugar and butter until just combined.
Add in the egg yolk and vanilla; mix until incorporated.
Add in the flour; mix until the dough is smooth. Wrap in plastic and chill for 1 hour, or up to 3 days.
Remove the dough from the refrigerator for 10 minutes to warm up. Roll out on a lightly floured surface to an ⅛” thick, 12 circle, turning the dough often to make sure it does not stick. Dust the surface with additional flour, if needed.
Roll the dough around the rolling pin and unroll it into a 10 tart pan. Carefully press the dough into the pan. Press your fingers against the rim of the pan to trim the dough.
Cover with plastic and chill until ready to bake. Covered, the crust will keep for up to three days in the refrigerator.
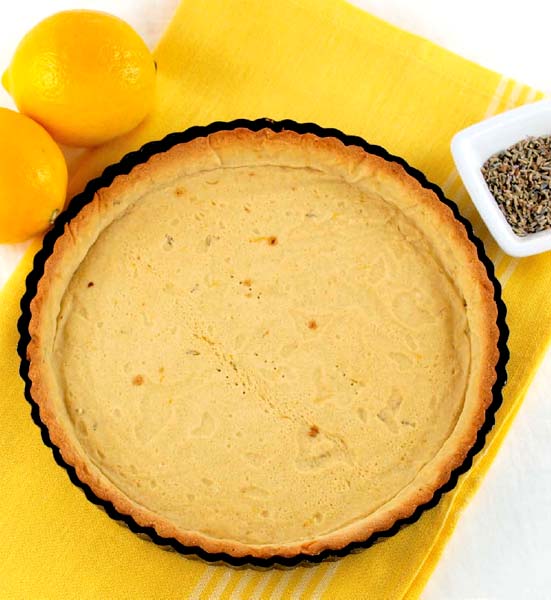
Lemon and Lavender Short Crust Pastry
The fresh lemon and lavender used in this recipe make this delicately flavored crust unforgettably upscale. Use this crust when making fresh fruit tarts to emphasize the flavors of the berries. This base is also lovely with a simple vanilla custard or some creamy lemon curd. Orange and lime zest can also be used here, so don’t be afraid to customize your crust and make it your own.
YIELDS 1 (9”) CRUST
¼ cup packed light brown sugar
1 stick unsalted butter, slightly softened
1 egg
1 teaspoon fresh lemon zest
½ teaspoon vanilla
1⅓ cups all-purpose flour
¼ teaspoon dried culinary lavender, crushed
¼ teaspoon salt
Cream together the sugar and butter until just combined.
Add in the egg, lemon zest, and vanilla; mix until incorporated.
Add in the flour, lavender, and salt; mix until the dough is smooth. If needed, add additional flour, 1 tablespoon at a time, if the dough is too sticky. Wrap in plastic and chill for 1 hour, or up to three days.
Remove the dough from the refrigerator for 10 minutes to warm up. Roll out on a lightly floured surface to an ⅛” thick, 12” circle, turning the dough often to make sure it does not stick. Dust the surface with additional flour, if needed.
Roll the dough around the rolling pin and unroll it into a 10” tart pan. Carefully press the dough into the pan. Press your fingers against the rim of the pan to trim the dough.
Cover with plastic and chill until ready to bake. Covered, the crust will keep for up to three days in the refrigerator.
Spicy Cheddar Crust
Cheddar cheese has a sharp, rich flavor and an enticing aroma. Here it’s combined with a hint of spicy cayenne pepper to create a crust with a flavor similar to the cheese straw, a staple of the South. This crust is best when filled with apple, pear, or even peach fillings where the sharp cheese can play off the fragrant fruit.
YIELDS 2 (9”) CRUSTS
2½ cups all-purpose flour
1 teaspoon salt
¼ teaspoon cayenne pepper
1 cup (2 sticks) unsalted butter, cubed and chilled
2 cups shredded sharp Cheddar cheese
6–8 tablespoons ice water
In a large bowl, sift together the flour, salt, and cayenne pepper. Add the chilled butter; rub into the flour mixture with your fingers until 30 percent of the fat is between pea and hazelnut sized, while the rest is blended in well. Add the Cheddar cheese and mix until evenly incorporated.
Add 3 tablespoons of water and mix until the dough forms a rough ball. Add more water, 1 tablespoon at a time, as needed.
Turn the dough out onto a lightly floured surface. Divide the dough in half. Form each half into a disk. Wrap in plastic and chill for at least 1 hour, or up to 3 days.
Remove one of the disks from the refrigerator for 10 minutes to warm up. Once warm, knead the dough 10 times on a well-floured surface. Roll out to an ⅛” thick, 12” circle, turning the dough often to make sure it does not stick. Dust the surface with additional flour, if needed.
Fold the dough in half and place it into a 9” pie plate. Unfold and carefully push the dough into the pan. Use kitchen scissors or a paring knife to trim the dough to within ½” of the pan’s edge. Cover with plastic and place in the refrigerator to chill.
Remove the second disk of dough from the refrigerator for 10 minutes to warm up. Roll out on a lightly floured surface to an ⅛” thick, 12” circle, turning the dough often to make sure it does not stick. Dust the surface with additional flour, if needed.
Place the crust on a baking sheet and chill for 30 minutes before use.
Graham Pecan Crust
Both buttery and nutty, pecans add not only a rich, decadent flavor but a pleasant, chewy texture to this crisp crust. Not a fan of pecans? You can use any ground nuts you like here. Hazelnuts, almonds, walnuts, and even macadamia nuts are excellent substitutes. You can also substitute chocolate wafer cookies for the graham crackers. In fact, if you added ground hazelnuts you would have a crust that mimicked in flavor the popular chocolate hazelnut spread.
YIELDS 1 (9”) CRUST
1 cup plus 2 tablespoons graham cracker crumbs
⅓ cup ground pecans
¼ teaspoon cinnamon
¼ cup sugar
6 tablespoons unsalted butter, melted
Preheat the oven to 350°F.
In a medium bowl, combine the graham cracker crumbs, ground pecans, cinnamon, sugar, and butter until well combined. Press the mixture evenly into a 9 pie pan.
Bake for 10–12 minutes, or until the crust is golden brown and the center is firm when pressed lightly. Cool completely before filling.
Ginger Snap Crust
When you are making a pie with a spicy filling, think about adding some warm spice to your crust, too. This causes the warm flavor profile of the spices to carry through your entire dish. You will want to use crunchy ginger snaps for this crust. The soft kind—while a pleasure to eat—are too soggy to form a solid base. If you have any leftover crispy gingerbread cookies, you can also use those here.
YIELDS 1 (9”) CRUST
⅔ cup graham cracker crumbs
⅔ cup gingersnap crumbs
2 tablespoons sugar
6 tablespoons unsalted butter, melted
Preheat the oven to 350°F.
In a medium bowl, combine the graham cracker crumbs, gingersnap crumbs, sugar, and butter until well combined. Press the mixture evenly into a 9 pie pan.
Bake for 10–12 minutes, or until the crust is golden brown and the center is firm when pressed lightly. Cool completely before filling.
Chocolate Cookie Crust
Want to take the chocolate flavor of your pie to the next level? Then this is the crust for you! If you are feeling particularly exotic, you can add even more flavor by adding a couple of tablespoons of toasted coconut, a teaspoon of instant coffee, or ¼ teaspoon of cinnamon to the cookie crumbs.
YIELDS 1 (9”) CRUST
1⅓ cups chocolate wafer cookie crumbs
2 tablespoons sugar
6 tablespoons unsalted butter, melted
Preheat the oven to 350°F.
In a medium bowl, combine the cookie crumbs, sugar, and butter until well combined. Press the mixture evenly into a 9 pie pan.
Bake for 10–12 minutes, or until the crust is firm in the center when pressed lightly. Cool completely before filling.
Blitz Puff Pastry
Traditional puff pastry can be quite tricky and time consuming to make: a block of cold butter is incorporated into dough, which is then repeatedly rolled out, folded, and chilled to create thousands of flaky layers. It can take a day, or more, to make this intricate pastry properly. This recipe makes a puff pastry with a lot of delicate, flaky layers, but from start to finish this takes less than an hour. Your guests will think you spent hours in the kitchen perfecting this impressive puff—and you don’t have to tell them otherwise!
SERVES 8
1⅓ cups all-purpose flour
1 tablespoon sugar
¼ teaspoon salt
1½ sticks unsalted butter, cut into 1 pieces and chilled
6 tablespoons ice water
In a large bowl, combine the flour, sugar, and salt; mix well.
Add the chilled butter; blend it into the flour mixture with your fingers until 10 percent of the fat is blended in well, leaving the rest as very large chunks, between hazelnut and pecan size.
Add the water a little at a time, and mix the dough with a spatula until it just hangs together. It will look very shaggy.
Turn the dough out onto a well-floured surface. Shape the dough into a rectangle; roll out to ½ thick. Dust the top with additional flour if the butter is too soft, but do not add too much.
Use a bench scraper or a large spatula to fold the dough into itself in thirds, similar to folding a letter. It will be crumbly.
Turn the dough 90° and square off the edges. Roll into a rectangle that’s ½ thick. Brush off any excess flour; fold in thirds.
Repeat this process 2 more times; wrap in plastic and chill for 30 minutes.
Remove from the refrigerator and allow to stand for 10 minutes.
Roll the dough out into a ½ thick rectangle, dust off any excess flour as you fold, then fold the 2 shorter sides into the center and then in half at the seam, like a book.
Roll out the dough to ½ thick; wrap in plastic and chill for 1 hour before use.
Cornmeal Tart Crust
Looking for a tart crust with a little something more? The magic ingredient in this recipe is cornmeal, which adds an interesting texture and savory flavor and is perfect when paired with bold-flavored fillings. Use a finely ground cornmeal for this recipe. While stone-ground cornmeal has a beautiful texture and flavor, it can be a little overwhelming for this recipe because of its rustic coarseness. A finer ground cornmeal will provide all the toothsome quality of cornmeal, all the earthy flavor, but it will not distract from the filling it houses.
YIELDS 1 (10”) TART
1 cup all-purpose flour
¼ cup yellow cornmeal
¼ teaspoon salt
⅓ cup unsalted butter, room temperature
¼ cup sugar
1 egg
2 tablespoons water
In a medium bowl, combine the flour, cornmeal, and salt until thoroughly blended.
In a separate bowl, whisk together the butter and sugar until lightened in color. Whisk in the egg.
Add dry ingredients to the butter mixture; stir until just combined.
Add the water; continue to mix until the dough starts to clump together.
On a well-floured surface, flatten the dough into a disk; wrap in plastic and refrigerate for 30 minutes.
Remove the dough from the refrigerator for 10 minutes to warm up. Roll out on a lightly floured surface to an ⅛” thick, 12” circle, turning the dough often to make sure it does not stick. Dust the surface with additional flour, if needed.
Fold the dough in half and place it into a 10” tart pan with 1” sides. Unfold and carefully press the dough into the pan. Press the dough against the edge of the pan to trim.
Cover with plastic and chill until ready to bake. Covered, the crust will keep for up to three days in the refrigerator.
Parmesan Pastry Crust
Parmesan cheese is a hard Italian cow’s milk cheese prized for its savory flavor—and its inclusion in this crust will take the sophistication of your pie to a whole new level. When it comes to Parmesan, it is wise to invest a little in the real thing. Avoid the shelf-stable canisters of grated cheese next to the dry pasta and opt instead for blocks of freshly cut cheese found in the deli. Fresh Parmesan is a little more expensive, but it’s well worth it; you’ll be rewarded with a stronger, saltier flavor and a creamier aroma.
YIELDS 1 (10”) TART
1⅔ cups all-purpose flour
¼ teaspoon baking powder
½ teaspoon salt
2 ounces grated Parmesan cheese
1 stick unsalted butter, cubed and chilled
2 tablespoons ice water
1 teaspoon white vinegar
In a large bowl, whisk together the flour, baking powder, salt, and cheese.
Add the chilled butter; rub it into the flour mixture with your fingers until 30 percent of the fat is pea sized, while the rest is blended in well.
Add the water and vinegar; mix until the dough forms a rough ball. Add more water, a few drops at a time, if needed.
Turn the dough out onto a lightly floured surface and form a disk. Wrap in plastic and chill for at least 30 minutes, or up to 3 days.
Remove the dough from the refrigerator for 10 minutes to warm up. Roll out on a lightly floured surface to an ⅛” thick, 11” circle, turning the dough often to make sure it does not stick. Dust the surface with additional flour, if needed.
Fold the dough in half and place it into a 9” tart pan with 1” sides. Unfold and carefully press the dough into the pan. Press the dough against the edge of the pan to trim.
Cover with plastic and chill until ready to bake. Covered, the crust will keep for up to three days in the refrigerator.
Brown Butter–Graham Cracker Tart Crust
The subtle, nutty, buttery flavor of the brown butter used in this crust works well in dishes that have warm spices or caramel. When butter browns, some of the water evaporates while the butter solids separate and sink to the bottom of the pot, where they gently toast. Keep your eye on your butter as you brown it. It can go from toasty and delicious to burned in seconds.
YIELDS 1 (10”) TART
6 tablespoons unsalted butter
1¾ cups graham cracker crumbs
⅓ cup packed light brown sugar
Preheat the oven to 350°F.
In a small saucepan over medium-low heat, add the butter; cook until it is nut brown, about 10 minutes, stirring constantly to prevent hot spots. Cool the butter to room temperature.
In a medium bowl, combine the graham cracker crumbs, sugar, and butter until well combined. Press the mixture evenly into a 10” tart pan.
Bake for 10–12 minutes, or until the crust is golden brown and the center is firm when pressed lightly. Cool completely before filling.