15 Using Stubs for Better Unit Tests
Testing the DayViewViewModel struct isn’t very different from testing the view models of the SettingsViewController class. The only tricky aspect is instantiating a DayViewViewModel instance in a unit test.
To instantiate a DayViewViewModel instance, we need a model. Should we fetch weather data from the Dark Sky API during a test run? The answer is a resounding “no”. To guarantee that the unit tests for the DayViewViewModel struct are fast and reliable, we need stubs.
The idea is simple. We fetch a response from the Dark Sky API, save it in the unit testing bundle, and load the response when we run the unit tests for the view model. Let me show you how this works.
Adding Stub Data
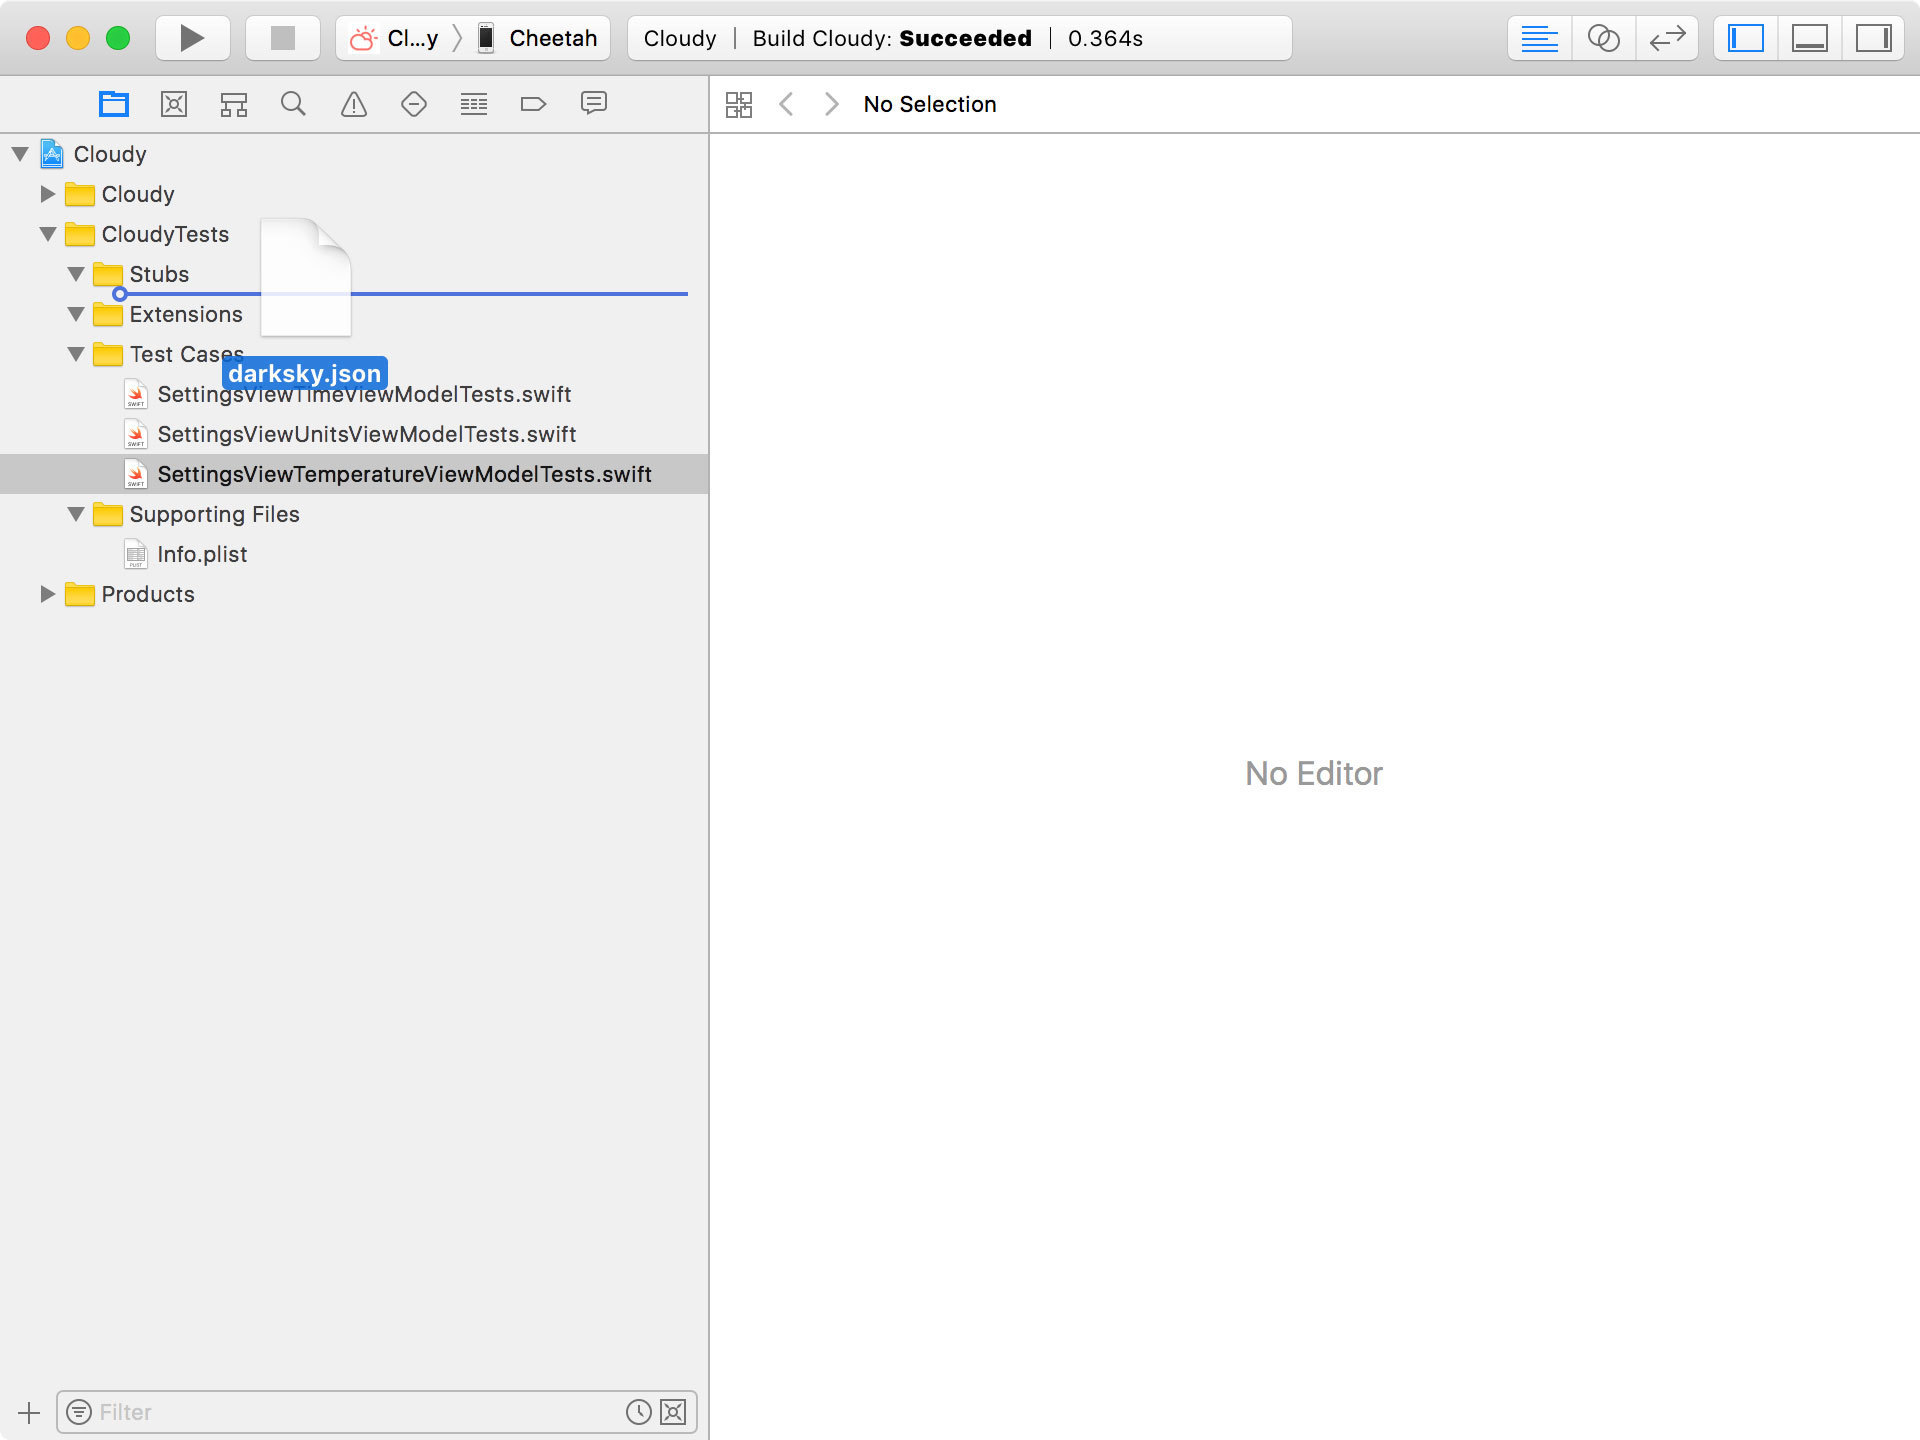
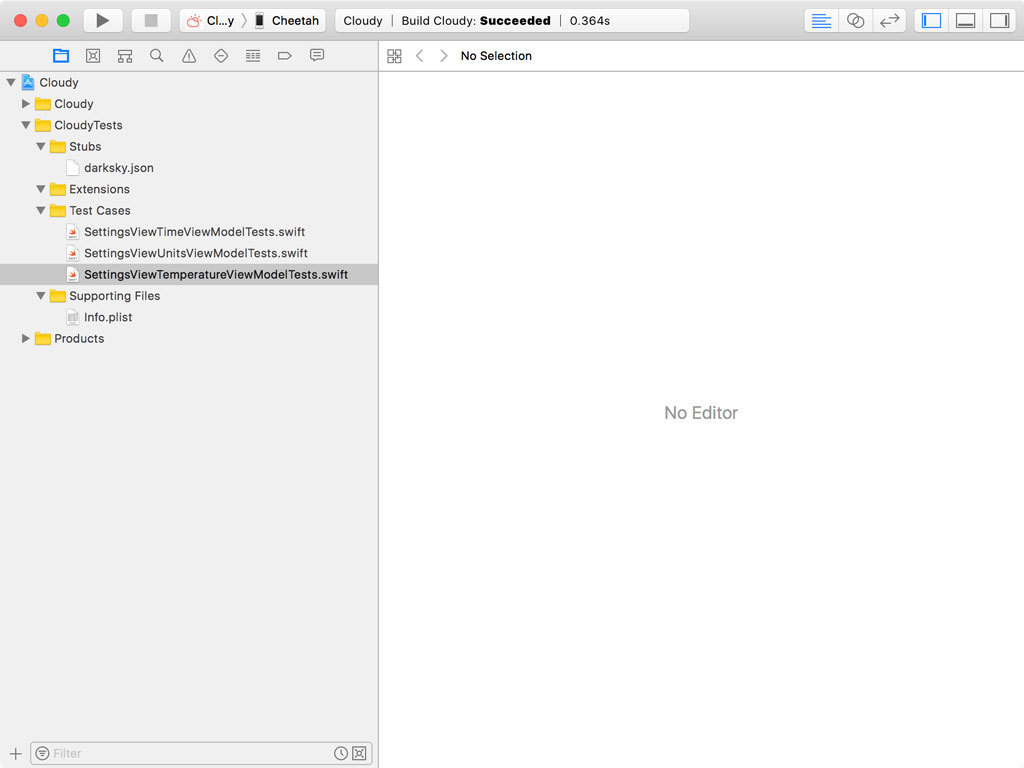
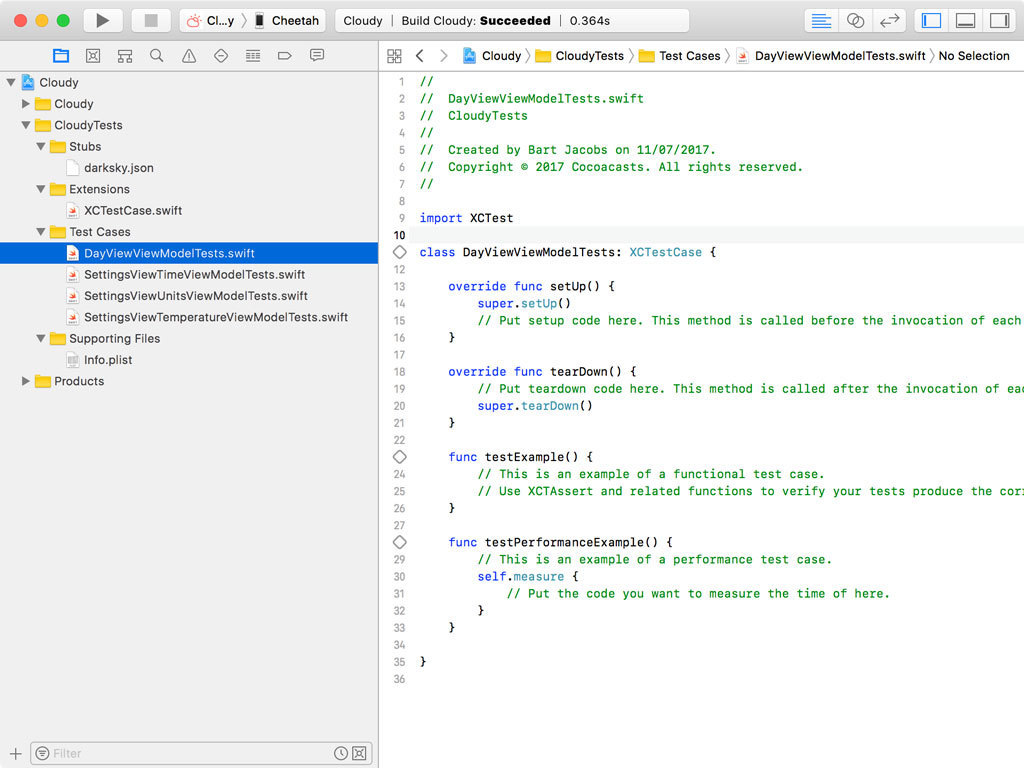
I’ve already saved a response from the Dark Sky API to my desktop. This is nothing more than a plain text file with JSON data. Before we can use it in the test case, we add the file to the unit testing bundle. The JSON file is included with the source files of this chapter. Drag it in the Stubs group of the CloudyTests target.
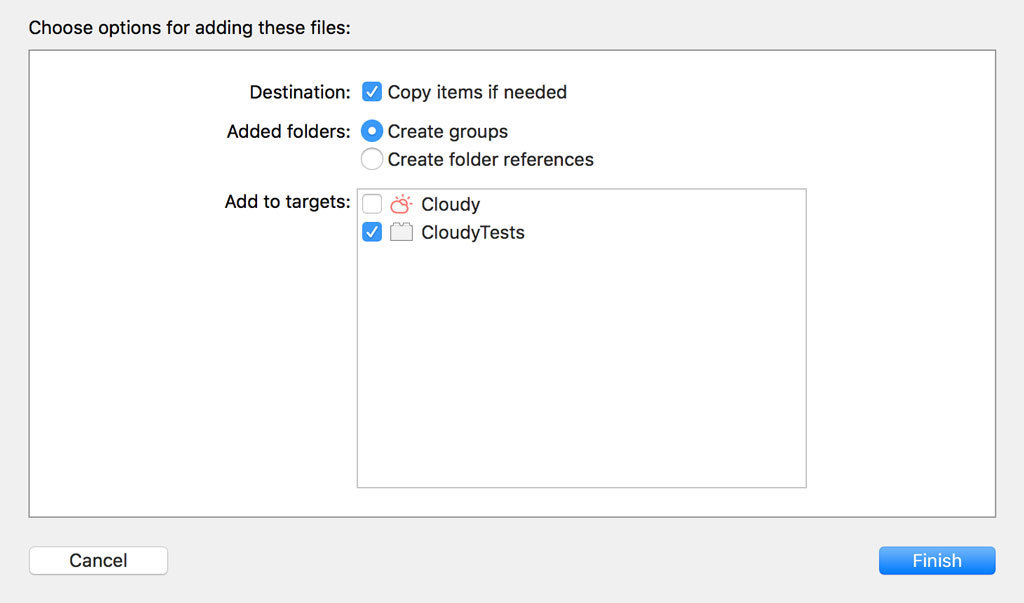
Make sure that Copy items if needed is checked and that the file is only added to the CloudyTests target.
Loading Stub Data
Because we’ll use the stub data in multiple test cases, we first create a helper method to load the stub data from the unit testing bundle. Create a new file in the Extensions group of the unit testing bundle and name it XCTestCase.swift.
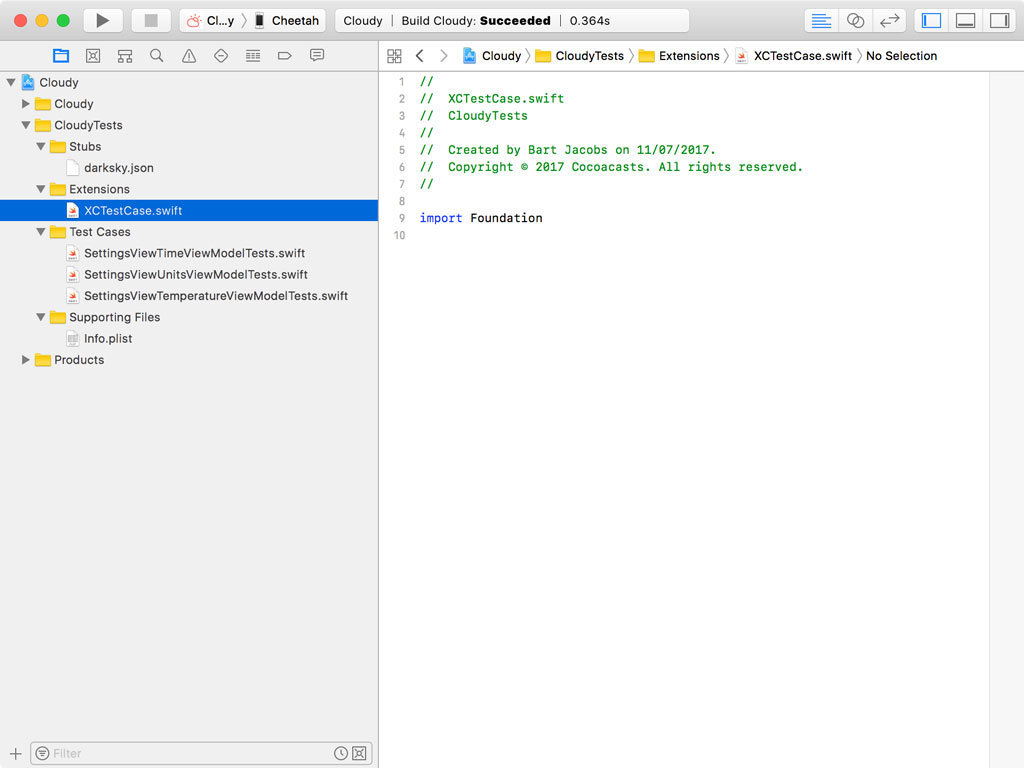
Replace the import statement for Foundation with an import statement for XCTest and define an extensions for the XCTestCase class.
XCTestCase.swift
1 import XCTest
2
3 extension XCTestCase {
4
5 }
Name the helper method loadStubFromBundle(withName:extension:).
XCTestCase.swift
1 func loadStubFromBundle(withName name: String, extension: String) ->\
2  Data {
3
4 }
The method accepts two parameters:
- the name of a file
- the extension of a file
In loadStubFromBundle(withName:extension:), we fetch a reference to the unit testing bundle, ask it for the URL of the file we’re interested in, and use the URL to instantiate a Data instance.
XCTestCase.swift
1 func loadStubFromBundle(withName name: String, extension: String) ->\
2  Data {
3     let bundle = Bundle(for: classForCoder)
4     let url = bundle.url(forResource: name, withExtension: `extensio\
5 n`)
6
7     return try! Data(contentsOf: url!)
8 }
Notice that we force unwrap the url optional and, Heaven forbid, use the try keyword with an exclamation mark. This is something I only ever do when writing unit tests. You have to understand that we’re only interested in the results of the unit tests. If anything else goes wrong, we made a silly mistake, which we need to fix. In other words, I’m not interested in error handling or safety when writing and running unit tests. If something goes wrong, the unit tests fail anyway.
Unit Testing the Day View View Model
We can now create the test case for the DayViewViewModel struct. Create a new test case and name the file DayViewViewModelTests.swift. We start by adding an import statement for the Cloudy module. Don’t forget to prefix the import statement with the testable attribute.
DayViewViewModelTests.swift
 1 import XCTest
 2 @testable import Cloudy
 3
 4 class DayViewViewModelTests: XCTestCase {
 5
 6     // MARK: - Set Up & Tear Down
 7
 8     override func setUp() {
 9         super.setUp()
10     }
11
12     override func tearDown() {
13         super.tearDown()
14     }
15
16 }
To simplify the unit tests, we won’t be instantiating a view model in each of the unit tests. Instead, we create a view model, the view model we use for testing, in the setUp() method. Let me show you how that works and what the benefits are.
We first define a property for the view model. This means every unit test will have access to a fully initialized view model, ready for testing.
DayViewViewModelTests.swift
 1 import XCTest
 2 @testable import Cloudy
 3
 4 class DayViewViewModelTests: XCTestCase {
 5
 6     // MARK: - Properties
 7
 8     var viewModel: DayViewViewModel!
 9
10     // MARK: - Set Up & Tear Down
11
12     override func setUp() {
13         super.setUp()
14     }
15
16     override func tearDown() {
17         super.tearDown()
18     }
19
20 }
Notice that the type of the property is an implicitly unwrapped optional. This is dangerous, but remember that we don’t care if the test suite crashes and burns. If that happens, it means that we made a mistake we need to fix. This is really important to understand. When we’re running the unit tests, we’re interested in the test results. We very often use shortcuts for convenience to improve the clarity and the readability of the unit tests. This’ll become clear in a moment.
In the setUp() method, we invoke the loadStubFromBundle(withName:extension:) helper method to load the contents of the stub we added earlier and we use the Data object to instantiate a WeatherData instance. The model is used to create the DayViewViewModel instance we’re going to use in each of the unit tests.
DayViewViewModelTests.swift
 1 override func setUp() {
 2     super.setUp()
 3
 4     // Load Stub
 5     let data = loadStubFromBundle(withName: "darksky", extension: "j\
 6 son")
 7     let weatherData: WeatherData = try! JSONDecoder.decode(data: dat\
 8 a)
 9
10     // Initialize View Model
11     viewModel = DayViewViewModel(weatherData: weatherData)
12 }
The first unit test is as simple as unit tests get. We test the date computed property of the DayViewViewModel struct. We assert that the value of the date computed property is equal to the value we expect.
DayViewViewModelTests.swift
1 // MARK: - Tests for Date
2
3 func testDate() {
4     XCTAssertEqual(viewModel.date, "Tue, July 11")
5 }
We can keep the unit test this simple because we control the stub data. If we were to fetch a response from the Dark Sky API, we wouldn’t have a clue what would come back. It would be slow, asynchronous, and prone to all kinds of issues.
The second unit test we write is for the time computed property of the DayViewViewModel struct. Because the value of the time computed property depends on the user’s preference, stored in the user defaults database, we have two unit tests to write.
DayViewViewModelTests.swift
1 // MARK: - Tests for Time
2
3 func testTime_TwelveHour() {
4
5 }
6
7 func testTime_TwentyFourHour() {
8
9 }
The body of the first unit test looks very similar to some of the unit tests we wrote in the previous chapter. We set the time notation setting in the user defaults database and assert that the value of the time computed property is equal to the value we expect. Let me repeat that we can only do this because we know the contents of the stub data and, as a result, the model the view model manages.
DayViewViewModelTests.swift
1 func testTime_TwelveHour() {
2     let timeNotation: TimeNotation = .twelveHour
3     UserDefaults.standard.set(timeNotation.rawValue, forKey: UserDef\
4 aultsKeys.timeNotation)
5
6     XCTAssertEqual(viewModel.time, "01:57 PM")
7 }
The second unit test for the time computed property is very similar. Only the value we set in the user defaults database is different.
DayViewViewModelTests.swift
1 func testTime_TwentyFourHour() {
2     let timeNotation: TimeNotation = .twentyFourHour
3     UserDefaults.standard.set(timeNotation.rawValue, forKey: UserDef\
4 aultsKeys.timeNotation)
5
6     XCTAssertEqual(viewModel.time, "13:57")
7 }
The remaining unit tests for the DayViewViewModel struct follow the same pattern. Put the book aside and give them a try. I have to warn you, though, the unit test for the image computed property is a bit trickier. But you can do this. You can find the remaining unit tests below.
DayViewViewModelTests.swift
 1 // MARK: - Tests for Summary
 2
 3 func testSummary() {
 4     XCTAssertEqual(viewModel.summary, "Clear")
 5 }
 6
 7 // MARK: - Tests for Temperature
 8
 9 func testTemperature_Fahrenheit() {
10     let temperatureNotation: TemperatureNotation = .fahrenheit
11     UserDefaults.standard.set(temperatureNotation.rawValue, forKey: \
12 UserDefaultsKeys.temperatureNotation)
13
14     XCTAssertEqual(viewModel.temperature, "44.5 째F")
15 }
16
17 func testTemperature_Celsius() {
18     let temperatureNotation: TemperatureNotation = .celsius
19     UserDefaults.standard.set(temperatureNotation.rawValue, forKey: \
20 UserDefaultsKeys.temperatureNotation)
21
22     XCTAssertEqual(viewModel.temperature, "6.9 째C")
23 }
24
25 // MARK: - Tests for Wind Speed
26
27 func testWindSpeed_Imperial() {
28     let unitsNotation: UnitsNotation = .imperial
29     UserDefaults.standard.set(unitsNotation.rawValue, forKey: UserDe\
30 faultsKeys.unitsNotation)
31
32     XCTAssertEqual(viewModel.windSpeed, "6 MPH")
33 }
34
35 func testWindSpeed_Metric() {
36     let unitsNotation: UnitsNotation = .metric
37     UserDefaults.standard.set(unitsNotation.rawValue, forKey: UserDe\
38 faultsKeys.unitsNotation)
39
40     print(viewModel.windSpeed)
41
42     XCTAssertEqual(viewModel.windSpeed, "10 KPH")
43 }
44
45 // MARK: - Tests for Image
46
47 func testImage() {
48     let viewModelImage = viewModel.image
49     let imageDataViewModel = UIImagePNGRepresentation(viewModelImage\
50 !)!
51     let imageDataReference = UIImagePNGRepresentation(UIImage(named:\
52  "clear-day")!)!
53
54     XCTAssertNotNil(viewModelImage)
55     XCTAssertEqual(viewModelImage!.size.width, 236.0)
56     XCTAssertEqual(viewModelImage!.size.height, 236.0)
57     XCTAssertEqual(imageDataViewModel, imageDataReference)
58 }
The unit test for the image computed property is slightly different. Comparing images isn’t straightforward. We first make an assertion that the value of the image computed property isn’t nil because it returns a UIImage?.
DayViewViewModelTests.swift
1 XCTAssertNotNil(viewModelImage)
We then convert the image to a Data object and compare it to a reference image, loaded from the application bundle. You can go as far as you like. For example, I’ve also added assertions for the dimensions of the image. This isn’t critical for this application, but it shows you what’s possible.
DayViewViewModelTests.swift
1 XCTAssertEqual(viewModelImage!.size.width, 236.0)
2 XCTAssertEqual(viewModelImage!.size.height, 236.0)
3 XCTAssertEqual(imageDataViewModel, imageDataReference)
Before we run the test suite, we need to tie up some loose ends. In the tearDown() method, we reset the state we set in the unit tests.
DayViewViewModelTests.swift
 1 override func tearDown() {
 2     super.tearDown()
 3
 4     // Reset User Defaults
 5     UserDefaults.standard.removeObject(forKey: UserDefaultsKeys.time\
 6 Notation)
 7     UserDefaults.standard.removeObject(forKey: UserDefaultsKeys.unit\
 8 sNotation)
 9     UserDefaults.standard.removeObject(forKey: UserDefaultsKeys.temp\
10 eratureNotation)
11 }
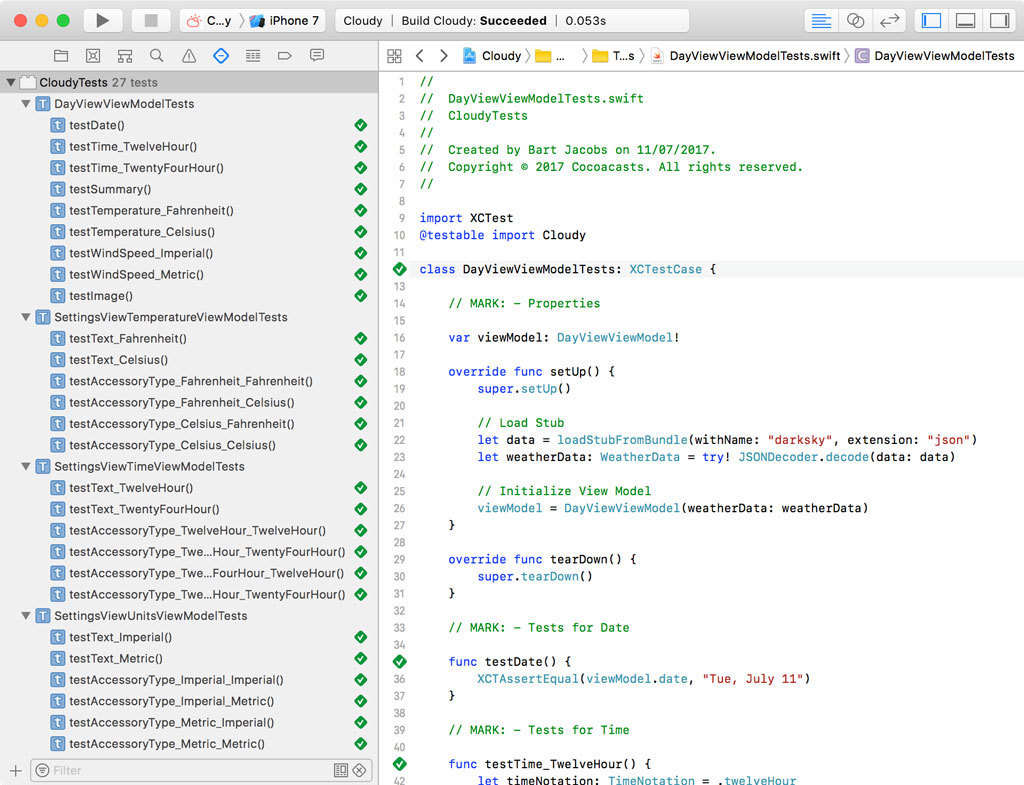
Press Command + U to run the test suite to make sure the unit tests for the DayViewViewModel struct pass.
In the next chapter, we unit test the view models for the WeekViewController class.