CHAPTER VI
MAKING CHAIN SWIVELS
Making a Log-Chain Swivel.
DIFFERENT METHODS.—PLAN 1.
My way of making a log-chain swivel is as follows: I take a piece of a bar, say three-quarters of an inch square, and flatten it a little and then draw out to three-eighths of an inch round, as shown by Fig. 275. I then cut it off long enough to draw out the other end the same way, leaving the center the full size, as shown by Fig. 276. I then punch a hole through it, and I have a mandrel shaped as by Fig. 277. I next take a welding heat, and putting the mandrel through the hole, turn up the two ends as shown in Fig. 278. After getting the ends turned up I finish it up on the mandrel with a light hammer, leaving it as shown by Fig. 279. I then take a piece of 3/8-inch round iron and swage it to half-round at both ends just long enough to go through the swivel, and with half an inch to weld a collar on. I then turn it around and weld a collar round it just the size of the mandrel, as shown by Fig. 280, then heat it, drive it through the hole and open with a punch as shown by Fig. 281. I next weld the two ends together as you would a link (Fig. 282), and you will have a good swivel, as I never make them any other way, and have found them always satisfactory.—By JOHN ATKINS.

Making a Log-Chain Swivel. Fig. 275—Showing how the Piece is Flattened and Drawn Out

Fig. 276—Showing how the Center is Formed

Fig. 277—Showing the Mandrel

Fig. 278—Showing how the Ends are Turned
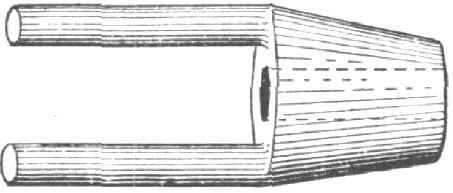
Fig. 279—Showing how the Piece is Finished

Fig. 280—Showing how the Collar is Welded On

Fig. 281—Showing how the Two Pieces are Joined

Fig. 282—Showing the Swivel Finished
Making a Log-Chain Swivel.
PLAN 2.
To make what I call a 3/8-inch swivel, that is one for 3/8-inch log chain, I use a piece of good Swedish iron 11/4 inch by 3/4 inch, and 4 inches long. Then I make fuller marks, as shown in Fig. 283, placing the marks just far enough apart to allow the middle part to be square. I next punch a 5/8-inch hole in the center, and draw the ends as shown in Figs. 284 and 285. I then bend up the ends, as in Fig. 286. I next take a good heat and use mandrel shown in Fig. 290. This is made of one-inch steel (machine or Bessemer). It is drawn to five-eighths inch, and the shoulder must be nice and square if your swivel is to work easily and true. After the piece has been brought to the shape shown in Fig. 287, I make the tug by taking a piece of 1/2 × 3/4 inch square Norway iron and forging it half round for about five and one-half inches, leaving a square piece (about five-eighths of an inch) at both ends to make the head. I then bend it around, take a good soft heat, weld it up and punch the head, which must be 1 inch × 3/8 inch and round. I then forge the tug down so as to make it go in the top, as shown in Fig. 287. After it has been put in, I take a very thin punch and open the tug up, as shown in Fig. 288, and weld the top together. This makes a very good swivel, and it can’t freeze up in cold weather.

Making a Log-Chain Swivel by the Method of “J. H. H.” Fig. 283—Showing how the Fuller Marks are Made

Fig. 284—Showing how the Ends are Drawn

Fig. 285—Another Illustration of the Method of Drawing the Ends

Fig. 286—Showing how the Ends are Bent Up
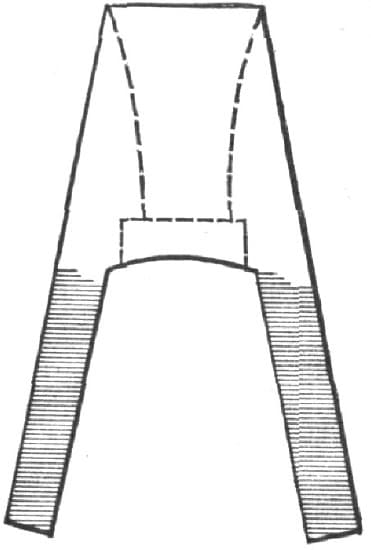
Fig. 287—Showing how the Ends are Flared Out
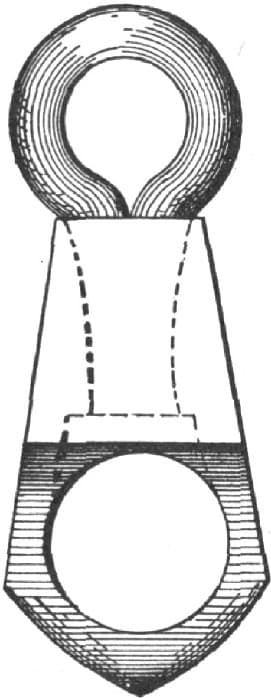
Fig. 288—Front View of the Swivel, Showing how the Tug is Opened Up
The dotted lines in Fig. 287 show how the end must be flared out to give the tug a chance to open. This is what they call a bar swivel. The mandrel must be just the right size for the head, and be driven hard enough to let the head of the tug draw out of sight. After the processes described have been carried through, warm the swivel up all over, then take it to the vise to finish it. Fig. 288 is a front view of the swivel. Fig. 289 is a side view. Fig. 290 shows the mandrel. Fig. 291 represents the tug before bending, and in Fig. 292 the tug is shown ready for the swivel.—By J. H. H.

Fig. 289—Side View

Fig. 290—The Mandrel

Fig. 291—The Tug Before Bending

Fig. 292—The Tug Ready for the Swivel
Making a Log-Chain Swivel.
PLAN 3.
To make a log-chain swivel cheaply and quickly, take a piece of round iron one size larger than the wire in the chain, flatten about six inches quite thin and turn at a right angle and a square corner as in Fig. 293. Then chamfer the out corner with a flat punch to get a lap, then commence at the end of the flat part and roll it up to the round, leaving a hole of about half an inch for the swivel for a three-eighths inch chain, as shown in Fig. 294. Then cut off the round about five inches from the corner, scarf the end short, thin and wide, and turn it on to the other side. Next take hold of the bow thus made, take a good weld and weld it on the horn as in Fig. 295. Hold your hand higher than the horn and you will get a tapering hole. Then take a piece of the same round iron, bend over about three inches, flat them together a little, and turn and weld a ring for a head, finish it up over the corner of the anvil and cut it off so that both ends are of the same length, as in Fig. 296. Heat the swivel, drive it through, open the ends as in Fig. 297, and turn and weld as you would a link. Then heat the whole and work loose, and the job is completed. Use a light hammer when welding.—By HOME.
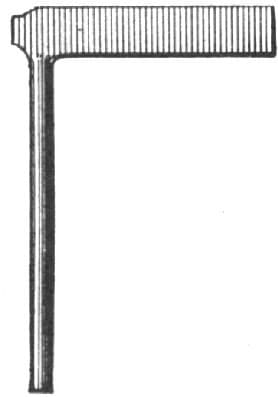
Making a Log-Chain Swivel. Fig. 293—Showing the Iron Flattened and Turned

Fig. 294—Showing how the Hole is Made for the Swivel

Fig. 295—Showing how the Bow is Made

Fig. 296—Showing how the Other Piece is Bent and Cut Off
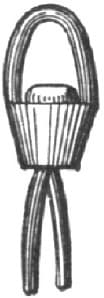
Fig. 297—Showing how the Two Pieces are Joined
Making a Swivel for a Log Chain.
PLAN 4.
To make a swivel for log chains, I first forge the piece shown in Fig. 298, making the hole by punching. The stem, shown in Fig. 299, should be made large enough to fit the hole in Fig. 298 neatly. A is a washer used when fitting the stem in the hole. The washer should be thick, narrow, flat and smooth, so as to secure an easy revolving of the part. The piece shown in Fig. 298 is then bent as indicated by the arrows, and the iron is kept cool excepting where the bends are made. The ends are left open. The next step is to heat the end of the stem, Fig. 299, to a cherry red, and rivet it to the piece shown in Fig. 298. In doing this use a vise and punch. The punch I use for the purpose is countersunk for a small space on the bottom. The result of this riveting is represented in Fig. 300, and by bending the points together and welding the job is completed as indicated in Fig. 301.—By C. E. B.

Making a Swivel for a Log Chain by the Method of “C. E. B.” Fig. 298—Showing the Piece as Forged and Before Bending
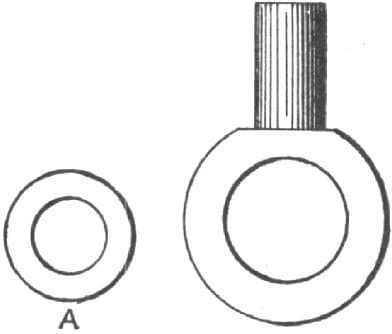
Fig. 299—Showing the Stem and Washer

Fig. 300—Showing the Result after Riveting
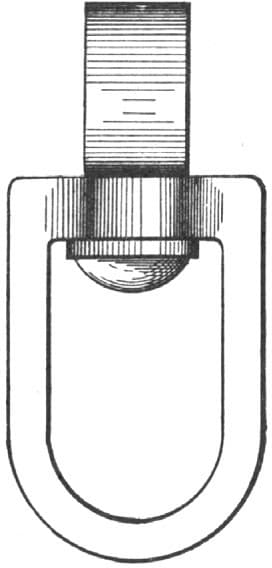
Fig. 301—Showing the Job Completed
Making a Swivel for a Log Chain.
PLAN 5.
In making a swivel to a log chain, I take a piece of good iron and forge it as at A B, Fig. 302, which are edge and top irons, B being a hole. I next forge a piece, C, shown in Fig. 303, and put it through the hole in A, and open out the split to form the eye, and then weld up the ends of A, and the job is complete, as illustrated in Fig. 304.—By H. K.
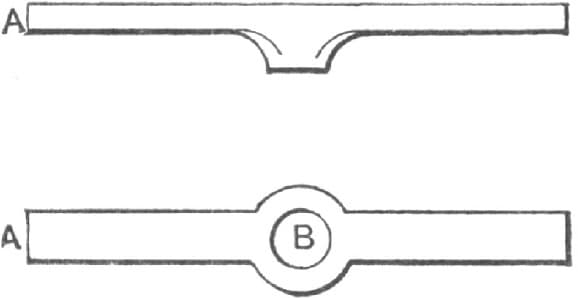
Making a Swivel for a Log Chain, as done by “H. K.” Fig. 302—Showing the Edge and Top Irons

Fig. 303—Showing the Piece used for the Eye
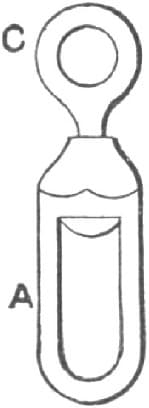
Fig. 304—Showing the Finished Job
Making a Swivel for a Log Chain.
PLAN 6.
My way of making a swivel for a log chain is to: 1st. Make an eye punch of one and one-eighth inch round iron, as shown in Fig. 305. 2d. Take a piece of good iron 11/2 × 1/2 inch, four inches long. 3d. Fuller and draw ends as shown in Fig. 306. 4th. Bend the ends, as illustrated in Fig. 307. 5th. Put in eye punch and work down, as in Fig. 308. 6th. Make the eye as shown in Fig. 309. 7th. Square the top end of the eye and make the washer three-eighths of an inch thick, with a square hole. Heat the end of the eye and washer, put the eye in the vise, put on the swivel, then put on the washer and rivet. Then weld the swivel. When finished (see Fig. 310) it will not be more than four inches long.—By A. S., Jr.

Making a Swivel for a Log Chain. Fig. 305—The Eye Punch

Fig. 306—Showing how the Ends of the Piece are Fullered and Drawn
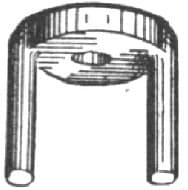
Fig. 307—Showing how the Ends are Bent

Fig. 308—Showing how the Eye Punch is Used
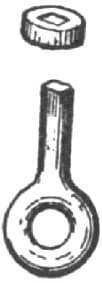
Fig. 309—Showing how the Eye is Made
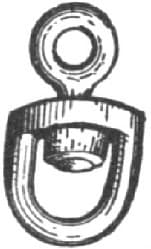
Fig. 310—The Finished Swivel
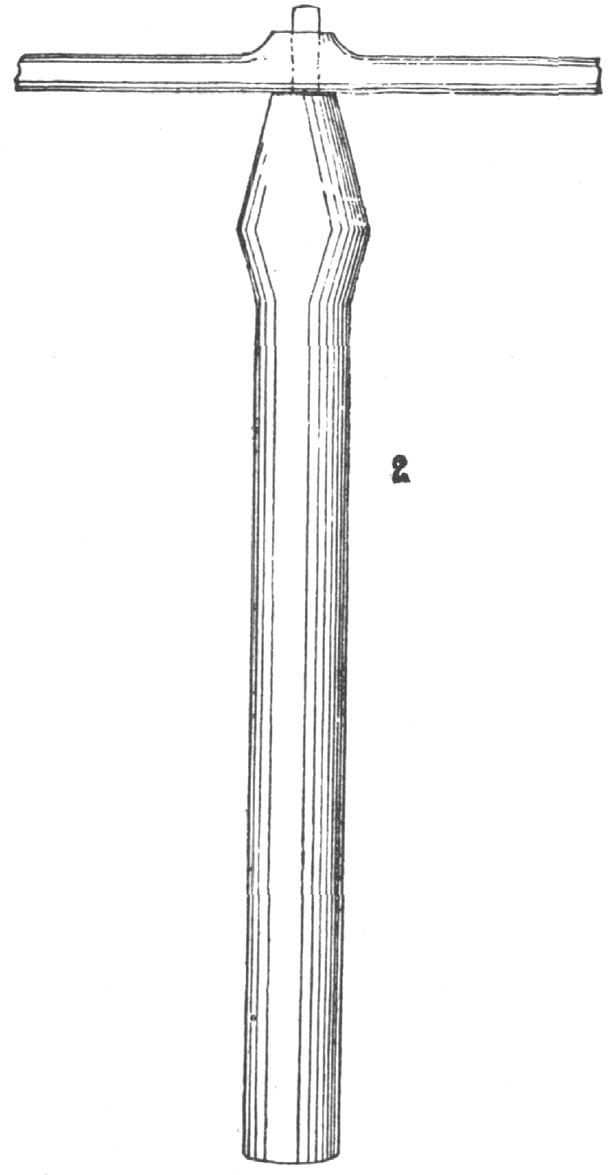
Making a Swivel by the Method of “J. E. N.” Fig. 311—Showing the Shape of the Ends and the Tool used in Bending
Making a Swivel for a Log Chain.
PLAN 7.
I think the best way is to make the link of square iron, drawing off the ends, as shown at 1 in Fig. 311, and leaving a heavy center in which the eye is to be punched. When the bending is to be done use the tool marked 2, Fig. 311. Then finish on a swage, rivet the swivel eye in hob, weld the ends of the swivel link, and while hot turn the eye around a few times. Then cool off, and the result will be a swivel as shown in Fig. 312.—By J. E. N.
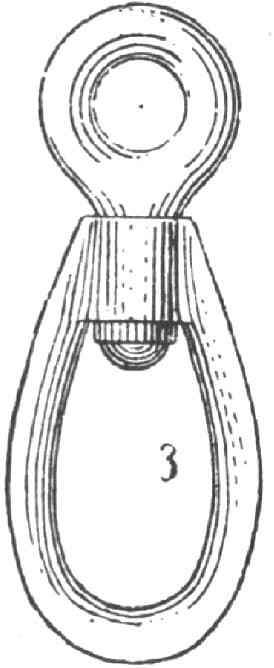
Fig. 312—The Swivel Completed