04 Molds
Steps for Making Hump Molds
There's a lot of flexibility with handbuilding, particularly with slab work. When you combine slab with molds, for instance, it can take endless forms. If you've hit on a style of bowl, or dish, or platter, or vase that you like to make over and again, using a mold is a great way to go.
Hump molds, also known as drape molds, are made when a slab of clay is draped over a form. The form, or mold, is typically made from plaster or clay. Personally, I don't use plaster molds because they're less durable and more complicated to make. I make my molds from clay because, after they're bisque fired, I can use them indefinitely.
You can also make a mold from found objects, such as wooden and plastic dishes. To do this, you'll need to either coat the dish with cornstarch or oil or cover it in fabric to prevent the clay from sticking. Roll out a slab of clay 1/2" (1.25 cm) thick and drape it over the prepared dish. When the slab becomes leather-hard, remove it and let it dry. Bisque it, and that is your mold.
To make a custom mold, I use a clay called Purge from a local ceramic supplier. This is a very cheap clay body guaranteed to fire just to cone 04. Since the mold only needs to be in bisque form, cone 04 is fine. Check with your ceramic suppliers to see what they have available for a cheap, low-fire clay body.
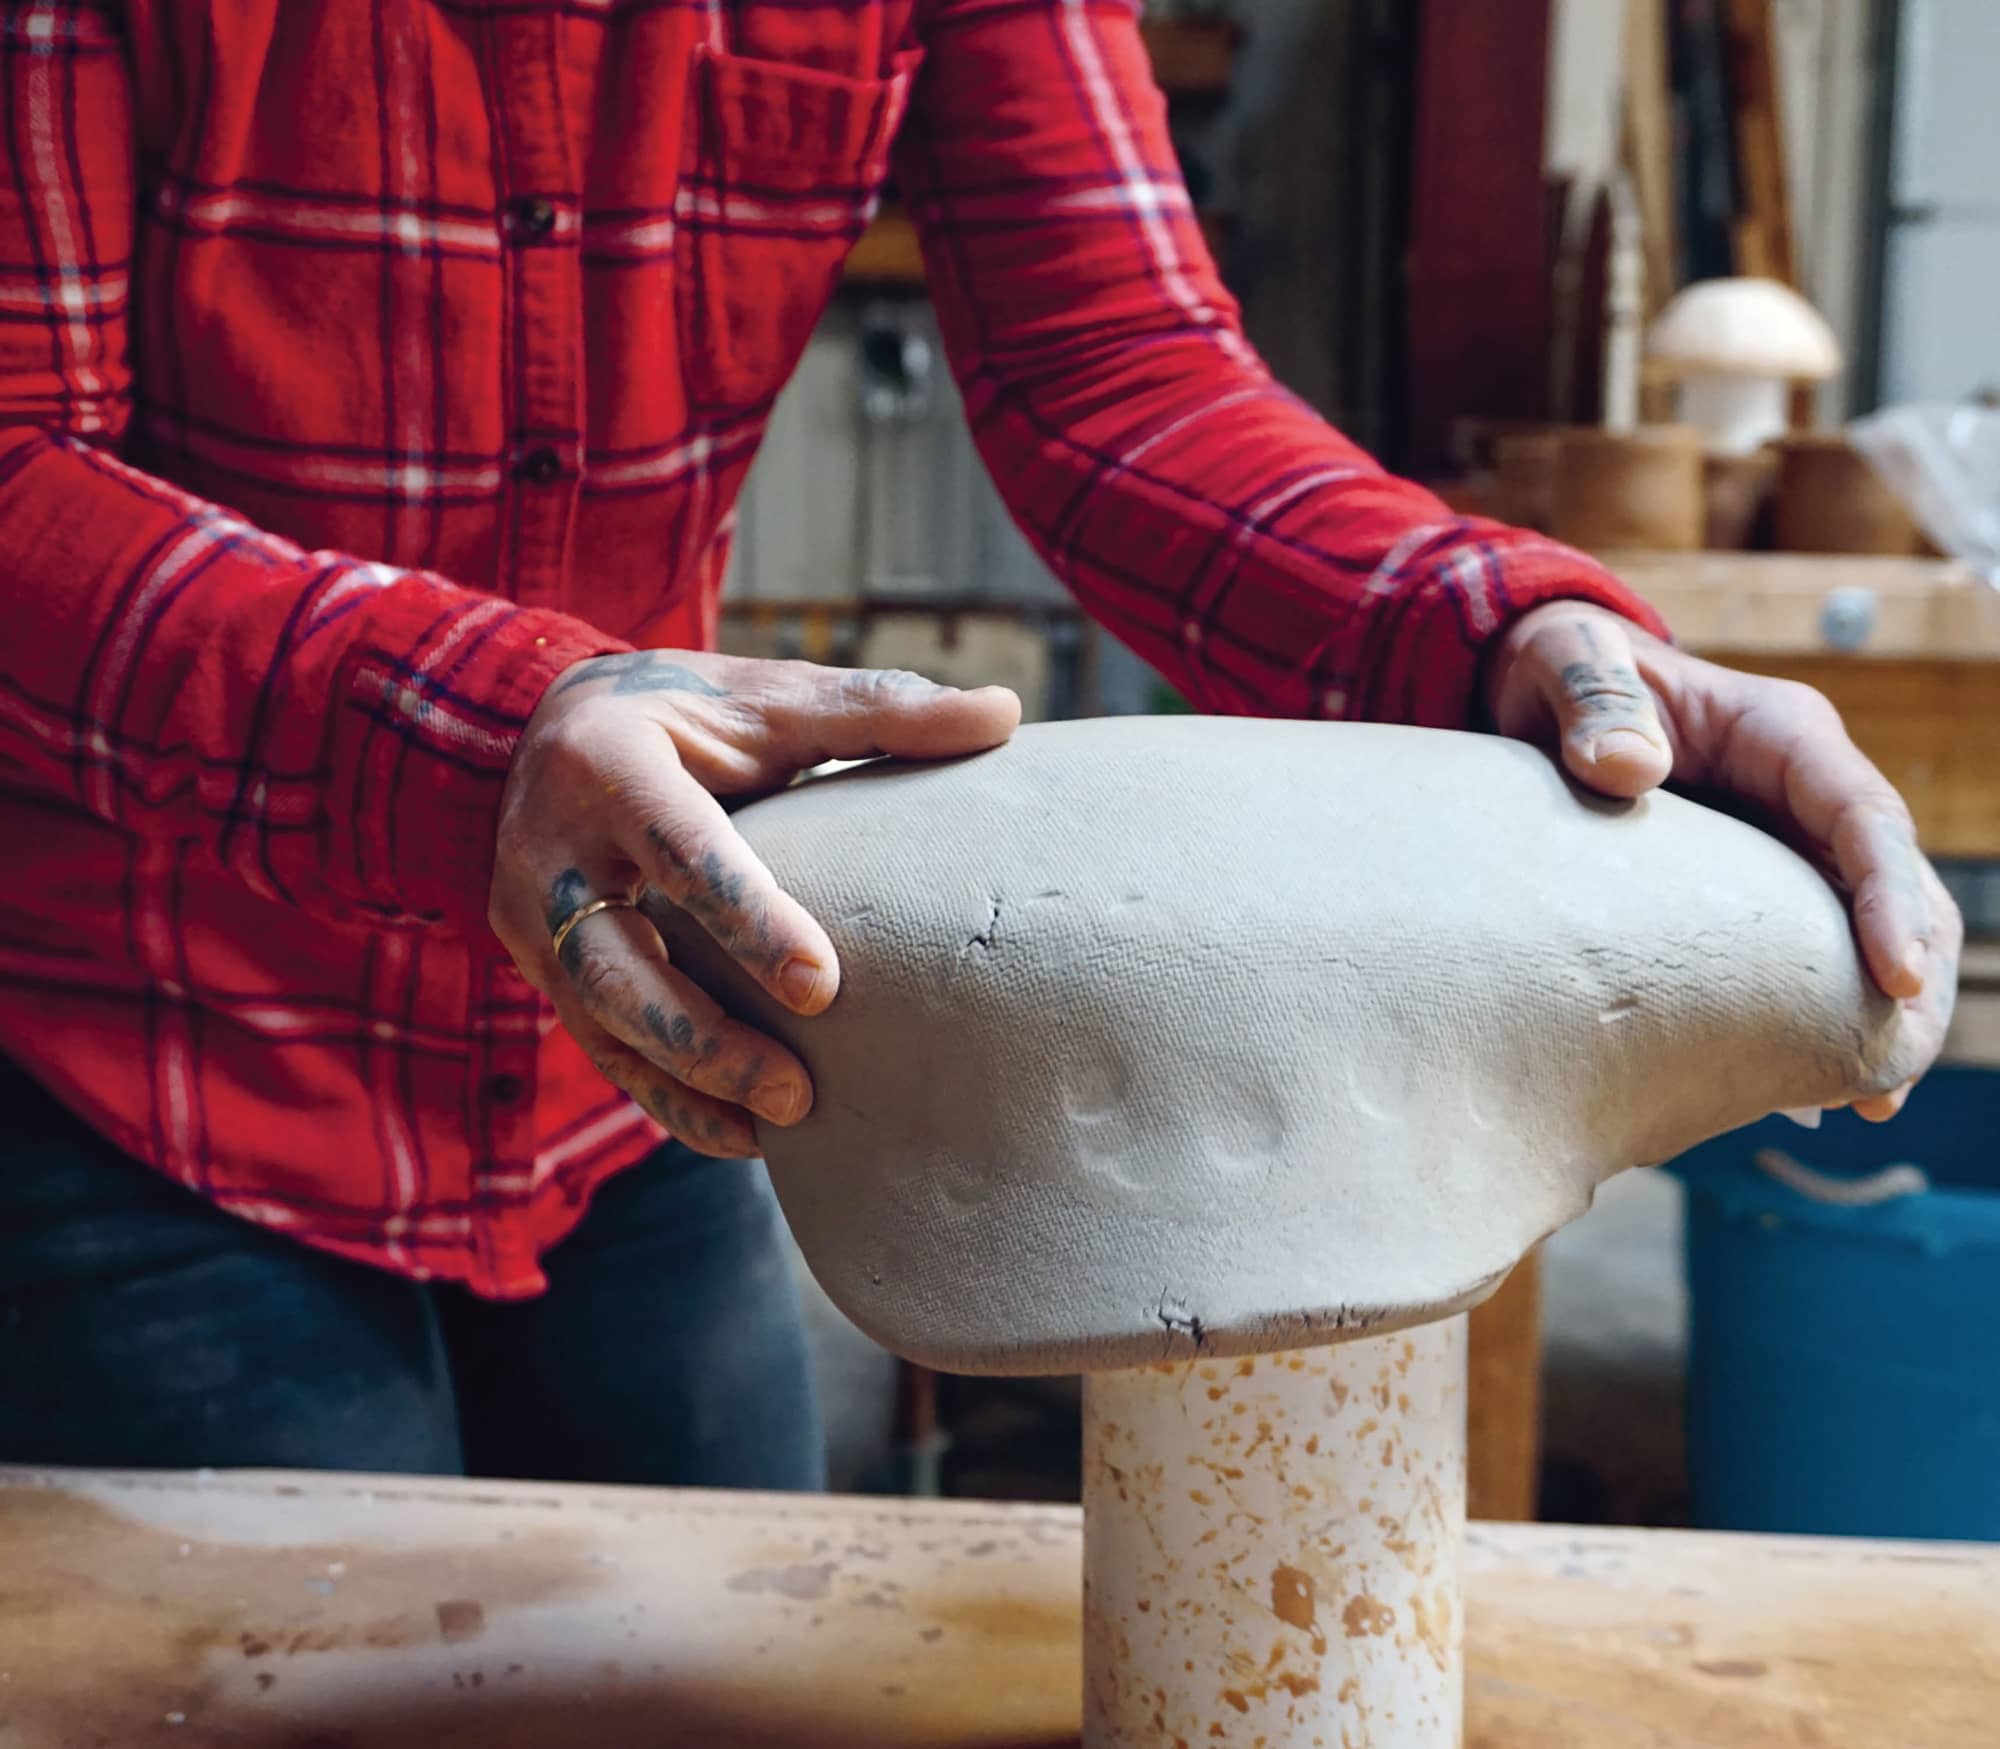
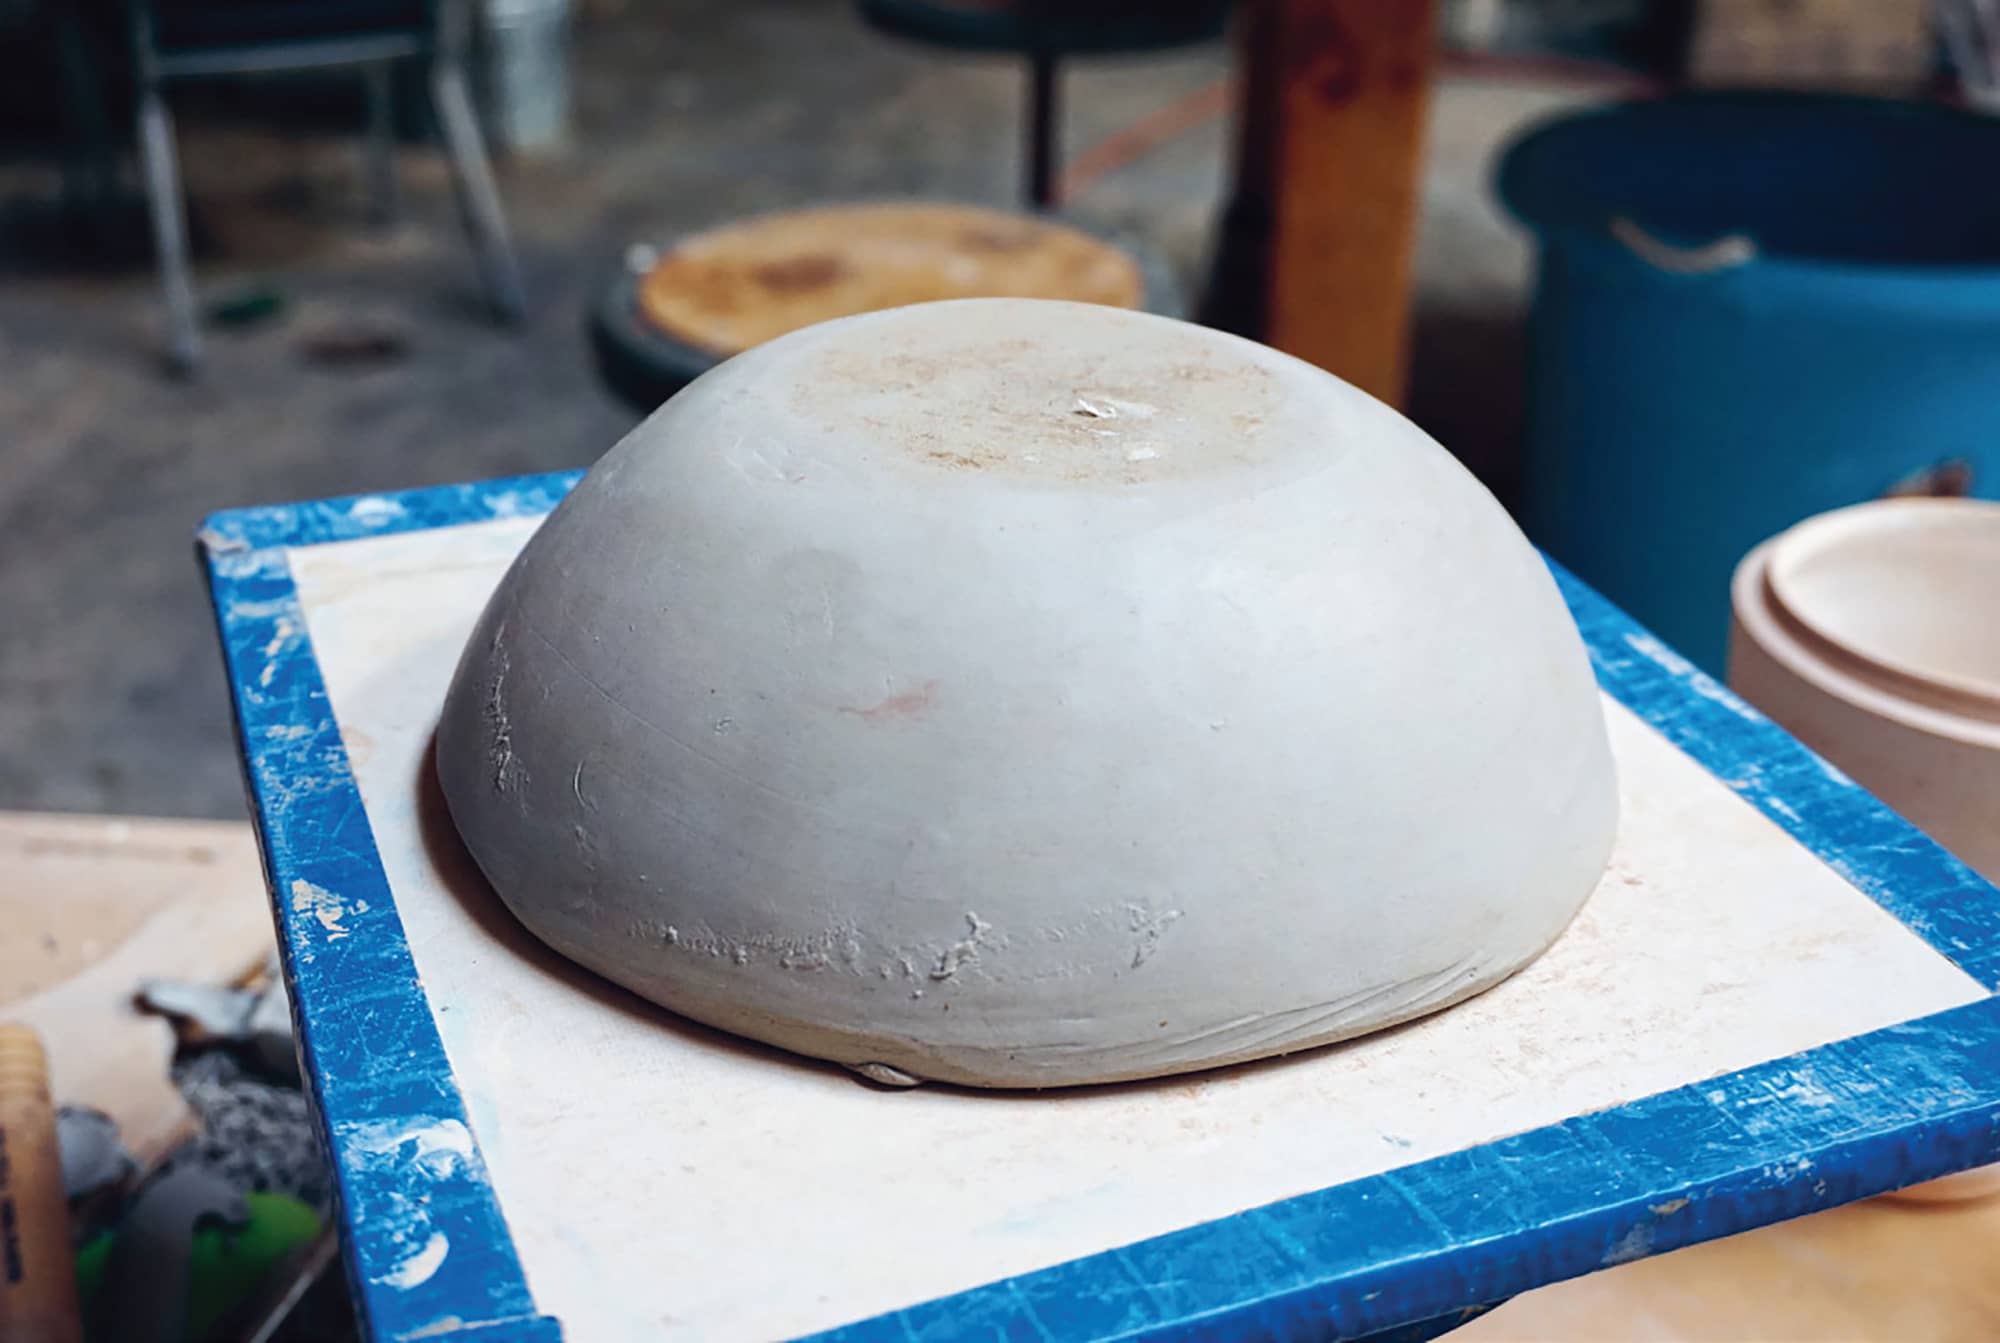
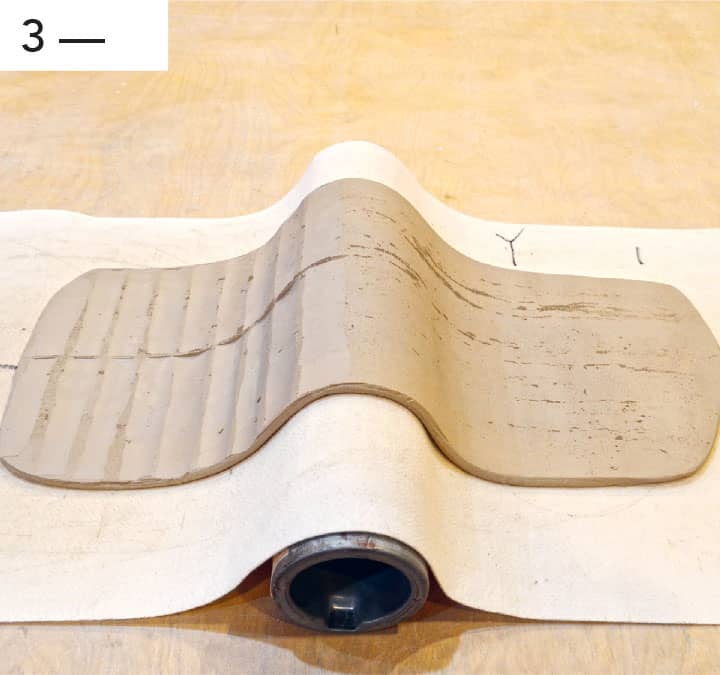
In making a mold, I start with a block of clay about the size of the dish I ultimately want to create, taking the depth, the slope of the sides, and the shape into consideration.
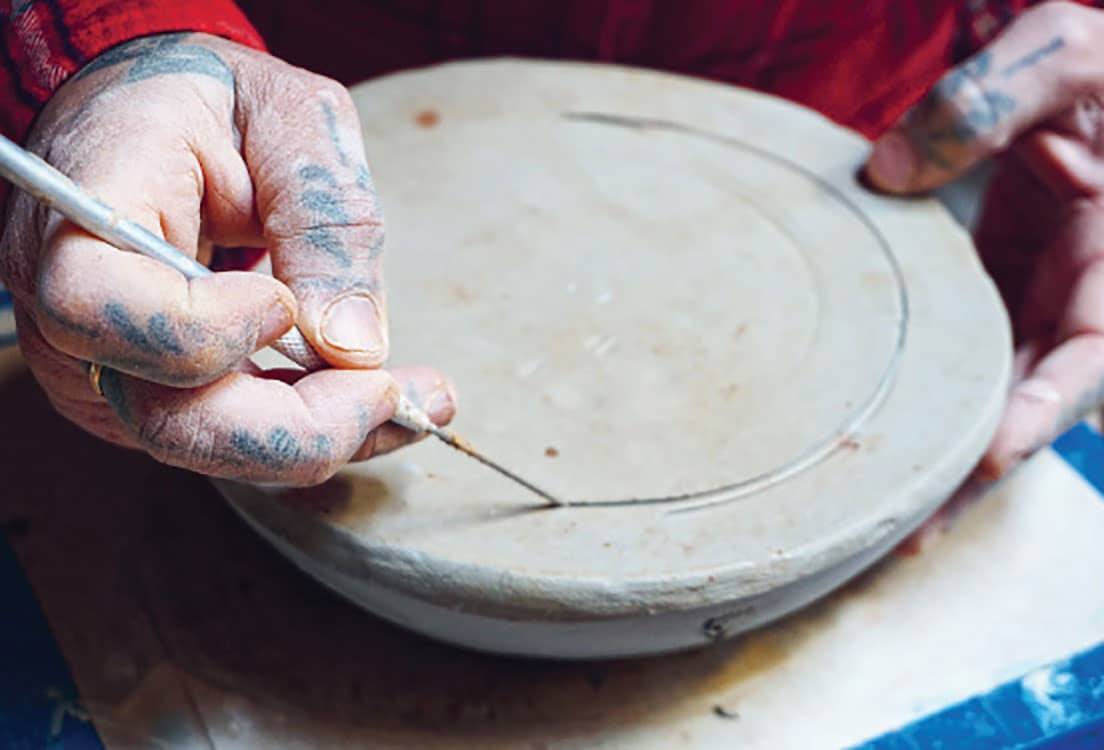
CREATE A SHAPE WITH A GRADUAL SLOPE TO THE SIDES.
Start with the shape of dish you want to make—square, round, oval, etc. Using your hands, pound and roll the clay into the rough shape. Hump molds tend to be most successful when they don’t have steep sides, so I try to create a mold with sides that slope gently, without creating an angled transition from the bottom to the sides. Think of a gradual slope, as opposed to a sharp turn. The degree of the slope will determine the shape of the sides of your dish and the size of the flat bottom. When you get the shape of the mold where you want it, set it aside, and let dry to leather-hard.
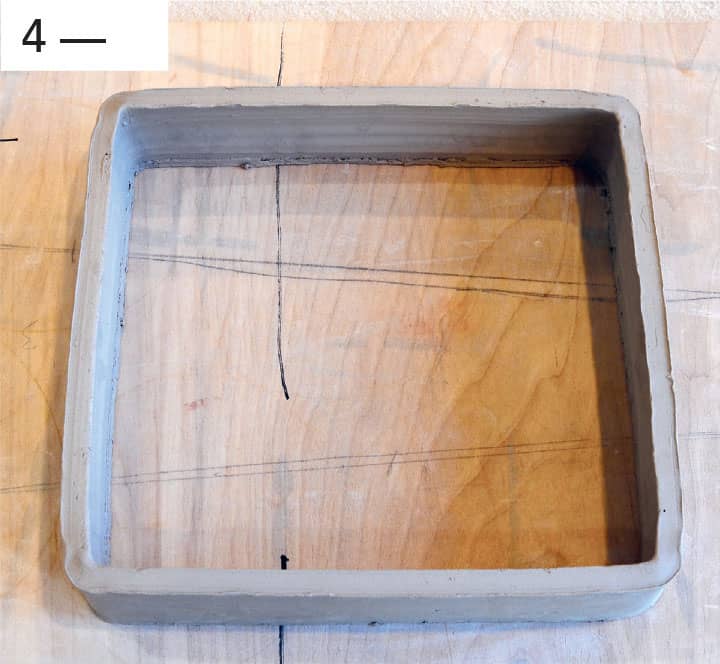
When the mold is leather-hard, use a surform to refine and hone the shape. Look at it from different angles to make sure it’s even.
“You can make molds from found shapes.”
USE THE SURFORM TO REFINE THE SIDES WHEN THE THE CLAY IS LEATHER-HARD.
Every dish you pull from this mold will be the same shape, so if something bothers you about it, or isn’t just right, this is the time to fix it.
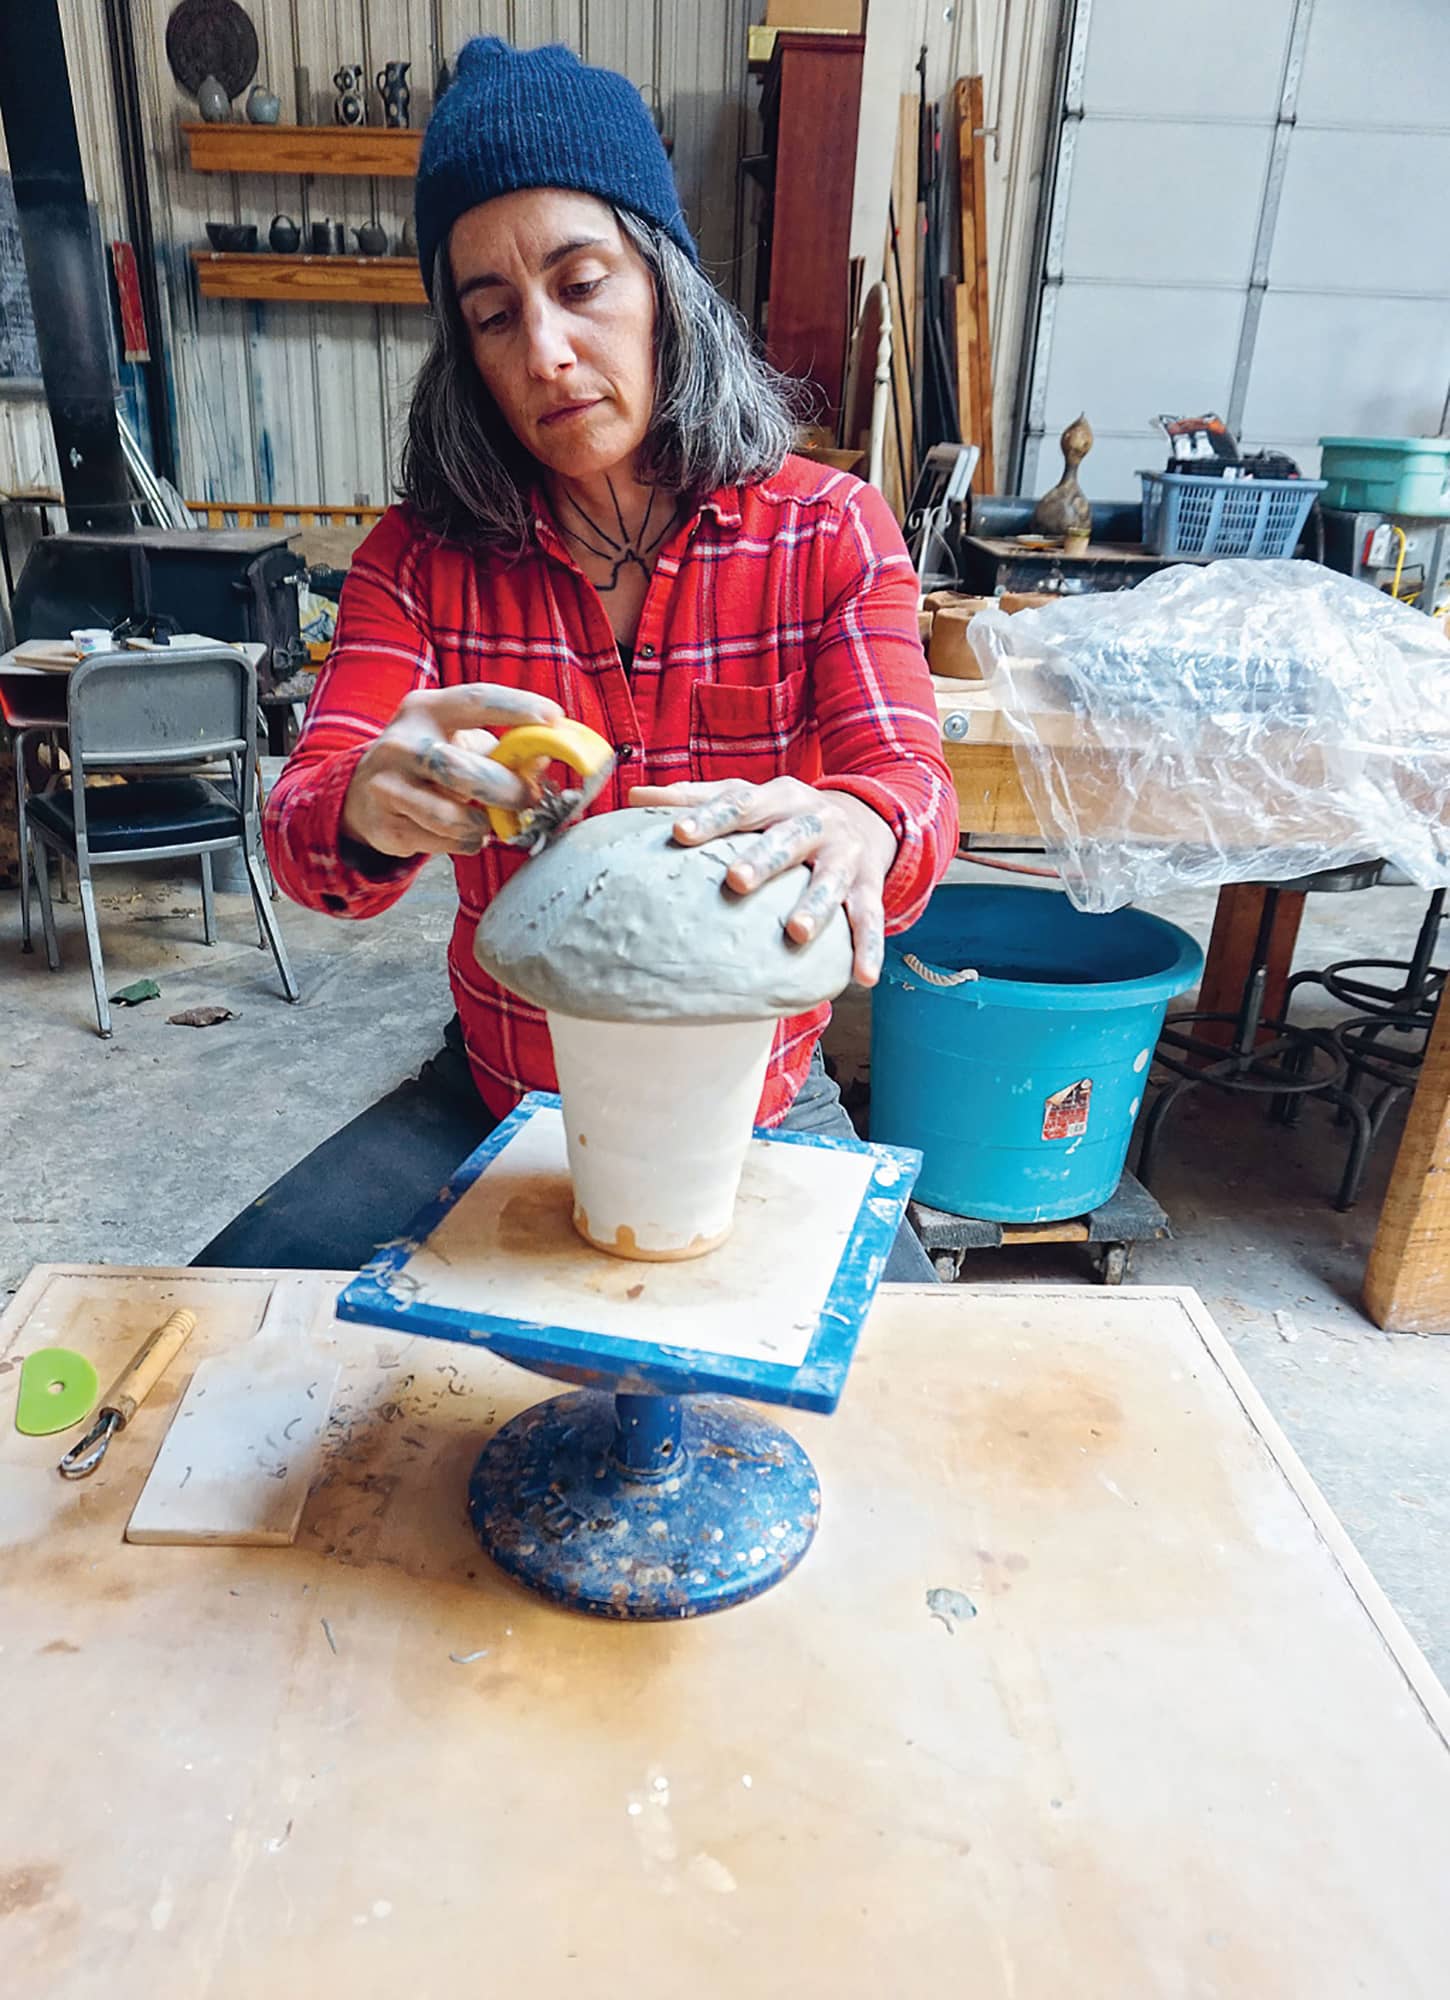
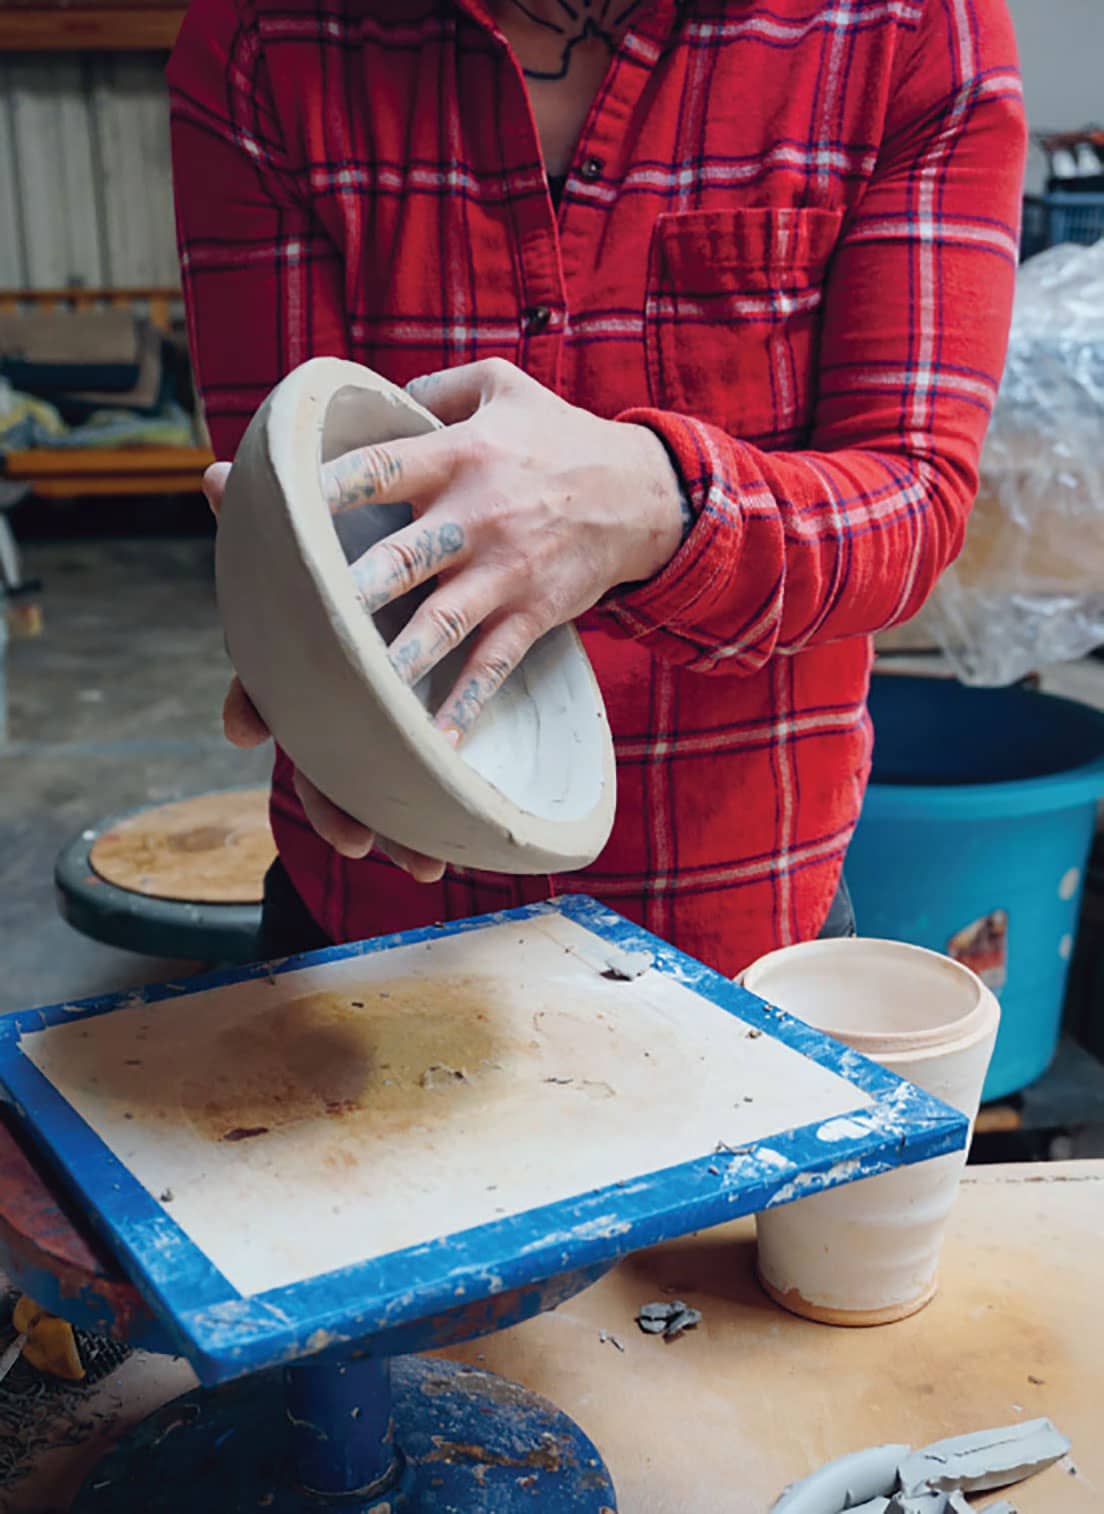
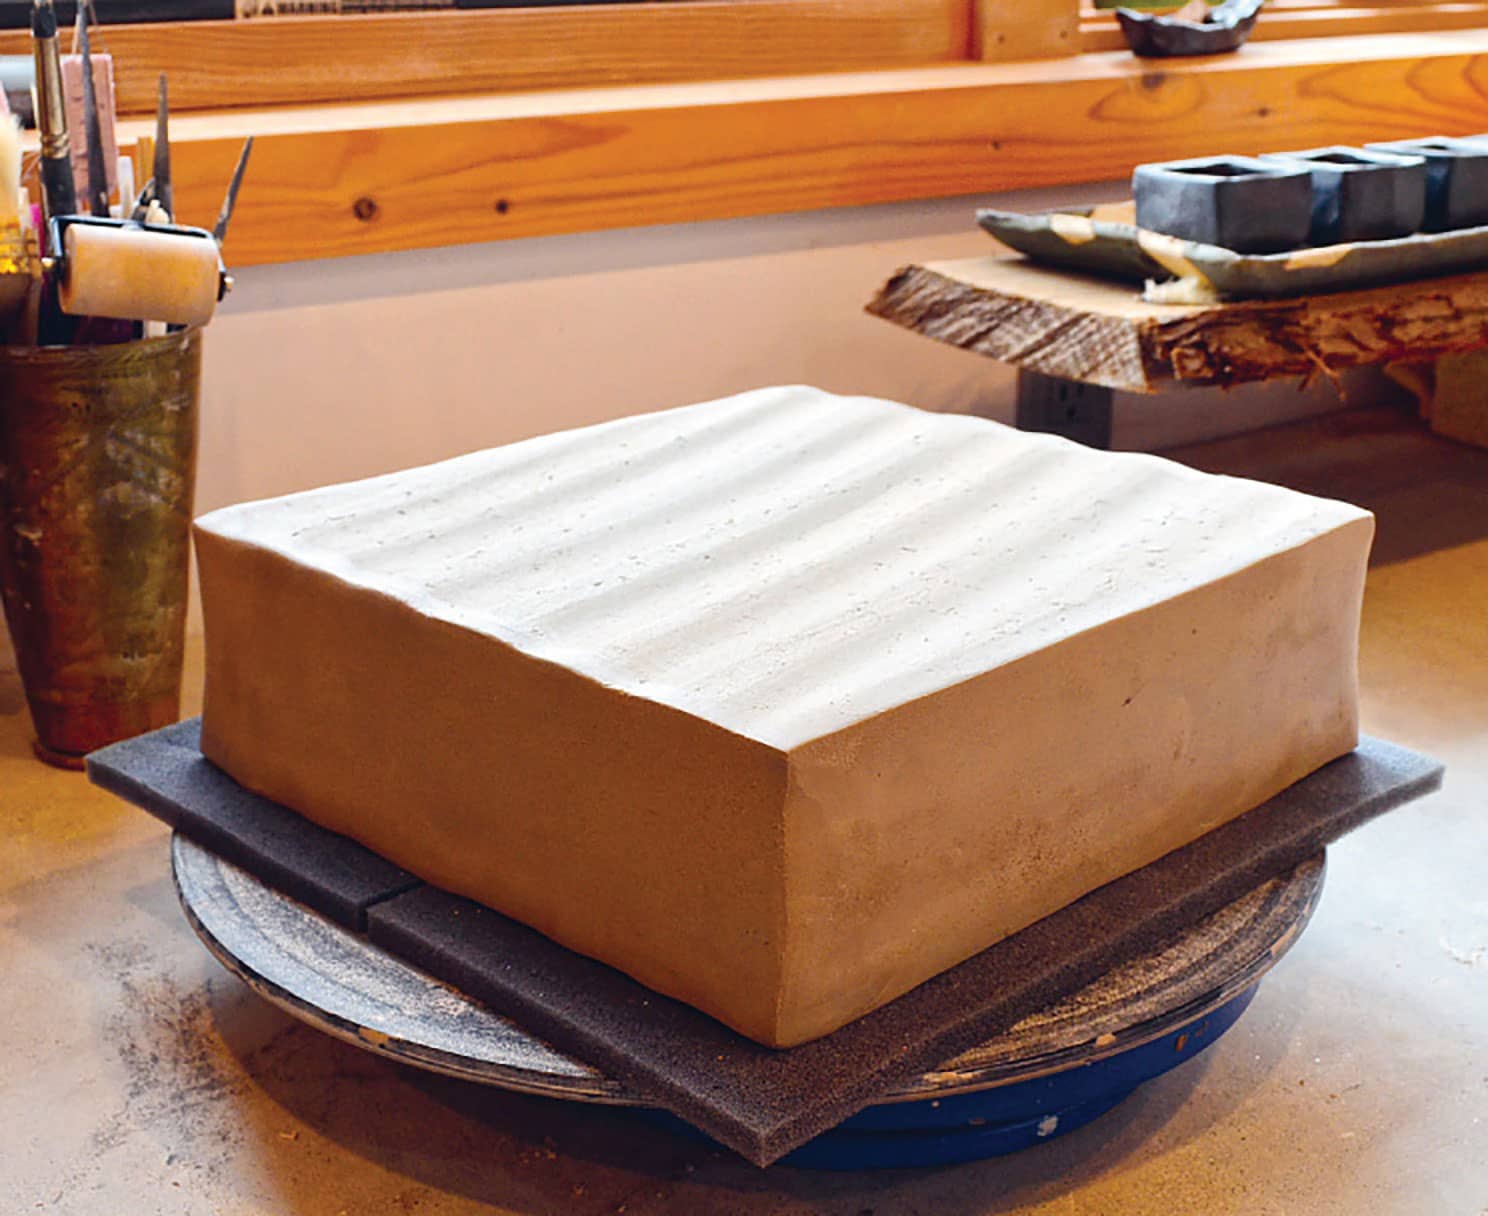
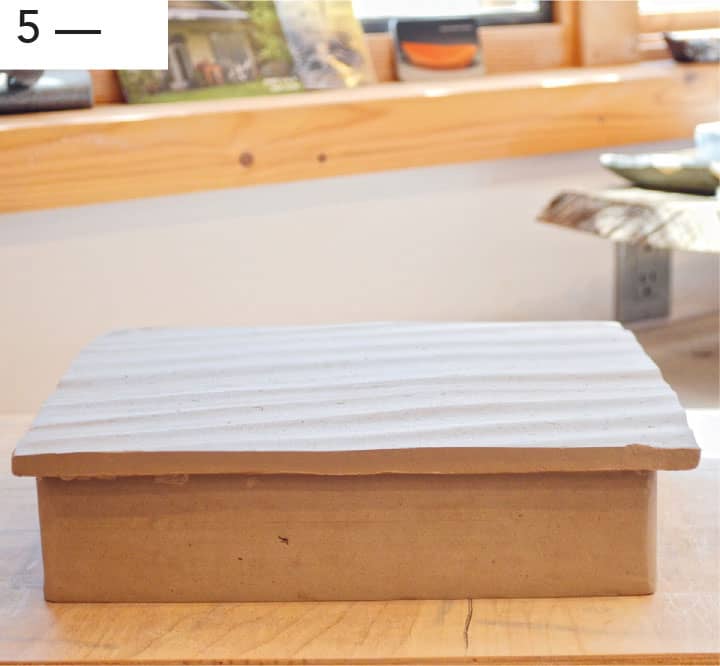
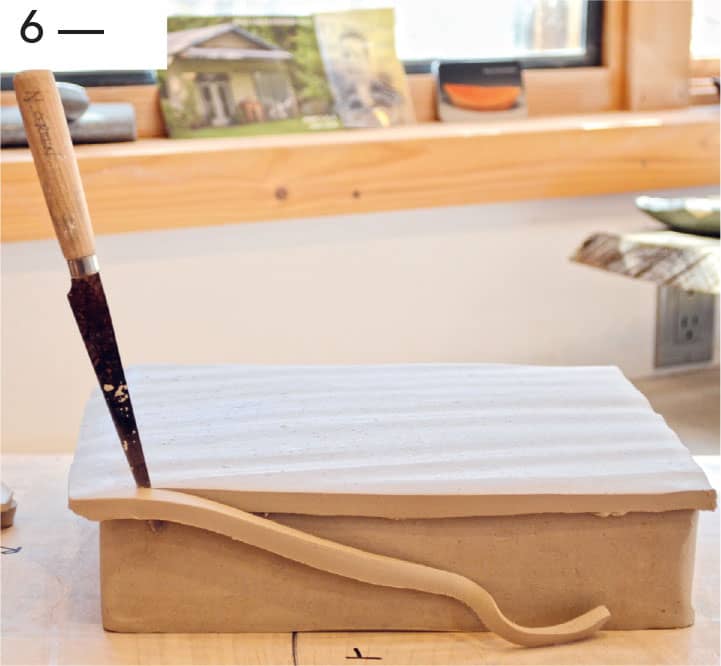
When it’s just the way you want it, flip it over and hollow it out with your carving tool. The sides and bottom of the mold should be no less than 1/2" (1.25 cm), preferably closer to 1" (2.5 cm) in thickness.
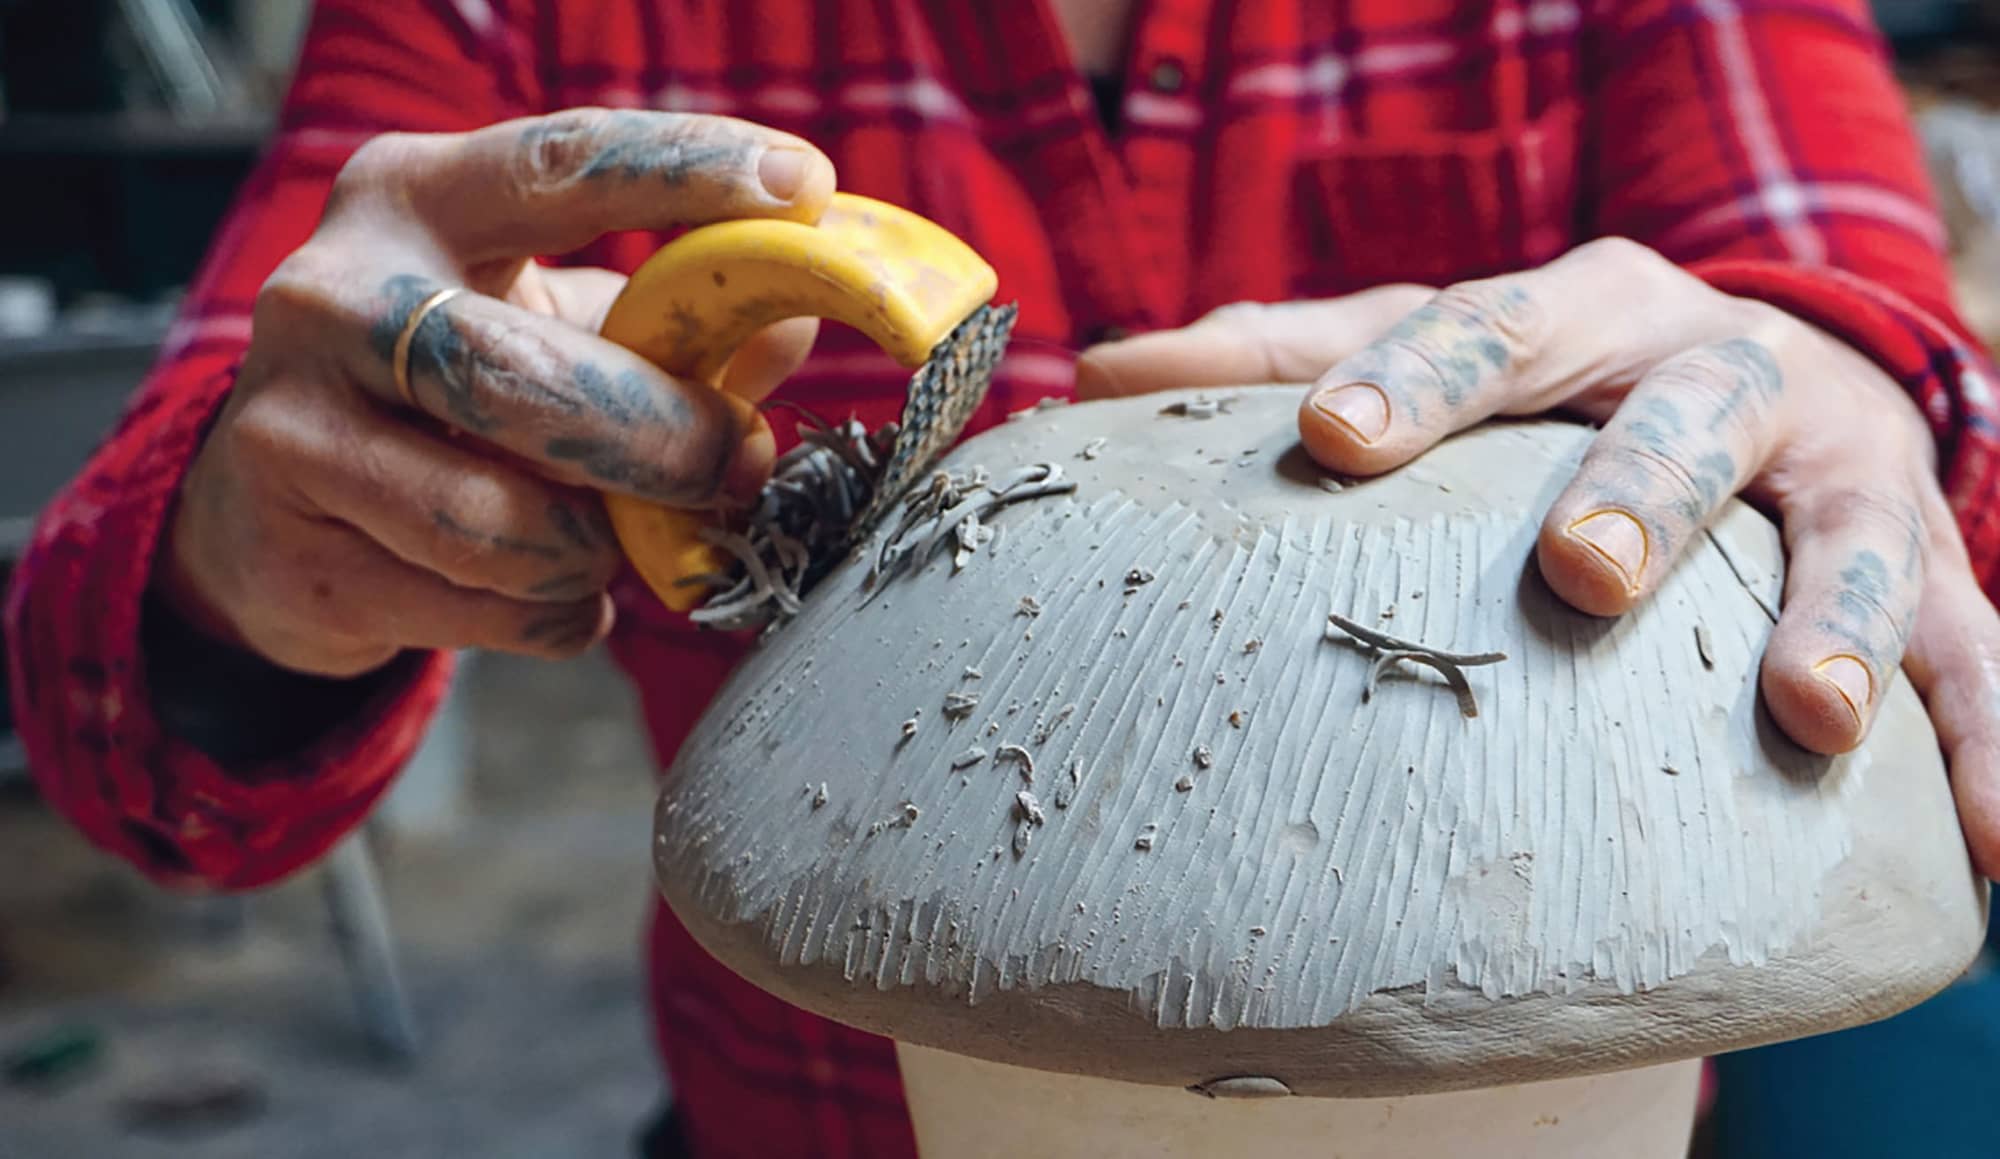
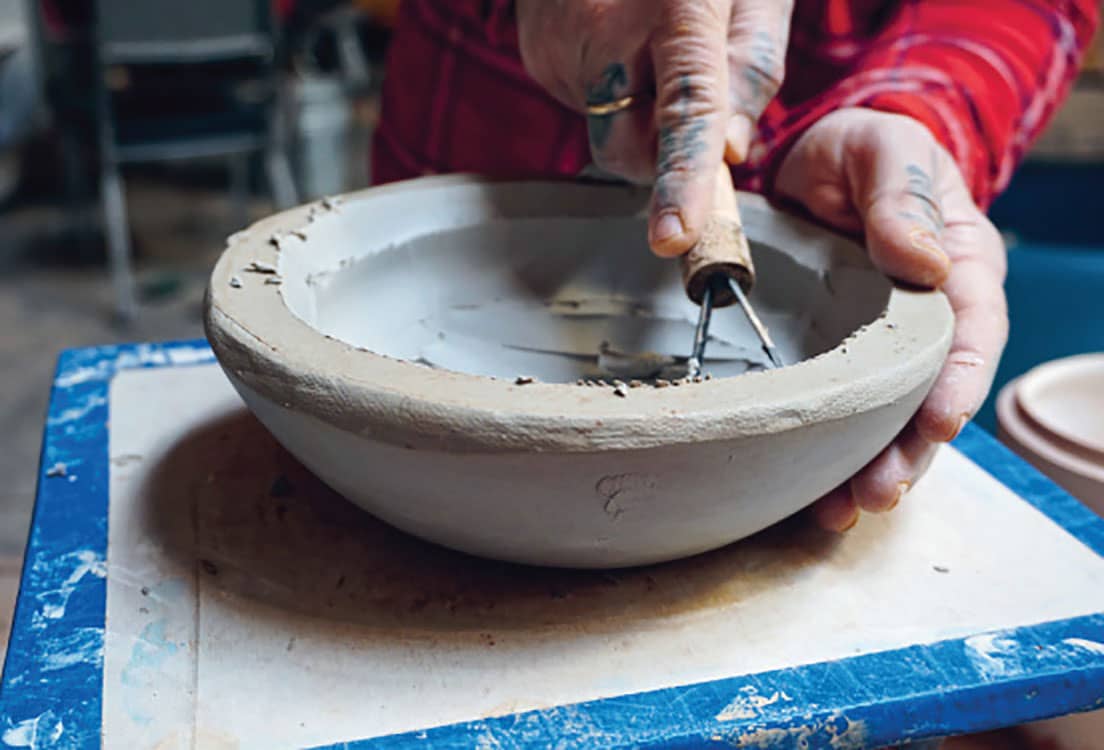
Flip it back over and remove all the carving marks with a rib. I like to hollow the mold right after finishing the shape, because you can apply a lot of pressure on the mold then. Every single mark will show up on every pot you make with this mold, so make it as clean as possible.
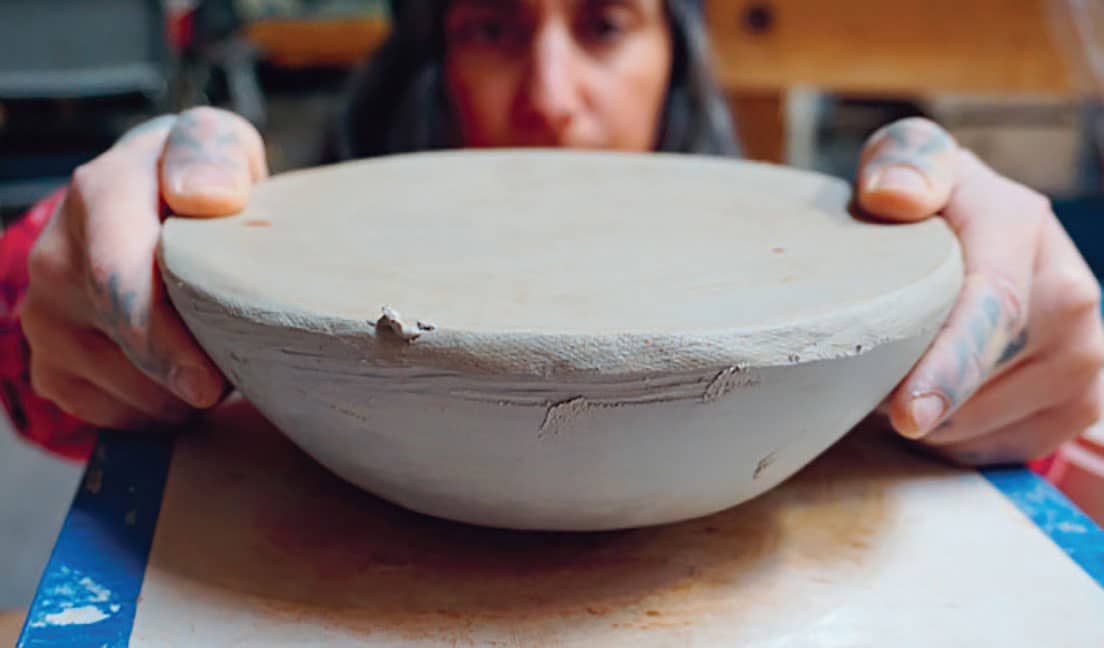
Remember that the outside of your mold will be the interior of your dishes. Let your finished mold dry slowly to prevent cracking. Fire to bisque temperature 04–06. Your mold is now ready to use and can be used indefinitely.
THE SIDES AND BOTTOM SHOULD BE NO LESS THAN 1/2"(1.25 CM), PREFERABLY CLOSER TO 1"(2.5 CM)
FLIP IT OVER AGAIN AND REMOVE ALL THE CARVING MARKS WITH A RIB.
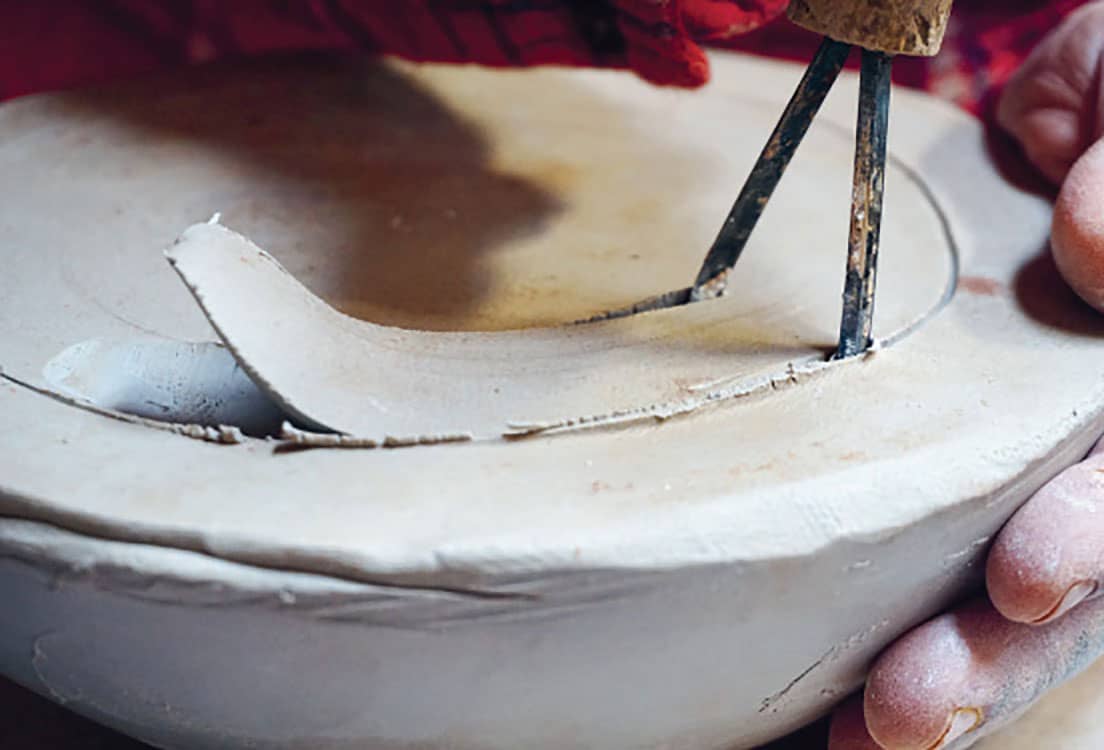
BEGIN TO HOLLOW OUT THE PIECE
REMEMBER THAT THE OUTSIDE OF YOUR MOLD WILL BE THE INSIDE OF YOUR DISHES.
Guest Potter Interview: Nancy Green
Casual, Comfortable, Elegant, Quiet Clay
MW: HOW DID YOU GET STARTED IN CLAY?
NG: My start in clay came from a casual exchange with a neighbor and friend. She asked me if I had ever been to one of Liz Lurie’s sales. I said, “No, why would I want to go and what does she sell?” She said, “Liz makes pottery, and I think that you would like her work.” Long story short, I started going, and after two years of attending Liz’s studio sales, Liz said to me “You know, Nancy, you could make pots.” Within weeks I was taking classes at a local ceramic center.
MW: WHAT ARE YOUR MOST ESSENTIAL TOOLS?
NG: I have a few favorites. In no particular order, these are the things I always have around: Thick backing material; 4" (10 cm) diameter tube about 18" (45.7 cm) long; Sherrill wire-cutting Mudtool; a big, heavy rolling pin; wood slats; a Sherrill red flexible rib; a fine-toothed scoring rib; a banding wheel; bats; and a fettling knife.
MW: YOUR POTS EXPRESS COMFORT AND FAMILIARITY AND SPEAK OF THE LIFE OF A STUDIO POTTER AS A SIMPLE, PRACTICAL LIFE. IS THAT YOUR LIFE?
NG: My pots, like my life, are simple, minimal, unadorned, casual, and comfortable. They are quiet but elegant, in a nonfussy kind of way. They mirror the practicality of how I move through life.
MW: WHAT IS YOUR FAVORITE FORM TO MAKE?
NG: Hollow forms—trays and vases. I like to make walls by throwing a bottomless cylinder—change the cylinder’s shape while it is still flexible but not tacky—cut portions of the wall away, and add a textured slab to the top and bottom. Some forms are turned up on a side into a vertical orientation and an opening is cut in the top to make a vase. Forms that remain horizontal are either round, square, wedge-shaped, or boat-shaped.
MW: DO YOU MAKE POTS WITH SPECIFIC FOODS IN MIND?
NG: I don’t consciously make forms to serve particular foods, but I am aware of what size tray is necessary for various courses of food one might serve. Serving pieces vary in size depending on their intent for appetizers, main dish, or dessert. A lunchtime plate is smaller than a dinner plate. Bowls vary in size and shape depending on their intent. A larger bowl would be made for a main-meal stir-fry; a smaller bowl for a side of soup, salad, or ice cream.
THE VASE ON ITS SIDE, READY FOR FINISHING
NANCY GREEN’S FACETED SLAB VASE, GLAZED AND FIRED
“My pots, like my life, are simple, minimal, unadorned, casual, and comfortable.”
CONSTRUCTION OF AN ASYMMETRICAL VASE FORM
1 | SLAB WALL
While I start this form with a thrown bottomless cylinder, it can just as easily be started with a handbuilt wall. If handbuilding the wall, I encourage you to start with a handbuilt bottomless cylinder so you can play around with the shape you want to morph it into.
2 | GETTING READY TO ROLL A SLAB AND SLAB ROLLING
I roll out a slab by using a rolling pin and slats. The slab can be made with a slab roller, cut with a wire and cutting sticks, or thrown by hand on a hard surface. Choose the process that you like. You have to enjoy the process, and I like using a rolling pin and slats.
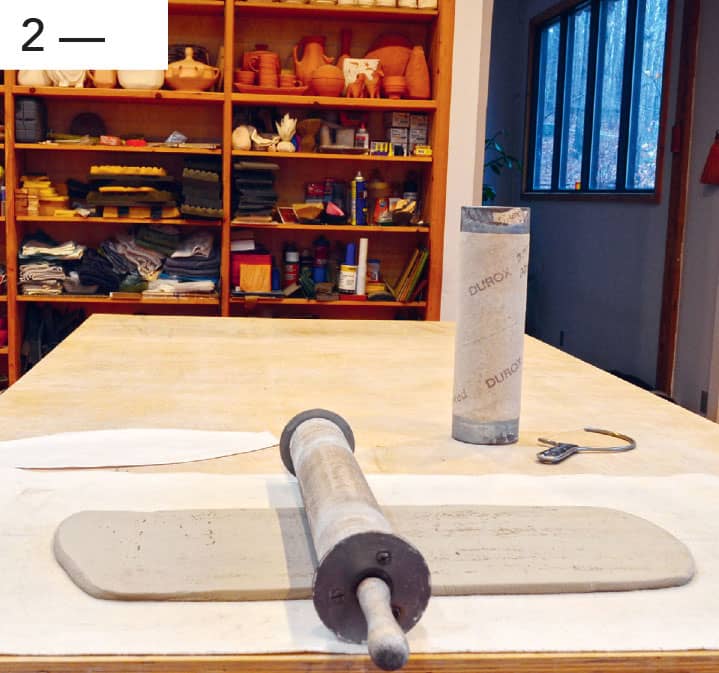
ROLLING THE SLAB
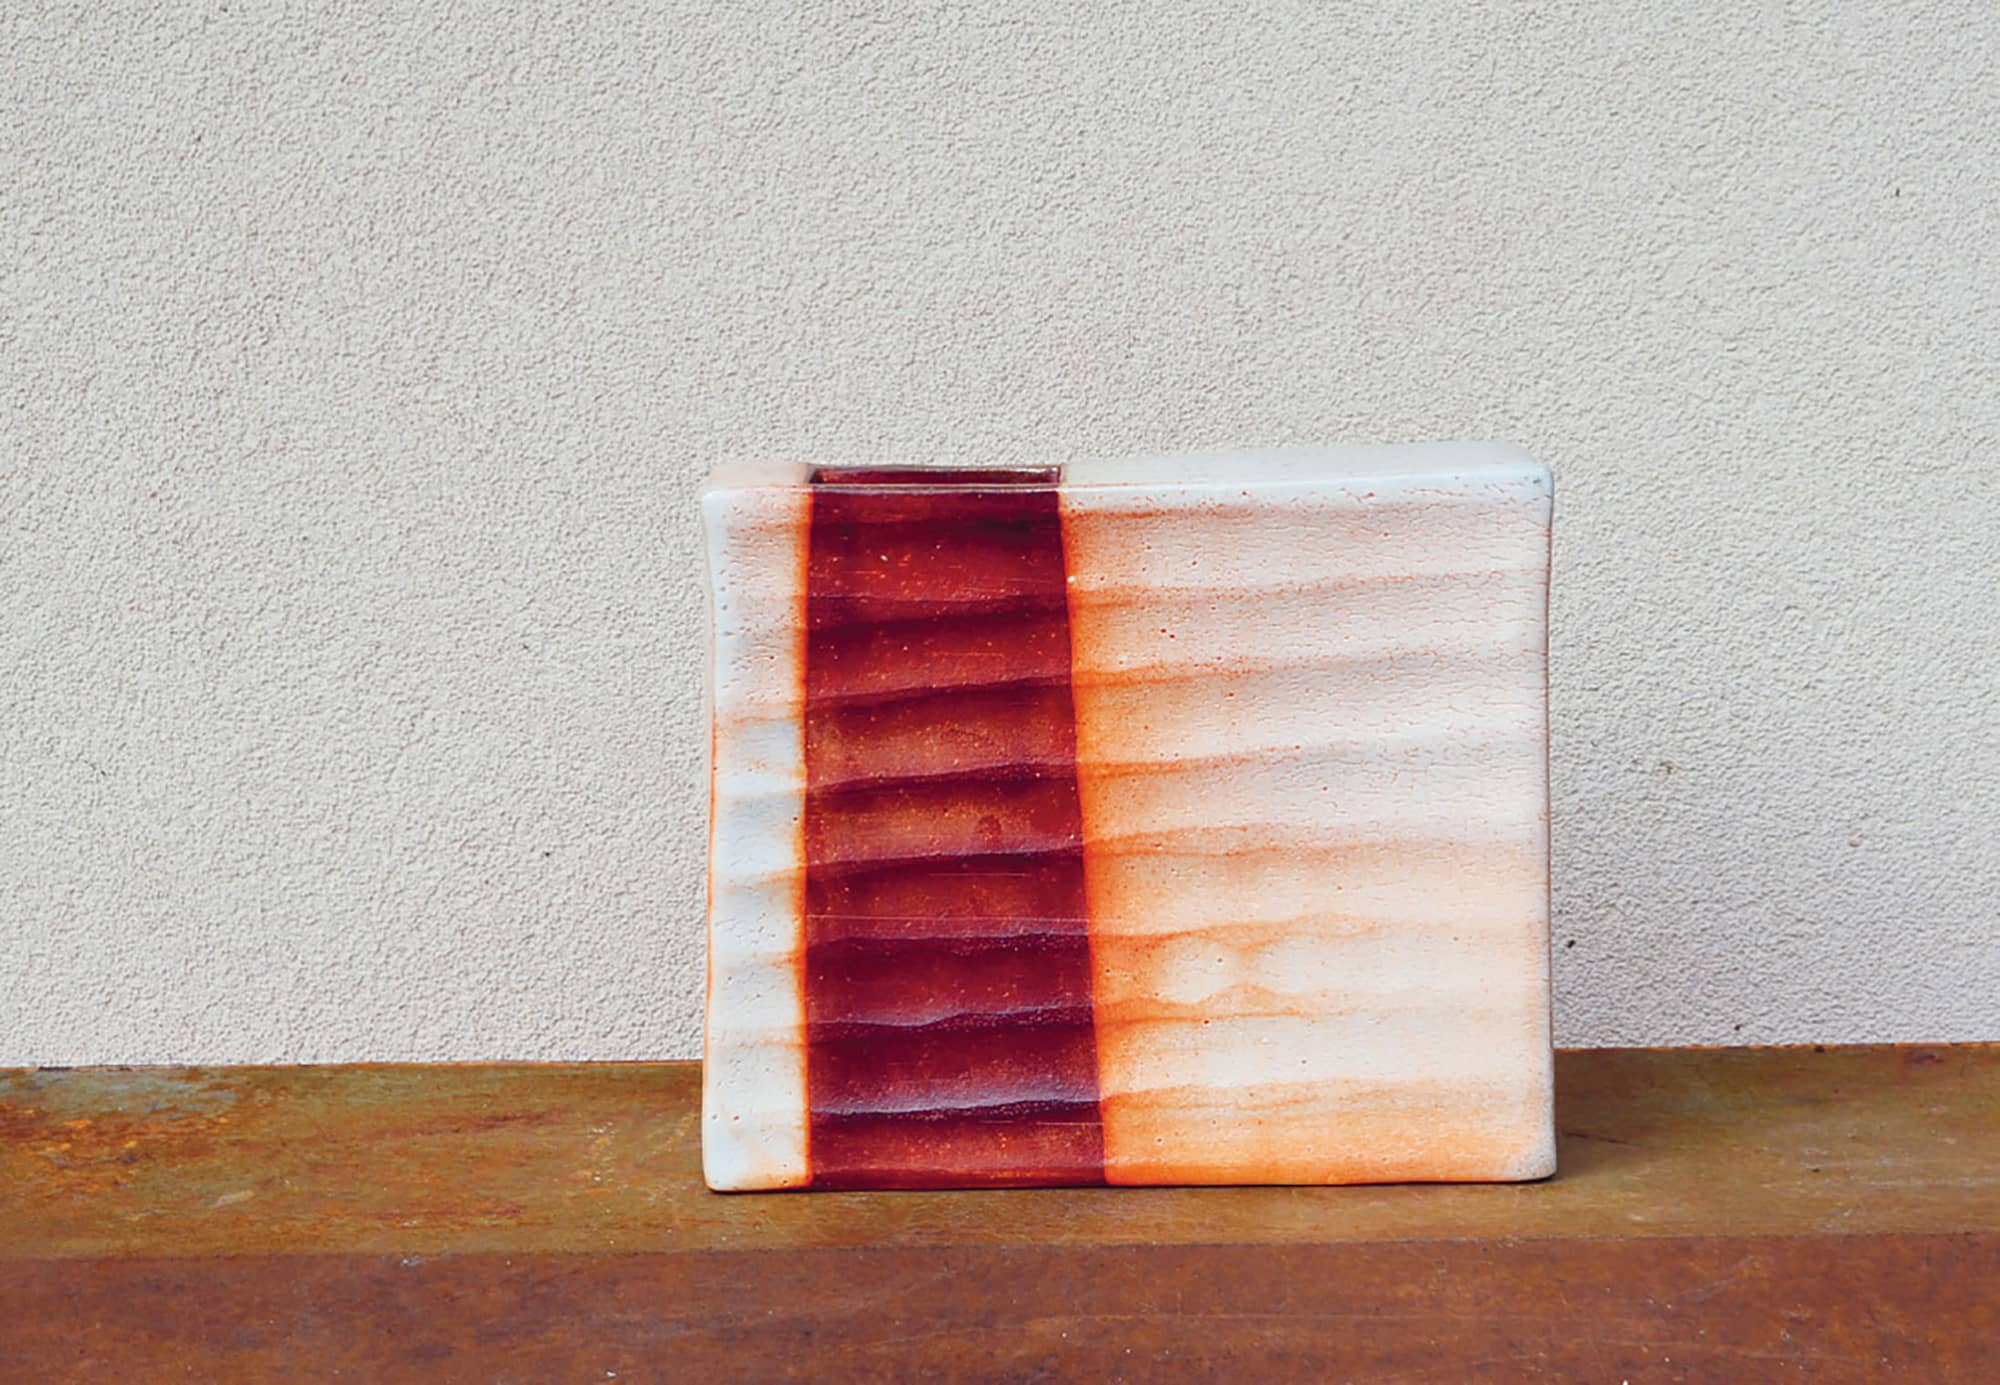
3 | FACETING
I like to use a textured slab that I make by faceting. The facet texture can be replaced by a design that could be anything from sprigging, slip design, drawing, wax resist patterns, decals, or stamping.
FACETING THE SLAB
4 | ROUND WALL INTO A SQUARE BY GENTLE MANIPULATION
I changed the walls from round to square while the walls were no longer tacky to the touch and still flexible.
SLABS CREATING THE WALLS FOR THE VASE
5 | SECURING THE SLAB
The slab is securely attached by first putting slip on the upper wall edge and then ribbing the outer edges of the slab onto the wall of the form.
PUTTING A SIDE IN PLACE
6 | TRIMMING TO FIT
I used a paper pattern to figure out how big to cut the slab. I cut the slab about 1/2" (1.25 cm) larger on each side than the periphery of the walls. Then I trim off the excess and smooth the slab to the walls.
TRIMMING TO FIT
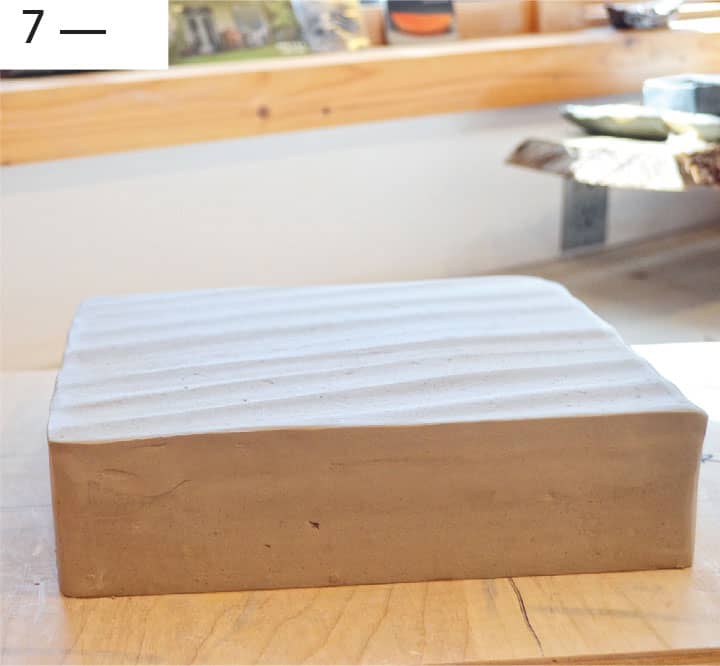
7 | A CLOSED HOLLOW FORM
I outline marks on top of the piece for guidelines to cut an opening for the vase. After I finish cutting, I smooth the edges of the opening.
THE SIDE JOINED WITH THE WALLS
8 | VOILA: MY FIRED ASYMMETRICAL VASE.
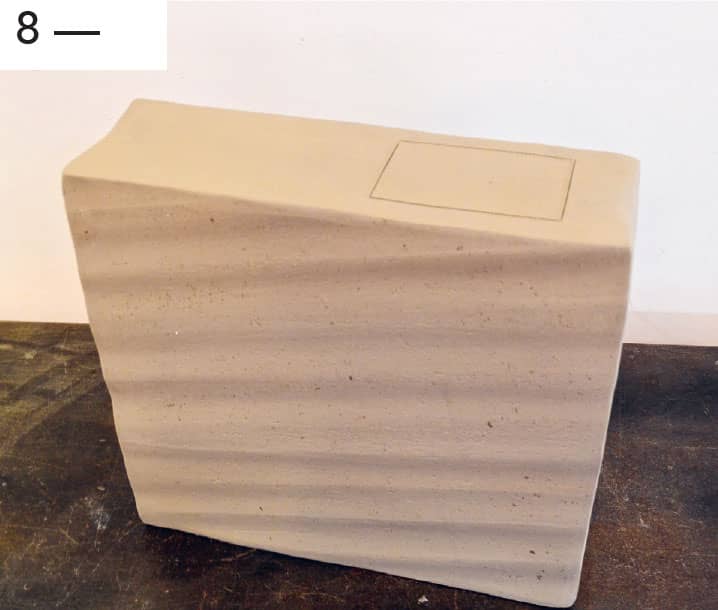
MARKED HOLE FOR CREATING THE OPENING
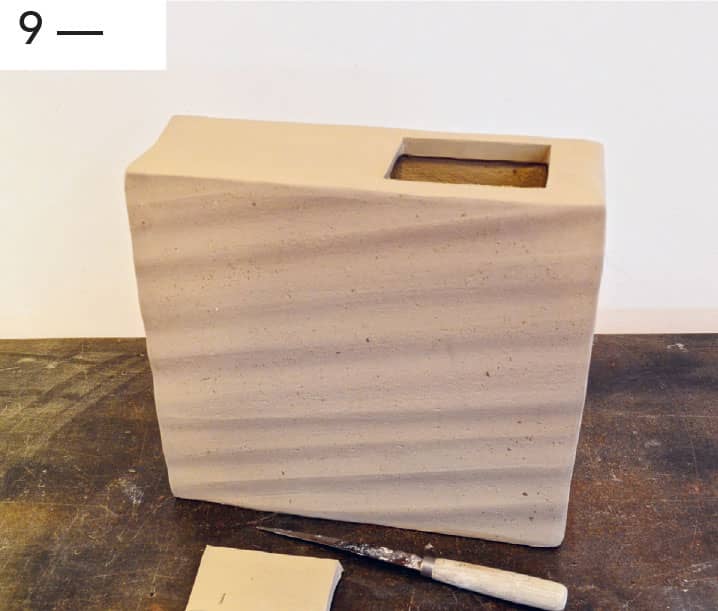
THE PIECE REMOVED FROM THE OPENING
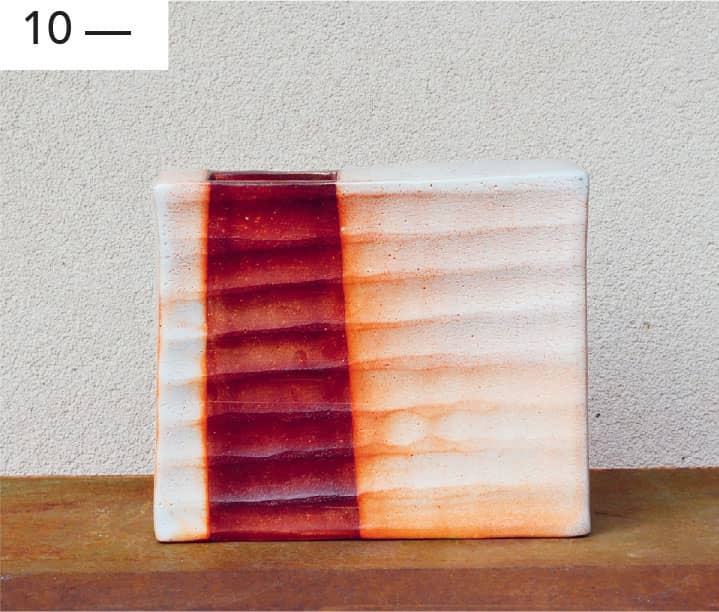
COMPLETED VASE
“I encourage you to start with a handbuilt bottomless cylinder so you can play around with the shape you want to morph it into.”