07 Handles
Making Handles
Handles can be decorative or functional, and they can really change the way a pot looks, feels, and functions. I enjoy making handles and think they’re the most important component of certain types of pots.
I make many different styles of handles using a variety of methods. I'll tell you about the three I use most. For mugs and pitchers, I make handles by attaching a piece of clay and, using water, pulling the handle into shape from the pot. I also make handles from an attached coil. For carved trays and buckets, I often use a disc of clay and a hole punch.
Handles are as varied as pots. The best way to choose which style to use is to look at the pot and decide what would suit it best. You don’t want to make a single style of handle and stick it on every pot you make.
YOU’LL NEED
 Serrated rib
Plastic rib
Slip
Hole punch
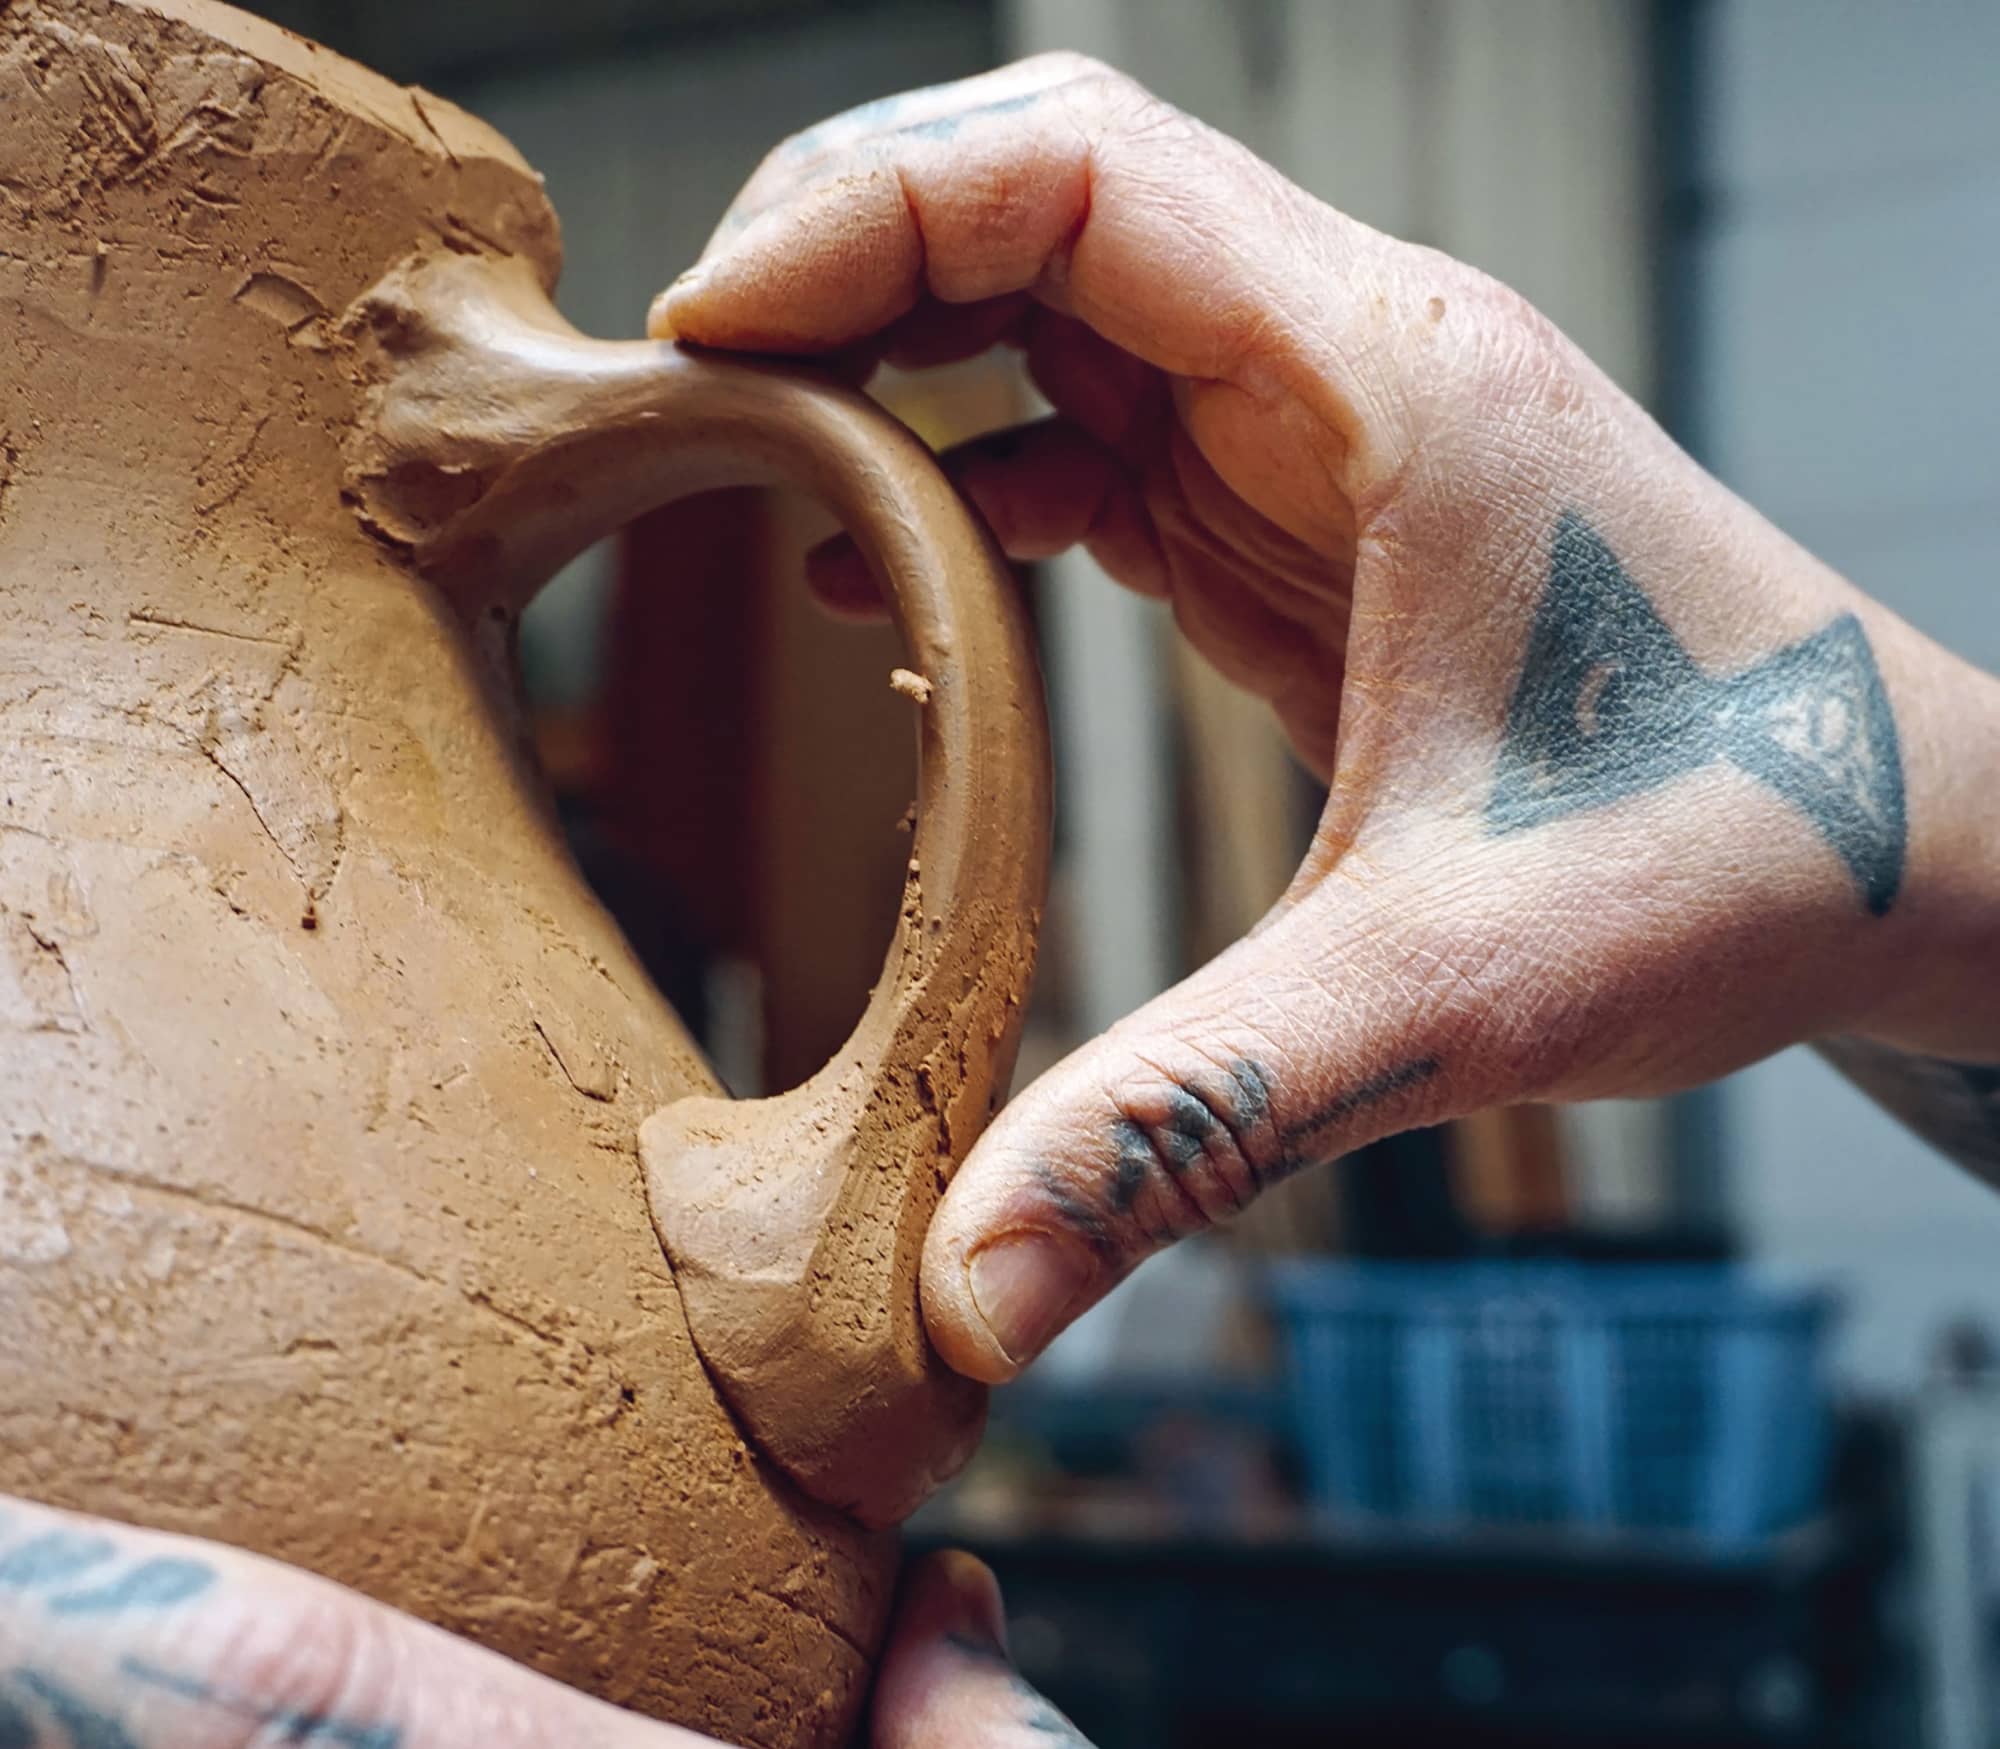
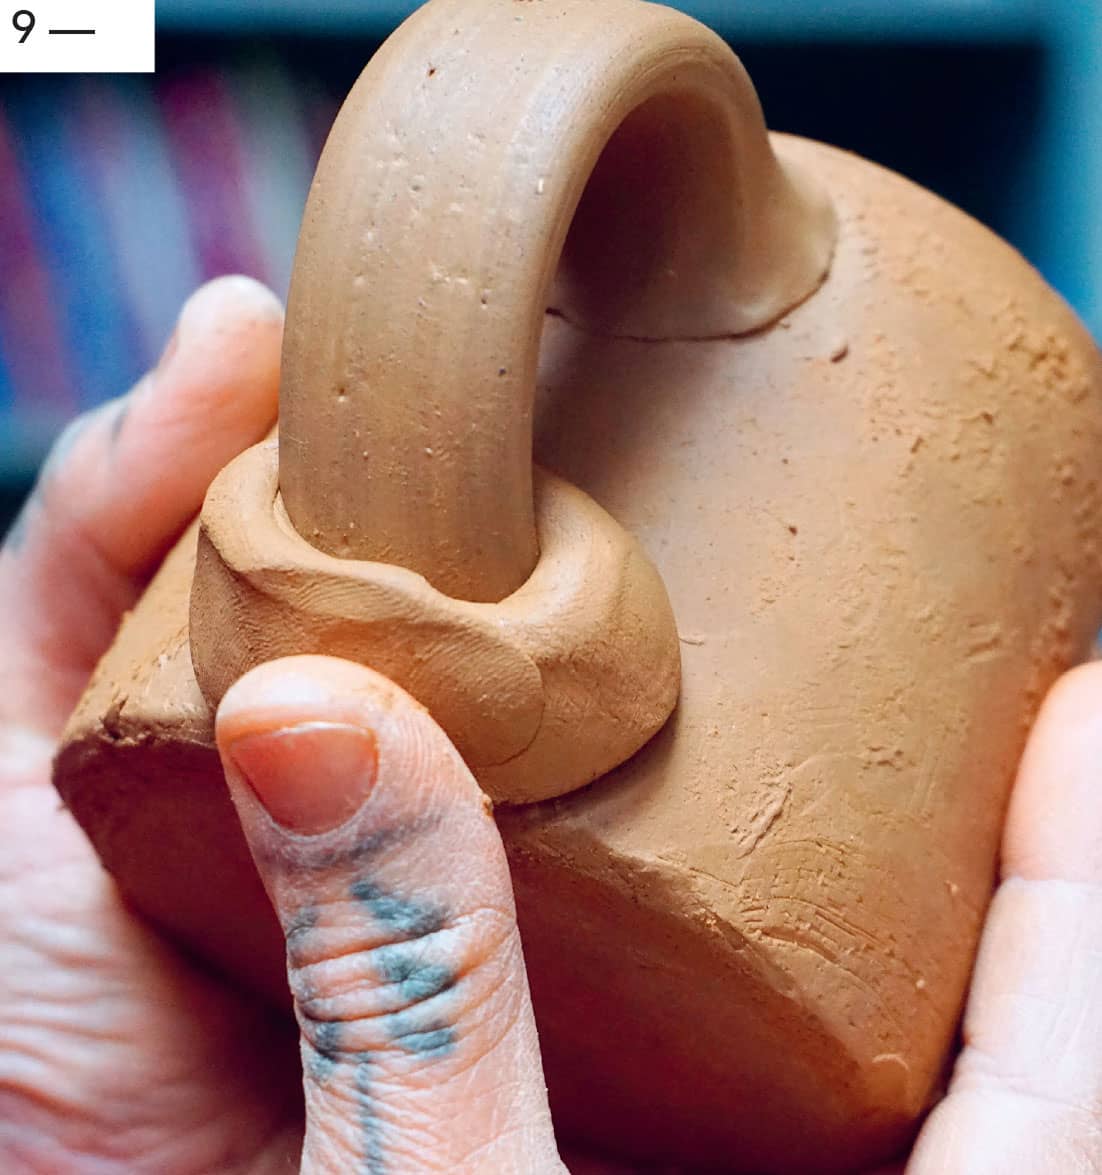
ATTACHED COIL HANDLES
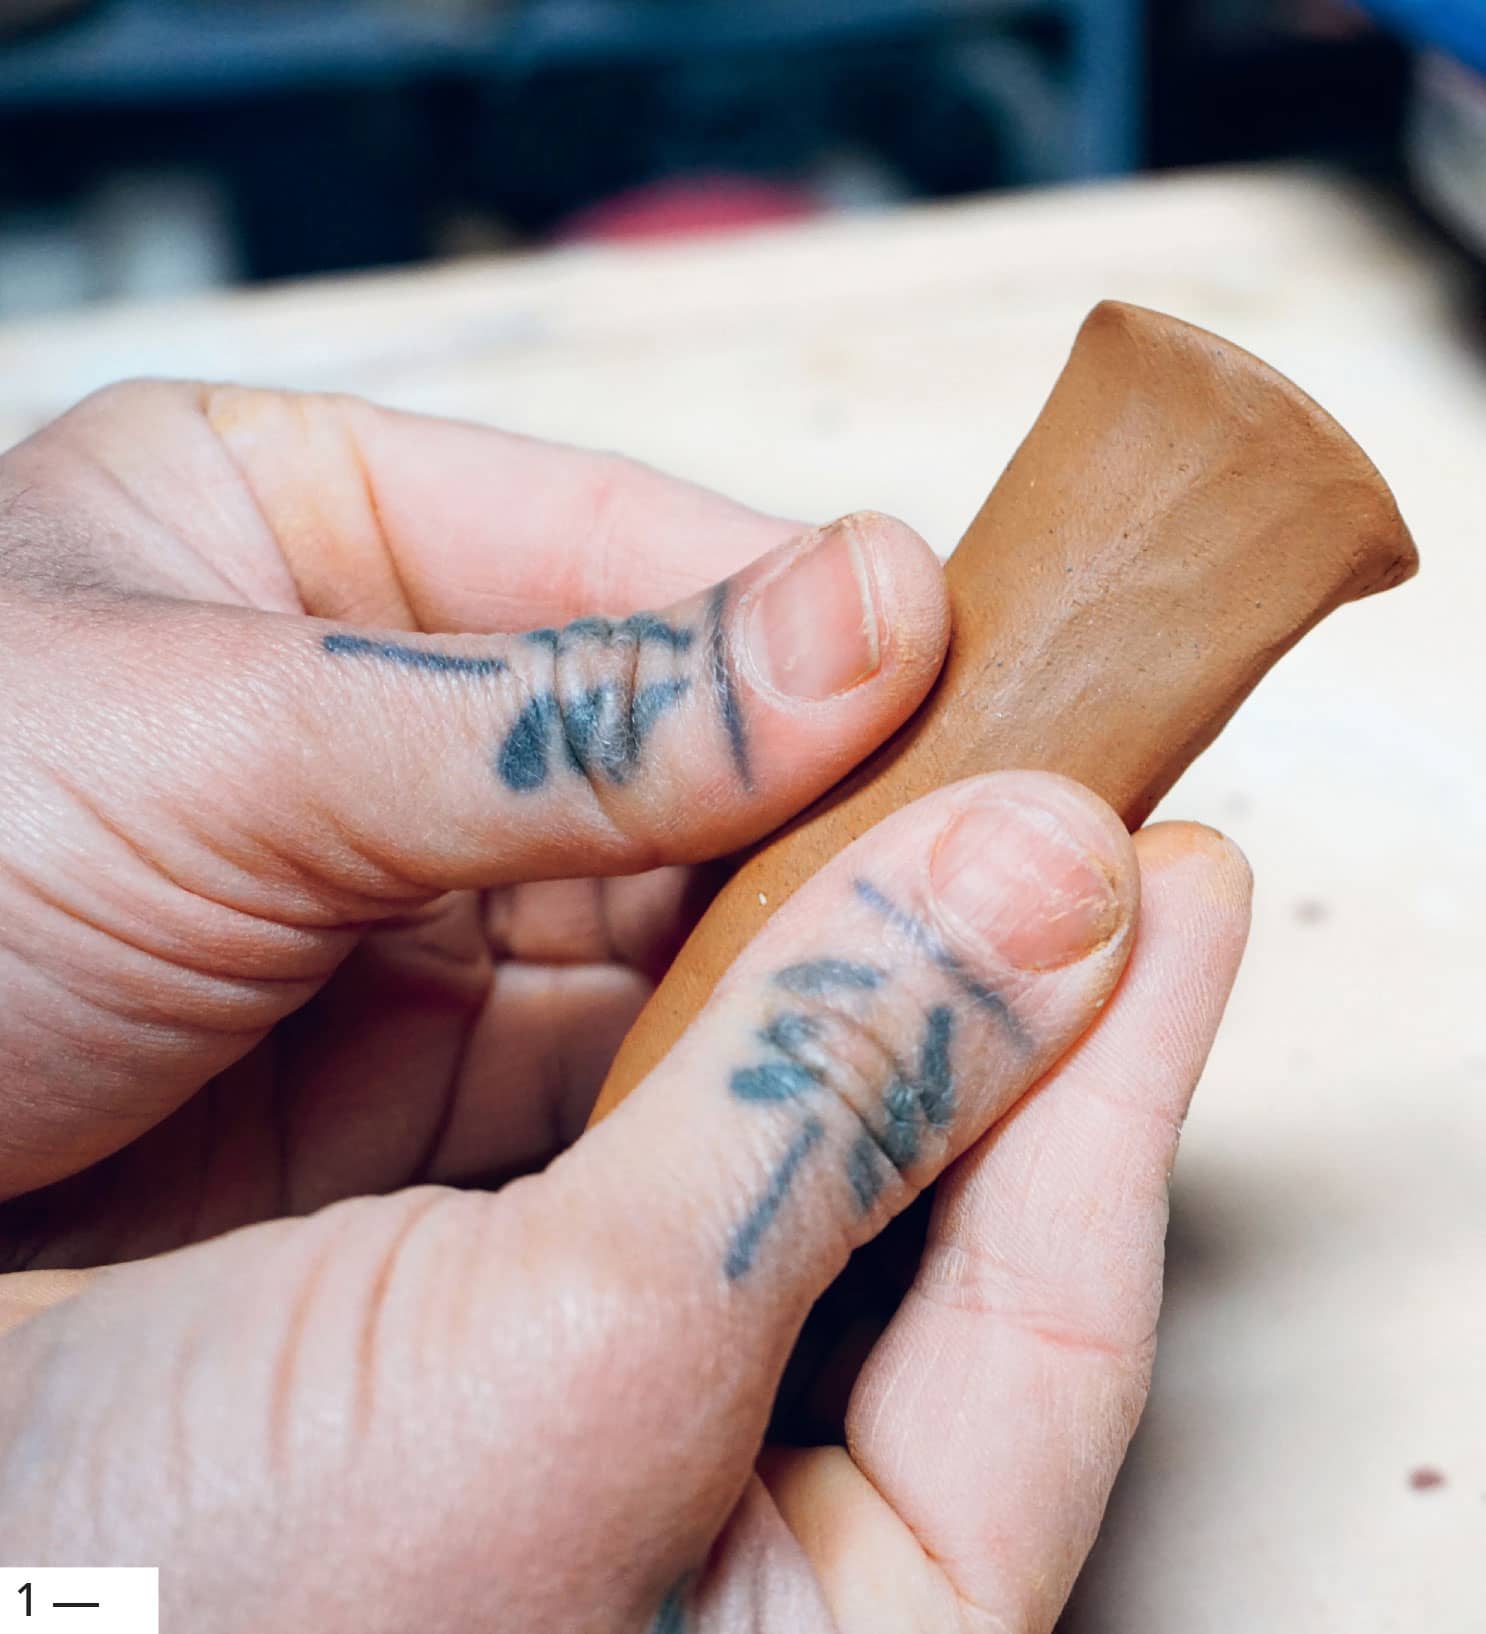
1 | Roll out a coil thicker than you want your finished handle to be. Make it slightly thicker at the ends.
2 | Hold the coil in position to see if it’s the right length and adjust if needed.
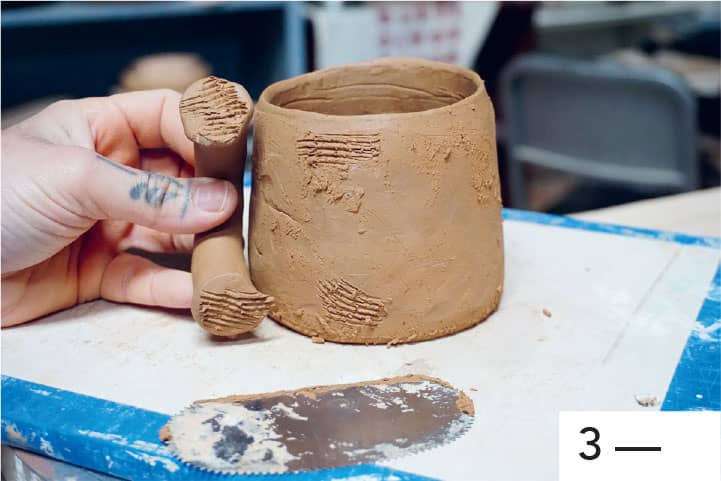
3 | Mark the place where you will attach the handle, and score and slip your pot.
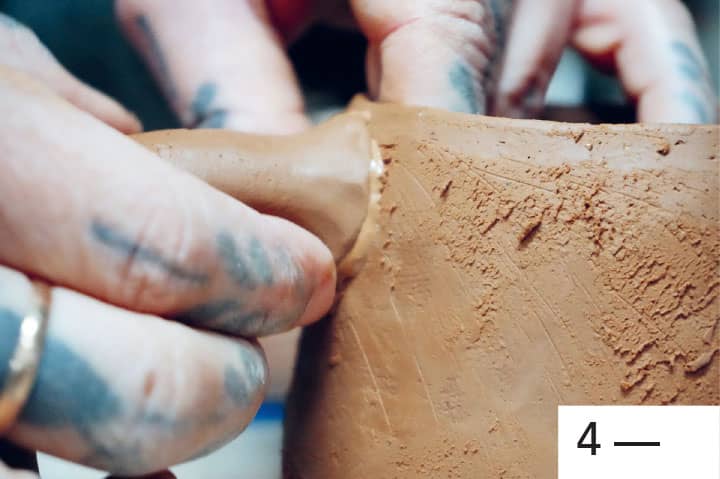
4 | Score the ends of the coil. Push one end into the upper attachment spot. I like to do this by holding the coil just back from the ends with my fingertips, then pressing the end onto the surface to widen it. This provides a wider access point and gives you extra clay to push into the pot for a solid attachment. Use your fingers to press the coil all around the edge of the flattened end into the pot.
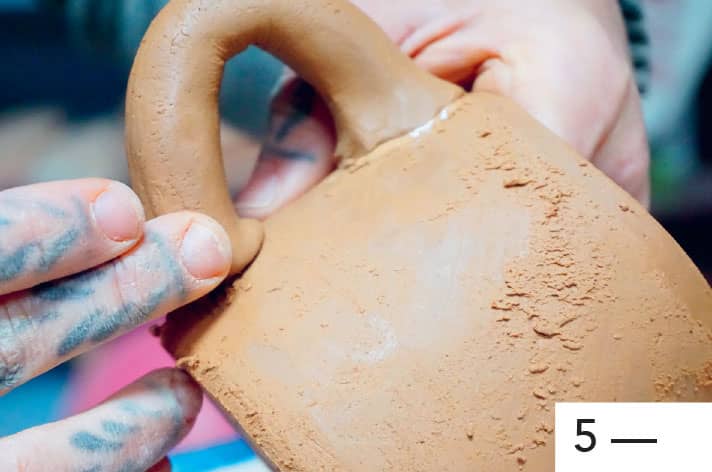
5 | Curve the coil down to meet the other end with the lower attachment spot. Push this end into place the same way. You can blend in this attachment or accentuate the seam. Let the coil dry to leather-hard, and refine with a flexible knife and a rib.
DISC HANDLES
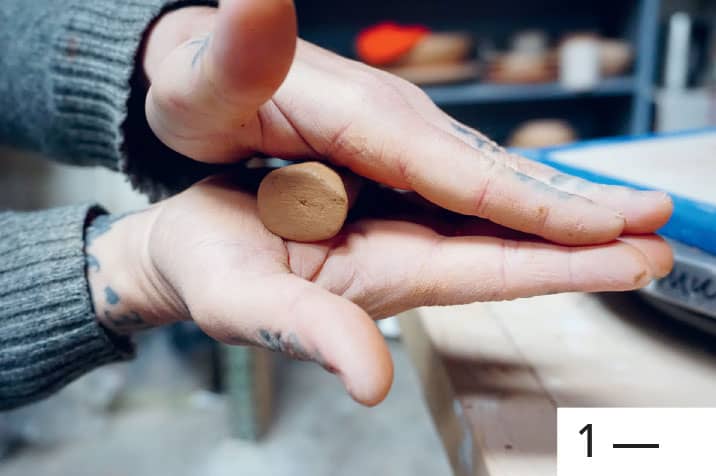
1 | Roll a piece of clay into a ball. The size of the ball depends on how big you want the handle to be. If you are making multiple disc handles for a pot, prepare them all at the same time from equal-sized balls.
2 | Flatten the ball into a thick disc. Take the disc and press it down onto a surface to flatten one edge, making a solid U shape.
3 | Further press on the edge to make it wider than the rest of the disc, giving you a wide access point for attaching it.
4 | Score and slip the pot where the handle will go.
5 | Score the flat edge of the disc.
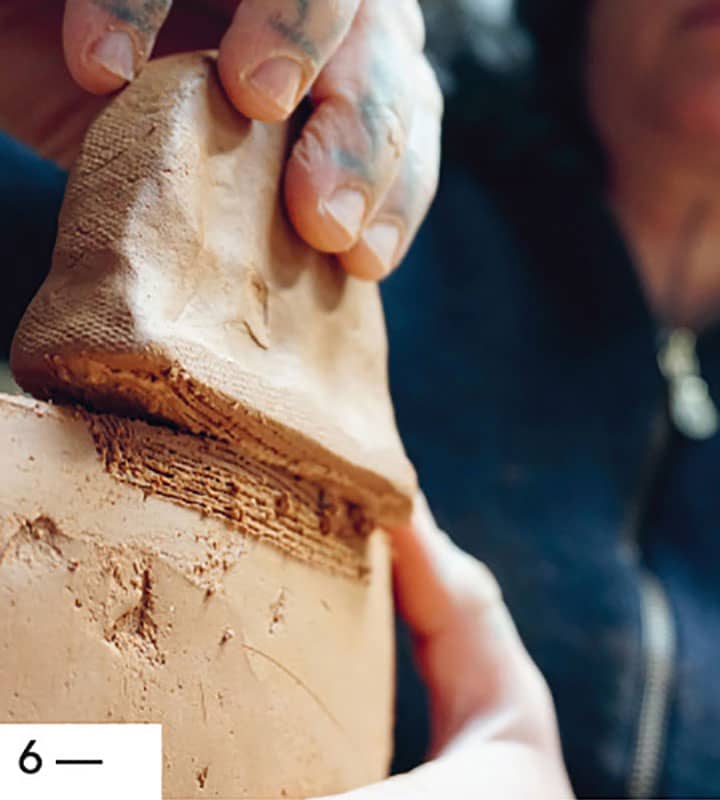
6 | Push the disc onto the pot, pressing the entire edge of the disc into the pot.
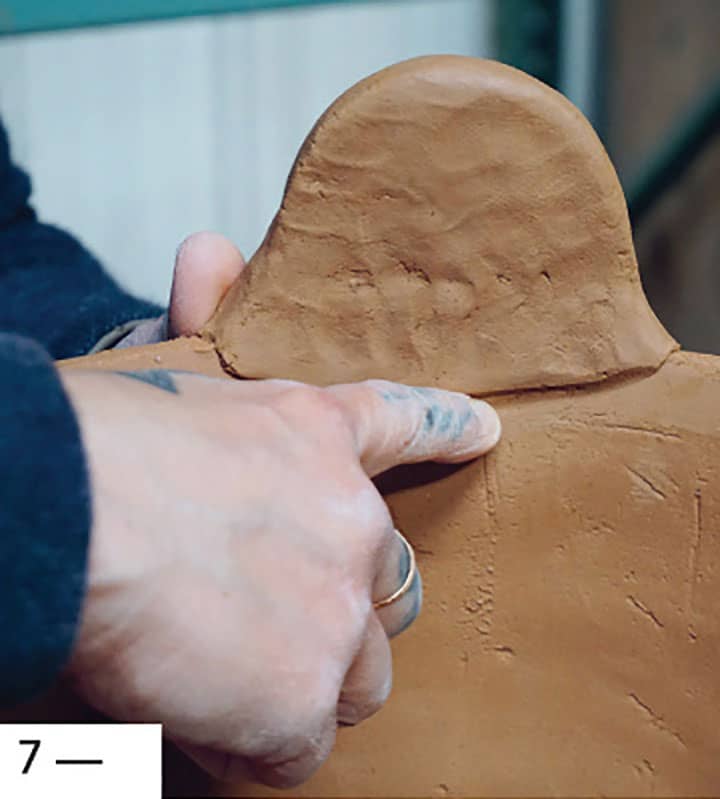
7 | Blend in or accentuate this attachment seam.

8 | Let the disc get to leather-hard. While supporting the disc and the pot, use the desired size of hole punch to make a hole in the middle of the disc.
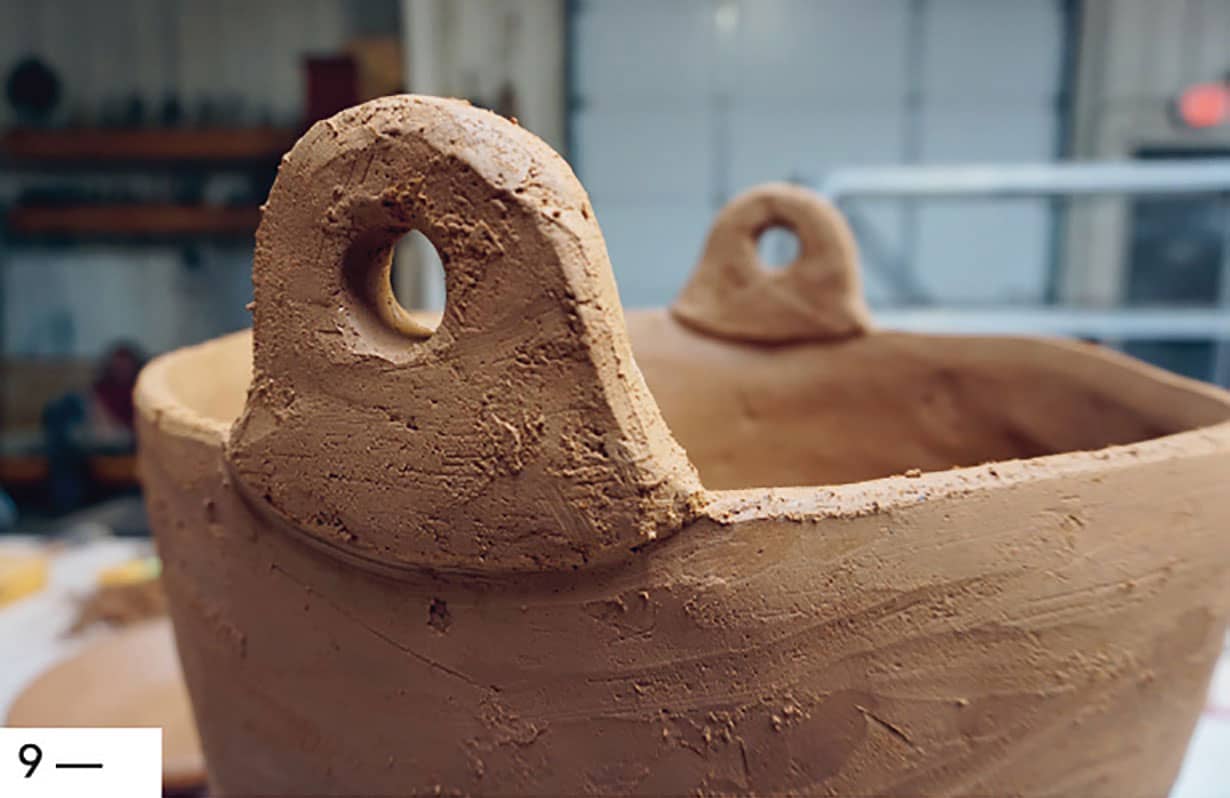
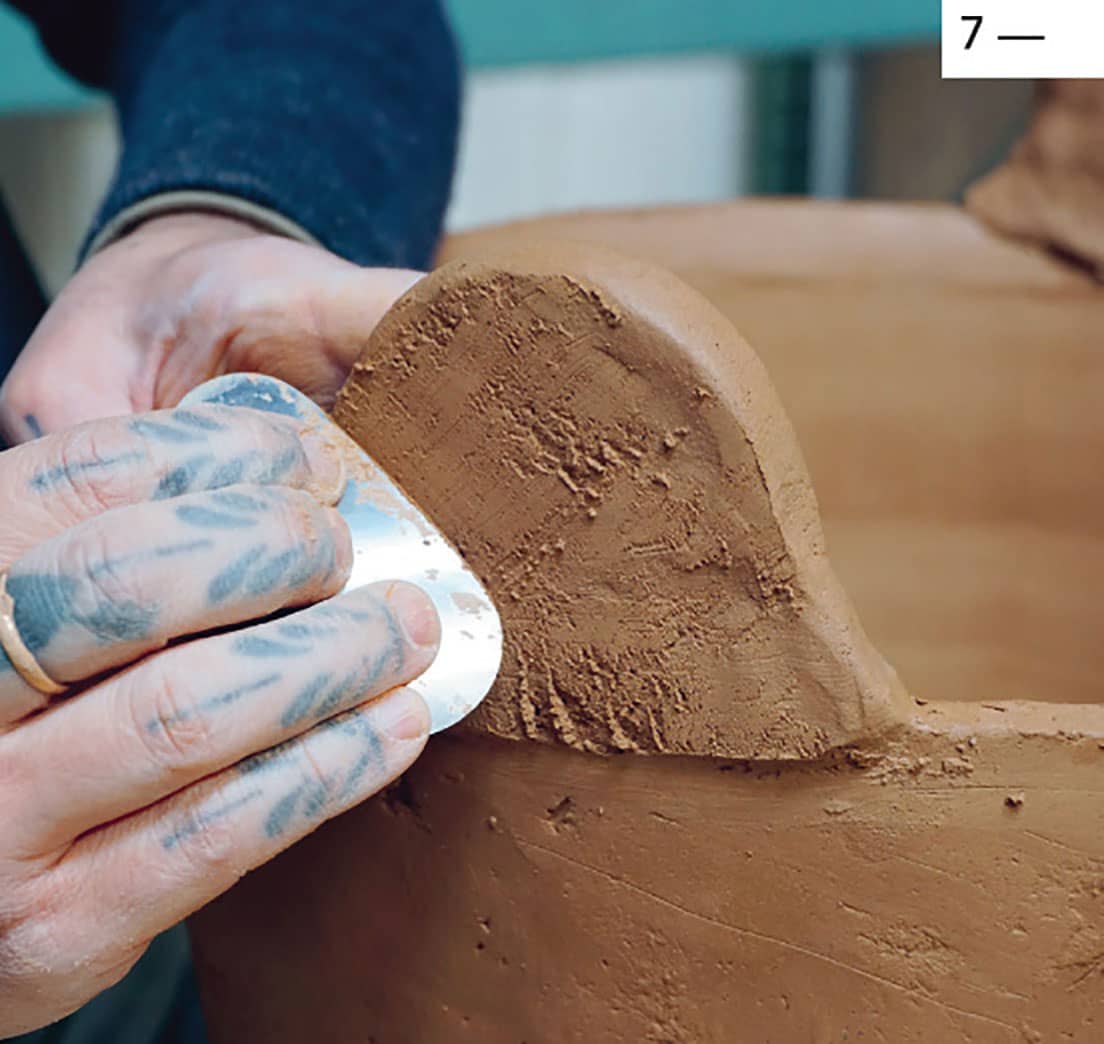
9 | I go back in and cut the edges of the hole to bevel them so they don't look quite perfect. Use a knife and/or a rib to refine your handle.
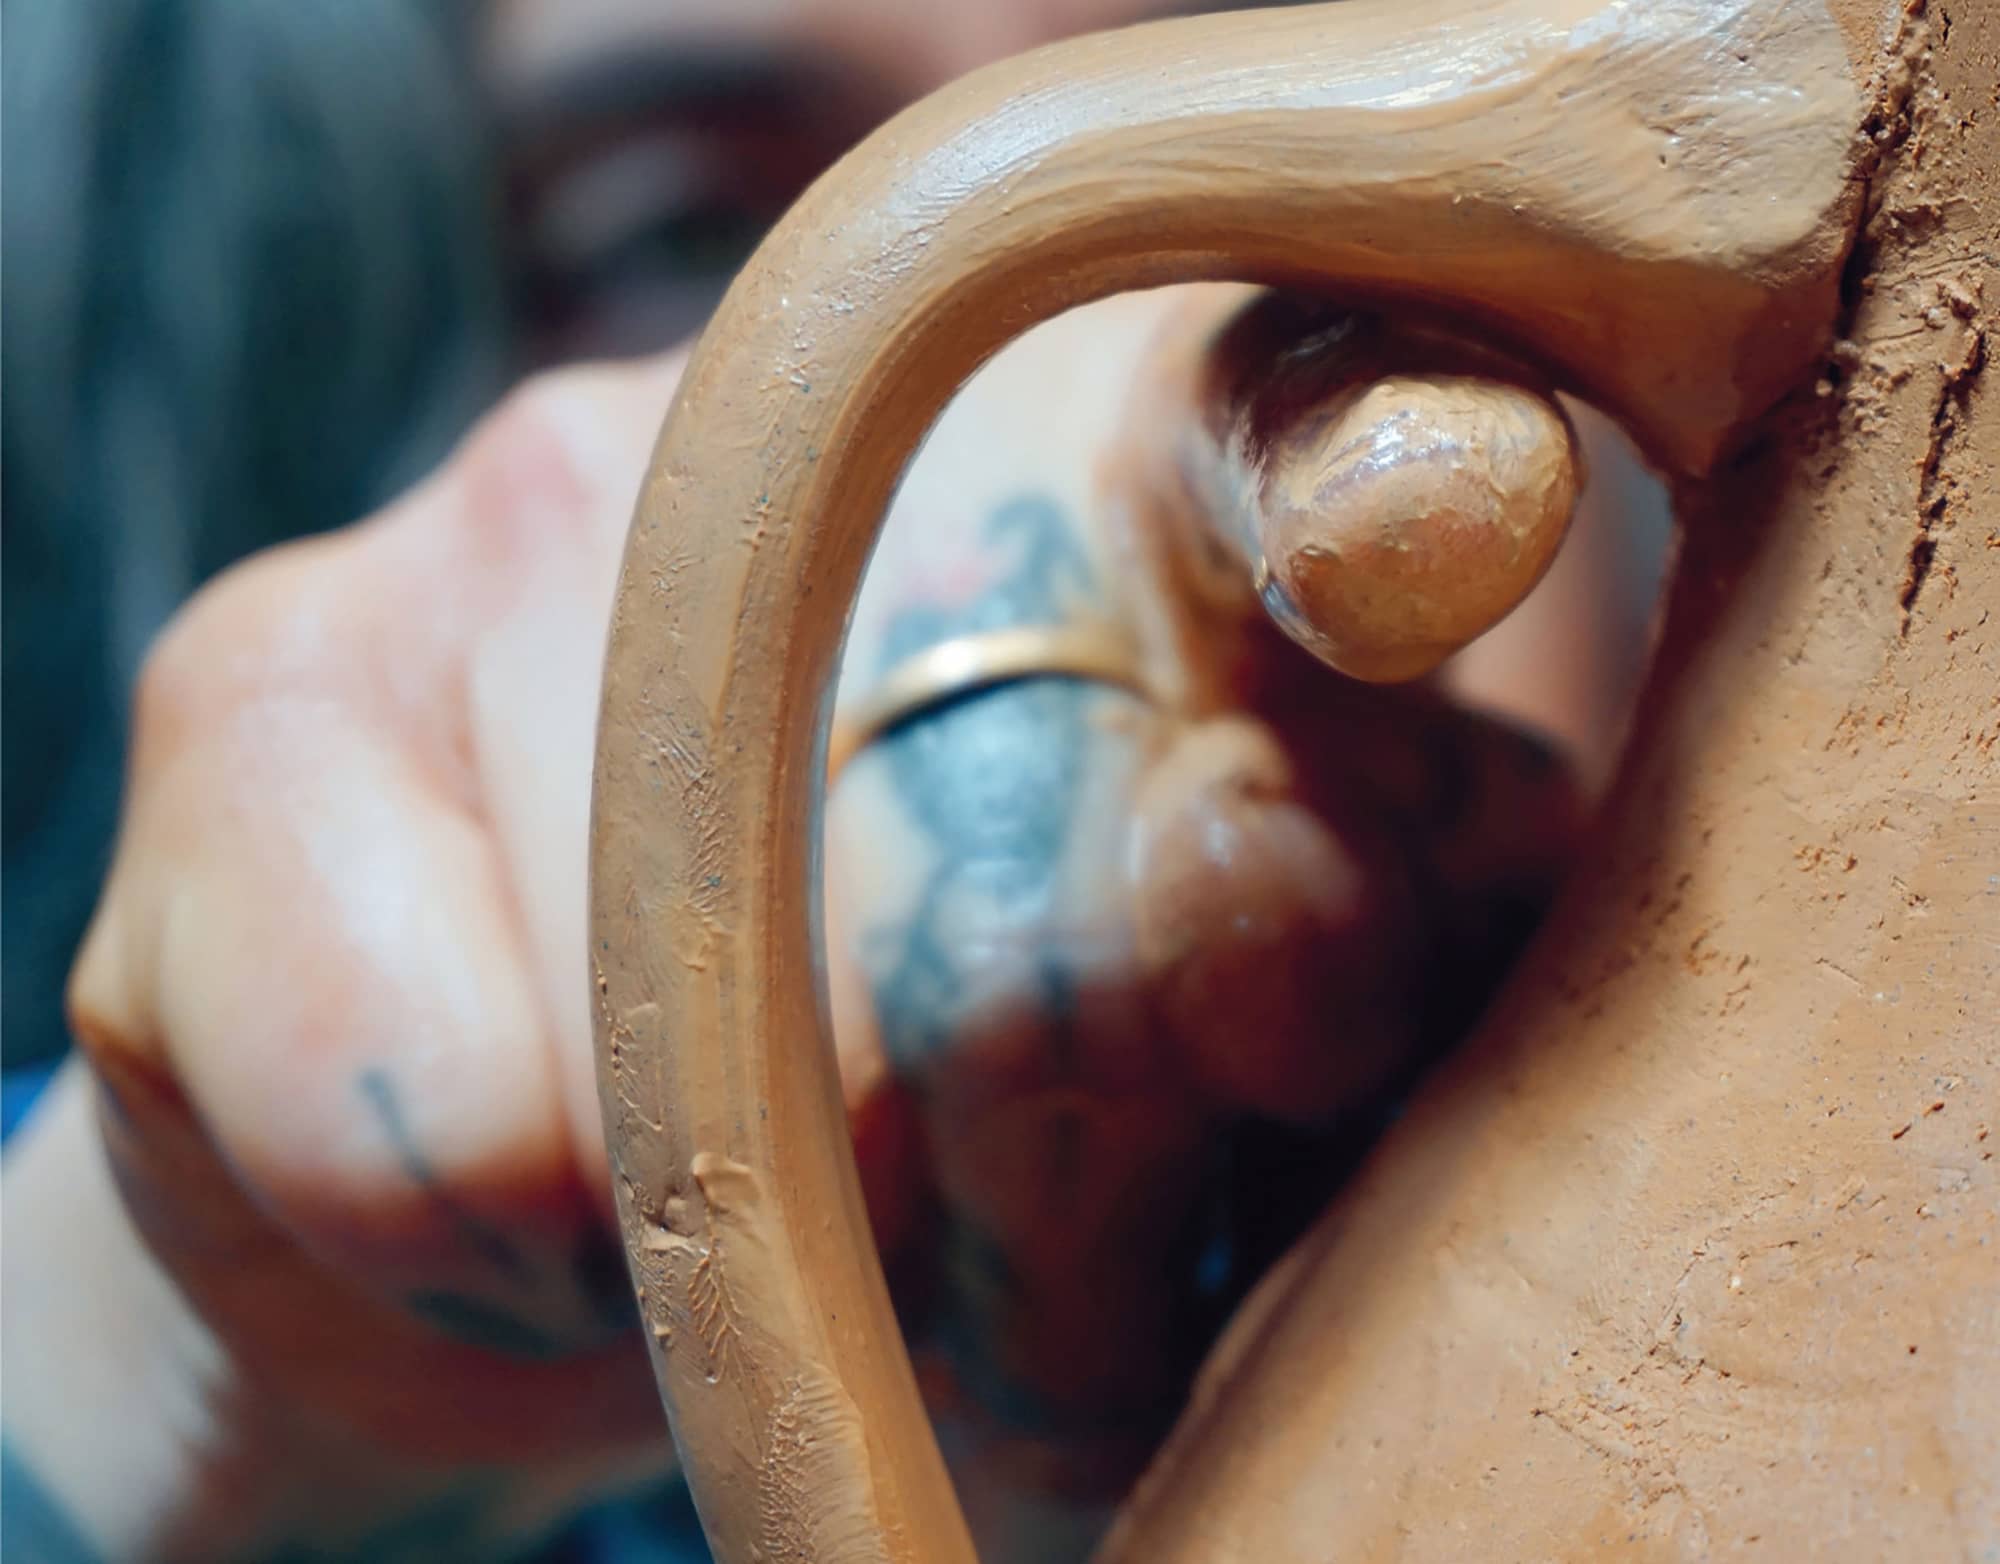
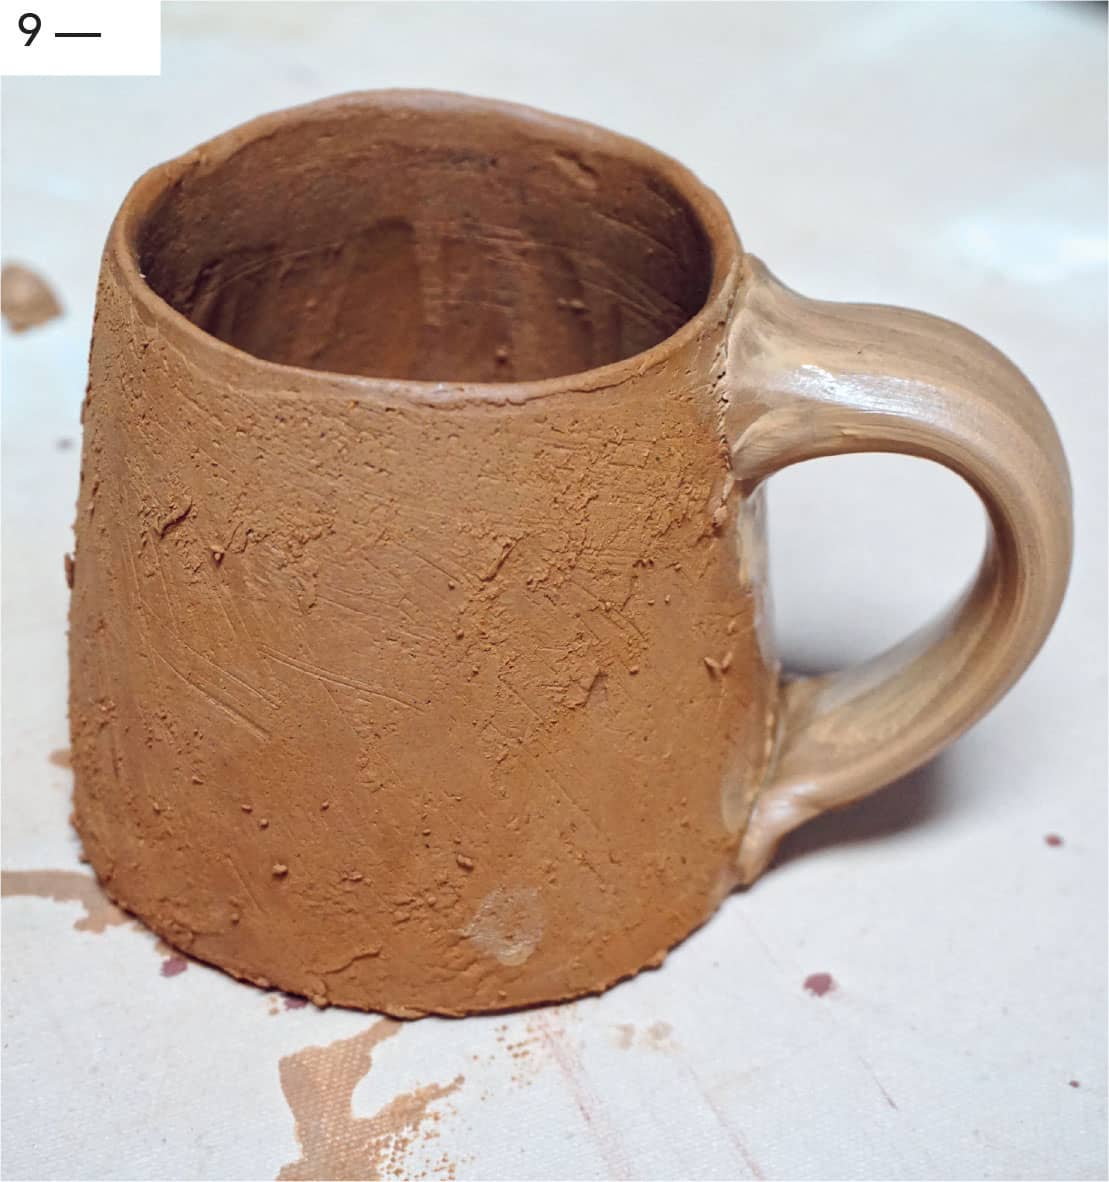
PULLED HANDLES
The first time I ever made a pulled handle, the teacher came by and said it looked like a piece of bacon. I was determined to get good at this method, so I threw fifty mugs on the wheel and proceeded to handle them all. I definitely cried out of sheer frustration.
This type of handle can take a while to master, but it's my favorite method for handling mugs and pitchers. It takes experience to find the balance between the right amount of clay and the pressure. It’s a learn-by-feel, more than by direction, process, but I will get you started with the basic instructions.
1 | Have a bucket of water ready. Shape a piece of clay into a thick, wide piece, kind of like a short, flat carrot. The size of this piece is dependent on the size of the mug or pitcher you're attaching it to. For a mug, start with at about 1" (2.5 cm) wide and 2" (5 cm) long.
2 | Press one end onto a surface to flatten and widen it. It’s important to do this, so when you press it onto the pot you don’t thin it out.
3 | Decide where it will attach at the top of your pot, and don’t worry about where it will attach at the bottom yet.
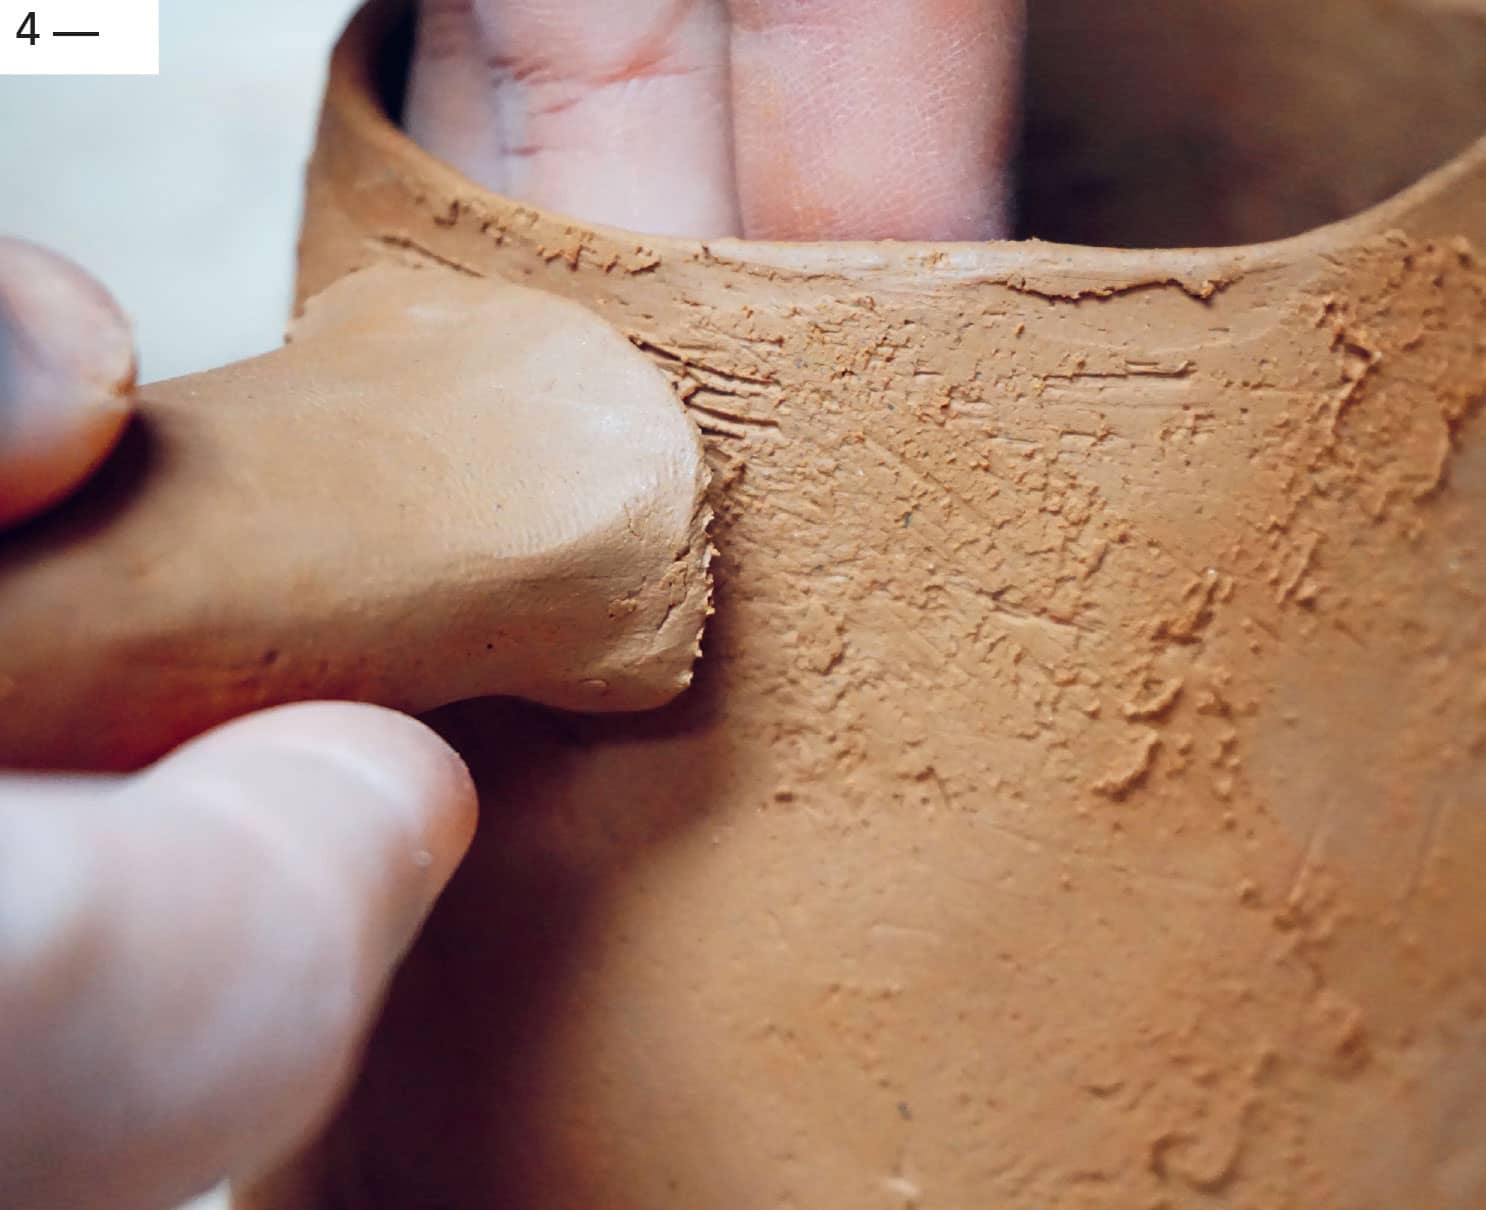
4 | Score and slip your pot and the flattened spot on your piece of clay, and press it into the pot. Press into the outer edge of the clay, securing it to the pot without thinning out the rest of the handle.
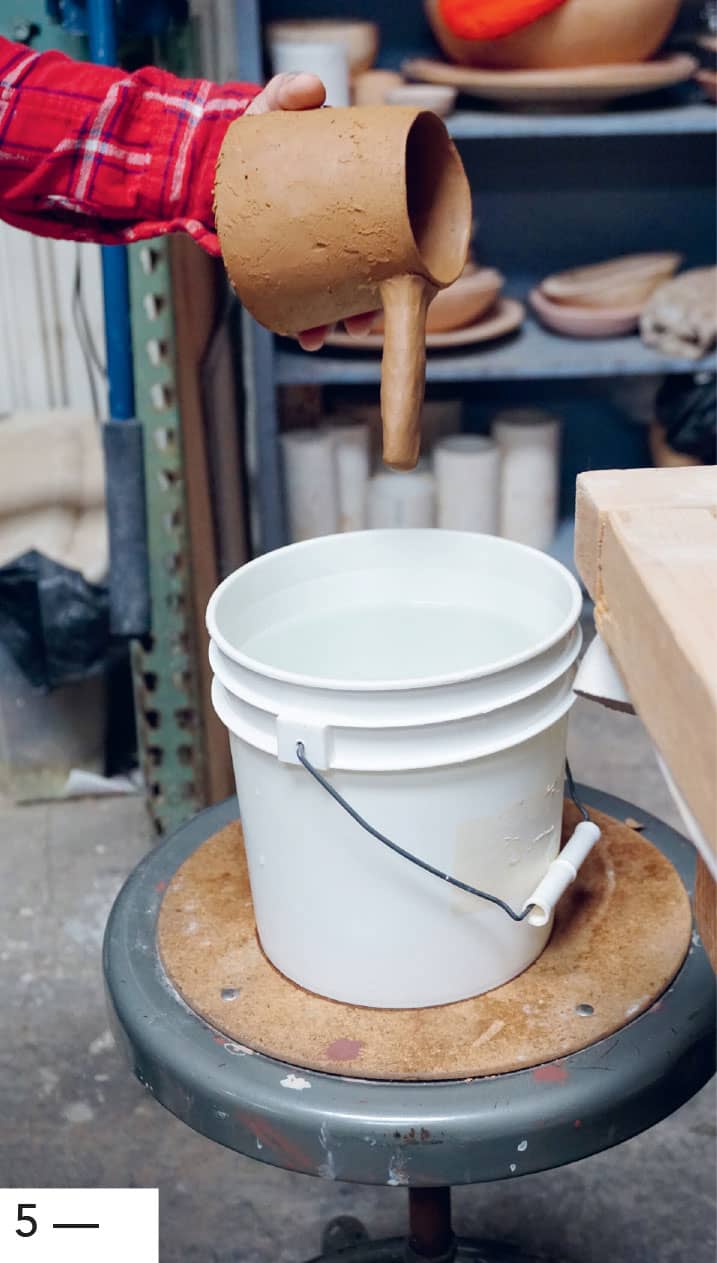
5 | When it is attached, hold the pot in front of you sideways with your nondominant hand so that the handle comes straight off your pot at a 90° angle. Submerge the handle quickly in the water.
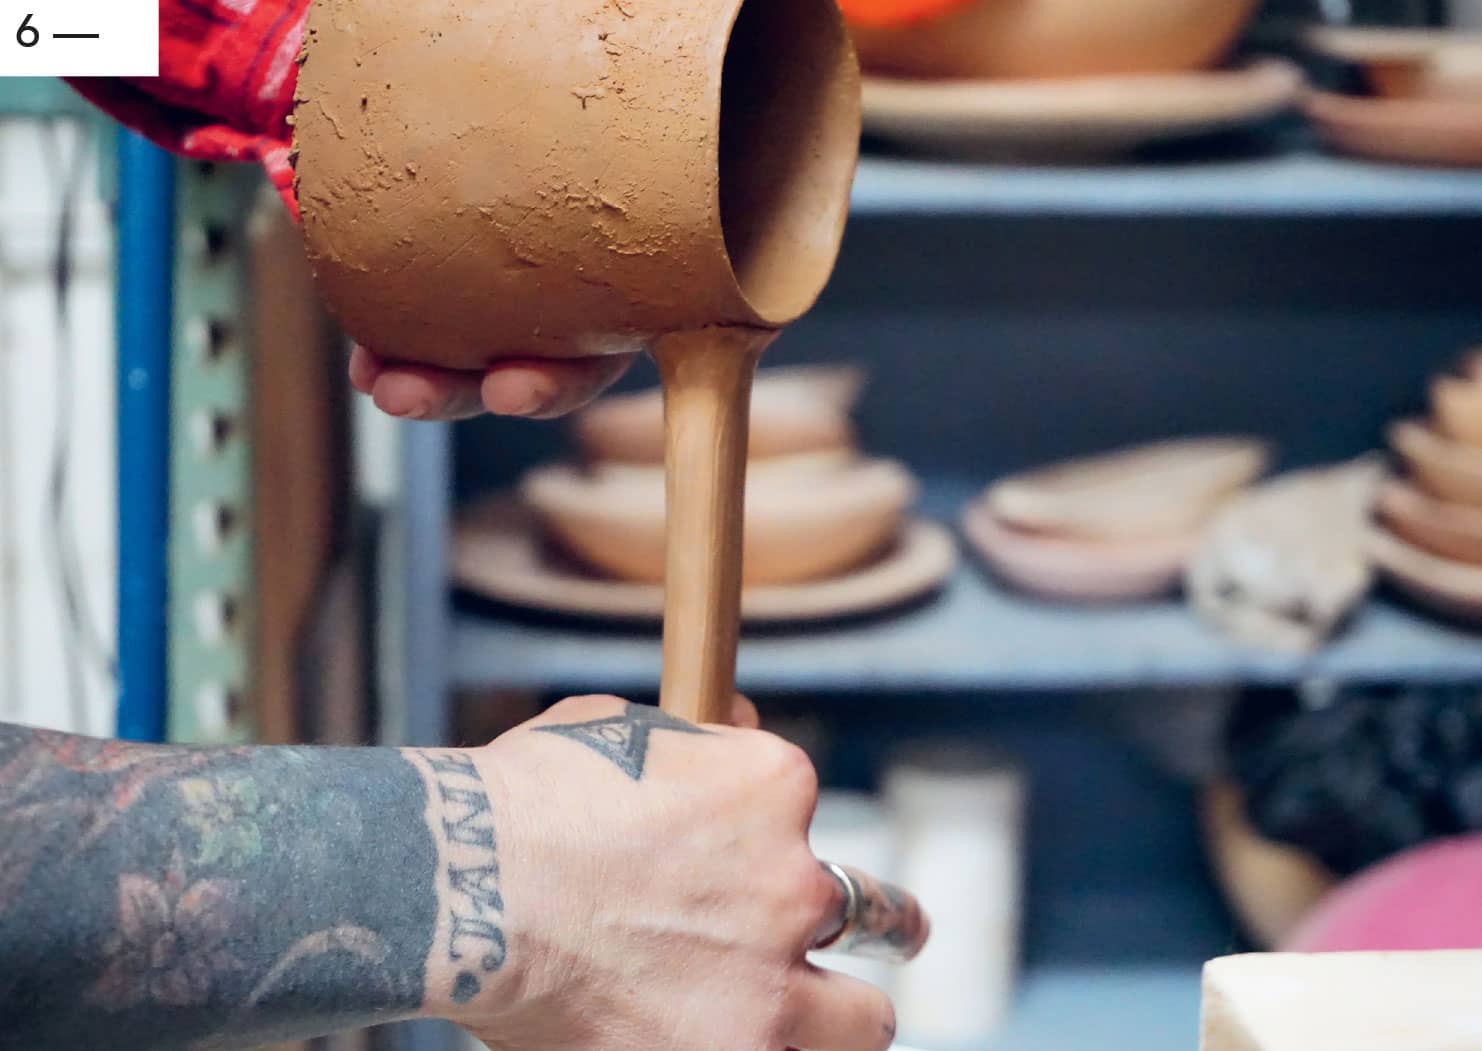
6 | Pull it out of the water and use the angle where the thumb and forefinger of your dominant hand meet to grab the handle at the top near the attachment. Pull your fingers along the handle so that it slides through your hand. You need to use enough pressure to thin and lengthen the clay, but not so much that it gets too thin and breaks.
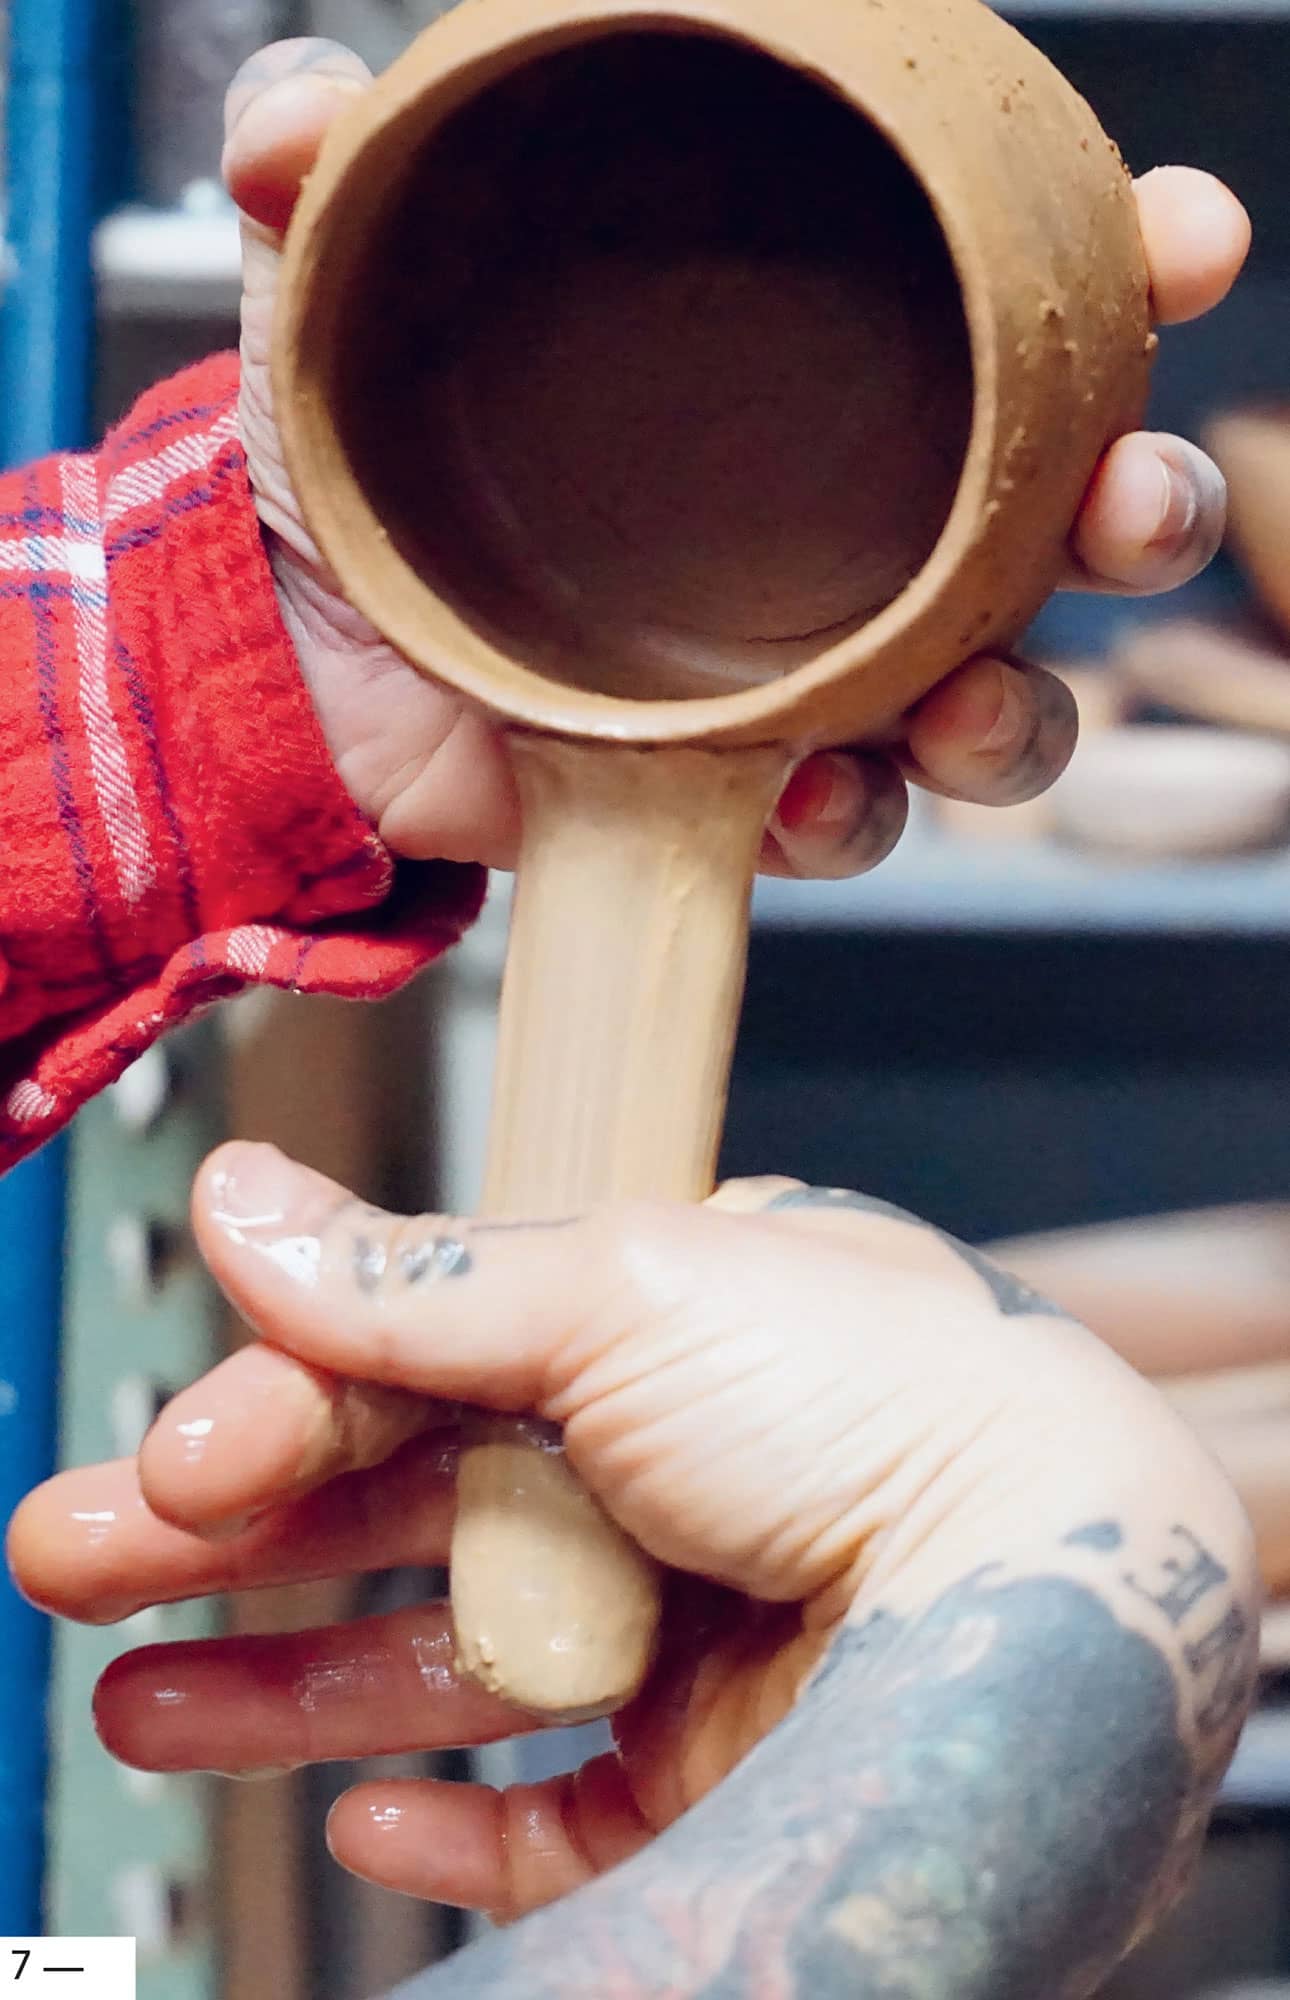
7 | Gradually and evenly thin and lengthen the handle with as many pulls as it takes to achieve the desired handle length and thickness, redipping in the water with every pull.
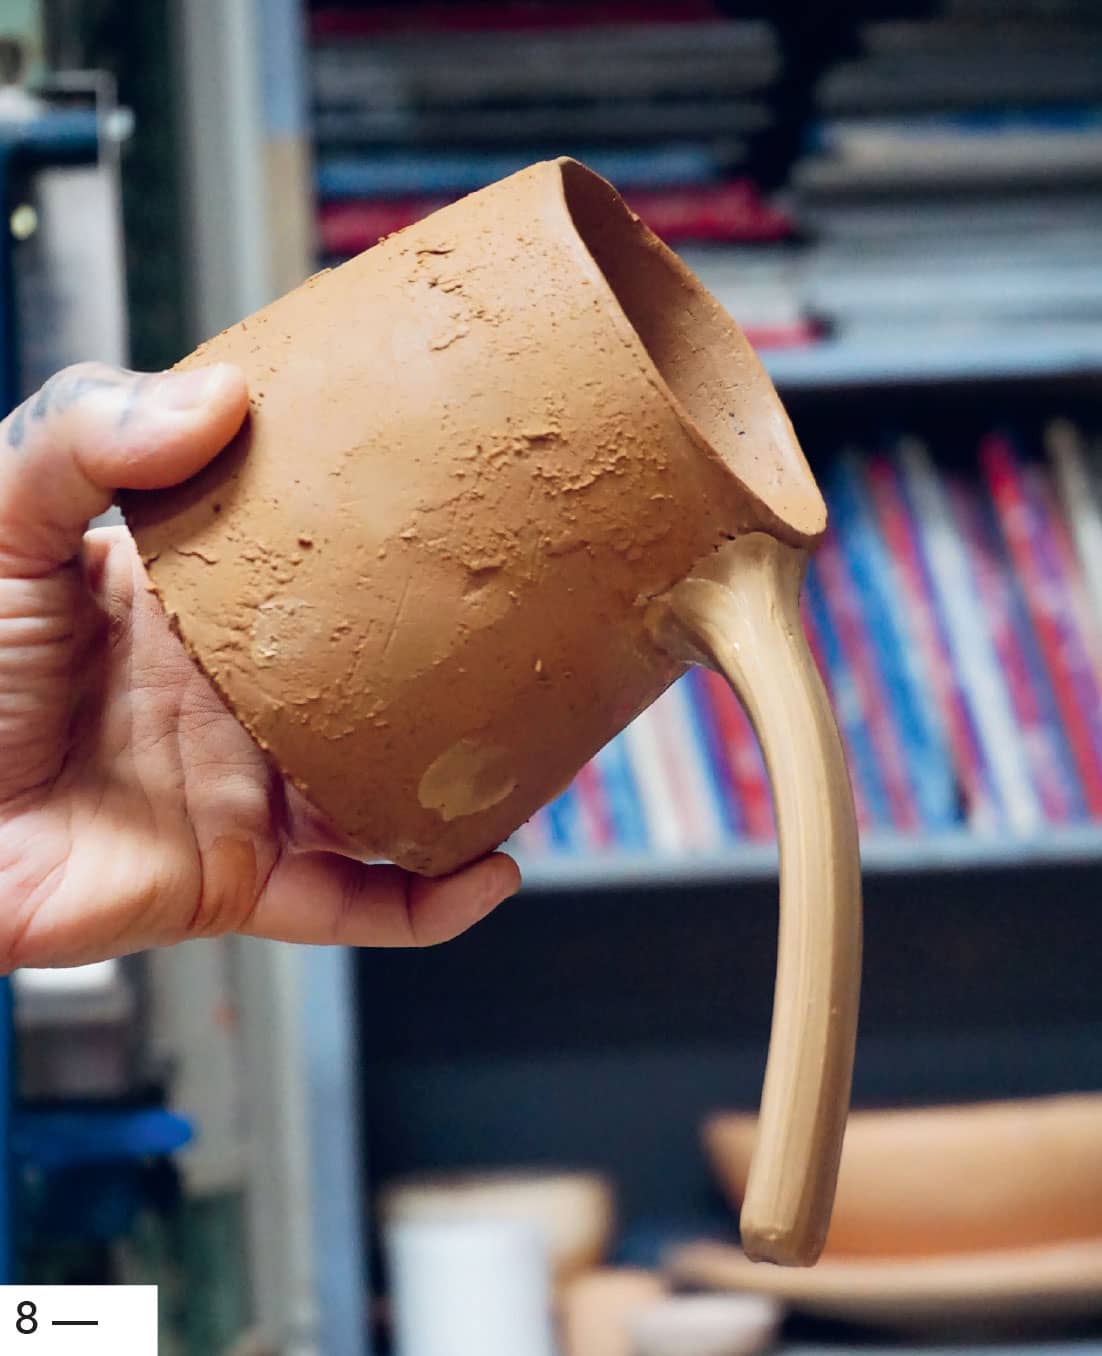
8 | To see where it will attach, I turn the pot right side up and let the handle fall naturally into place. If it’s too short, I give it another pull. If it’s too long, I cut off the excess. For some reason, I never score and slip this bottom attachment, and it’s always fine.
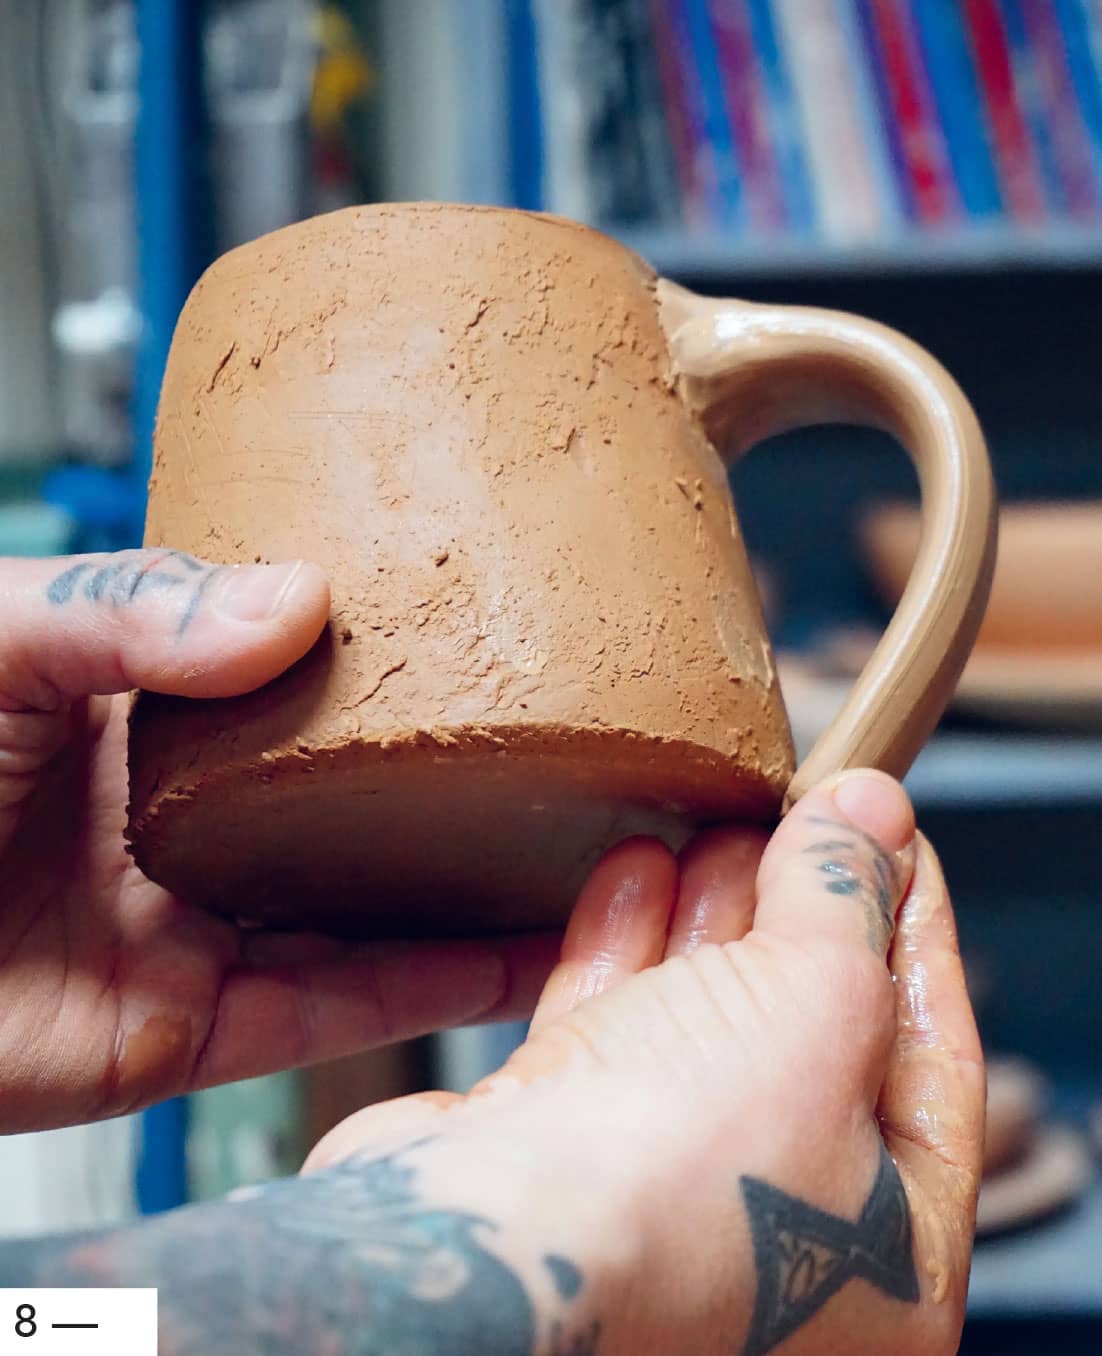
9 | Once I push the bottom of the handle into place on the pot, I put it aside to get leather-hard. Normally, I backfill my handles to eliminate the gap on the inside of the bottom attachment. To do this, I roll a coil about the width of a pencil that wraps around the bottom of the handle where it meets the pot. Then I push the coil in and blend it into the handle and the pot so it disappears, filling in that gap and making a visually solid attachment.
Note: In my experience, it’s best to slow dry pots with these types of handles.
Guest Potter Interview: Catherine White and Warren Frederick
Jointly Independent in Warrenton, Virginia
Warren and I describe ourselves as artist potters. We make pots for use with an artistic intent because there is always an emotional resonance embedded in physical use. This artistic timber isn’t necessarily comforting. Contravening convention can refresh one’s perception. Artistic presence and physical use cannot be disentangled.
Our married and working relationship is delightfully tangled as well. We often tell people that in our professional life we work independently as artists, but we work together mechanically. We each make our own objects, but we will jointly mix clay and fire kilns, or take photographs and clean the studio together. When we are both in the groove of making, we will often ask each other’s opinion. It’s as if the other person’s eye helps to confirm what we instinctively know. Sometimes, however, advice is vociferously ignored because its mere mention crystalizes a hidden intuition headed in an alternative direction.
We are always keeping our eyes open for useful materials. Warren has more of an engineering background, so he will look at soil and geological maps, search for technical data, and do calculations for clays and glazes. I (Catherine) am more intuitive and hands-on, so I will make little test pieces using found materials and try kooky things with a broad brush. This turns out to be a great balance for both of us. After he researched clay at Stancills, Warren got a twelve-ton dump-truck load. I make pickup-truck runs and fill up five-gallon buckets with diverse materials, concocting recipes as if they were this week's soup. You have a working formula that you then adapt to the new fresh materials. Then you taste and modify. Each method has its value and its shortcomings. We learn from each other all the time, and we jointly modify our process, aiming for freshness, excitement, and evocative results.
WOOD-FIRED SLAB VASE
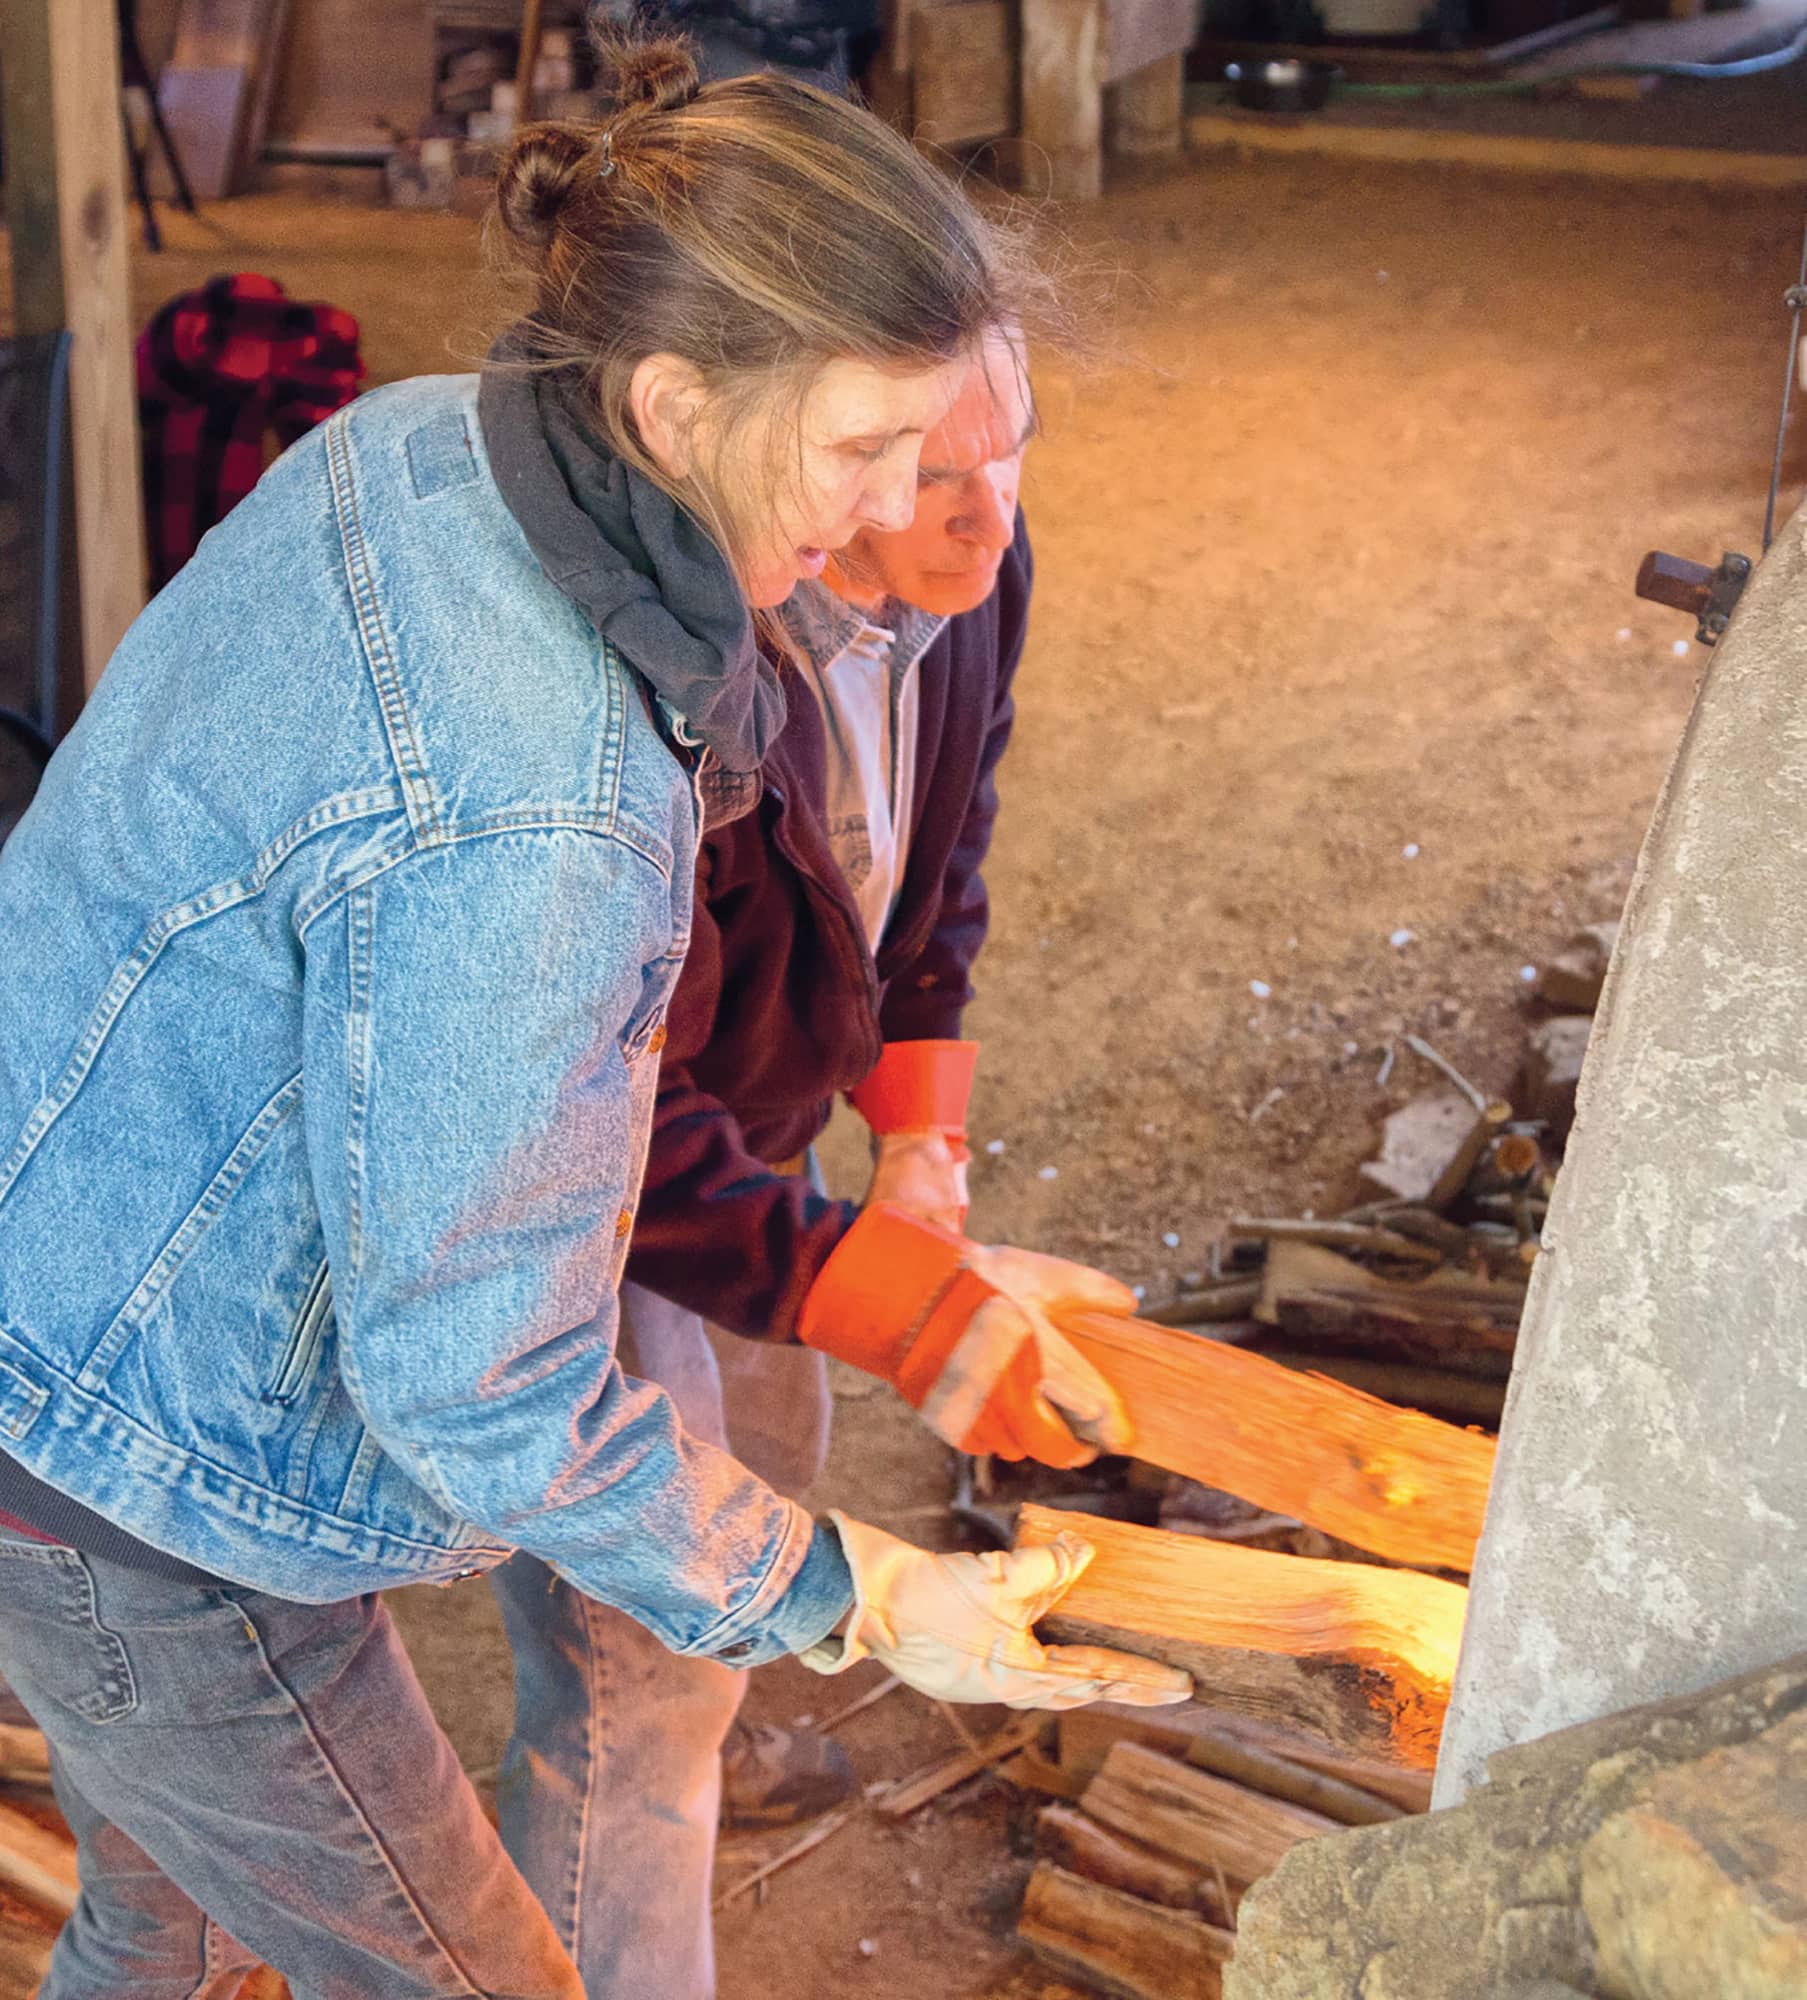
We have a wood-fired anagama kiln and a propane gas kiln for glazed work. The wood kiln is large and is fired once or twice a year. Each type of firing influences the other. The gas kiln has a faster turnaround, so ideas can be tested and then be more quickly refined.
The wood kiln is like navigating a huge ship that is slow to change course. It takes a long time to fill the anagama, fire it, and assess the results. We generally try to make clear changes slowly, yet each firing has its own flavor. We like the longer lead-up to firing the anagama. There is room to explore ideas and be innovative in the stacking. We do not use glaze, and so each object influences how the ash flows to the surrounding work. Warren often describes the flame moving through the kiln as being like a current moving through a stream; our pots are the boulders that disrupt the flow, causing the ash deposits and the different forms of flashing that interact with the character of the clay, thus creating the complex variety of natural ash, wood-fired glaze surfaces.
The longer we work, the more the line between what is thrown and what is handbuilt gets blurred. Handbuilt work is put on the wheel, while thrown parts get assembled off the wheel. The largest work is almost always coiled and paddled. It is stacked in the very front of the kiln, adjacent to the large firebox. These pots become partially covered with the massive bed of coals that fill the firebox as we reach cones 11 to 13. Plates are often fired in stacks of four to six (separated by clay wads that are removed after the firing). Plates are thrown, slab built, or even some combination of the two.
HEX PLATES
RIDGED MOON VASE
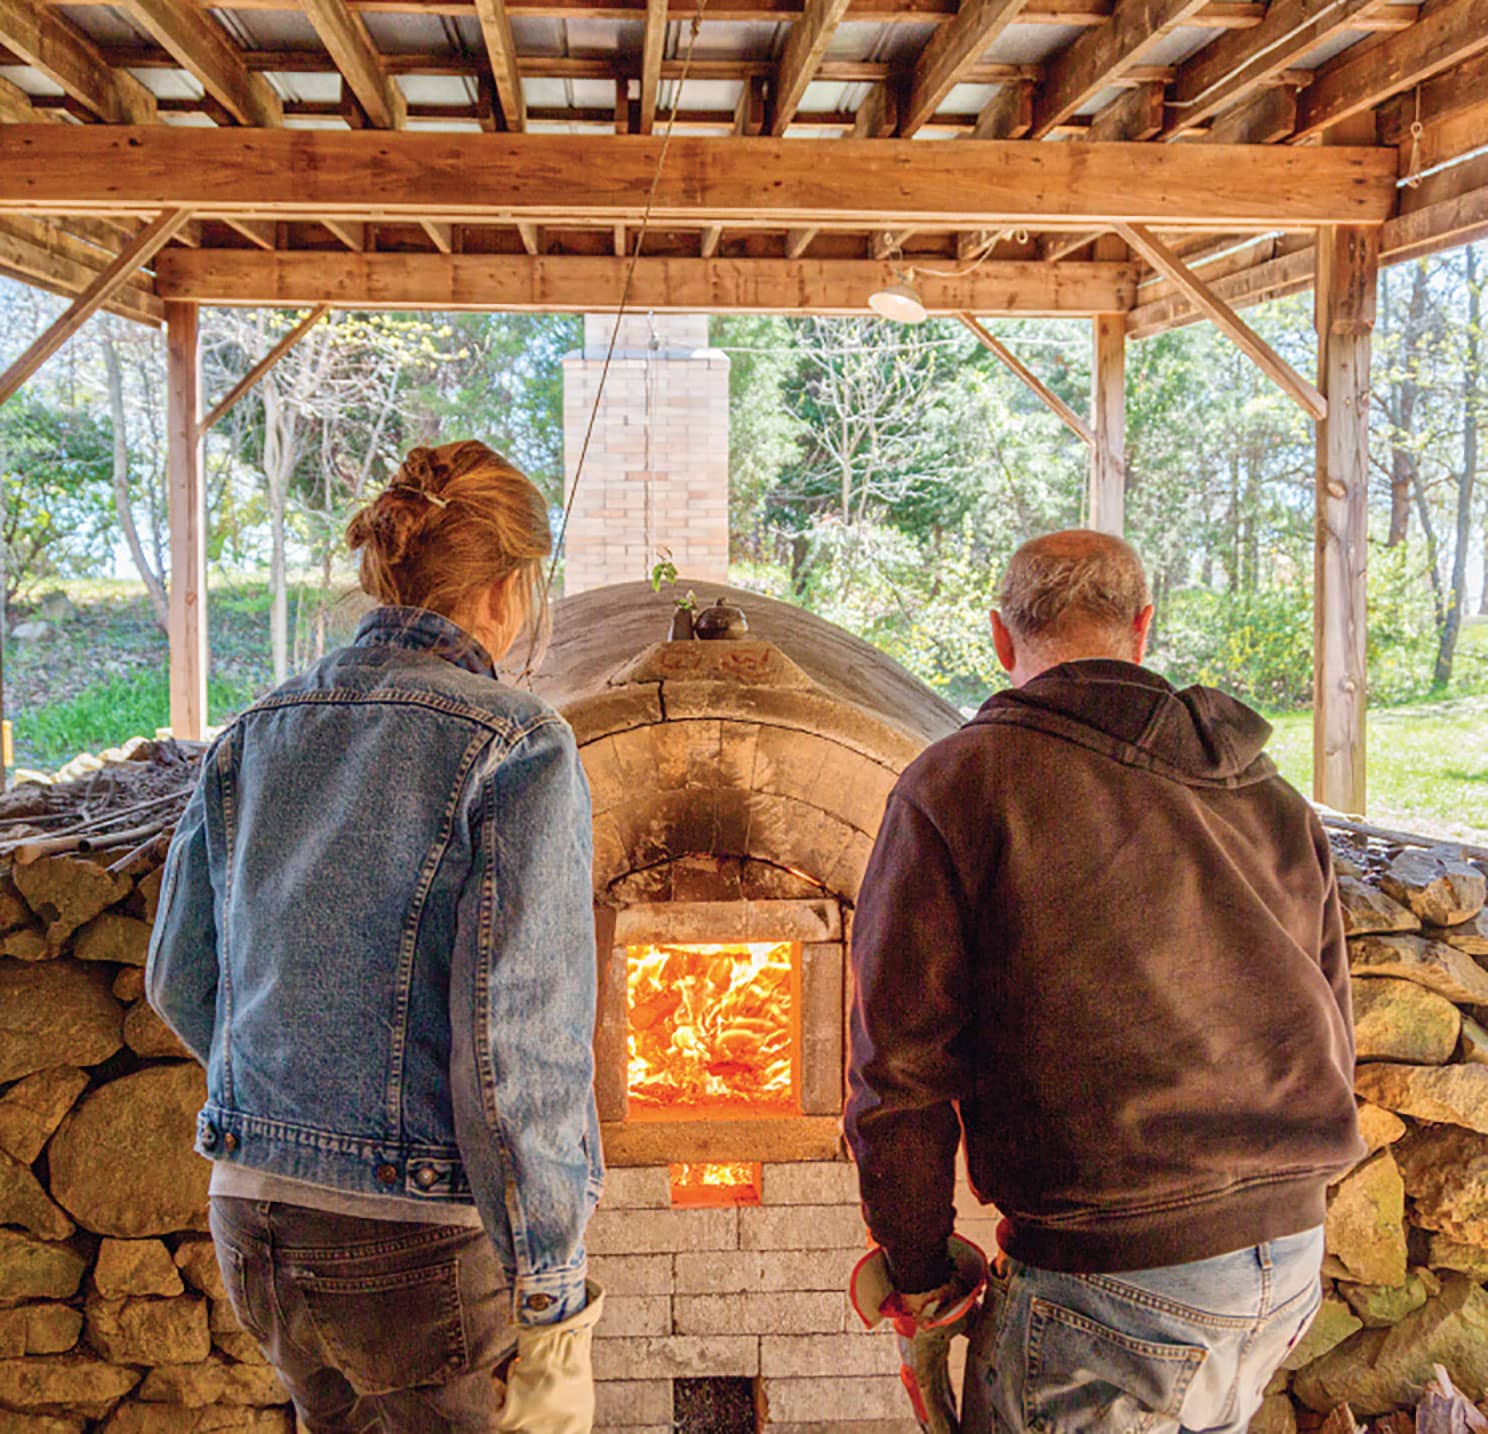
CATHERINE AND WARREN AT THEIR WOOD KILN
Because the wood kiln floor is cool, where less ash is deposited, we have found it useful to make our own patterns using ash, basalt rock dust, or porcelain clay dust. This has become one of my favorite stacking areas because there's a tight connection between the clay object and my ever-ongoing painting, drawing, and journaling.
The accompanying how-to images show one example of making a set of slab plates with a continuous porcelain clay dust drawing. These slab plates are directly influenced by our local landscape of rolling pastures with windblown grasses. I often feel that what I am looking at moves through my body and out my hands. Just as when I draw or paint, I am testing my hand against what I see.
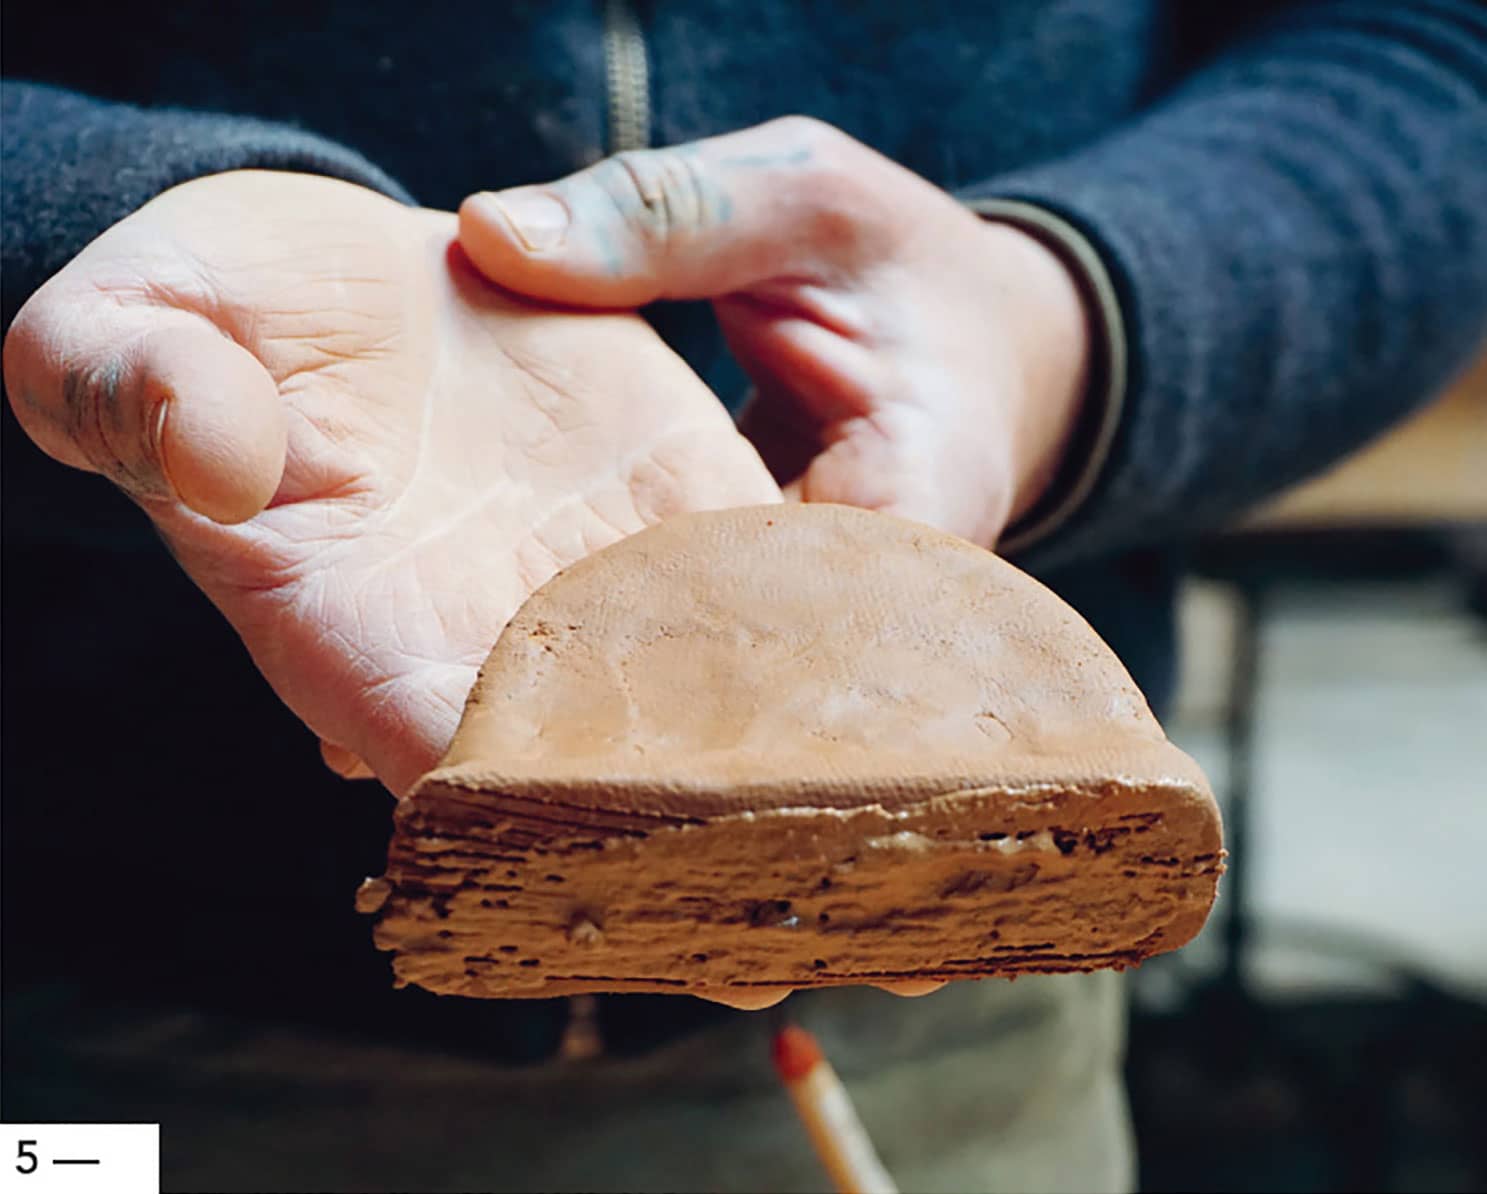
In the dust print images, I prepared a set of circular, stiff slabs using our tabletop North Star slab roller and some circular, stainless steel pastry rings. With limited space, we like a slab roller that can be put away. I will do a drawing as a warm-up and plan, but I will often improvise off of a drawing once I'm actually working with clay. We have lots of simple bisque mold shapes that can be used as drape molds or as exterior molds to shape a curve and stiffen a slab. I use simple tools for a dust drawing: a kitchen sieve, a large roll of inexpensive paper, a wide drywall knife, a series of circular baking rings, a pencil, and plastic-tipped brushes. After the drawing is done, the slabs are placed on top, and the pressure applied by the rolling pin picks up the drawing.
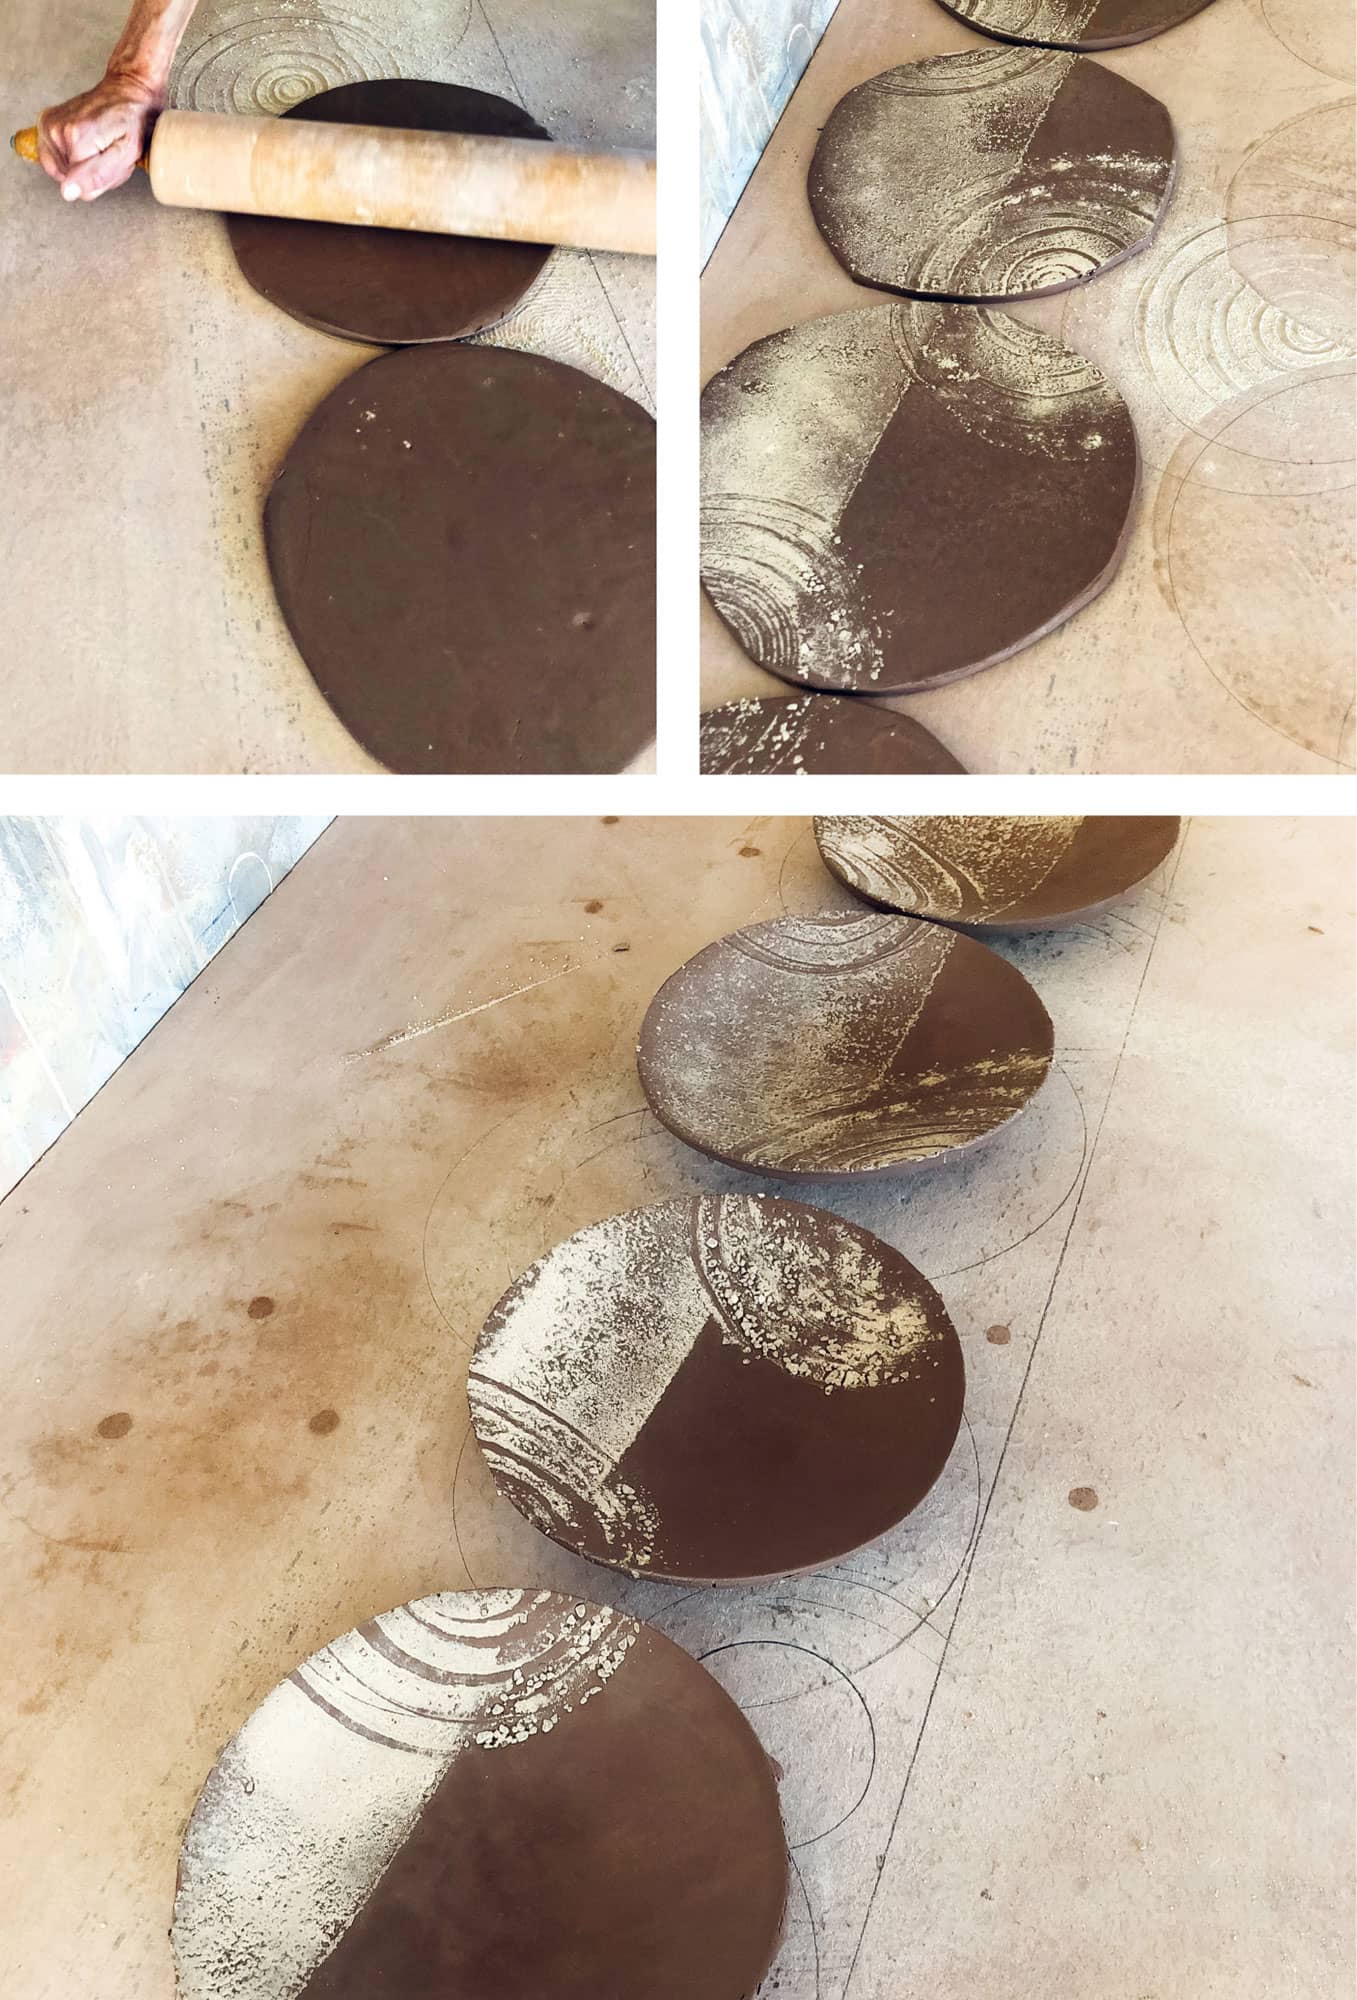
MAKING SLAB PLATES WITH PRESSED DUST DESIGNS
Draping and paddling the slab over a bisque mold (and rotating on a banding wheel) further compresses the drawing into the clay. In this instance, three feet are added, and after further drying the plate's edge will be softened.
Each fired group of plates provides new ideas for the next set. Each drawing suggests new directions for handbuilt shapes. Because drawing and clay are complementary but materially different, we’re always stretching the boundaries, seeking to translate one vision into another. The anagama stacks best with a diverse genre of sizes and forms—plates, bowls, cups, vases, teapots, jars—but our artistic bent means the particulars are always in flux. We seek fresh variations, different nuances, the effects of new materials, and evolving methods of making.
Because our touch and signature styles are so different, those familiar with our work almost always know which of us made a particular object. Melanesian shields may inspire us both, but we will head off in dissimilar directions. We each may encounter inspiration on a local hike, in a sculpture exhibition, or from a museum retrospective. Many influences are not ceramic, but we treasure encounters with historical work directly handled. Working away at some new idea is often frustrating. We remind ourselves that this is where art arises, working past the frustration, past the marks that have been made. We amplify and focus the thoughts in the prior attempt. We turn the proverbial page to create the next line, the next pot, and the next vision.