09 Firing Methods
Firing and Cones
Crafts don't get much more elemental than pottery. Pots are made with materials dug out of the earth, formed by hand, and fused with fire. About the only difference between making pottery today and in ancient times is that potters now have gas and electric kilns available to them. To talk about firing pottery, we have to define a few essential terms: cones, bisque, slips, reduction, and the types of clay.
CONES | When you hear of cone 10 or cone 04 in ceramics, the term refers to a temperature-gauging system. Pyrometric cones are made from clays that melt at specific temperatures. They are used to measure the amount of heat absorbed by clay in the kiln. The numbers on cones designate temperatures, going from 022 to 01 at the lower range, and then from 1 to 23 and up at the higher range. You'll use cones in both your bisque firings and your glaze firings.
Even if you have a pyrometer—a sensing device that reads the temperature of surfaces—you will need to use cones in firings. They read temperature more accurately, and pyrometers can sometimes fail.
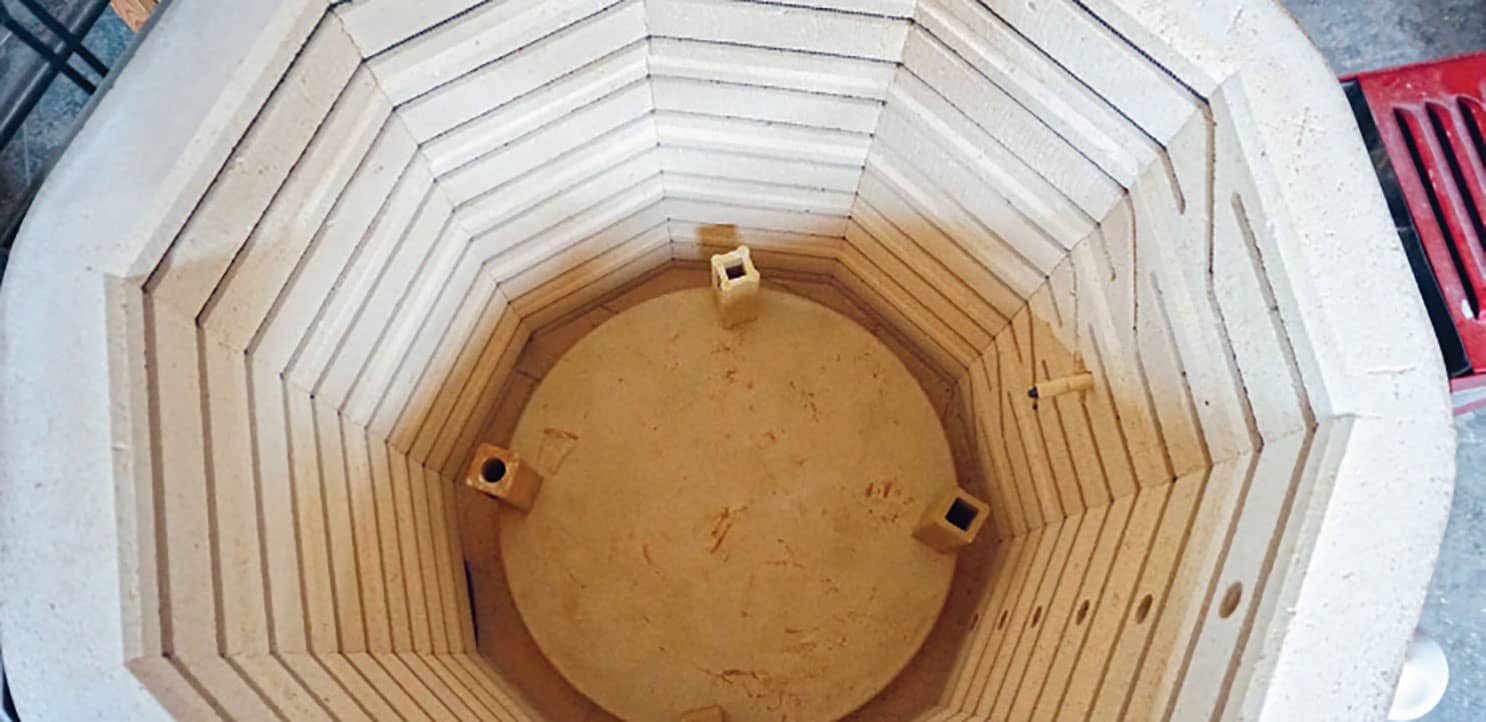
Cones are placed in a kiln in a shallow clay stand called a cone pack. You can make your own cone packs, and you should have them for several different areas in your kiln, such as the top and bottom peeps. Peeps are the spots in your kiln with a removable brick for checking cones. The bigger the kiln, the more peeps and the more areas of temperature fluctuation that need to be checked.
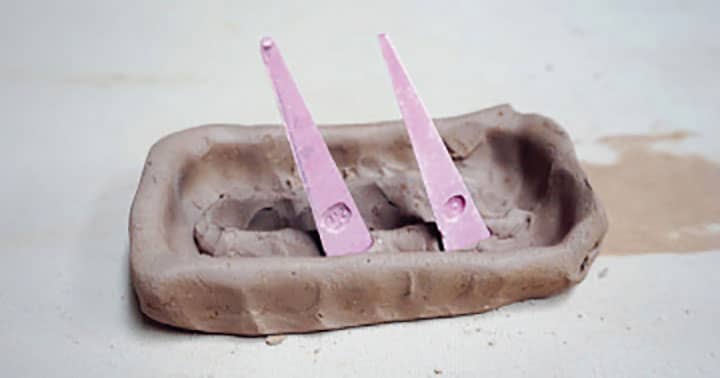
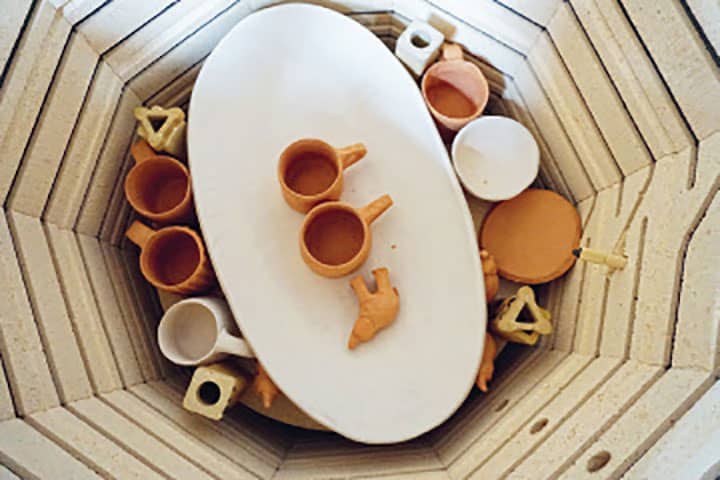
A cone indicates when the kiln reaches a certain temperature by melting. So, in preparing for a firing, you will use cones with a range of firing numbers. Make a cone pack to hold them in the kiln. Shape 4 ounces (115 grams) of clay into a thick rectangle and pinch up the edges. Then pinch up two ridges that go from end to end though the middle. This will create a clay mound for holding the cones.
Use your needle tool to poke lots of holes all over the cone pack to encourage drying. Cone packs are not bisqued, so they must be bone-dry before they go in your kiln. I try to make them well in advance of a firing.
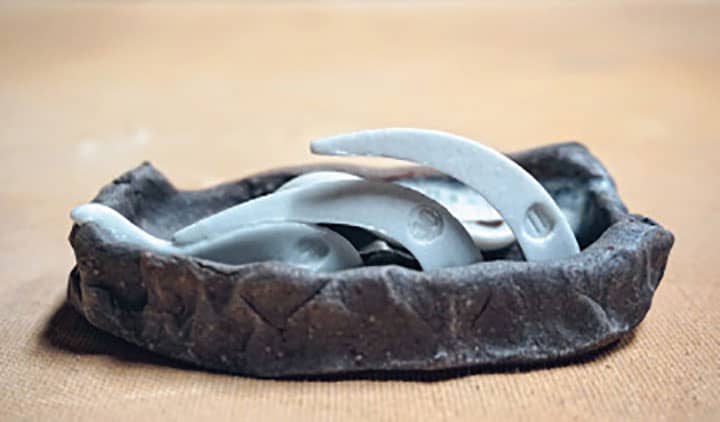
Stand the cones in the clay, going from the lowest to the highest temperature in two rows. I put the lowest in first—it will melt first, so put it in front so it doesn’t melt onto the other cones. Behind that goes the second-lowest, then the third. Then I turn the cone pack and make another row facing the opposite direction, with the next highest cone until the highest cone is in the back. For instance, I use cone 012 at the lower range to determine when to put my kiln in reduction for body reduction, followed by several middle-range cones, such as 04 and 6, to make sure the kiln is firing evenly, and then 9, 10, and 11. I fire to cone 10, but my clay can handle cone 11.
It’s a good idea to have a cone above your firing temperature, in the event your kiln is uneven. If cone 10 is down on the top but not even bending on the bottom I can continue to monitor cone 11.
The large Orton cones I use come in boxes of fifty. You can purchase them from most ceramic supply stores. You will want to buy cones that correspond to your firing schedule, regarding reduction and maximum firing temperature. If you want to start reduction at 012, then buy 012 cones. If you are using cone 10 clay, then buy cone 10 and cone 11. A few in the middle will let you know if your kiln is even or what temperature you are in if you don’t have a pyrometer or yours breaks during a firing.
Earthenware clays are low-fire, stoneware clays are mid- and high-fire, and porcelain clays are high-fire. If you buy clay from a commercial supplier, it will be rated by cones. Your clay, glaze, and firings all need to be the same cone rating. This applies to all firings: electric, gas, and wood. Electric kilns will be rated to a maximum cone temperature and the elements cannot exceed that temperature. Make sure, if you want to fire to cone 10 in an electric kiln, that it is rated for that.
MAKING A CONE PACK
CONE PACK WITH CONES
MELTED CONES AFTER FIRING
Bisque

Most pottery goes through two transformative firings. The first, the bisque or biscuit firing, transforms the unfired clay—called greenware—into a hard, but still porous bisqueware. All the moisture and organic matter in the clay disappears during bisque firing—you may be surprised to find that your pots have shrunk. Once bisqueware has cooled, it's ready to be glazed. The porous surface of bisqueware can absorb glaze and is perfect for glaze adherence. Bisque firings are done at a lower cone temperature than glaze firings.
Greenware is ready to be bisqued when it is at least leather-hard, if not completely air-dry. How long that takes is completely dependent on the temperature and humidity levels in your workspace and the size and thickness of the pot. A small, thinner cup on a hot, dry day can dry in twenty-four hours. A larger, thicker pot in the winter or rainy weather can take weeks to fully dry. You'll want to monitor your greenware, turning it over, wrapping fast-drying parts, such as rims and handles, in plastic while it air-dries, to make sure that the pot dries evenly.
If you are firing pots that are not bone-dry, you will need to do a preheat hold—placing the pots in the kiln at a temperature below 200°F (93°C) to let them dry thoroughly. (Water boils at 212°F [100°C], and any water in the clay at this temperature can cause the pot to explode.) The preheat hold can last anywhere from a couple of hours to many hours, depending on how wet the clay is. I typically put leather-hard pots in a bisque with a 12– to 15–hour hold at 180°F (82°C). Pots run the risk of cracking if not dried slowly, especially larger, thicker pots or pots with a lot of attachments. The safest way, if you have the time, is to let the pots dry slowly.
Slip
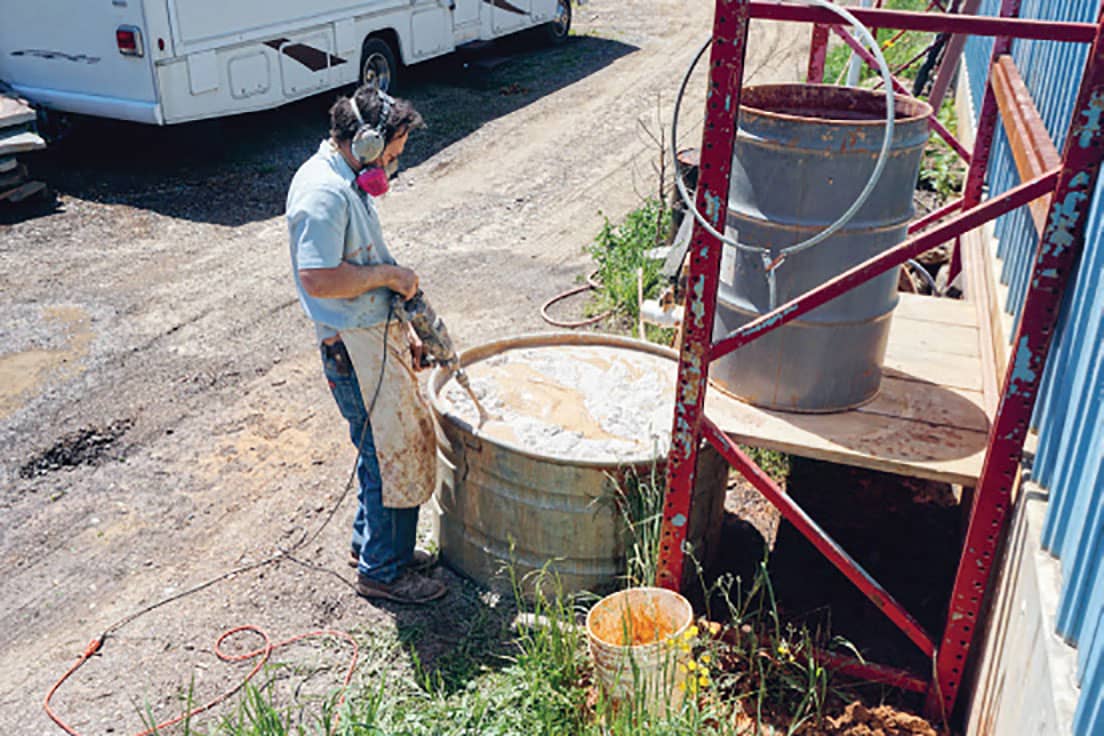
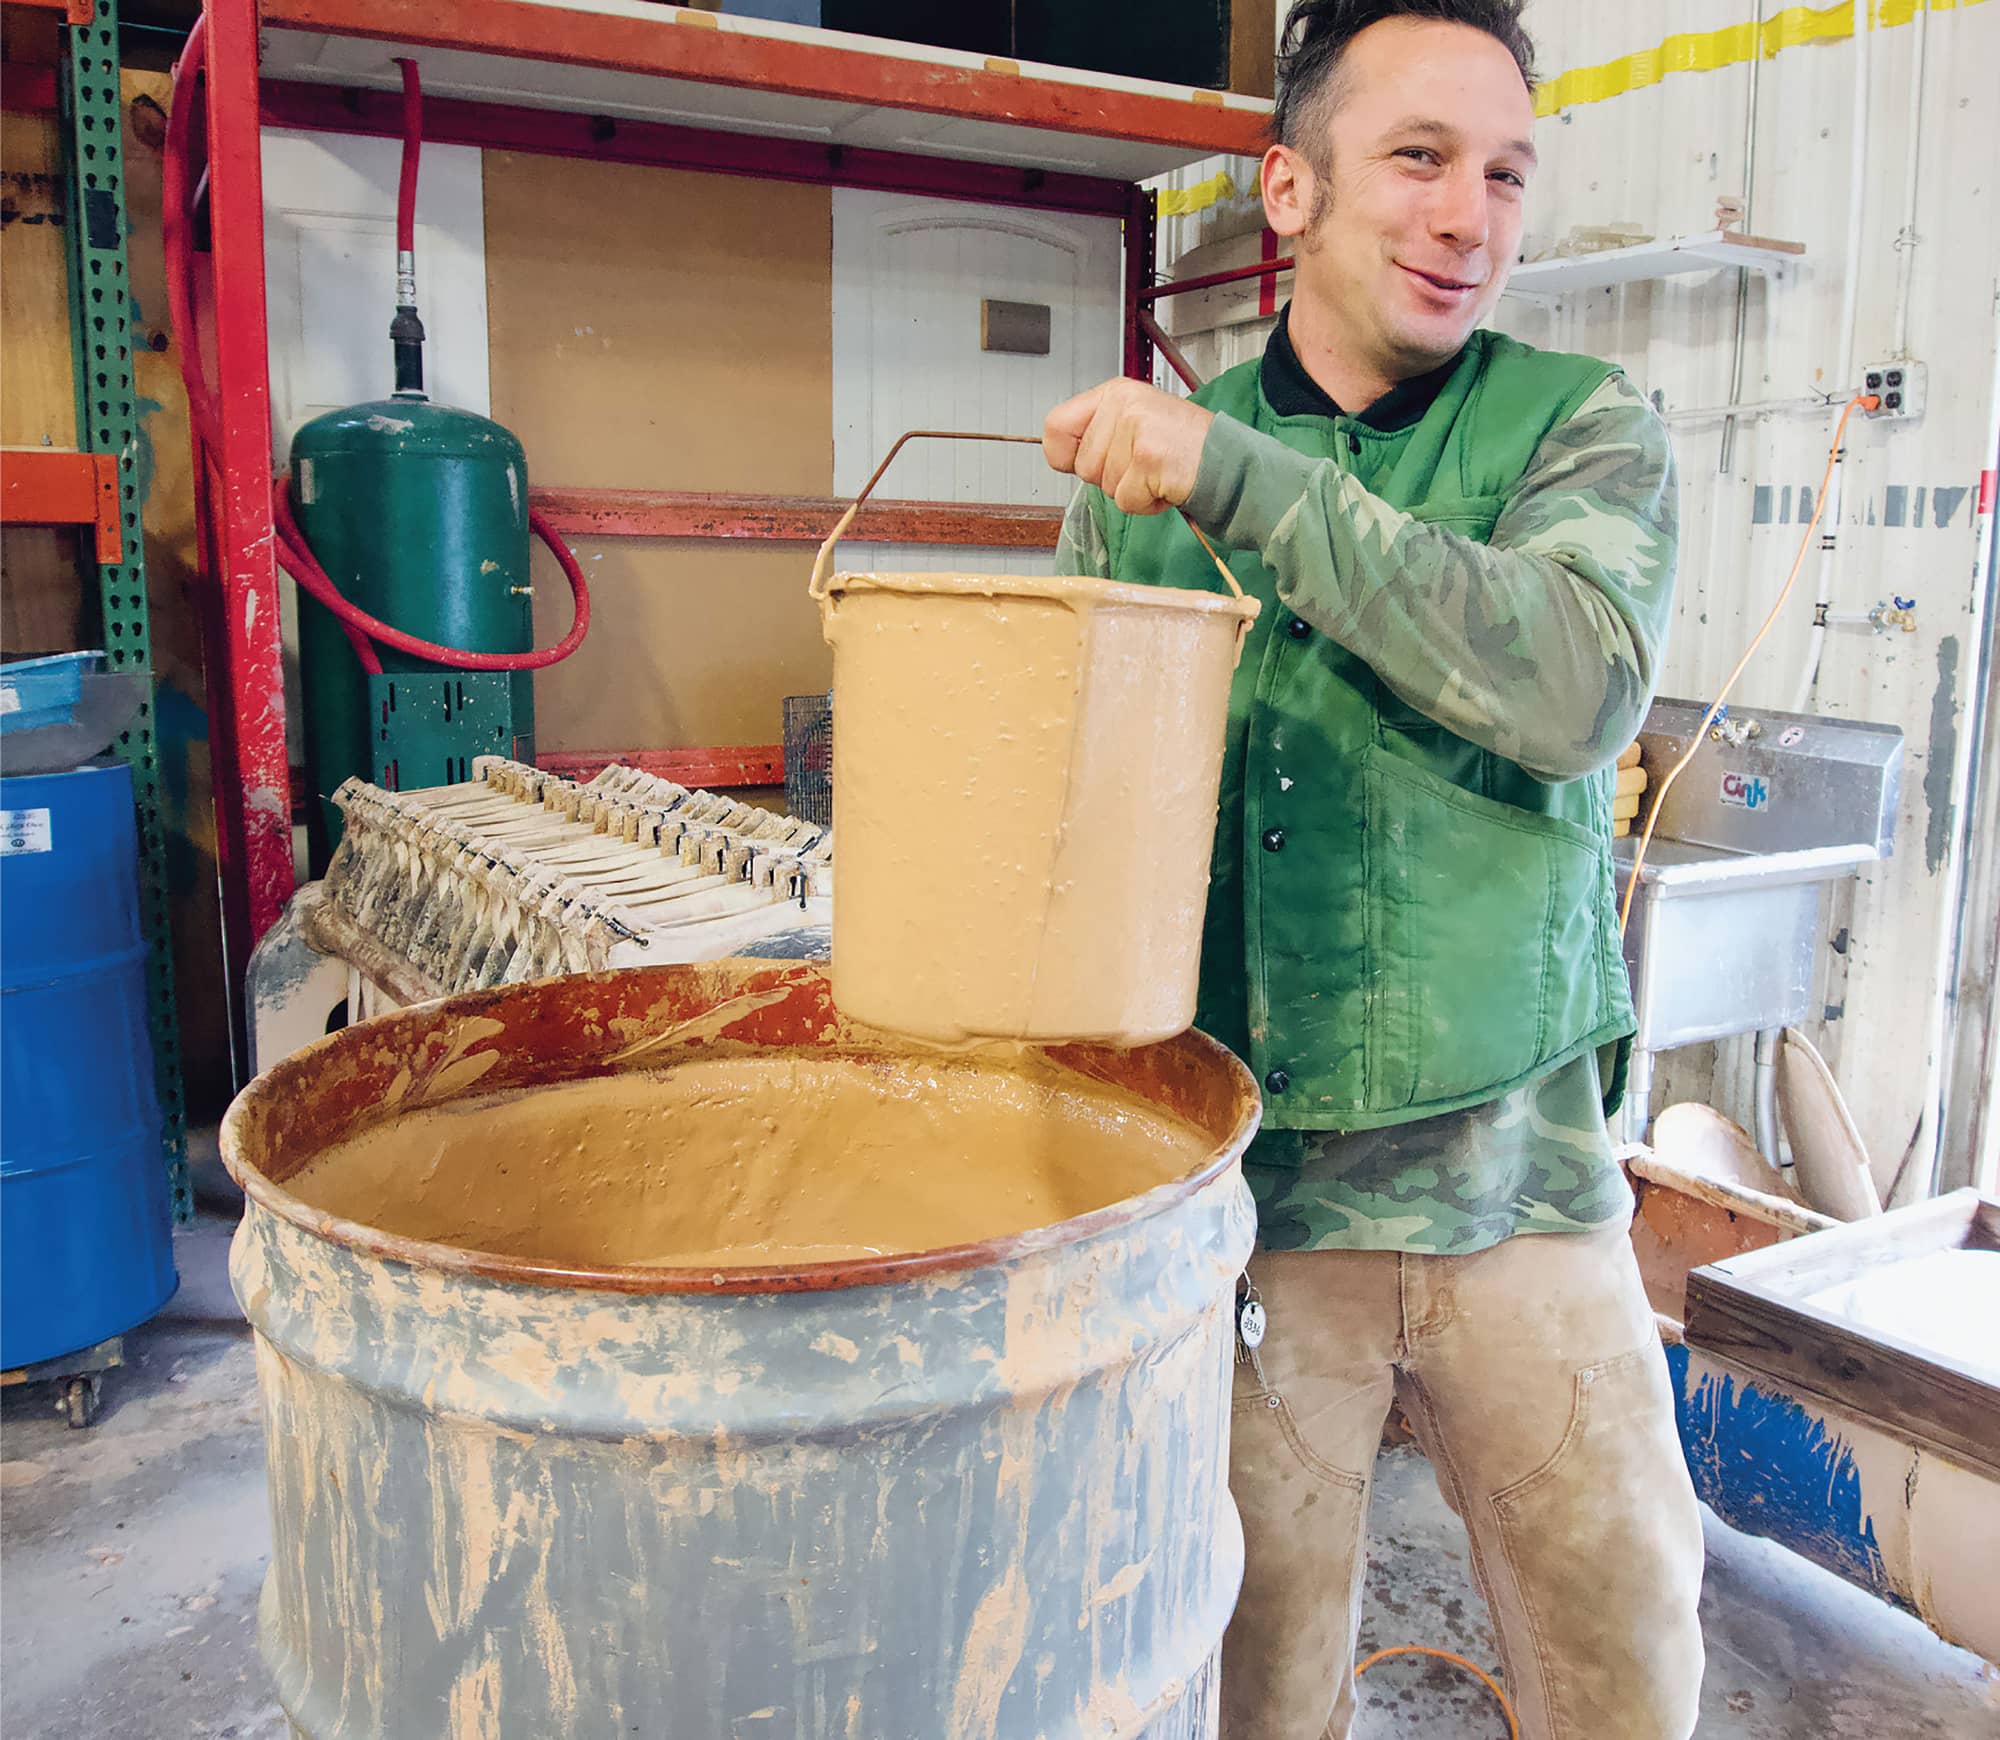
I've explained a few things about slip in the section on glazes shown here. But slip goes hand in hand with bisque firing, so I'll return to it here. Slip is liquid clay, or slurry. It can be used to cover a pot, like a glaze, or you can paint it onto a pot with a brush for decoration. You can apply slip to greenware before bisque firing so that it fuses with the clay.
I apply my slip to leather-hard pots. Applying slip to bone-dry pots with attachments will likely make the attachments come apart. If you want to apply the slip to bone-dry pots, it’s best to brush it on, rather than dipping the pots into the slip. The texture of the slip when fired can look like crazing when put on bone-dry pots and can be beautiful. I use a very iron-rich dark clay and a white slip to add another layer of color, and to provide depth and texture and whiten or brighten my glazes. There are slips formulated for bisqueware, but I do not use them.

YOU CAN APPLY SLIP TO COVER A POT IN ITS ENTIRETY BY DIPPING IT.
About Kilns
REDUCTION
In firing pottery, the term “reduction” refers to reducing or eliminating the amount of oxygen inside the kiln when the pots are fired and cooled. Glaze and clay react to oxygen, or the lack of it, and reduction firing creates wonderful variations in the finished pots.
A kiln—whether electric, gas, or wood-fired—is always rich in oxygen at the start of a firing. That is necessary, so that sulfur and organic compounds can be burned off. Electric kilns remain high in oxygen throughout the firing—you cannot reduce the amount of oxygen in an electric kiln. Gas and wood-fired kilns, on the other hand, can be adjusted. To a degree, you can control the outcome of the glazes. More about that in the gas kiln section ahead.
TYPES OF CLAY
There are generally three categories of clay bodies used in ceramics: earthenware, stoneware, and porcelain.
Earthenware is considered a low-fire clay, firing to cone 04 to 06. Earthenware clays are easily worked, and, after firing, remain somewhat soft—they chip easily and the surface can be scratched with a knife. Because it doesn't vitrify (become glasslike) in its low firing, earthenware remains porous—it must be glazed in order to hold water.
Stoneware clays include mid-fire and high-fire varieties: mid-range are generally cone 4 to 7, and high-fire cone 8 and above. There is a wide range of stoneware clays that range in color, from buff to light and medium grays and reds. High temperatures allow stoneware clays to vitrify or semi-vitrify during firing, so they are watertight when fired, and extremely durable. The clay I make is a stoneware clay.
Porcelain is the strongest, purest clay body used for high fire. Porcelain typically matures at cone 10 to cone 13. Porcelain is made of kaolin, which makes it less plastic. A clay body that is less plastic is known as “short” and can be challenging to work with. Porcelain is often described as “cream cheese.” It tends to crack more easily and warp during firings. I do not use it.
If you want to mix different colored clay bodies, as in swirl ware, you will need to use clays that fire at the same temperature and you should test them together. The different clay bodies will need to have similar shrinkage rates.
Kilns
CHOOSING A KILN
Not every potter gets to choose what type of kiln to work with. If you live in a large urban area, it's not likely that you can use a wood-fired kiln. In places like New York City, there are very strict laws and codes for using gas kilns as well. The costs associated with fulfilling city ordinances and codes is often prohibitive.
Luckily, potters tend to be a pretty generous and communal group, and in many communities there are lots of opportunities for helping and trading labor in exchange for kiln space. For the first eleven years of my pottery career, I bartered work-trade to get my pots into wood kilns, and I shared and rented communal gas kilns in town. Working communally is a great way to learn the varying methods of firing in many different types of kilns.
Wood and gas kilns are called atmospheric firings because the potter is able to control the amount of oxygen being let in during firing and cooling. So, a wide range of variations is possible, and beautiful, surprising results can be achieved.
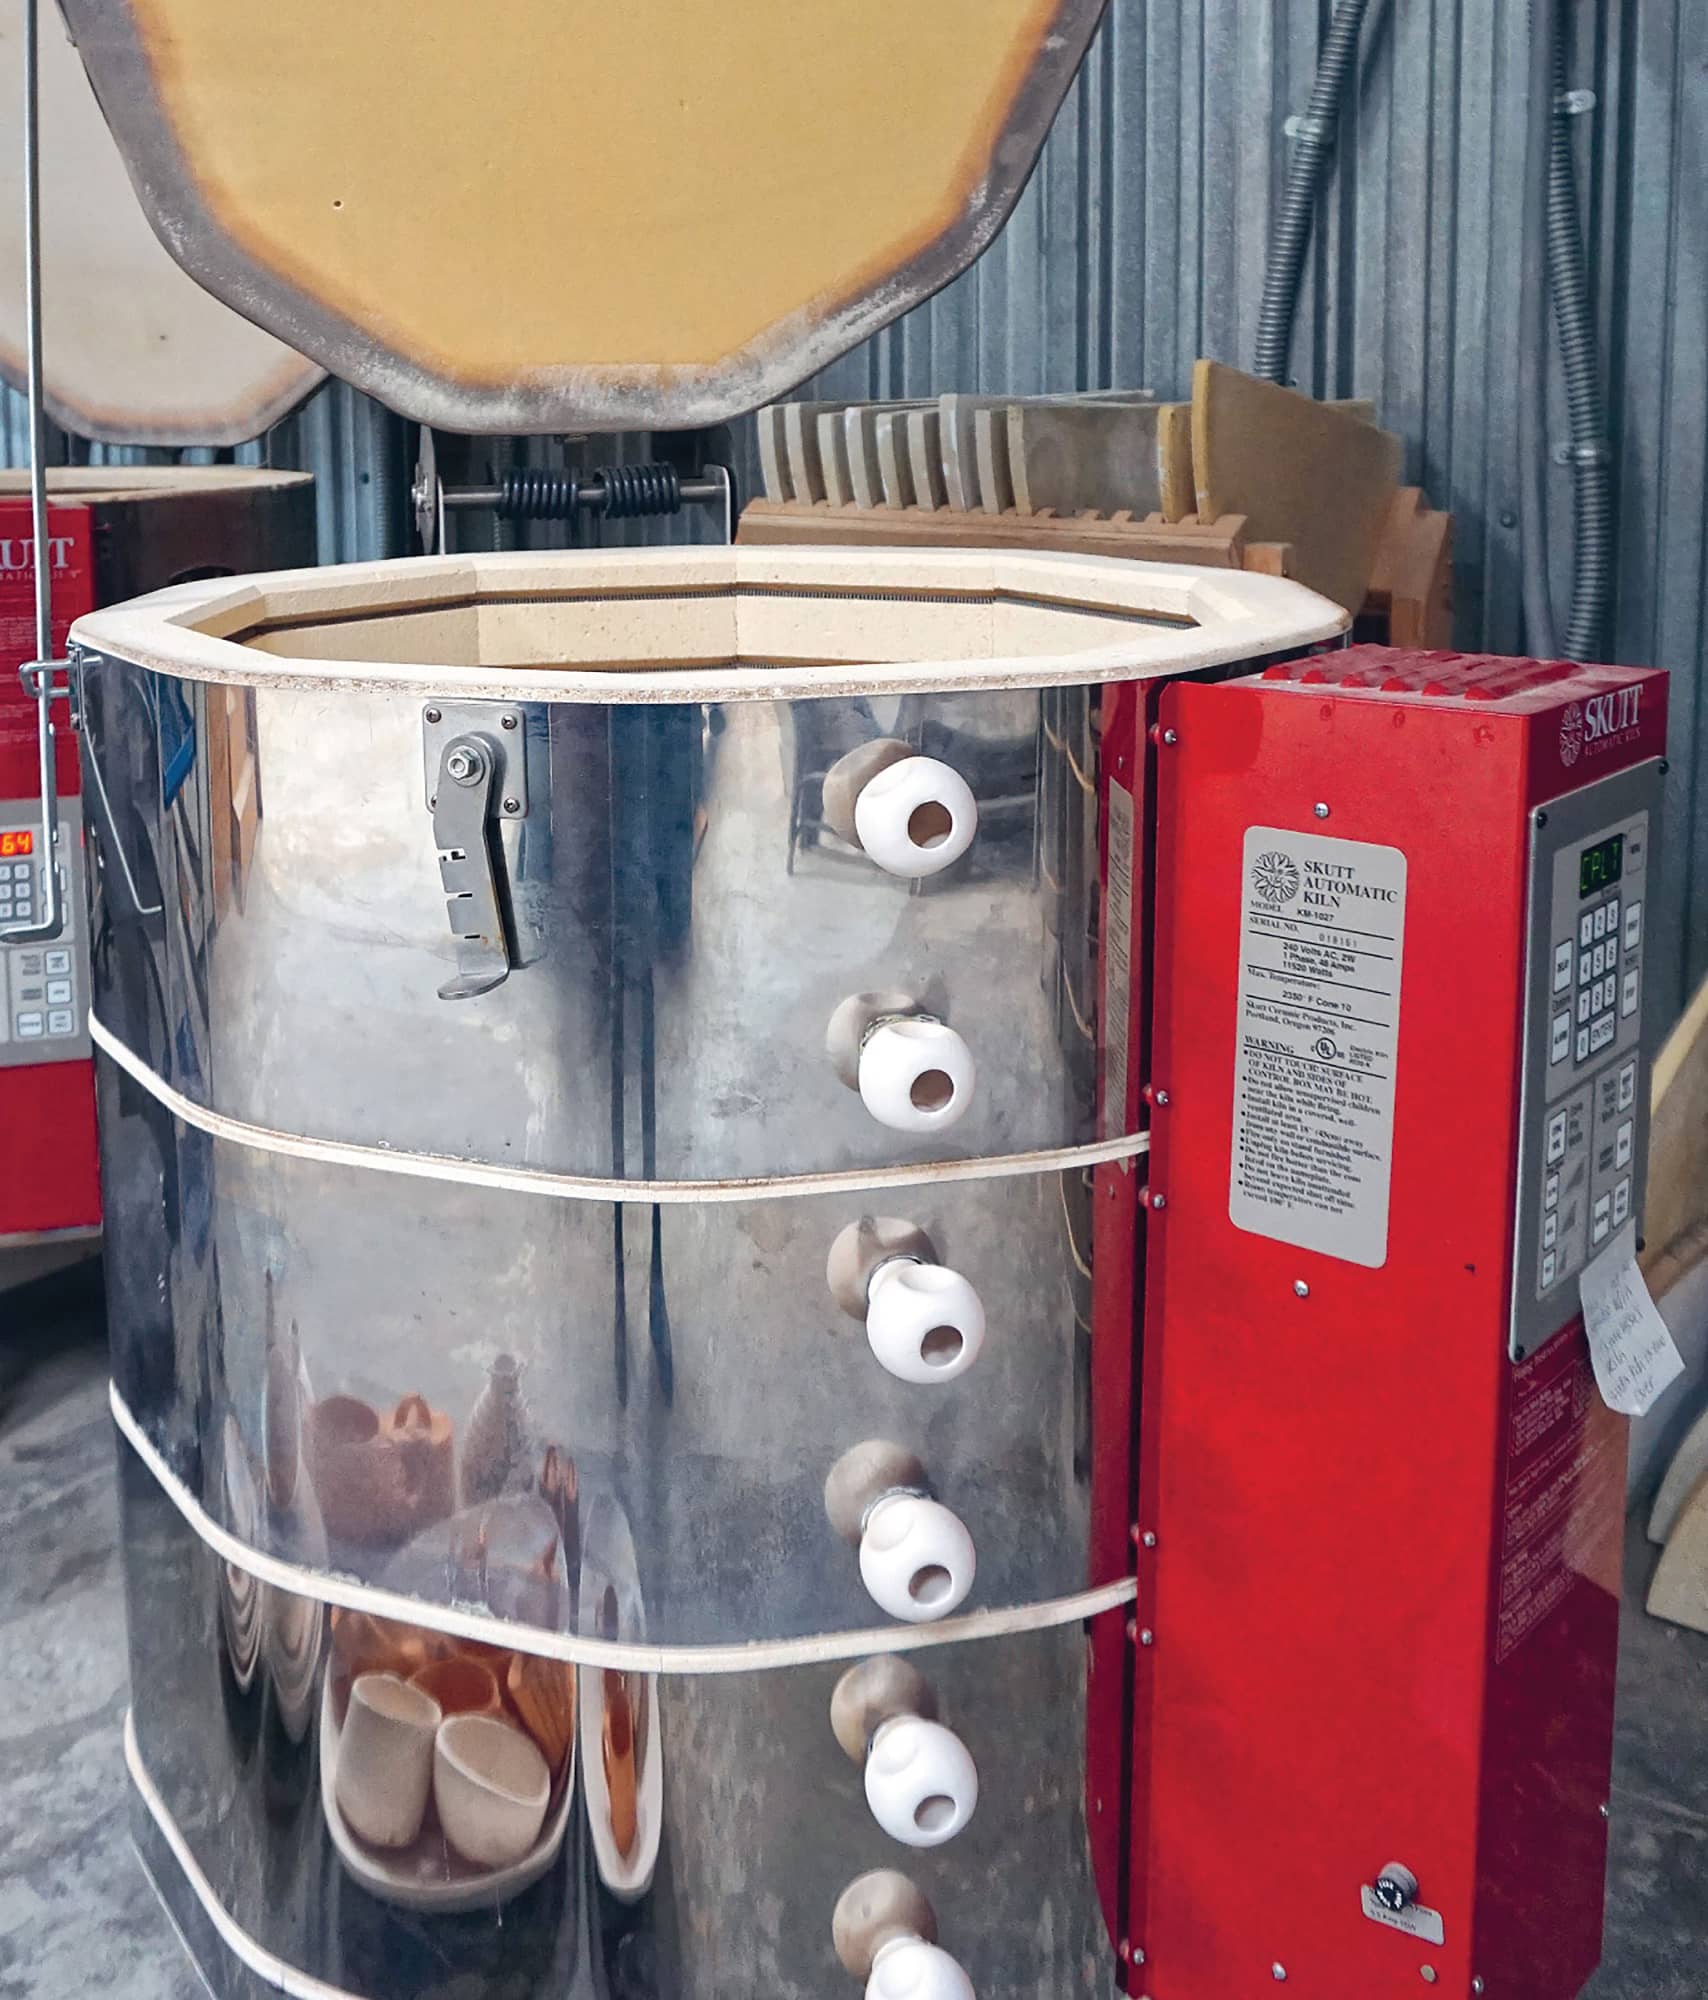
Electric kilns fire in oxidation. You cannot do reduction firings, controlling the amount of oxygen, in an electric kiln without modification. You can, however, control the speed of cooling and soaking at high temperature to create interesting and varied results. Electric kilns are much more affordable than gas-fired kilns, and you can operate them in your home, garage, or basement. They can go up to cone 10, but not all do. The higher the temperature, the faster the elements wear out.
You can fire any kind of clay in an electric kiln.
BISQUING IN AN ELECTRIC KILN
I use an electric kiln strictly for bisquing my pots. There are manual and computerized electric kilns. I use a computerized Skutt kiln for more freedom during firing and the ability to program a specific schedule.
A manual bisque kiln normally has separate controls in three segments: bottom, middle, and top. It also has a kiln sitter, which is a mechanism that holds a small cone; when the kiln reaches the temperature of the cone, it trips the kiln and shuts it down.
Electric kilns typically have multiple sections. These sections heat up independent of one another and let the kiln be turned on and heated up slowly. To fire a manual kiln for bisquing, you'll turn the segments on one at a time for specific amounts of time. To dry or hold work at a low temperature in a manual kiln, for instance, you turn on the control to low in the bottom segment for as many hours as needed. Then you turn the middle and top on low. This heats the kiln slowly from the bottom up. Then start back at the bottom by moving to medium and on up. How much time you leave between turn-ups varies. Your electric kiln should have instructions on how to fire it.
BISQUE SCHEDULE IN A MANUAL KILN
After the hold on low, I put the middle and top on low and wait three hours. Next, put the bottom on medium and wait an hour before turning the middle to medium, and then another hour before turning the top to medium. Wait three hours, then repeat with the bottom on high, waiting an hour between the middle and top turn-ups.
Stay near the kiln and wait for it to shut off to make sure the kiln sitter doesn’t malfunction and overfire. I bisque to cone 06. To be safe with bisque firing, only fire bone-dry greenware. I sometimes vary from that rule and will bisque pots when they are leather-hard and still contain some moisture—but I had to blow up a few pots in order to figure out a formula for doing so. Water boils at 212°F (100°C), and if there is still moisture in the pot when it gets to this temperature it will blow up. To get around that, I put a hold on my kiln at 180°F (82°C) for up to fifteen hours, so that it finishes drying out in the kiln. The hold time depends on how moist and/or large the work is.
You cannot allow pieces of pottery to touch one another in a glaze firing, because the glazes will fuse them together. But in a bisque firing, with no glazes, it's all right if the pieces touch. I carefully stack pots on top of one another. It is important to fire bisque slowly through quartz inversion. Quartz inversion occurs at 1064°F (573°C). At this point, quartz crystals rearrange themselves into a slightly different order. Firing too fast through this phase can lead to cracking and other serious issues later in the glaze firing.
SLOW BISQUE PROGRAM FOR A COMPUTERIZED ELECTRIC KILN
SEGMENTS 4
SEGMENT 1 50°F PER HOUR TO 180°F HOLD (ENTER NUMBER OF HOURS)
SEGMENT 2 200°F PER HOUR TO 1000°F
SEGMENT 3 100°F PER HOUR TO 1300°F
SEGMENT 4 250°F PER HOUR TO 1828°F
GAS KILNS
After eleven years of using other people’s kilns, I finally bought my own, a Bailey gas kiln. By that time, making pots had become my business and full-time job. It made more sense for me to buy a factory-made kiln than to build my own, which would require dealing with code, safety, and bureaucratic regulations that can be difficult and costly to navigate.
Having my own kiln changed everything about how I make pots. I now had the luxury of being able to fire how and when I wanted. I also had the opportunity to “get to know” my kiln and how it fires.
LOADING THE GAS KILN
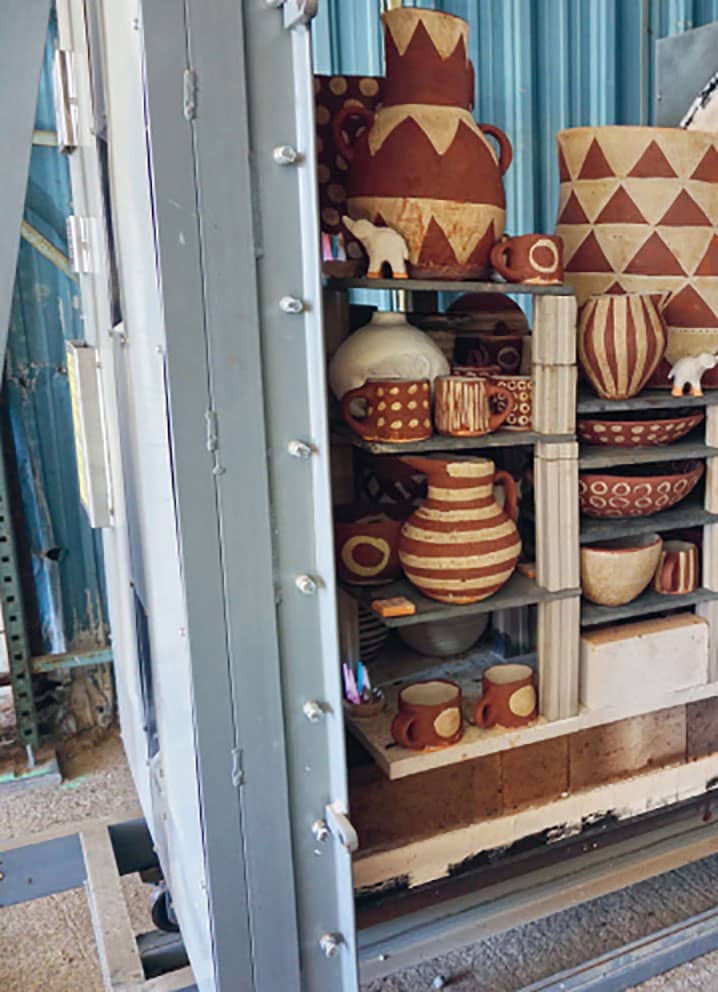
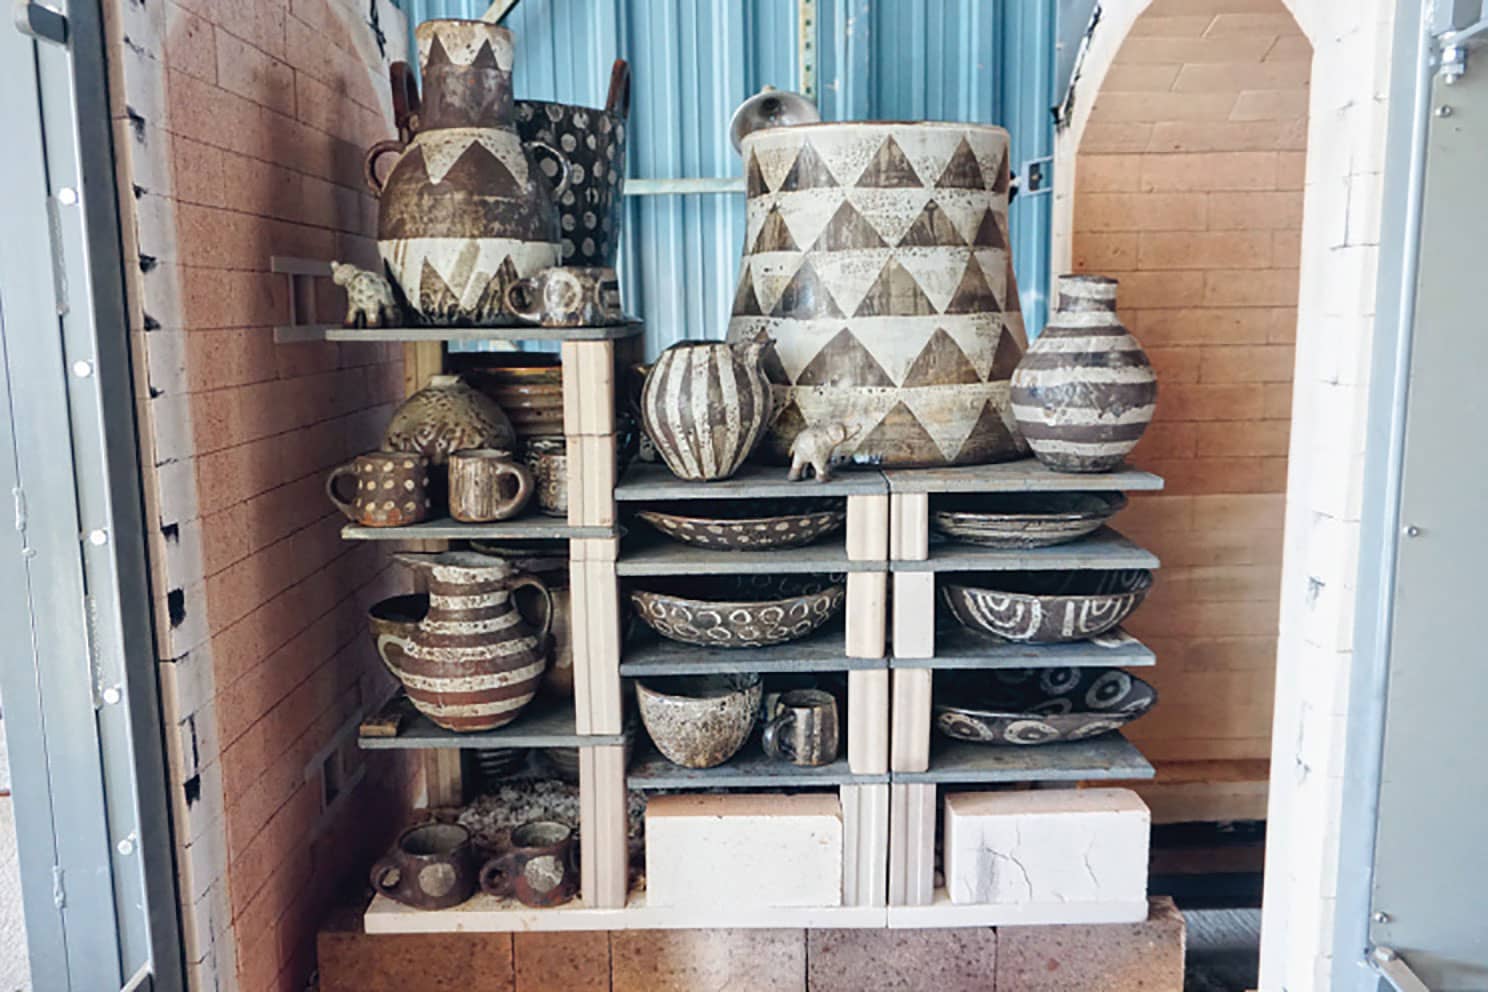
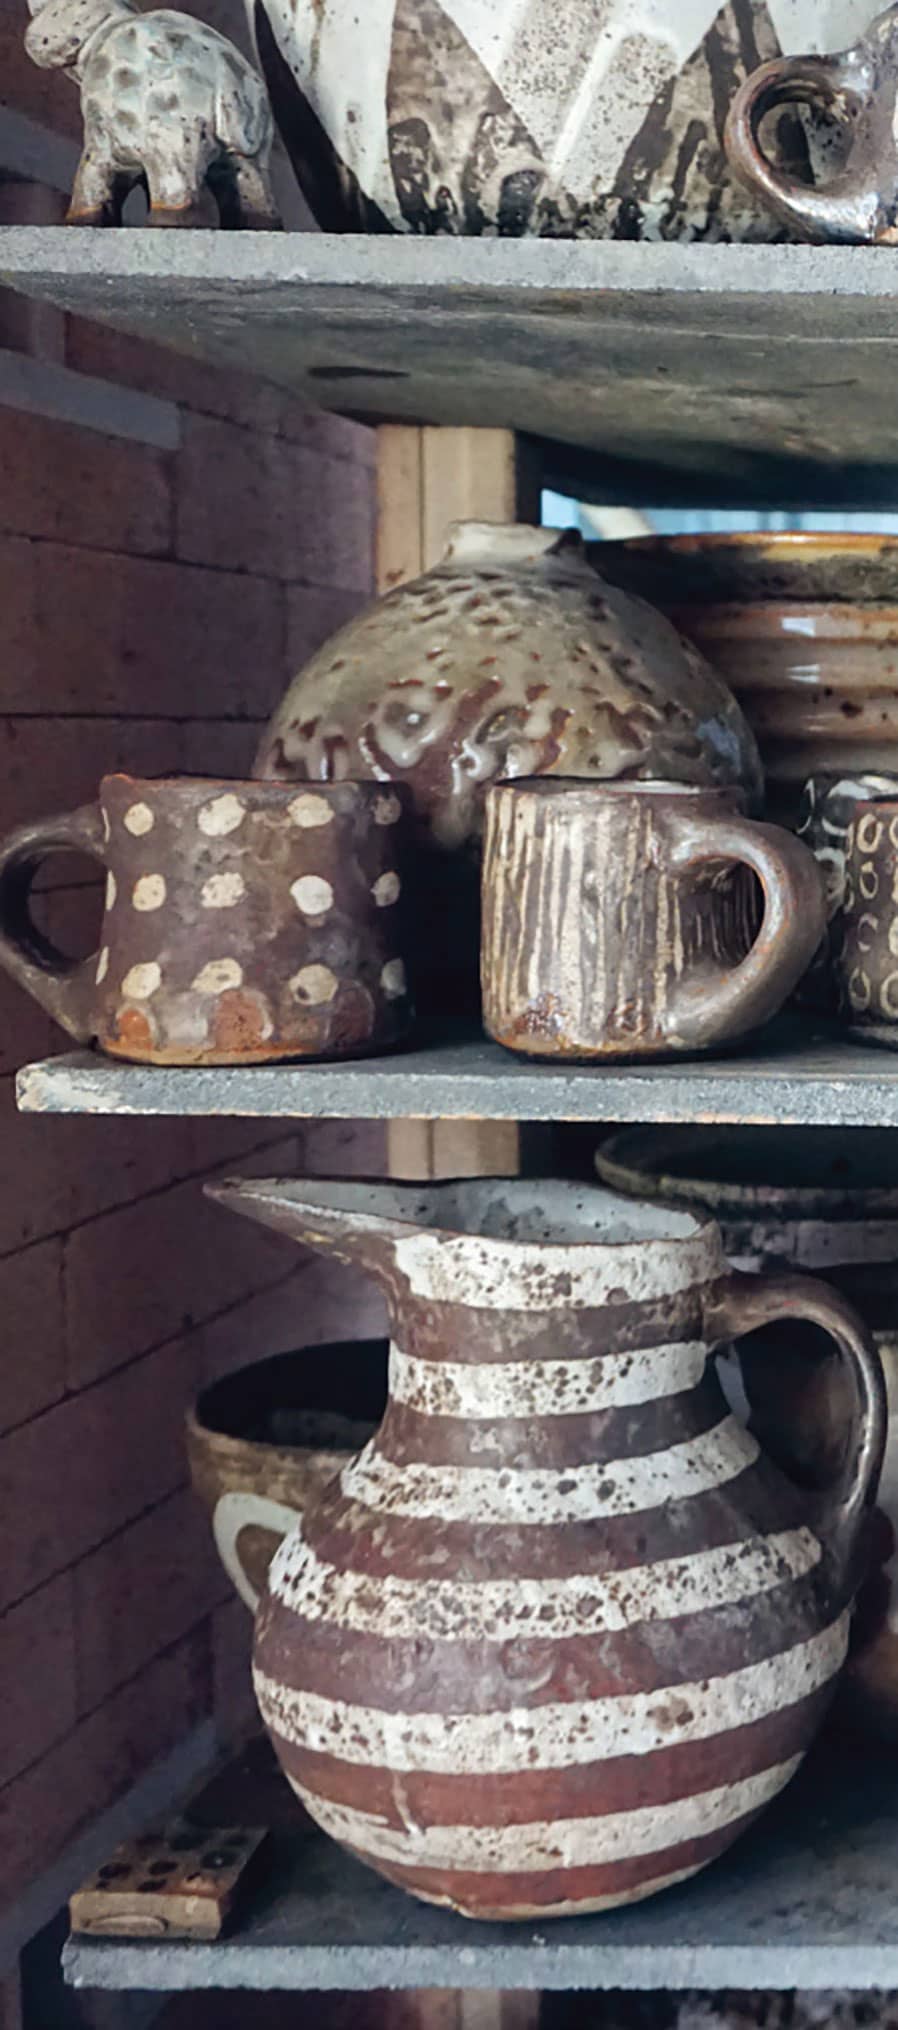
Once my pots have been bisqued, cooled, and glazed, I'm ready to fire them. Loading a glaze kiln involves thought and patience. When I load my bisque kiln, I am trying to fit as many pots as possible, carefully stacking and balancing them to get them all in; loading the glaze kiln is completely different. The pieces cannot touch each other, or they will fuse permanently one to another during the firing.
It took me a few firings to get to know my kiln and how the temperature and reduction varied in different parts of the kiln during firing. Some areas got hotter, some more reduced. Knowing all of this helps me make decisions about where to place certain pots.
My kiln is a cart kiln. The stacking area is on a cart that attaches to the kiln door and rolls in and out of the kiln on a track. I have 18 cubic feet of stacking space. This holds about 100 to 150 pots in a typical mix of platters, cups, bowls, and pitchers.
I start by putting my cone pack on the bottom in front of the peep. My kiln takes three 12" × 18" (30.5 × 45.7 cm) shelves per level, but these can be staggered. On the first level I leave an empty channel from the front to the back, because I'll need space to add wood sticks during the cooling (more about that in the reduction-cooling section ahead).
I load the kiln by putting pots of similar heights on a shelf, being careful that none of the pots touch each other. I insert stilt supports that are at least a 1/2" (1.25 cm) taller than the tallest pot on that shelf and when the shelf is full, I add another shelf that sits on top of the stilts. When using stilts, it's important to use three to a shelf and that they occupy the same spot on each shelf from the bottom up. If the stilts are in different places on each shelf, they won't provide enough strength, which can cause a shelf to break in the firing. I continue to stack in this fashion until I reach the top.
REDUCTION FIRING AND COOLING
My gas kiln is easy to fire. It takes me about twelve hours to get to cone 10. I use the R1 reduction firing schedule in John Britt’s book The Complete Guide to High-Fire Glazes. It is a schedule based on degrees per hour and reduction. It calls for a heavy reduction around cone 012, then a medium reduction until it reaches cone 10.
The way I reduce my kiln is to push the damper in a few inches to limit the amount of oxygen coming into the kiln. When the kiln is deprived of oxygen, it enters a reduced atmosphere. This reduction can be light to heavy and can have huge effects on clay bodies and glazing.
When and how much you reduce the oxygen matters. Body reduction, which affects the clay body, happens at 012. Different glazes react to how and when reduction is introduced. Iron, for instance, reacts very strongly to reduction. Iron-rich clay bodies will vary from light orange to black, with purples, reds, browns, and all variations of those colors within them, from light to dark. You can see a great example of this is in old factory bricks. If you look at a brick wall of an old building, you will see these colors varied throughout the bricks. They were made from an iron-rich clay and in the firing, were all exposed to a different amount of reduction.
KEEP A KILN LOG
The best way to figure out how much reduction, and when to do it, is to experiment and keep good kiln logs for each firing. Referencing these notes is key to understanding what is happening and how to adjust or repeat your firings.
Curiously, once I figured out how to fire for the look I wanted from my clay and glazes, I got bored! Instead of feeling excited with the anticipation of discovery when I'd open a kiln, the pots just looked the same each time! That was nice, of course, but nice pots are not all I am after. I want strange pots. Weird pots. How-did-this-happen pots. Whoa pots! I want pots that make me think about what I'm doing and inspire me to try new things. And I want pots that teach me lessons and encourage me to grow. Creativity is a living beast and needs to be fed or it will die. Feeling anxious that I would be stuck or bored or uninspired, I took down the pots from my keeper shelf.
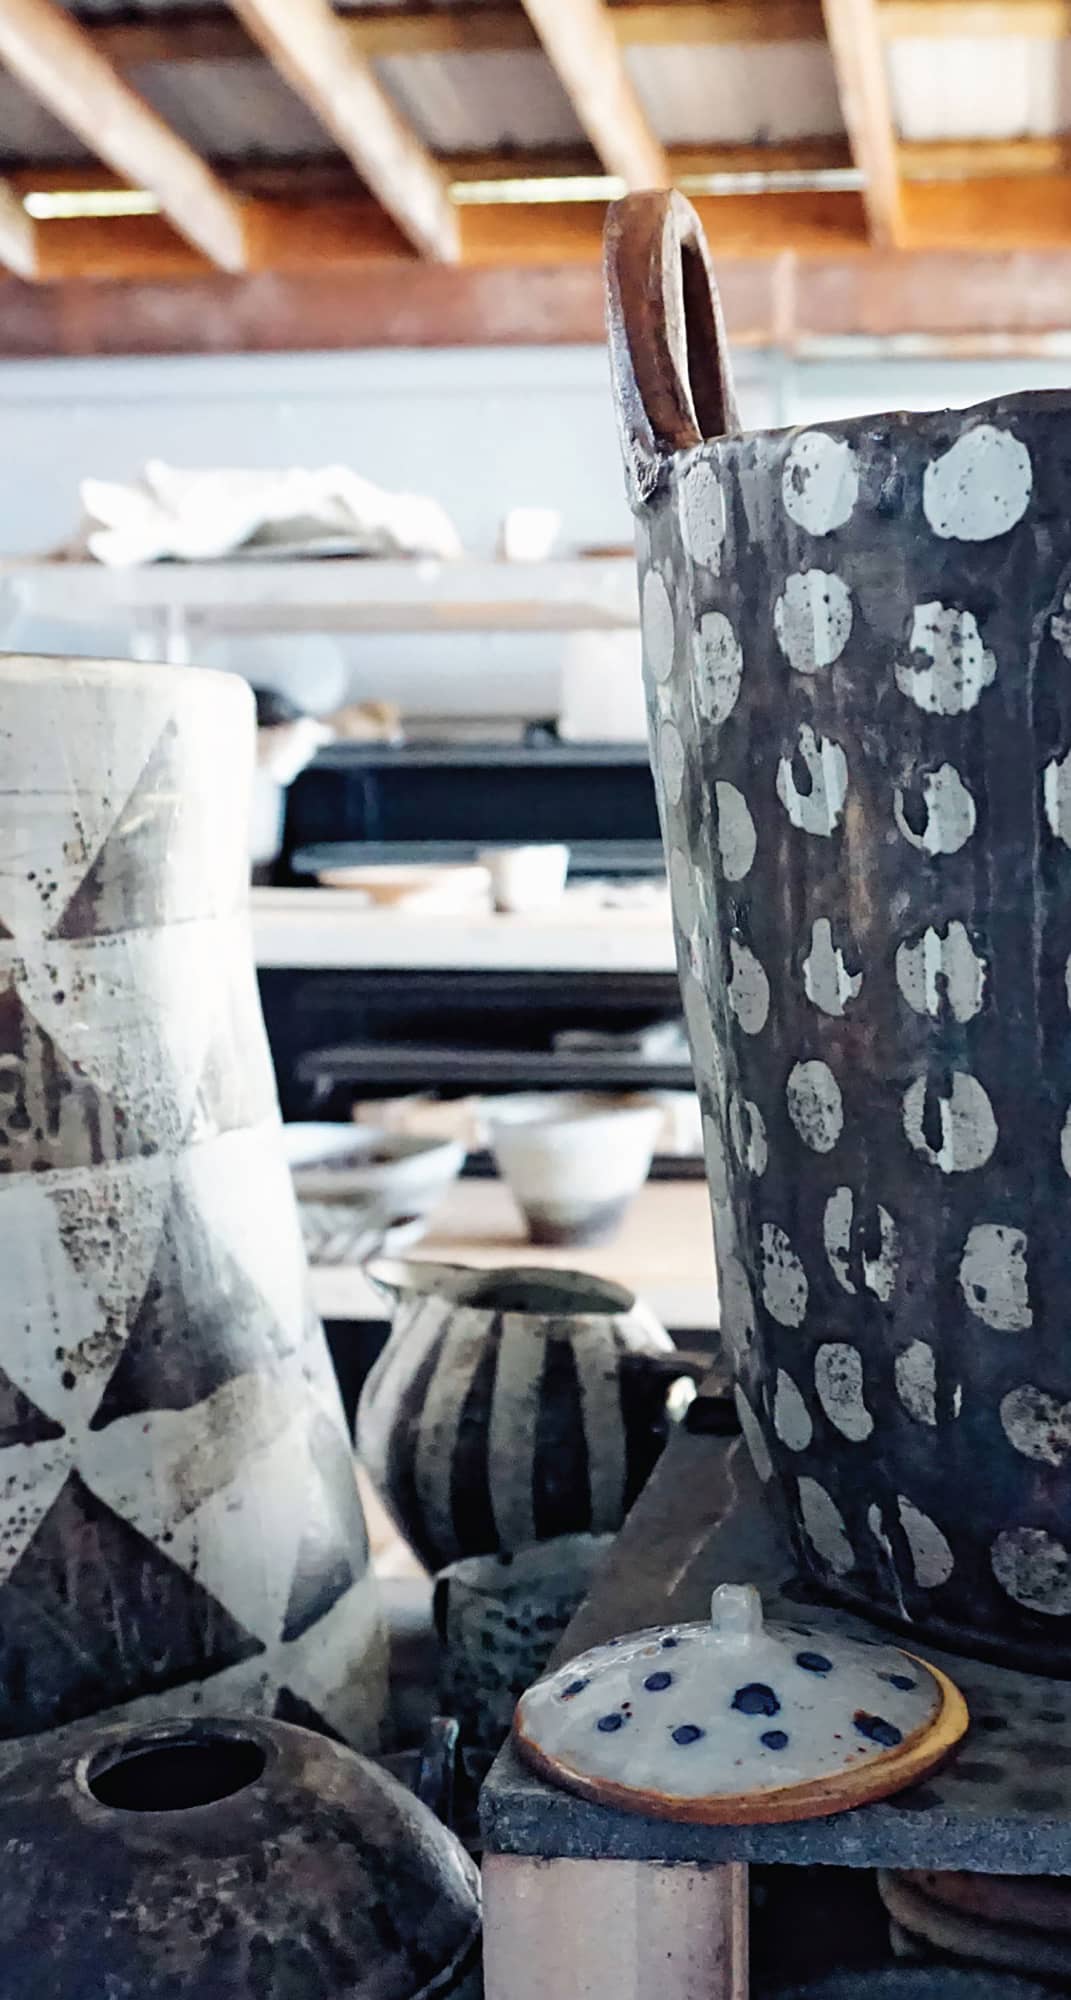
My keeper shelf houses a collection of pots that I've kept over the years. These are pots that were exceptional or so strange that it was unlikely I'd ever achieve their finished look again. The collection has become a reference of my forms, glazes, and firings.
REDUCTION COOLING
I looked at some plates that I kept from a reduction-cooled wood firing that I participated in a few years back. In this process, the kiln is kept in reduction throughout the cooling. A true reduction cooling would allow no oxygen. This firing allowed some oxygen, so technically, it would be called a controlled cooling. I studied these plates, each of which had a different glaze. They were the start of something that wasn’t quite realized yet.
When I decided to keep these plates, I had a sense that they were important to keep, even though I didn’t understand why. But when I looked at them again now, I knew instantly that I wanted to reduction cool my gas kiln. I started to do some research on the process but couldn’t find too much about it. There aren’t a lot of potters doing reduction cooling, and the ones that do mainly use wood kilns.
I got a few questions answered and some loose guidelines, but that was all. I decided to just go for it. We fired the kiln up to temperature about 2350°F (1287°C) as normal, but then, instead of sealing up the burner ports and pushing in the damper and calling it done, as we had in all previous firings, we sealed up one burner port and kept the gas on low in the other. We pushed the damper all the way in, so as not to let in any oxygen, and we pulled out the peeps every so often to register how much flame was coming out of the hole.
The amount of flame exiting from the peep hole is a good indication of the degree of the kiln's reduction. We didn’t know how much reduction to give it, so we just guessed. We kept it quite well reduced. We had already learned previously that for the clay to go black, we needed to cool in reduction until 1550°F (843°C). We used an oxyprobe, which reads the level of oxygen in the kiln, and we kept that number at about 700.
It took twelve hours to reduction cool the kiln. It was a twenty-four-hour firing, all in all. After a very long day of waiting for the kiln to be cool enough (200°F [93°C]) to open, we—both excited and nervous—opened the kiln. WOW! It worked!! It was incredible.
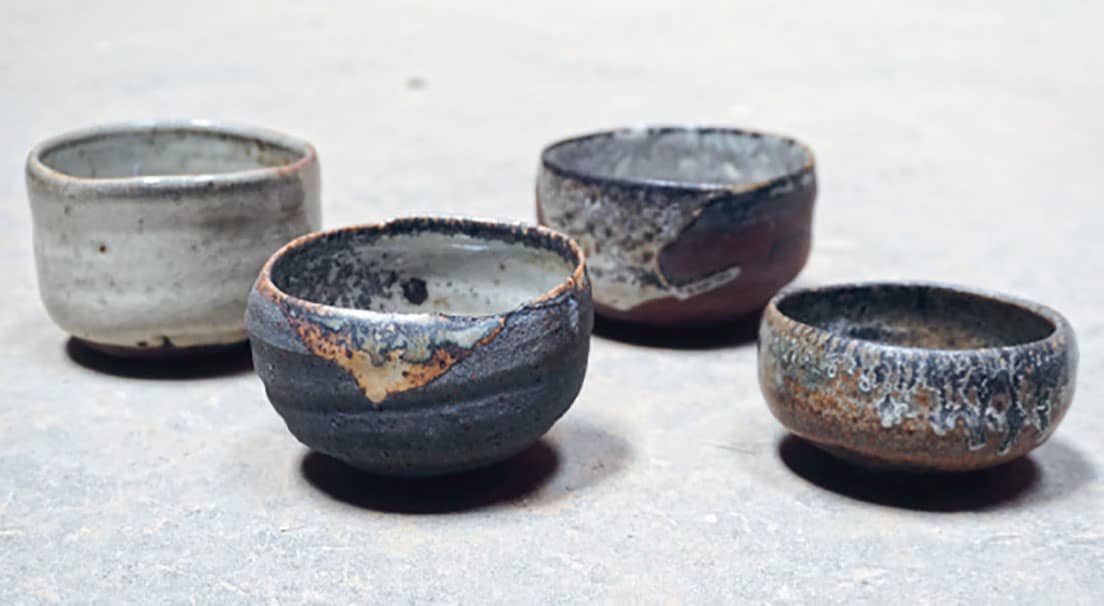
RICH BLACK TO ROBIN’S-EGG BLUE
Due to the reduction in the cooling, my iron-rich clay body went black. Normally in a reduction firing without a controlled cooling, my clay would get a nice red color, similar to brick. My Ru celadon went from its previous shiny greenish color to an icy, matte robin’s-egg blue. My iron decoration on the ash-glazed pots was a rich black, with varying shades within it.
The pots looked old, spooky, smoky, and rich. I hadn’t expected such beautiful results the first time through. I also hadn’t known what I wanted out of the pots until I had it, but I felt like I'd achieved the unknowable result that I was hoping for.
This first successful experiment was encouraging. It motivated us to keep going with it. We have since reduction cooled all of our kilns, and the work has changed and evolved because of this new way of firing. Over the next year and a half, we experimented and achieved so much variation. The clay body alone has come out red, purple, and black in different firings.
When I bought my own kiln, we needed to do some adjusting and experimenting to get those same sorts of results. We were dependent on the oxyprobe, and the slightest adjustments put our oxygen numbers out of range. Too much reduction, and the clay had an anemic look and the glazes looked washed out. Not enough reduction, and everything went purple. It was really hard to achieve a good firing.
REDUCTION COOLING WITH WOOD IN THE GAS KILN
For over a year we struggled—there were many good firings, but there were also many that weren’t great. Our dependency on the oxyprobe wasn’t working for us either. We decided to cool the kiln with wood instead of gas. When it was time for the cooling, we turned off the gas, pushed in the damper, and covered the flame ports.
We had long, skinny scraps of wood from the waste of a cabinet shop. We stuck one piece into the bottom peep. We no longer needed the oxyprobe and relied instead on the flame coming out of the peep. When the stick burned down and a short 1 to 2 inch (2.5 to 5 cm) flame flickered out, we fed another stick. It was about a stick every ten minutes to keep it in reduction. At around 1900°F (1037°C), we introduced oxygen by letting the kiln clear out by opening the damper for a couple of minutes. This seemed to make the blacks richer.
The kiln dropped to 1550°F (843°C) in half the time, and it’s much more fun to feed wood and look at flame instead of staring at a fluctuating number on an oxyprobe. We don’t even use the oxyprobe for the cooling anymore.
When we unload the kiln, we just sweep up the ash from the wood and there is no damage to the kiln.
The potters I reached out to who are doing reduction cooling and making beautiful, interesting work are Lindsay Oesterritter, John Neely, Eric Knoche, Ernest Gentry, and Warren Frederick.
WOOD KILNS
I have participated in many wood firings with local wood-fire potters. The potters Will Ruggles and Douglass Rankin of Rock Creek Pottery left a powerful and lasting mark on the potters of western North Carolina. They have moved on to Santa Fe, New Mexico, and are not currently making pottery, but during their years here, they not only wood fired their pottery, but also designed kilns. Many wood-fire potters in western North Carolina have kilns designed by them.
There are many great and informative books on wood firing and kiln design/construction. My experience is limited and the subject is vast. The more you know, the more there is to know. Each wood kiln fires differently, and while there are certain rules about how to achieve heat, evenness, and other practicalities, there is no one formula that applies. You learn how your particular kiln fires by loading the pots in specific ways, keeping notes, listening to the fire, watching the color and density of the smoke, and doing lots of firings.
Kilns The Heart of the Studio: Elijah Cody Ferguson
I can't complete this book without writing about Elijah. He is my partner in the studio and my partner in life. The pottery studio is no longer a one-person operation and he does most of the hard work, making clay, glazes, and slips; firing kilns; and rebuilding pugmills and filter presses. When I quit my job in the service industry and decided to go for being a full-time potter, he came on board full time, too.
Elijah is from Boise, Idaho. We met in Arkansas through mutual friends when I went out to dig clay one spring. That summer he came to visit me in North Carolina and never left. He had been working in construction, and now he uses his endless skills at building, welding, woodworking, and fixing machinery to make our production more efficient. He is tireless.
Elijah is a self-taught potter who first discovered his love of making pottery in high school. He is always testing glazes, digging local clays, and adding rocks and ash and other ingredients to pots to see what will happen. He has a curiosity about life that has found an interesting home in pottery and he makes beautiful, fearless pots. It makes sense that using wild clays, rocks, ash, and minerals would drive his creativity, as it matches his deep love for the natural world. He loves the forest and is always telling me the names of different plants, rocks, trees, and mushrooms. I nicknamed him nature boy.
He has taught me so much about patience, quiet, and love. His good-natured, easygoing self is a necessary balance to my tendencies of hyper-focus, stress, and anxiety. He is constantly reminding me that "we got this" and it’s going to be fine. I need that.
A family pottery business is hard, never- ending work, and we love every minute of it. It is a gift to wake up every day and be excited about what we do. The privilege of being potters for a living is not lost on us and we are grateful for it. We get to travel all over the country doing shows, and work surrounded by other creatives, our dogs, and a garden. This living lets us appreciate all that we have and do.
Pottery is a lesson in slowing down, listening, paying attention, humility, love, patience, and time.