Tools and Materials
Every ceramics supply store or online site will carry most if not all these tools.
CLAY You can hndbuild pottery with any type of clay, but for me, handbuilding is most successful with a groggy clay with a little bit of texture, called “tooth.” This clay shrinks less and has fewer issues with cracking. Typically, if you buy a clay advertised as a handbuilding clay, it will have more grog than a throwing body. Clays vitrify at different temperatures; make sure you use the clay that corresponds with the temperature you will be firing to.
CLAY

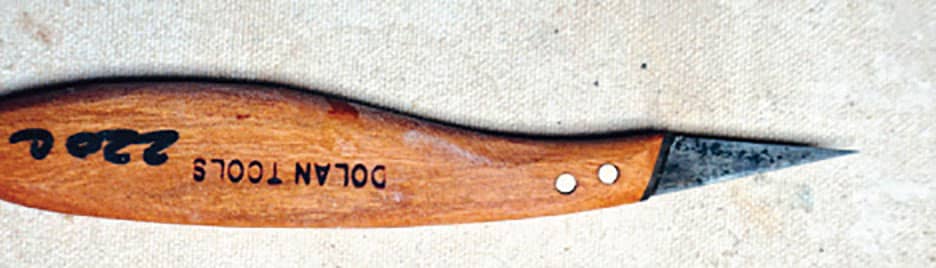
CARVING TOOLS There is a wonderful selection of tools for carving clay available from many different companies. My favorites are Kemper Pro-Line and Dolan. Most clay carving tools have a wood or metal handle with a steel tool or loop at one end. These might be shaped as a teardrop, oval, triangle, bird beak, or circle, which allows you to carve broad, fine, angled, or curved areas, or get into tight corners. Be sure to get the professional series, as the others will not be sharp enough.
THE BASICS | Kemper Pro-Line: 300 series—PT325, PT 345; 400 series—PT445, PT430, PT480L; S series—PTS10, PTS20, PTS60, PTS80; M series—PTM 80; Dolan: DPT110
KNIVES
FLEXIBLE KNIFE | Knives with a thin, flexible blade make sharper and more precise cuts. These are great for detailing handles, rims, and spouts. I use my flexible knife all the time. I like Dolan DPT 220C and DPT 240.
KNIFE
RIGID KNIFE | I typically use the rigid knife only for cutting clay slabs off molds. Knives come in many styles and widths. If you have only one, I find the Dolan DPT 250 very versatile.
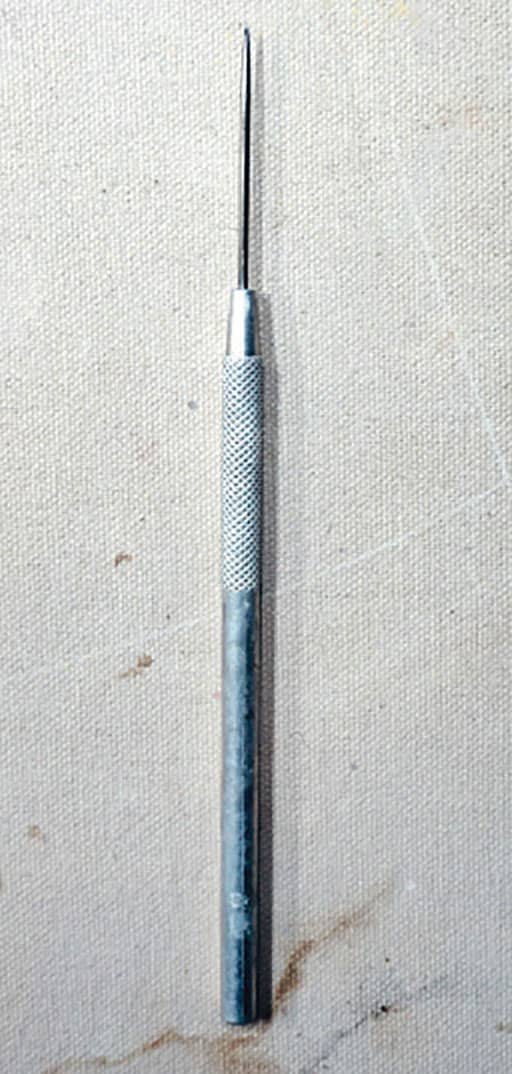
NEEDLE TOOL | As its name suggests, this tool is a steel needle with a wood or metal handle. The needle tool is great for cutting through clay when you don’t need a precise cut, marking the clay, and poking the bottom to gauge thickness.
NEEDLE TOOL
RIBS
PLASTIC RIBS | These are tools for shaping, sculpting, scraping, and adding details. They look a little like the end of a rubber spatula and are available in a variety of shapes. I prefer Sherrill Mudtools for ribs. They color-code their ribs to designate soft to hard, with red being the softest, then up through yellow, green, and blue. The essential ones are R0, Y0, G0, B0, Y3, and G3. Ribs are also available in metal and wood, but I like the flexibility of the plastic ones. I typically use a flexible metal rib only for scraping the surface of pots for texture.
RIBS
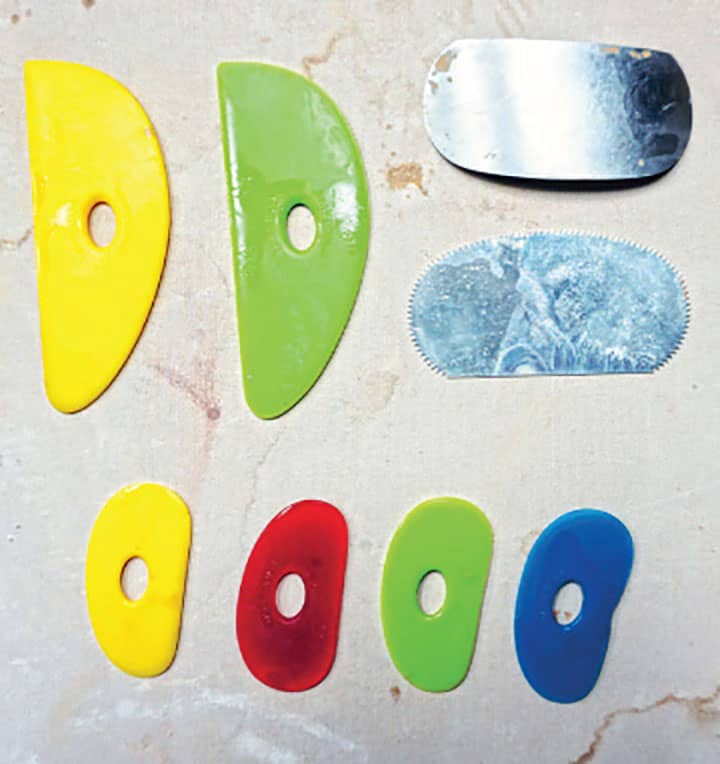
SERRATED RIBS | Serrated ribs are available in the same shapes as plastic ribs, but they have a serrated edge. I use the serrated edge for scoring clay when I add attachments, such as handles.
OTHER IMPORTANT TOOLS
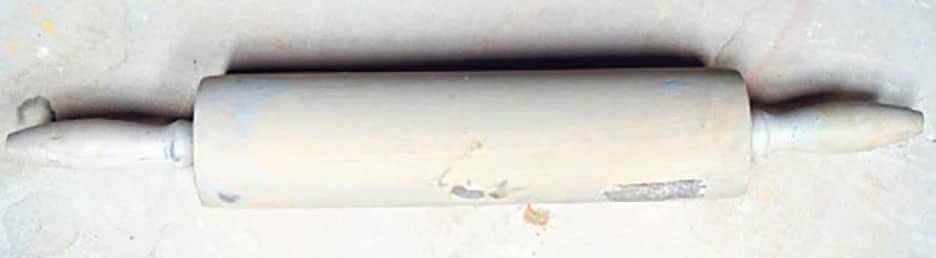
ROLLING PIN | A rolling pin is an option for slab work if you do not have a slab roller. There are rolling pins available from ceramic supply companies, but a kitchen rolling pin will work just as well.
ROLLING PIN
SHEET OF FOAM | You’ll use this often. Place a sheet of foam on your work surface when you turn your pot upside down to work on the foot. This will protect the lip of your pieces from getting flattened or damaged.
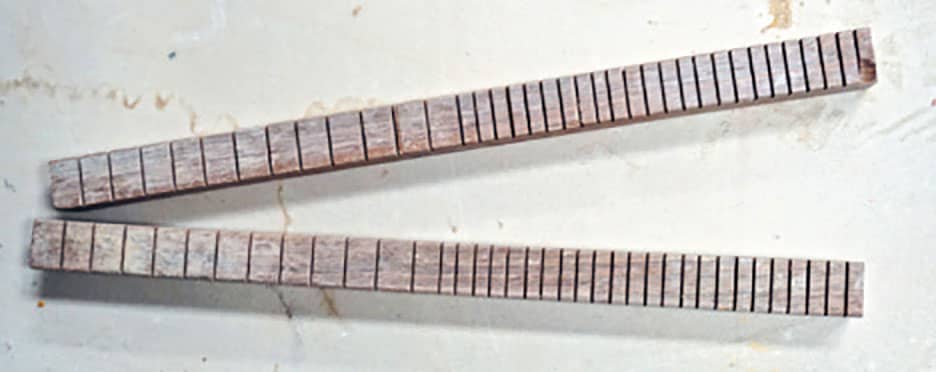
SLAB STICKS | Slab sticks are a primitive way of making slabs. Notches in the sticks allow you to wrap a wire around the sticks and slice slabs of an even thickness from a block of clay.
SLAB STICKS
STURDY CYLINDER / HALF-GALLON MASON JARS | When I’m using molds to shape slabs of clay, I place cut PVC pipe or mason jars under the molds to raise them off the table. When you lay your slab on top you will need to get under the mold to cut the clay.
SURFORM OR RASP | This is a rasp with a handle. It’s a great tool for shaving clay to make an even surface.
SURFORM
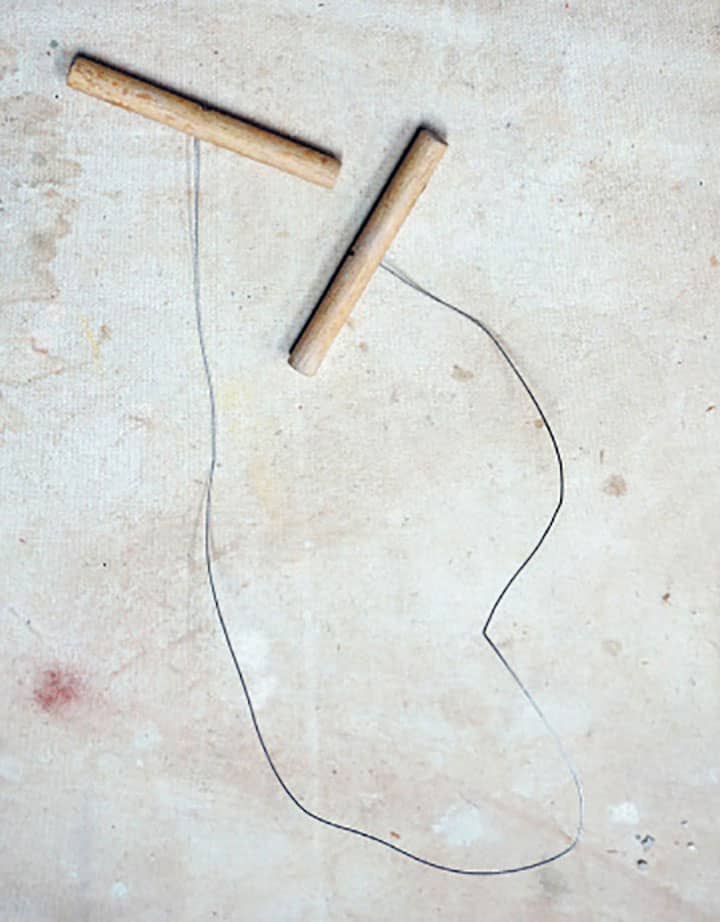
WIRE TOOL | This is essentially a length of wire with a handle at either end so that you can get a good grip on it. It’s the simplest tool in the world, but it’s amazingly useful for cutting a hunk off a large block of clay. This is a tool you can make yourself if you don’t want to buy one. All you need is a 2-foot (61 cm) length of fishing line and a washer to tie onto each end.
WIRE TOOL
WARE BOARDS | Make these from pieces of plywood cut into squares, or from pieces of drywall with the edges taped. Place these on your work surface and build your projects on them. When you're done working on a project, you can simply pick up the board to set the project aside for drying, minimizing the risk of damaging the moist clay. Plan on 12" × 12" (30.5 × 30.5 cm) squares for smaller projects and larger for bigger work.
WEDGING TABLE | Your work space will need a sturdy table or a board covered in canvas for kneading, cutting, and working on clay. The surface will be alternately wet, scraped, or embedded with clay, so it will need to hold up to rugged use.
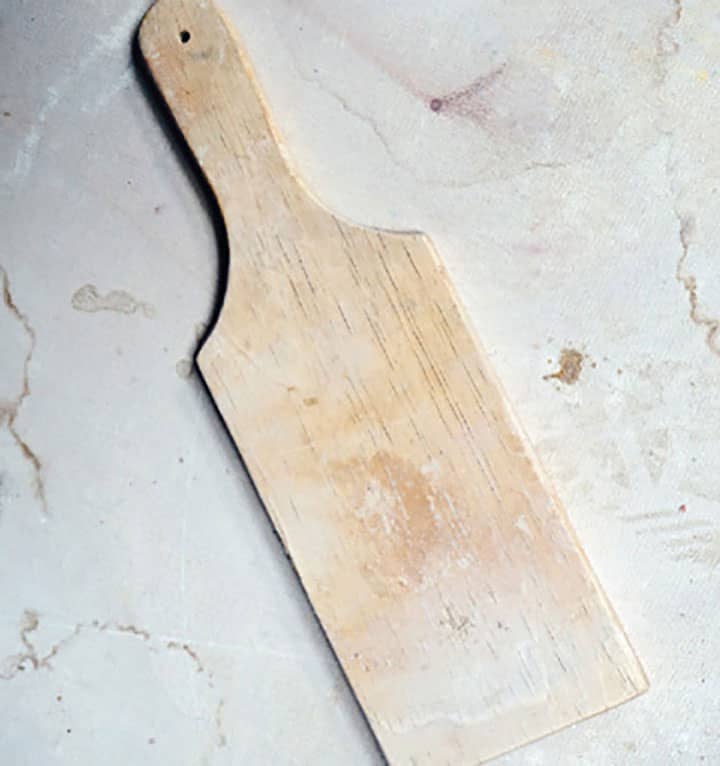
WOODEN PADDLE | This small, useful hand tool is used for shaping pots and compressing clay.
WOODEN PADDLE
OPTIONAL TOOLS
SLAB ROLLER | If you are setting up a professional pottery studio and plan to do a lot of handbuilding, a slab roller is a good investment. It’s much like an intaglio printing press that allows large slabs of clay to be rolled out evenly.
SLAB ROLLER

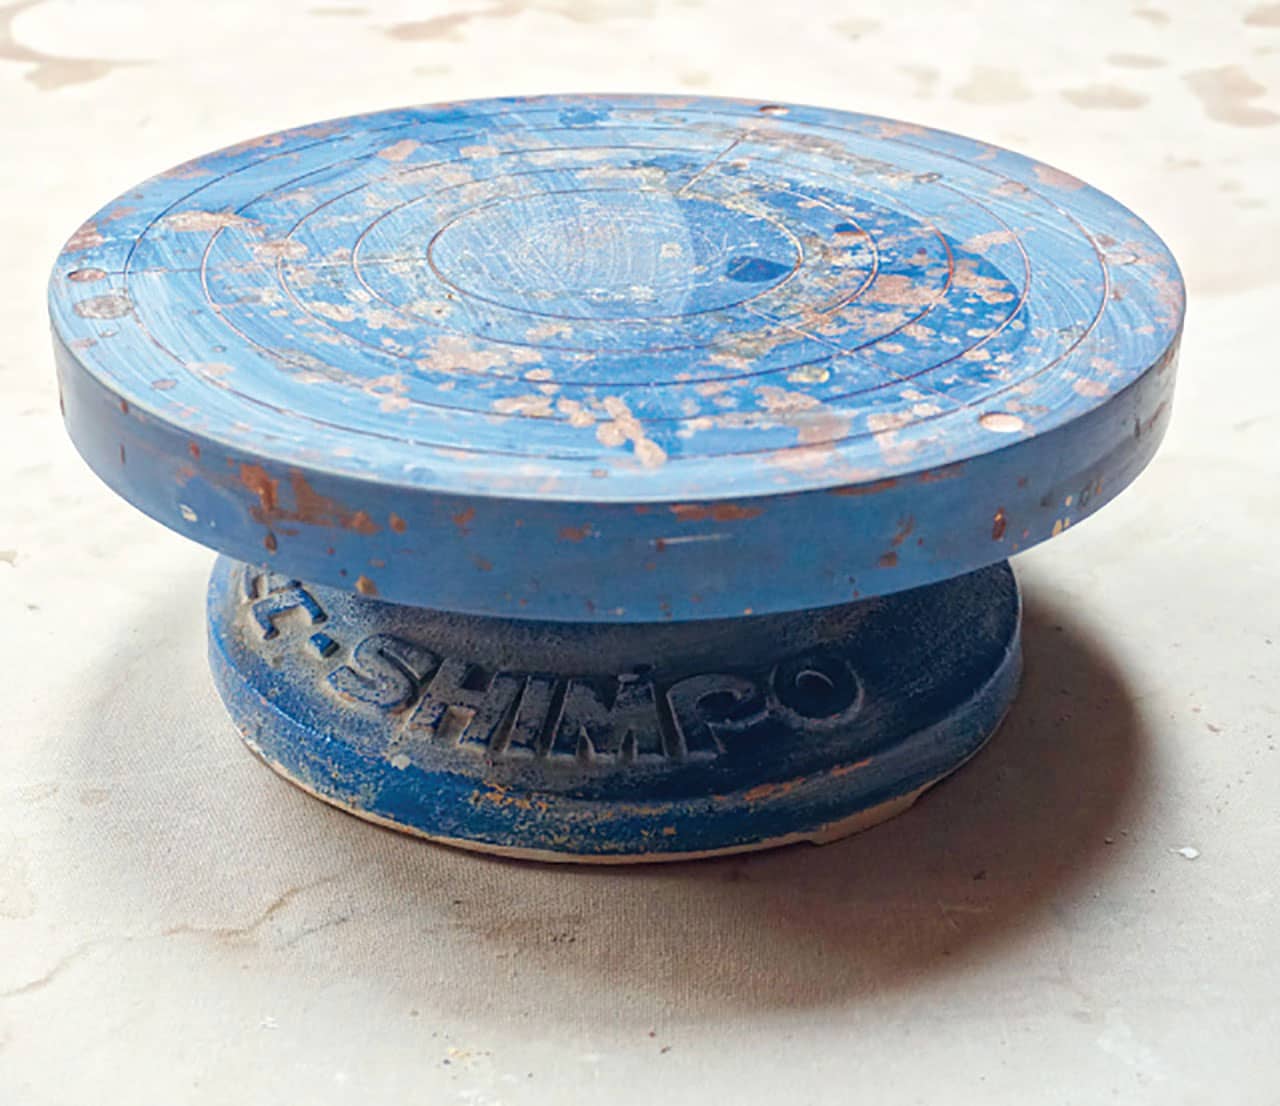
BANDING WHEEL | This handy platform is a potter’s lazy Susan. You can turn it 360 degrees as you carve or glaze a pot.
BANDING WHEEL
CHOP | This is a small stamp with your initials or a symbol that identifies your pots as yours. Make your own chop out of clay and bisque fire it for stamping all of your pots. It’s an alternative to literally signing your pot.