Stick To It Pressed Jewelry Set
I love making pendants more substantial using a background of just epoxy clay. Use any color that makes sense with your pendant. The clay adds weight and a frame that makes the item stand out. It also adds a handmade quality that you won’t get if you just hang a store-bought metal pressing from a jump ring.
 Skill level: Easy
 Time: 15 minutes plus curing time
Supplies
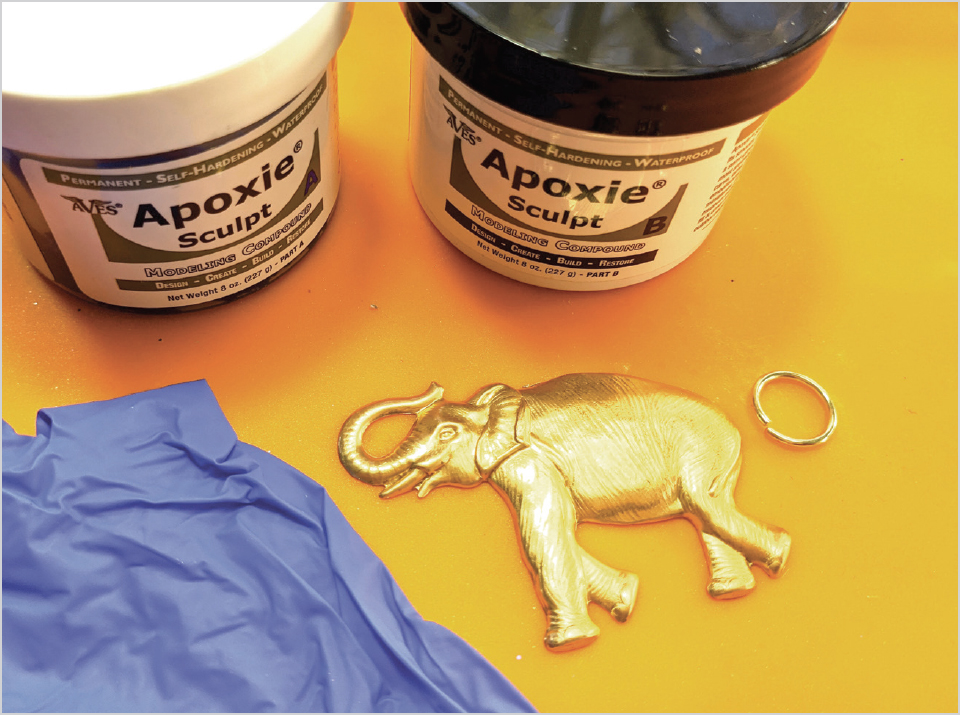
♦ Disposable gloves
♦ Two-part epoxy clay (any colors)
♦ Protected work surface
♦ Wet wipes
♦ Brass pressings
♦ Beads
♦ Jump rings
♦ Gold paint marker
♦ Chain
♦ Lobster claw clasp
♦ Earring hooks
Gay Isber
1. Mix the clay. Roll it into a ball and flatten it. For most items, you can just press the brass item you want to feature right in the center of the clay. This is the case for the beetle charm and the horseshoe earrings (which also have beads pressed into the center). But for this elephant, I wanted to create a wax seal effect.

Mike Mihalo

Gay Isber
2. I found that the cap to the clay container was the perfect size for the elephant. Choose an item to fit your brass pressing.

Gay Isber
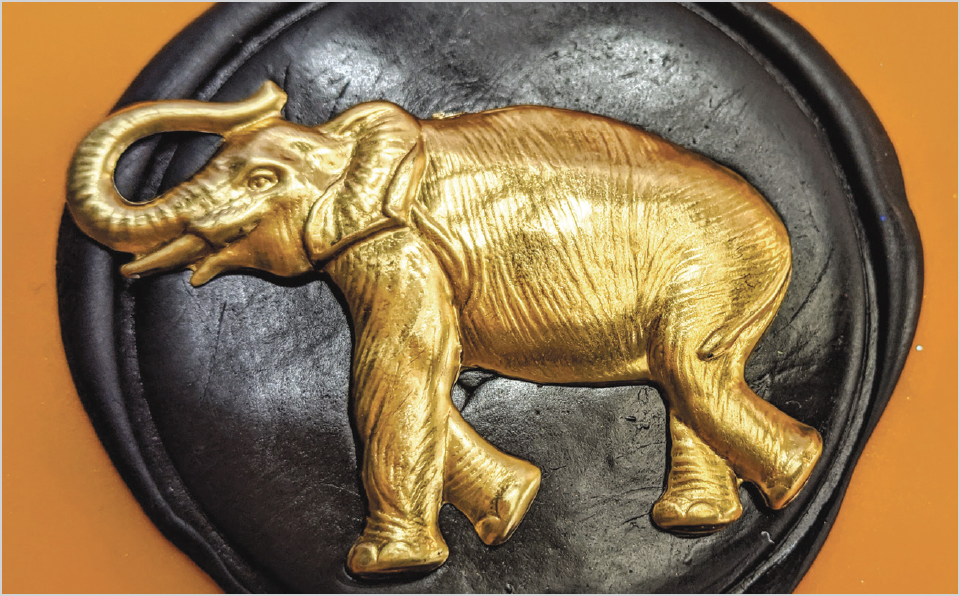
3. Press down on the flattened clay with the cap. See how some of the clay oozes out from underneath? That’s exactly the wax seal effect I’m looking for.
Gay Isber
4. Add the brass item, making sure it’s pressed into the clay, not just sitting on top. Insert a jump ring at the top of the pendant, smushing it into the clay well.

Gay Isber
5. After about an hour of curing time, burnish your clay with your fingertips to make it shiny. Just rub and push down over and over until it has a glossy look. Then allow it to cure fully. Once the clay is cured, use a gold paint marker to highlight the edges. Your piece is ready to be added to a chain or leather cord! Make earrings out of the smaller pieces.
VARIATION
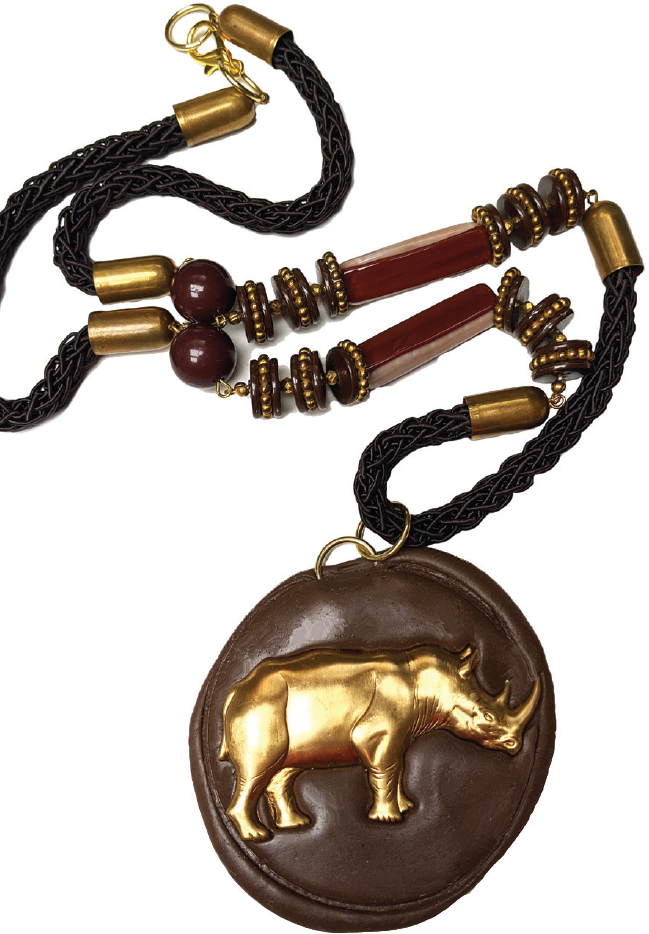
Use findings and beads that match the color scheme of your clay and your metal item.
Gay Isber