

Grilling Evolved
the evolution
OF FIRE

What began with a spark turned into flames . . . and then the flames sparked some clever designs.
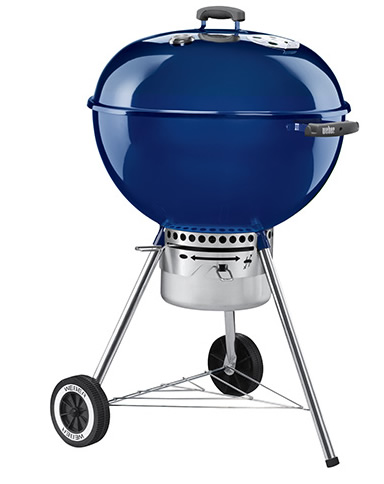
CHARCOAL GRILLS
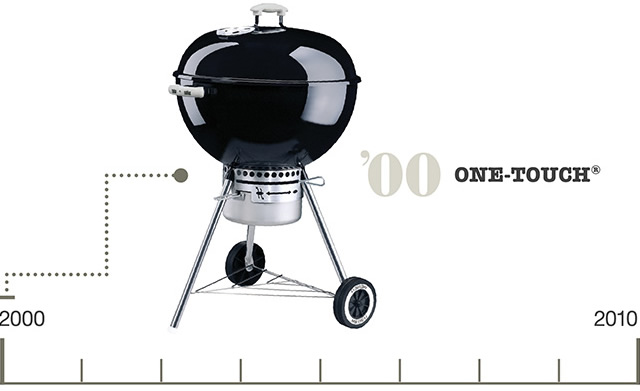
Our classic kettle is a purist griller’s dream, but for those who dream even bigger, along came a few bells and whistles. To some charcoal grills we added the convenience of gas-assisted ignition and plenty of grill-side charcoal storage. A large work surface on some recent models answers the ever-present “where do I put my tongs?” call, and a lid holder provides a safe place for the lid while you tend to your fire.
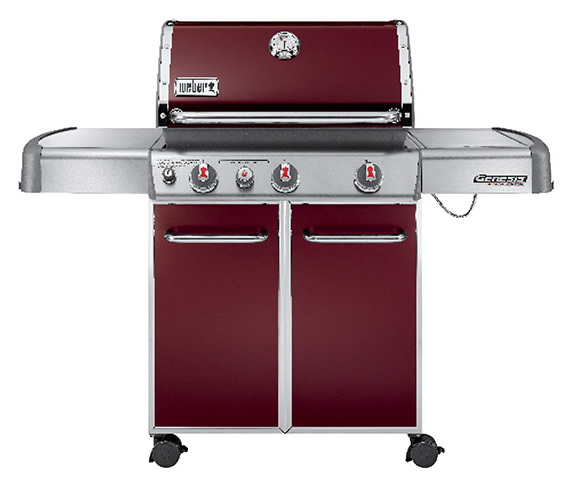
GAS GRILLS
Back before we introduced the Genesis® grill in the mid-’80s, predecessor gas grills used lava rocks to distribute heat. While, um, groovy in theory, they were a little too hotheaded in practice, causing volcanic flare-ups and torching food beyond recognition. The gas grill market was booming and just starting to outpace charcoal grill sales, as busy folks everywhere sought convenient options. Riding that wave—but steering clear of the lava thing—we engineered the Genesis grill with a set of precisely angled bars set over the flames. These Flavorizer® bars channel juices falling from the cooking grates down onto the heating element where they sizzle and smoke, creating that coveted grill flavor all the while deterring flare-ups.
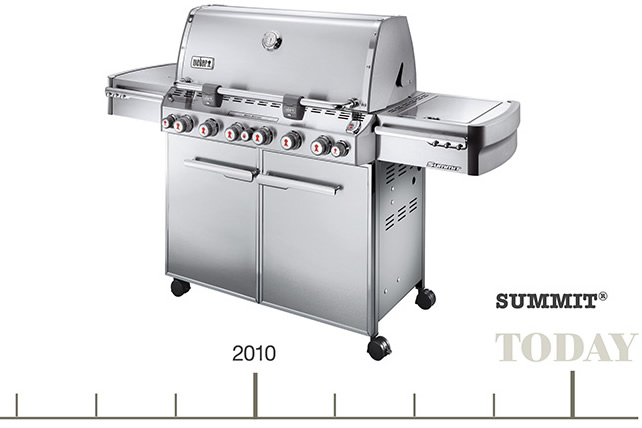
That first Genesis model was a runaway hit, but it keeps on getting better. For instance, a Sear Station® allows you to cook food at extremely high temperatures—a must for that perfect steak. A tank scale provides an accurate reading of how much gas is available, which is nice to avoid panicked propane runs. Side burner technology rivals the kitchen stove with the ability to cook at super low or super high temperatures.
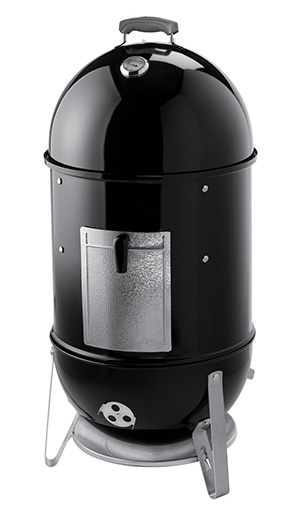
SMOKERS
Where the kettle leaves off, the smoker picks up, and that is at the next level of low-and-slow grilling intensity. The first smokers were fashioned out of old oil drums cut in half and rigged with a cooking grate. Like any good idea, it was taken in all sorts of directions—vertical smokers, water smokers, electric smokers—that all did pretty much the same thing: cook food at a low temperature for a very long time. The Smokey Mountain Cooker™ smoker is designed simply but smartly, enabling consistent temperatures using a spot-on thermometer and vents to control airflow.
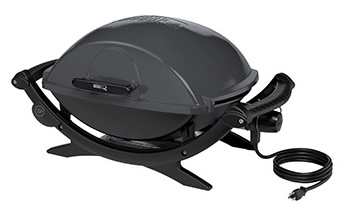
ELECTRIC GRILLS
Apartment dwellers, campers, and the otherwise space-challenged need love, too. Enter: the portable and compact Q® electric grill. Having a tiny footprint is great, but not when you can’t get the thing hot enough using a standard 110-volt household current. Innovations to grill design, however, have yielded searing hot results. The Q grill produces food that tastes just like it was grilled on a standard-sized grill.

CHARCOAL VERSUS GAS
The debate has left many a house divided, but it’s finally been settled. Which is better? Both.
Before you slam this book shut, hear us out: charcoal and gas allegiances have less to do with one fuel’s superiority than his or her personal taste and lifestyle. If it’s mostly weeknight burgers and chicken breasts on the docket, then you may be partial to the flick-of-a-switch ease of a gas grill. Perhaps you’re more of a low-and-slow type, relishing the smoke and strategy behind coals in a kettle—then charcoal it is. Gas gets a bad rap for being too mild in smoke flavor, but juicy meat plus fire equals smoke every time, regardless of the grill type. And if all else fails, there’s always the smoker box.
Charcoal’s many varieties, from no-frills briquettes to the knock-your-socks-off smokiness of lump coals, give us good options. Each type uniquely flavors food and impacts how much hands-on time and money go in to grilling it (pricier charcoals tend to burn hotter—and faster). For these reasons, cost isn’t always a good argument for charcoal versus gas because of all the variables attached to your style and frequency of grilling. When in doubt, embrace both. There’s no need for rivalry talk when everybody wins.

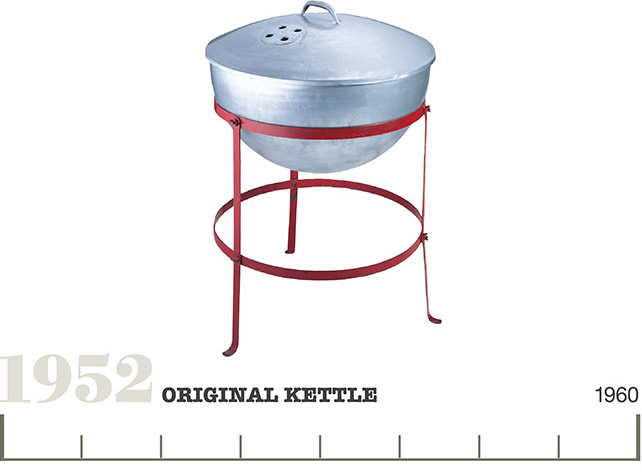
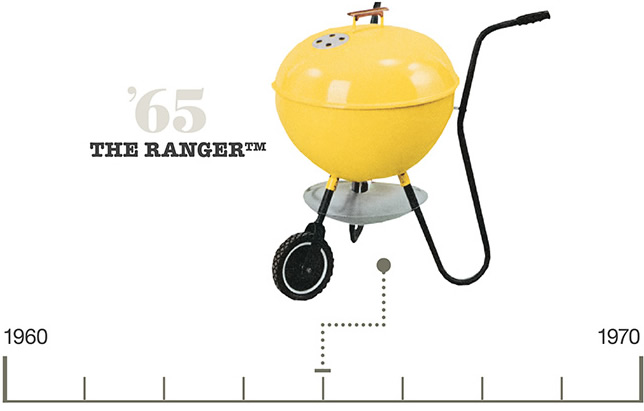
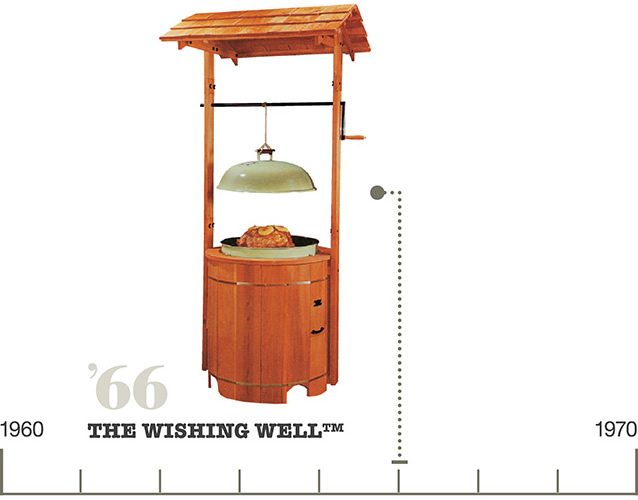
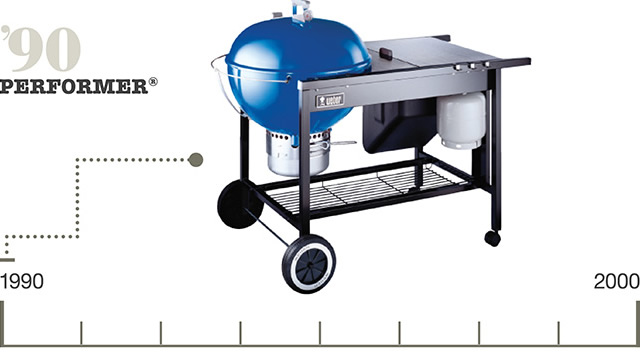
Some of weber’s more memorable hits and misses over the last 60+ years.


USING A
wok
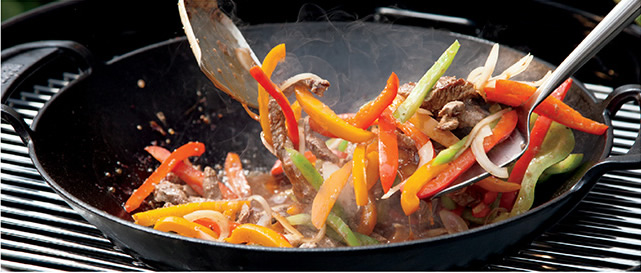
Wok cooking on your grill may sound like newfangled fusion cuisine, but in fact it’s steeped in tradition. For thousands of years, the focal point in a typical Chinese kitchen was a round hole over a firebox of burning wood and embers with a wok fit snugly inside the hole, making efficient use of a small amount of expensive fuel. And you can replicate the ancient art of stir-frying over live fire by using a grill-proof wok on your backyard barbecue.
TRY THESE WOK RECIPES:
Five-Minute Pepper Steak Stir-Fry
Chicken and Broccoli Stir-Fry with Peanuts and Scallions

WHAT YOU’LL NEED
 GAS OR CHARCOAL GRILL
 COOKING GRATE WITH REMOVABLE CENTER
 GRILL-PROOF WOK
Use enamel-coated cast iron. It retains heat without reacting with acidic ingredients like uncoated cast iron can.
UTENSILS
Spatulas with a shovel-like shape that fit the sloped sides of a wok work best.

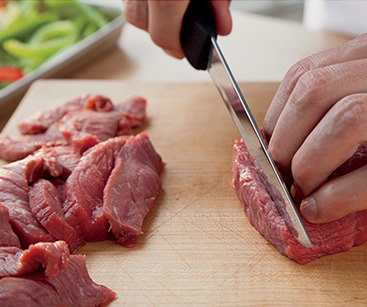
1 Prep everything first. Then cook. Stir-frying happens in a short burst of time. Once it starts, you won’t have time to slice or dice anything, so arrange all your chopped ingredients, sauces, and even serving platters near the grill first. Chop all the ingredients into cubes or strips of about the same size (no bigger than bite size) so they cook evenly.
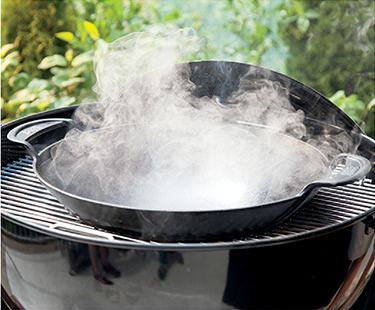
2 Get the wok hot. Smoking hot. It’s pretty simple, really. Light 50 to 75 briquettes and let them burn until they are lightly coated with ash. Arrange the charcoal one or two layers deep in the center of the charcoal grate. Put in place the cooking grate with a hole in the center. Set the wok in the hole and close the lid. Let the wok get smoking hot for about 10 minutes. When you flick a few drops of water into the wok, they should dance vigorously and disappear within just a second.
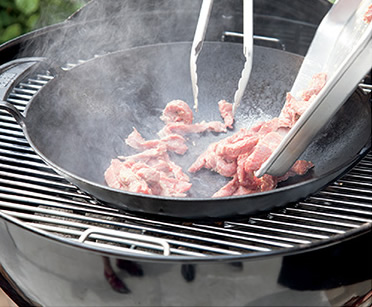
3 To stir or not to stir? That is the question. Stir-fry masters have a keen sense for when to stir with zeal and when to exercise patience. In most cases, when you add meat or other protein to a wok, you should quickly spread out the pieces to get as many of them as possible in direct contact with the hot wok surface. Then wait for 20 to 30 seconds so the food has a chance to sear.
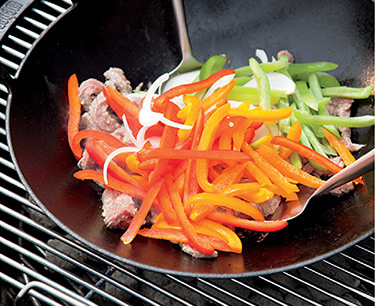
4 Scoop and toss. Next, scoop to the bottom of the wok with two wok spatulas to lift the ingredients into the air and let them tumble back down repeatedly until the outside is evenly browned. Move the meat up the cooler sides of the wok to finish cooking it, and then add the vegetables to the blazing hot bottom of the wok. Again, let the new ingredients sear for a matter of seconds, and then toss them with your spatulas.
USING A
pizza stone
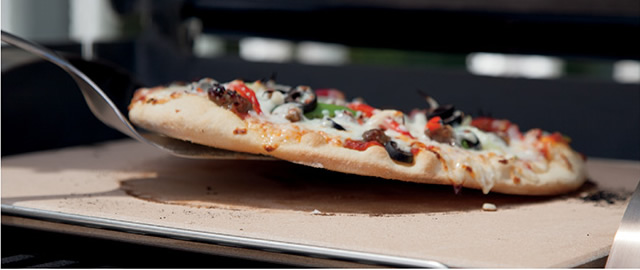
It’s a long fall from the culinary heights of the Italian masterpiece known as pizza to the lows of the American convenience food made of frozen, lifeless dough covered in icy toppings. Why take that fall when nowadays many supermarkets carry the components that used to take us so long to make? When you can buy fresh dough, good tomato sauce, and grated cheese, a pizza worthy of its authentic roots is really only about 30 minutes away. The key is using the impressive heat retained by a solid stone slab to fill each pizza with light, doughy air pockets and to toast the bottom with a golden brown crust.
Try These Pizza Stone Recipes:
Grilled Pizzas with Sausage, Peppers, and Herbs
Chocolate Chip and Peanut Butter Cookies

WHAT YOU’LL NEED
 GAS OR CHARCOAL GRILL
 PIZZA STONE
 ROLLING PIN
 WOOD OR METAL PIZZA PEEL


1 Preheat the pizza stone first. Prepare your gas or charcoal grill for direct cooking over high heat, and preheat the stone for at least 15 minutes. The temperature of the grill should rise to at least 500°F. Meanwhile, roll the dough and prepare your other ingredients.
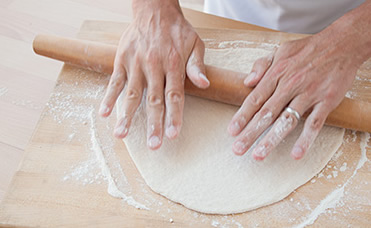
2 Roll the dough on a lightly floured surface. Turn the ball of dough in the flour a few times so it is not so sticky. Flatten into a disc and use a rolling pin to roll to a thickness of about 1/3 inch, flipping the dough over once or twice to make sure it’s not sticking.
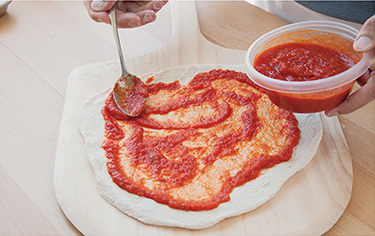
3 Lightly coat a pizza peel with flour, too. Then slide the peel completely under the dough. Spread a thin layer of sauce almost all the way to the outer edge of the crust. Don’t use too much sauce; otherwise, the dough will soak it up and turn soggy.
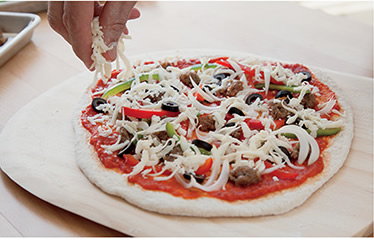
4 Scatter the toppings over the sauce. Don’t use any toppings (like raw meat) that would not be safe to eat after only 10 minutes of cooking. Make sure the pizza can slide a little on the peel. If any areas of the dough are sticking, lift them up and flick a large pinch of flour underneath.
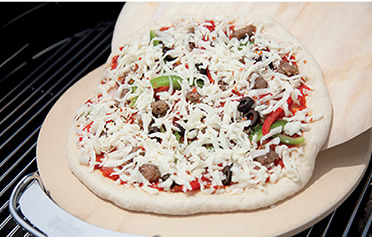
5 Slide the pizza onto the hot stone. Tilt the peel so that the pizza slides easily away from you and the edge of the crust lands near the part of the stone farthest from you. Then slowly pull the peel toward you and lay the rest of the pizza on the stone. Close the lid and let the pizza cook for 4 to 5 minutes.
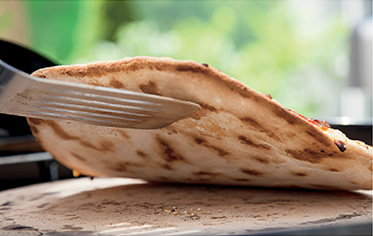
6 Rotate the pizza once or twice. Slide the peel or a large spatula underneath and rotate the pizza a half turn for even cooking. You will know it is ready when the underside of the crust is golden brown in spots and the cheese is completely melted.
USING A
griddle
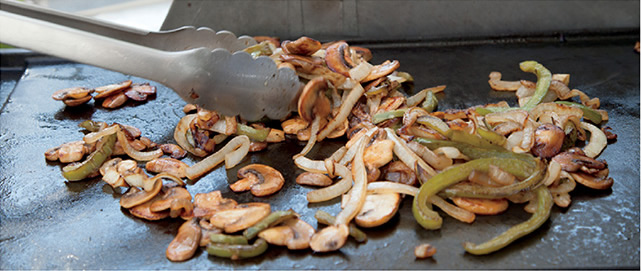
Is there anything that appears as ordinary as a black slab of metal? You might be surprised to learn that there is also probably no other accessory that opens up as many cooking possibilities on the grill. For example, what if your vegetables are cut so small that they might fall through the cooking grates? What if a fish is too thin or delicate to put right on an open grate? What if you need a hot, flat surface to toast panini crust evenly? What if you feel like making breakfast with eggs, bacon, and pancakes on the grill? A griddle handles all these jobs and more easily.
Try These Griddle Recipes:
Black Forest Ham, Brie, and Pear Panini
Griddled Cod with Sweet Pickle Tartar Sauce
French Toast with Grilled Peaches and Blueberry Syrup

WHAT YOU’LL NEED
 GAS OR CHARCOAL GRILL
 GRILL-PROOF GRIDDLE
Make sure it fits your grill’s dimensions.
 LONG-HANDLED SPATULA OR TONGS
 GRILL PRESS
Use one you can hold in your hand for good control when toasting grilled cheese sandwiches, flattening bacon, and crisping chicken skin.

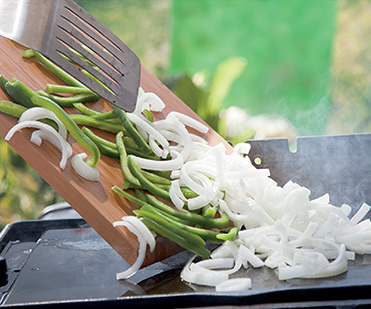
1 Preheat a grill-proof griddle for at least 10 minutes. It takes that long for the thick metal to get hot. Cut any vegetables small enough so that they cook in less than 10 minutes, and coat them with oil before sliding them onto the griddle.
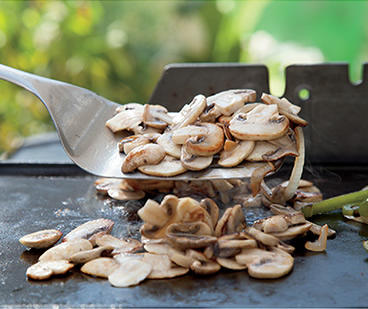
2 Don’t flip the vegetables too often. Spread them out and leave them in place for at least 1 minute to let them brown. Then turn them over with a wide spatula. If each vegetable cooks differently, separate them into piles.

3 Remember to toast the bread. Brush the cut sides with oil or butter and lay them flat on the griddle. Meanwhile, you can grill the meat right on the cooking grate.
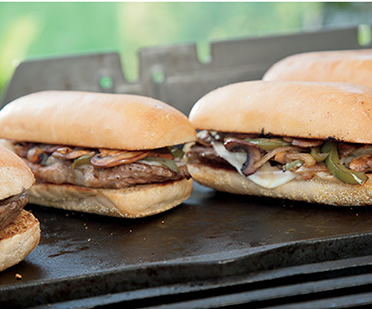
4 Bring it all together. As a final touch, warm the sandwiches on the griddle until the outsides are crusty. If you like, flatten the sandwiches with a grill press.
braising
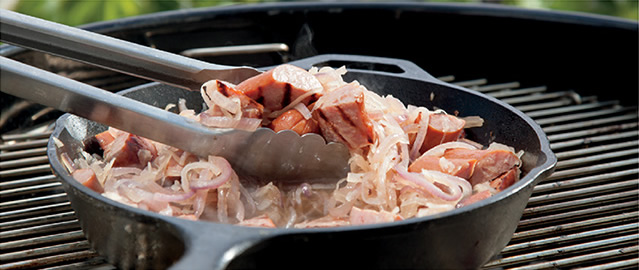
Grilling can dazzle us with its flickering, sparkling flames. Its dry, searing heat creates charred crusts and smoky aromas to admire—but don’t overlook what a grill can also do with moist, gentle heat. Those same flames can simmer a flavorful liquid for braising and tenderizing meats and vegetables of many kinds, even the toughest of all, like beef brisket. By combining both dry and moist heat, you can develop layers of flavors and textures that one kind of heat alone could not achieve. In the kielbasa recipe shown here, the sausages benefit first from the char of a sizzling hot cooking grate. Then they are submerged in a savory stew of red onions, sauerkraut, and beer. What happens next is close to magic, as all those ingredients blend into something much greater than the sum of their individual flavors.
Try These Braising Recipes:
Kielbasa Submarine Sandwiches with Beer-Braised Onions

WHAT YOU’LL NEED
 GAS OR CHARCOAL GRILL
 LARGE CAST-IRON SKILLET
 DISPOSABLE FOIL PAN
 HEAVY-DUTY ALUMINUM FOIL
When you want to simmer the liquid without much of it evaporating, it’s good to cover the pan tightly with aluminum foil.

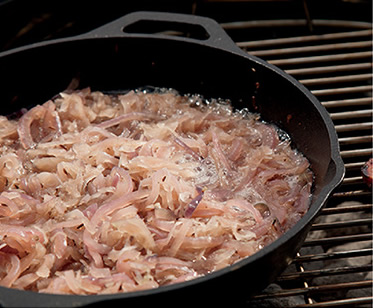
1 Use a heavy, grill-proof pan. In a large cast-iron skillet braise the onions in simmering sauerkraut and beer. This softens the onions and builds a rich base of flavors for braising the sausages later.
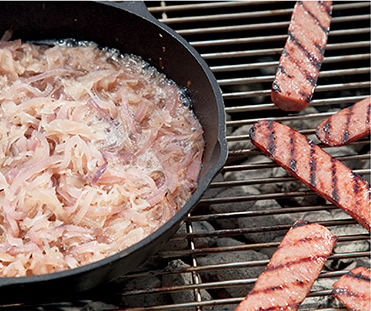
2 Sear the meat on the side. While the onions are braising, brown the sausages over direct heat. Cutting each sausage in half lengthwise exposes more surface area for browning and charring right on the hot cooking grate.
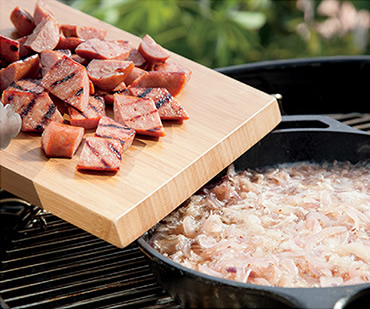
3 Combine the meat and vegetables. Chop the browned sausages into bite-sized pieces and push them into the braising pool. Nestle the sausages into the liquid and let them simmer in the juices.
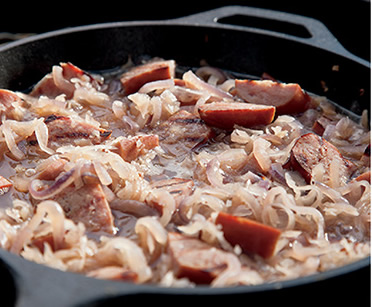
4 Move the pan for the right heat level. To slow down the cooking, slide the skillet over indirect heat and close the grill lid. Your food will stay warm and moist for at least 30 minutes. When you are ready to eat, toast some buns over direct heat and pile them high with sausages and onions.
using a
rotisserie
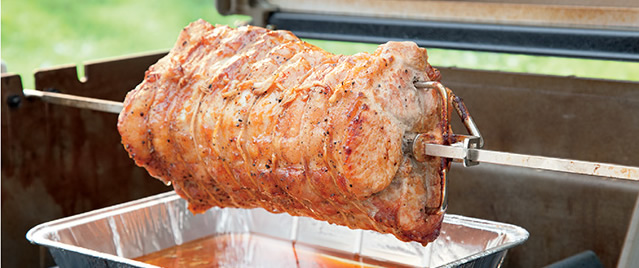
Rotisseries may conjure up images of medieval knights cranking a spit by hand to slow cook a wild beast over a bed of embers, but so much has changed since the days of King Arthur. For one thing, we cook in a covered grill now, which means that the meats are surrounded by circulating heat to cook them more quickly and evenly. Rotisserie cooking today is much more like oven-roasting large cuts of meat and whole birds in midair, with the significant advantage that as the food turns (with a motor, by the way), its juices are slowly redistributed to baste the food inside and outside.
Adapting Recipes for the Rotisserie
Almost any recipe that calls for indirect heat does really well on the rotisserie. As long as the meat can be evenly balanced on the spit, it’s a prime candidate for the rotisserie. For example, try one of these recipes:
Leg of Lamb with Apricot and Chickpea Couscous

WHAT YOU’LL NEED
 GAS OR CHARCOAL GRILL THAT ACCOMMODATES A ROTISSERIE
 ELECTRICAL OUTLET AND AN EXTENSION CORD
 INSULATED BARBEQUE MITTS
 BUTCHER’S TWINE

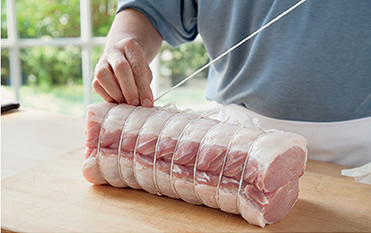
1 Truss any unwieldy meats. If you are cooking something that holds together naturally, such as a beef rib roast, there is no need to truss it. But if it could fall apart or flop around and cook unevenly on the revolving spit, such as these pork loins, you must truss.
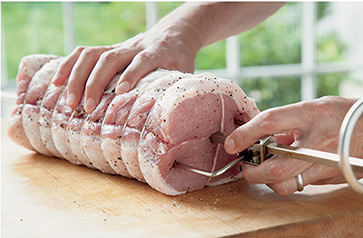
2 Secure the food with forks. Run the spit right down the center and insert the forked tongs into each end. If necessary, first turn the spit so that the tongs are inserted into a dense section of the meat that will hold the tongs in place.
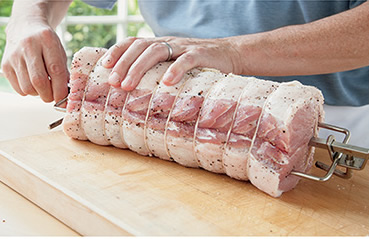
3 Press the tongs all the way into the meat. The meat will shrink as it cooks and could potentially slide off the tongs, so begin with the tongs pressed in as deep as possible.
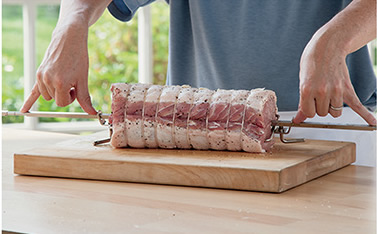
4 Center the roast. There should be an equal distance of metal on each side. Tighten the screws on the tongs.
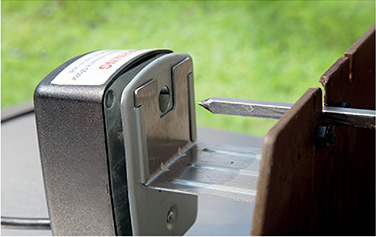
5 Put the roast on the grill. Place the tip of the spit into the mount of the rotisserie motor, and then lower the other end of the spit into place.
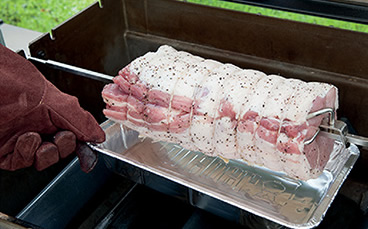
6 Catch the drippings with a disposable foil pan. To make room for the pan, you may need to remove the cooking grates first.