
Grill Skills
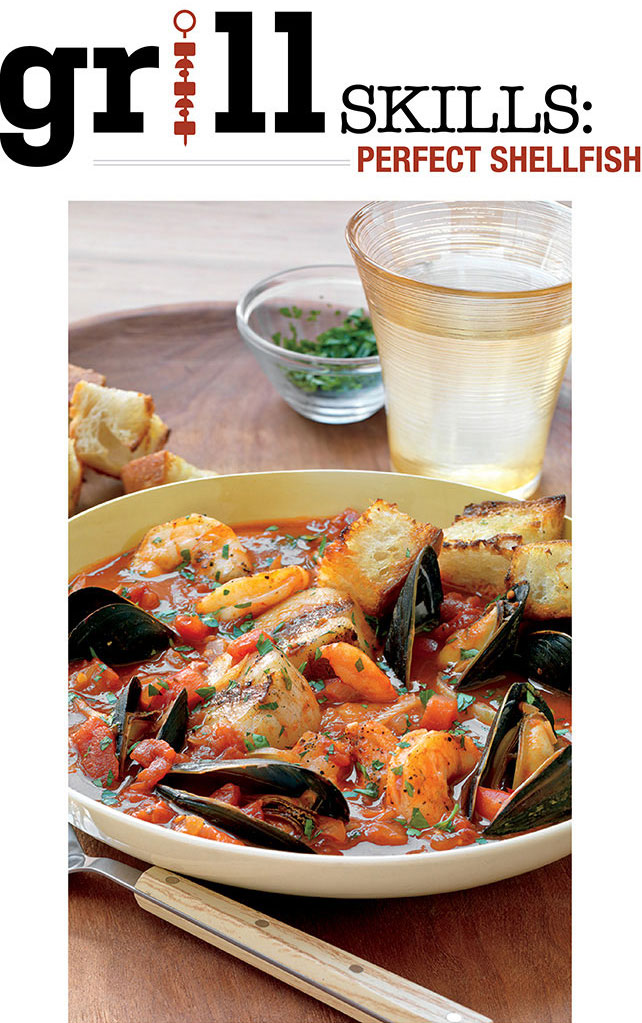
Shrimp
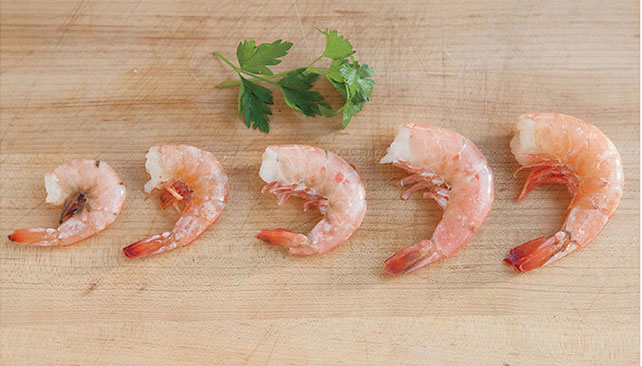
Terms like “small,” medium,” and “large” are used inconsistently where shrimp are sold. The best way to know for sure what you are buying is to look for the number of shrimp per pound. A label that reads “16/20” means that it takes 16 to 20 of those shrimp to make a pound. In the photo above, the shrimp on the far left is an example of what you get when you buy 36/45. Immediately to the right is an example of 31/35. The next one is an example of 21/30. The next is an example of 16/20. And the one on the far right is an example of 11/15. Generally speaking, the three largest sizes are the best choices for grilling because they are easy to peel and they don’t dry out as quickly as the smaller shrimp.
When Is It Done?
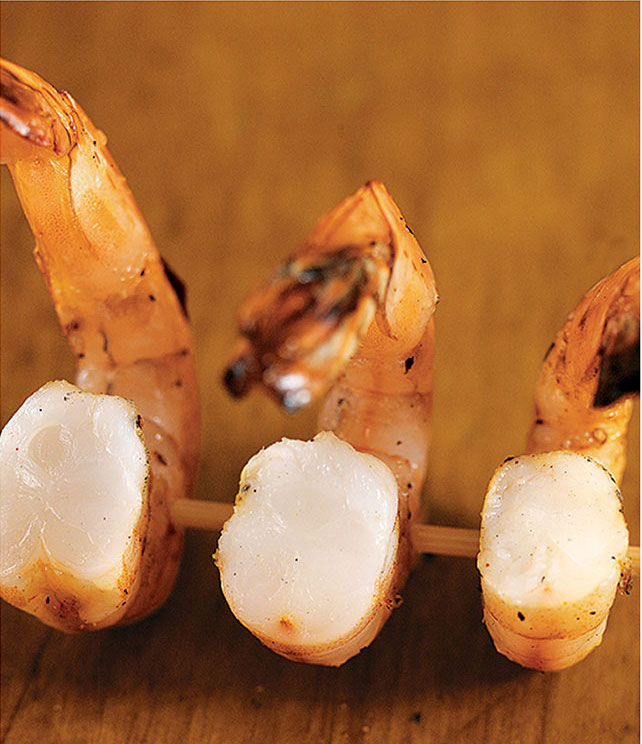
Shellfish don’t flake, but they turn an opaque, pearly white color at the center when they are cooked. The only way to know for sure how the center looks is to cut into it, so plan on sacrificing one or two shellfish. In this photo, the shrimp on the left is underdone, the shrimp on the right is overdone, and the shrimp in the middle is just right.
Scallops
As with shrimp, bigger is usually better because bigger scallops allow for more time on the grill to develop flavors. However, avoid “wet packed” scallops that have been treated with a phosphate-and-water solution that causes them to swell with liquid. Wet scallops tend to steam (and stick) rather than sear on the grill, so look for “dry-packed” scallops instead.
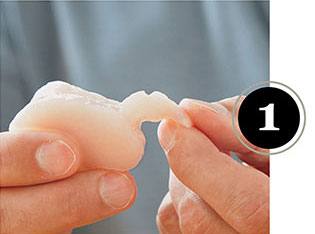
Check your scallops for a small, tough muscle along the side. This is the adductor muscle that helps the scallop hold onto its shell. It is quite chewy, so pull it off with your finger and discard it before grilling.
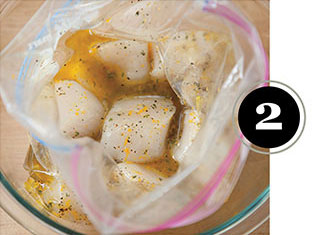
Marinate your scallops for extra flavor and moisture, but don’t overdo it. If your marinade has a fair amount of acidity, your scallops could turn mushy. One to two hours of marinating is usually a good time frame.
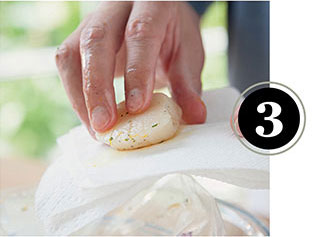
Going onto the grill, scallops should be well oiled or buttered, but not dripping wet. Too much liquid causes sticking. If you have used a wet marinade, lightly pat the scallops dry on paper towels.
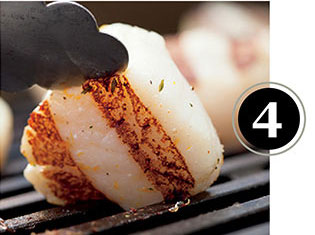
Grill scallops over direct high heat with the flattest side down first. Wait at least two minutes for that side to brown. Turn them over only when you can lift each scallop along its edge with tongs. Don’t scrape under a scallop with a spatula and tear it.
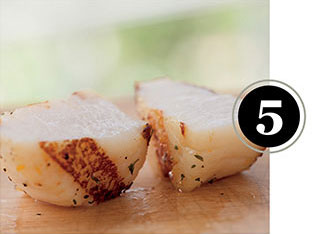
The sweet succulence of a perfectly grilled scallop is spectacular. When it reaches its ideal doneness, the pearly color is opaque, and the texture is both creamy and wet.
Mussels, Clams, and Oysters
The easiest way to cook any of these bivalves (meaning they have two shells) is to lay them directly over the fire. When they get hot, their briny juices boil and the steam released puts pressure on their shells, causing them to open. When the shells burn just a little, the smoke carries magical aromas.
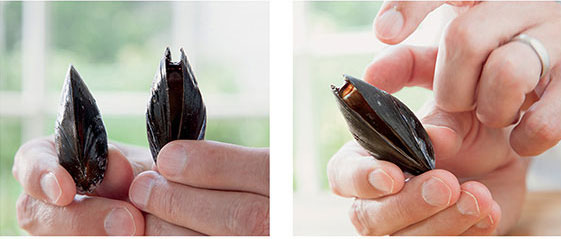
A tightly closed mussel shell is a good sign of freshness. If any mussel is gaping open a bit, tap it with a finger. If the shell closes immediately, the mussel is alive and fresh.
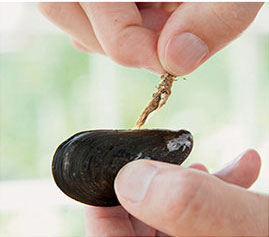
Some mussels come with the added issue of a “beard.” To remove the beard, use your thumb and index finger to grasp the beard, and pull sharply, perpendicular to the mussel. Do this shortly before grilling, because once its beard has been removed, a mussel begins to spoil.
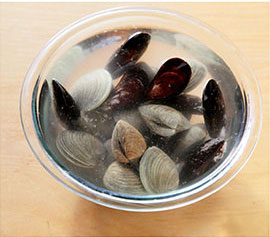
Clams and mussels often have some sand and grit inside and outside. The easiest way to clean them is to soak them in salt water (1 1/2 cups kosher salt to 1 quart of water) for 30 minutes to 1 hour. Then rinse and scrub the outside of the shells with a stiff brush.
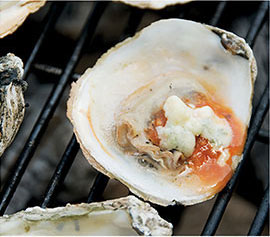
Big, juicy oysters do best on the grill. After you have shucked each one and have released the flesh from the shell, grill it with the deeper shell balanced over direct high heat, with or without sauce. As soon as the juices start to bubble, the oysters are done.
Choose Wisely
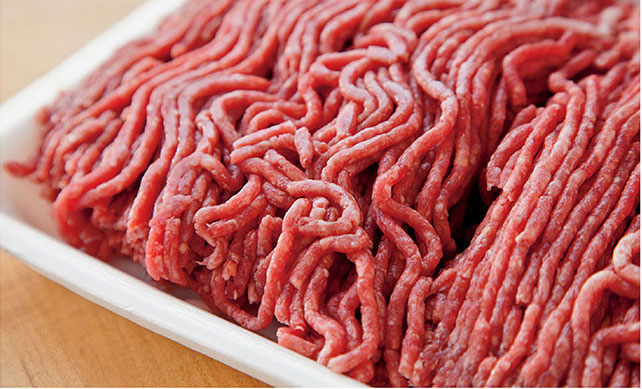
Hamburgers need some fat to be delicious—about twenty percent, actually. Hamburgers with less fat are destined to be dry and crumbly; however, when the meat has enough milky white fat speckled throughout it, the fat dissolves into mouthwatering moisture that not only feels good on your tongue, but it also tastes good. Fat has its own beefy flavors, and it carries other flavors, too, including the seasonings in the patties and the smokiness of the grill.
Most people get their ground meat from a supermarket, where it has been packed into a foam tray. You can make some very good burgers with this meat, but if you are in search of perfection, ask a butcher to grind the meat for you so that the meat is loosely packed. This type of texture, where you can see long strands of beef just as they came out of the grinder (see photo above), leads to the plumpest, juiciest burgers, assuming the meat has enough fat. This also allows you to choose the best cut. An excellent choice is chuck, a well-exercised, flavorful shoulder cut. Sirloin, a cut from close to the hardworking hip, is another good choice.
Building a Better Burger
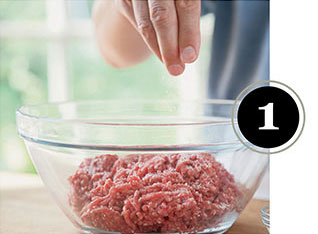
Put the meat in a bowl and season with salt and pepper before you make the patties.
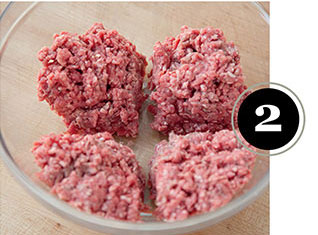
Divide the meat into equal portions before you shape the patties. This step avoids the problem of having too much or too little meat left over for that last patty.
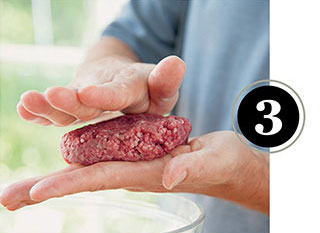
With wet hands, gently shape each portion into a loose, round ball. Then flatten each ball into a patty with a thickness between 3/4 and 1 inch.
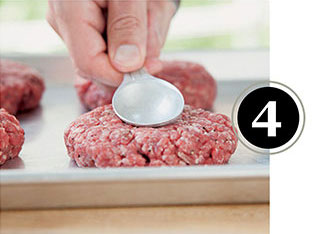
Use a spoon or your thumb to create a shallow well in the middle of each patty. This will prevent “the meatball effect,” where the patty develops a domed top.
Butter Up

A trick for making really juicy burgers is to nestle a small pat of cold butter in the center of each patty. Just be sure to seal the butter well inside so that it doesn’t cause flare-ups.
Grilling Perfect Burgers
A perfect burger is a study in contrasts. The top and bottom of each patty is lightly charred with crispy brown bits all over. Inside each patty the meat is soft, tender, and dripping with juices. The key to this kind of contrast is the magic combination of the patty’s thickness (3/4 to 1 inch) and the grill’s temperature (400° to 500°F). Over the course of 8 to 10 minutes, the surface has just enough time to turn dark brown and delicious while the inside cooks fully without losing much of its juices, assuming the lid is closed.
Cooking with the lid closed reflects heat onto the top of each patty, meaning the patties are cooking on both sides. This speeds up the overall cooking time. Also, closing the lid restricts the amount of air getting to the fire and eliminates a lot of potential flare-ups. And finally, the lid also keeps the cooking grate hot enough to sear the surface of each patty properly.
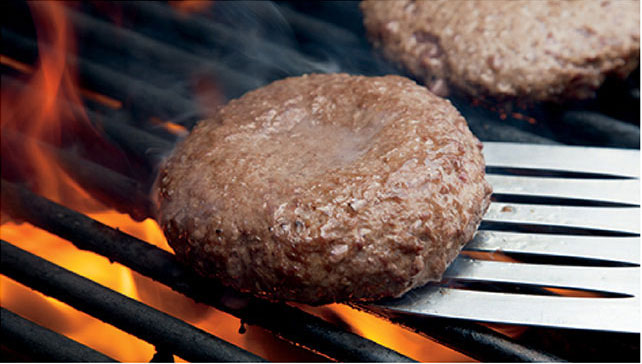
No Flipping Out. You should only turn patties once or twice. If you try to turn a patty during the first few minutes, you are bound to leave some meat sticking to the grate. If you can manage to wait 4 minutes or so, the meat will develop a lightly charred crust that releases naturally from the grate.
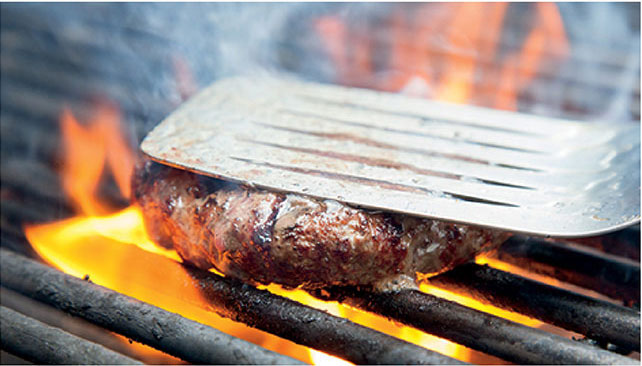
No Smashing. One of the worst things you can do to a patty is to press or smash it with a spatula. The juices run out quickly, causing flare-ups and drying out your burger.

Choose Wisely

The main thing to look for in steaks is marbling, those visible lines of fat running throughout the meat. This fat is essential to great steaks because, as it melts on the grill, it fills the meat with juice and flavor. On the other hand, wide streaks or hunks of fat, particularly around the outer edges of steaks, can melt and drip so much flammable fat into the fire that you get unwanted flare-ups and risk burning the meat. So choose your steaks well and trim any excess perimeter fat.
Prepping Steaks
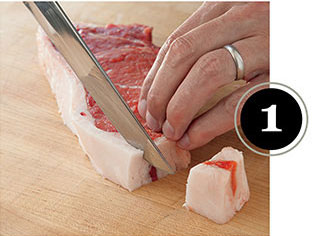
Pull your steaks out of the refrigerator 15 to 30 minutes before you plan to grill them, and trim the fat around the edges to 1/4 inch or less to prevent flare-ups.
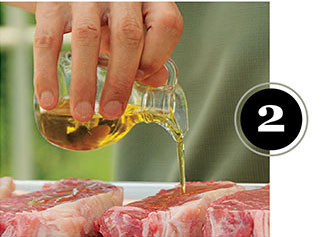
Lightly coat trimmed steaks with extra-virgin olive oil. This adds flavor and prevents sticking.
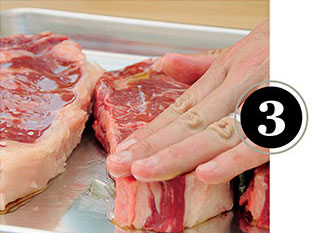
Rub the oil evenly all over the steaks to prevent them from sticking to the cooking grate. The oil also helps the seasonings adhere to the meat.
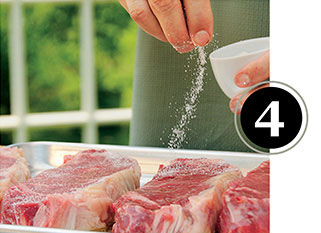
Season with kosher salt. Within 15 to 30 minutes, the salt seasons the meat deeply, amplifying the steak flavor below the surface. Don’t be timid with the salt.
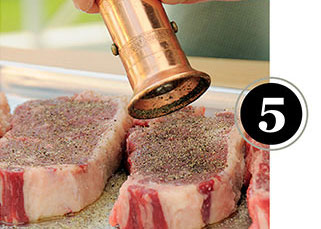
Generously season with freshly ground black pepper for a kick of flavor.
Grilling Perfect Steaks
Brush the cooking grates clean and place your steaks over direct high heat. A good hot grill won’t “seal in the juices,” as you may have heard, but it will add tremendous flavor and texture.
Leave the steaks alone for at least 2 minutes, preferably 3 minutes. Resist the urge to fiddle with them, unless:
A. You want crosshatch marks. In this case, rotate each steak 90 degrees after about 1 1/2 minutes.
B. You’re fighting a flare-up. Move the steaks over indirect heat temporarily, until the flames subside, and then move them back over direct heat.
Once you have a deep, delicious sear on the first side, turn the steaks over and sear them on the second side for 2 to 3 minutes.
If your steaks are thinner than 1 1/2 inches, finish them over direct heat. If they are 1 1/2 inches or thicker, finish them over indirect heat so that the inside has a chance to cook before the outside burns. Use the handy doneness tests below to help determine when the steaks are ready to come off the grill.
Let steaks rest at room temperature for just a few minutes before anyone cuts into them. This does so much to help each steak hold onto its juices.
When Is It Done?
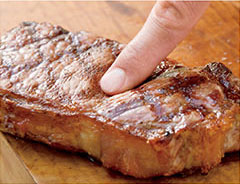
Touch Test. Press the meat surface with your fingertip. When it has the same firmness as the base of your thumb, take the steak off.

hand Test: Rare. If you touch your index finger and thumb together and then press the base of your thumb, that’s how most steaks feel when they are rare.

hand Test: medium Rare. If you touch your middle finger and thumb together and then press the base of your thumb, that’s how most steaks feel when they are medium rare.
Choose Wisely
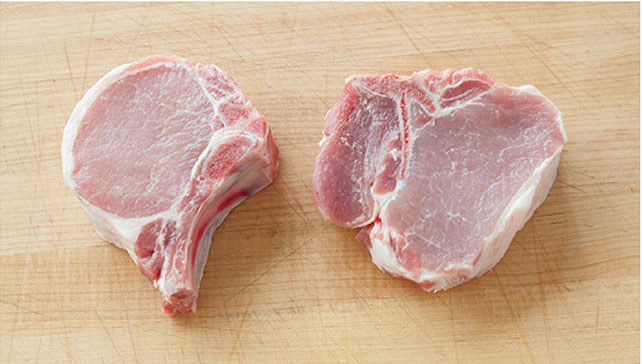
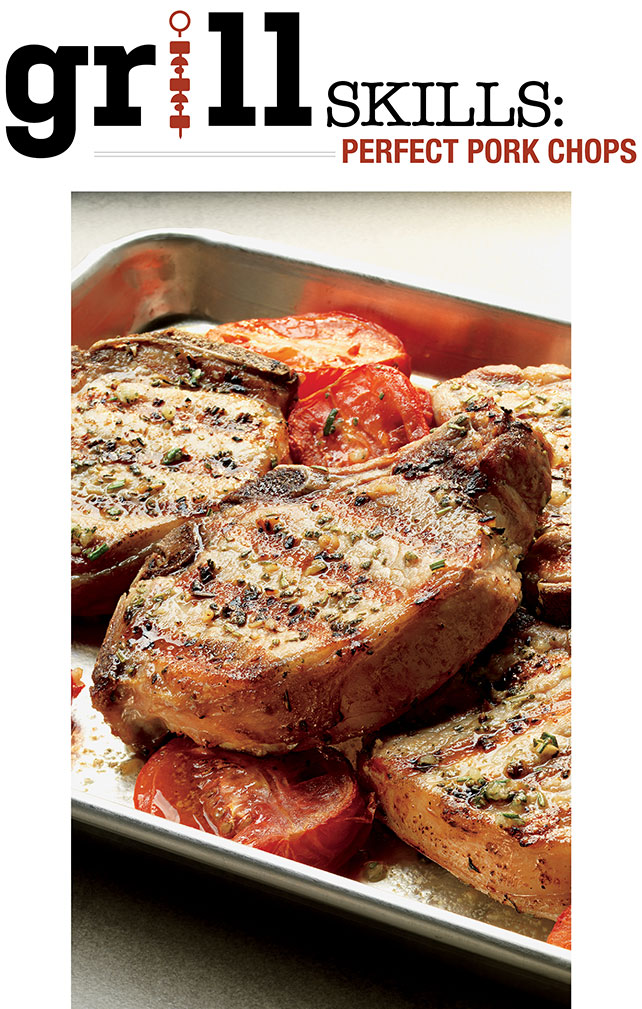
A lot of chops fall under the category of pork chops, but they are not all the same. They are all cut from a pig’s loin, which extends from the shoulder blade to the hip, but along that loin you will find significant differences. The chops from the shoulder area (blade chops and country-style ribs) have quite a bit of fat and chewy sinew, which makes them less than ideal for grilling. The chops cut from the hip area (sirloin chops) are often too lean and dry for this kind of cooking. The chops you should be grilling are from middle of the loin, aka, the “center-cut rib chops” and “center-cut loin chops.” They are very similar to one another in taste and texture. Each loin chop features a T-shaped bone that separates the loin meat from some tenderloin meat on the other side. Each rib chop has a large bone (from a rack of baby back ribs) running down one side of some sumptuous loin meat. With either of these chops, try to find a thickness of at least 3/4 inch. Thinner chops tend to dry out too quickly.
Making Mock Chops
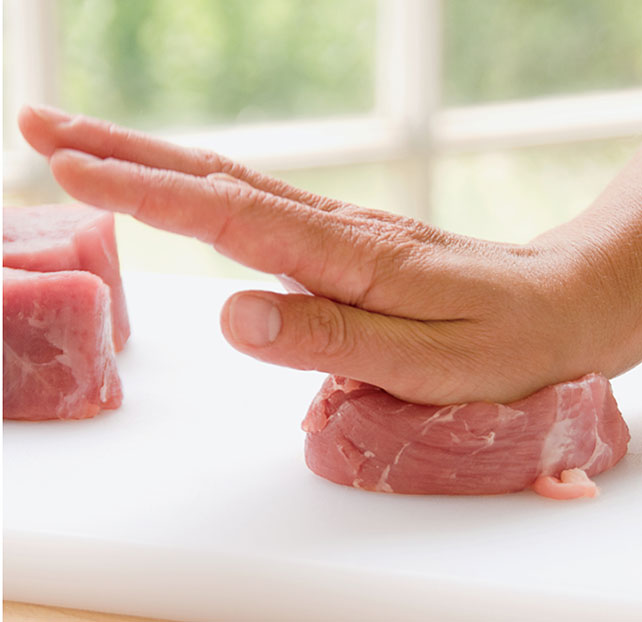
Pork tenderloins are not chops, but if you cut them crosswise into thick disks and flatten them with your hand, you’ve got little medallions that cook and taste very much like chops.
Brining Pork Chops
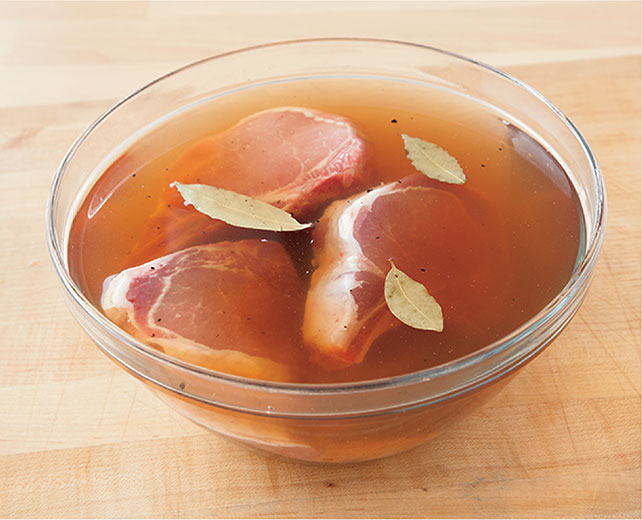
For brag-worthy results, brine your chops in a salt-and-sugar solution before grilling. This is how master grillers achieve especially juicy results. It only takes 30 minutes or so for pork chops to absorb some of that flavorful brine.
Once you have removed the chops from the brine, pat them dry with paper towels, and then coat them with oil and a spice rub. Because of the salt in the brine, you will not need as much salt in the spice rub.
As with any piece of meat destined for the grill, it’s smart to let it sit at room temperature for 15 to 30 minutes before grilling. After that, the chops will cook faster and stay juicier.
Grilling Perfect Pork Chops
High heat tends to char the outside of pork chops too quickly and leave the centers rare or medium rare, like a steak, so go with medium heat instead for an even doneness. For chops that are less than 1 1/2 inches thick, direct medium heat is all you really need.
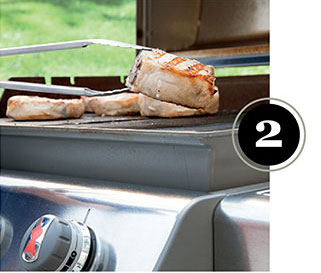
For chops that are thicker than 1 1/2 inches, grill them over direct medium heat until you have the color of grill marks you like, and then move the chops to indirect heat for the final few minutes of cooking.
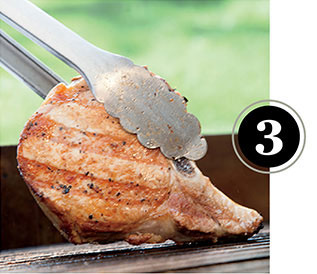
If any of your chops have a layer of undercooked fat around the perimeter, you might want to stand it on its edge over direct heat for up to 1 minute. Be mindful here because the fat can burn quickly, but if you work carefully, you will give your pork chop a crispy, sizzling edge.
When Is It Done?
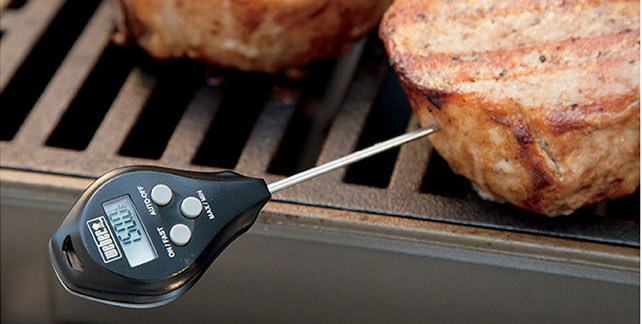
Chances are good that you learned somewhere that 165°F is the safe internal temperature for pork. The USDA was touting that temperature for years. It’s still true that ground pork must be cooked to 165°F, but chops are safe to eat when they reach 145°F. This is hot enough to eliminate the risk of trichinosis, a parasitic disease contracted from undercooked pork, but not so hot that you run every last drop of moisture out of the meat.
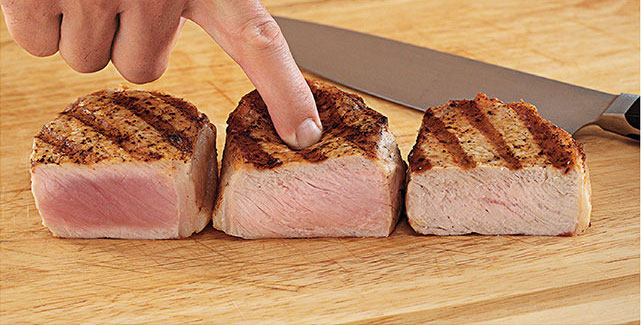
Remove the chops from the grill and give them a few minutes to rest at room temperature so that the juices settle throughout the meat. When you cut a perfect pork chop open, you should see a very light pink color and a glistening sheen of moisture. The pork chop on the left, with raw meat in the center, is clearly undercooked. The chop on the right, with a dry, gray appearance, is overcooked. The chop in the middle, with a little bit of pink in the center, is cooked to 150°F (just right). See how the meat gives a little under pressure.
Cracking the Code
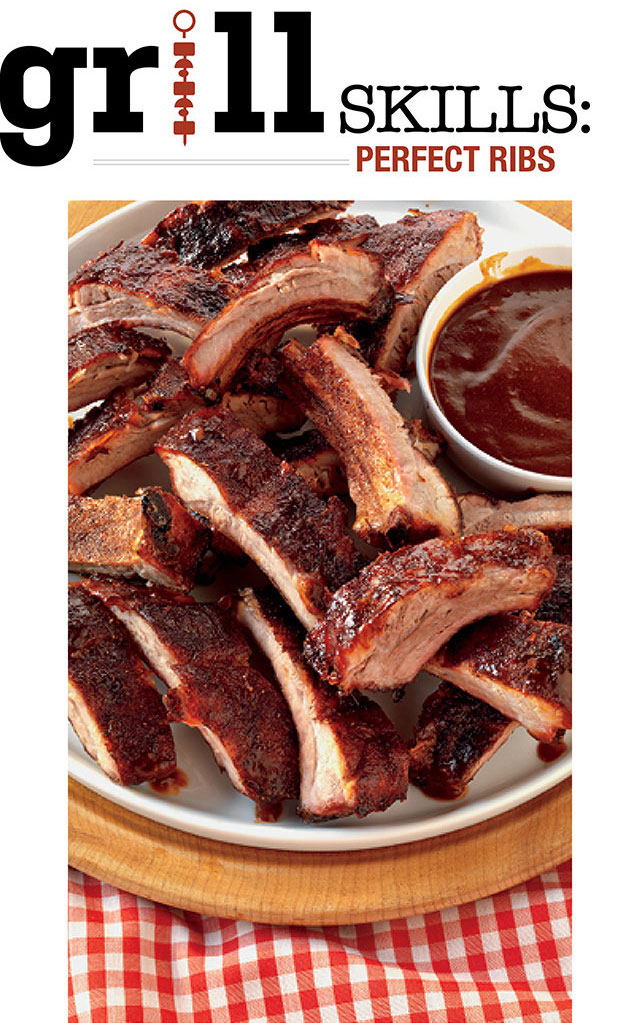
If you ask ten barbecue fanatics about the features that add up to perfect ribs, you will get about ten different (and probably legitimate) answers. Ribs are that personal. Having said that, most of us agree on some basic elements. The meat itself should be so tender and moist that when you take a bite, it pulls clean off the bone. The seasonings should be a complementary mélange of hot, sweet, savory, and salty, and no flavor should stick out from the crowd. The smoke from whatever kind of wood you like should blend into the meat as an ethereal background flavor. The sauce can vary from the sweet, smoky, tomato-based style of Missouri to the tangy, mustardy style of South Carolina to the spicy, chile-laced style of New Mexico—but no sauce should ever smother the nuances of the meat underneath it. In the end, if you can get the meat, spices, smoke, and sauce to play together nicely, you are well on your way to perfecting ribs.
Removing the Membrane
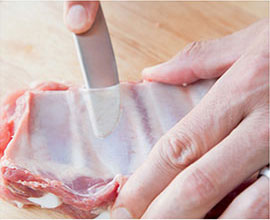
For the meat to be tender, you need to remove the tough membrane first. Slide a dull knife under the membrane and along a bone far enough that you can pry an edge of the membrane loose.
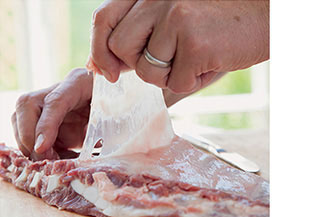
Then grab the loose edge and peel off the membrane in one big sheet or a few smaller pieces. You can use a paper towel if the membrane is hard to grip.
Season, Smoke, Mop, and Sauce
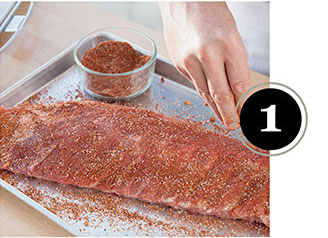
Season the racks generously, especially on the meaty side. Then let the racks stand at room temperature for 45 minutes so that they are not too cold going onto the grill.
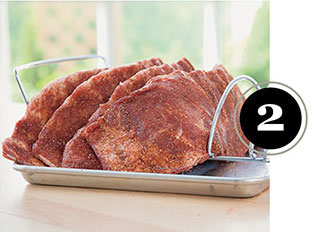
If you stand them upright in a rib rack, you can cook twice as many racks in the same amount of space.
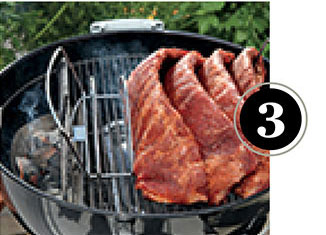
Create a small pile of charcoal to one side of the grill and feed it with more charcoal about once an hour (more often during cold or windy weather). A foil pan filled with water will help to maintain a steady temperature.
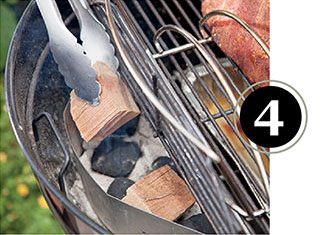
Once an hour, add a couple dry wood chunks or a couple handfuls of soaked and drained wood chips to the coals to maintain a steady stream of smoke during the first half of the cooking time.
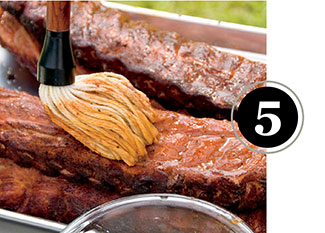
Occasionally baste the ribs with a seasoned liquid called a “mop.” Something as simple as apple juice with a little cider vinegar will moisten any areas that are drying out.
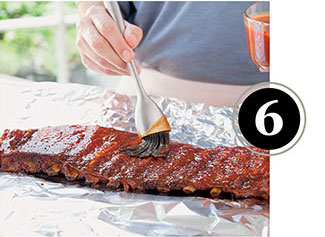
Barbecue sauce should not go on until the final 20 to 30 minutes of cooking; otherwise, the sugar in the sauce is likely to burn. Brush it on lightly—it should glaze the meat, not drown it.
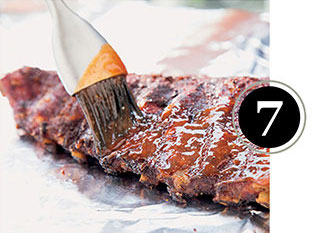
For really tender ribs, glaze each rack with some sauce or mop, and wrap it in heavy-duty aluminum foil. Return each rack over indirect heat for the final 30 minutes to 1 hour of cooking time.
When Is It Done?
You will know you have reached perfect tenderness when each rack passes the bend test.
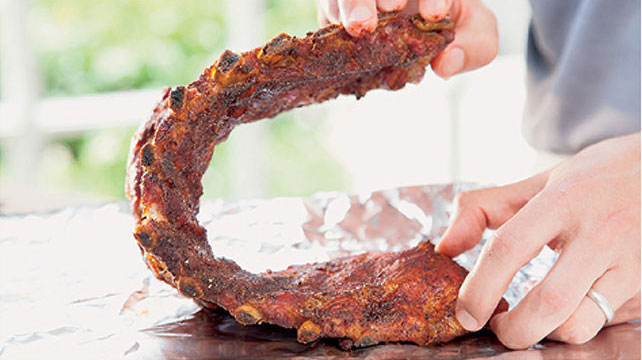
When you lift a rack at one end, bone side up, and the rack bends so easily in the middle that the meat tears open, the ribs are done.
Choose Wisely
Most chicken parts these days are mass-produced for the lowest cost possible. With the help of a lively mix of spices or an interesting marinade, along with some solid grilling technique, these conventional parts can be good. If, however, you are willing to spend more for organic, free-range chicken parts, you will appreciate an obvious difference. When chickens are fed a diet free of artificial ingredients and growth-promoting antibiotics, and when they are able to run and forage in the great outdoors, they have a cleaner, more pronounced chicken flavor and their texture is firm without being tough.

The darker meat on the left comes from an organic, free-range chicken with pure, natural flavors. Whenever you see chicken like the paler breast on the right, with thin white lines, you are looking at a conventional chicken that will be relatively bland and a little chewier.
Every Minute Counts
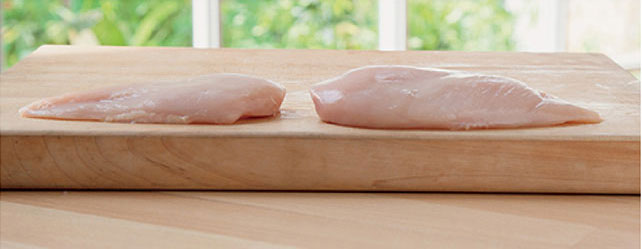
When you take the bones away from a chicken, especially the breasts, and expose that lean meat to the grill, there is a matter of only a couple of minutes between underdone and overcooked. The precise timing depends on the heat of the grill and the thickness of each breast, so you must pay close attention to those details. With direct medium heat (about 400°F), the thin breast on the left will be fully cooked in about eight minutes, but the thicker breast on the right will require at least ten minutes, and maybe twelve, to cook all the way to the center.
Cutting Up a Whole Chicken
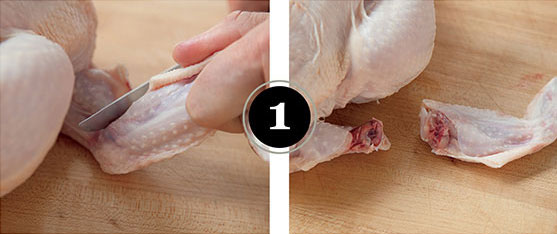
Using a sharp knife, cut off each wing at the second joint.
Leave the rest of each wing attached to the breast.
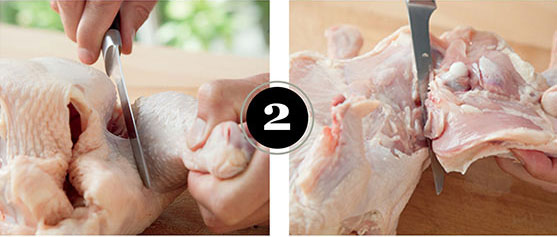
Cut through the skin between each leg and the rest of the body.
Bend each leg to expose the thigh joint, and cut through it.
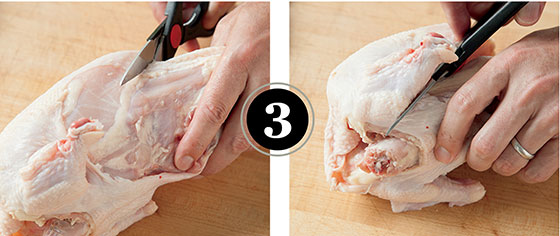
Cut off the part of the rib cage below the breast on each side.
Finish each cut just below the remaining part of each wing.
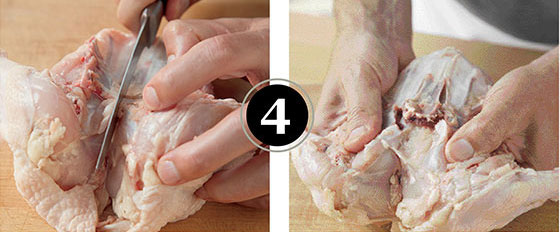
Make a shallow cut at the top of the rib cage.
Bend the chicken with both hands to crack the rib cage.
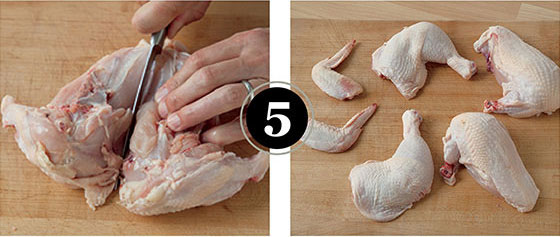
Run your knife down the middle of the breast to divide it.
This technique will give you six meaty pieces.
The Bones Matter
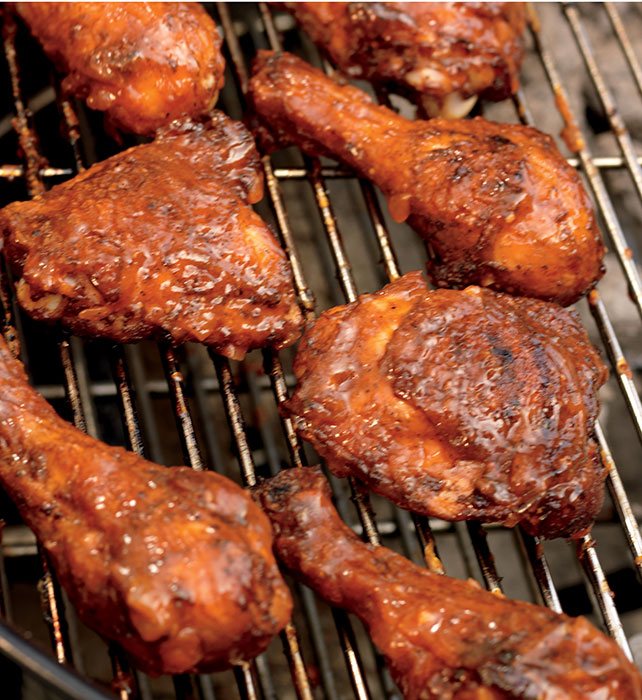
Boneless chicken pieces are thin enough that you can grill them entirely over direct heat, but when bones are involved, the parts take longer to cook, so it is important to use both direct and indirect heat. Otherwise the surface will burn to a crisp before the meat at the bones has lost its pink color.
You can start grilling bone-in parts over direct heat to brown the outer surfaces and then finish the parts over indirect heat, or you can start the parts slowly over indirect heat and finish them over direct heat for a final crisping of the skin. Either way works, though it is usually safest to begin the cooking over indirect heat. That way you are less likely to experience flare-ups, because some fat will render out of the skin before you set the parts right over the flames.
When Is It Done?
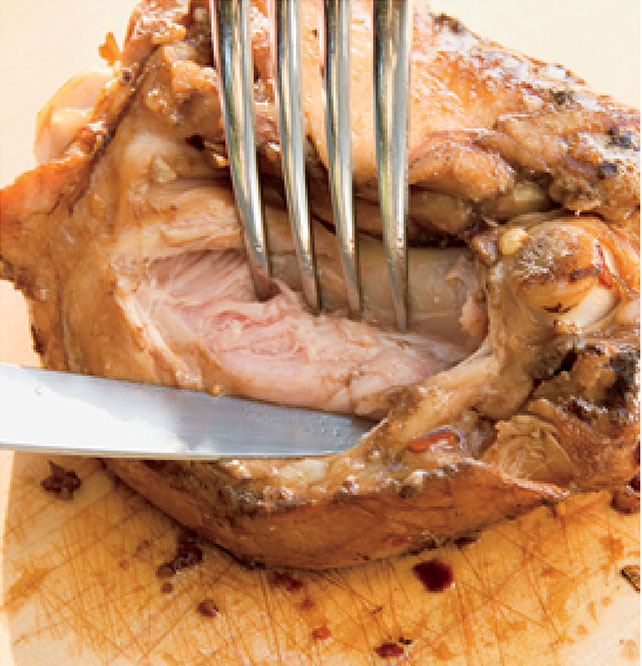
Check the thigh meat by inserting the probe of an instant-read thermometer into the thickest part (but not touching the bone). If you don’t have a thermometer, cut into the center of the meat. The juices should run clear and the meat should no longer be pink at the bone.
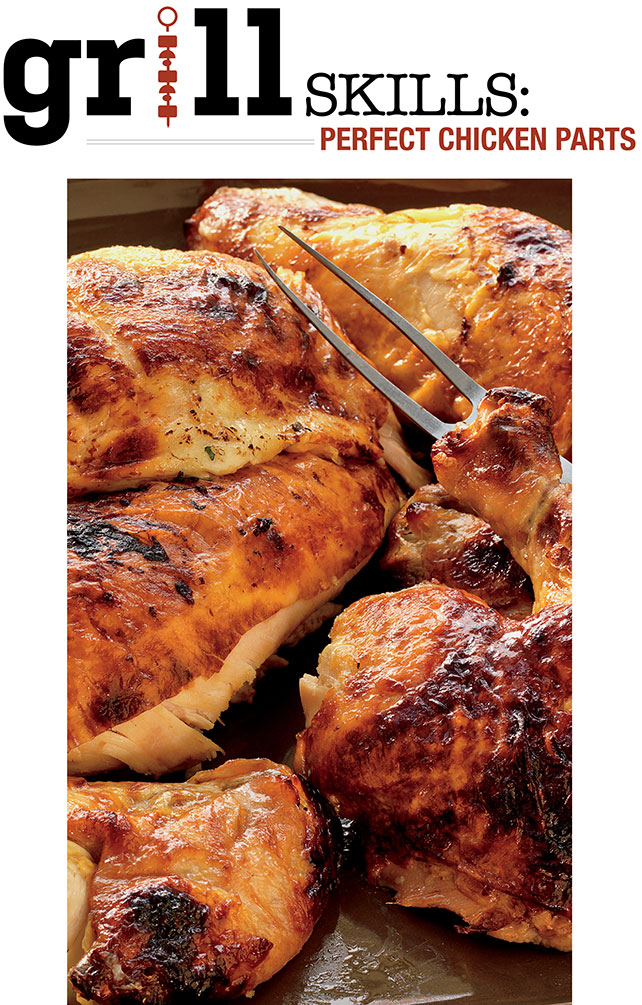
Done right, a roast chicken dinner from the grill is spectacular. When its golden skin turns crisp, and warm juices run throughout the tender meat, it is worth every minute and every dollar spent. The first step toward such a dinner happens at the store, because nowadays there is a big difference between a factory-farmed, commodity chicken and an organic, free-range chicken. Commodity birds are often fed hormones and artificial ingredients to grow quickly with large breasts and yellowish skins. They may look good, but organic birds are definitely more flavorful and their texture has a tender, meaty integrity that is also quite moist if you cook it right.
Classic Roast Chicken
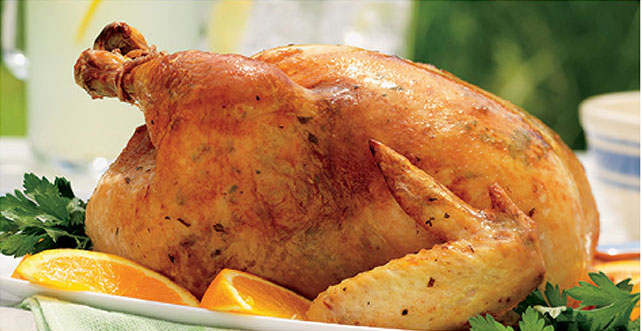
Prepare the grill for indirect medium heat (350° to 450°F). For a particularly crisp skin, get the temperature somewhere between 400° and 450°F.
Remove any excess fat from inside the cavity. Also remove the giblets, if there are any. The wing tips tend to burn and they don’t have much meat, so either cut them off or tuck the tips under the back of the chicken.
Lightly coat the surface of the chicken with good olive oil and season inside and outside with salt and pepper, especially the outside of the chicken. Salt is crucial for a deliciously crisp skin. If you like, stuff the cavity with some herb sprigs and a quartered lemon for added flavors.
Truss the chicken to make it evenly compacted and to protect the top of the breasts with the ends of the drumsticks.
Set the chicken over indirect heat and let it roast for an hour or so. Let it rest at room temperature for 10 to 15 minutes, cut it up, and serve warm.
Spatchcocked Chicken
Spatchcocking, or butterflying, a chicken is a clever way of cooking it more evenly and more quickly.
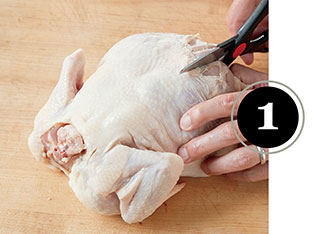
Set the chicken, with the breast side facing down, on a work surface. Using sharp kitchen shears, cut from the tail end along both sides of the backbone.
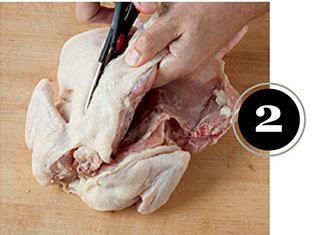
Remove the backbone and discard it. Flatten the chicken with both hands to crack the rib cage. Then use a sharp knife to cut a shallow slit at the top of the rib cage. Run your fingertips alongside both sides of the breastbone to expose it.
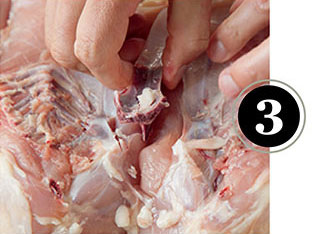
Dig your fingertips down along the breastbone until it comes loose from the meat. Then pull it out and discard it.
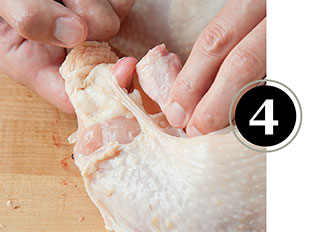
Cut a small hole in the loose skin on both sides at the leg end of the chicken. Pull the end of each drumstick through the hole on its side. This will hold the legs in place on the grill.
Beer Can Chicken
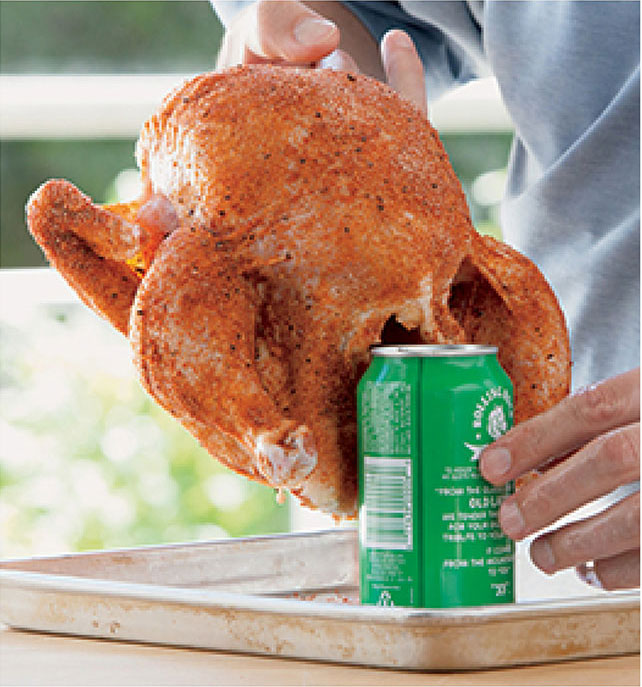
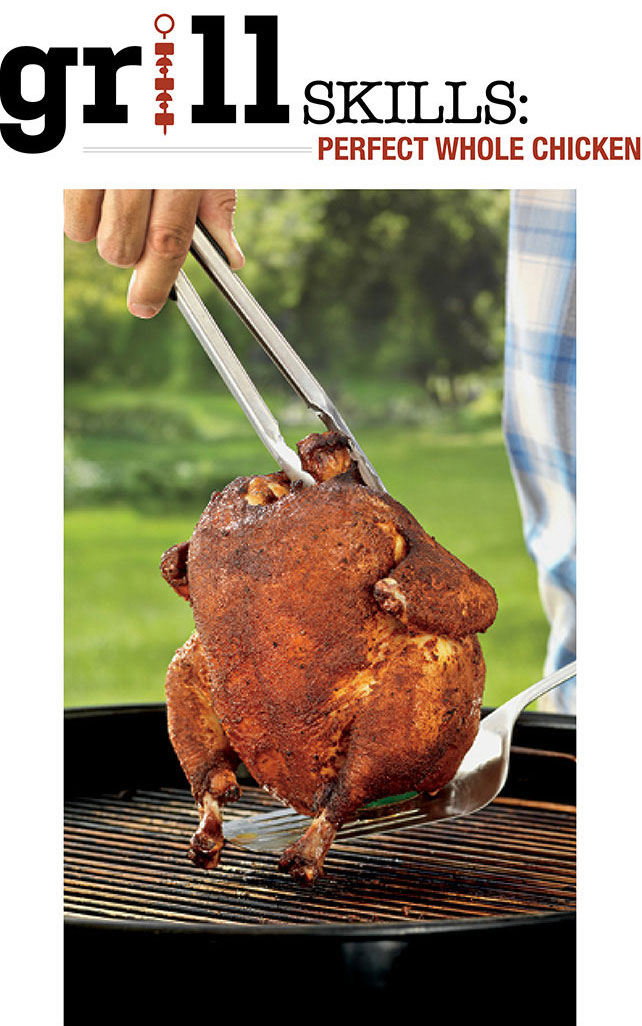
This wacky looking idea is actually kinda brilliant. With the chicken standing upright on a can, you have a solution to an age-old problem of cooking whole birds, which is that the breast meat cooks faster than the leg meat and tends to turn dry by the time the leg meat is done. In this showstopping situation, the legs are closer to the heat source, so they get a little hotter and cook a little faster than the breasts. Now both areas are done at the same time. Genius! Also, the entire surface of the bird gets full exposure to the dry, caramelizing heat of the grill, so you get a handsome, crisp skin all the way around. But wait, there’s more. The beer left in the can steams the chicken from the inside, producing moist, succulent meat. The key for that is to have less than one-third of the beer in the can; otherwise, the beer doesn’t get hot enough to steam.
Pour out at least two-thirds of the beer, poke a couple of extra holes in the top of the can, season the chicken, and lower the hollow cavity of the chicken onto the can.
Tuck the wing tips behind the back of the chicken. Transfer the chicken on the beer can to the grill’s cooking grate, balancing it on its two legs and the can, like a tripod.
Grill over indirect medium heat until done. For a smoked beer can chicken, add soaked and drained wood chips to the charcoal or to the smoker box of a gas grill once or twice during the first half of the cooking time. See full recipe.
When Is It Done?
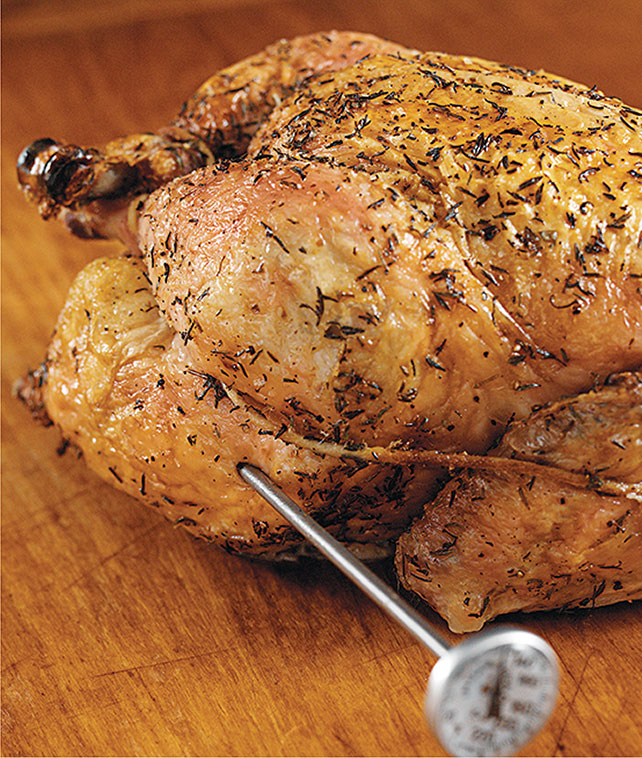
As a chicken overcooks, the meat loses its flavor and gradually shrivels to a chalky texture. To avoid that, take your chicken off the grill just in time.
As long as you have a reliable instant-read thermometer, the “temperature test” works perfectly. Insert the sensor of the thermometer into the deepest part of the thigh, not touching the bone. The temperature there should be about 170°F. The meat is safe to eat above 160°F, but the dark meat is not really tender until it reaches 170°F. Ideally, the breast meat will be about 165°F.
If you don’t have an instant-read thermometer, cut through the skin between a leg and the rest of the body. Bend that leg away from the body to expose the thigh joint. When the chicken is done, the meat at the joint should be opaque and the juices should run clear with no trace of pink.
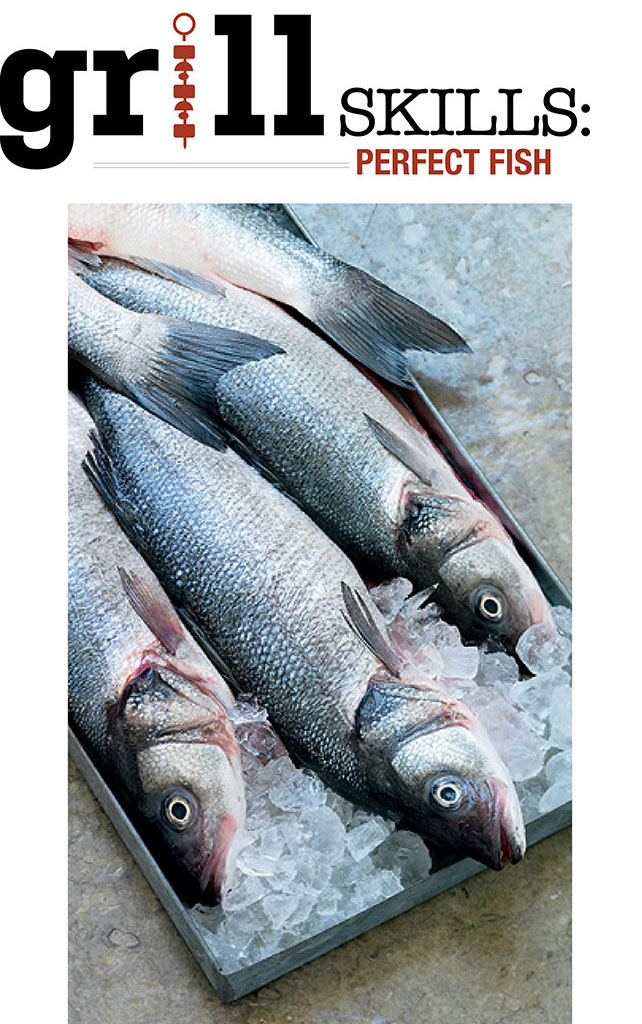
Choose Wisely
Fresh fish have a firm, shiny flesh that bounces back a bit when you touch it. If the fish has started to separate, or if it’s discolored, don’t buy it.
High-quality fish smells like the ocean, not like cooked fish.
For whole fish, look for clear, bright eyes. If a fish has eyes that have clouded over, it’s way past its prime.
The scales of whole fish should be smooth. Breaks or cracks in the scaling pattern indicate poor handling or age.
Filleting a Whole Fish
Begin by scaling and rinsing the fish in the sink. Then remove the head by making a diagonal cut just behind the small fin at the base of the head. Cut all the way through the bones.
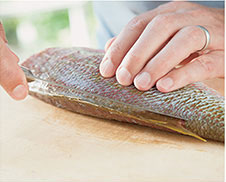
Using a very sharp knife with a flexible blade, begin a cut about 1/2 inch deep just above the backbone near the tail end. Continue the cut along the length of the back until you reach the other end of the fish.
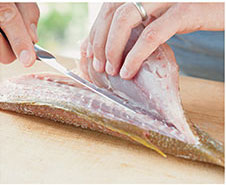
Then go back and make the cut deeper and deeper with each gentle stroke, keeping the blade of the knife as close to the bones as possible. Gently lift the top fillet with one hand so you can see where your knife is cutting.
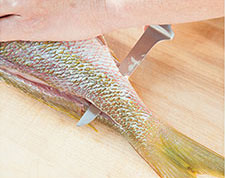
Lay the fillet back in place and cut through the tail end, always moving the blade of the knife away from you in case the knife slips. Turn the fish over and repeat the process on the other side.
Firm Fillets
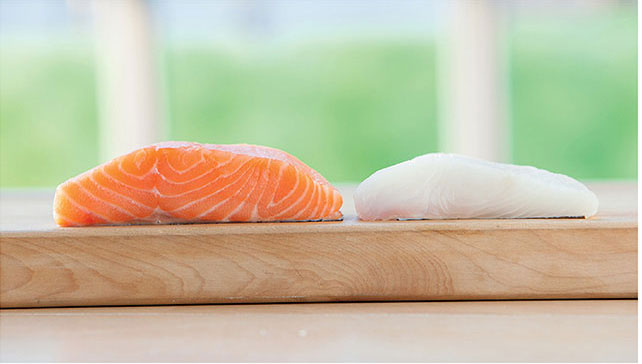
Salmon and halibut are good choices for grilling because their flesh is firm. Look for fillets that are at least one inch thick from end to end. Thinner fillets cook too quickly and tend to break apart.
Preventing Sticking
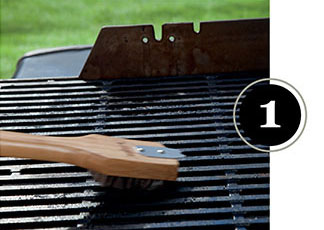
The first step is to get your cooking grate hot and clean enough that it will dry the watery surface of the fillets quickly so they can brown. Once they begin to brown on a clean grate, they begin to release.
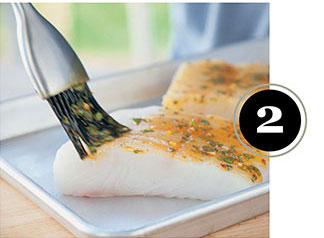
Oil is a natural lubricant that will prevent sticking, so brush it evenly and generously over the fillets. But don’t overdo it. If the fish is dripping with oil, you will probably get flare-ups.
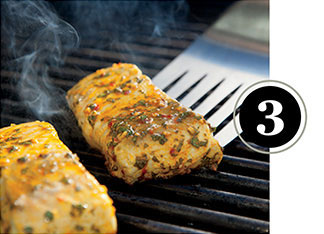
Don’t touch any fillet until it is browned and ready to turn. It is often a good idea to grill the first side a little longer than the second side. An extra few minutes on the first side (with the lid closed) will help the fillet to release from the grates more easily.
When Is It Done?
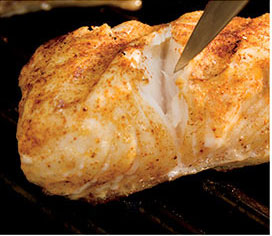
peek Test
When the flesh turns from translucent to opaque all the way to the center and just begins to flake around the edges, the fish is done. This typically happens when the internal temperature reaches 125° to 130°F.
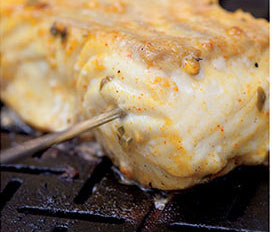
skewer Test
If you don’t have an instant-read thermometer, insert a metal skewer into the thickest part of the fish for a few seconds and then touch the skewer on a sensitive part of your skin.
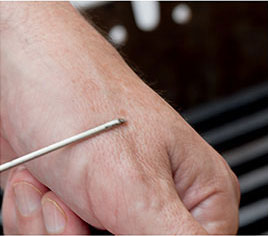
If the skewer feels cold to an area like the base of your thumb, the fish is underdone. If the skewer feels warm, the fish is cooked. If the skewer feels hot, the fish is overcooked.
Using a Perforated Grill Pan
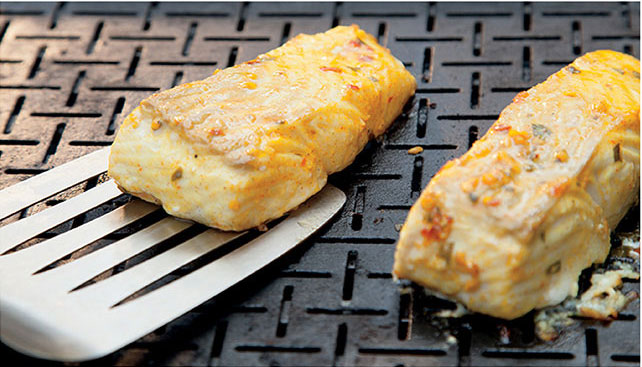
If you are concerned about turning your fillets on the grill, just set them on a preheated grill pan over indirect high heat. There is no need to turn them. They will roast fairly evenly on both sides, but the side touching the pan should develop a nice golden crust.