Gardening: The Planting
SEEDS ARE SIMPLY MIRACULOUS. THEY ARE BUNDLES OF LIFE— plants in embryonic form—just waiting for the right conditions to grow and reproduce.
You can group plants into three primary classes, depending on their life cycles. Some plants are annuals. They must go through their whole life cycle, including producing seeds, in the year that they sprout. Biennials are plants that take two years to complete a growth cycle and yield seeds. Perennial plants live from year to year; shrubs and trees are all perennials. Some annual plants are self-seeding, so from a gardener’s point of view, they behave like perennials.
Annuals reproduce strictly from seeds, so gardeners consider their reproduction sexual. Biennials and perennials can reproduce sexually from seeds, but these plants may also reproduce asexually from existing roots.
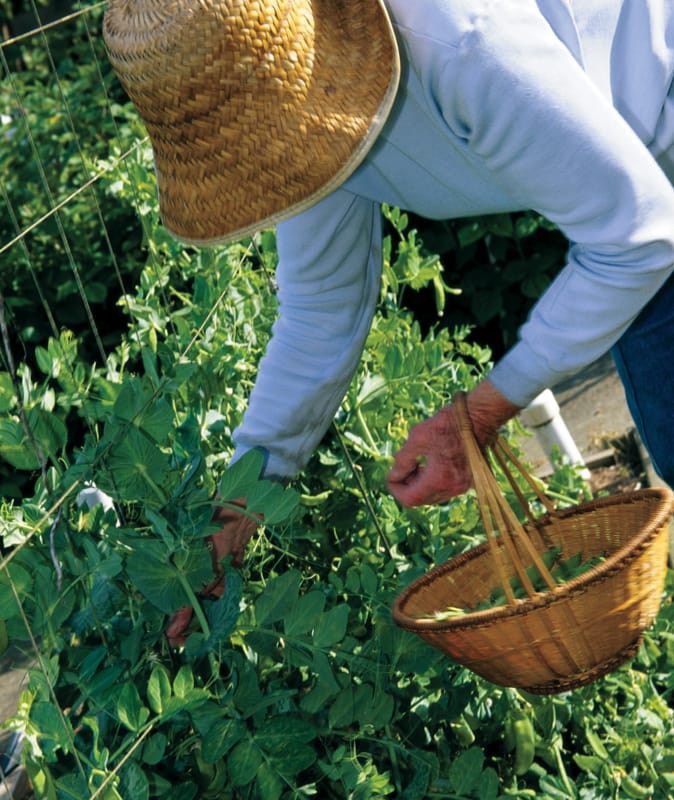
With the warm sun on her back, a woman enjoys the peacefulness of her garden, gathering her homegrown peas.
Think of plants, like people, as part of a family. Like human families, plant families share significant traits. Some of the important families that farmers and gardeners deal with are:
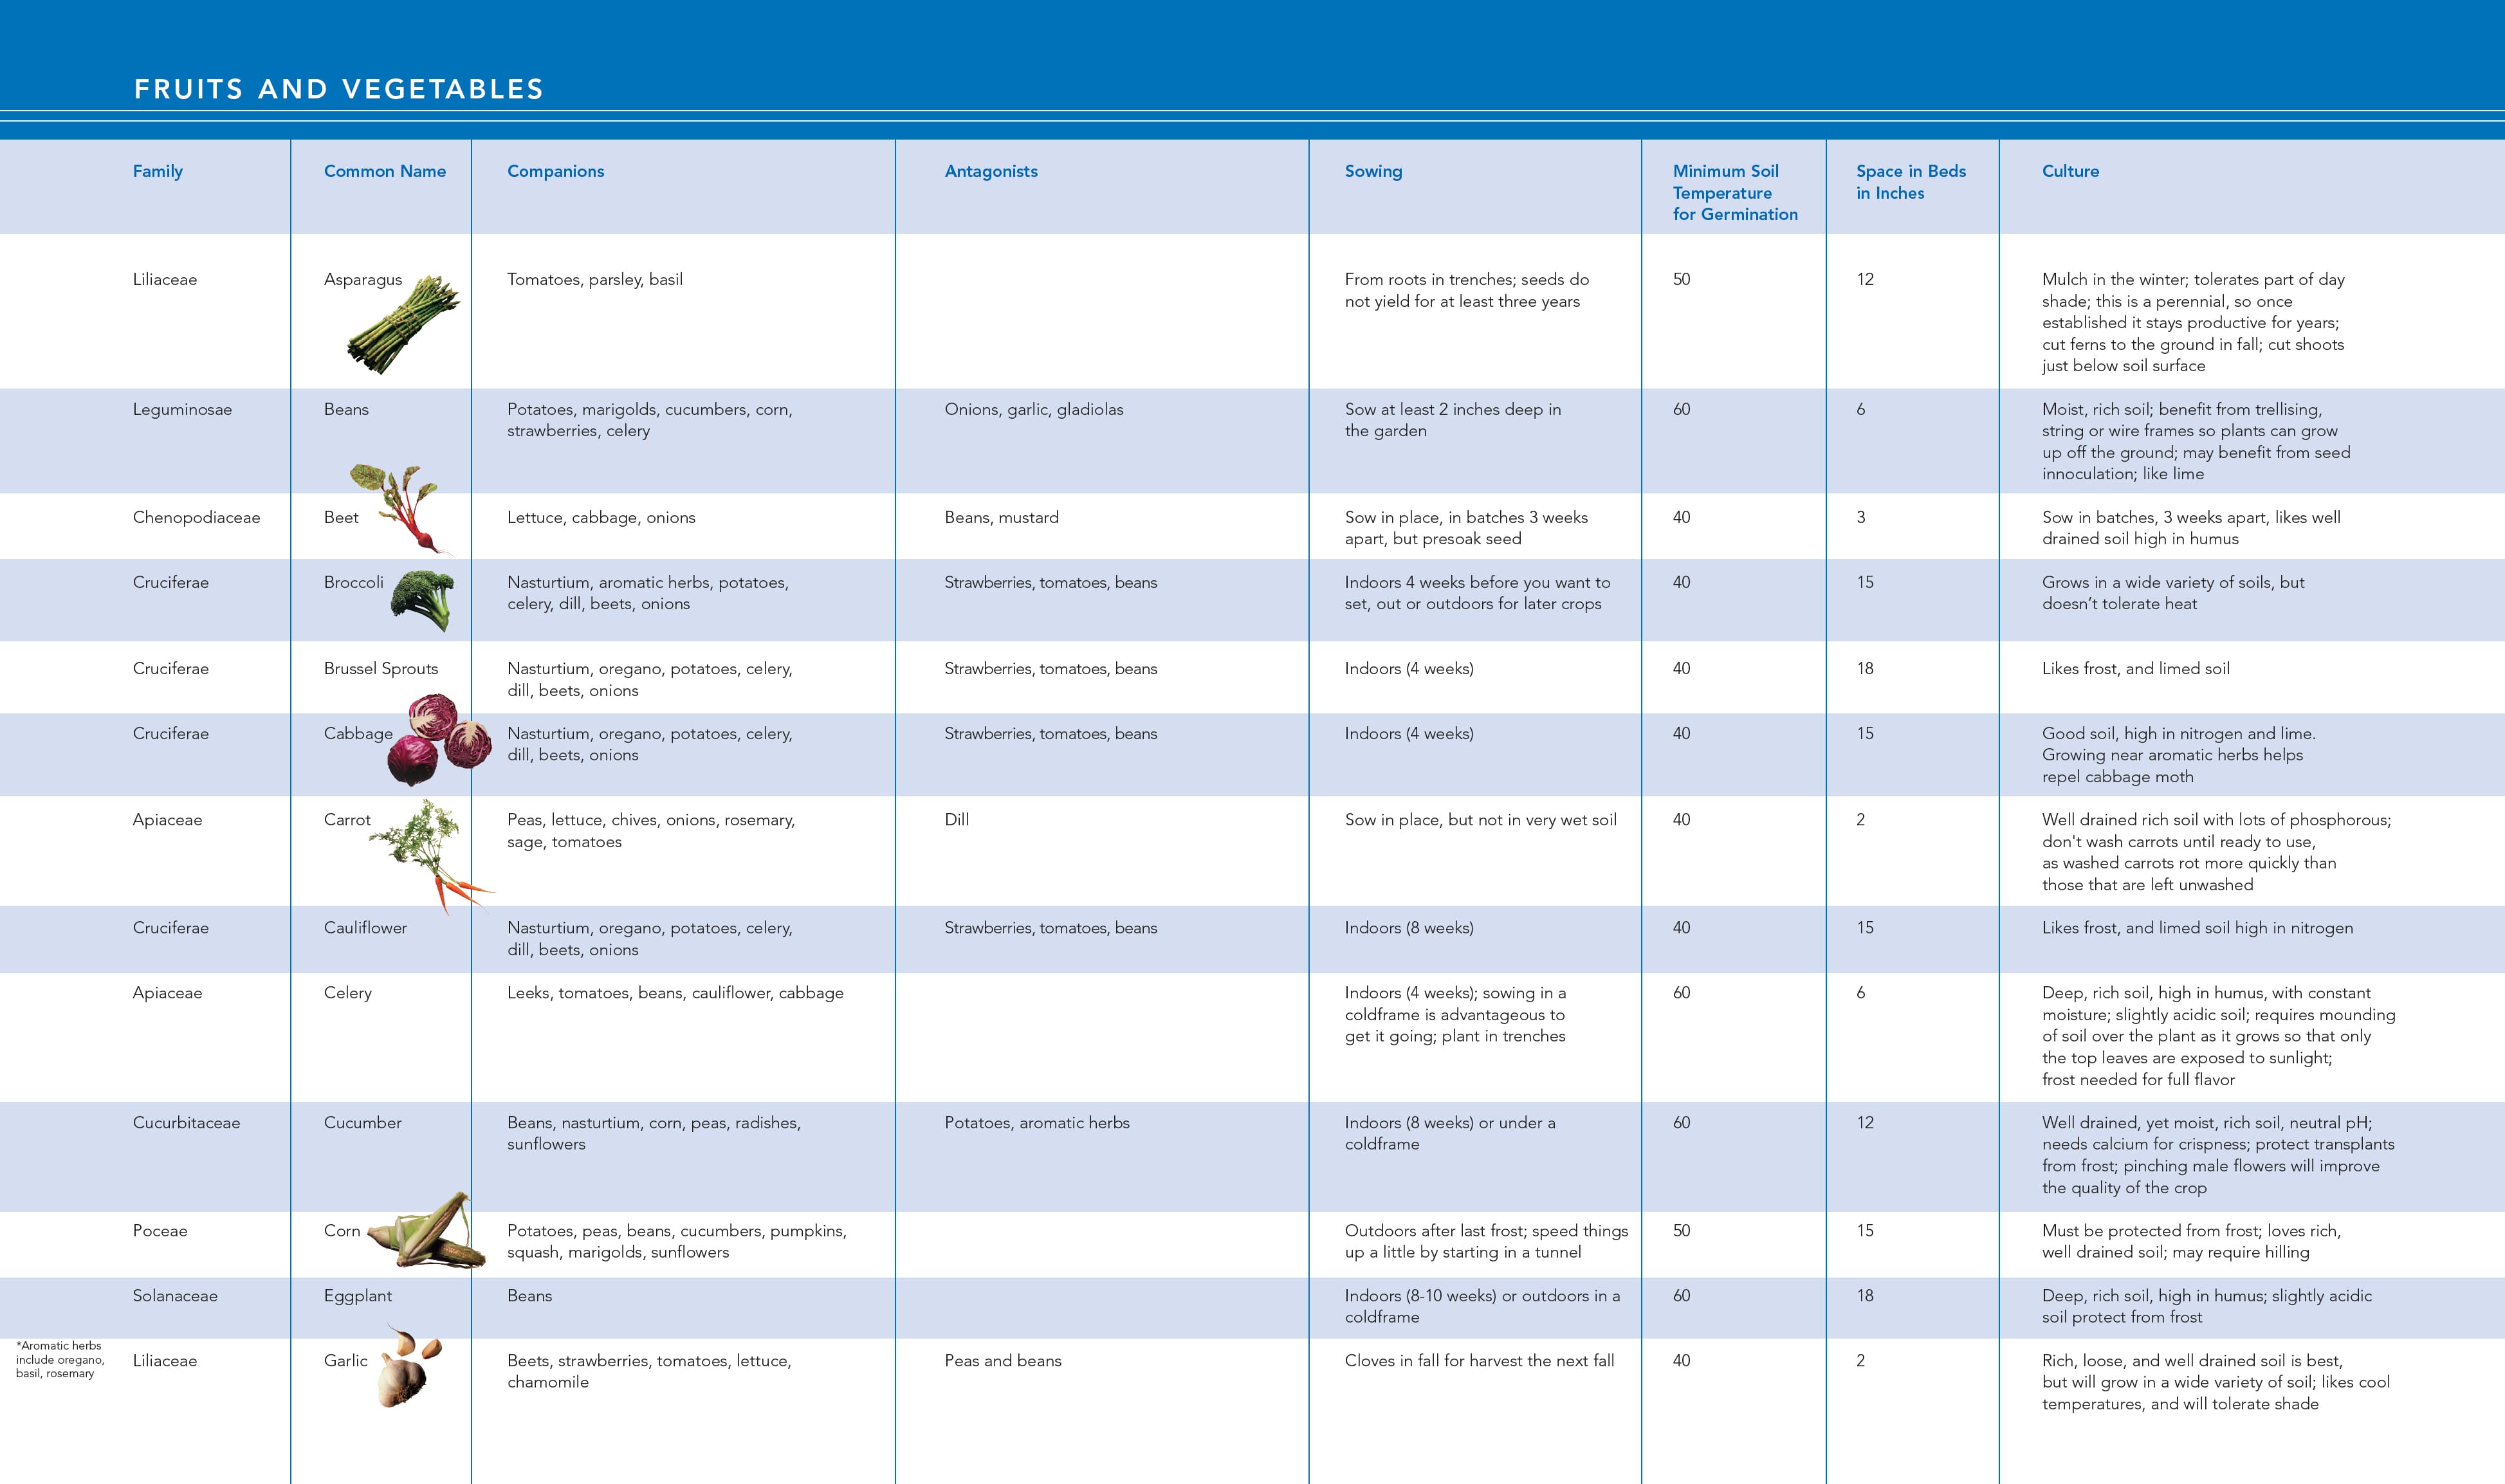
Apiaceae (formerly Umbelliferae): Carrots are probably the most common member of this family in gardens, but you may also plant celeriac or celery. Apiaceae herbs include anise, coriander, cumin, dill, fennel, and parsley.
Chenopodiaceae: Beets and spinach are the two most common members of Chenopodiaceae, but quinoa (a grain from Central and South America that is finding its way into our diet), Swiss chard, and sea kale are other members you might consider planting. The “seeds” that you plant are actually tiny fruits containing the real seeds inside them, so when you plant one “seed,” multiple plants come up. This means you have to thin your plantings. An advantage of planting Chenopodiaceae is that the members of this family have a dense root system that breaks up compacted soil. Grow beets for livestock feed as well as for humans.
Compositae: Lettuce is probably the most famous member of the Compositae family. Included as well are artichokes, cardoons, chicory, endive, salsify, and scorzonera. Unfortunately, this family also brings us some weedy members—such as dandelions and thistles—that find their way into gardens, lawns, and fields against our wishes.
Cucurbitaceae: Yum, yum, yum. This family brings us cucumbers, melons, pumpkins, and squash. All members of this family are warm-season crops, so do not place seeds or transplants in the ground until the danger of frost has passed. Though generally grown for their fruit, Cucurbitaceae blossoms are edible, and you can add them to salads.

pumpkins year round.
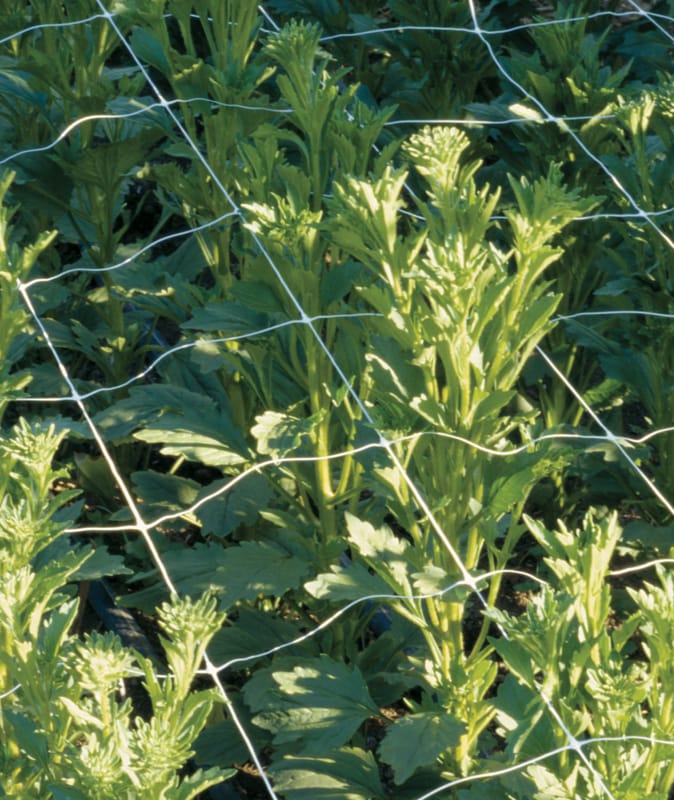
Even a small garden can provide enough vegetables, such as the carrots

Like other of members of the Cruciferae family, broccoli
Cruciferae: Also called the cabbage family, or the Brassicas, the Cruciferae family includes broccoli, Brussels sprouts, common and Chinese cabbage, cresses, kale, kohlrabi, radishes, rutabagas, and turnips. All the plants in this family are biennials. They have a two-year growth cycle to create seeds, though for garden produce, you pick the crop during its first year. The Brassicas are cool-season crops, so they can go in the garden early, producing some of the first goodies to come from the garden. Plant brussel sprouts in summer for harvest in the fall, as frost sweetens the result.
Lamiaceae: Known as the mint family, this group brings us a wide variety of herbs, ranging from basil and bee balm to sage, rosemary, and thyme. These are highly aromatic herbs that are widely used in cooking. You may also use them for their medicinal properties.
Lauraceae: This is a family that doesn’t rest on its laurels. It brings us a number of perennials, including avocados, as well as the herbs bay leaf and cinnamon.
Leguminosae: Most living organisms use the ammonia form of nitrogen (NH3) for building protein that is required for body functions. The atmosphere consists of about 80 percent nitrogen; however, this nitrogen is available in a non-useable form of gas (N2). The legumes are unique in that they are able to “fix” that atmospheric form of nitrogen in their roots, changing it to the useable NH3 form. By doing this, they provide part of their own fertilizer while increasing soil fertility that other plants can take advantage of. Legumes accomplish this feat thanks to a mutually beneficial, relationship that they have with a group of soil microorganisms, known as rhizobium. Rhizobium lives in nodules on the roots of the legumes. The plant contributes energy, in the form of sugars and other nutritional factors, for the bacteria, so the bacteria can provide the nitrogen that the plant needs in a form it can use. To enhance nitrogen fixing, inoculate seeds with appropriate rhizobium before planting.
The legumes are also special, because they provide more dietary protein for animals (including us two-legged creatures) than any other plant can provide. The legumes include such garden favorites as peas and beans, lentils, and peanuts. Crops for livestock feed include field peas, alfalfa, clovers, vetches, and birdsfoot trefoil.
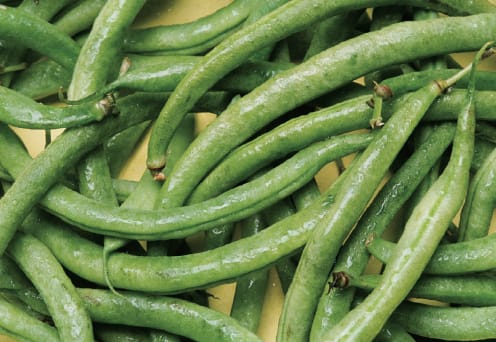
The legumes, such as green beans, are popular crops, too, because they enrich the soil.
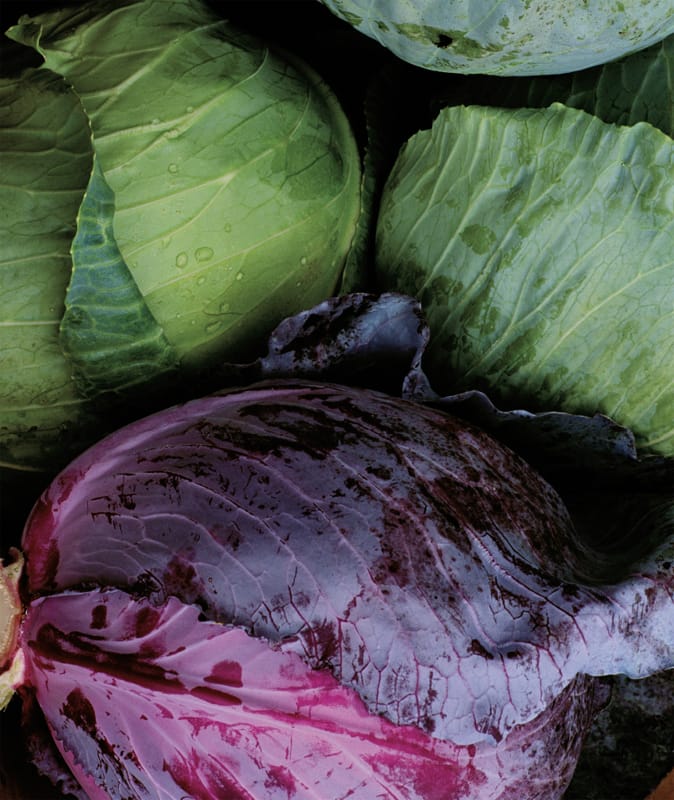
Cabbage are some of the first treats to pop up in your garden.
Nothing tastes better than fresh fruits and veggies from your own yard.
Liliaceae: This is one of my favorite families. Its members include asparagus, chives, garlic, leeks, onions, and scallions. This family has flowering members as well, such as day lilies, camas, crocuses, daffodils, hostas, hyacinths, lilies-of-the-valley, and tulips. The aloe plant, known for its medicinal properties, is also a member of the clan. All members of this family are monocotyledons.
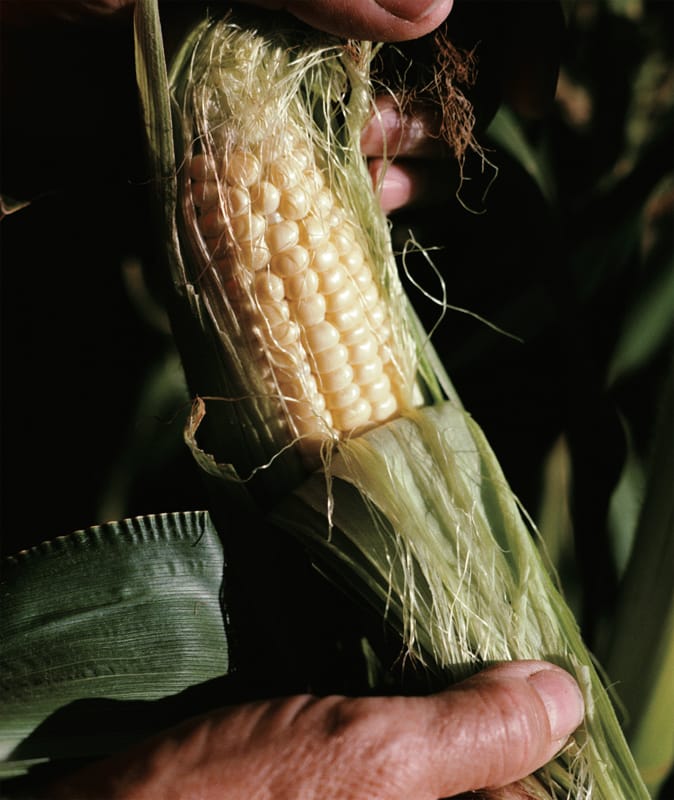
Poaceae (formerly Gramineae): Better known as the grass family, Poaceae is represented in the garden by only one family member—sweet corn. Outside the garden environment, poaceae includes many cereal grains, such as oats, rice, rye, and wheat, and forage crops for the pasture, such as bromegrass, orchard grass, and timothy.
Polygonceae: Rhubarb and sorrel are the two members of this family found in the garden, but the most famous member is buckwheat, a major green manure crop as well as a minor grain crop. Buckwheat hulls can be used as stuffing for pillows.
Rosaceae: As the name implies, roses are members of this family, but also included are many of our favorite fruits: almonds, apricots, apples, blackberries, cherries, nectarines, peaches, pears, plums, raspberries, and strawberries. All members of this family are dependent on insects (primarily bees) for pollination.
Rutaceae: Those of you who live in southern-tier states and some parts of California are probably familiar with Rutaceae, which support a large amount of economic activity in your regions. These are the citrus family members: grapefruit, lemons, limes, oranges, and tangerines. For those relegated to northern climes, if you are dedicated, you may get fruit from trees grown indoors in pots.
Soanaceae: This group includes some all-time favorites—potatoes, tomatoes, peppers, and eggplants. Soanaceae also includes some dark horses, such as tobacco, belladonna, and deadly nightshade. Petunias, ground cherries, and jimson weed are members of the tribe as well. The edible members of this clan are good sources of vitamin C. Soanaceae plants like slightly acidic soil, so you don’t want to add lime where you will plant them. They do like potassium, so adding a source of potash, such as wood ash, is a good idea.
Nothing tastes better than fresh fruits and veggies from your own yard.
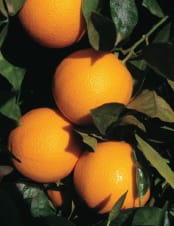
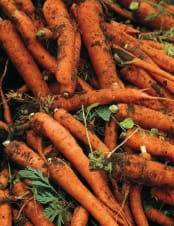
These vibrantly colored oranges beg to be picked.
To save grapes and other fruits in orchards and vineyards, owners often use heaters, or smudge pots.
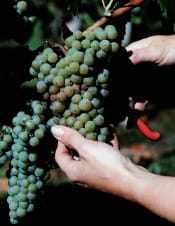
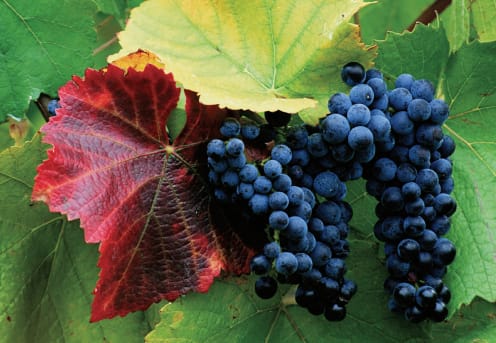
Vitaceae: The final family of importance for gardeners, farmers, and wine drinkers is the Vitaceae family, which brings us the grape. Most areas of the country can grow one or more varieties of grapes, but grapes are very geographically specific. Some grapes can’t grow in high humidity areas, others crave humidity; some tolerate heat well; others are hardy enough to survive a Minnesota winter. If you are interested in trying grapes, research varieties suitable to your area before purchasing any vines.
You can successfully grow most annuals throughout the United States (though in cold climates you may need to start annuals indoors and transplant out if they are to reach maturity). Unfortunately, biennials and perennials won’t grow everywhere; climate dictates where they will grow. In 1960, Henry T. Skinner, then director of the U.S. National Arboretum, in cooperation with the American Horticultural Society, supervised the creation of the Plant Hardiness Zone map. The map is broken down into hardiness regions, based primarily on average annual minimum winter temperatures. It has become a valuable tool for gardeners interested in growing perennials.
When shopping for perennials, you will see references to the zones that the plant you are looking at will grow in. Plants may survive in warmer or colder zones than those listed, but the range represents the optimum for that plant’s performance.
Be aware of microclimates, localized areas where weather conditions may vary from the norm. A sheltered yard may support plants not normally adapted to the region, or a north-facing slope may be significantly cooler or windier than surrounding areas, thereby reducing the survival of plants normally adapted to the area.
To save grapes and other fruits in orchards and vineyards, owners often use heaters, or smudge pots.
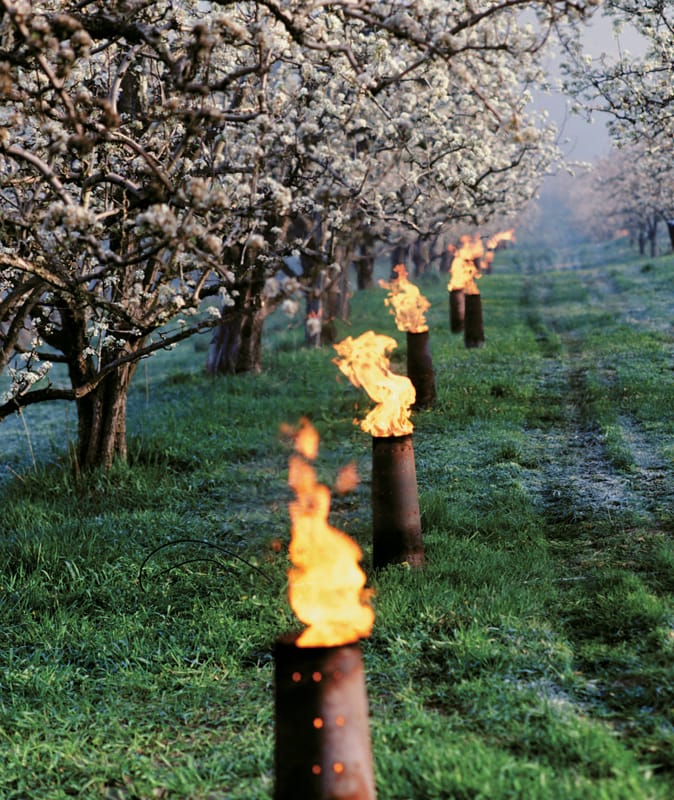
The smudge pots trap heat between the ground and a thick smoke cloud that hovers over the orchard or vineyard.
The vegetable garden shown, you’ll discover the true meaning of “enjoying the fruits of your labor.” Waiting for perfect temperature and soil conditions (among many other factors) that seeds require to sprout can be tough; consider purchasing transplants instead.
Plants that grow from seeds are classified as either monocotyledons (also known as monocots) or dicotyledons (dicots), depending on how their first leaves grow. Monocots start life with a single, straight leaf and include many grasses and grains. Most fruits, vegetables, and legumes are dicots, sending up two leaves. The dicots have thicker, tap-type roots, and the leaves are often patterned with veins in a weblike design.
A seed coat protects most seeds from the elements until the time is right for them to grow. Some seeds only remain viable for a short period, measured in days, but others can remain dormant for many years and then spring to life when the time is right. Lotus seeds, for example, remain viable for thousands of years. Most garden seeds, however, last no more than a few years.
When it comes to many heat-loving plants, transplants give you a head start on the growing season. They are readily available in the spring at garden centers, grocery stores, and discount stores. You can also start them in the house with little effort. The biggest benefit of starting your own plants is that you have more seed varieties to choose from. Starting your own transplants is cost-effective as well. It’s almost essential if you want fully organic produce because commercially available transplants are often fertilized with petroleum-based fertilizers and treated with chemicals to protect from insects and diseases.
Cutting, division, and layering are techniques that offer an alternative to starting plants from seeds when you wish to propagate perennial and biennial plants. These are asexual techniques that start new plants from a parent plant’s stems or roots.
You can start seeds directly in the garden, indoors for transplanting outside, or in containers for remaining inside. Seeds sprout when temperature, moisture, light, and other conditions are just perfect.
For some seeds with particularly hard seed coats, breaking dormancy naturally may take years, but you can opt for some intervention strategies that trick the seed into breaking dormancy when you want it to. Scarification helps break dormancy; out in nature, it is the result of years of freezing and thawing, and of living creatures (ranging from microscopic organisms to birds and animals) working over the seeds. To scarify seeds, scratch the seed coat (an emery board works well), freeze and thaw, or soak the seed in hot water (170 to 212 degrees Fahrenheit). For hot-water treatment, allow seeds to soak in the water as it cools, for twelve to twenty-four hours right before planting.
After germination occurs, seedlings require ten to sixteen hours of intense light a day. Without strong light, the seedlings become spindly or leggy and may lean toward whatever light source is available. For indoor sowing, light from a south-facing window may be sufficient, but if not, use a grow light for supplemental light. (You can make a light stand for a fluorescent fixture from PVC pipe.) Not all grow lights are created the same: A combination of cool white and warm white fluorescent bulbs placed three inches from the top of the tallest plants you are supplementing does the trick. (Just remember to move the light up frequently, or you will find a plant cooking itself right against the light.)
You can seed in the garden by hand or with a single-row seeder that you push. Different models use different approaches for delivering the seed. Fluid, belt, and vacuum seeders are expensive specialty seeders, probably only justified for very large commercial gardens. Plate seeders, such as those made by Earthway Products of Indiana and the Lambert Corporation of Ohio, are reasonably priced and accurate in seed placement, making them an ideal choice for smaller gardens. Adding seed to a pasture to improve the diversity of grasses and legumes is easy to do with a broadcast seeder. Broadcast seeders are available as bags that fit over your shoulder or in larger units that you pull behind a tractor or ATV. Seeding field crops requires specialized planters or seed drills.
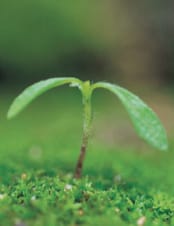
From spotting your first seedling such as the one to a sea of green.

Transplanting started seedlings gives you a jump on achieving a thriving garden.
You can start seedlings indoors in almost any kind of container, or you can use a soil blocker, which presses out soil cubes in sizes ranging from three-quarters to four inches. I have used both, and for large-scale planting the blocks can’t be beat. For starting a small batch of transplants, however, pots, yogurt cups, milk cartons, egg cartons, flats, or any container in which you can poke a hole in the bottom works fine. I keep plantings watered from beneath as much as possible, and until the first seedlings emerge I keep the container or blocks lightly covered with plastic wrap (plastic produce bags or the ones you buy for cooking turkeys work well for containers, which can be set right in the bag). Make a few slits in the plastic to allow airflow.
Some people recommend against using anything but commercial potting mixes for starting seeds, but I like to use a home brew that incorporates my ever-improving garden soil, compost and/or well-aged manure, some commercially purchased sphagnum moss or peat, and perlite. If my base soil were high in clay, I would add some purchased sand. My proportions are one part garden soil, one part compost/manure, one part moss, and a quarter part perlite (for clay, add half part coarse sand). This mixture works well in any container, and it does well in blocks if you keep stones and rocks from the garden out of it. A few grass seedlings or weeds may pop up in the transplants, but they are easy to pluck right out.
To water plants from beneath, run a piece of un-dyed wool yarn through the soil as you place it in the pot and out the bottom of the pot. This will act as a wick that brings water up from the pan placed below the pot.
Layering is suitable for many perennials with flexible branches. It is the simplest and most reliable method to increase perennials. The idea is to produce roots on a stem while the stem is still attached to the parent plant. Once the root is established, cut the new plant from the parent plant.
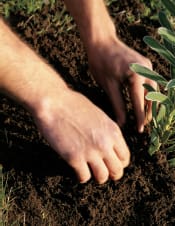
Select a healthy branch that is growing close to the ground and that is flexible enough to bend down to the soil. While holding the branch close to the soil, bend the top 6 to 10 inches of the stem into a vertical position. It’s helpful to scrape the bark on the underside of the branch at the bend. Bury the bent, scraped portion three to six inches deep, and anchor it with a wire loop. Insert a small stake to hold the top upright. Keep the branch moist.
You can take cuttings any time during late spring and summer from healthy, well-established plants. Those taken in fall have to over-winter in pots or temporary beds, so they take longer to fully develop. Healthy tip growth makes the best cuttings. Cut below a node to form a cutting that is 3 to 5 inches long, and root in potting soil. Keep the soil well moistened and in partial shade until the roots form. Rooting can take anywhere from two weeks to two months depending on the plant; the woodier the cutting the longer it will take. Transplant once the roots take off.
You can buy started plants at a home-and-garden store or grow your own in pots, then relocate the plants when they’re ready.
Fragrant sage is a broad-leafed herb commonly used in cooking for its powerful flavor.
Division is useful for multiplying healthy, established plants that may be two to four years old. Dig up the old plant and cut or pull it apart into sections. Replant the sections and keep them moist until the new plants are established.
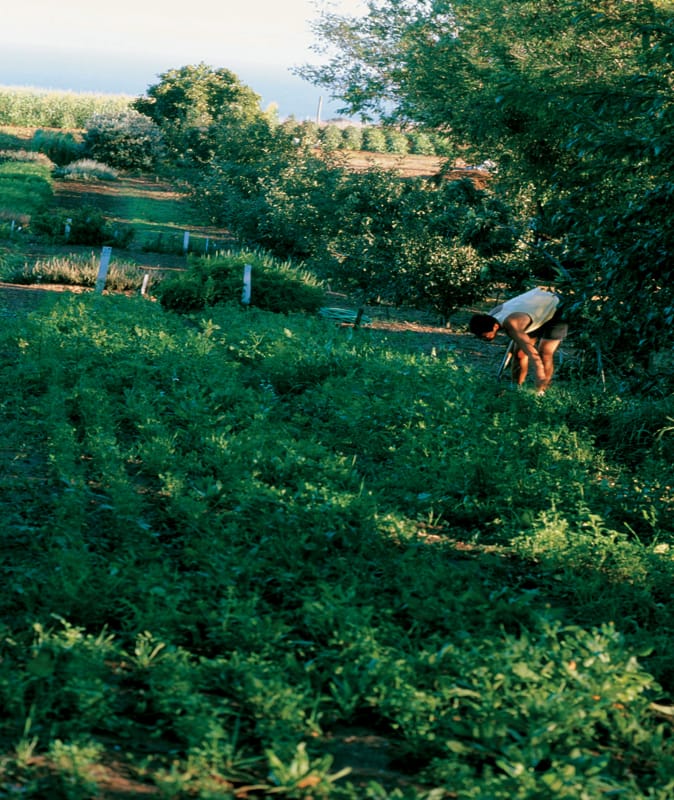
Mention gardening, and the first thought that comes to mind is a small vegetable patch, or some ornamentals planted near the house. We farmers, however, can grow things on different scales and in different places. A field of alfalfa, just sprouting after a spring rain, or a grove of trees, grown for fruit, nuts, shade, or other forest products, are as much a farmer’s garden as the rose bushes next to the house or the potatoes by the kitchen door.
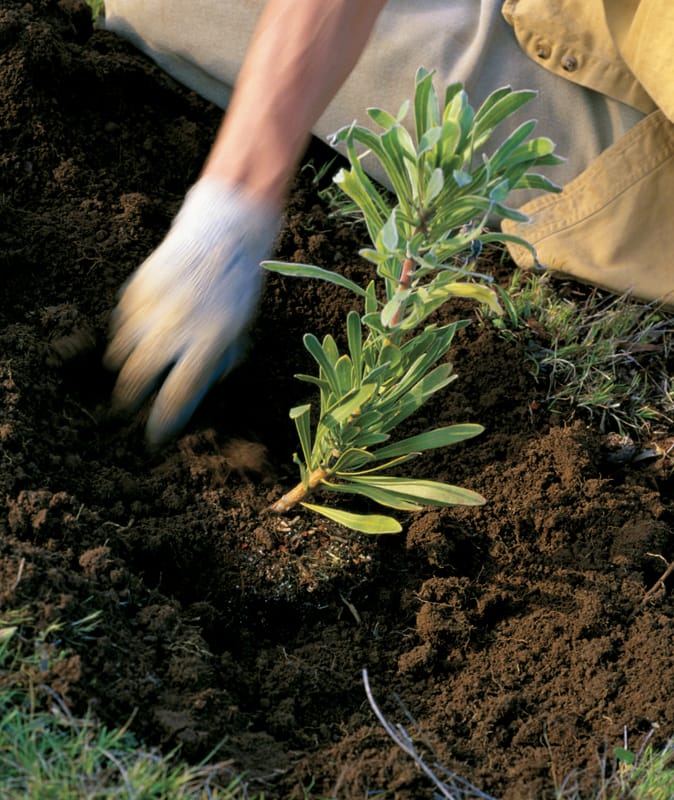
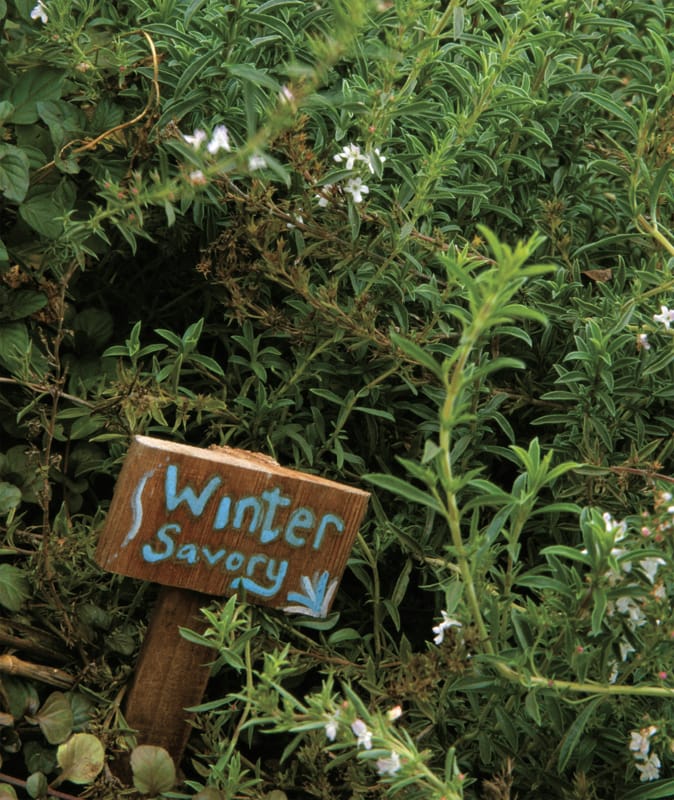
From a botanist’s point of view, a true herb is a plant that does not produce a woody stem and that dies back to the ground each winter. But in general terms, gardeners have expanded the term herbs to include aromatic plants grown largely for their ability to flavor foods, for medicinal purposes, for cosmetic uses, and as ornamentals. They include woody and non-woody annuals, perennials, biennials, bulbs, and grasses in their definition. The broad classification comprises hundreds of plants that you can plant in gardens or as part of landscaping.
If you want to experiment with developing locally adapted plants, or keep heirloom plants, which can be great fun to grow, you will need to learn how to save seeds. The process can be challenging. There are a few essential rules:
• Don’t try to save seeds from “hybrids.” Don’t save these unless you want to get into serious plant breeding. They won’t reproduce true to the plant you had last year. Look for heirloom, or open-pollinated varieties.
• Save seeds from the best plants in the garden. These include plants that resisted disease or insects, had high yield, and good size fruits, vegetables or flowers, and those that produced the most flavorful fruits and vegetables.
• Avoid cross-pollination. Cross-pollination is the acceptance of pollen from a different plant of similar genetic makeup. Some plants, such as cucumbers, pumpkins, and squash, are very easily cross-pollinated; others, such as beans and peas, peppers, and tomatoes, are less vulnerable to cross-pollination. A few, such as carrots and radishes, not only cross-pollinate with domestic garden mates, but also easily cross-pollinate with nearby wild relatives.
You can avoid cross-pollination by providing sufficient distance (anywhere from a few garden rows to a mile, depending on how easily a crop crosses) between plantings intended for seed production, or by staggering planting times so that flowering and pollination are not happening in two varieties at the same time. Alternatively, you could use a cheesecloth plant cover to protect flowers from receiving “foreign” pollen. The cheesecloth approach requires you, the gardener, to hand-pollinate, so if you are going to go with that approach, you’re making a real commitment.
The easiest crops to experiment with initially are beans, peas, peppers, and tomatoes, because they are annual crops and have low or moderate susceptibility to cross-pollination. (Biennial crops, which include most root crops as well as some herbs, take an extra commitment because they require a two-year cycle to produce seed.) For tomatoes and peppers, separate varieties by at least 200 feet or only grow one variety. Allow the “fruit” to fully ripen, but not rot, on the vine. For beans and peas, allow the pods to dry on the vine. Separate seeds from fruit or pods, and allow them to dry completely at room temperature. I find this easiest to do by spreading seeds out on a glass dish. As the pulp dries, keep moving seeds apart and allow them to continue drying. Once fully dry (which may take up to several weeks for large seeds), store the seeds in clearly marked envelopes to protect from light damage, then place the envelopes in tightly sealed glass jars. Stored like this, most seeds will last at least a couple of seasons; dry bean and pea seeds can remain viable for many years.
The Seed Savers Exchange is a great nonprofit group dedicated to preserving seldom-seen and heirloom varieties. They publish excellent information regarding seed saving and an annual list of available heirloom seed varieties—such as sun and moon melons and Cherokee purple tomatoes—that are available from their members all over the country. Visit them at www.seedsavers.org or write to them at Rural Route 3, Box 239, Decorah, Iowa 52101.
Herb gardens bring the hobby farmer a kick for cuisine, medicinal benefits, and just plain aromatic goodness.

Versatile, easy-to-grow herbs make themselves at home almost anywhere—in a dedicated plot or nestled among other plants—but they’ll do best in slightly acidic soil.
Most herbs are easy to grow. They can be mixed in beds with other plants or have dedicated areas, but whichever approach you opt for, remember that they generally like a sunny location. The oils, which account for an herb’s flavor, are produced in the greatest quantity when plants receive six to eight hours of full sunlight each day. Herbs will grow in any good garden soil, but they don’t need a lot of extra fertilization. Highly fertile soils tend to produce excessive foliage that is poor in flavor. Most herbs like soil that is slightly acidic.
Many herbs do very well as potted plants, growing on a windowsill throughout the year. For potted herbs, watering from below works well, providing adequate moisture without soaking the roots. After the outdoor growing season is over, enjoy dried herbs in fragrant potpourris and sachets, or grow them indoors in pots on sunny windowsills, and use them for culinary purposes.
One thing I really miss living at 9,200 feet above sea level is the ability to have an orchard. On our Minnesota farm, we had about a dozen kinds of apples and several kinds of plums. With such an extensive variety, we were able to pick apples and plums for several months. What we didn’t use, we shared with friends and neighbors—and what they didn’t use, our livestock enjoyed immensely.
Trees (and shrubs) provide shade and wind protection; they yield not only fruits, but also nuts, Christmas trees, lumber, firewood, and fence posts. They invite wildlife to share our world as well. Planting them and nurturing them is really not all that hard, and the rewards are great.
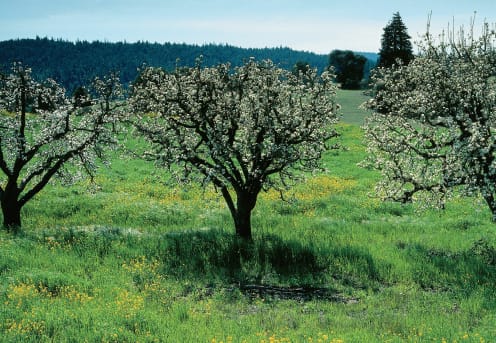
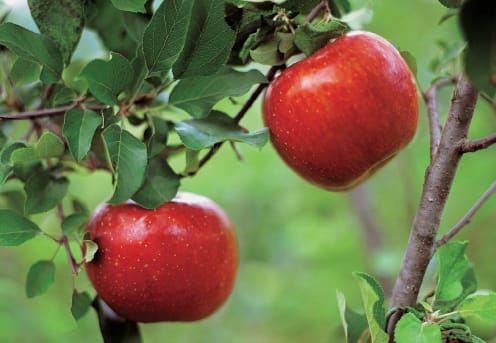
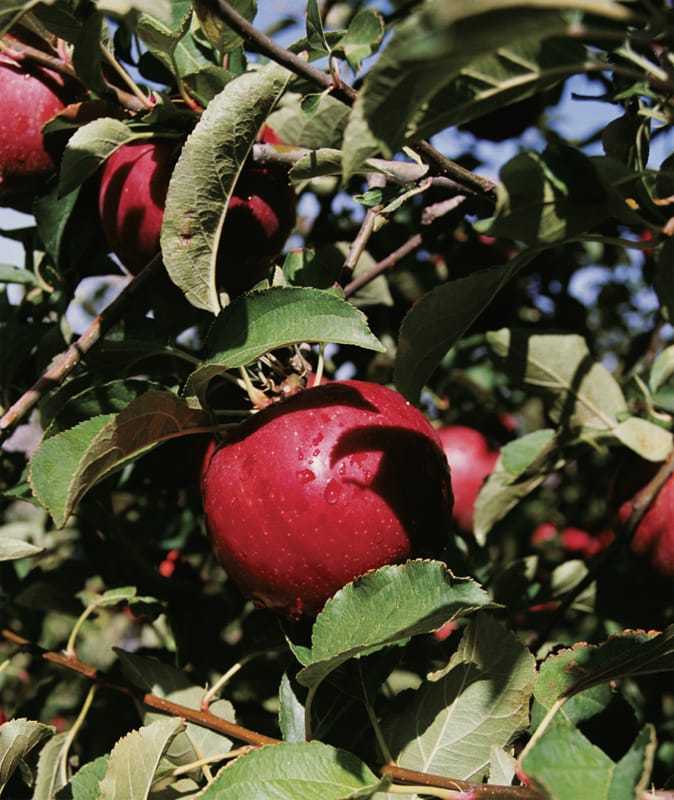
For gardening on a grander scale, you could grow apple trees, which explode with color in the spring and delicious fruit in the summer or fall.
Trees are usually sold as container-grown, balled and burlapped (B&B), or bare root stock. Container-grown trees are the easiest to plant and successfully establish in any season, including summer. With container-grown stock, the plant has been growing in a container for a period of time, so little damage is done to the roots as the plant is transferred to the soil. One disadvantage to container-grown trees is that they may be root bound if the nursery kept them in one size pot too long, and root-bound plants may suffer from problems. When you remove root-bound plants from their containers, you will notice that the roots are wrapped tightly in circles at the edge of the soil they were planted in. You can help these plants get a better start by pulling the bound roots apart and spreading them out in the planting hole.
Growers dig B&B plants from a nursery, wrap the tree in burlap, and keep it in the nursery for an additional period of time to give the roots an opportunity to regenerate. B&B plants can be quite large. It’s best to transplant B&B plants in fall or early spring, while the plant is dormant; they do not do well in summer transplanting without a tremendous amount of babying.
Bare root plants are usually extremely small. Because there is no soil on the roots, you must plant them when they are dormant to avoid drying out. Seed and nursery mail-order catalogs and wholesale traders frequently offer bare root trees. Many state-operated nurseries and local conservation districts also sell bare root stock in bulk quantities for only a few cents per plant. Bare root plants usually are offered in the early spring and should be planted as soon as possible upon arrival.
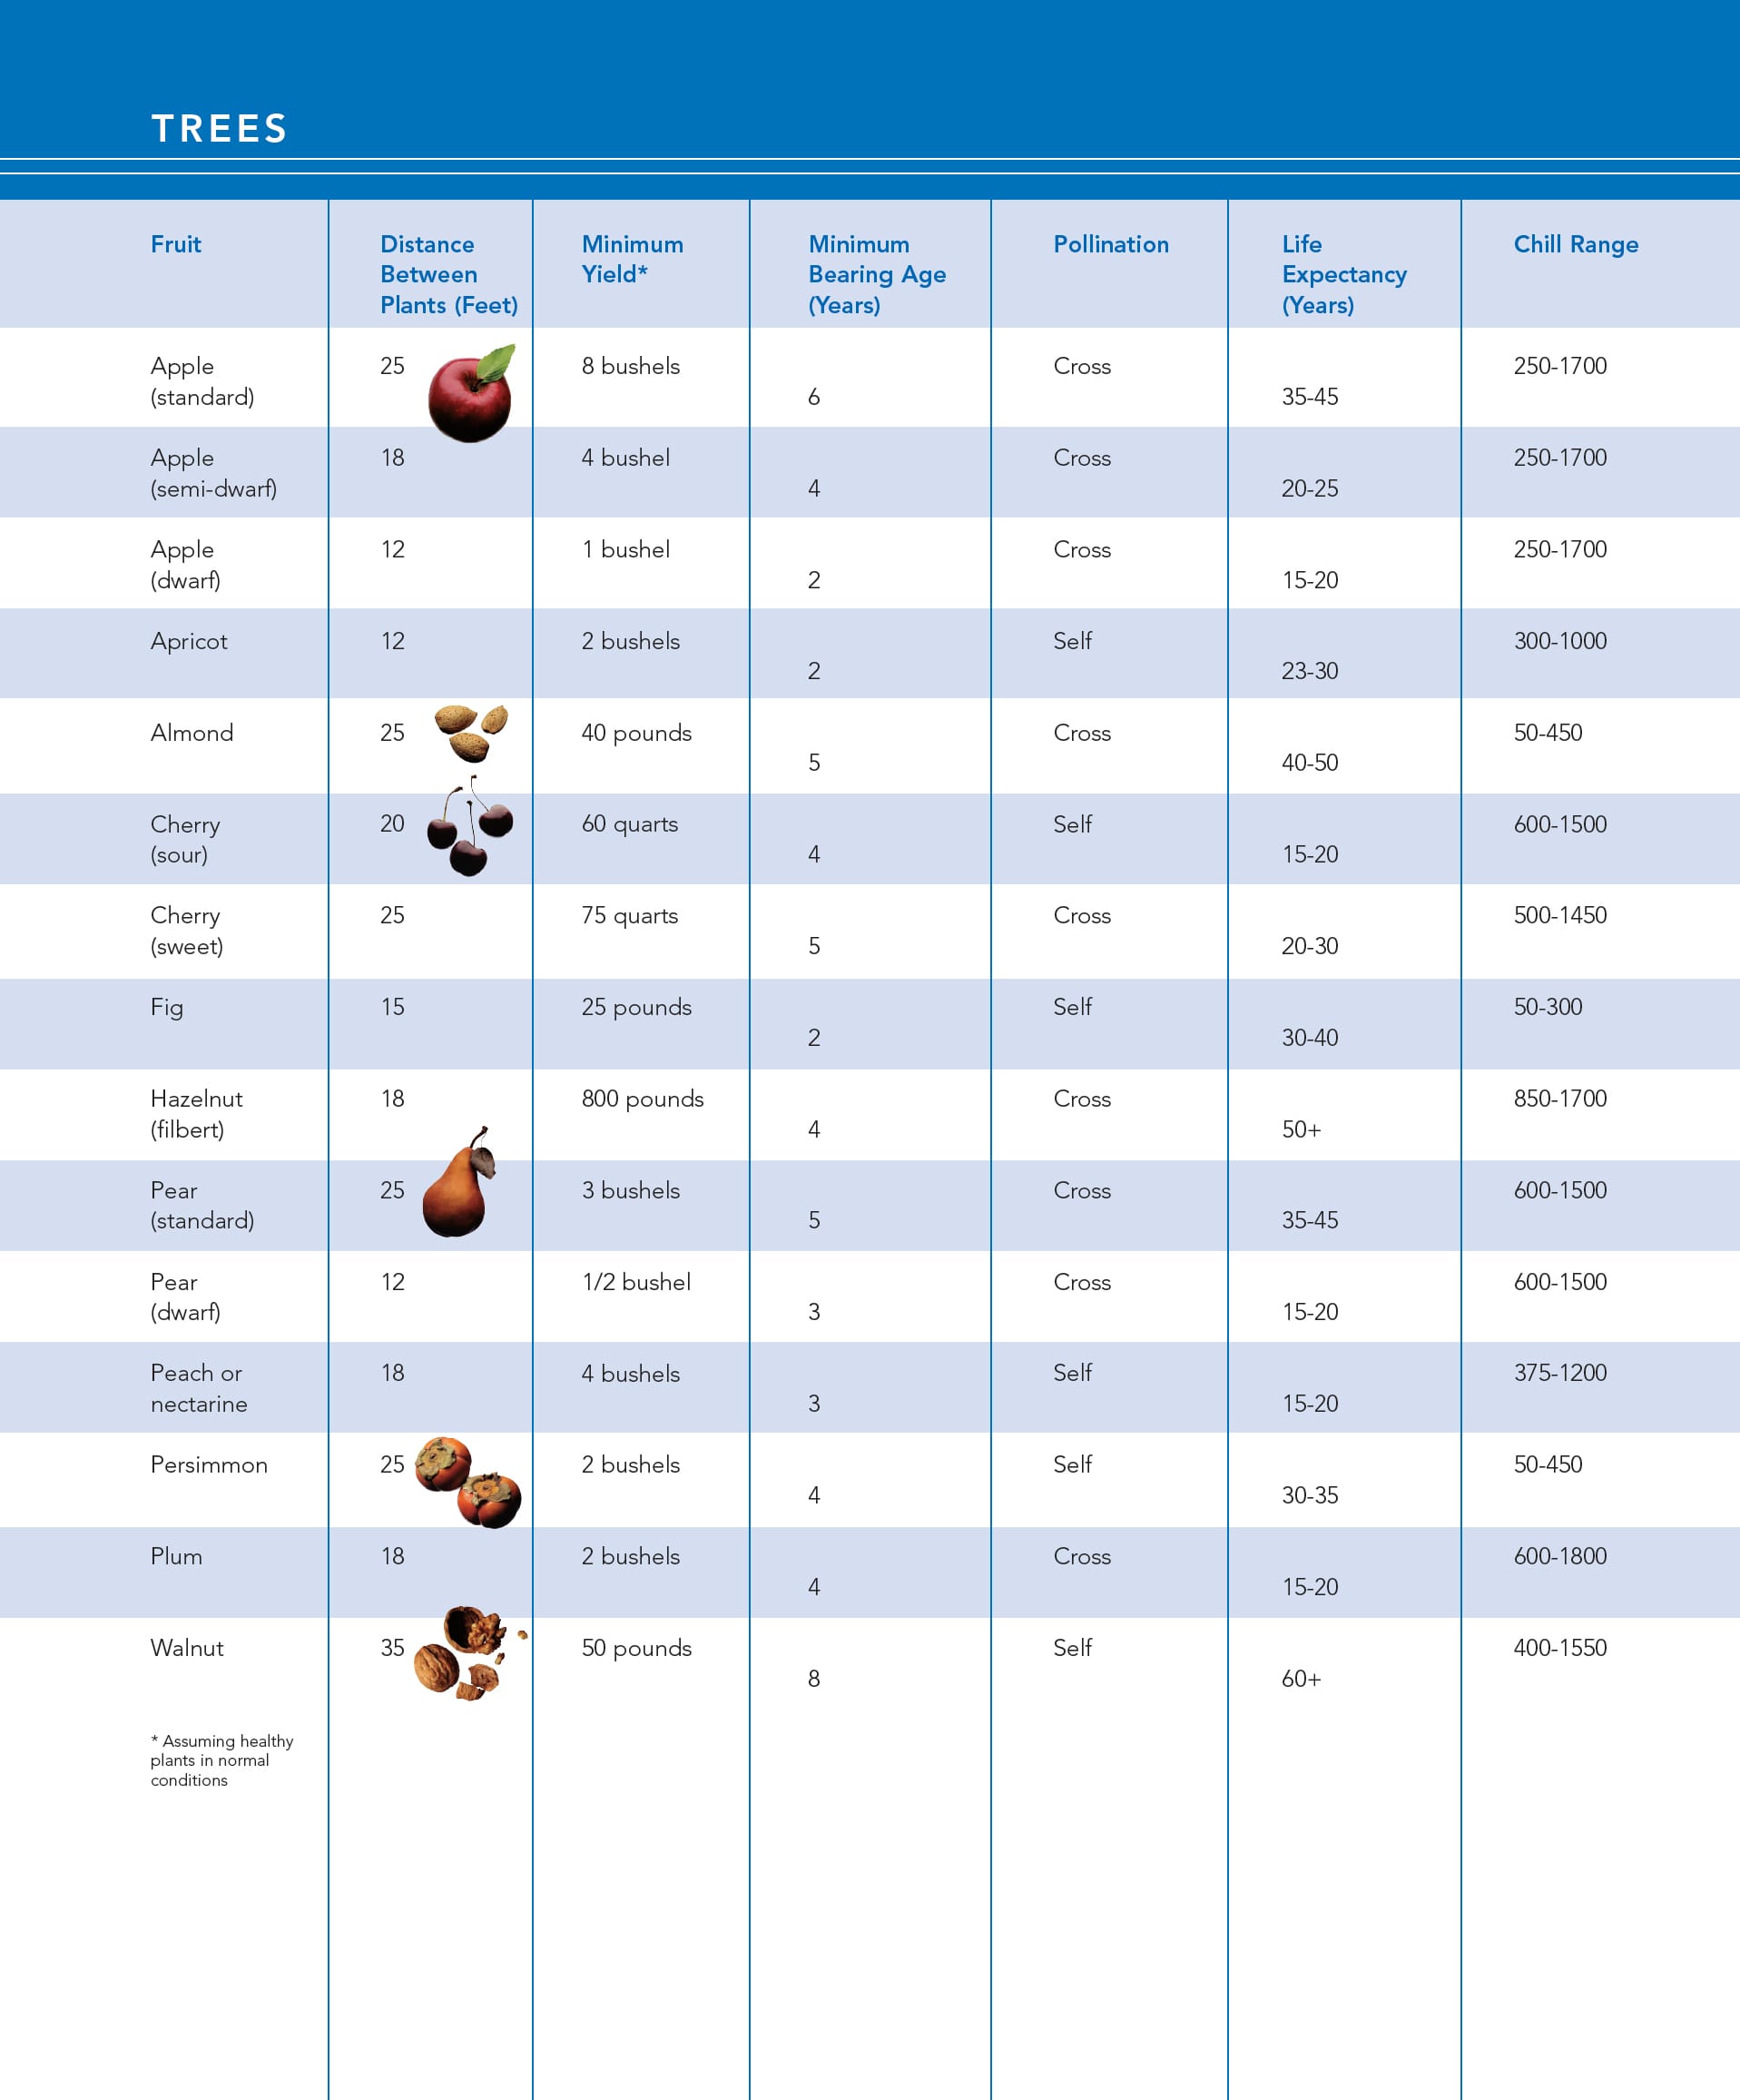
Most fruit and nut trees have a chilling requirement, which is defined as the accumulation of hours that the tree needs to spend below 45 degrees Fahrenheit and above 32 degrees Fahrenheit during the course of the year. The requirement varies by species and variety. For example, apples require between 250 and 1,700 hours, depending on the variety, and blueberries require 250 to 1,200 hours. After an unusually mild winter, or an unusually severe winter, you may notice that fruit crops are poor despite the fact that the variety normally performs well in your hardiness zone. This is simply because that particular winter did not meet the tree’s chill requirements.
1. Before digging, call your local utilities to identify the location of any underground utilities.
2. Dig a hole two to three times as wide, and just about the same depth, as the root ball. Roughen the sides and bottom with a pick or shovel so that roots can penetrate the soil. For poor, compacted soils, you can give trees a boost by digging down deeper and then filling in the bottom of the hole with compost.
3. With a potted tree, gently remove it from the container, or remove the strings that hold the burlap on a B&B tree. If roots are growing in a circular pattern around the root ball, slice through the roots on a couple of sides of the root ball.
4. Root tips die quickly when exposed to light and air, so work fast once they are exposed.
5. Place the root ball in the hole. Leave the top of the root ball (where the roots end and the trunk begins) a half to one inch above the surrounding soil, making sure not to cover any more of the stem than is necessary to get the roots covered.
6. For bare root plants, make a mound of soil in the middle of the hole and spread plant roots out evenly over mound. As you add soil to fill in around the tree, lightly tamp the soil to collapse air pockets, or add water to help settle the soil.
7. When the hole is about three-fourths refilled, straighten and level the tree, tamp the soil down carefully, and water heavily. Then bring soil up to the surface and tamp.
8. For all plantings, build a temporary water basin around the base of the tree. You can accomplish this by mounding the extra soil that comes out of the hole around the tree. This encourages water penetration. Water thoroughly after planting, and once a week during dry weather.
9. Mulch around the tree. A 3-foot-diameter circle of straw mulch or wood chips works well.
10. Depending on the size of the tree and the site conditions, you may need to stake the tree. Staking supports the tree while the roots establish themselves to properly anchor the tree. Staking should allow for some movement of the tree. After a tree is established, remove all support wires. If you do not remove the stakes, they can girdle the tree, cutting into the trunk and eventually killing it.
Cherry blossoms announce the arrival of spring. Flowering trees are generally pruned in the dormant season, but you should contact a local horticulturist for precise instructions for the species on your farm.
You can propagate grapes and cane fruits fairly easily from cuttings off existing plants or by layering. Nursery stock is also readily available. Spring is the best time for planting, and also for pruning, which you should do before the plants break dormancy. Most cane and vine fruits bear the best fruit on new or one-year-old shoots, so pruning out older shoots will help production. Grapes, blackberries, blueberries, currants, gooseberries, and raspberries all grow on canes or vines and are typically long lived. There are varieties that work in most plant hardiness zones.
Some fruit and nut trees, like apples and pears, need cross pollination with another tree of the same species, though the tree must be of a different variety (in other words a Jonah apple and a Jonah apple can’t cross-pollinate, but a Jonah and a red delicious can). Nursery stock for some trees that need cross-pollination may come with two varieties grafted onto the same root, thereby allowing a single tree to cross-pollinate. Other trees, such as apricots and sour cherries, are self-pollinators, so male flowers pollinate female flowers on one tree by pollen from the same tree. In a few fruit species, such as kiwifruit and persimmons, different plants produce the male and female flowers. In these species, only the female plants bear fruit, though a male plant must be nearby to produce compatible pollen.
Fruit trees for some species, such as apples and pears, come in standard size, dwarf size, or semi-dwarf size. The standard-size trees produce more fruit, for more years, but they take longer to begin producing, and they may present difficulties at harvest time to get fruit from the tops of the trees. Gardeners can train dwarf and semi-dwarf varieties along a fence or wall in an espalier; this provides fruit in small areas, such as a backyard.
Most fruit and nut trees benefit from pruning. Pruning is done to open a tree’s crown, thus providing good air circulation and light to the fruit, and to keep branches from crowding one another. Pruning lightly every year or so is far better than heavy pruning every few years. After pruning, treat bare wood with shellac or tree paint to minimize decay and prevent insect attack and disease.
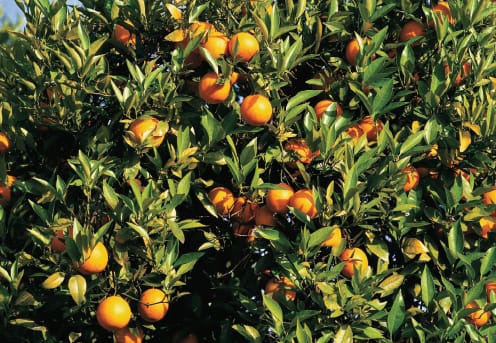
If you’re thinking of planting orange or apple trees such as ones on these pages, consult your local nursery to determine which types fare well in your area. Valencia oranges, for instance, grow best in the western and southwestern states.
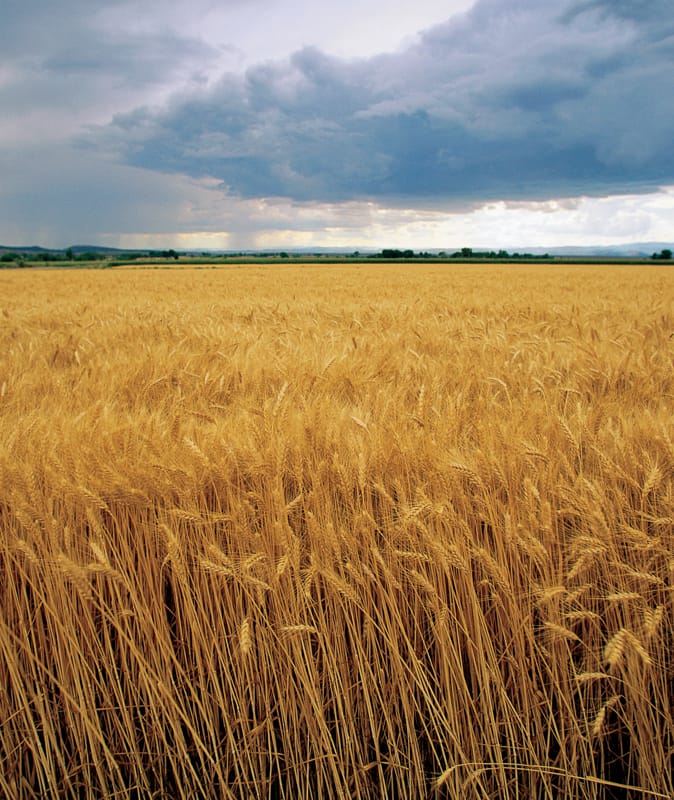
A field of golden wheat, nearing harvest time, sways in the breeze beneath lowering clouds.
Forage crops are often the first field crops that new farmers need to deal with, since livestock often plays a role in the life of small farmers. Like everything else in the world, forage has its own lingo:
Pasture is a field of grasses, legumes, and forbs (broad-leaf plants) that farmers grow to feed livestock. Though pasture may require some maintenance (liming, spreading manure for fertility, clipping to reduce weed and brush pressure), it is not routinely tilled.
Hayfields are cropped fields that farmers periodically till, plant (with grasses and legumes), and harvest, producing bales of dry forage. (You can easily put up small quantities of hay—say, enough to feed a couple of sheep or some rabbits—rather than making bales.)
Straw Many nonfarmers confuse hay and straw. Hay is made from grasses and legumes before the plants have gone to seed and died back. Straw is the residual dead vegetation that a grain crop, such as wheat, rye, rice, or oats, leaves in a field after harvest. Farmers bale this dry material, much like hay, but with few nutrients. Farmers mostly use straw for bedding (or straw-bale construction) rather than for feed.
Haylage is an ensiled feed, prepared from cuttings off the hayfield. You can first bale forage and then bag it. Or you can chop and blow it directly into long tubular bags. You can make haylage when crop moisture is between 40 to 60 percent.
Silage is another ensiled feed, prepared from crops like corn or sorghum. Farmers ensile many grain crops. You can put silage in a silo with moisture content between 60 to 70 percent.
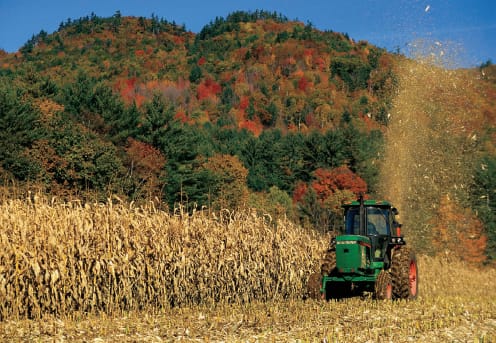
A tractor makes its way back and forth across a field of dried cornstalks, chopping it up for silage.
Grains (particularly oats) can make good hay or haylage if harvested early, when the grain is just beginning to form. You can use dozens of grasses for hay, but some of the most common are bent grass, bluestem, bromegrass, fescue, orchard grass, ryegrass, timothy, and wheatgrass. Alfalfa, clovers, vetch, and birdsfoot trefoil are common legumes for hay.
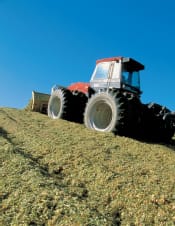
A tractor packs silage into a bunker silo.
Properly harvested and stored hay can last for extended periods, with the bulk of its nutrients intact, though hay that is a little damp when it’s baled will mold, and hay stored outdoors may lose valuable nutrients to leaching by the weather. Hay should have less than 15 to 20 percent moisture when it is baled and stored. The quality of hay is dependent on several factors:
• the moisture content at baling and stacking
• the time in storage and storage conditions
• age when baled
• what cutting you are taking (first cutting of the season, second, and so on)
• the species present (including not only the grass or legumes present, but also the weeds present)
Cut hay when grasses are just beginning to reach the flowering stage but before the plants begin setting seed. This is the time when the nutritional value of the plants is at its peak. Hay cut with a sickle mower or by hand with a scythe is windrowed (piled and raised off the ground to dry). Windrowing is usually done with a hay rake, though it can be done by hand for a small patch. Hay cut with a haybine is dropped by the machine into a windrow.
Mother Nature plays a big role in how well the hay turns out. If she grants you a few nice, sunny, breezy days after cutting, the hay dries quickly and the windrows don’t have to be turned before baling. But if she spits moisture on your hay, the process can take longer and you may need to turn the rows with a rake several times before they are ready to bale. Each time you have to turn windrows, you lose a little more nutritional value. But wet hay that molds is worse than bleached hay, because moldy hay can contain toxins or cause respiratory problems in animals that eat it.
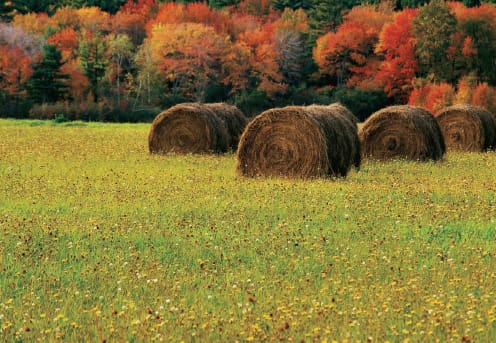
Round bales of hay rest in a field surrounded by trees kissed by autumn’s shades of orange and red.
Prepare both silage and haylage by packing the harvested crop into an airtight container (a silo or large agricultural plastic bags in the field), so that bacteria ferment the feed. Although the upfront costs for an operation that allows haylage and silage making are stiff, for larger operations they offer benefits. The operations are cost-effective when handling large amounts of feed; weather and crop moisture are more forgiving for ensiling than for haymaking; and you can chop and ensile stubby, drought-stricken crops that would make poor hay.
You won’t be the only one who likes your plants: Animals, insects, and microorganisms will find your vegetables, fruits, and flowers to their liking as well.
Although commercial agriculture has come to depend on harsh chemicals to control pests, it’s best to resist the temptation to use these chemicals. The chemicals reduce biodiversity, thereby killing off the good organisms that work on your behalf. In addition, they are often dangerous to use for you, your family, and your livestock. You can raise crops successfully without toxic chemicals.
A healthy garden, with plants that are well cared for, is much less susceptible to pests than an overgrown garden, so keep up with weeding, pruning, and other chores. Catch problems early by performing regular checks. You’ll catch the most pests by checking at different times of the day and night, Be sure to check right around dawn and dusk, as these are the times many unwanted and unsavory characters are busy in the garden. An ounce of prevention is worth a pound of cure. Try these approaches to animal, insect, and disease control:
• Use manual methods, such as pulling and hoeing weeds or picking off and disposing of pests or infested leaves, regularly to keep the situation under control.
• Practice crop rotations, even in the garden. Many pests become a problem only when you grow the same crop in the same place for years.
• You can attract pill or sow bugs (which like very ripe fruit) to cut-up pieces of raw potatoes placed on the ground, and then drown the bugs in a bucket of soapy water.
• Fences can keep out large animals, such as rabbits or deer.
• Recognize that not all bugs are bad. Spiders, ladybugs, lacewings, and minute parasitoids (“mini-wasps”) are all bugs that eat bad bugs in your garden. Create an environment that beneficial insects like, and they will control many problems for you. Plant asters, calendula, chervil, chrysanthemums, coriander, cosmos, dill, fennel, fleabane, poppies, Queen Anne’s lace, rosemary, rudbeckia, sunflowers, sweet alyssum, and yarrow around the garden to attract these good insects.
• Keep slugs and snails (check several hours after dark for these guys) away by grinding up eggshells and sprinkling them in a ring around each plant. Powdered ginger sprinkled around a plant can also help keep slugs and snails at bay. Remember to reapply after rain. Make traps by placing upside-down flowerpots, dark-colored plastic sheeting, and wooden boards around the garden; then collect snails and slugs in early morning from your traps and drown them in soapy water. Wrap a strip of copper around a tree trunk, flowerpot, or the wooden sides of garden beds or fences. The unpleasant reaction between their bodies and the copper will repel snails and slugs.

This garden snail can munch an entire seedling in one evening. You can discourage destructive snails and slugs by sprinkling eggshells a round your greens; these pests don’t like to drag their bodies over the jagged pieces.
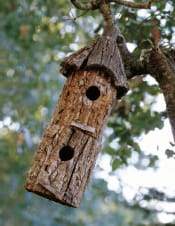
A birdhouse, swinging from a tree branch over a garden, waits for the arrival of feathered guards.
• Diatomaceous earth sprinkled around the base of plants and on leaves will reduce populations of soft-bodied insects, such as aphids.
• Hose down plants and shrubs with water to rid them of aphids, whiteflies, and spider mites, being careful not to damage flowers or buds.
• Place a tin can with its ends cut out around plants to a depth of 1 inch to keep cutworms away from plants.
• Use agricultural fabrics to create a physical barrier that keeps insects away from plants. For example, floating row covers are very effective at protecting brassicas from cabbage loopers.
• Brew your own bug sprays. Mix 100 ml of crushed hot peppers with 400 ml of water. Strain the concoction and spray it on infested plants. (Note that hot peppers can irritate eyes and skin.) Do not spray when it is windy or in strong midday sun. Or, finely chop ten to fifteen cloves of garlic and soak them in 500 ml of mineral oil for twenty-four hours. Strain the solution and spray as is, or dilute it with water before applying. (Be aware that use of these solutions may also repel beneficial insects.)
• Use commercially available nematodes, which are microscopic worms that prey on grubs and other pests, to control grubs.
• Place bat houses and birdhouses near your garden.
• Use companion planting, as many pests have a natural aversion to mint, garlic, basil, chives, dill, onions, marigolds, and other aromatic plants. These plants may be interspersed with more vulnerable plants in your garden.
• For bad infestations, try using insecticidal soap (dissolve one part dishwashing liquid in forty to eighty parts water). Spray infected plants, covering undersides of leaves, and rinse off after fifteen minutes to avoid damage to foliage. For severe infestations, repeat three times during a ten-day period to treat successive generations.
• Bacillus thuringiensis (Bt) is a commercially available, naturally occurring soil bacterium that infects and kills caterpillars when they eat it. It’s used for many garden pests.

Birds offer a natural way to keep pests out of your vegetable patch. The bad guys don’t include ladybugs, however, who feed on soft-bodied pesky insects and larvae that would destroy your leafy greens.