

Preserving the Harvest: Dairy and Meat
DAIRY PRODUCTS AND MEAT FROM YOUR OWN ANIMALS that have had access to plenty of sunshine and fresh air, good pasture and clean water can’t be beat. They provide not only great flavor but also more micronutrients, such as omega-3 fatty acids, conjugated linoleic acid, and vitamin E, than their feed-lot or factory-farm counterparts.
Milk is a mother’s food for its young, but with a dairy cow or dairy goats, you can also have your own fresh milk and produce your own butter, cheese, ice cream, and yogurt. A larger herd of dairy animals may also provide an enterprise. Even if you don’t own dairy animals, you can make homemade dairy products with purchased milk or cream.
Milking is typically done twice a day, as close to 12-hour intervals as possible. Commercial-scale operations will require a milking machine, but for a cow or a couple of goats, you can get by hand milking. Hand milking isn’t hard, but it takes some time to get the hang of it. Put the animal in a stanchion (a head-holding device) or restrain her with a rope halter. Clean the animal’s udder and teats with warm soapy water. After they are clean, wash your hands, and then dip each teat in an iodine-based teat dip solution, which is available from farm supply stores or by catalog (see Resources).
Hard and soft cheeses, cream, sour cream, yogurt, cottage cheese, and butter
Now that Bessie is ready, sit down beside her on a milking stool, and lightly grasp one teat in one hand, as though you were making a fist around the teat. Squeeze your hand together and apply a slight downward pressure as you do so. Release the pressure, and reapply it in a smooth motion. Discard the first several squirts of milk and collect the rest in a bucket. Milk each teat until you fully strip it of milk. This sounds easy, but at first it is really challenging, and your hands will probably begin cramping before you have fully drained the animal’s udder. However, once you (and your animal) get in the groove, you can do it rather quickly, and you can milk two teats at once. Once you have stripped out all four teats (two in the case of goats), re-dip each teat in iodine solution and apply a thin coat of udder balm to keep the teats from becoming dry and cracked.
Cleanliness is critical from start to finish in dairying. Keeping your hands and the animal’s teats clean during the actual milking process is crucial to preventing mastitis. I recommend purchasing a California Mastitis Test (CMT) kit if you plan to milk your animals. The kit is very expensive. It comes with a paddle-like device and a bottle of reagent. Test at least once a week by stripping the first few squirts of milk out of each teat; then squirt a little milk into each cup on the paddle. Add a few drops of reagent, then gently swirl the paddle with a back-and-forth rocking motion of your wrist. If the animal has mastitis starting, the milk/reagent solution will begin gelling. In advanced cases it will instantly clump together. There are a number of treatments for mastitis, so contact a veterinarian if an animal shows positive on the test.
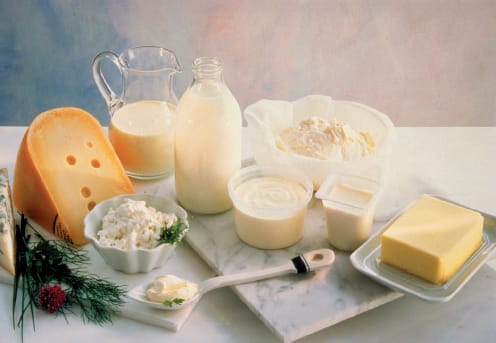
Are among the multitude of products you can make with milk from your dairy cows or goats.
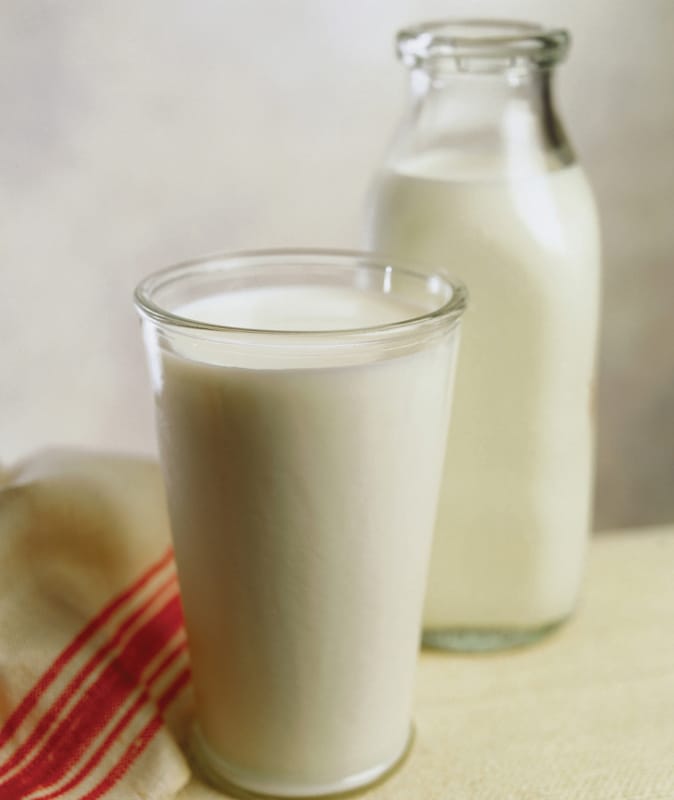
Or just enjoy a delicious glass of milk at breakfast.
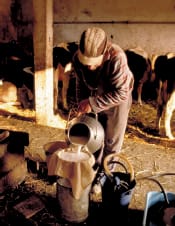
A farmer in Poland strains raw milk into a milk can a German farmer milks one of his cows out in the pasture.
Many people who come from nonfarm backgrounds worry about drinking unpasteurized milk. We drank our own raw milk all the time, as did all the dairy farmers we knew. If you use a CMT, you will know that the milk coming from the animal is safe. But, milk is excellent food not only for animals, but also for bacteria, so cleanliness must extend from milking time right through the time when you consume your milk or dairy products. Keep all utensils squeaky clean. You can purchase a home pasteurizer from many farm supply stores if you are uncomfortable using raw milk.
Milk from the store is not only pasteurized, it is also homogenized. Homogenization is a process of breaking up the fat globules in cream to such a small size that they remain suspended evenly in the milk, rather than separating out and floating to the surface.
Since you haven’t homogenized your milk when it comes from the animal, the cream will separate and float to the top. You can leave the cream with the milk or skim it off the top for use in coffee or in making butter.
Many dairy products require cooking within specific temperature ranges. A thermometer with a range of 32 to 225 degrees Fahrenheit is an indispensable tool.
You can prepare butter as sweet-cream and sour-cream types. Sweet-cream butter has a much milder flavor than sour-cream butter, but it takes longer for the fat particles to coagulate than if you allow the cream to “sour” at room temperature for a day. One quart of cream will yield about one pound of butter and half-quart of buttermilk. Cream that has aged for several days in the fridge before using makes better butter than cream that just came from the critter.
You have probably seen butter churns in antique stores. They are still available from farm suppliers, though they are kind of expensive if you won’t be preparing a lot of butter regularly. For small amounts of your own butter for home use, the method I use is easy and quick: Use a wide-mouth, pint-size canning jar (you can reuse clean canning lids for this application). Fill the jar about halfway so there is plenty of room for agitation. Add a dash of salt (up to a teaspoon depending on taste) and then begin shaking the jar to agitate the cream.
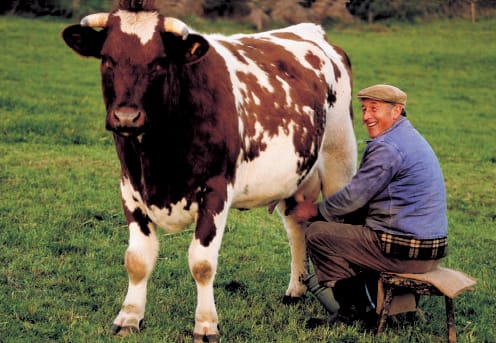
Though the equipment may differ, the basics elements of milk production are similar the world over.
Agitating incorporates air into the cream and causes it to increase in volume, so that the butter granules gather together. It is best done when the cream’s temperature is between 54 and 58 degrees Fahrenheit in summer, or 58 and 64 degrees Fahrenheit in winter. At first, the cream begins to take up the entire volume, but quite suddenly butter granules begin to form and buttermilk separates out. When the granules form, continue shaking, but don’t shake too vigorously or you will whip the butter, making it more difficult to handle. When the butter granules have become gruel-like, pour off the milk buttermilk (pigs, chickens, dogs, or cats will enjoy this treat), and then wash the butter granules with cold water, working them together with a wooden spoon. Wash and work with the spoon several more times until the liquid you pour off is fairly clear. Now your butter can be hand-formed into a block or packed into a mold to give a more pleasing shape. This approach yields about G-pound of butter in less than a half hour.
Yogurt is a fermented milk product that originated in the Middle East. You ferment yogurt through the addition of Lactobacillus bacteria (either L bulgaricus or L acidophilus) and Streptococcus thermophilus. These bacteria produce lactic acid during fermentation, which lowers the pH and causes the milk protein to thicken. The partial digestion of the milk makes yogurt easily digestible.
The acidity of yogurt inhibits the growth of bad bacteria, so if the lids are on properly, a container of yogurt will keep at least a month or two in the refrigerator. Baked goods rise well when you use yogurt, again due to its acidity. When you use yogurt as part or all of the liquid in cakes, waffles, pancakes, and muffins, cut down on the amount of baking powder.
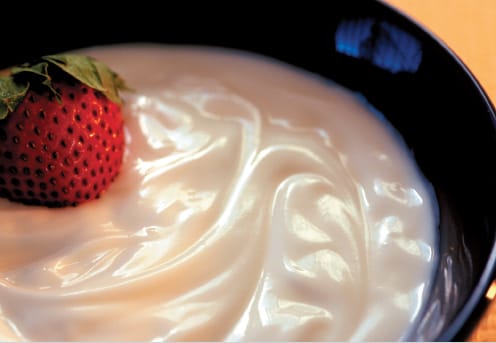
A ripe strawberry swims in a bowl of creamy yogurt. Enjoying fresh, homemade dairy products is one of the sweetest rewards of country life.

On the porch of her family’s farm, a little girl churns butter.
YOGURT DIP
1 pint of plain yogurt
2 tbsp. mayonnaise
1 package dry ranch-style salad dressing mix, or dry French onion soup and dip mix
1 tsp. Worcestershire sauce
Blend ingredients well. Chill at least 3 hours beforeserving.
Factors that are crucial for successful yogurt making include using good sterile technique (proper cleansing of tools and containers and keeping out unwanted bacteria), controlling incubation temperature between 100 and 122 degrees Fahrenheit (the temperature range that inhibits the growth of pathogenic bacteria, yet is ideal for the good bacteria that do the fermenting), and protection of the starter from contamination. Starter is just plain yogurt (store bought or from a previous batch). The degree of tartness of your finished yogurt depends on the time you ferment it. You ferment mild yogurt less than tart yogurt. At 100 degrees mild yogurt takes about 6 to 8 hours (at 122 degrees it takes about 3 to 4 hours).
To prepare yogurt, warm 4 cups of milk in a pot over medium heat (in a heavy pot or double boiler) until it just starts to boil, stirring continually. As soon as it begins to boil, remove the pot from the burner and set it in the sink in cold water. Ladle about ½ cup from the heated milk to a bowl or your measuring cup and place in the fridge for about 10 minutes. Add ½ cup of starter to the cooled milk from the fridge, and mix thoroughly. Once the milk that has been cooling in the pot reaches 122 degrees, return the starter/milk mix to the pot, and stir until you’ve distributed the starter well. For richer yogurt, substitute ¼ cup of heavy cream for ¼ cup of milk.
Pour the mix into sterilized canning jars (you can add chopped, canned fruit and a little syrup—or other flavors—to the bottom of the jar before adding the yogurt), and cover with new canning lids. Although making yogurt is a most-of-the-day job (it is a great project for rainy or snowy days), once it is in the jars it isn’t too distracting. Keep the mix at a temperature between 100 and 122 degrees Fahrenheit until it has fermented. After fermentation, clean the jars and store them in the fridge. The way I do this is by setting the yogurt jars in my canning kettle after the water in the kettle has reached about 122 degrees. (In the winter, I place the pot on the wood stove in the summer on an eye on the cook stove; set at a medium setting.) I take the kettle off the heat source until the temperature gets down to about 100 degrees and then reheat it to 122 degrees, repeating this step until the mix turns to yogurt. It usually takes only a short time to bring the kettle up to 122 degrees, and it takes a couple of hours to get it down to about 100 degrees. For a typical batch I might have to reheat the kettle three times during the day.
If your only experience with yogurt is the kind you buy in the store, the first thing that you’ll notice that’s different about your homemade yogurt is the whey (or yellow liquid) that forms on top. This is just the water-fraction of the milk, and it should be there. You can purchase a strainer (see Lehman’s catalog listed in the Resources for this, and other handy equipment) if you want to get rid of all the whey, but I usually just pour it off (a favorite of my dogs) before I eat the yogurt.
I generally make plain yogurt and add fruit, nuts, or flavors as I use it. Plain is great for baking (substitute yogurt for up to H the liquid in your favorite recipes), or in dips and sauces that call for sour cream. The recipe yields two 1-pint jars of plain yogurt.
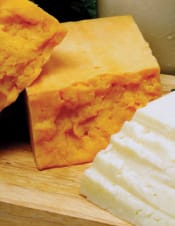
You’ll find cheese throughout the world, with almost every culture preparing some form. You can make it not only from cow’s or goat’s milk, but also from the milk of sheep, horses, buffaloes, or yaks. All cheeses fall into one of three categories: hard, soft, or cottage cheese. Hard cheeses (such as cheddar) require aging, and are more complicated to make, though they can be stored for long periods. You make soft cheeses the same way as hard cheese, but they are aged for a shorter time. Cottage cheese is a soft cheese that you do not allow to age. You can easily make soft and cottage cheeses at home without any specialized equipment. They have a refrigerator life of five to ten days.
The basic ingredients of cheese are:
• Milk: You can make cheese from whole milk, 2 percent milk, or skimmed milk, though the cheese’s richness correlates with the amount of milk fat.
• Rennet: An enzyme—rennin—converts the protein, or casein, in milk from a soluble form to an insoluble form, causing the milk to clump. Rennet is commonly available in supermarkets in the pudding section, or you can purchase liquid rennet from a cheese-maker’s supply house.
• Starter: You must add bacteria to acidify the milk so that the rennet will work and to aid in the curing. Cultured buttermilk or yogurt can serve as starter, or you can purchase pure cultures from a cheese-maker’s supply house.
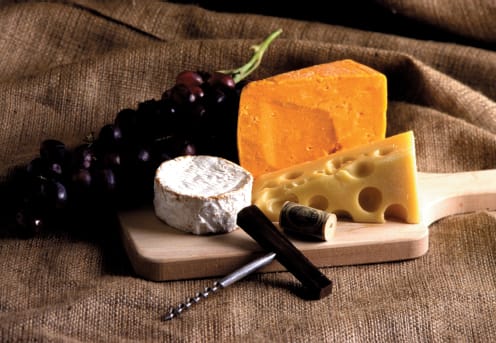
Sharp cheddar, creamy Swiss, and savory brie are just a few of the countless varieties of cheese made around the world.
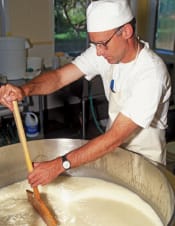
In Oregon, a farm owner stirs a vat of curds in the process of making goat cheese.
NEUFCHÂTEL
This is a soft cheese that is easy to make at home.
1 gal. of whole milk
¼ cup cultured buttermilk or ½cup plain yogurt
1 tablet rennet dissolved in 1 cup water (or five drops if you are using liquid rennet)
3 tsps. salt
1. Place the milk in the upper part of a double boiler,adding enough water in the bottom to prevent milkfrom scorching. Stir in buttermilk or yogurt starterand warm slowly to a temperature between 92 and94 degrees Fahrenheit. Try to maintain this tem-perature through the next two steps.
2. Add the rennet and whisk into the milk/starter mix-ture for 2 to 3 minutes. Allow the mixture to set undis-turbed for about 30 minutes or until a firm gel forms.To test for curd formation, cut a slit in the curd with ametal spatula, then slip it under the curd. As you liftwith the spatula, if the cut in the curd breaks cleanlyfrom the spatula, move onto the next step; if it is likegelatin sticking to the spatula, allow to rest longer.
3. Cut the curd into 1-inch cubes, and stir gently andcontinuously for 20 to 30 minutes to help firm curds.
4. Pour off whey. Allow the curds to settle and dip outthe remaining whey.
5. Add 1 teaspoon salt and mix gently. Wait 5 minutesand mix in the second teaspoon of salt. Wait 5 moreminutes and mix in the last teaspoon of salt. You canalso add other flavors to your Neufchatel by stirringin spices, diced dry fruits or vegetables, liquidsmoke, or pepper sauce at this time.
6. Next, apply pressure using a cheese press, or createyour own cheese press by poking several holes (fromthe inside out) in two 1-pound coffee cans. Line thecans with clean cheesecloth or muslin. Place half ofthe cheese curd inside each lined can. Fold the clothover the top. Cut the plastic lids of the coffee cans sothat they just fit inside the cans, and drop the lidsonto the tops of the folded cloths. Apply pressure byplacing a can of food on each plastic top, and allow itto press down on the cheese so the whey is forced out.Do this in the sink to allow the whey to drain out ofcans. Keep the pressure on for 3 to 4 hours.
7. Remove the formed cheese and the cloth. Wrap thecheese tightly in plastic or in waxed paper and storein refrigerator. It will keep for seven to ten days inthe refrigerator. You can freeze cheese for four tosix months. However, freezing lowers the quality.
Butchering involves the actual slaughtering and cutting of animals for meat. Processing is taking raw meat and making some other type of product through the addition of other ingredients (such as beans, tomatoes, onions, peppers, and spices for chili), or through specialized handling, such as smoking. With the exception of poultry (which you can generally butcher on the farm for direct marketing), I’m not going to go into the actual processes involved in butchering and processing. If you want to learn the techniques to butcher your own large animals, get a copy of Dr. John Mettler’s book, Basic Butchering of Livestock and Game (see Resources) or check with your extension agent for a booklet on butchering.
What I do want to go over are some things you’ll need to know about butchering and processing if you plan to raise animals for meat. For instance, how much meat will a 1,000-pound steer actually yield? How do you respond when the butcher asks if you want the short ribs? Or, what do you say to a first-time customer who is considering purchasing a lamb, but wants to know how much meat they’ll receive, and how much freezer space it will take up?
When a butcher uses the term yield, he or she is generally referring to the “hanging” weight. The term comes from the fact that butchers hang a carcass on a rail attached to the ceiling of the cutting room to make their work easier. Typical hanging yields are:
• Lamb—50 to 55 percent of live weight
• Beef—60 to 65 percent of live weight
• Pork—70 to 75 percent of live weight
Depending on the type of animal and the age of the animal, you can either cut it up immediately, or hang it in a cooler for up to two weeks to age the meat. Aging helps cure meat, improving flavor, texture, and tenderness.

Many hobby farmers find that raising their own livestock for meat is more challenging, but ultimately more rewarding, than purchasing meat at the local market.
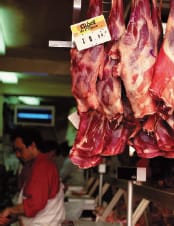
Beef hanging in a butcher’s window and skillfully cut short ribs are familiar sights.
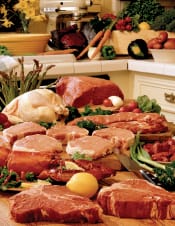
A variety of fresh, uncooked meats covers the surface of this table. Though you may not see such a spread in your own home, you should learn as much as possible about the butchering and processing of any animal you raise for meat.
The meat yield depends on how closely you trim the fat, and on how many “bone-in” cuts you prepare. Typical meat yields are:
• Lamb—40 to 45 percent of live weight
• Beef—45 to 50 percent of live weight
• Pork—55 to 60 percent of live weight
So, a 250-pound hog will hang on the rail at about 185 pounds, and when you pick up the packages of meat, you will receive about 140 pounds of meat. A 1,000-pound, grass-finished steer will hang around 650 pounds and yield 500 pounds of meat.
On average, cut and wrapped meat requires one cubic foot of freezer space for each thirty-five pounds of meat. The meat from a whole steer will almost fill a fifteen-cubic-foot chest freezer. The pig will require four cubic feet, which is about the size of the freezer space in a large combination refrigerator/freezer, but it is too much for a smaller combo unit. The lamb will fit into the freezer compartment of a small refrigerator/freezer.
When you drop off an animal at the butcher’s shop, the butcher wants to know your “cutting orders.” The cutting orders are simply the directions that tell him or her how you want the animal cut and wrapped. The first thing to tell your butcher is how you want the animal trimmed. Trimming is simply cutting away external fat. We go for well-trimmed meat, and our ground beef is 95 percent lean. At the same time, some processed meat products do benefit from the addition of some extra fat from the trimmings. We had all-beef wieners prepared one time, with no additional fat added, and they were too dry. Luckily, Karen, the woman who took cutting orders at the time, warned us that all-beef wieners might be too dry, so we only had a few pounds made up to try them.
The butcher also needs to know how many steaks, chops, and such you want in each package, and how thick to cut them. We have found—particularly if you plan to direct market meat—that packages with two steaks or chops are a good size. We have also found that that three-quarter-inch-thick cuts seem to be ideal for most steaks and chops. Most of the meat from the round (the butt) and the chuck (the shoulder) is best ground.
The first time we took a steer in to have it butchered, Karen asked if we wanted the short ribs. I stared kind of dumbly, and said, “Well, I don’t know. Why?” She went on to explain that most people didn’t take the short ribs because they’re really tough and stringy and there isn’t much meat on them. I didn’t take them that first time, but the next time we took in a steer, I decided to keep them. By this point I was thinking they’d at least be dog food if nothing else. I also told her we wanted all of the organ meat—even the tongue—as well as packages of soup bones and boxes of bones for our dogs. Our policy became, “get everything back, because something will eat it.”
Short ribs are, true to their reputation, stringy and tough when prepared by most conventional cooking methods. But we discovered they’re actually pretty darn good if cooked in a pressure cooker. The technique: put about one inch of water in the bottom of the pressure cooker, load in the short ribs, pour some barbecue sauce over the top and pressure cook them for about forty-five minutes. After this treatment, they fall off the bone, and taste great, though they are messy.
Lamb, bison, deer, and elk all have similar cutting orders to beef, but pork is different. The butcher will want to know if you want hams or fresh roasts. Hams are cured (smoked) roasts. Like the hams, bacon is cured “side pork,” and we have found that side pork is quite delicious. You can make the front shoulder of a hog into a picnic ham or slice it for pork-shoulder bacon. Pork-shoulder bacon is nice lean meat, much like Canadian bacon. There is lots of “trim” on a hog (and it isn’t all fat) so plan on getting lots of sausage made.
HASTY HASH
1 lb. ground meat (beef, lamb, or game)
1 tbsp. oil
1 small onion, diced
½ sp. salt
½ sp. garlic powder
½ sp. black pepper
4 tbsp. soy sauce
2 cups shredded raw potato (or defrosted, packaged hash browns)
Sauté the meat with oil until it is no longer pink; addonions and sauté until they are transparent. Stir inspices and soy sauce, and mix well with meat andonions. Layer potatoes on top of meat, cover pan, andcook on medium heat for 20 minutes, stirring gently from time to time. Uncover and turn the heat up alittle; stir and cook until potatoes start to brown.

Butchering poultry isn’t fun, but farmers usually do it at home if raising chickens for meat. If you’re planning to butcher many birds, you need to develop an assembly-line approach to butchering (or find a poultry packer). When starting out with a small number of birds for home use—or to begin assessing your production and marketing strategies for a commercial enterprise—the following directions work.
1. It is best if the birds you plan to butcher have been “starved” for 24 hours before you butcher them. This helps pass the contents of the digestive tract out—so you have less to deal with. They should still have access to water.
2. There are many ways to actually dispatch the bird. Though killing any animal isn’t a pleasant task, each of these methods, when done correctly, is quick and humane: ringing the neck, chopping off the head, or slitting the throat.(See sidebar on page 228.)
3. After you kill the bird, allow it to bleed out for a couple of minutes. By “bleeding” the animal, the meat remains cleaner, and less likely to spoil.
4. Scalding loosens the feathers, making plucking easier. Submerge the bird in the scald bucket for about 40 seconds by holding it by the feet, and dunking it headfirst (130-degree water works for a small bird, and 140-degree for a large bird). If your scald water gets a little too cool, you’ll need to leave the bird in longer; if it gets too hot, the bird will be over scalded, which results in “cooked” meat. Swishing the bird around a little in the bucket helps to move the heat around all the feathers. When doing multiple birds, try to keep the scald water fairly clean, as scald water can be a source of contamination. If the birds are dirty, hose them off prior to scalding.
5. Pick feathers immediately after scalding. When picking by hand, it’s easiest if you hang the bird back up, so you’re working at a comfortable height. Pull the feathers down and away from the body. If the scalding temperature was right, most of the feathers will come off fairly easy. If you plan on butchering lots of birds, a rubber-fingered “plucker” makes the job easier.
6. After picking most of the feathers, rinse the bird with cool water to reveal any remaining feathers and the pinfeathers. This rinse isn’t in your cold-water bucket. Rinse with a garden hose or under a faucet.
7. Scrape off pinfeathers with a short, dull knife, or pick them out with tweezers. Singe any hairs with a propane torch (older birds have more hairs than young ones do). A method that is commonly used with waterfowl (they have lots of down and pinfeathers) is to dip the bird in hot wax (150 degrees Fahrenheit), then dip it in cold water to set the wax, and finally peel the wax away. The bird may require a second dip.
From this point forward, you may find it easier to work on a cutting table than with the bird hanging. Try both approaches.
8. Remove the head by cutting just below the first vertebra in the neck and then twisting off.
9. To remove the neck, first insert the thin knife in the skin above the neck, at the shoulders, and cut forward to open the skin. Then pull the skin away from the neck. Next, pull the crop, the trachea (or windpipe), and the gullet away from the neck skin, and cut off where they enter the body. Finally, cut the neck off where it enters the shoulders by cutting the muscle around the bone and then twisting off. Wash the neck, then set aside in your bucket of ice water.
10. About 1 inch in front of the oil “nipple” on the tail, make a clean cut all the way down to the vertebra in the tail. Then cut out the oil gland, by cutting from front to back, and scooping out the gland.
Tools you need for butchering poultry
• Two sharp knives, one paring style, about three to four inches long, and one thin boning knife, about four to five inches long. If you don’t know how to correctly sharpen knives, learn. (The best instructions I know of are in Joy of Cooking, the cookbook.)
• One short, dull knife, or tweezers.
• Three, five gallon buckets; one to catch blood and guts, one for the hot water, and one for the cold water.
• Hot water for scalding--ideal temperature is between 130 and 140 degrees Fahrenheit.
• Cold water for rinsing and cooling the bird--the colder the better. Add some ice cubes to keep it very cold.
• A trash can for feathers and offal. You can bury these in a compost pile after you’re done, but place them deep in the pile so they don’t attract vermin and so they heat up sufficiently to kill off bacteria.
• A small propane torch to singe hairs.
• A system to continuously heat the water for scalding.
• For those considering larger-scale production, consider adding an automated plucker--available from NASCO (see Resources).
Methods for killing a chicken
• Wringing a bird’s neck is an old and somewhat lost skill. Pick up the bird by its head and swing it completely around in a 360-degree circle. If you use this method, hang up the bird after it is dead and cut its throat, as described below.
• Chopping off the head with an ax on a block is also an old method, though somewhat messy.
• The most common method in use today: Hang the bird upside down with its feet tied, or in a killing cone. Using a sharp knife, slit the bird’s throat by making a cut directly behind the lower jaw, but try to avoid cutting through the esophagus and windpipe. When you cut the bird’s throat, you cut the jugular vein; a bucket underneath the bird will catch the blood and make cleanup easier.
Evisceration methods
• For smaller birds Starting just below the point of the breastbone, insert the thin knife just enough to penetrate the skin and muscle. Cut down toward the vent (anus) and then cut all the way around it. When cutting around the vent, keep the knife pressed as close as possible to the back and tail. Pull the vent and a small section of the large intestine out of the way.
• For larger birds Make a half moon cut around the vent, pressing closely to tail and backbone. Insert your index finger into the cut and up and over the intestines. Pulling the intestines down, and out of the way, continue to cut around the vent until you have completed the circle. Pull the vent and a short section of the intestines out of the way. Next, pull the skin back toward the breastbone, then make a side-to-side cut about 3 inches wide and 2 inches below the breastbone. Finally, pull the bar of skin that remains backward and over the piece of vent and intestines.
11. Remove the shank (the lower part of the leg and foot) by cutting through the hock joint from the inside surface.
12. The next step is evisceration (removal of the animal’s internal organs). This process takes practice to become adept at, so take your time when learning to do it. If you accidentally cut through the intestines, and release their contents onto the meat, you have contaminated it. There are two methods: There are two methods: one that is appropriate for small birds that you won’t truss for roasting, and another that is appropriate for large roasting birds such turkeys. (See sidebar.)
13. Insert your hand into the abdominal opening and begin gently working your way up and around, loosening organs from the body cavity as you go. When all attachments are broken, scoop the insides out.
14. You should remove the gizzards, liver, and heart from the rest of the entrails. Cut the gizzard away from the stomach and intestines. Peel away the fat, split it open, and rinse well; add to ice water. Trim off the heart sac and heavy vessels from around heart, rinse, and add to ice water. Pinch the gall bladder off of the liver, rinse the liver, and add to ice water. (Discard gall bladder.) Retrieve the gizzard from the ice water and peel away the lining by inserting a fingernail under the lining at the cut edge and pulling away. Now, retrieve the gizzard from the ice water, and peel the lining away by inserting a fingernail under the lining at the cut edge and pull away. Return the gizzard to ice water.
15. Use your hands to check along the backbone for any remaining organs (the lungs and sexual organs are often still in the bird). Remove any you find. Rinse the bird well under running water, both inside the body cavity and on the outside of the carcass. When the carcass is clean, add to your ice-water bucket to chill. Chilling time varies depending on the size of the bird and the temperature of the water, but it may take several hours. The goal is to get the carcass temperature down to about 40 degrees Fahrenheit as quickly as possible. Once the carcass is adequately chilled, hang to drain for about ten minutes. While the carcass is draining, wrap the heart, liver, and gizzard in plastic wrap. Insert the neck and the wrapped organs into the carcass.
16. Finally, bag the bird, and label.
Place carcass bones, with some meat still affixed, in a large kettle and cover with water. Bring to a boil, but reduce heat as soon as the water begins to boil. Simmer, uncovered, for 45 minutes, frequently spooning off the scum that forms during the cooking process. Add 1 cup chopped celery and 1 cup chopped onion. Simmer for an additional hour, continuing to spoon off scum. Strain mixture. Return to a boil, and then ladle into jars immediately, leaving ¼-inch head space. Adjust lids and process.