Red Coat
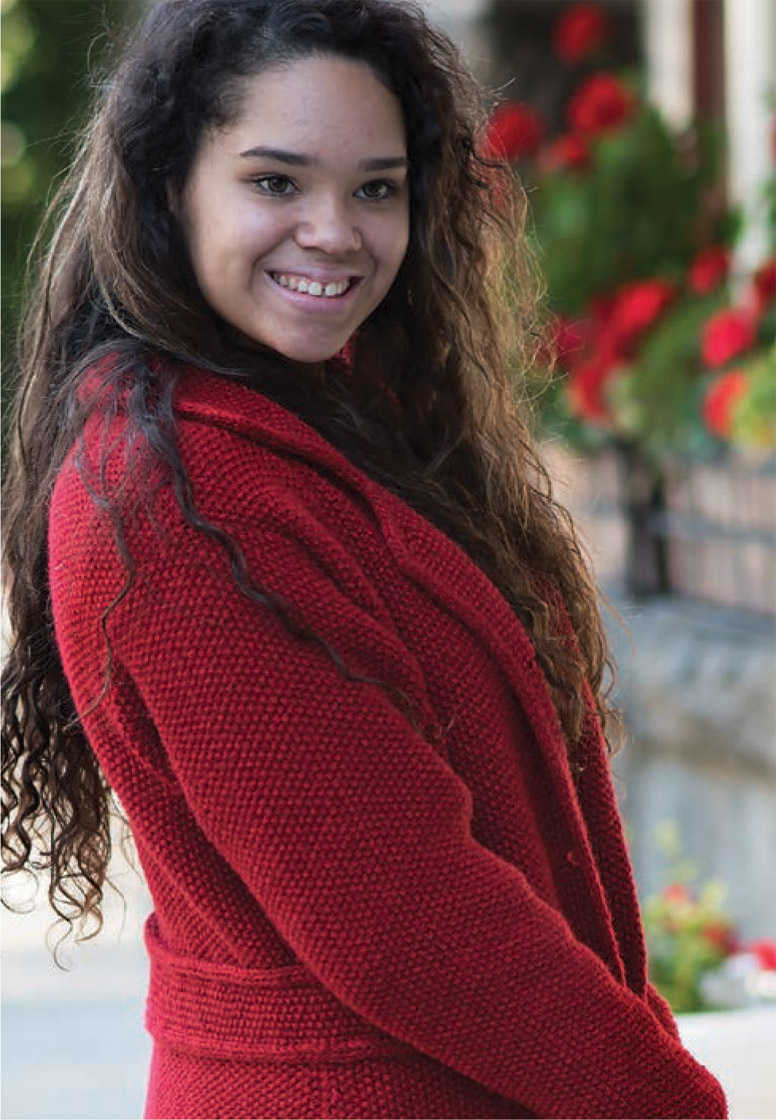
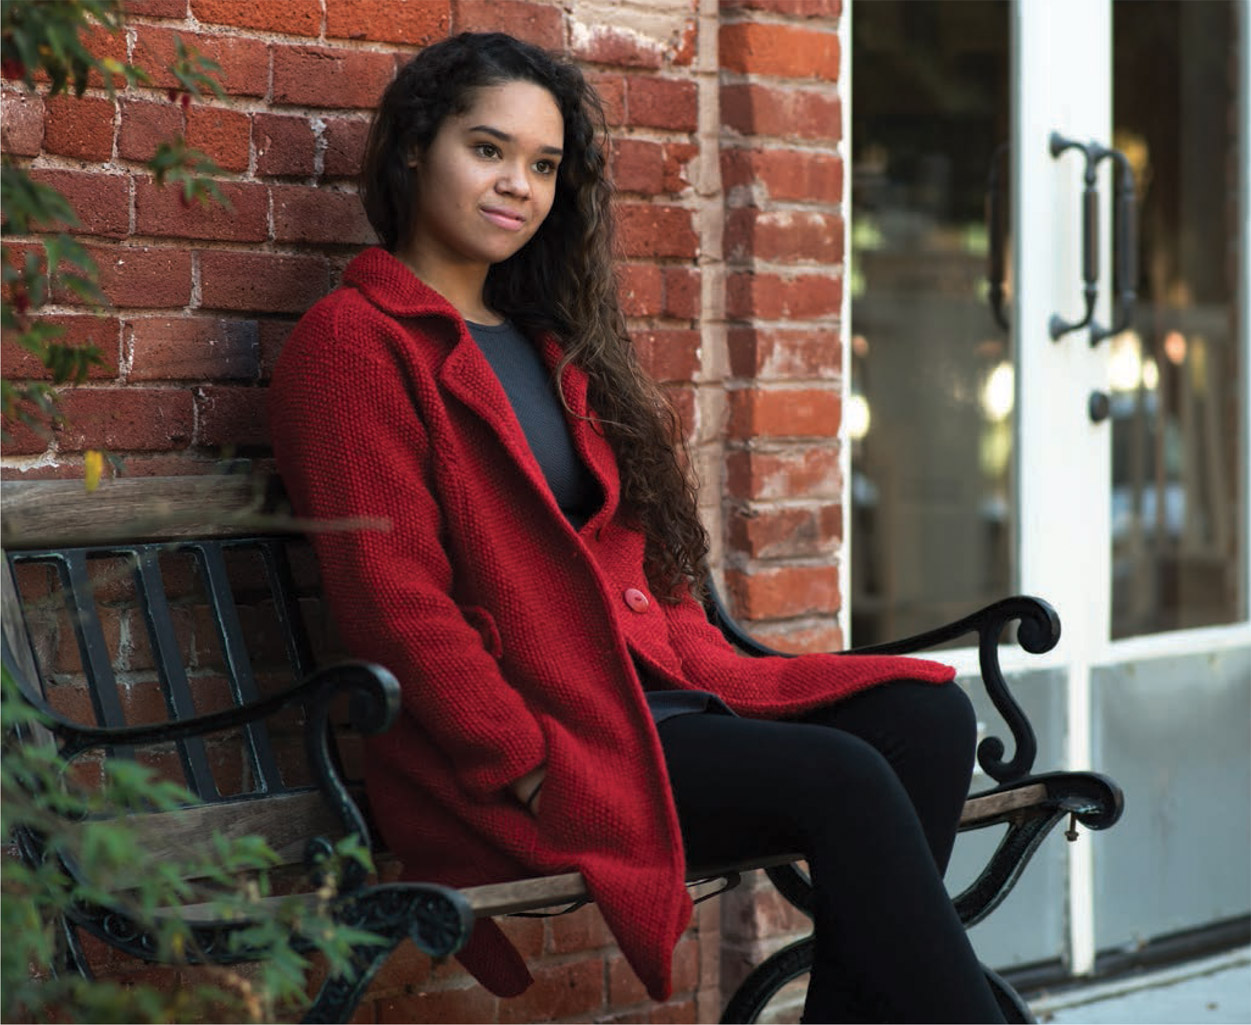
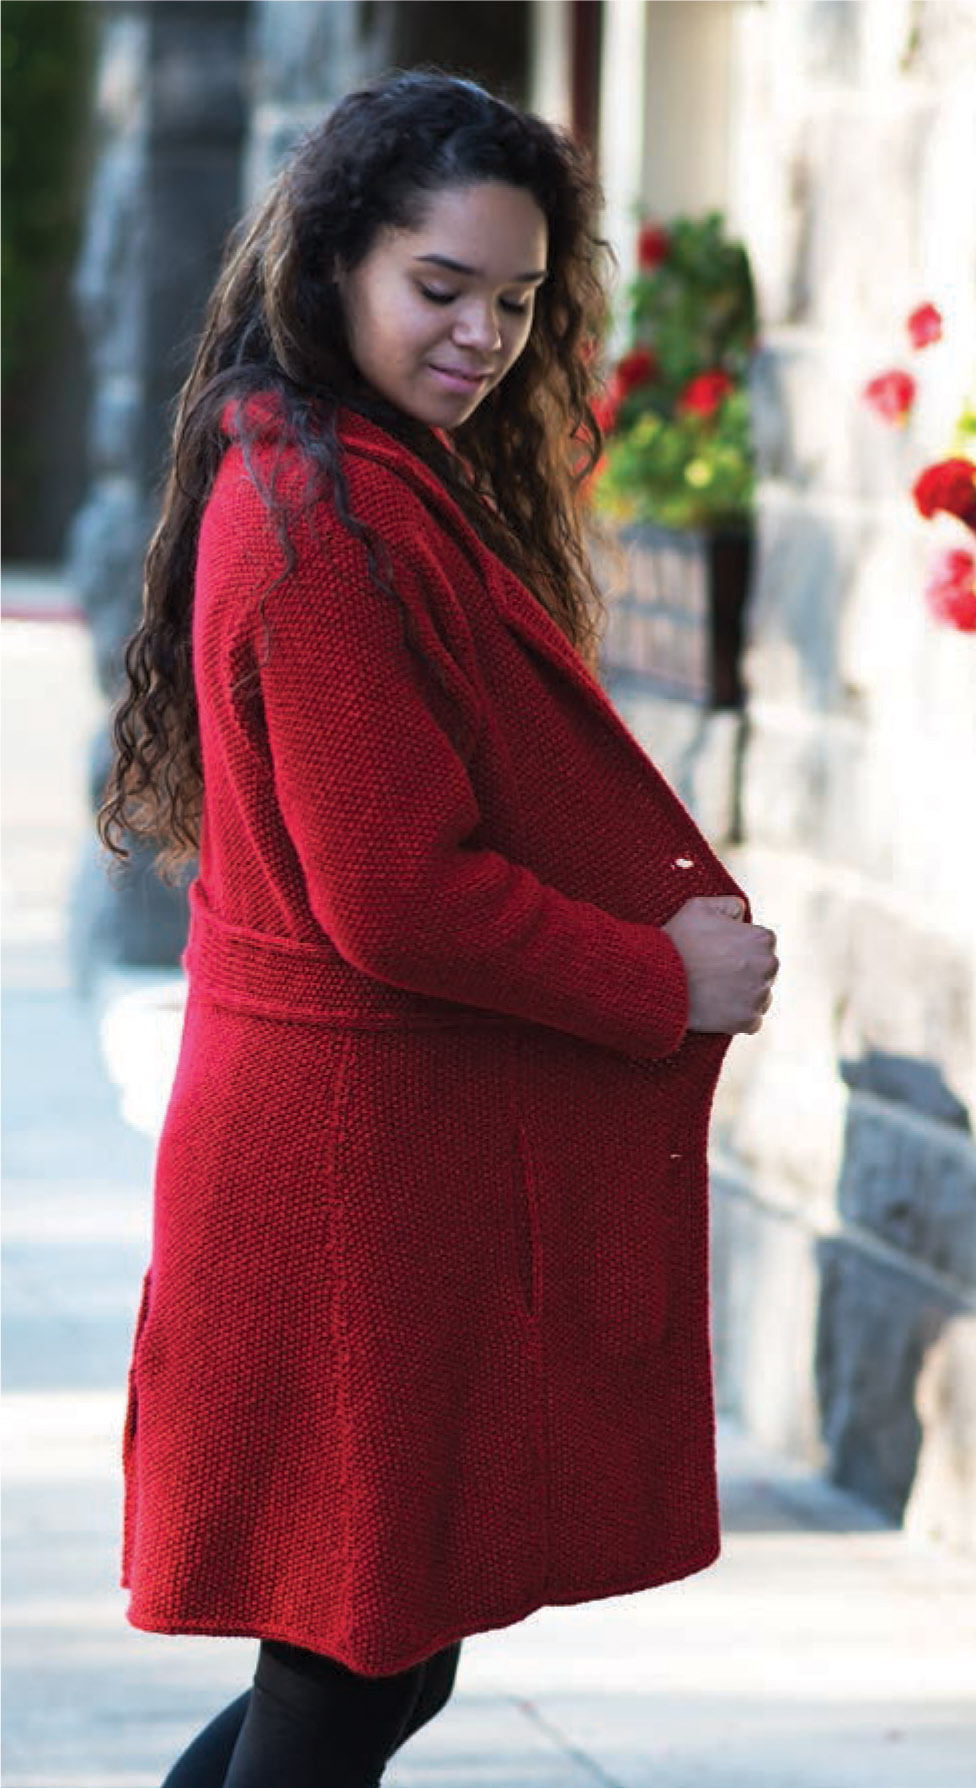
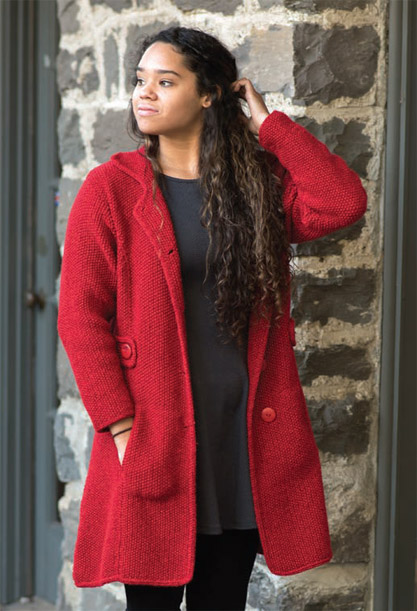
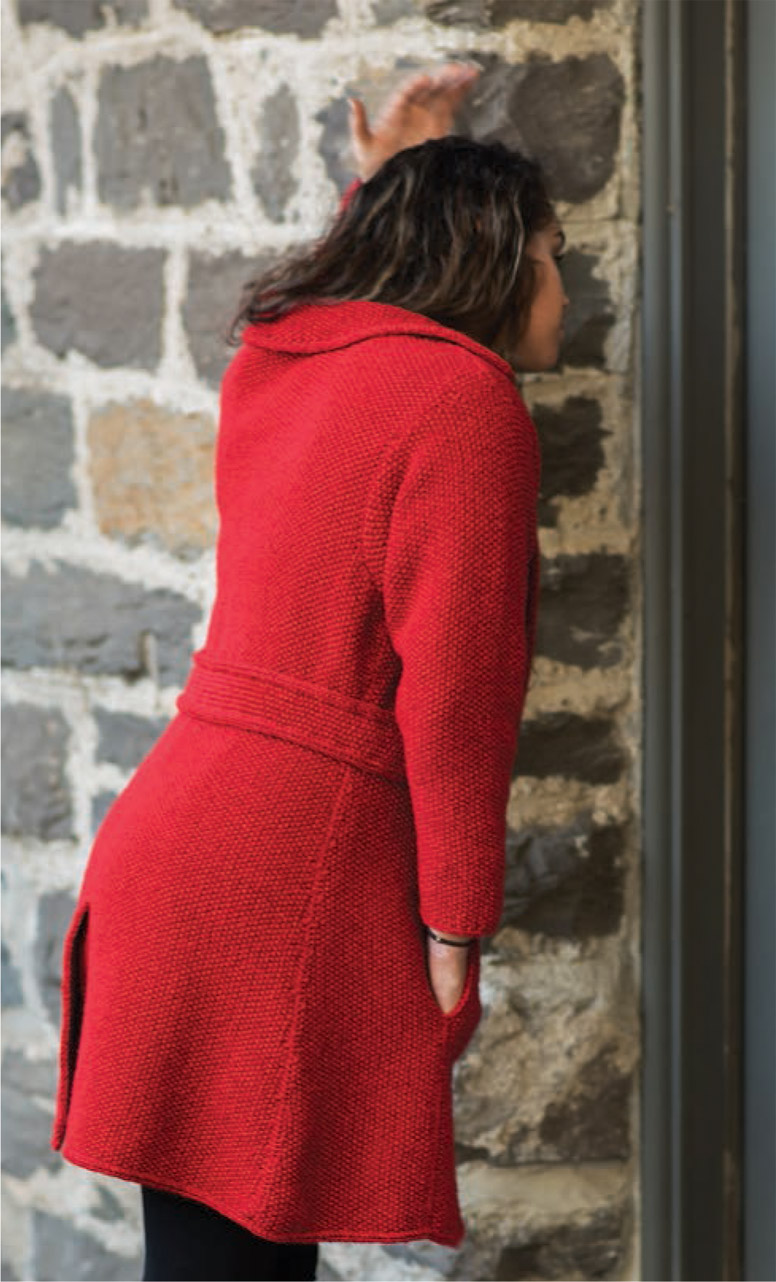
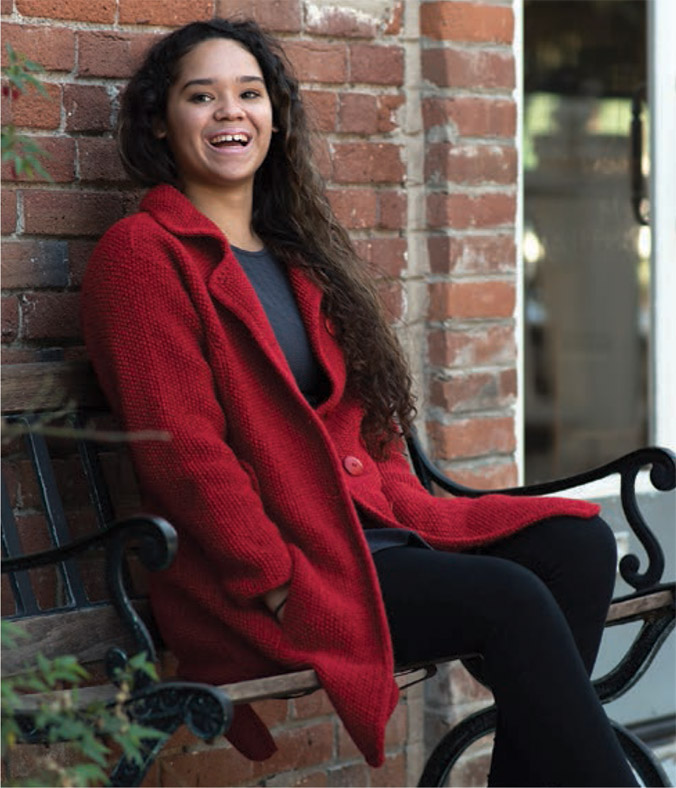
This Seed stitch coat is fashioned with panels in front to mimic seam lines, with vertical pockets and attached I-cord around the entire coat. The decorative belt with buttons adds class to this comfortable coat.
SIZES
All girls’ sizes 6 (7, 8, 9, 10) 12
Instructions are written for size 6; all other sizes follow. For ease in knitting, circle your size before beginning.
FINISHED MEASUREMENTS
Chest: 27 (28½, 30, 31½, 33) 34 in. / 68.5 (47, 76, 80, 84) 86.5 cm
Waist: 24 (25½, 27, 28½, 30) 31 in. / 61 (65, 68.5, 76) 78.5 cm
Total length: 24 (26, 27½, 29½, 31) 32 in. / 61 (66, 70, 75, 78.5) 81.5 cm
YARN
Lion Brand Heartland; 5 oz. / 142 g each 251 yd. / 230 m; 94% acrylic, 6% rayon
• 8 (9, 9, 9, 10) 10 skeins #113 Redwood
MATERIALS
• Size US 6 /4 mm 24 in. / 61 cm circular needles (or size to obtain gauge)
• Tapestry needle
• Waste yarn
• Pin-type markers
• Seven 1¼ in. / 3 cm buttons
GAUGE
22 sts and 36 rows to 4 in. / 10 cm in Seed st

STITCH GUIDE
Seedfb. Knit, then purl (or purl, then knit) into next stitch to keep seed pattern correct.
Seed2tog. Knit or purl 2 sts together, keeping the seed st pattern correct.
Seed Stitch (Seed st)
Row 1 (RS): [K1, p1] across.
Row 2 and all other rows: Knit the purls and purl the knits.
PATTERN NOTES
• This Seed stitch sweater coat has vertical pockets and an attached I-cord finish.
• Although both sides of the Seed stitch fabric look the same, it’s important to mark a “right side” to work proper shaping later.
• Every row begins with a slipped st and ends with a knit st. This forms a neat chain to pick up easily for I-cord and a beautiful seam to whipstitch from the right side.
BACK
Note: Back is worked in two pieces to form kick pleat, then joined and finished as one piece.
Left Back
Cast on 46 (49, 51, 54, 57) 60 sts.
(RS): With yarn in front, slip first st purlwise, then work in Seed st to last st, k1. Mark this row as the RS.
To work a decrease row on RS: Sl1, continue in Seed st to last 3 sts, seed2tog, k1.
To work a decrease row on WS: Sl1, seed2tog, continue in Seed st to last st, k1.
Work a decrease row every 9th row 6 (7, 7, 7, 7) 8 times total to 40 (42, 44, 47, 50) 52 sts.
Work one WS row and place all sts on a holder or waste yarn.
Right Back
Cast on 55 (58, 60, 63, 66) 69 sts.
(RS): With yarn in front, slip first st purlwise, then work in Seed st to last st, k1. Mark this row as the RS.
To work a decrease row on RS: Sl1, seed2tog, continue in Seed st to last st, k1.
To work a decrease row on WS: Sl1, continue in Seed st to last 3 sts, seed2tog, k1.
Work a decrease row every 9th row 6 (7, 7, 7, 7) 8 times total to 49 (51, 53, 56, 59) 61 sts.
On next WS row (this counts as Row 1, we’re still decreasing) bind off first 9 sts, then continue across row.
Work across RS (Row 2), then place sts from left back onto needles and work across [80 (84, 88, 94, 100) 104 sts total].
Row 2 complete, backs joined; bound-off flap will be tucked under left back and stitched down on the inside.
To work a decrease row: Sl1, seed2tog, work Seed st to last 3 sts, seed2tog, k1.
Continue decreasing every 9th row 7 (7, 7, 8, 9) 9 times more to 66 (70, 74, 78, 82) 86 sts.
Work even if necessary until piece from cast-on edge measures approx. 13 (14½, 14½, 15½, 17) 17½ in. / 33 (37, 37, 39.5, 43) 44.5 cm, or desired length to waist. Hang a pin-type marker here for easy measuring.
Waist to Bust Shaping
To work an increase row: Sl1, seedfb, work in Seed st to last 2 sts, seedfb, k1.
Work an increase row every 4th (4th, 5th, 5th, 6th) 6th row 8 times total to 82 (86, 90, 94, 98) 102 sts.
Work even if necessary until piece from beginning of waist shaping measures 4 (4, 4½, 5, 5½) 5½ in. / 10 (10, 11.5, 12.5, 14) 14 cm. End having completed a WS row.
Armhole Shaping
Note: For ease in measuring depth of armhole, place a hanging marker somewhere in the middle of the row.
Beginning with a RS row, bind off 8 sts at the beginning of the next 2 rows [66 (70, 74, 78, 82) 86 sts rem].
Next row (RS): Sl1, seed2tog, work Seed st to last 3 sts, seed2tog, k1.
Next row: Sl1, knit to end.
Work last 2 rows 4 times more to 56 (60, 64, 68, 72) 76 sts.
When armhole measures 3½ (4, 4, 4½, 4½) 4½ in. / 9 (10, 10, 11.5, 11.5) 11.5 cm, work increases at armhole edge (seedfb, same as above) as follows for your size: Work an increase row now, and then every 6th (6th, 7th, 7th, 7th) 8th row 4 times more to 66 (70, 74, 78, 82) 86 sts.
Continue on these sts (if necessary) until total length of armhole measures 6½ (7, 7½, 8, 8) 8½ in. / 16.5 (18, 19, 20.5, 20.5) 21.5 cm. End having completed a WS row.
Back Neck Shaping
Note: Remember to slip the first st of every row.
(RS): Work across 48 (52, 55, 58, 60) 63 sts, place last 30 (34, 36, 38, 38) 40 sts just worked onto a holder or waste yarn and continue across last 18 (18, 19, 20, 22) 23 sts.
Row 1 (WS): Sl1, work Seed st to last 3 sts, seed2tog, k1.
Row 2 (RS): Sl1, seed2tog, work Seed st to last st, k1.
Repeat Row 1 [15 (15, 16, 17, 19) 20 sts rem].
Shoulder Shaping
Next row (RS): Sl1, work Seed st to last 3 (3, 3, 3, 4) 4 sts, w&t. Work back as established.
Next row (RS): Sl1, seed to last 6 (6, 6, 6, 8) 8 sts w&t. Work back as established.
Next row (RS): Sl1, seed to last 9 (9, 9, 9, 12) 12 sts, w&t. Work back as established..
Next row (RS): Sl1, seed to last 12 (12, 12, 12, 16) 16 sts, w&t. Work back as established.
Work one more row and pick up wraps (place wrap on left needle and work it together with next st). Place live sts on a holder or waste yarn.
Other Side, Back Neck Shaping
Join new yarn at other edge from the WS and shape back neck as follows:
Row 1 (WS): Sl1, seed2tog, work Seed st to last st, k1.
Row 2 (RS): Sl1, work Seed st to last 3 sts, seed2tog, k1.
Work Row 1 again [15 (15, 16, 17, 19) 20 sts rem].
Next row (RS): Sl1, work Seed st to last st, k1.
Shoulder Shaping
Next row (RS): Sl1, work Seed st to last 3 (3, 3, 3, 4) 4 sts, w&t. Work back as established.
Next row (RS): Sl1, work Seed st to last 6 (6, 6, 6, 8) 8 sts, w&t. Work back as established.
Next row (RS): Sl1, work Seed st to last 9 (9, 9, 9, 12) 12 sts, w&t. Work back as established.
Next row (RS): Sl1, work Seed st to last 12 (12, 12, 12, 16) 16 sts, w&t. Work back as established..
Work one more row and pick up wraps. Place live sts on a holder or waste yarn.
FRONTS
Note: Each front is worked in two sections to form a vertical pocket opening and a decorative seam through the bust shaping. For accuracy in joining, pieces are worked simultaneously from armhole. Place pin-type markers wherever you can to denote areas of importance for ease in measuring.
Left Front, Section A
Cast on 24 (26, 28, 30, 30) 32 sts.
(RS): With yarn in front, slip first st purlwise, then work in Seed st to last st, knit last st. Mark this row as the RS.
Continue in Seed st (remember to slip first st and knit last st) with no decreases until piece measures 13 (14½, 14½, 15½, 17) 17½ in. / 33 (37, 37, 39.5, 43) 44.5 cm from beginning (or same length as back to waist). Mark as waist and continue with no shaping until total length measures 17 (18½, 19, 20½, 21½) 22½ in. / 43 (47, 48.5, 52, 54.5) 57 cm. Place sts on a holder or waist yarn. Do not cut yarn.
Left Front, Section B
Cast on 30 (32, 34, 36, 38) 40 sts.
(RS): With yarn in front, slip first st purlwise, then work in Seed st to last st, k1. Mark this row as the RS.
To work a decrease row on RS: Sl1, seed2tog, work Seed st to last st, k1.
To work a decrease row on WS: Sl1, work Seed st to last 3 sts, seed2tog, k1.
Work a decrease row every 9th row 13 (14, 14, 15, 17) 17 times total to 17 (18, 20, 21, 21) 23 sts.
Continue until piece measures 13 (14½, 14½, 15½, 17) 17½ in. / 33 (37, 37, 39.5, 43) 44.5 cm from beginning (or same length as back). End having completed a WS row. Mark for waist.
Waist to Bust Shaping
To work an increase row on RS: Sl1, seedfb, work Seed st to last st, k1.
To work an increase row on WS: Sl1, work Seed st to last 2 sts, seedfb, k1.
Work an increase row every 4th (4th, 5th, 5th, 6th) 6th row 8 times total to 25 (26, 28, 29, 29) 31 sts.
Work even if necessary until piece from beginning of waist shaping measures 4 (4, 4½, 5, 5½) 5½ in. / 10 (10, 11.5, 12.5, 14) 14 cm. End having completed a WS row.
Armhole Shaping
Note: For ease in measuring depth of armhole, place a hanging marker somewhere in the middle of the row.
(RS): Bind off 5 sts at the beginning of the next row (yes, less than for back): 20 (21, 23, 24, 24) 26 sts rem. At end of row, place all sts from Section A onto needle and work across.
Both pieces will now be worked separately, but at the same time, each with its own yarn. Section A will have no shaping while the armhole is shaped on the right side of Section B.
Next row (WS): Section A: Sl1, work Seed st to last st, k1. Section B: Sl1, work Seed st to last st, k1.
Next row (RS): Section B: Sl1, seed2tog, work to last st, k1. Section A: work across as established.
Work last 2 rows 4 times more to 15 (16, 18, 19, 19) 21 sts on section B. Section A will have original 24 (26, 28, 30, 30) 32 sts.
Work across one WS row on both sections.
Begin shaping on both sections as follows:
Note: Section B will now decrease by one st at the same time Section A increases.
Row 1 (RS): Section B: Sl1, work Seed st across to last 3 sts, seed2tog, k1. Section A: Sl1, seedfb, work to last st, k1.
Row 2 (WS): Work across both sections as established.
Repeat Rows 1 and 2 until one st rem on Section B. On next row, work it together with first st on Section A. Cut yarn from Section B.
Sections are now joined; adjust sts if necessary on next row to 39 (42, 46, 49, 49) 53 sts.
Piece should measure approx. 3½ (3½, 4, 4, 4) 4½ in. / 9 (9, 10, 10, 10) 11.5 cm from beginning of underarm shaping. Place a pin marker at front edge now to aid in measuring for depth of neck.
Increase row on RS: Sl1, seedfb, work Seed st to last st, k1.
Increase row on WS: Sl1, work Seed st to last 2 sts, seedfb, k1.
Work an increase row now, and then every 6th (6th, 7th, 7th, 7th) 8th row 3 times more to 43 (46, 50, 53, 53) 57 sts.
Continue on these sts (if necessary) until total length of armhole measures 5 (5½, 6, 6½, 6½) 7 in. / 12.5 (14, 15, 16.5, 16.5) 18 cm, or 1½ in. / 4 cm less than back). End having completed a RS row.
Front Neck Shaping
(WS): Bind off 12 (13, 13, 14, 14) 14 sts. Work across next 13 (15, 18, 19, 17) 20 sts [14 (16, 19, 20, 18) 21 sts on needle] and place sts just worked on a holder or waste yarn; work across rem 18 (18, 19, 20, 22) 23 sts.
Row 1 (RS): Sl1, work Seed st to last 3 sts, seed2tog, k1.
Row 2 (WS): Sl1, work Seed st to last st, k1.
Work Rows 1 and 2 twice more, then work Row 1 [15 (15, 16, 17, 19) 20 sts rem].
Work even (if necessary) until armhole measures same as for back. End having completed a RS row.

Shoulder Shaping
Next row (WS): Sl1, work Seed st to last 3 (3, 3, 3, 4) 4 sts, w&t. Work back as established.
Next row (WS): Sl1, work Seed st to last 6 (6, 6, 6, 8) 8 sts, w&t. Work back as established.
Next row (WS): Sl1, work Seed st to last 9 (9, 9, 9, 12) 12 sts, w&t. Work back as established.
Next row (WS): Sl1, work Seed st to last 12 (12, 12, 12, 16) 16 sts, w&t. Work back as established.
Work one more row and pick up wraps (place wrap on left needle and work it together with next st). Place live sts on a holder or waste yarn.
Right Front, Section A (with Buttonholes)
Note: For placement of buttonholes, lay out completed left front on a table. Hook a pin-type marker around any chain at the front edge where the waist shaping begins. Place another marker ½ in. / 1.5 cm from top at neck. From there, you can count the chains and divide equally for the two buttons in between, and count chains for the buttonhole below the waist shaping (5 buttons total). While knitting section A, the marked buttonhole rows on the left front will denote placement of buttonhole rows. Make note of the number of rows between buttonholes, or the measurement in inches.
Cast on 24 (26, 28, 30, 30) 32 sts.
(RS): With yarn in front, slip first st purlwise, then work in Seed st to last st; k1. Mark this row as the RS.
Continue in Seed St (remember to slip first st and knit last st) with no decreases until piece measures same as left front to designated first buttonhole. End having completed a WS row.
Buttonhole row 1 (RS): Sl1, work 2 sts in Seed st, bind off 3 sts, knit to end.
Buttonhole row 2 (WS): Sl 1, work to bound off sts, turn work and cast-on 3 sts with the knitted cast on, turn back, work 2 sts in Seed st, k1.
Continue with buttonholes at the intervals calculated until total length measures 17 (18½, 19, 20½, 21½) 22½ in. / 43 (47, 48.5, 52, 54.5) 57 cm from beginning. End having completed a RS row.
Place sts on a holder or waste yarn. Do not cut yarn. Note where you are in buttonhole placement as they will continue when front sections are joined.
Right Front, Section B
Cast on 30 (32, 34, 36, 38) 40 sts.
(RS): With yarn in front, slip first st purlwise, then work in Seed st to last st, k1. Mark this row as the RS.
To work a decrease row on RS: Sl1, work in Seed st to last 3 sts, seed2tog, k1.
To work a decrease row on WS: Sl1, seed2tog, work in Seed st to last st, k1.
Work a decrease row every 9th row 13 (14, 14, 15, 17) 17 times total to 17 (18, 20, 21, 21) 23 sts.
When piece measures 13 (14½, 14½, 15½, 17) 17½ in. / 33 (37, 37, 39.5, 43) 44.5 cm from beginning (or same length as back). End having completed a WS row, and place a marker for waist.
Waist to Bust Shaping
To work an increase row on RS: Sl1, work Seed st to last 2 sts; seedfb, k1.
To work an increase row on WS: Sl1, seedfb, work Seed st to last st, k1.
Work an increase row every 4th (4th, 5th, 5th, 6th) 6th row 8 times total to 25 (26, 28, 29, 29) 31 sts.
Work even (if necessary) until piece from beginning of waist shaping measures 4 (4, 4½, 5, 5½) 5½ in. / 10 (10, 11.5, 12.5, 14) 14 cm. End having completed a RS row.
Armhole Shaping
Note: For ease in measuring depth of armhole, place a hanging marker somewhere in the middle of the row.
(WS): Bind off 5 sts at the beginning of the next row: 20 (21, 23, 24, 24) 26 sts rem. At end of row, place all sts from Section A onto needle and work across.
Both pieces will now be worked separately, but at the same time, each with its own yarn. Section A will have no shaping (remember to continue with buttonholes), while the armhole is shaped on the wrong side of Section B,
Next row (RS): Section A: Sl1, work Seed st to last st, k1. Section B: Sl1, work Seed st to last st, k1.
Next row (WS): Section B: Sl1, seed2tog, work Seed st to last st, k1. Section A: Work across as established.
Work last 2 rows 4 times more to 15 (16, 18, 19, 19) 21 sts on Section B. Section A will have original 24 (26, 28, 30, 30) 32 sts.
Work across one RS row on both sections.
Note: Continue where you left off with buttonhole placement on Section A.
Begin shaping on both sections as follows:
Note: Section B will now decrease by one st at the same time Section A increases.
Row 1 (WS): Section B: Sl1, work Seed st across to last 3 sts, seed2tog, k1. Section A: Sl1, seedfb, work Seed st to last st, k1.
Row 2 (RS): Work across both sections as established.
Repeat Rows 1 and 2 until one st rem on Section B. On next row, work it together with first st on Section A. Cut yarn from Section B.
Sections are now joined; adjust sts, if necessary, on next row to 39 (42, 46, 49, 49) 53 sts.
Piece should measure approx. 3½ ( 3½, 4, 4, 4) 4½ in. / 9 (9, 10, 10, 10) 11.5 cm from beginning of underarm shaping. Place a pin marker at front edge now to aid in measuring for depth of neck.
Increase row on RS: Sl1, work Seed st to last 2sts, seed-fb, k1.
Increase row on WS: Sl1, seedfb, work Seed st to last st, k1.
Work an increase row now, and then every 6th (6th, 7th, 7th, 7th) 8th row 3 times more to 43 (46, 50, 53, 53) 57 sts.
Continue on these sts, if necessary, until total length of armhole measures 5 (5½, 6, 6½, 6½) 7 in. / 12.5 (14, 15, 16.5, 16.5) 18 cm,or 1½ in. / 4 cm less than back. End having completed a WS row.
Front Neck Shaping
(RS): Bind off 12 (13, 13, 14, 14) 14 sts. Work across next 13 (15, 18, 19, 17) 20 sts [14 (16, 19, 20, 18) 21 sts on needle] and place sts just worked on a holder or waste yarn, work across rem 18 (18, 19, 20, 22) 23 sts.
Row 1 (WS): Sl1, work Seed st to last 3 sts, seed2tog, k1.
Row 2 (RS): Sl1, work Seed st to last st, k1.
Work Rows 1 and 2 twice more, then work Row 1: 15 (15, 16, 17, 19) 20 sts rem.
Work even, if necessary, until armhole measures same as for back. End having completed a WS row.
Shoulder Shaping
Next row (RS): Sl1, work Seed st to last 3 (3, 3, 3, 4) 4 sts, w&t. Work back as established.
Next row (RS): Sl1, work Seed st to last 6 (6, 6, 6, 8) 8 sts, w&t. Work back as established.
Next row (RS): Sl1, work Seed st to last 9 (9, 9, 9, 12) 12 sts, w&t. Work back as established.
Next row (RS): Sl1, work Seed st to last 12 (12, 12, 12, 16) 16 sts, w&t. Work back as established.
Work one more row and pick up wraps (place wrap on left needle and work it together with next st).
Use the three-needle bind-off to connect shoulders together from the RS (for a decorative seam).
Seam front panels together as follows:
Beginning at bottom edge, whipstitch chains until seam measures 6 (7, 7, 7, 8) 8½ in. / 15 (18, 18, 18, 20.5) 21.5 cm. Secure and cut yarn (leave a tail for weaving). Leave an opening of 5 (5½, 5½, 6, 6½) 6½ in. / 12.5 (14, 14, 15, 16.5) 16.5 cm for pocket, join new yarn, and seam to armhole edge. Fronts are now complete.
COLLAR
Place all live sts from front and back neck on a needle. From RS, join new yarn at right front and work in pattern around, picking up stitch for stitch on edges of neck shaping. Shoot for somewhere around 82 (84, 86, 88, 90) 94 sts for your size.
Row 1: Sl1, work Seed st to last st, k1.
Repeat Row 1 until collar measures 3½ (3½, 3½, 4, 4) 4 in. / 9 (9, 9, 10, 10) 10 cm, or desired width. Bind off in pattern.
SLEEVE (make two)
At underarm, from RS, place a marker after first and before last 5 sts; join yarn and pick up and knit 70 (76, 80, 86, 86) 90 sts around armhole edge between markers.
Next row (WS): Sl1, work Seed st to last st, slip last st to right needle, then pick up bound-off st from under-arm and place on left needle. Put slipped st back to left needle and knit it together with bound-off st.
Repeat last row until all bound-off sts are worked into sleeve [stitch count doesn’t change: 70 (76, 80, 86, 86) 90 sts rem].
Work 9 (7, 7, 6, 6) 6 rows.
Decrease row: Sl1, seed2tog, work Seed st to last 3 sts, seed2tog, k1.
Work a decrease row every 10th (8th, 8th, 7th, 7th) 7th row 12 (15, 16, 19, 18) 20 times total [46 (46, 48, 48, 50) 50 sts rem].
Work even, if necessary, until sleeve from underarm measures 14½ (15, 15½, 16, 16½) 17 in. / 37 (38, 39.5, 40.5, 42) 43 cm, or desired length.
Bind off using the I-cord bind off.
POCKET LINERS
Right Front: From the RS, at edge closest to side of coat, pick up stitch for stitch through back loop only of chains along pocket opening. Turn and work back on WS, casting on 10 sts at beginning of next row. Work back and forth in Seed st until pocket liner measures just short of buttonhole. Bind off in pattern.
Work left front pocket the same. Turn pocket liners to inside of coat and stitch into place.
BELT
Cast on 10 sts (or as many as desired for width of belt).
Row 1: Sl1, work Seed st to last st, k1.
Repeat Row 1 until belt measures the length from front panel at seam, around the back to other side front panel seam.
Finish with I-cord bind-off. At end of row, turn work clockwise and continue with attached I-cord around.
FINISHING
Sew side and underarm seams from the RS using a whipstitch into each chained edge st.
Stitch belt around back to seam between Sections A and B. Sew on two decorative buttons.
Sew five buttons opposite buttonholes.
Weave in all ends.
From the RS, beginning at bottom side edge, work I-cord edging around entire coat. Graft or join I-cord ends together and weave in ends.


