We will now go over how to set up our application information in iTunes Connect. Any other information pertaining to user accounts, contracts, and banking that you would like to set up can be found at https://developer.apple.com/app-store/review/.
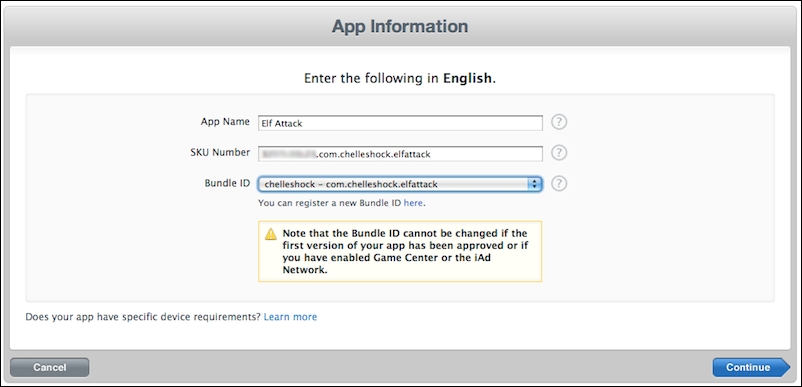
- Log in to iTunes Connect at http://itunesconnect.apple.com/. Your login information is the same as your iOS Developer account. Once logged in, select Manage Your Applications. Click on the Add New App button. App Name is the name of your application. SKU Number is a unique alphanumeric identifier for the app. Bundle ID is the one you created in the iOS Provisioning Portal. Fill in the information and click on Continue:
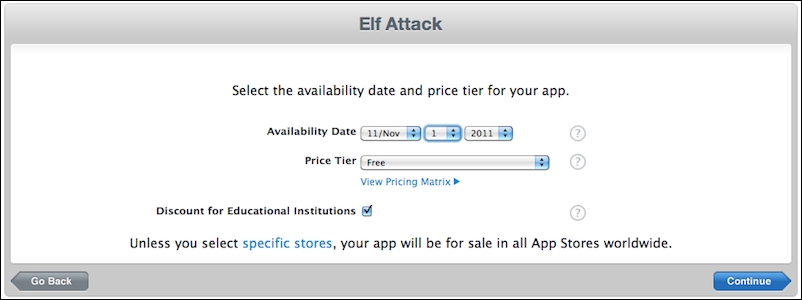
- The next step is to select the date on which you want your application to be live in the App Store and Price Tier that you want to charge. There is an optional checkbox for Discount for Educational Institutions. This is only if you want your app to be discounted for educational institutions that want to purchase multiple copies at the same time. Click on Continue when done:
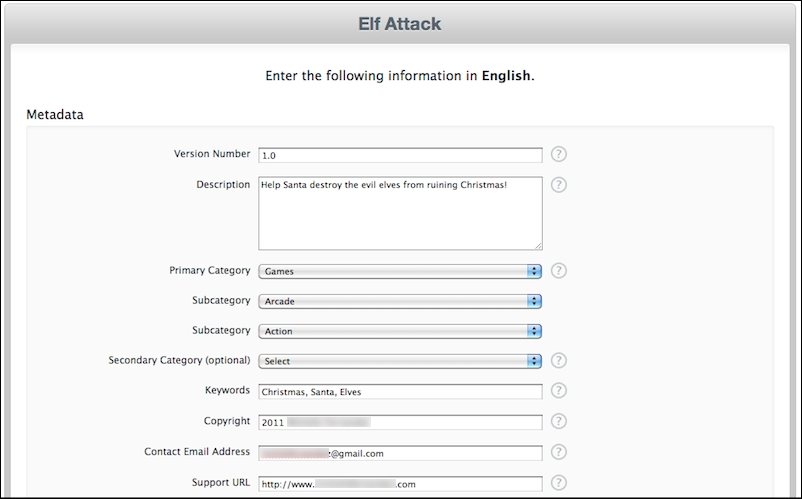
- Next, fill in the Metadata section about your application. This includes the version number, description of your game, categories, keywords pertaining to your app, copyright, contact information, and support URL:
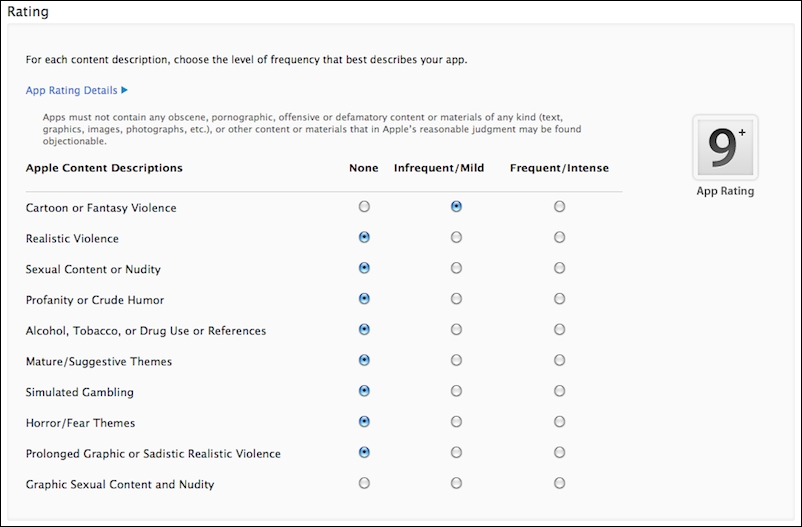
- The Rating section is based on the content of your application. For each description, choose the level of frequency that best describes your app. There are certain content types that will result in automatic rejection, such as realistic violence portrayed in your app or personal attacks to a target individual or group. You can learn more about App Store Review Guidelines at https://developer.apple.com/appstore/resources/approval/guidelines.html.
- As discussed earlier in the Uploads section, you will need a large version of your app icon, that is, iPhone/iPod Touch screenshots and iPad screenshots (if your app runs on iPad) of the content in your application.
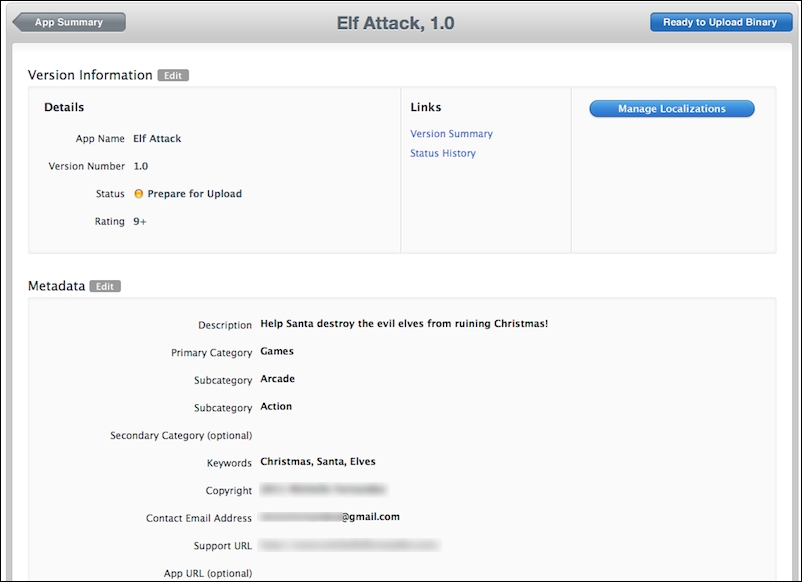
- You will be greeted with a page summary of your application information. Check to make sure that the information displayed is correct and then click on Done:

- You will be sent back to your version details page. Notice a button that says Ready to Upload Binary. Click on the button, and you will be required to answer a couple of questions about Export Compliance. Once completed, you will have the permission to upload your binary through Application Loader.
iTunes Connect is where you'll be managing your application from here on out when distributing it to the App Store. Every single piece of information you want to display about your app is done through iTunes Connect.
Once you're in the section pertaining to App Information, make sure that your SKU Number is unique and that it relates to your app, so that you can identify it later down the line. Also, make sure that Bundle ID you designated for your app is the correct one.
The app availability in the Rights and Pricing section controls when you want your app to go live once it's approved. It's good to set it for a date a couple of weeks in the future from when you submit it. It can take a couple of days to a couple of weeks for the review process to go from Under Review to Ready for Sale as long as there are no problems with the submission. The price tier is where you set the price for your app, or it can be set to Free. You can click on View Pricing Matrix to determine the price you're aiming to sell your app for.
The information in the Metadata section is what the customer will see in the App Store. The Rating section pertains to Apple Content Descriptions. Make sure that the level of frequency is checked off as close as possible to the content of your application.
The Uploads section is where you include your 1024 x 1024 px app icon and screenshots that best suit your app visually. Make sure that you provide the correct image sizes. Once you have transitioned back to the Application Information screen, you'll notice that the status says Prepare for Upload. When you click on the Ready to Upload Binary button on the Version Details page, you will answer questions about Export Compliance. Soon after, the status will change to Waiting for Upload.
More information relating to iTunes Connect can be found at http://developer.apple.com/library/ios/iTunesConnectGuide.