

Soil is the tablecloth under the banquet of civilization.
—STEVEN STOLL, Larding the Lean Earth (2002)
Back in the mid-1960s when I was first looking for land to farm, I was fortunate to visit Scott and Helen Nearing. Their book Living the Good Life had inspired my interest in organic farming. We became friends, and in 1968 they generously sold me the back part of their farm for the same price they had paid for it twenty years earlier. Since I had very little money, that kindness was truly a gift. However, all the land was wooded with spruce and fir trees, it had very sandy acid soil (pH 4.3), and there were lots of stones left behind by the glacier. Over time we have cleared fourteen of our forty acres, the rest being too wet, too steep, or too seriously rocky to bother with. The larger portion of the cleared land is presently in pasture. But the work involved in turning any of that sandy acid podzol (a soil scientist’s term) into high-quality market-garden soil has been another project entirely. With a lot of effort we have removed enough stones and created enough fertility to transform one and one-half acres into a really decent loam. When visitors ask what soil type we are on, I tell them “anthropogenic” (made by human beings). That’s one reason I feel kinship with the Parisian growers described in chapter 2, because, as Kropotkin notes, “they make the soil themselves.”
When we began serious greenhouse growing, we knew we wanted as perfect a soil as we could create. Most commercial greenhouse vegetable growers grow in artificial media (hydroponics) because they have never learned how to create the ideal greenhouse soil for a natural system.
We knew from experience that we wanted all the soil in the greenhouse to be almost like potting soil, but a potting soil attached to the earth rather than isolated in a flat. We wanted all the benefits that a connection to the living earth confers, such as dependable moisture supply, access for earthworms and other soil creatures, increased depth of rooting, and more. So we spread a 2-inch layer of peat moss over the soil surface (adding enough ground limestone to counteract its acidity) and tilled it in to full tiller-tine depth. Peat moss, which provides very little available plant food, has plenty of slow-to-decompose fibrous organic matter that adds structure to the soil. And good structure, which results in optimum aeration and biological activity, is what all soils need but especially in the semi-artificial confines of the greenhouse. Then the compost, the rock powders, the dried seaweed, the alfalfa meal, or whatever you add subsequently based on the needs of your particular soil, can be fully effective.
Maintaining Fertility
During the initial soil preparation we fertilized the greenhouses with the same minerals—limestone, phosphate rock, and green-sand— that are discussed in The New Organic Grower. But we have learned that for consistent success, year in and year out, we need to go the next step beyond those basic amendments and focus on rock powders or seaweeds or specific soil minerals to meet the needs of our particular soil. For example, a lot of reading and soil tests and many trials have shown that additional boron is a key supplement for the sandy acid podzol we have been improving. Thus we are engaged in what I would call a deeper organic farming. We pay attention to, and try to optimize, every possible factor affecting the quality of what we grow in order to produce the most nutritious (and pest-free) food possible. (See the discussion in chapter 20.)
Our standard extra-boost fertilizer, between crops in the greenhouse, is alfalfa meal. We like it not only because it works, but also because it is an amendment we could produce ourselves if necessary. For crops following spinach or claytonia in the winter greenhouse, we have found that some additional nitrogen beyond the alfalfa meal is necessary to make up for the excessive drain on soil reserves by those two heavy-feeding crops. Years ago we used cottonseed meal for that extra boost, but since the advent of GMOs we have shifted to a locally available fertilizer made from dried crab wastes. You can push the crops too hard in the greenhouse using too much high-analysis fertilizer like dried blood, and we are convinced that in most cases and for most crops a “low test” amendment like alfalfa meal is ideal.
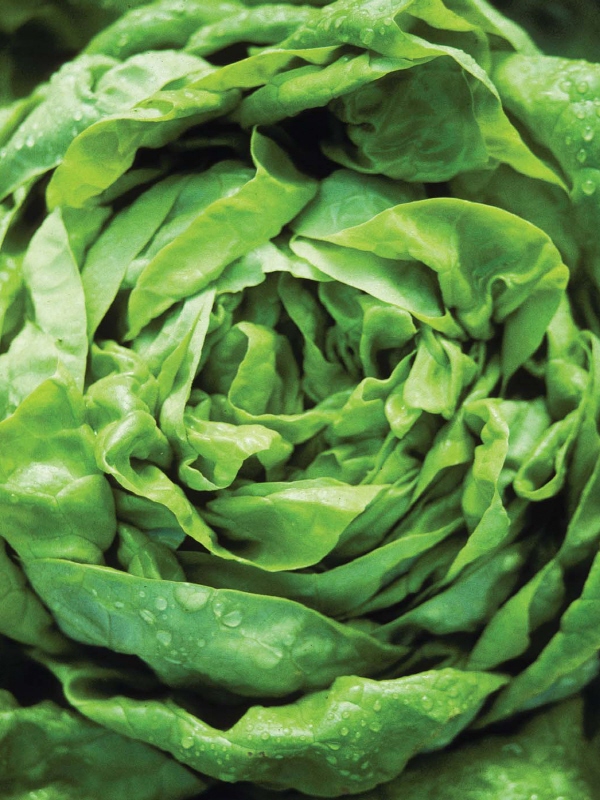
Butterhead lettuce thrives in a greenhouse environment.
Because the beds in our greenhouses are in continuous production of a varying range of crops, soil preparation happens continuously also. The steps involved are clearing away the old crop, aerating the soil, adding amendments, and applying compost. Outdoors we use a ten-horsepower walk-behind rotary tiller for soil preparation, but it would be awkward to use for our frequent replanting of just one or two beds at a time inside the greenhouse. Furthermore, the accumulation of fumes would be noxious. We initially used a human-powered three-tooth cultivator to mix amendments shallowly into the greenhouse beds. It was nicknamed “the human rototiller,” and using it was the least popular job on the farm. We wanted a well-designed electric tiller for greenhouse use, but since I could not find one I designed one myself and convinced a local manufacturer to produce it (see appendix C for a source). We named it the “Tilther” since it is designed to work only the top 2 inches of the soil. I decided on 2 inches based on weed research indicating that weed seeds rarely germinate from more than 2 inches deep in the soil. Shallow soil working has always seemed desirable so as not to disturb soil structure, and the 2-inch depth made sense because it would avoid disturbing those dormant weed seeds that were unlikely to germinate as long as we did not move them closer to the soil surface.
The Tilther is designed like a tractor tiller with a chain-drive on the side so it does not leave an untilled gearbox strip in the center. The power comes from a cordless drill that sits on top of the housing and drives a shaft connected by a chain to the tine shaft below. A rope around its trigger is pulled from the handlebars. This is a wonderfully simple tool with little noise and no fumes. We keep a charger for the cordless drill batteries in the greenhouse.
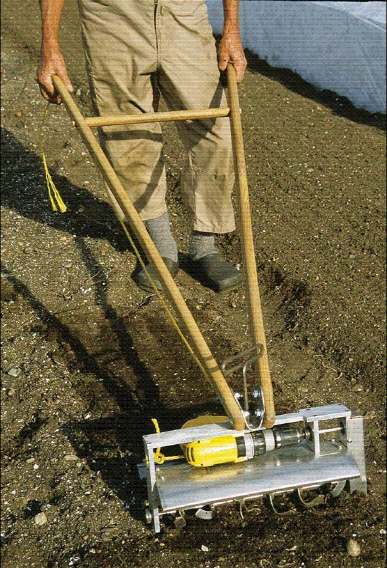
The Tilther in action.
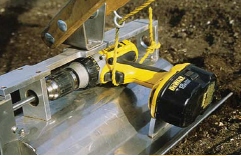
The Tilther is powered by a cordless drill.
Before using the Tilther, we aerate the soil by making a pass down the bed with a broadfork. This broadfork has two handles, each 4 feet long, which sit upright at either end of a 30-inch-wide metal crossbar. Seven soil-penetrating tines, each 10 inches long, are attached to the crossbar. The operator applies pressure with one foot to press the tines into the soil, and then pulls back on the handles just enough to lift and loosen the lower soil slightly. Then the operator raises the tines out of the soil, moves 6 inches further back, and repeats the sequence.
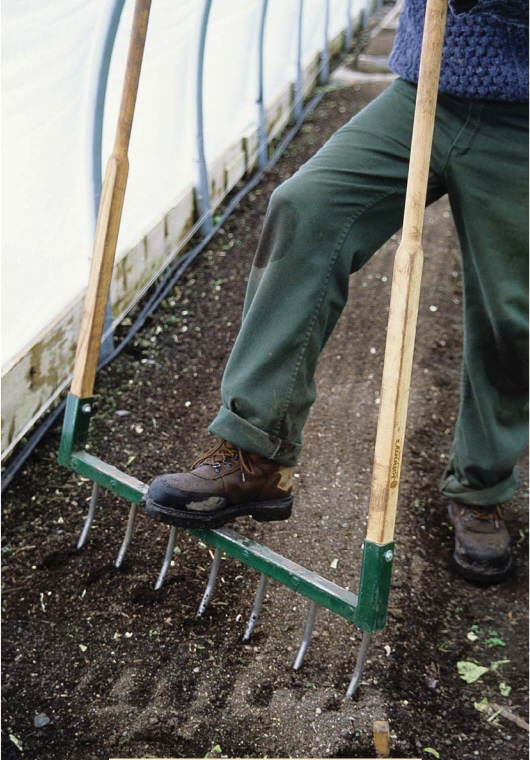
The broadfork is used to aerate the soil between succession crops.
After using the broadfork, we use the Tilther to incorporate any soil amendments needed, such as alfalfa meal, and then we apply compost.
We have learned over the years that compost applications in the greenhouse are most effective when left on the surface, mixed only shallowly into the top ½ inch of the soil. This technique has worked very well, possibly because it mimics Nature where the highest percentage of organic matter is at the surface of the soil. We certainly achieve exceptional germination rates by keeping the compost at the surface. That compost gets turned into the soil at the end of each crop when we go through the process of preparing the soil for the next crop.
We rake the bed smooth and mix in the compost shallowly with a 30-inch-wide Austrian hay rake. One of the wooden-tooth grading rakes sold in many hardware stores is a good second choice. Finally we firm the bed surface lightly with one pass of a 30-inch-wide mesh-surfaced roller. The firming helps to give purchase to the toothed-wheels of the “pinpoint” seeder we use (it’s described in the next chapter).
COMPOST
We spread a layer of our well-finished compost on the soil before each succession crop at the rate of one 5-gallon bucket to each 10 feet of 30-inch-wide bed. If you weigh it out, that comes to a rate of about 15 tons per acre. Since we plant and harvest at least four succession crops per bed in an average year, our yearly compost application works out to about 60 tons per acre. Although that is a lot less than the 100 to 400 tons used by the Parisian growers, it may seem high to some readers. If we had access to unlimited horse-manure supplies as the Parisian growers did we would probably use more ourselves. Soil organic matter, whether from composted manure or composted vegetable wastes, is what powers this system. Intensive growing and intensive harvests mean intensive maintenance of soil fertility. You need high fertility for high production.
A Four-Season Compost Supply
We make our compost from mowed forage crops with added vegetable wastes and clay as described in The New Organic Grower. Since we are close to the rocky Maine coast, we add seaweed. We also add manure produced by our livestock. The compost is turned twice the summer before we begin to use it by loading the compost heap continuously into a small manure spreader that chops, aerates, and throws it out so as to form a windrow as the spreader moves slowly ahead. The end result is a thoroughly decomposed, crumbly product. We spend a lot of time making compost and we use as much as we can make. Good compost is a key ingredient for soil fertility whether in the greenhouse or the open field. Before we got back into livestock, after a fifteen-year hiatus, we would occasionally buy manure compost from a local horse farm. It was made from hay, straw, and manure, but without wood shavings, which I consider detrimental in a vegetable soil. We would limit our purchases to the amount of manure our future livestock would be producing because we wanted to establish the baseline for a truly locally based fertility program for the farm.
In order to have compost available all winter for replanting the greenhouses, we erect a temporary plastic-covered A-frame structure over one of the compost windrows each fall. We build this A-frame out of pieces of straight pipe that are leftover from greenhouse experiments, but it would be just as easy to construct a frame with poles cut from the woods. Wiggle-wire channel up and over each end and sandbags along the bottom hold the plastic on. This structure keeps rain and snow off the compost, protects against leaching, and is sufficient insulation against the cold to prevent more than surface freezing of the ingredients.
A second layer of plastic draped directly over the windrow inside the A-frame is needed from December thru February during really cold winters. In milder winter areas, if you place your windrow in a sunny site and just cover it directly with a sheet of plastic in the late fall held down around the edges with sandbags or rocks, there should always be plenty of thawed compost available.
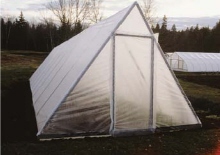
Simple A-frame greenhouse keeps winter compost supply unfrozen.
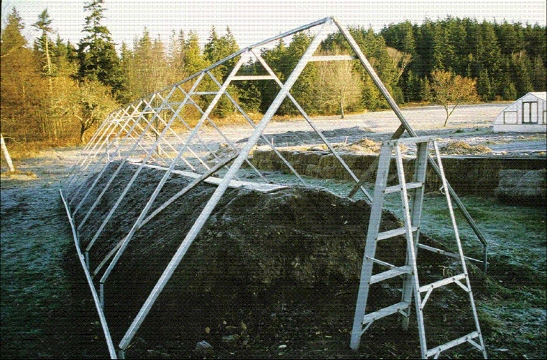
Structural frame of A-frame greenhouse.
Removing Crop Debris
We remove old crops before replanting on a bed-by-bed basis. We always want to get rid of the old plants so as to have a clean seedbed with no decomposing green matter that could inhibit germination of the next crop.
When harvesting heads of lettuce, we remove debris as we harvest, by twisting the plants out of the ground so the fat lower stem is partially removed from the soil. Depending on the baby-leaf salad crop and amount of plant remaining after harvest, we either pull out the old plants, roots and all by hand or, on larger areas, we can clean up faster by mowing off the old crop with a scythe. The technique is actually as much shaving as it is mowing since you want to keep the blade right down along the surface of the soil so as to leave no stubble. I carry a file in my back pocket for frequent re-sharpening of the blade. We collect the green mass with a large lawn rake and place it in baskets to take to the compost heap.
Another way to clean up beds is to use the greens harvester (described in chapter 15) by running the blade along the surface of the soil with a forward motion, so the spent plants fill the cloth basket. Again you will have to re-sharpen the tool frequently. With these techniques, we leave the root mass of the previous crop in the ground, but roots do not have the same inhibitory effect on the germination of the subsequent crop as would incorporated green-leaf residues.