Fabric PROJECTS
Fabric and thread go together like peanut butter and jelly. It’s a natural alliance and the different things that you can create with them are astounding. Fabric lends its fluidity to the stitching so they work together in harmony. From wearables to home décor to “I’m making this because it’s FUN!,” the fabric projects in this section cover all the bases.
Stitched Buttons
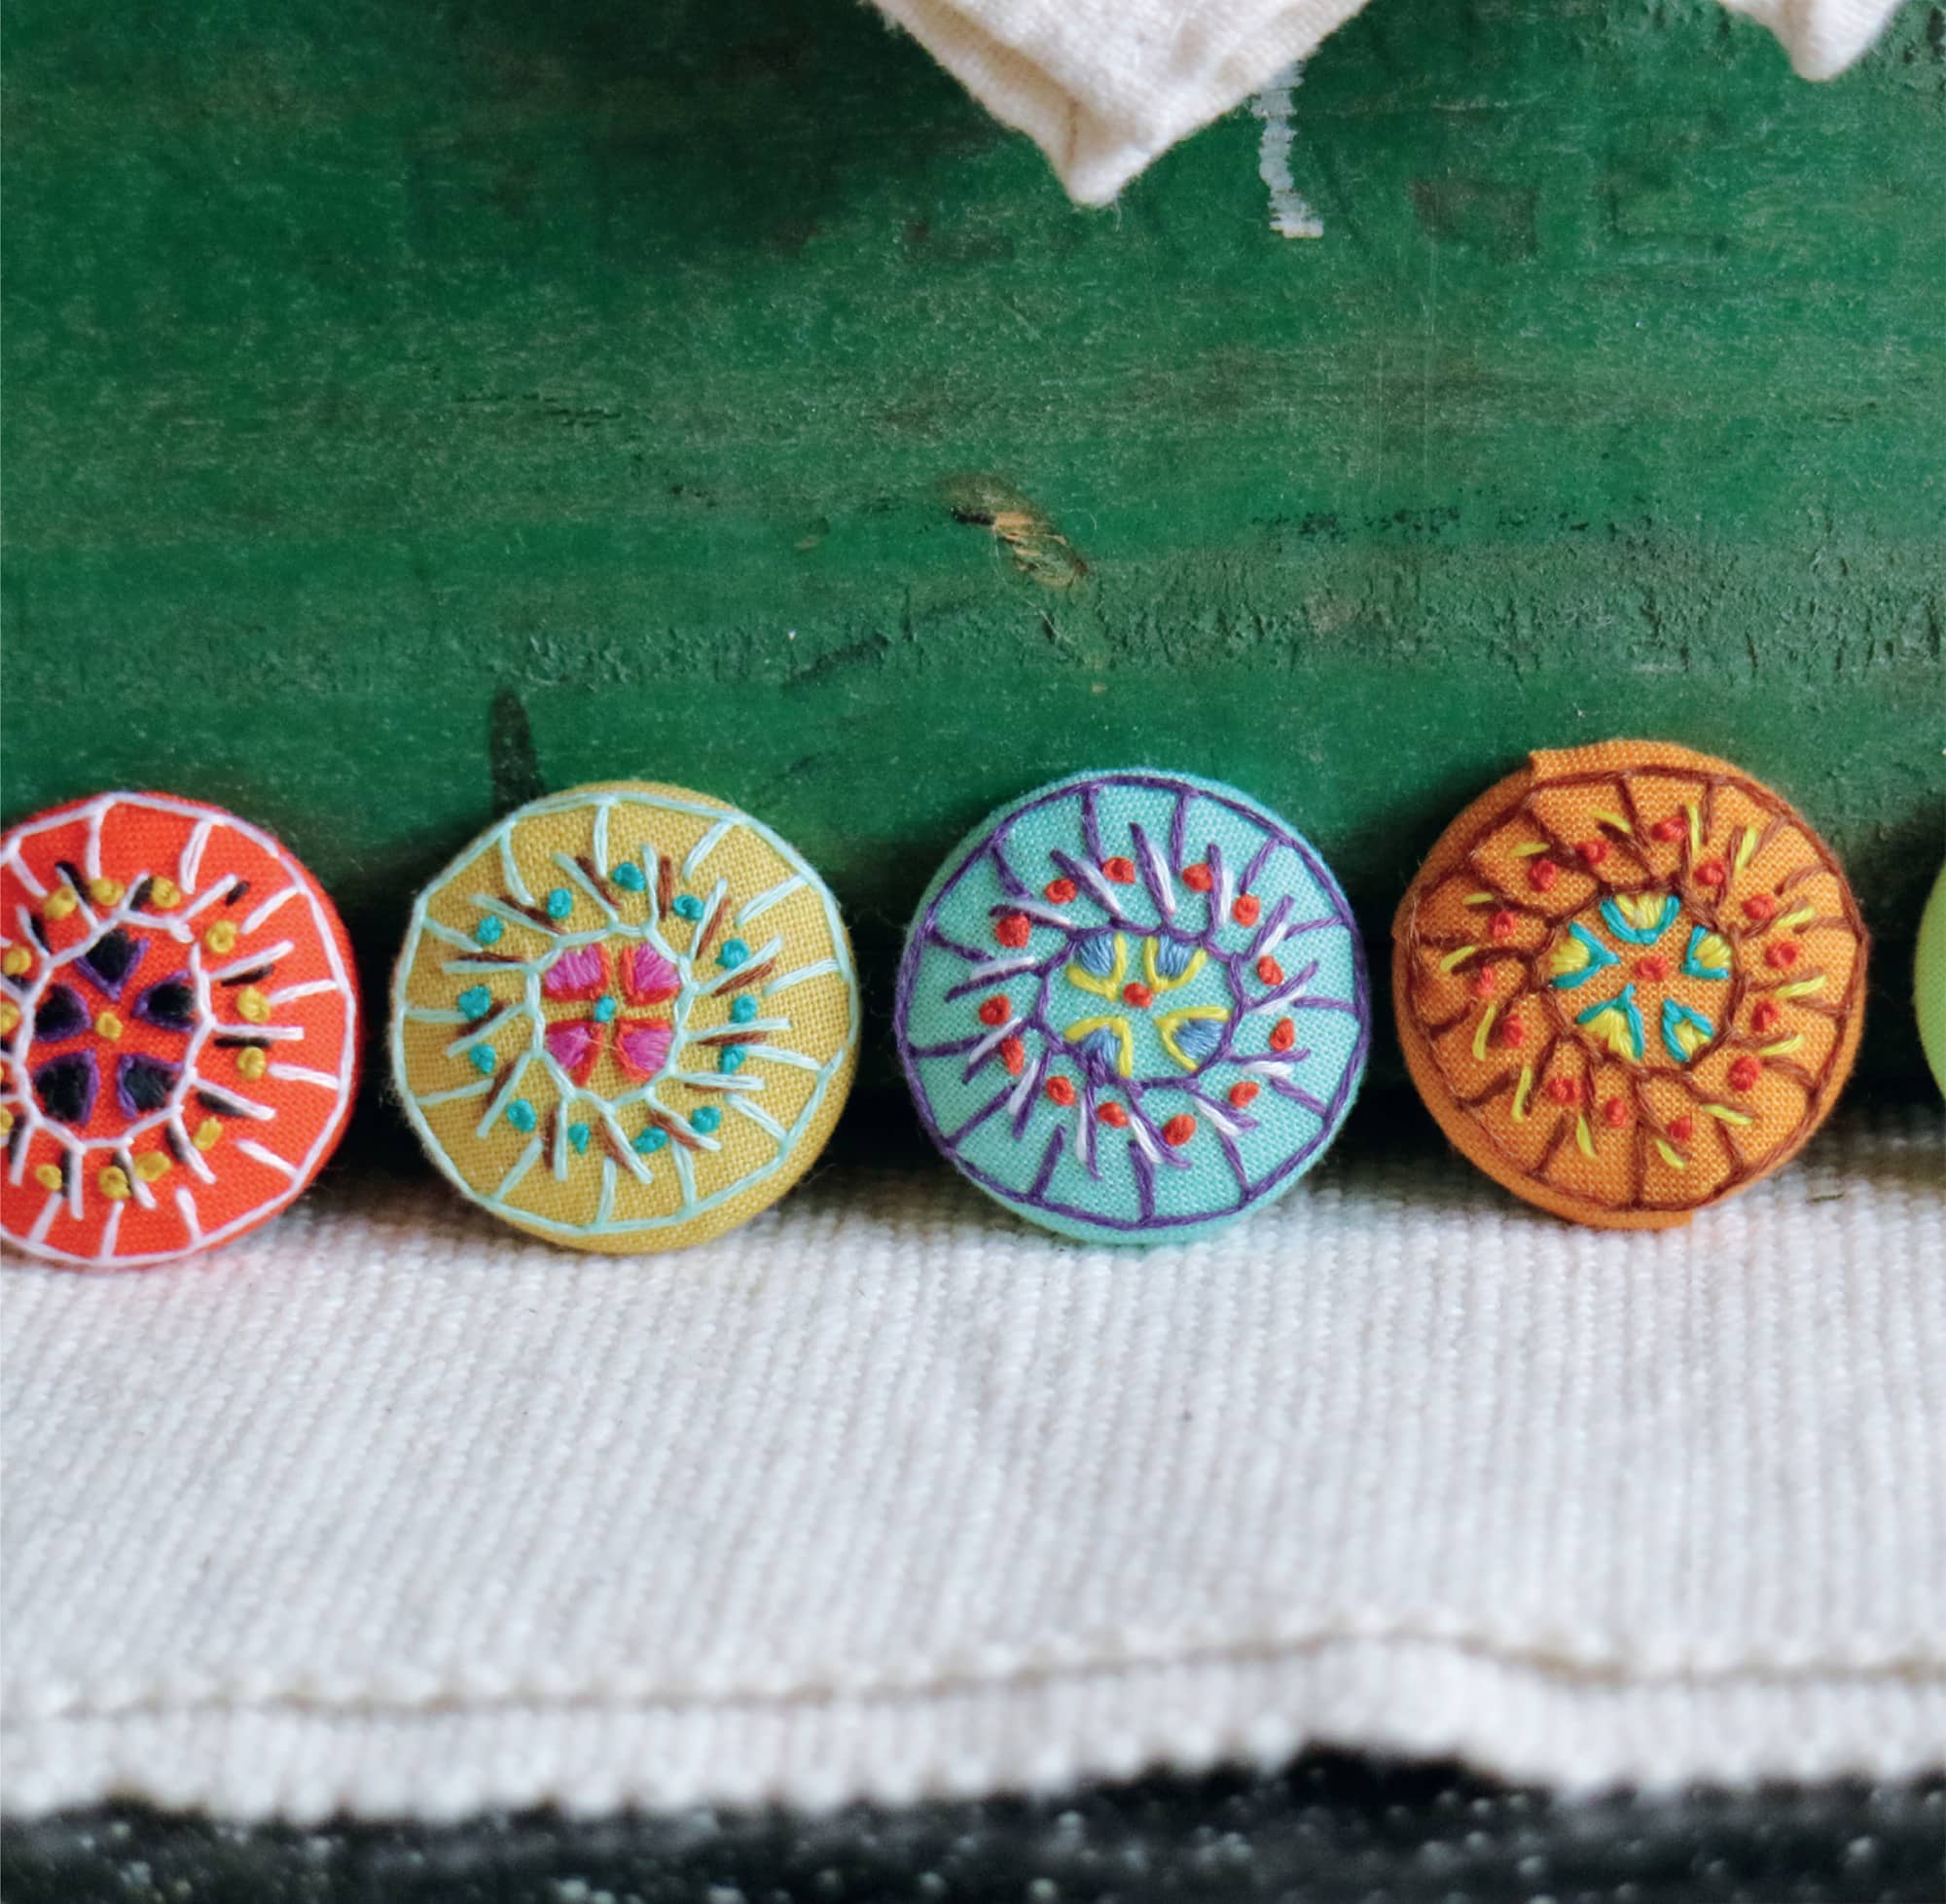
Life is about the details, and this project honors that belief. Buttons are such small objects, but that doesn’t mean they can’t pack a punch. They have a wide range of uses, from clothing to mixed-media jewelry to closures on bags. Adding some hand stitching can personalize them and bring that final punch of special to your project. You can find cover button kits at craft stores.
M/A/T/E/R/I/A/L/S
Cover button kit with shanks on back and template to trace on fabric (size 45 or 11/8" [2.8 cm] button)
3"× 3" (7.6×7.6 cm) pieces of quilting-weight cotton in various solid colors
Fabric marking pen
Size 5 embroidery needle
2 strands of embroidery floss in five different colors
—
Note: Perle cotton is too bulky for this project because it will form lumps beneath the fabric.
Embroidery hoop (optional)
—
Note: If you want the extra support of a hoop to control your tension, you’ll need larger pieces of fabric to fit inside of it. Do not double the fabric, or it will become too thick to assemble.
1 Trace the button template from the kit onto the fabric with a fabric marking pen (FIGURE A). (Note: The photo shows the template marked in dark black pen. This is for illustration purposes only. Use a marking pen that can be removed easily.)
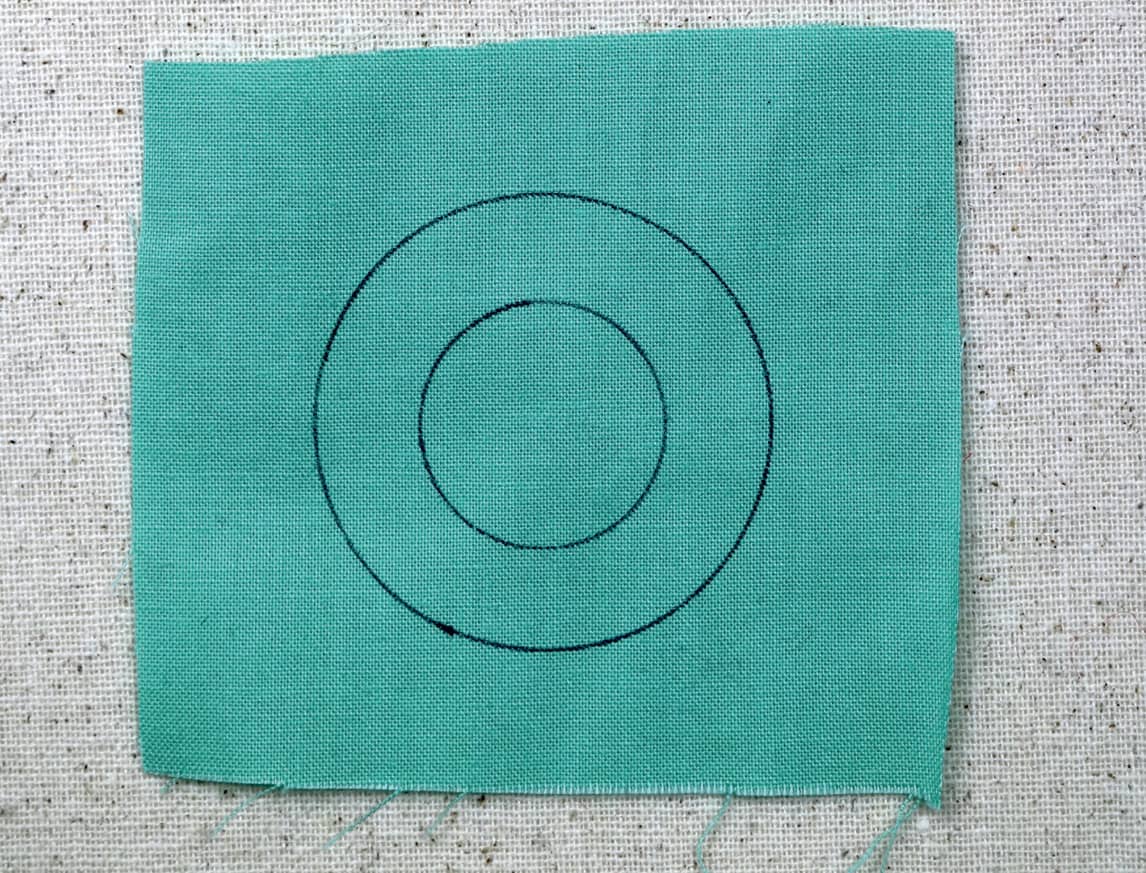
FIGURE [A]
2 Use the embroidery needle and purple thread to blanket stitch (see here) around the line for the smaller circle. Keep the straight posts perpendicular to the circle. Stitch only to the edge of the smaller circle in the center. Stitching to the outer boundary will make the button difficult or impossible to assemble (FIGURE B).
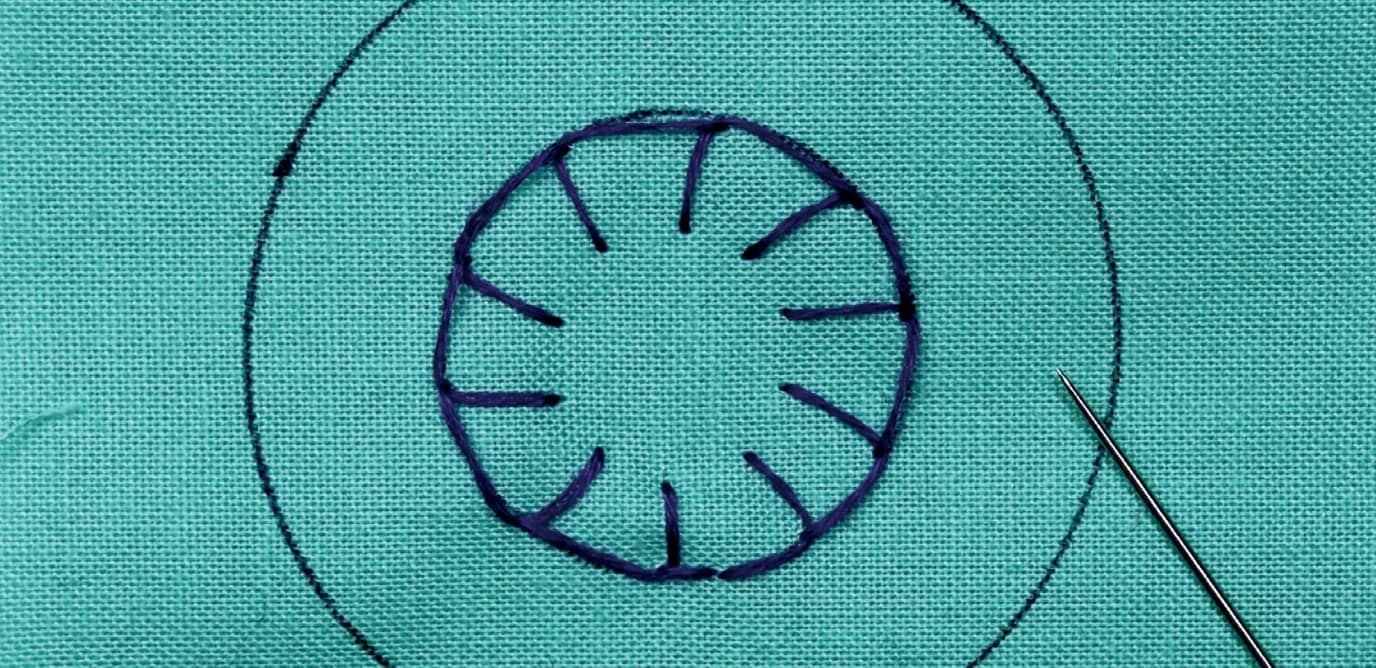
FIGURE [B]
3 Add a second row of blanket stitch so that it’s nested inside of the first one. Bring the thread up below a straight bar of the first row of blanket stitch and go down between the gap created by the first row. Bring the thread back up below the next straight bar from the first row. Continue all the way around. This will create a slightly curved blanket stitch. Do not tie a stop knot in the thread. Leave a tail. This will get trapped between the two button halves when you assemble it (FIGURE C).
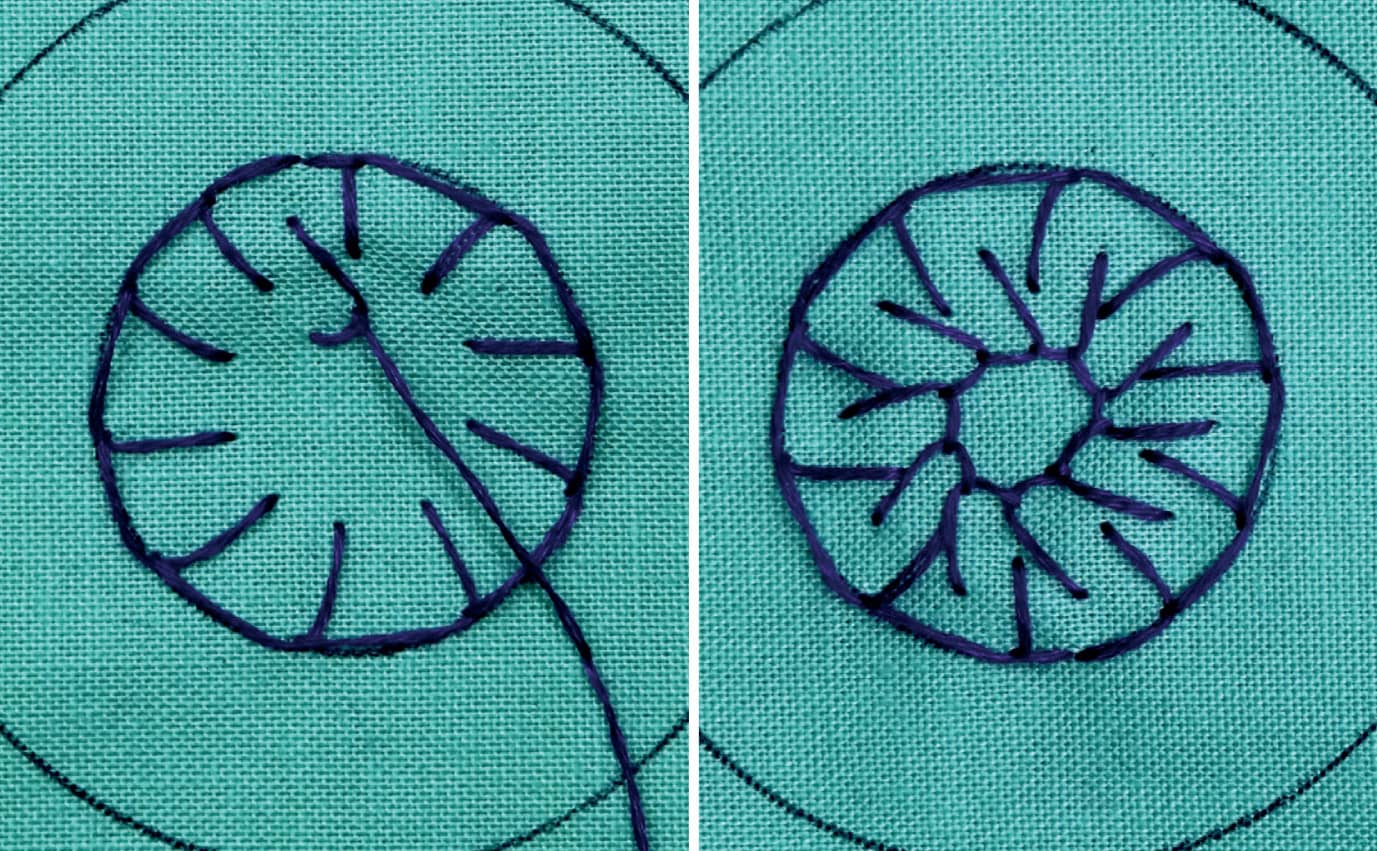
FIGURE [C]
4 Using yellow thread, stitch four fat lazy daisies (see here) in the center of the smallest circle. Make them fat by leaving a small distance between where you bring the thread up and where you take it back down at the base.
5 Using medium blue thread, satin stitch (see here) inside the yellow lazy daisies to fill them in. Using medium red thread, add French knots (see here) between the slanted bars of the second row of blanket stitch and in the very center of the button.
6 Using white thread, add a running stitch (see here) to one side of the slanted bars on the second row of blanket stitch. The stitching is complete at this point (FIGURE D).
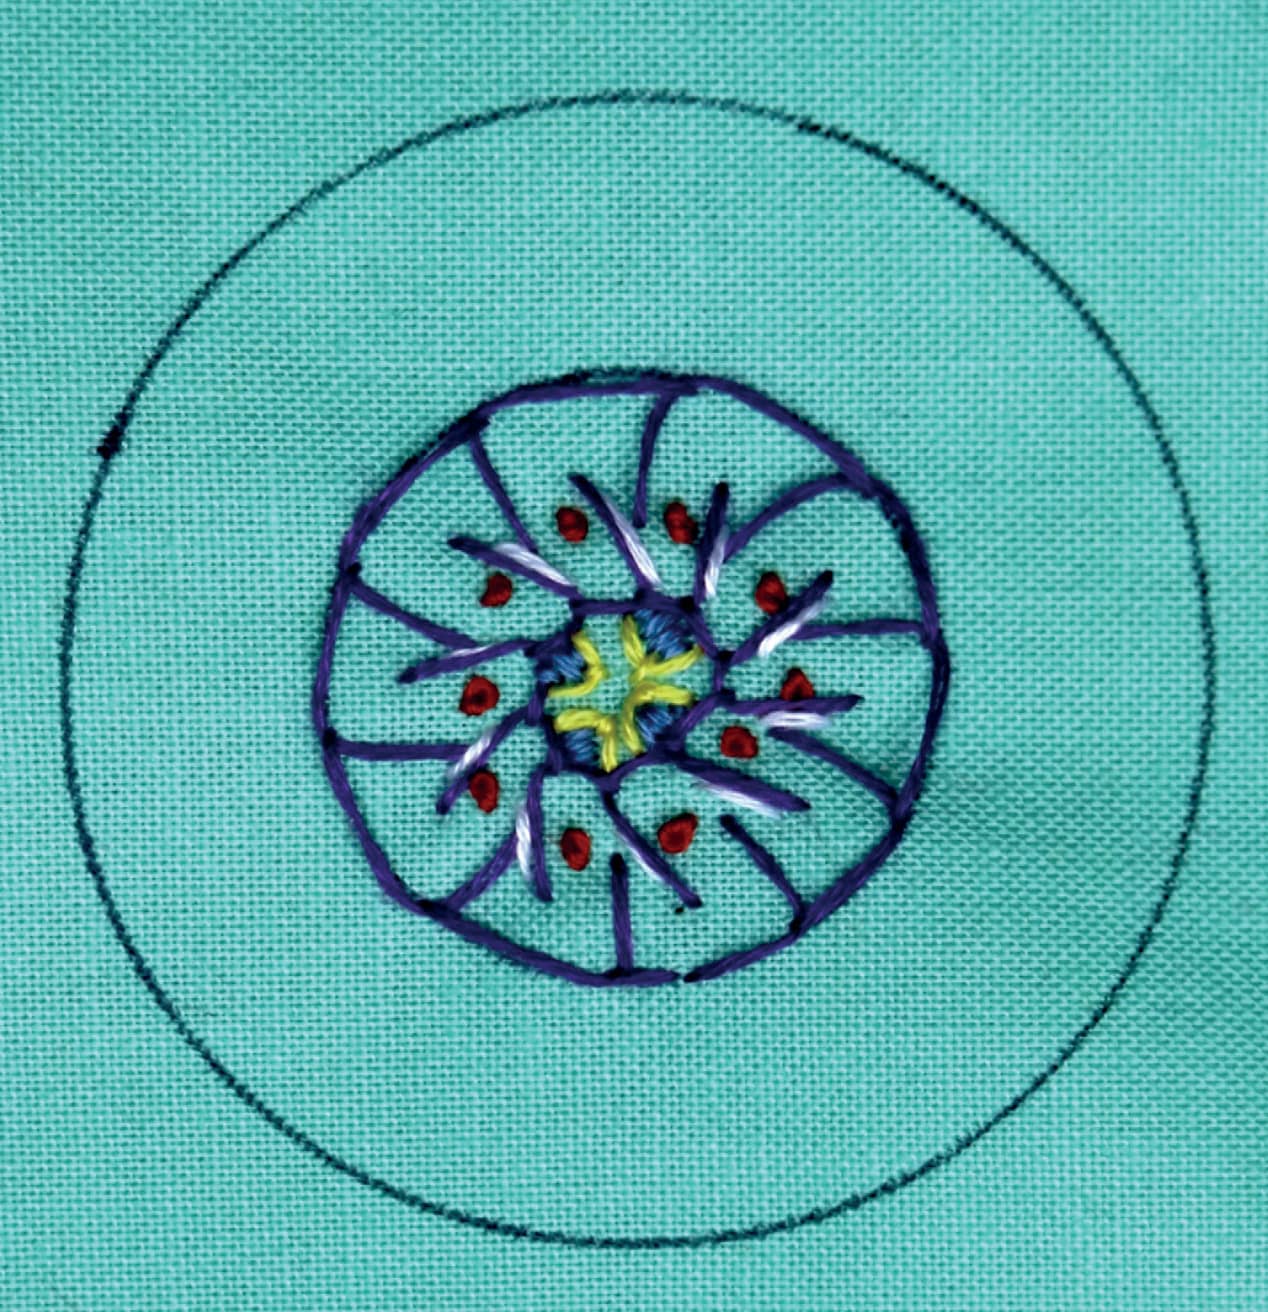
FIGURE [D]
7 Trim away the excess fabric at the big circle’s outline. Trim the threads so that they do not extend past the edge of the fabric. This is what it should look like on the back (FIGURE E).
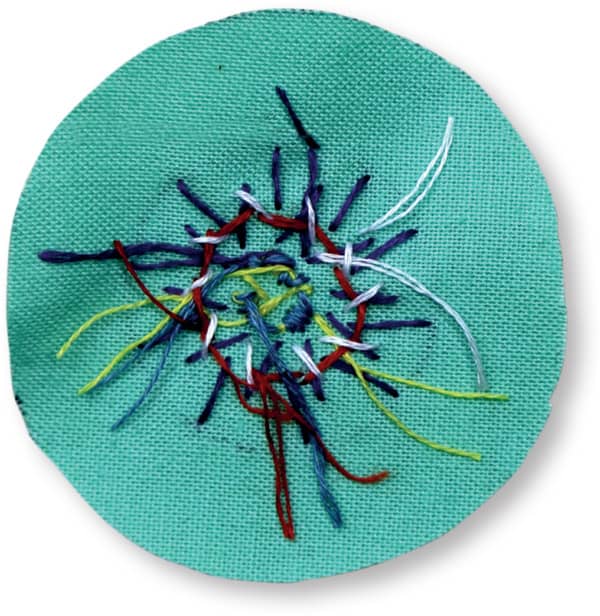
FIGURE [E]
8 Assemble according to the button kit directions (FIGURE F).
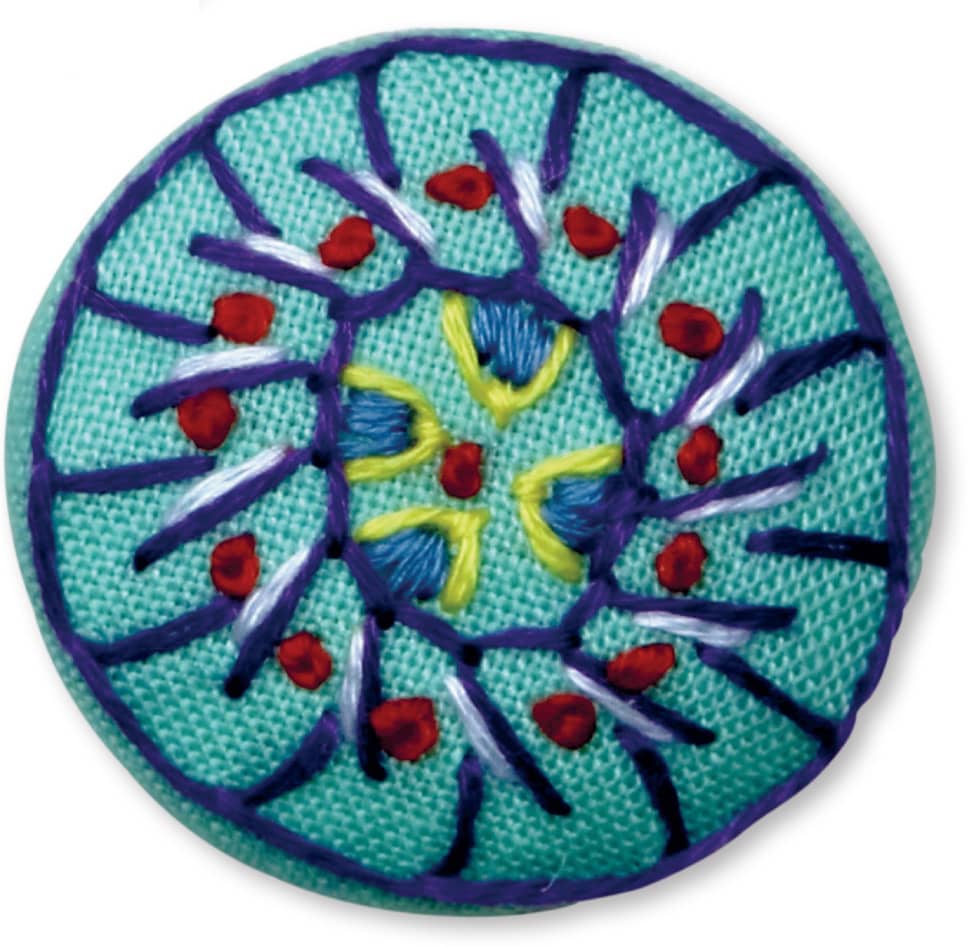
FIGURE [F]
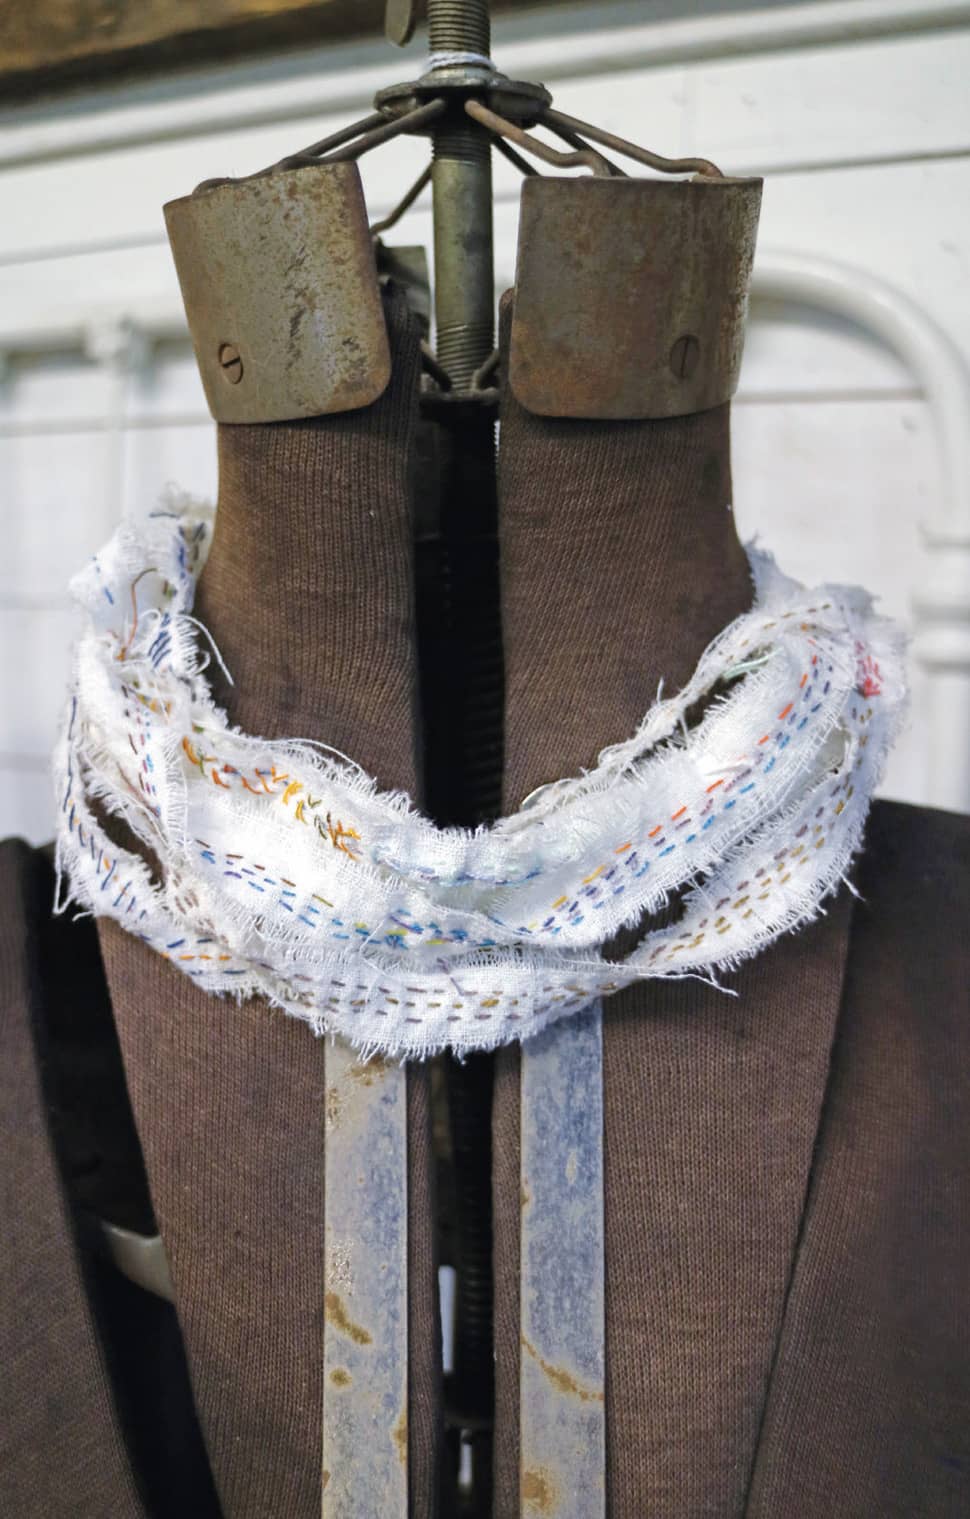
Strip-Stitched Fabric Necklace
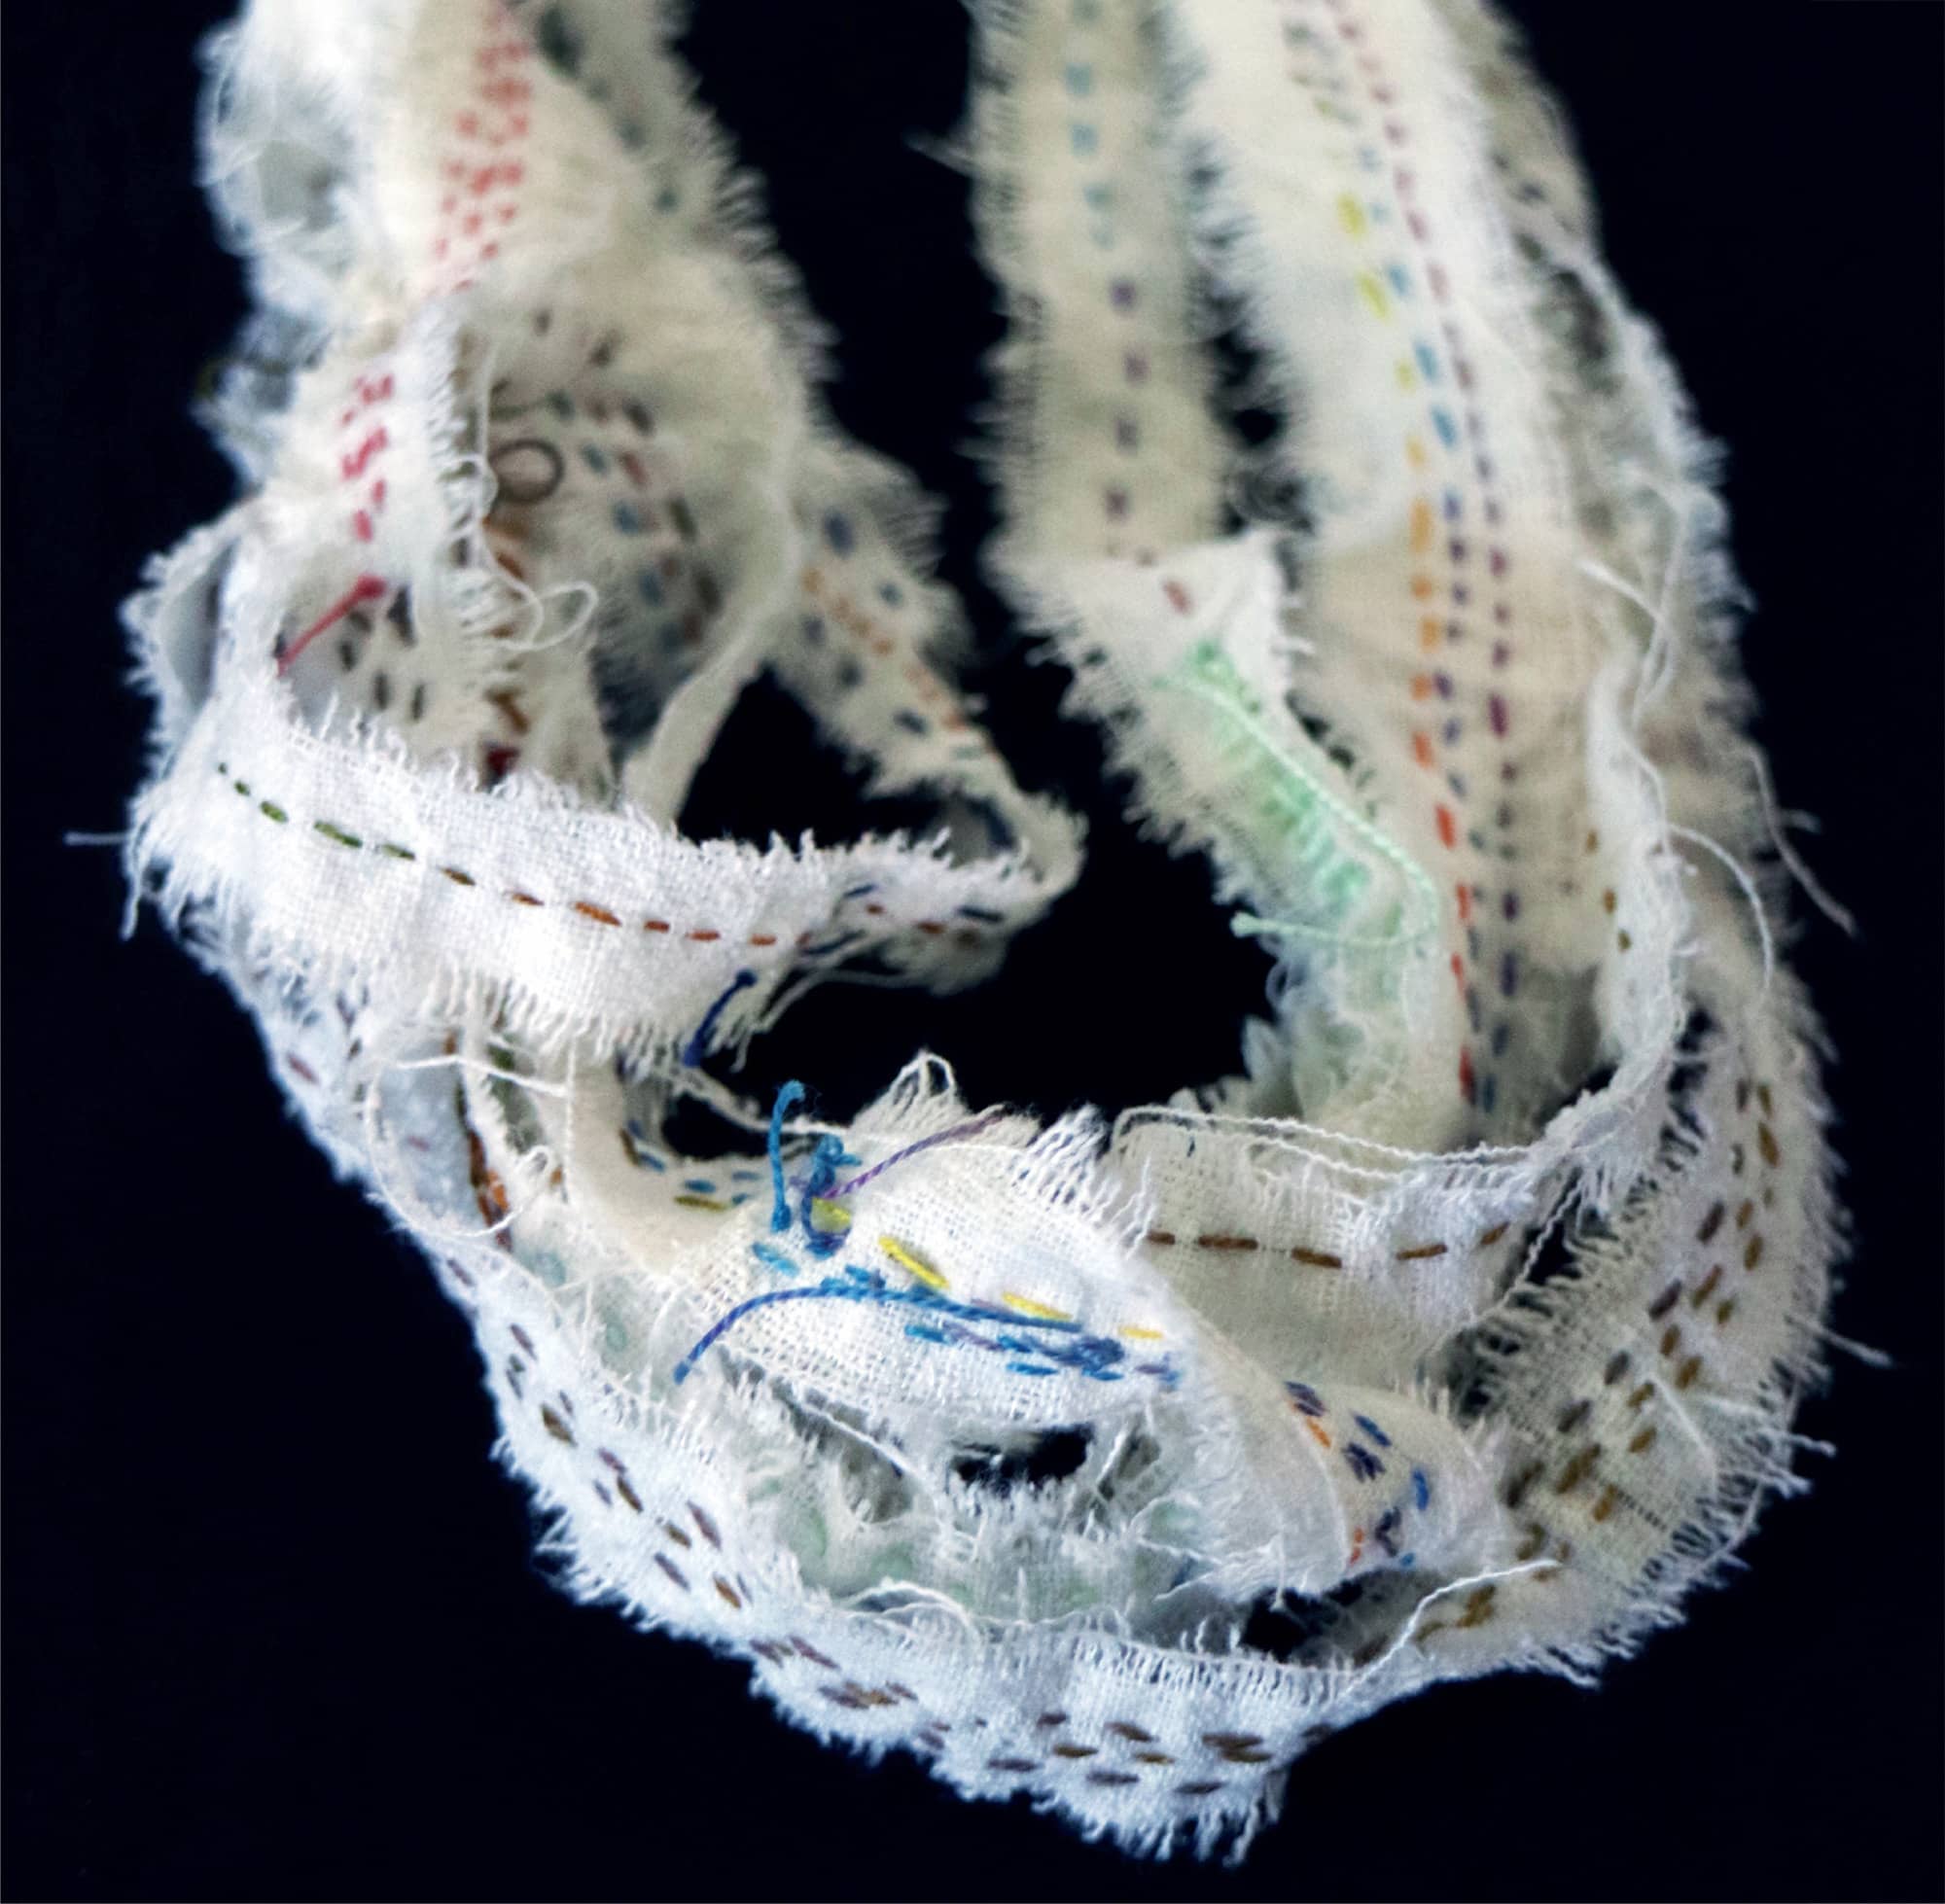
Fabric and thread go with fashion like toast and butter. Often accessories like jewelry are made from stiff materials like metal or wood. But why should those substrates have all the fun? There’s absolutely no reason why fabric can’t also be jewelry.
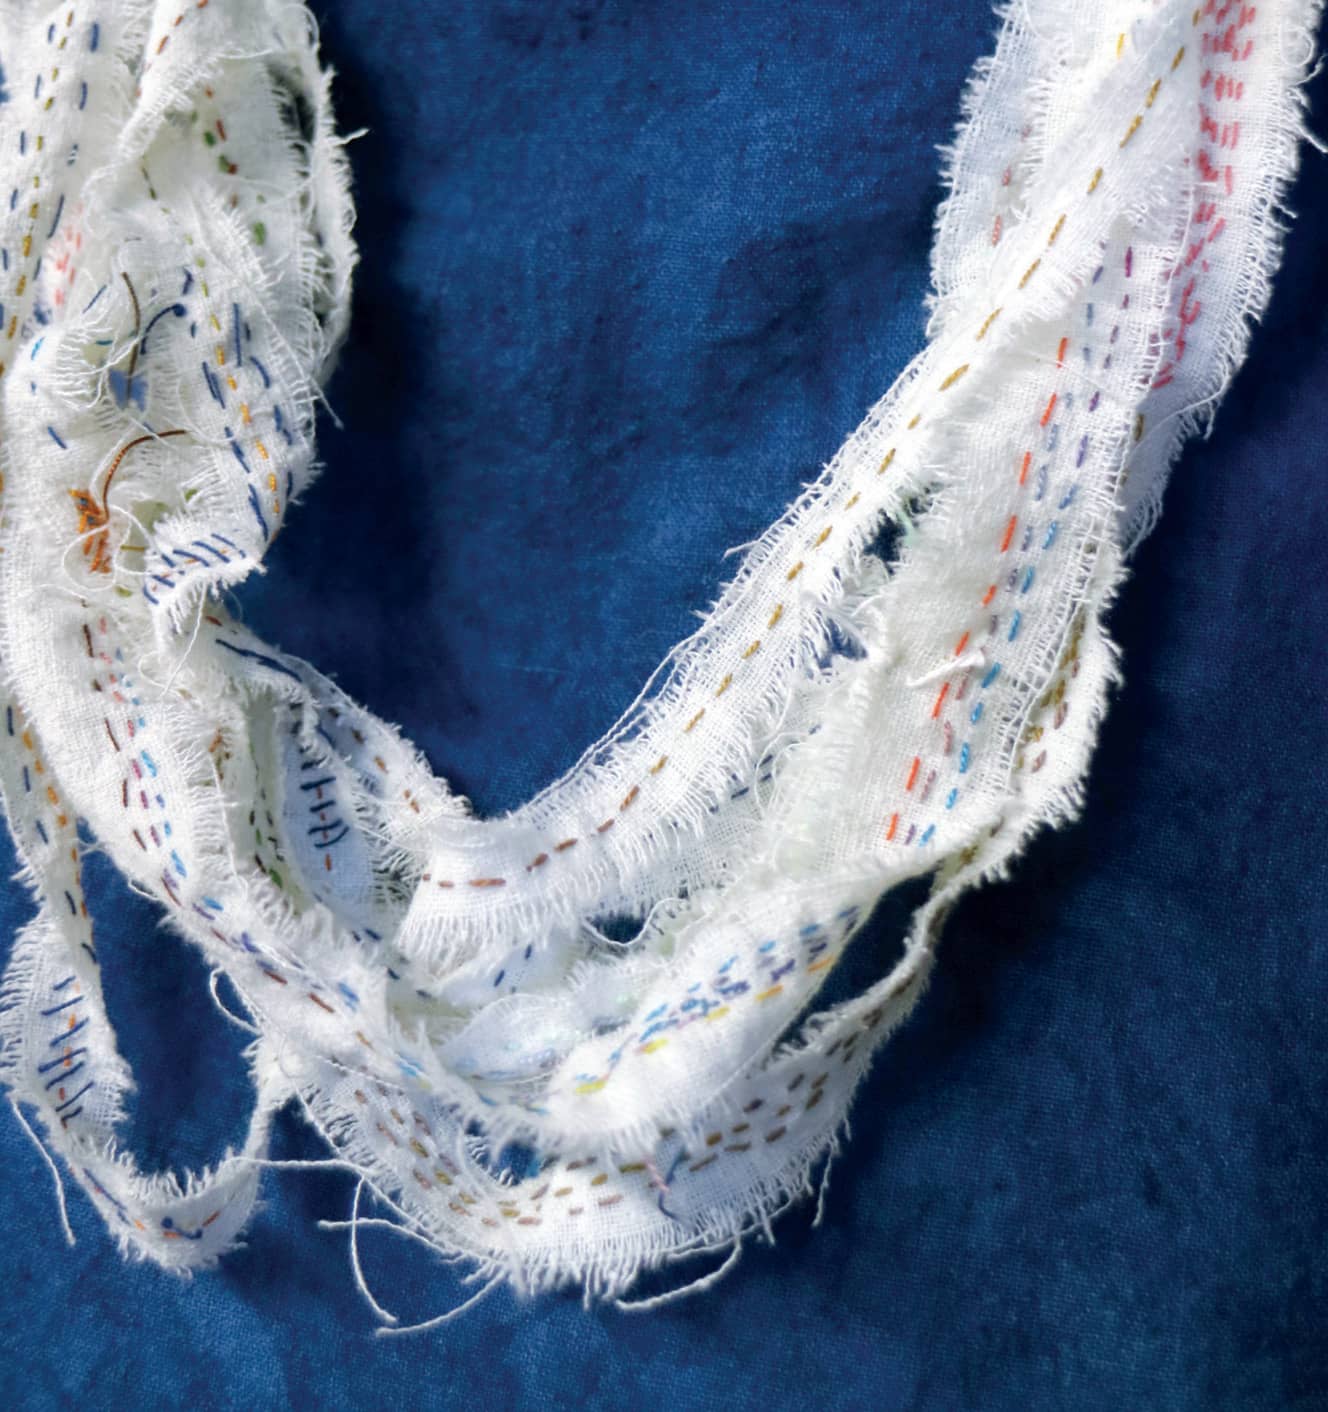
This particular necklace lets fabric be itself. The frayed edges add to the texture. Using different weights of threads and colors also adds to a depth of interest. Only straight stitch is used on this project, showing its ability to stand strong as the primary design stitch. The delicate nature of the fabric demands an easy touch, a slow progression of layered stitching. I love this project because it’s a kind of meditation and practice of patience.
M/A/T/E/R/I/A/L/S
9" × 24" (22.9 × 61 cm) piece of loose-weave fabric (I used raw silk.)
Thread in various weights, from perle 5 to sewing weight, and in variegated colors
Size 22 chenille needle
Size 5 embroidery needle
9" × 21/2" (22.9 × 6.3 cm) piece of fabric
1 Tear the loose-weave fabric into seven 1/2" × 24" (1.3 × 61 cm) strips.
2 Using different weights and colors of threads, and the chenille and embroidery needles, add a running stitch (see here) to each strip (FIGURE A).
Be creative and add running stitches on the diagonal or arrow stitches (see here). Allow the knots in the start of the thread and the tails at the end of the stitching to show. They will add extra texture.
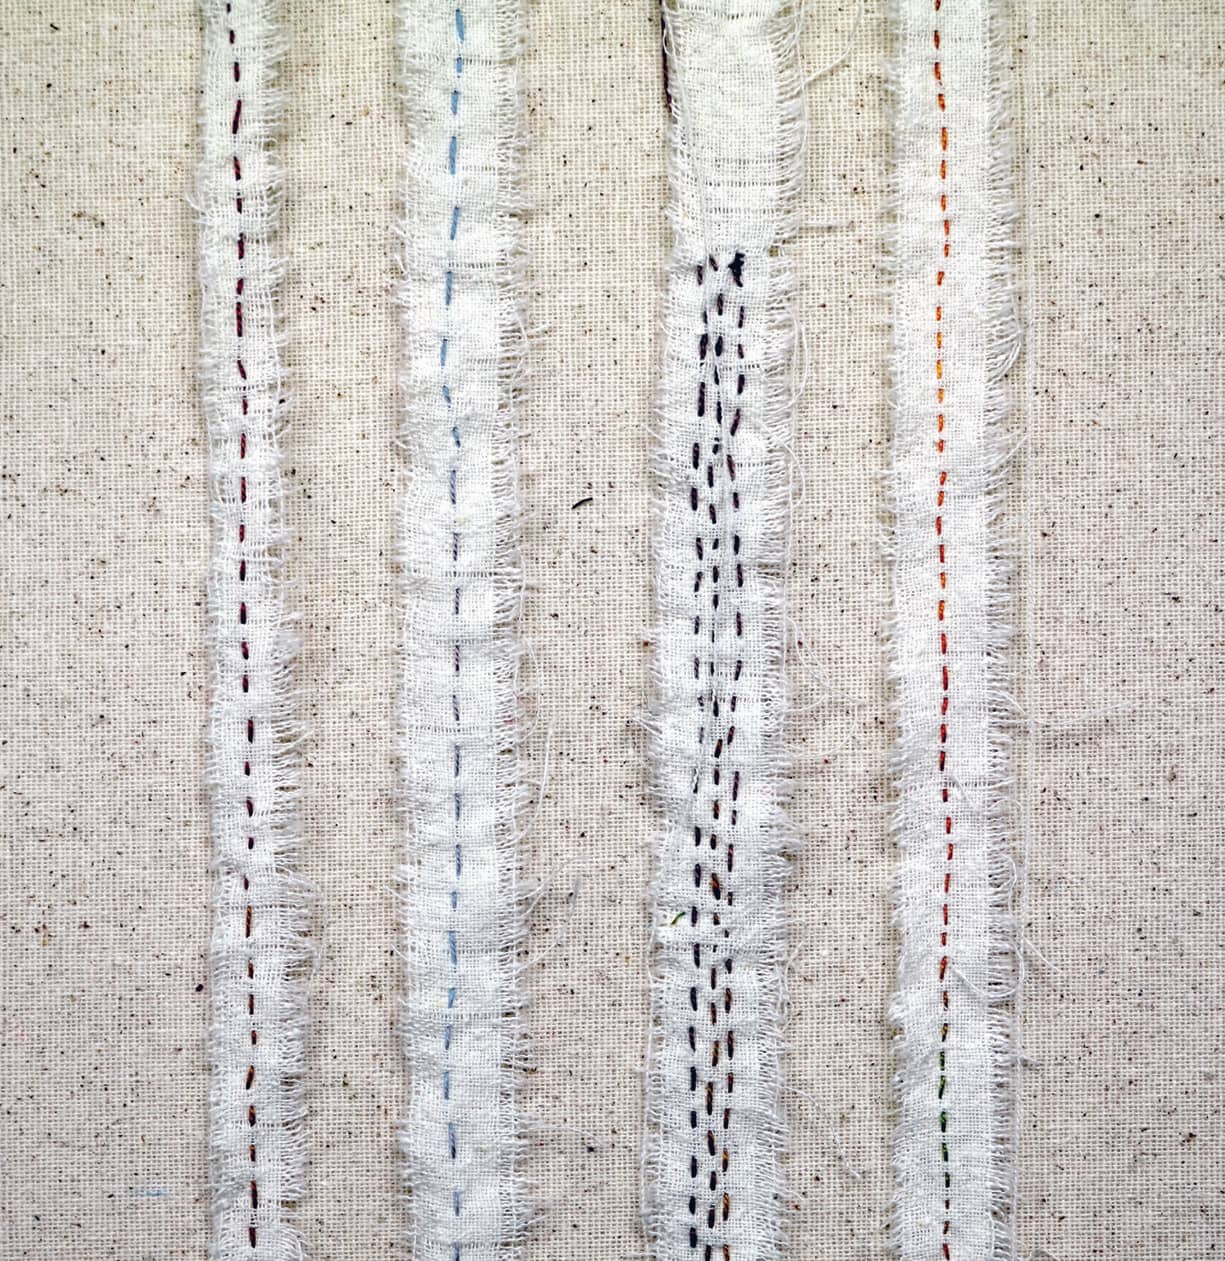
FIGURE [A]
3 Once you have stitched all the strips, line up the ends and arrange them as you like. Take a couple of tack stitches at each end to secure the strips together as well as in two other locations to help them keep their shape (FIGURE B).
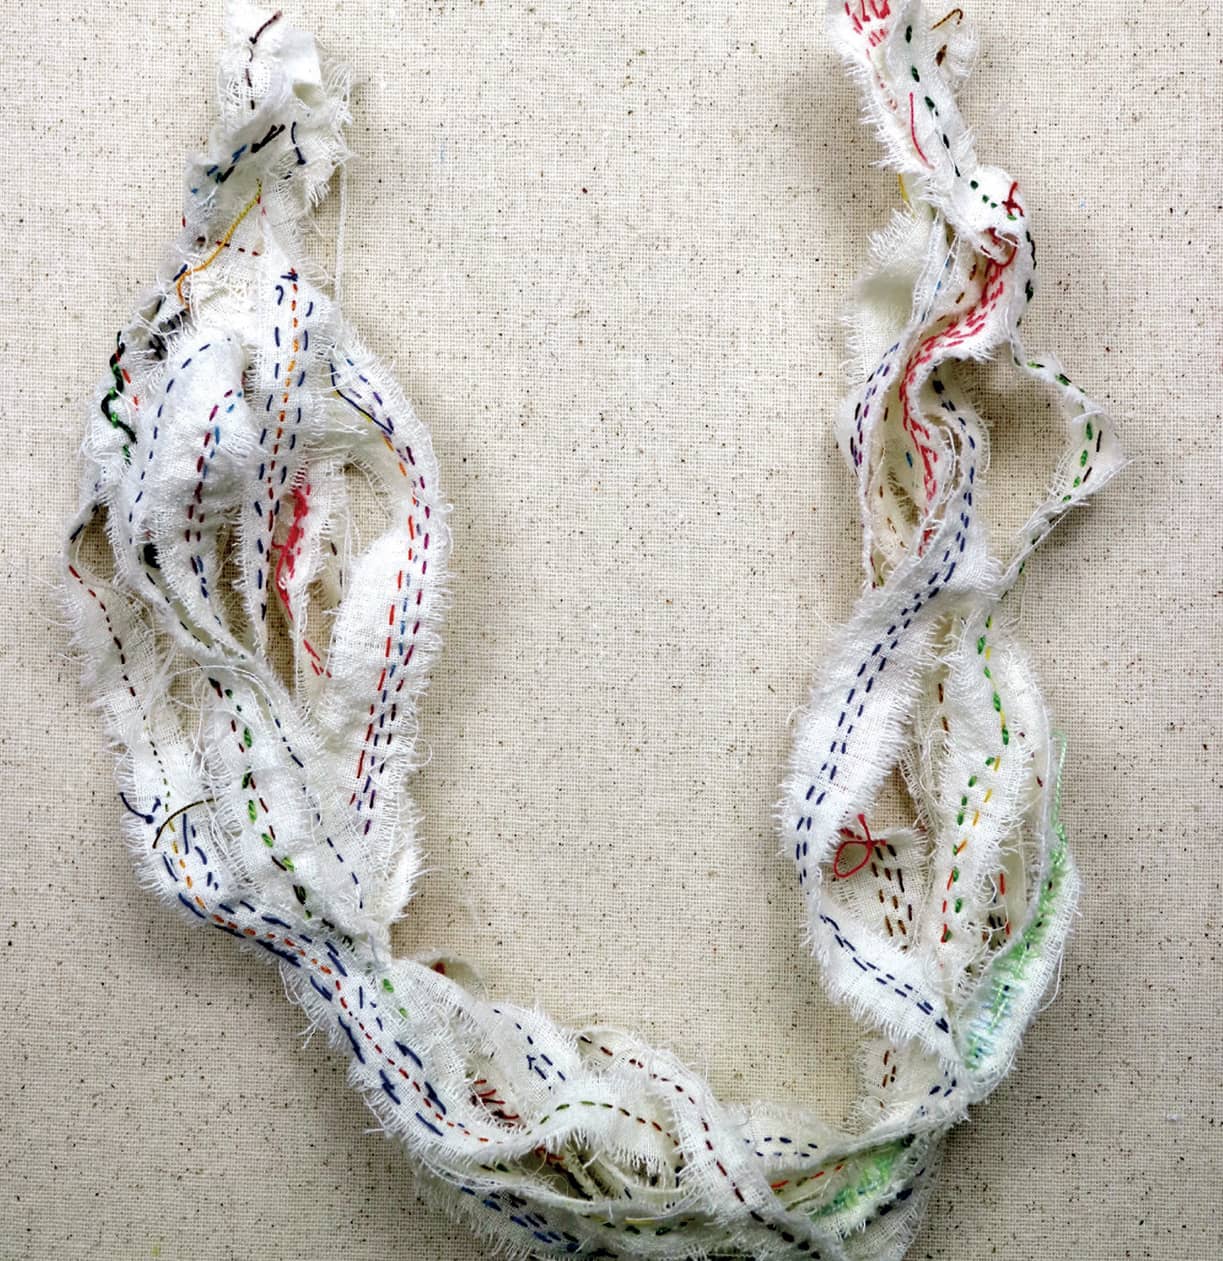
FIGURE [B]
4 Lay about 11/2" (3.8 cm) of the 9" × 21/2" (22.9 × 6.3 cm) piece of fabric over one edge (FIGURE C).
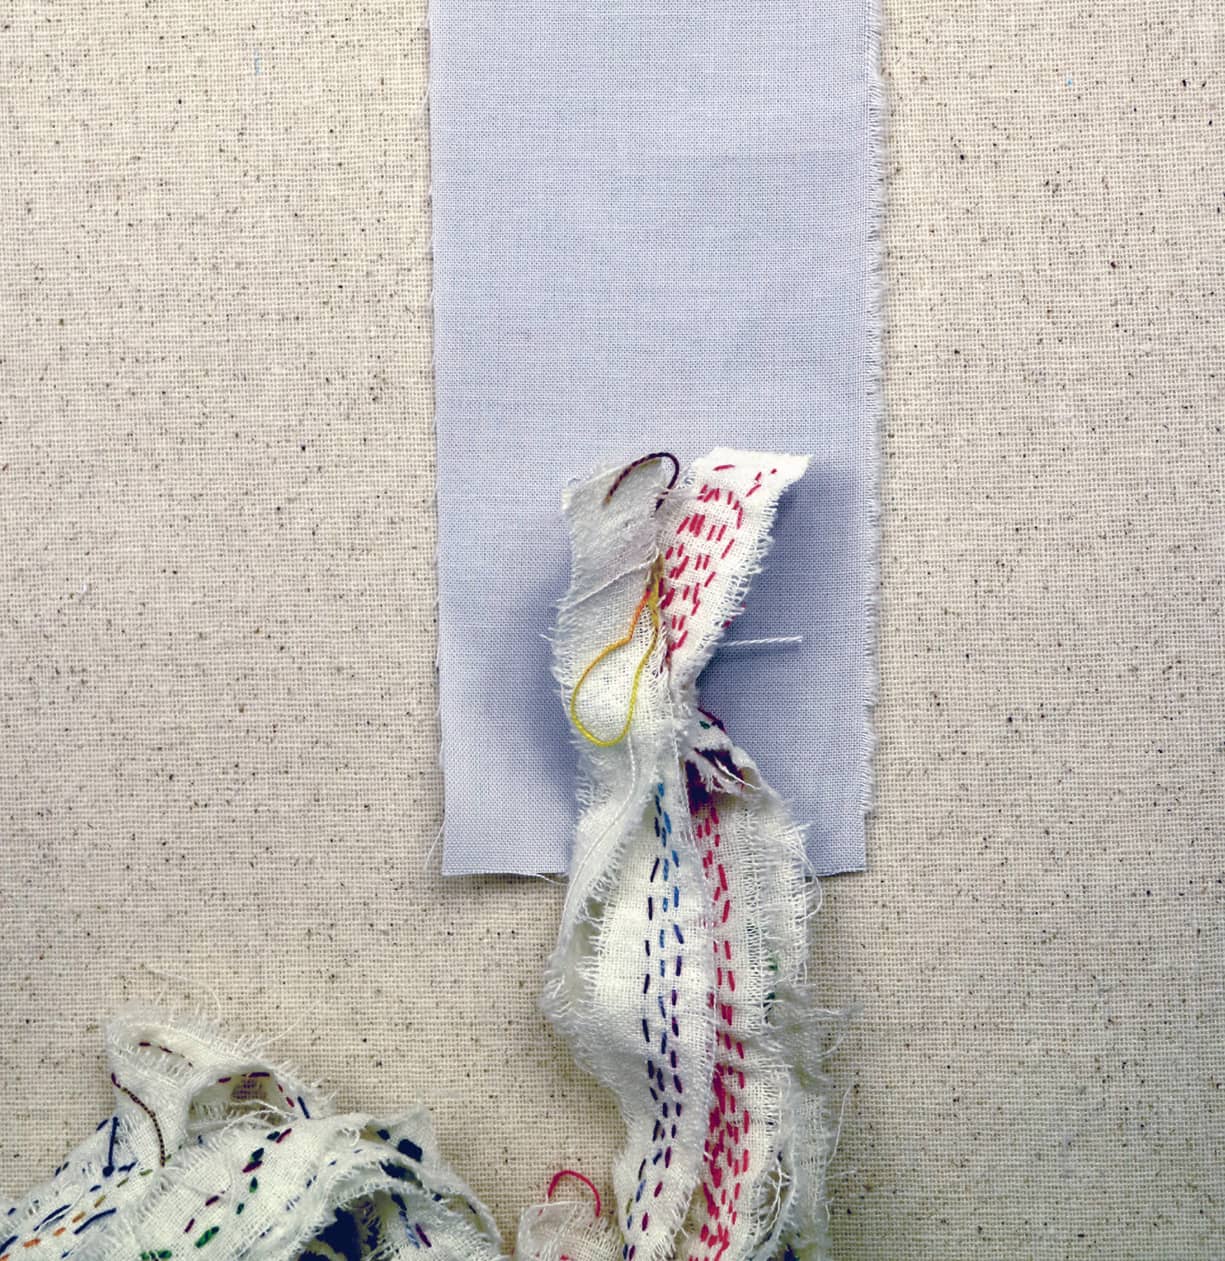
FIGURE [C]
Fold the fabric over and stitch it closed (FIGURE D). Repeat on the other side.
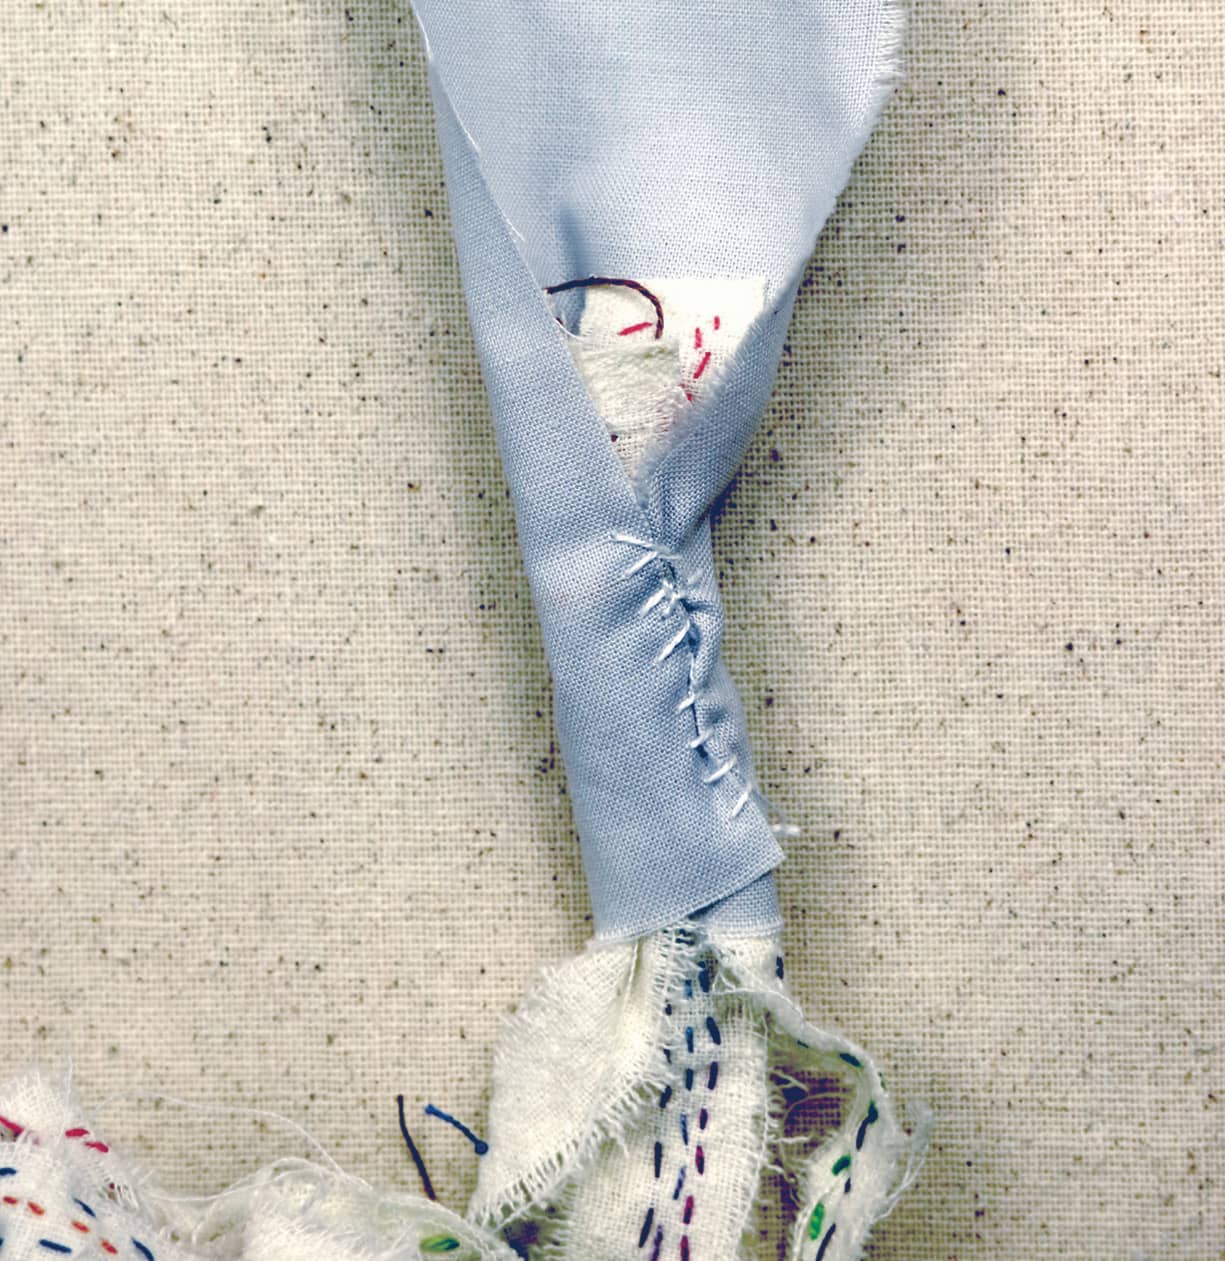
FIGURE [D]
Boho Collage Coasters
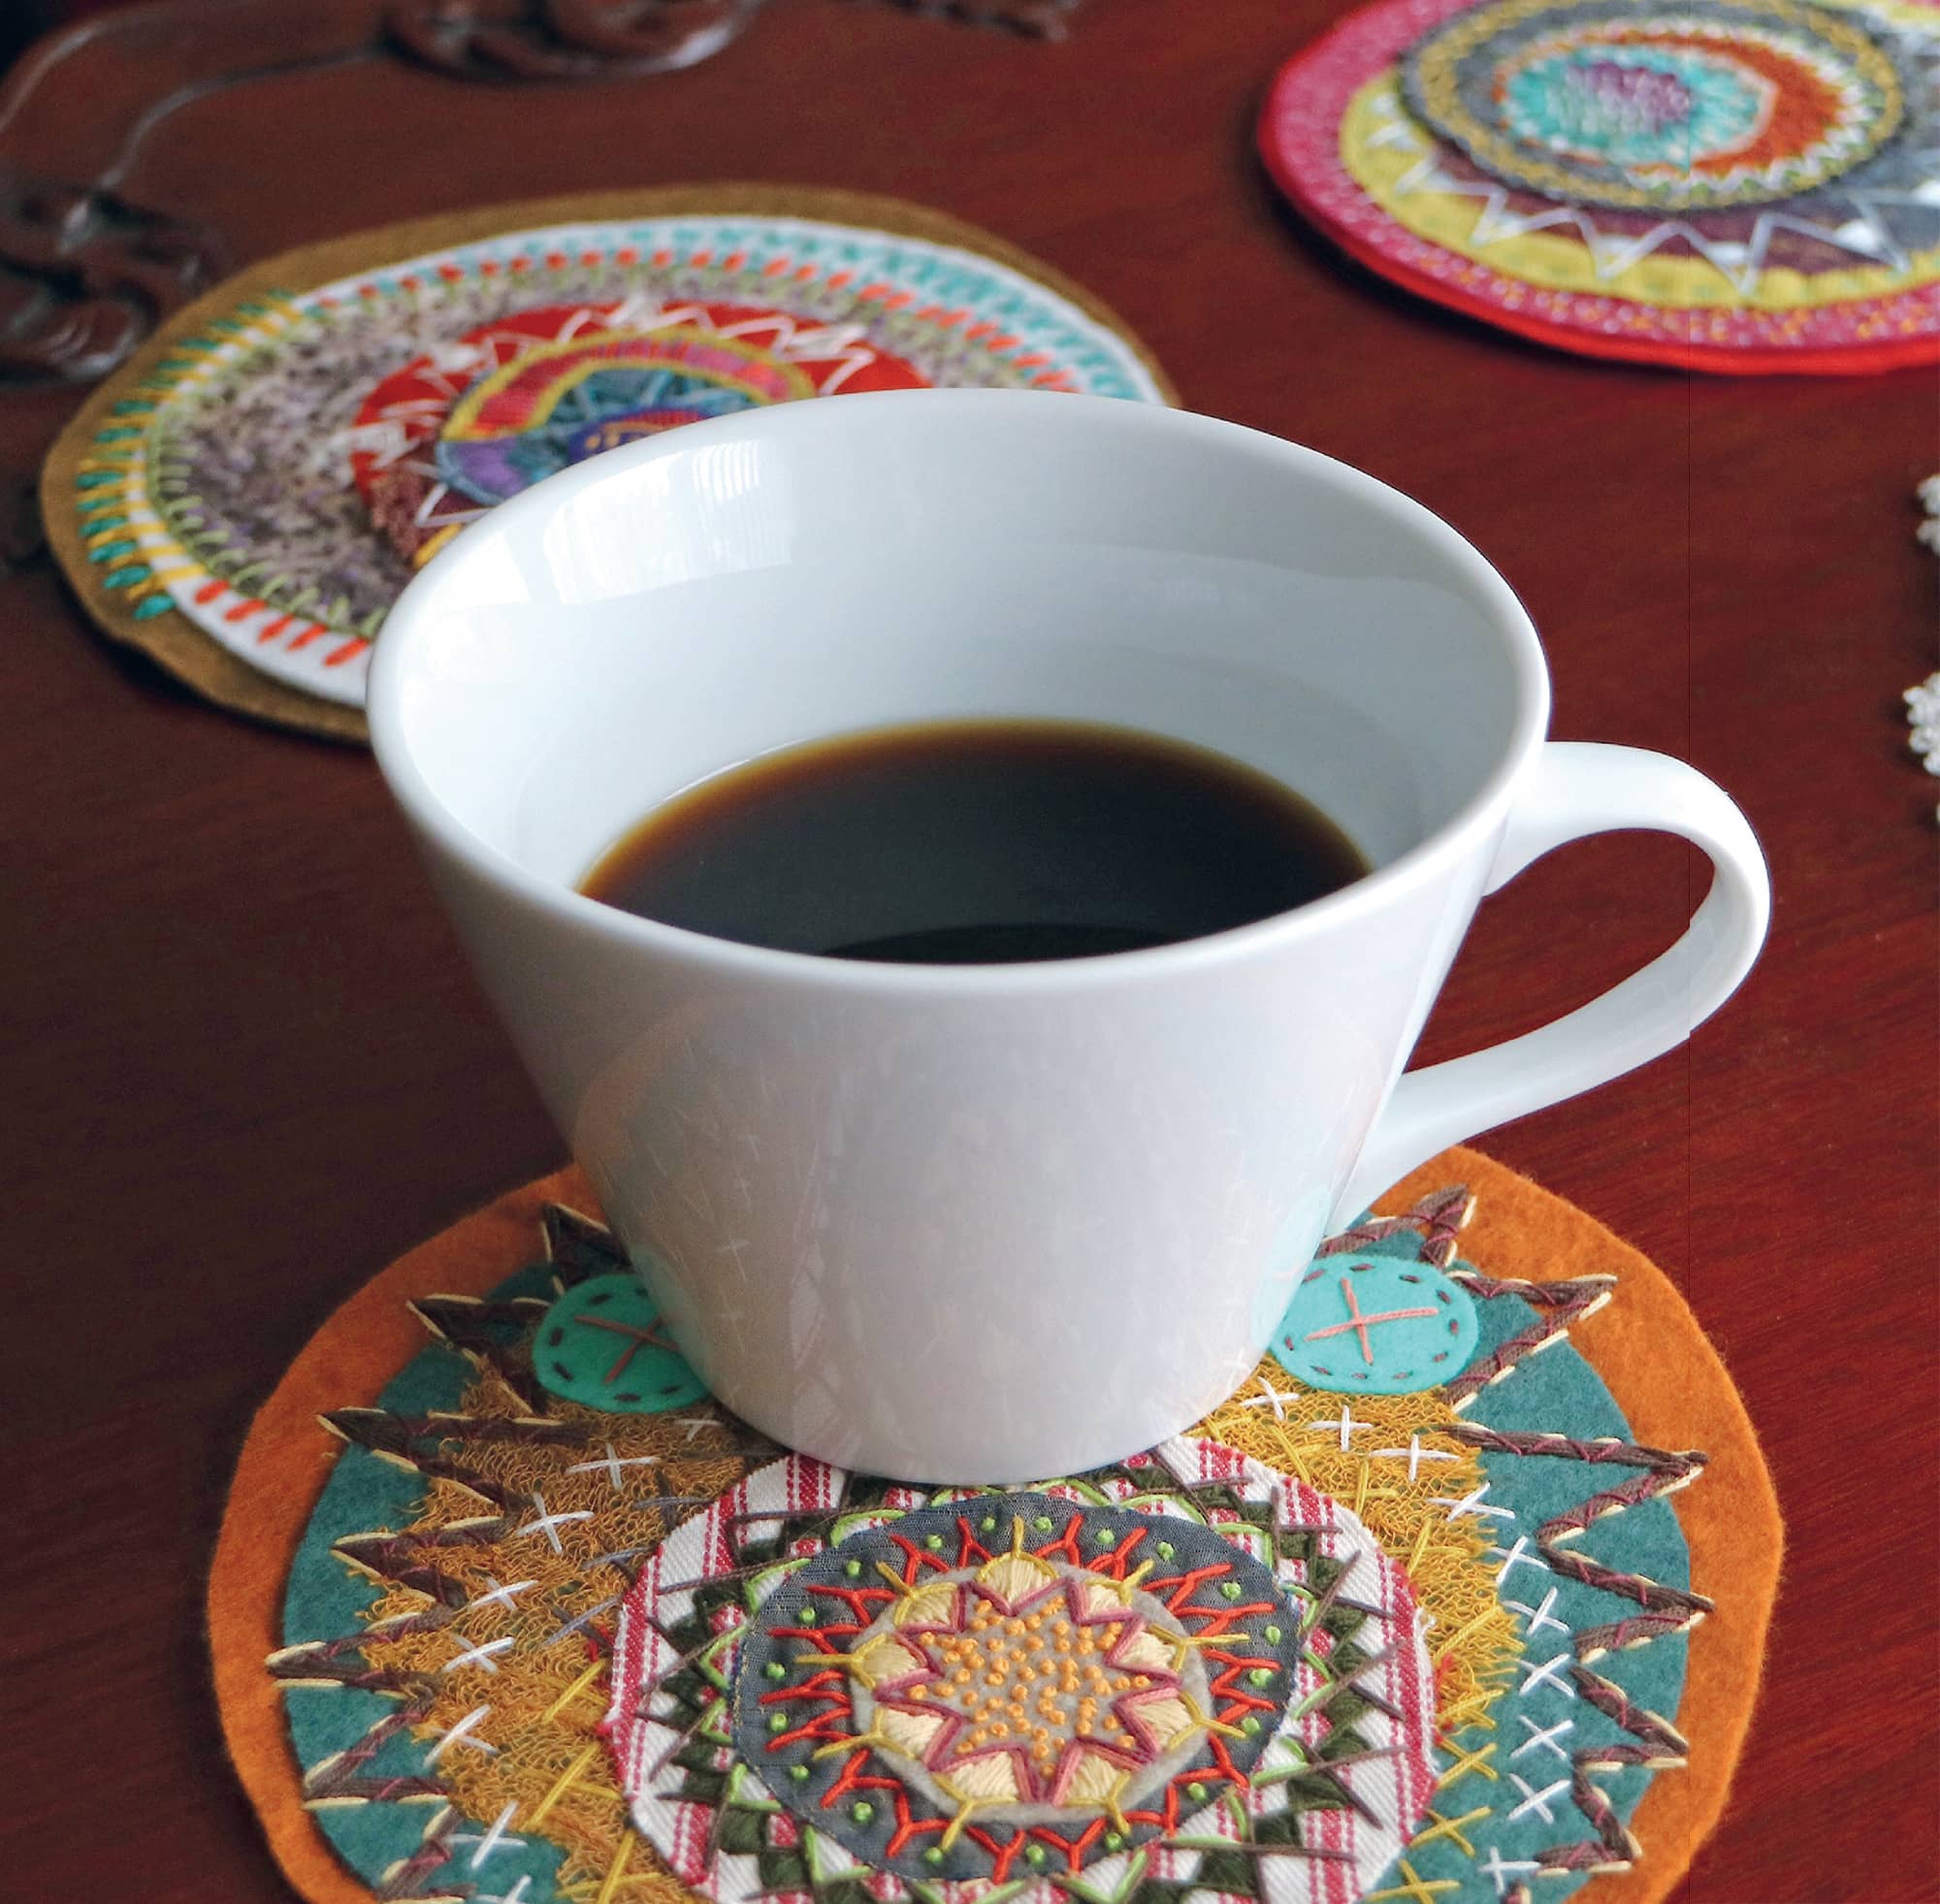
Every day for me begins with an enormous cup of coffee. I’m so not a morning person, and this magical drink snaps me out of the grumps and into a pleasant human being. My love for coffee has led to a strong affection for coffee cups and things to set them on. Something so awesome should have a pretty perch, don’t you agree?
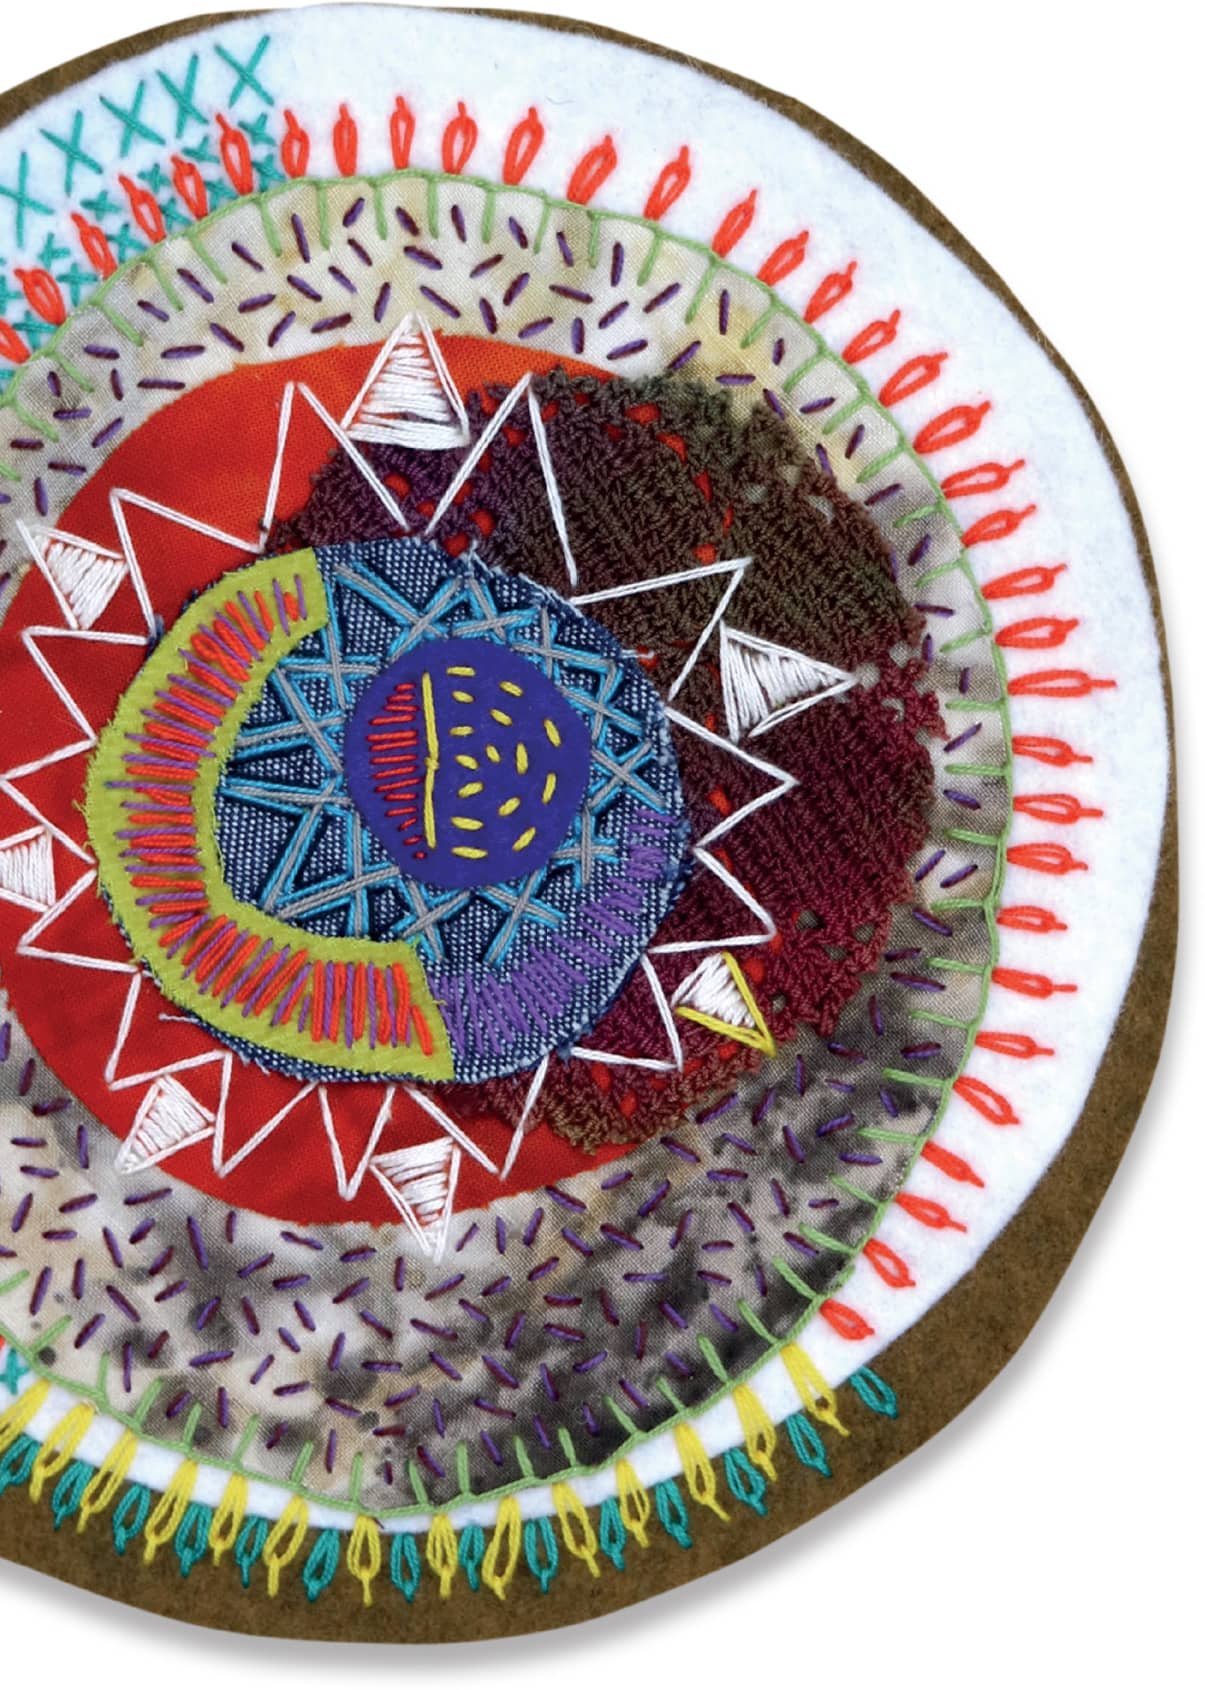
My studio is in no short supply of fabric scraps, so this project gathers them and uses improv stitching (see here) to create a special place to park your morning cup of coffee.
6 to 8 pieces of fabric of various weights and fiber content (for example, felt, home décor fabrics, silk, gauze, or cheesecloth)
Sewing machine–weight thread or pins (for basting)
Floss or thin thread (I used two strands of size 16 perle cotton.)
Size 5 embroidery needle
1 Scan and print the templates per the instructions shown here. Cut out the templates with scissors. Use the fabric marking pen to trace the templates onto the wrong side of each fabric in the following quantities:
Two each of templates 1, 2, and 5
One each of templates 3 and 4
2 For the circles traced from template 1: Cut one exactly the size of the template and cut the second circle about 1/4" outside the traced line so it will be a little bigger than the template (FIGURE A).
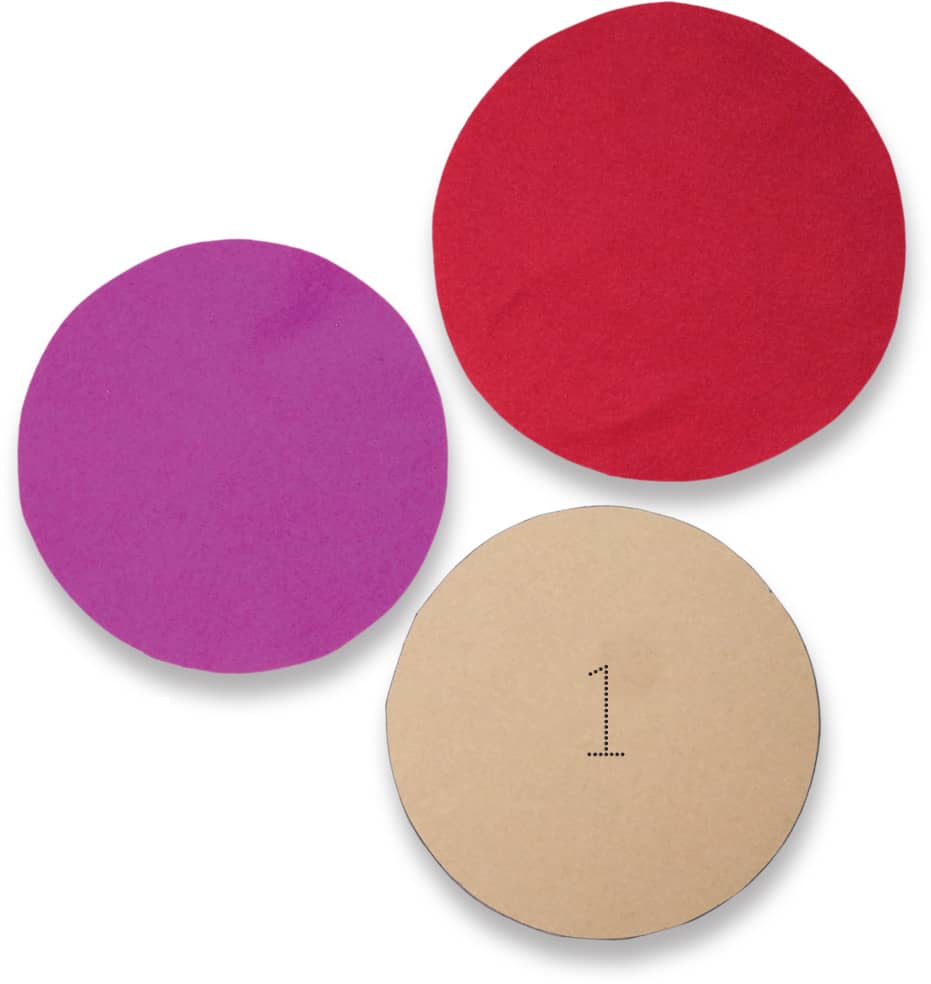
FIGURE [A]
For template 2, cut one circle exactly the size of the template and one circle just inside the traced line so it’s a little smaller than the template (FIGURE B). I used dyed cheesecloth for my smaller circle to add textural interest.
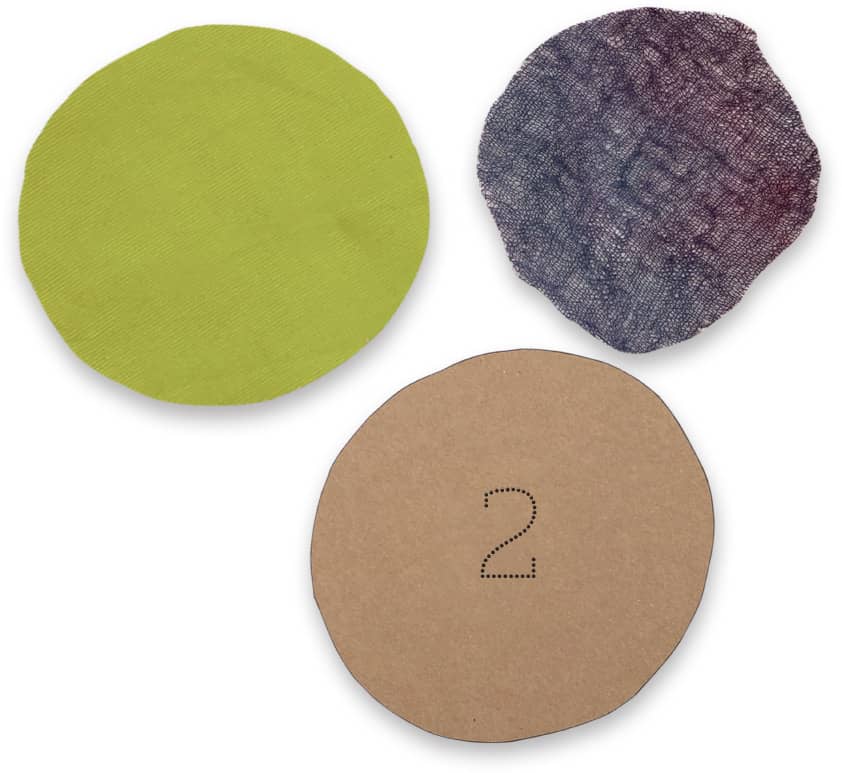
FIGURE [B]
For templates 3 and 4, cut your fabrics on the traced line (FIGURE C).
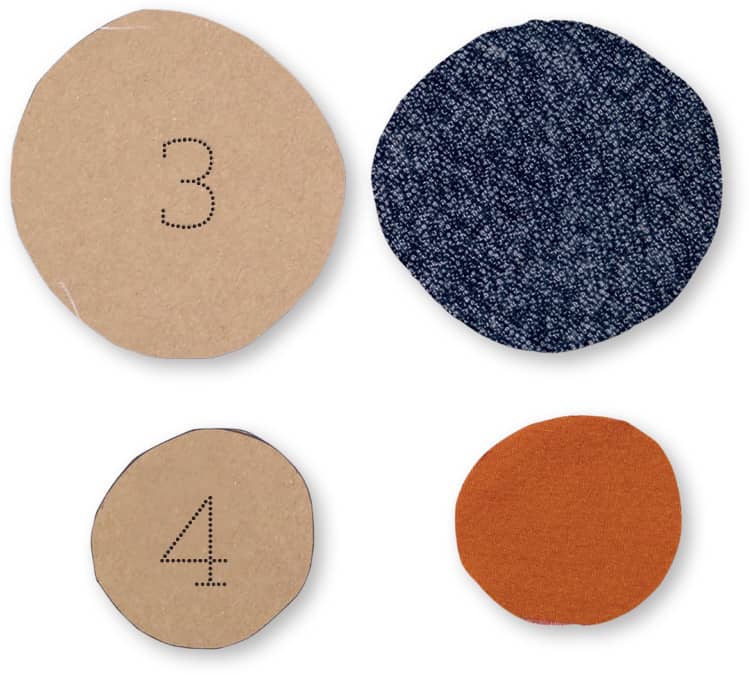
FIGURE [C]
For template 5, cut one circle exactly the size of the template and one circle just inside the traced line so it’s a little smaller than the template (FIGURE D).
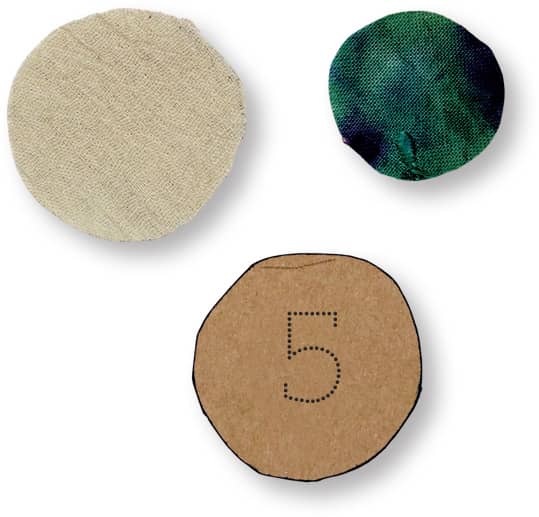
FIGURE [D]
3 Stack the fabrics from largest to smallest, adjusting the arrangement until you’re happy with it. Push them off-center to create visual interest (FIGURE E). Baste-stitch the layers together or pin them to hold them in place while you work.
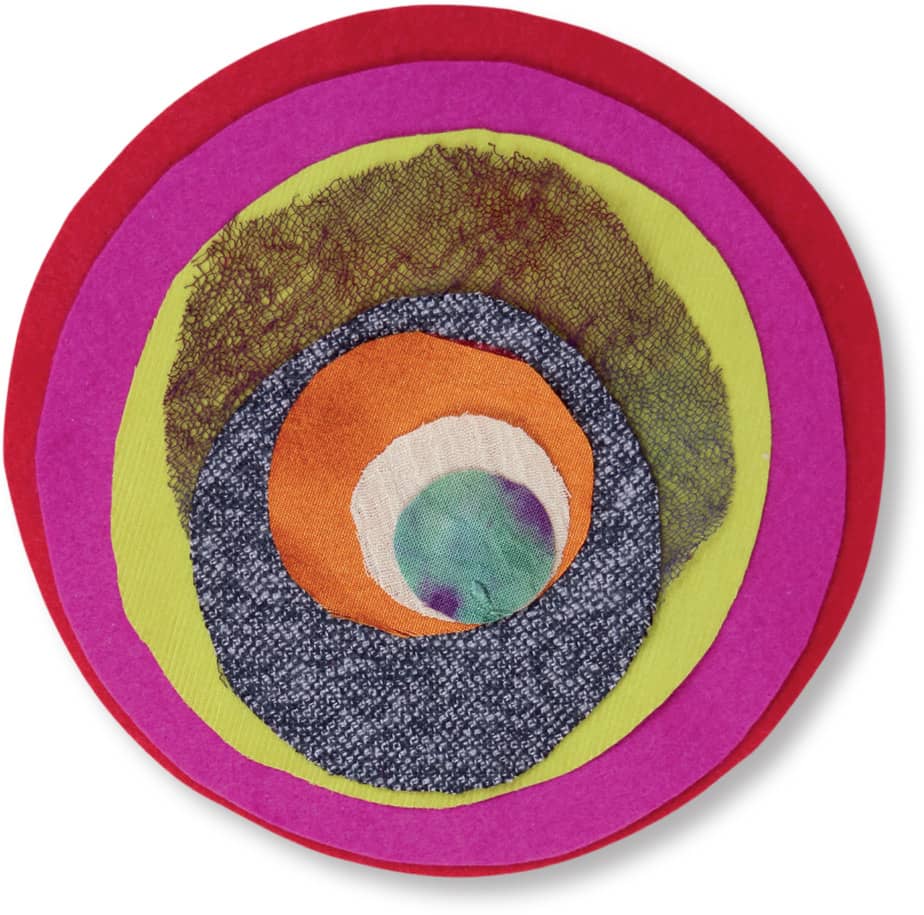
FIGURE [E]
4 Using the tips and tricks from the improv stitching exercises (see here), work from the center of the coaster outward to create your stitching composition. Remember to add stitching first to the outer edges of each shape and then go back and fill in (FIGURE F).
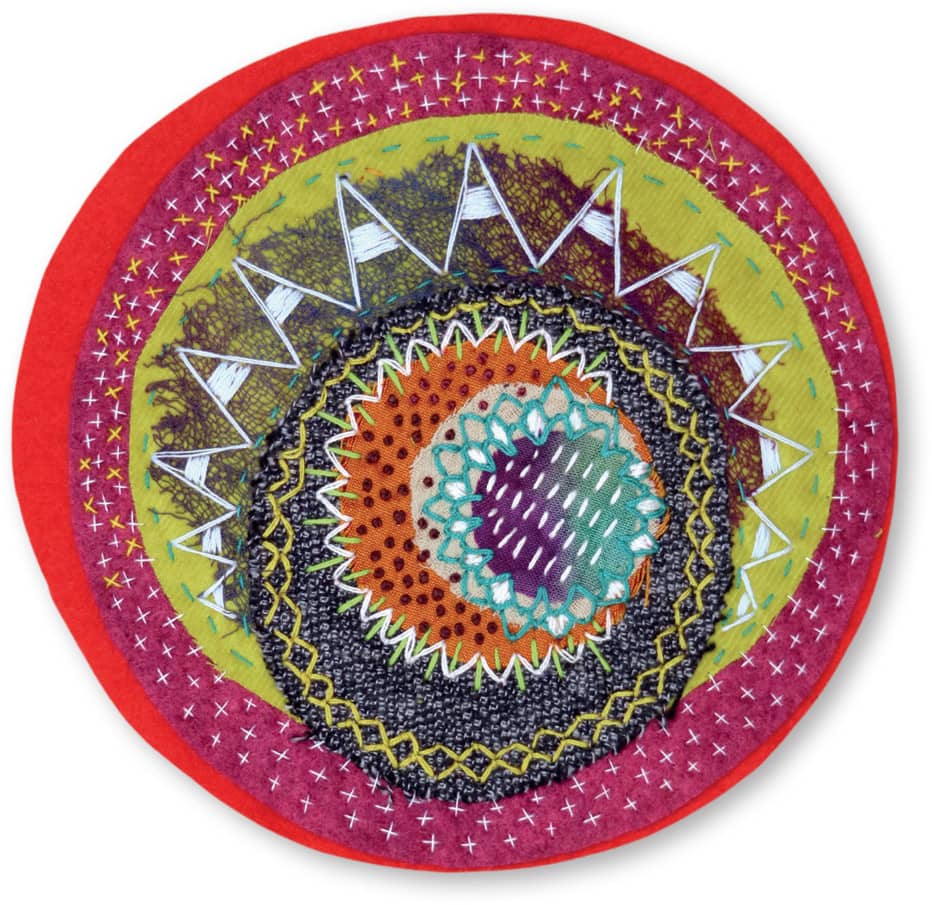
FIGURE [F]
Coffee-Addict Kitchen Towel
Whether we realize it or not, our days contain rituals. Small ones, such as drinking our morning coffee, is an integral part of how we choose to begin each day.
It’s no secret that I am a coffee addict. I say that I can’t exist without it, and while it’s true that the caffeine is much appreciated, it’s the way I signal that my day is ready to begin. It forces a pause in the morning when the instinct is to hurry and frantically go about the daily tasks.
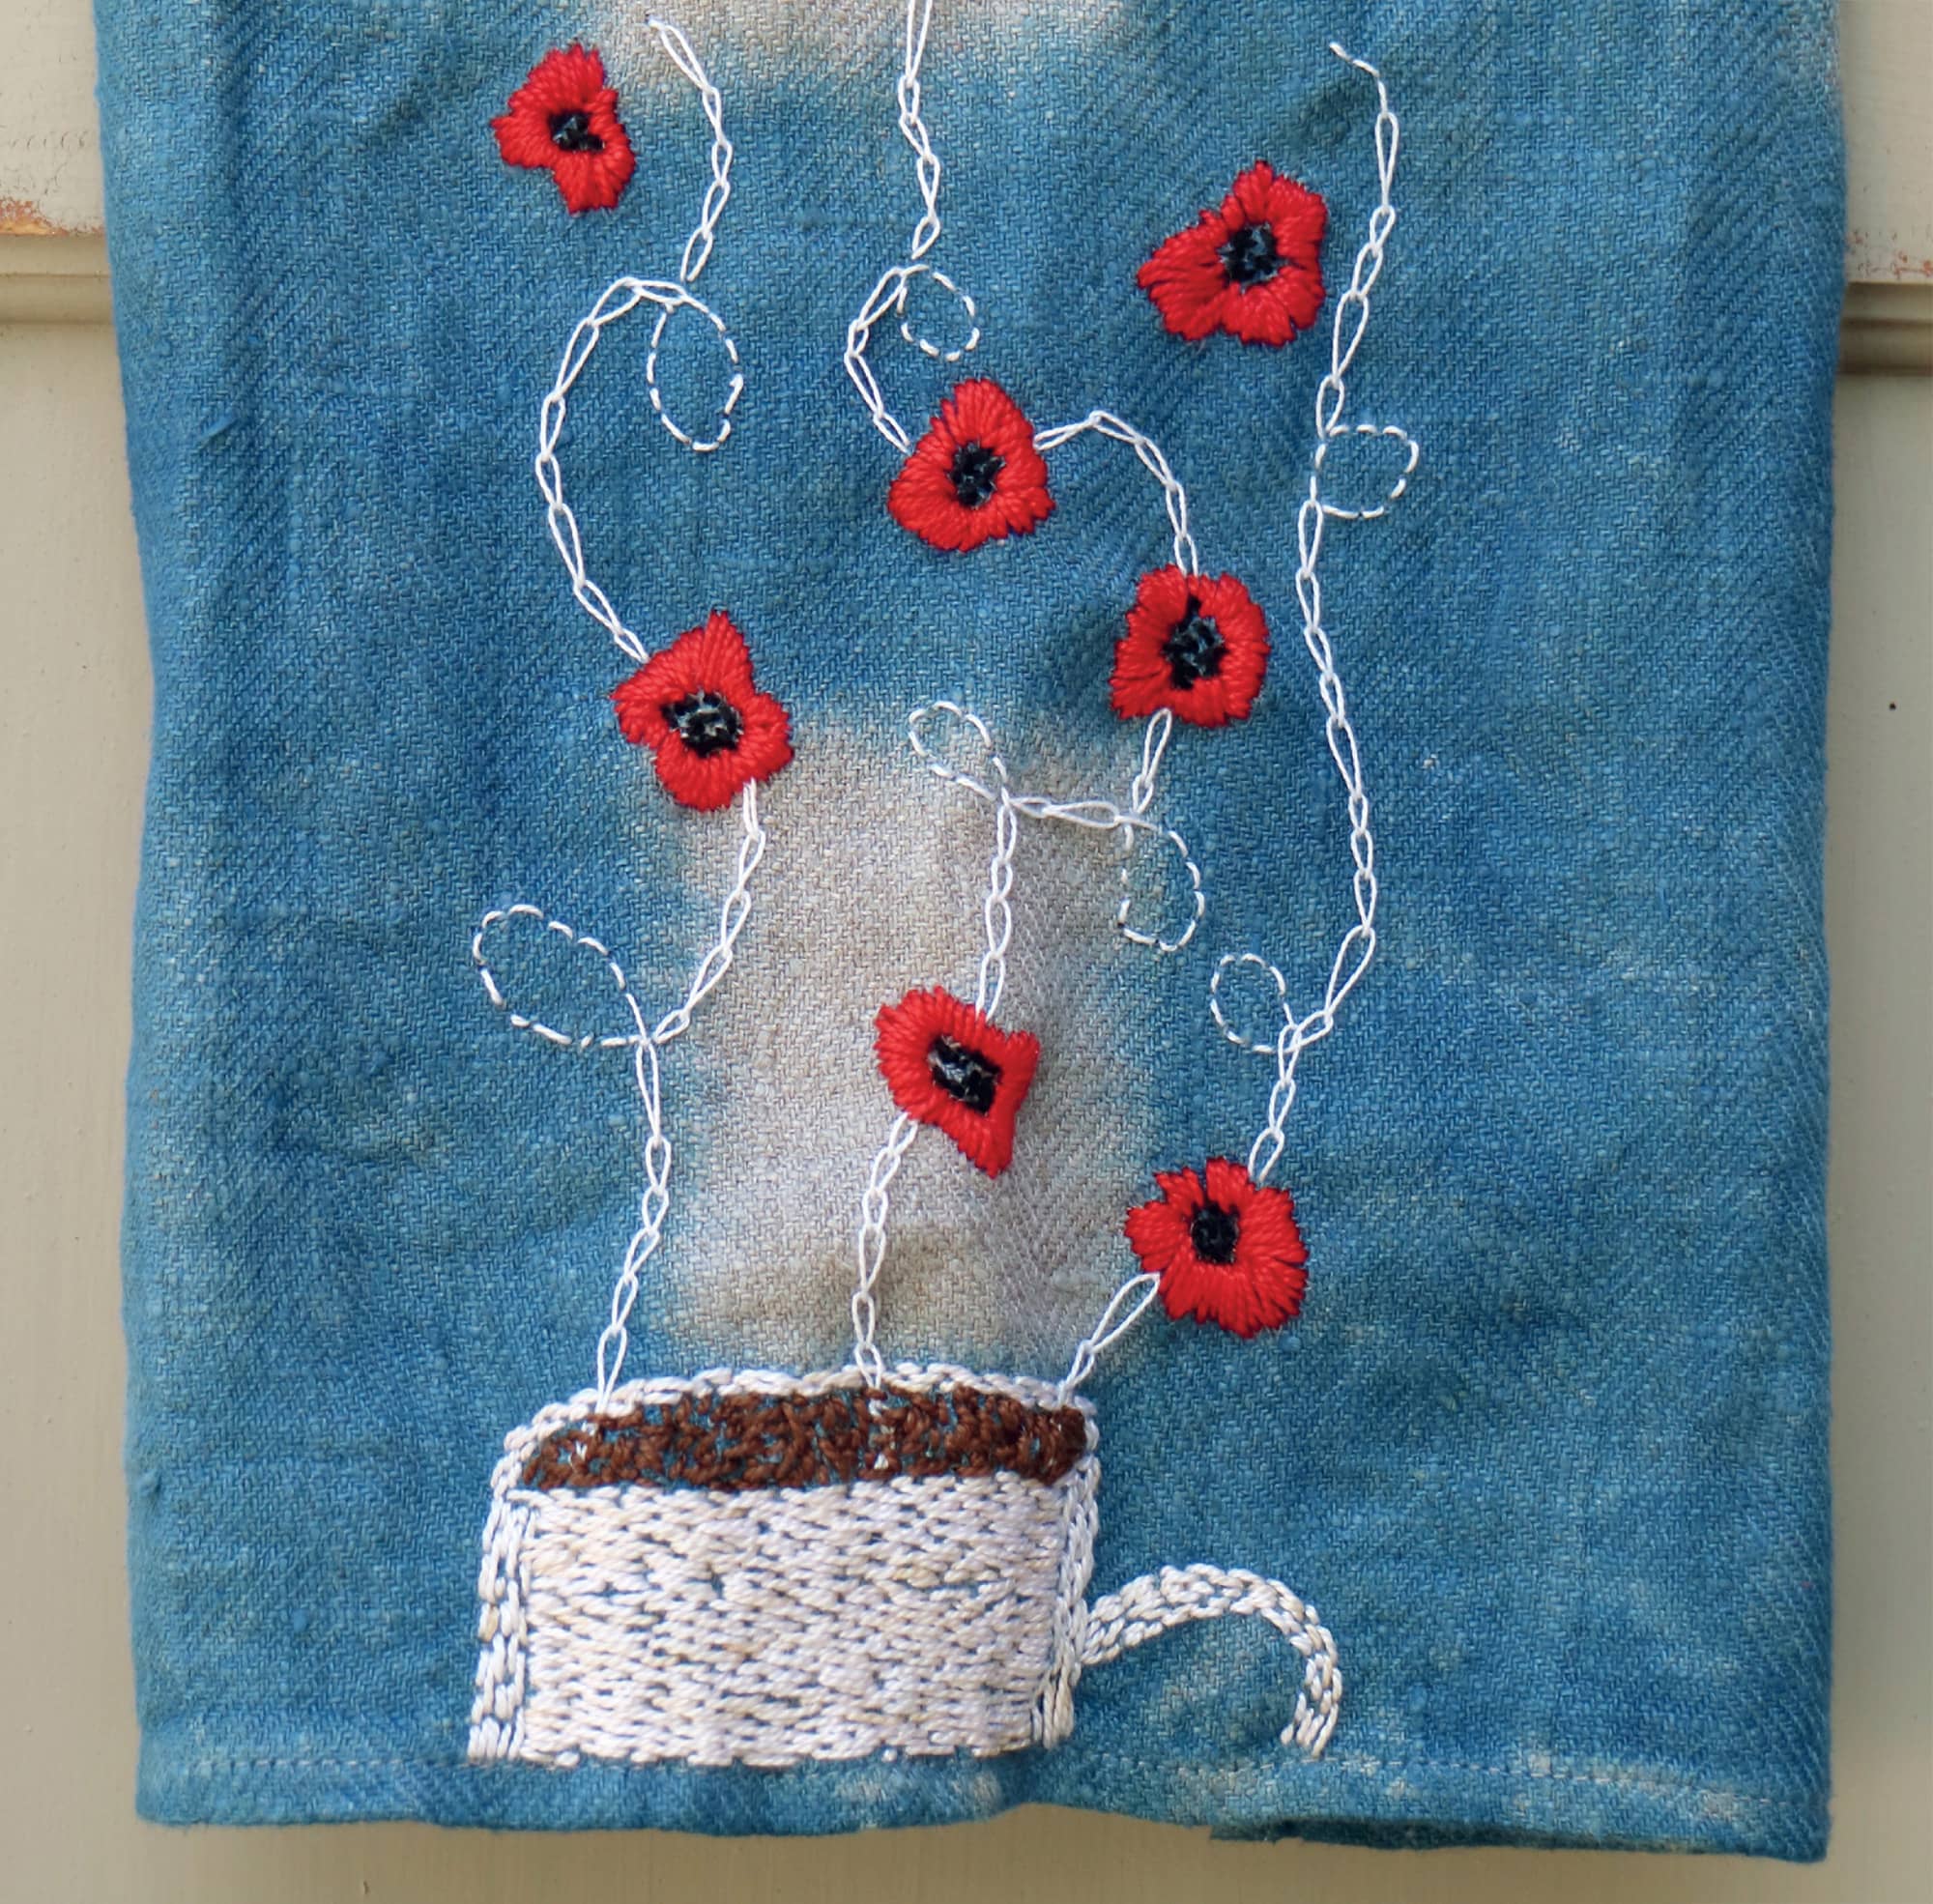
This kitchen towel is a “company” towel—you know the kind. The one that hangs in the kitchen to be admired. It’s made even more special by some dye treatments to both the towel and one of the threads used. The inspiration for the poppies stitched between the steam swirls comes from my love of Meakin coffee pots, beautifully decorated ceramic pots bearing a wide range of designs, my favorite of which is the poppy pot.
This little towel bears so much of what I love about textiles—pattern creation, dyeing, stitching, and adding personal imagery. It’s a grand way to recognize a daily ritual that many of us enjoy.
M/A/T/E/R/I/A/L/S
Jacquard indigo dye kit
28" × 17" (71 × 43 cm) natural color linen towel
Brewed coffee
1 skein white, size 5 perle cotton embroidery thread
Scissors
Embroidery transfer paper
Coffee-Addict Kitchen Towel template
Dull-pointed stylus
Embroidery thread in the following sizes and colors:
white, size 8 cotton perle brown, size 5 cotton perle black, size 5 cotton perle red, size 5 cotton perle
Size 20 chenille needle
1 Using indigo dye might sound mysterious and impossible to accomplish, but a dye kit makes it a snap. You’ll have all the ingredients you need to dye the pattern shown on the towel. Follow the directions on the package. The kit makes a 4-gallon (4 L) vat of dye. Have a dye day with friends and experiment with all the different ways to apply this dye to textiles!
2 Add a special touch to the thread used on the towel by coffee dyeing white size 5 perle cotton thread. Brew some strong coffee and soak the thread in it overnight. This is not a true dye—it’s more of a stain—and although the color will be pale, it will have a lovely ecru shade (FIGURE A).
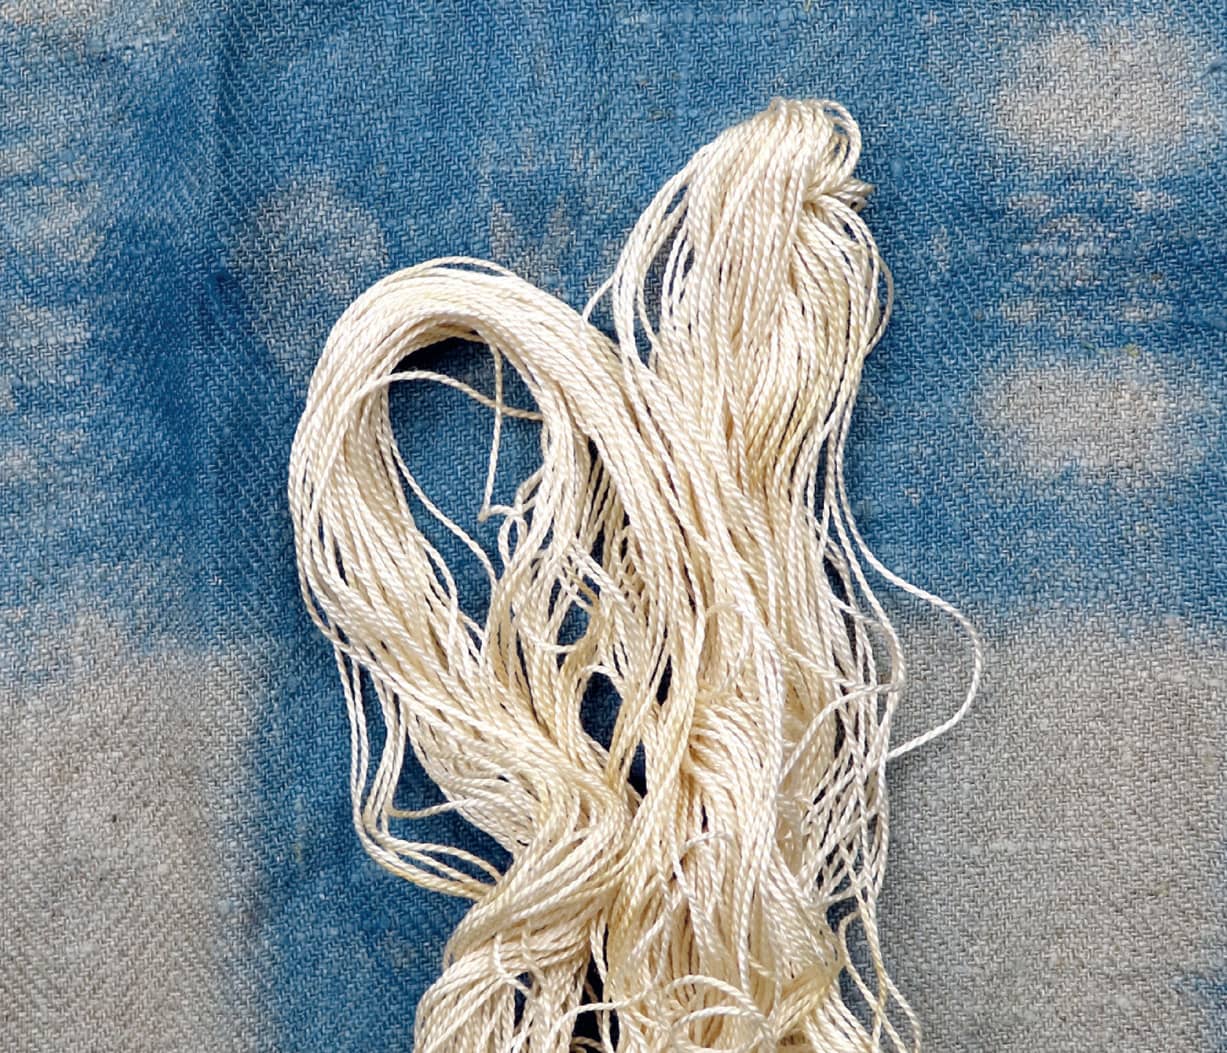
FIGURE [A]
3 Fold the towel into thirds lengthwise. The stitched pattern will be centered on the middle fold.
4 Scan and print the templates per the instructions shown here. With scissors, cut a piece of transfer paper to the size of the stitch pattern on the template. Place the transfer paper beneath the stitch pattern, lining it up with the edge of the towel. Using a blunt stylus, trace over the pattern. Apply firm pressure so that the pattern will transfer to the fabric (FIGURE B).
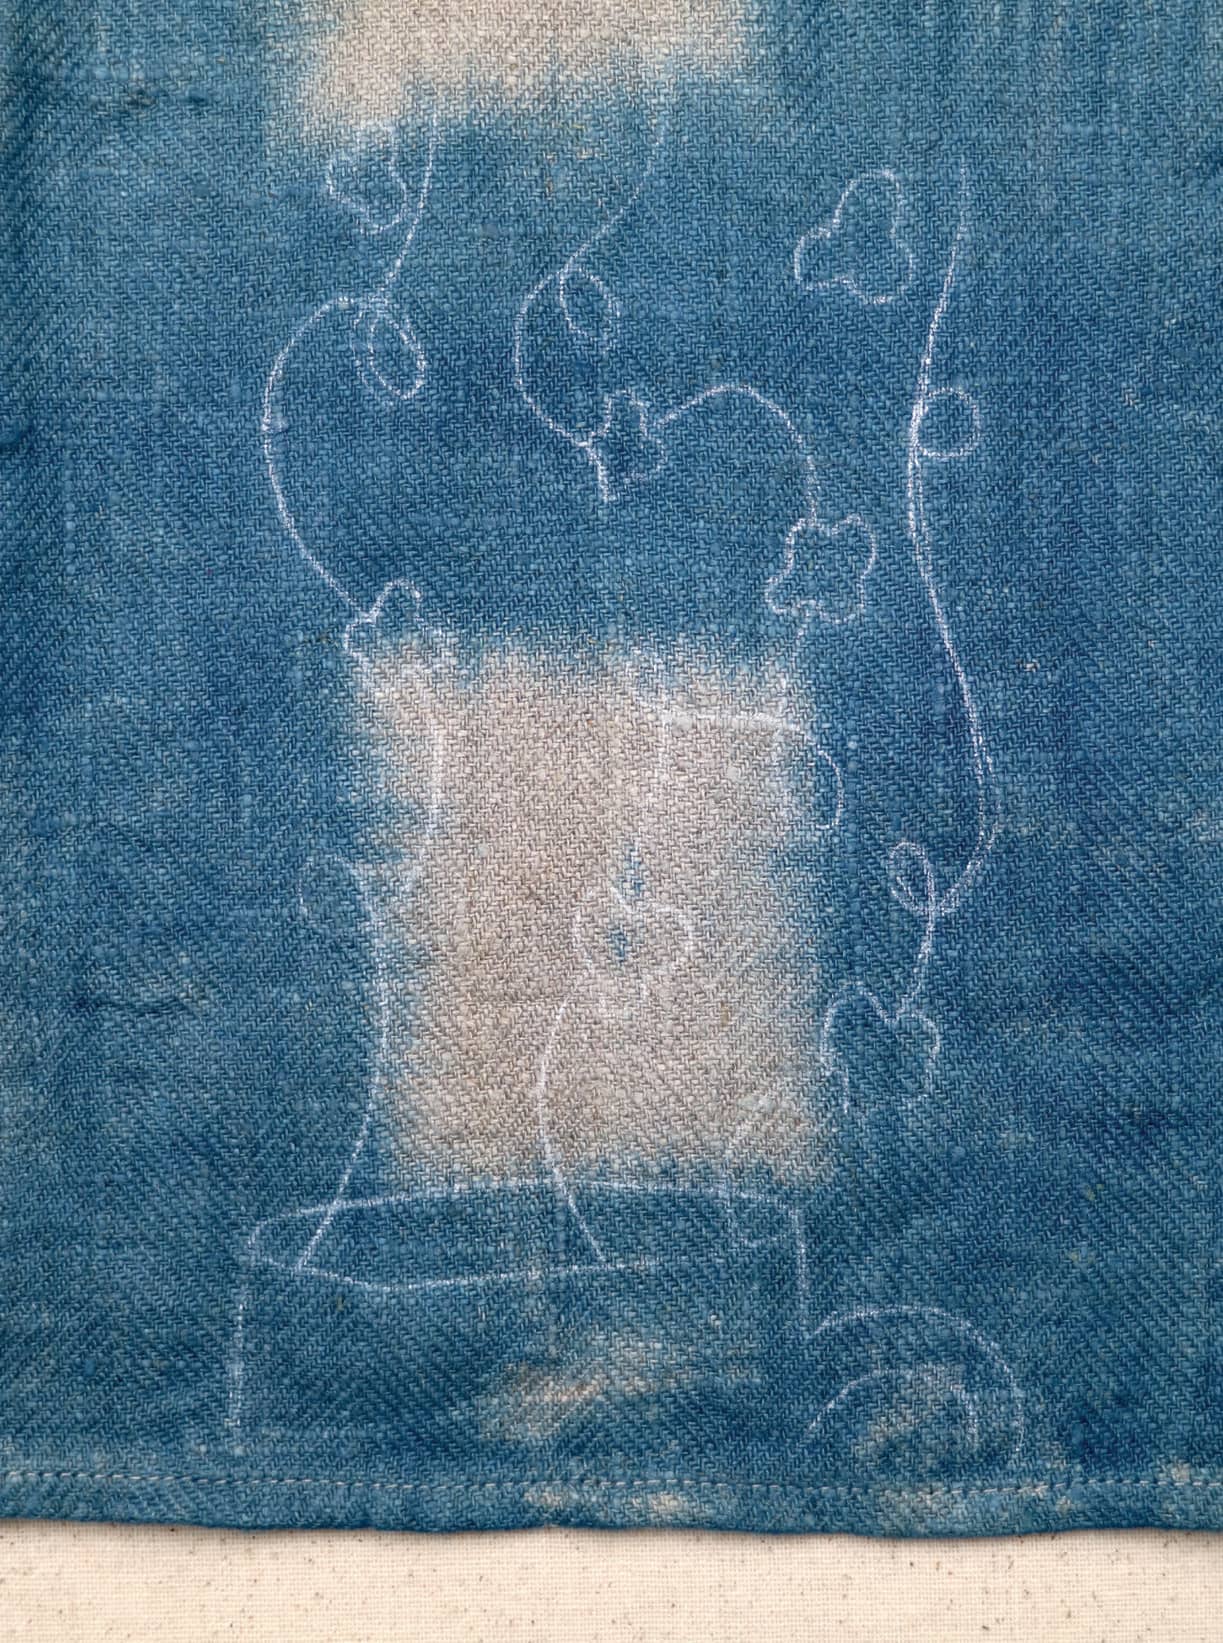
FIGURE [B]
5 Using the coffee-dyed thread and chenille needle, outline the coffee cup using backstitch (see here). Using the size 8 white perle cotton and a chain stitch with varying size loops (see here), stitch the swirls up to the points where the poppies will be stitched (FIGURE C).
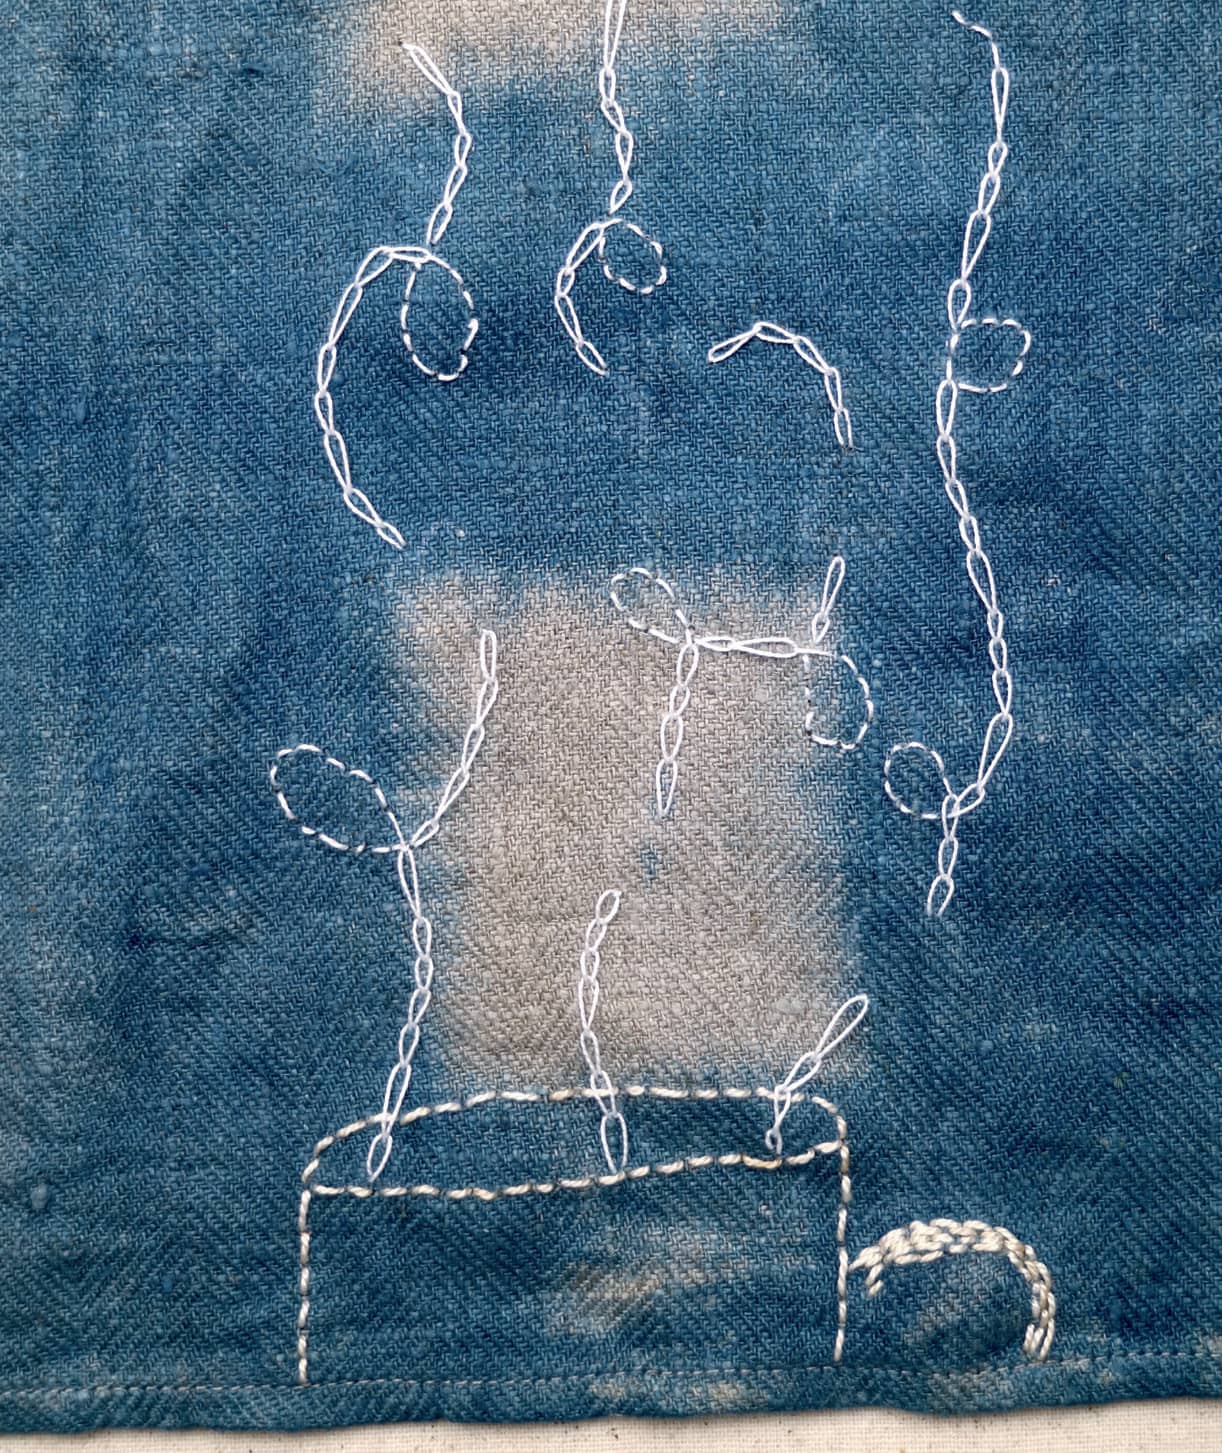
FIGURE [C]
6 Fill in the remainder of the coffee cup using backstitch. Stitch the coffee with brown thread and overlapping seed stitch (see here). Create the poppies by first stitching the centers with black thread and seed stitch. Then add satin stitch (see here) in red thread from the edge of the centers to the edge of the transferred shape (FIGURE D).
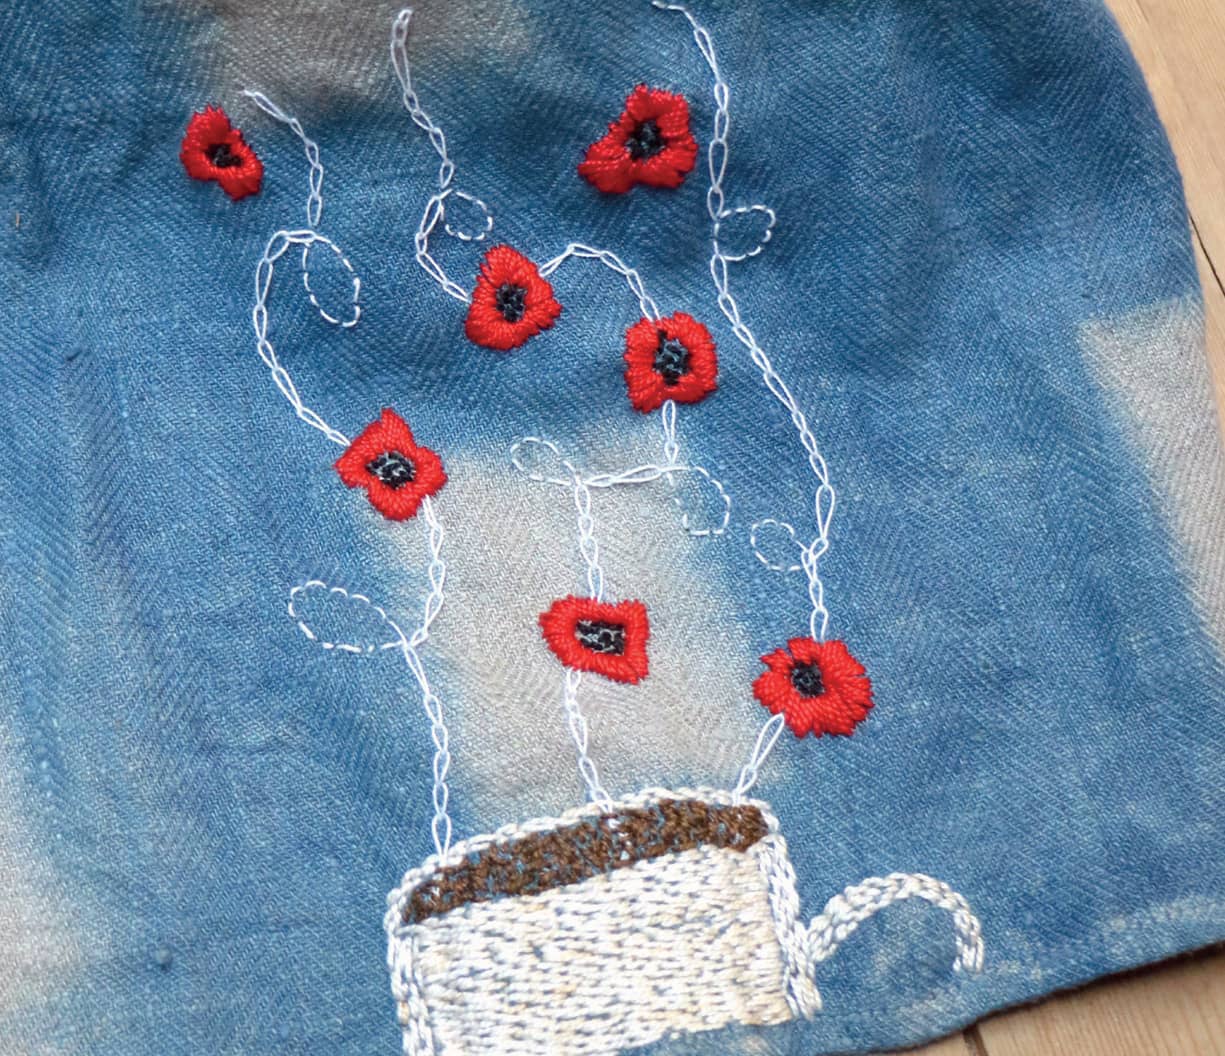
FIGURE [D]
Deconstructed Needle Book
Hand stitching can be a lot like babysitting a two-year-old—take your eye off your needle for three seconds and it goes missing, moving on to cause nothing but mischief.
If there is one thing that I’ve learned after twenty years of stitching it’s this: you must have a place to safely keep your needles and pins. I’ve had many needle books over the years, but there has always been something I wished was different about every one. So I decided to design my own.
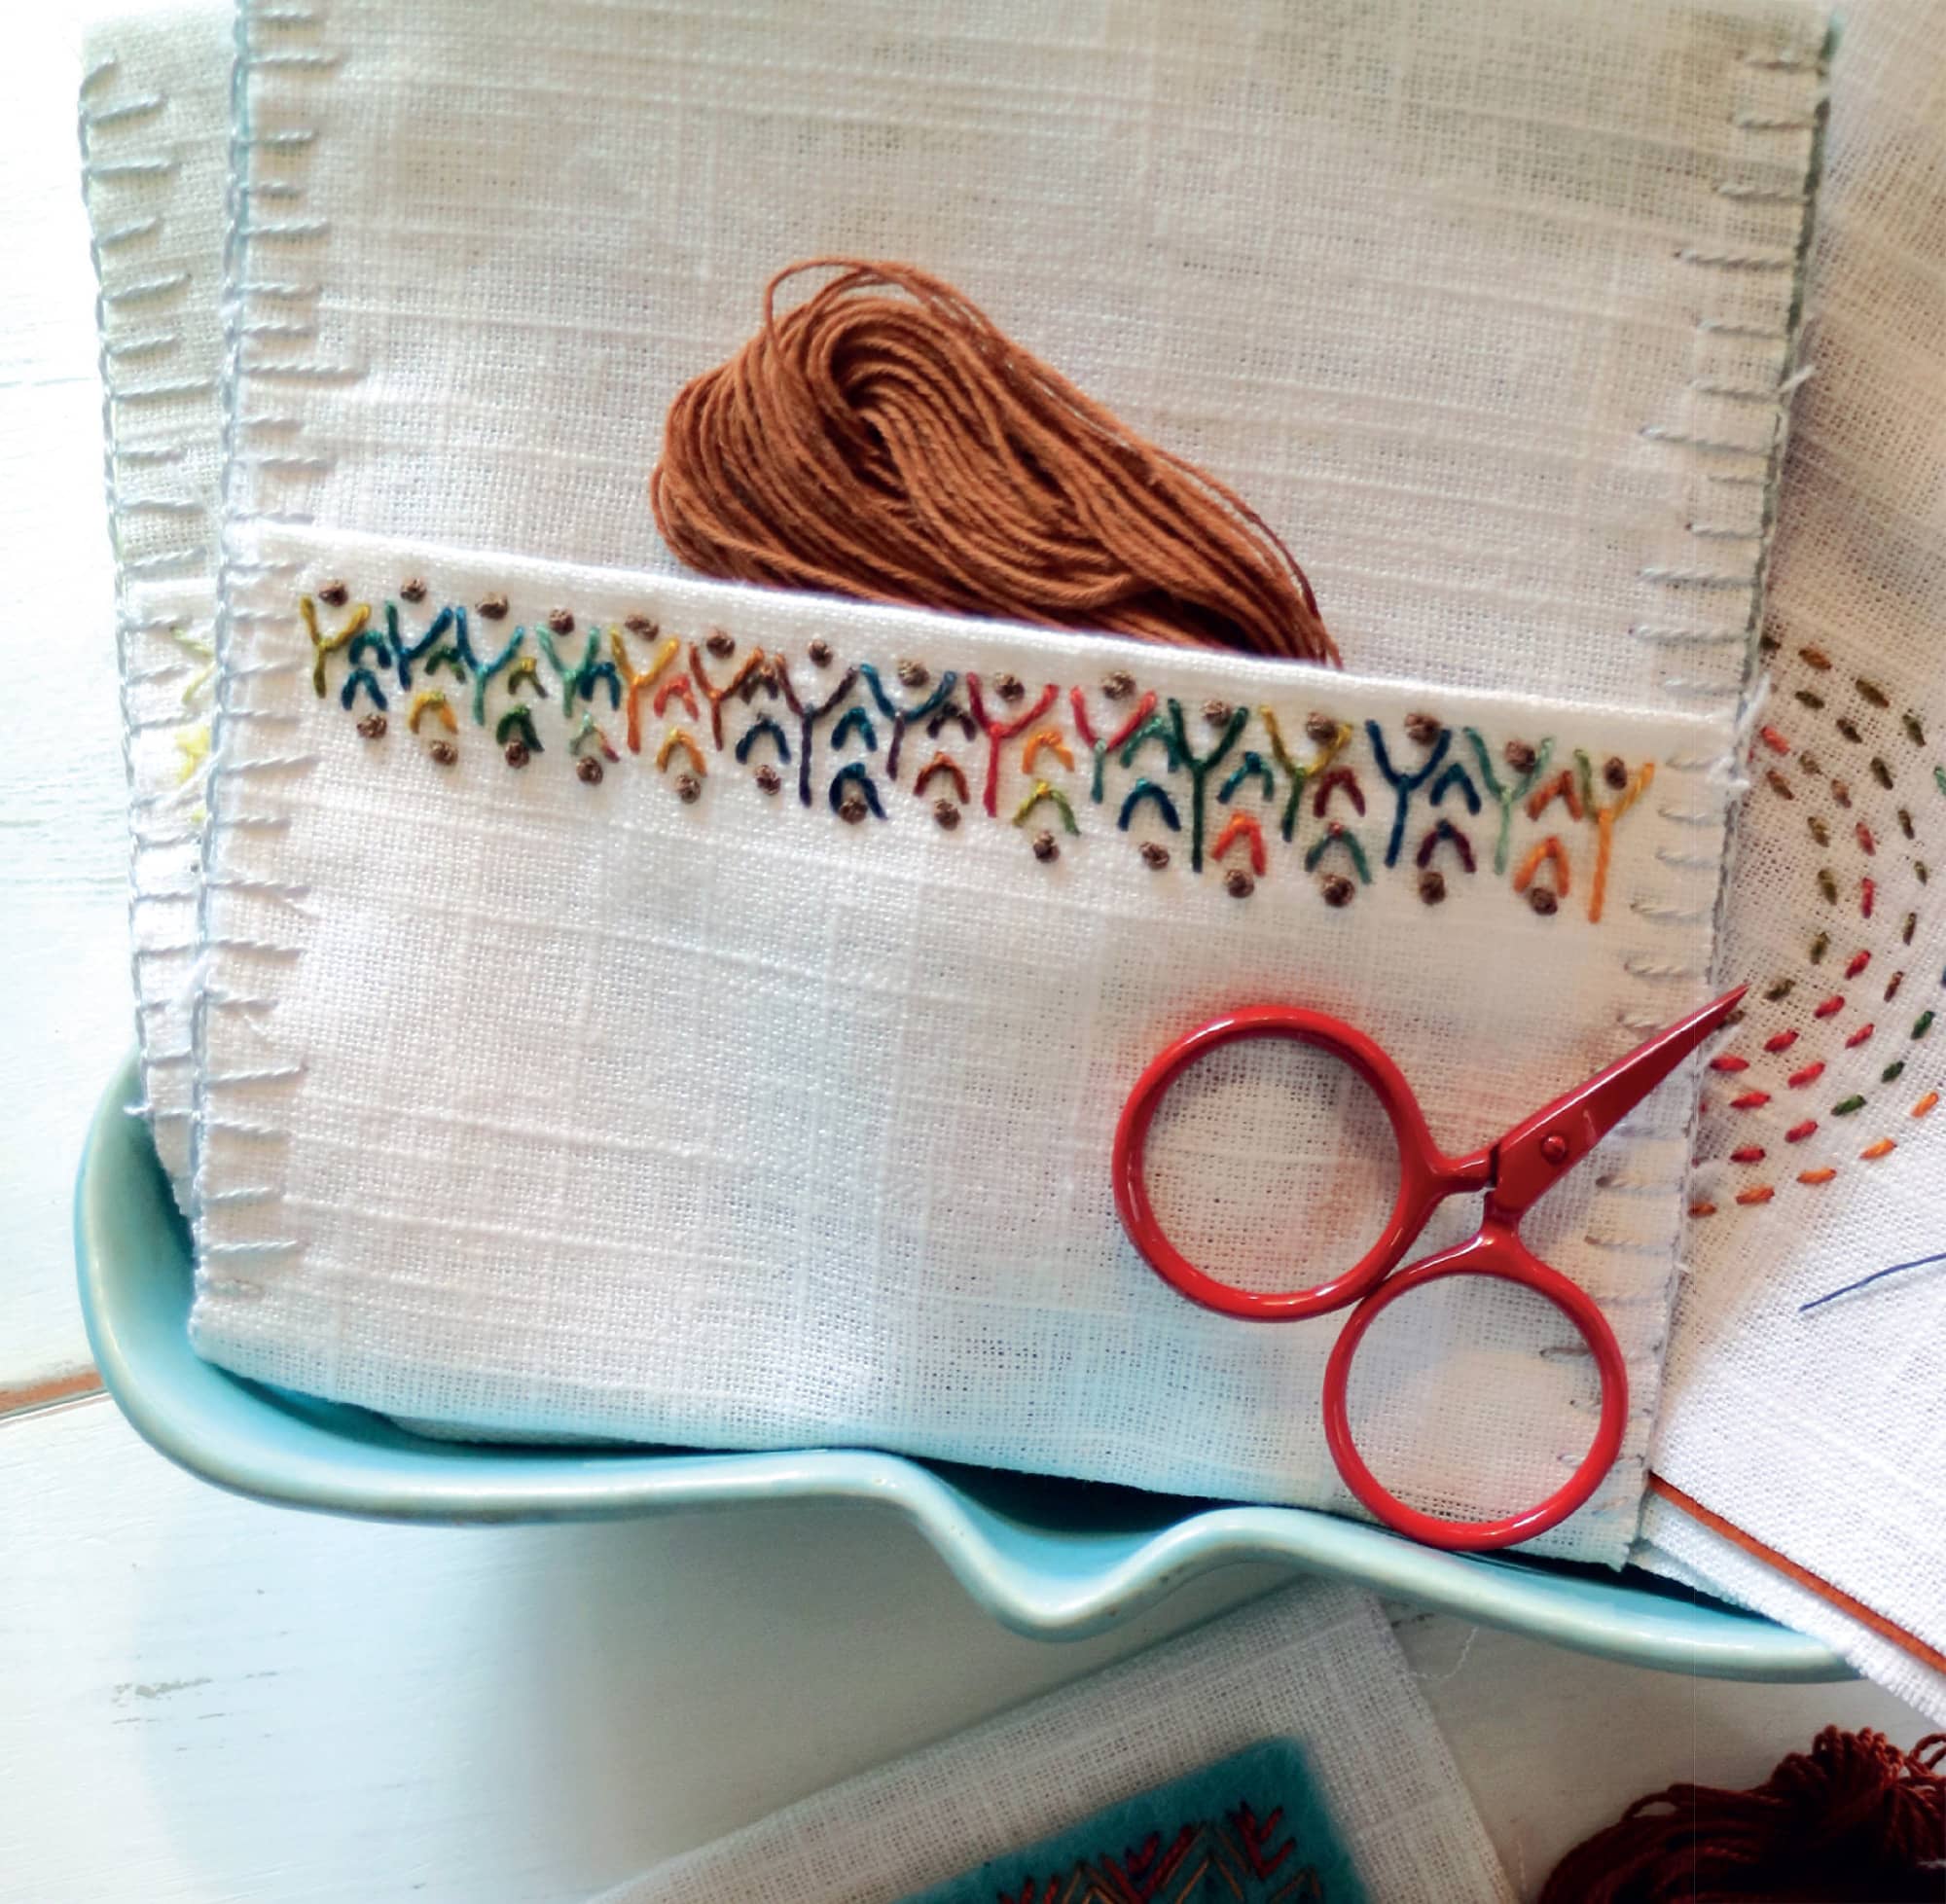
This needle book is not bound; all of the pages are a generous size and can be separated to only the ones you need for a particular project. Tuck the remaining ones safely away as you work. The book also has plenty of blank spaces, allowing you to record special projects by adding a stitch to the pages here and there. This needle book is a great project to show off variegated thread.
M/A/T/E/R/I/A/L/S
Craft knife
Cutting mat
Two 6" × 6" (15.2 × 15.2 cm) pieces of book board, 0.087" (2 mm) thick
Rotary cutter
1 yard (91 cm) white linen fabric
Six 6" × 6" (15.2 × 15.2 cm) pieces of felt in a variety of colors
One 5" × 14" (12.7 × 35.6 cm) piece of felt
One 4" × 4" (10.2 × 10.2 cm) piece of felt
One 11/2" × 50" (3.8 × 127 cm) piece of fabric (to use as the tie for the book)
Size 5 embroidery thread in various colors (to add accents to the pages)
Size 18 chenille needle
Pins
Glue stick
Craft glue
1 Using a craft knife on a cutting mat, cut the book board into two 6" × 6" (12.7 × 12.7 cm) squares. If you do not have access to book board, you can upcycle cardboard boxes for this step.
2 With a rotary cutter and the cutting mat, cut the linen to the following sizes:
Four 6" × 12" (12.7 × 25.4 cm) rectangles
Two 6" × 17" (12.7 × 43.2 cm) rectangles
Three 6" × 14" (12.7 × 35.6 cm) rectangles
3 Take a 6" × 12" (12.7 × 25.4 cm) piece of linen and fold it over a 6" × 6" (15.2 × 15.2 cm) piece of felt so that it covers the entire square (FIGURE A).
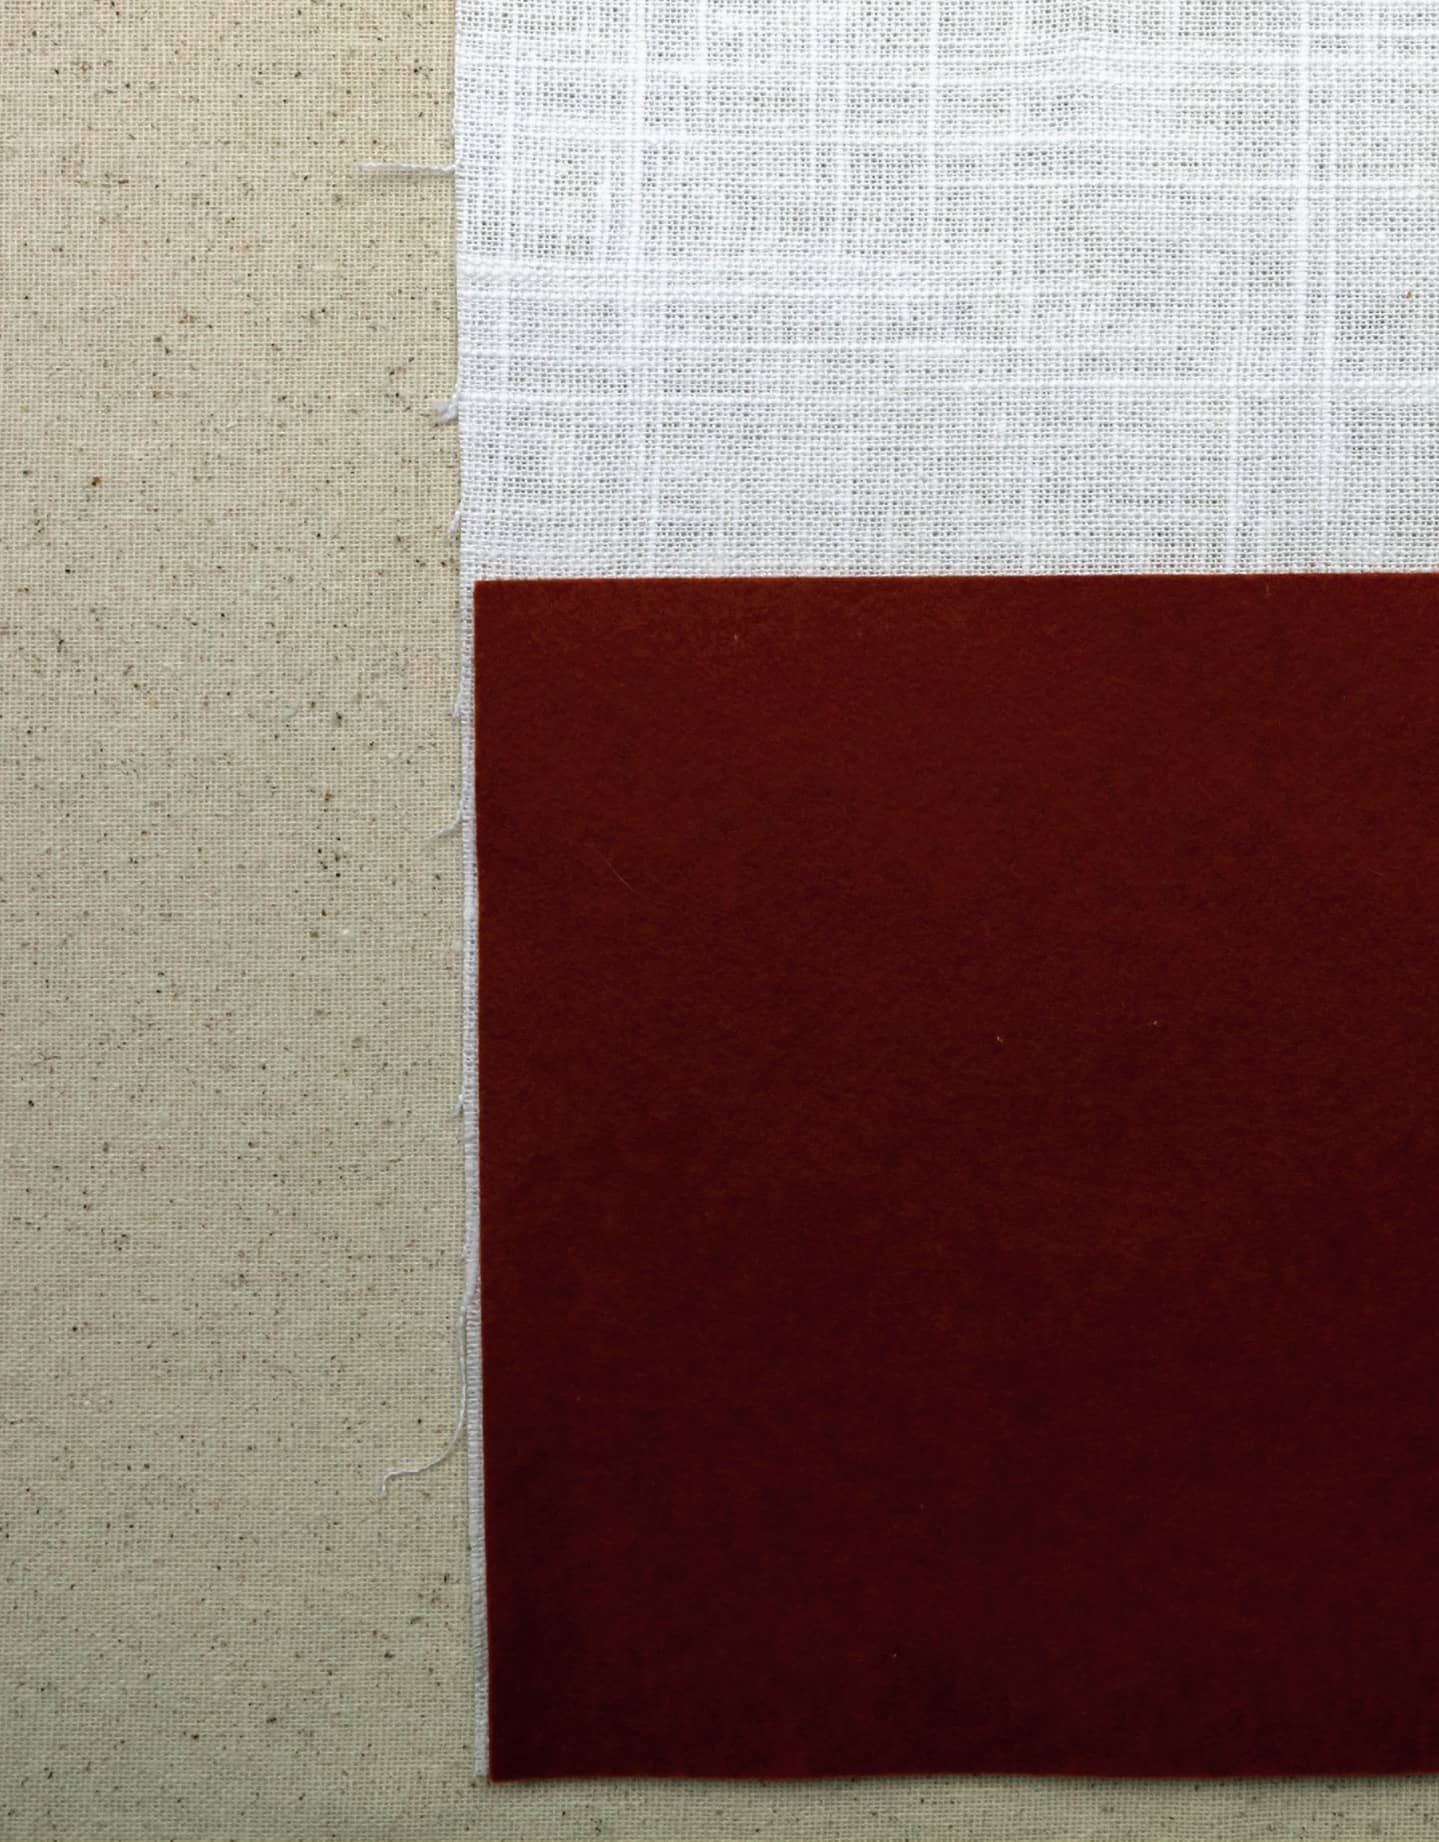
FIGURE [A]
4 Using light gray size 5 perle cotton and the chenille needle, blanket stitch (see here) the two open edges along the sides, leaving the edge opposite the folding edge open to allow the felt color to show through (FIGURE B).
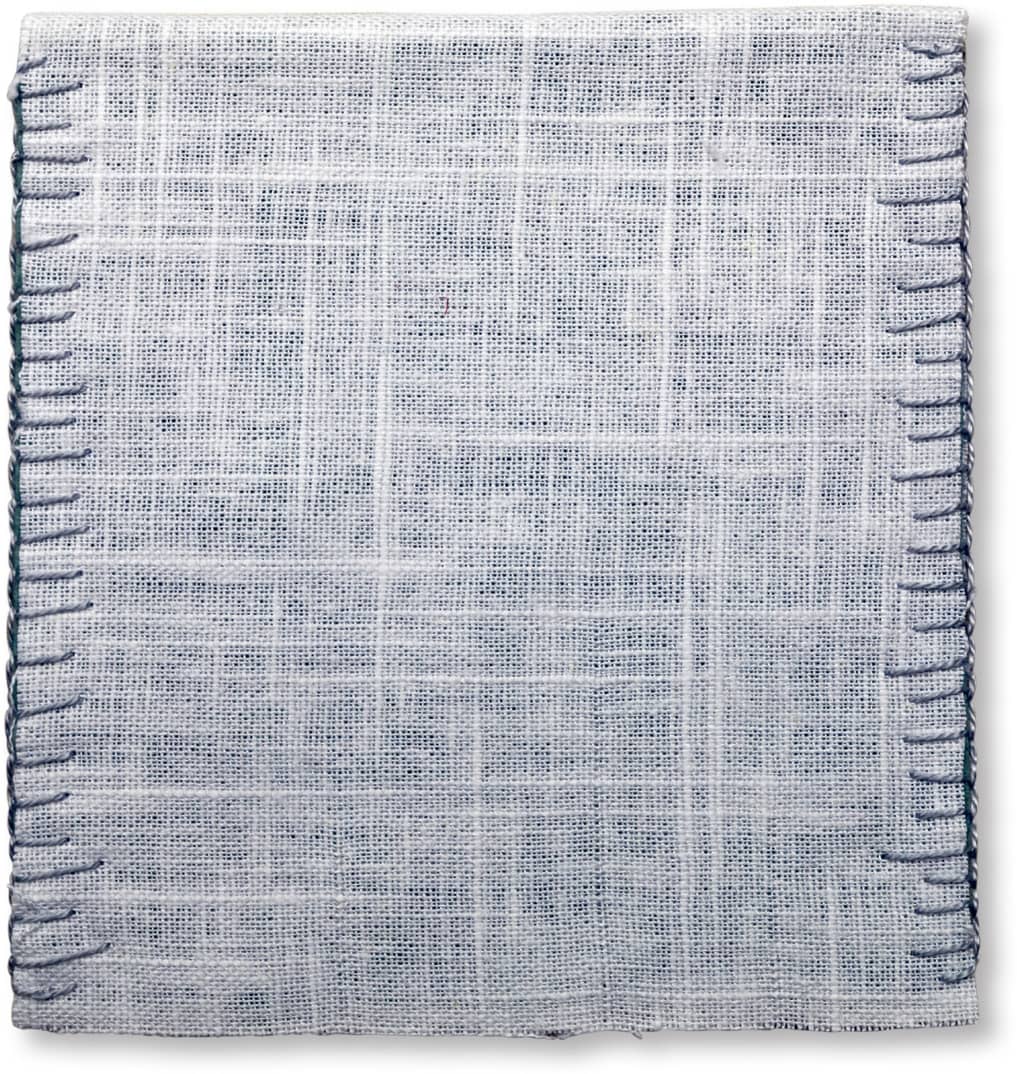
FIGURE [B]
5 Repeat steps 3 and 4 for a total of four pages. Add stitched details to the pages to add interest (FIGURE C).
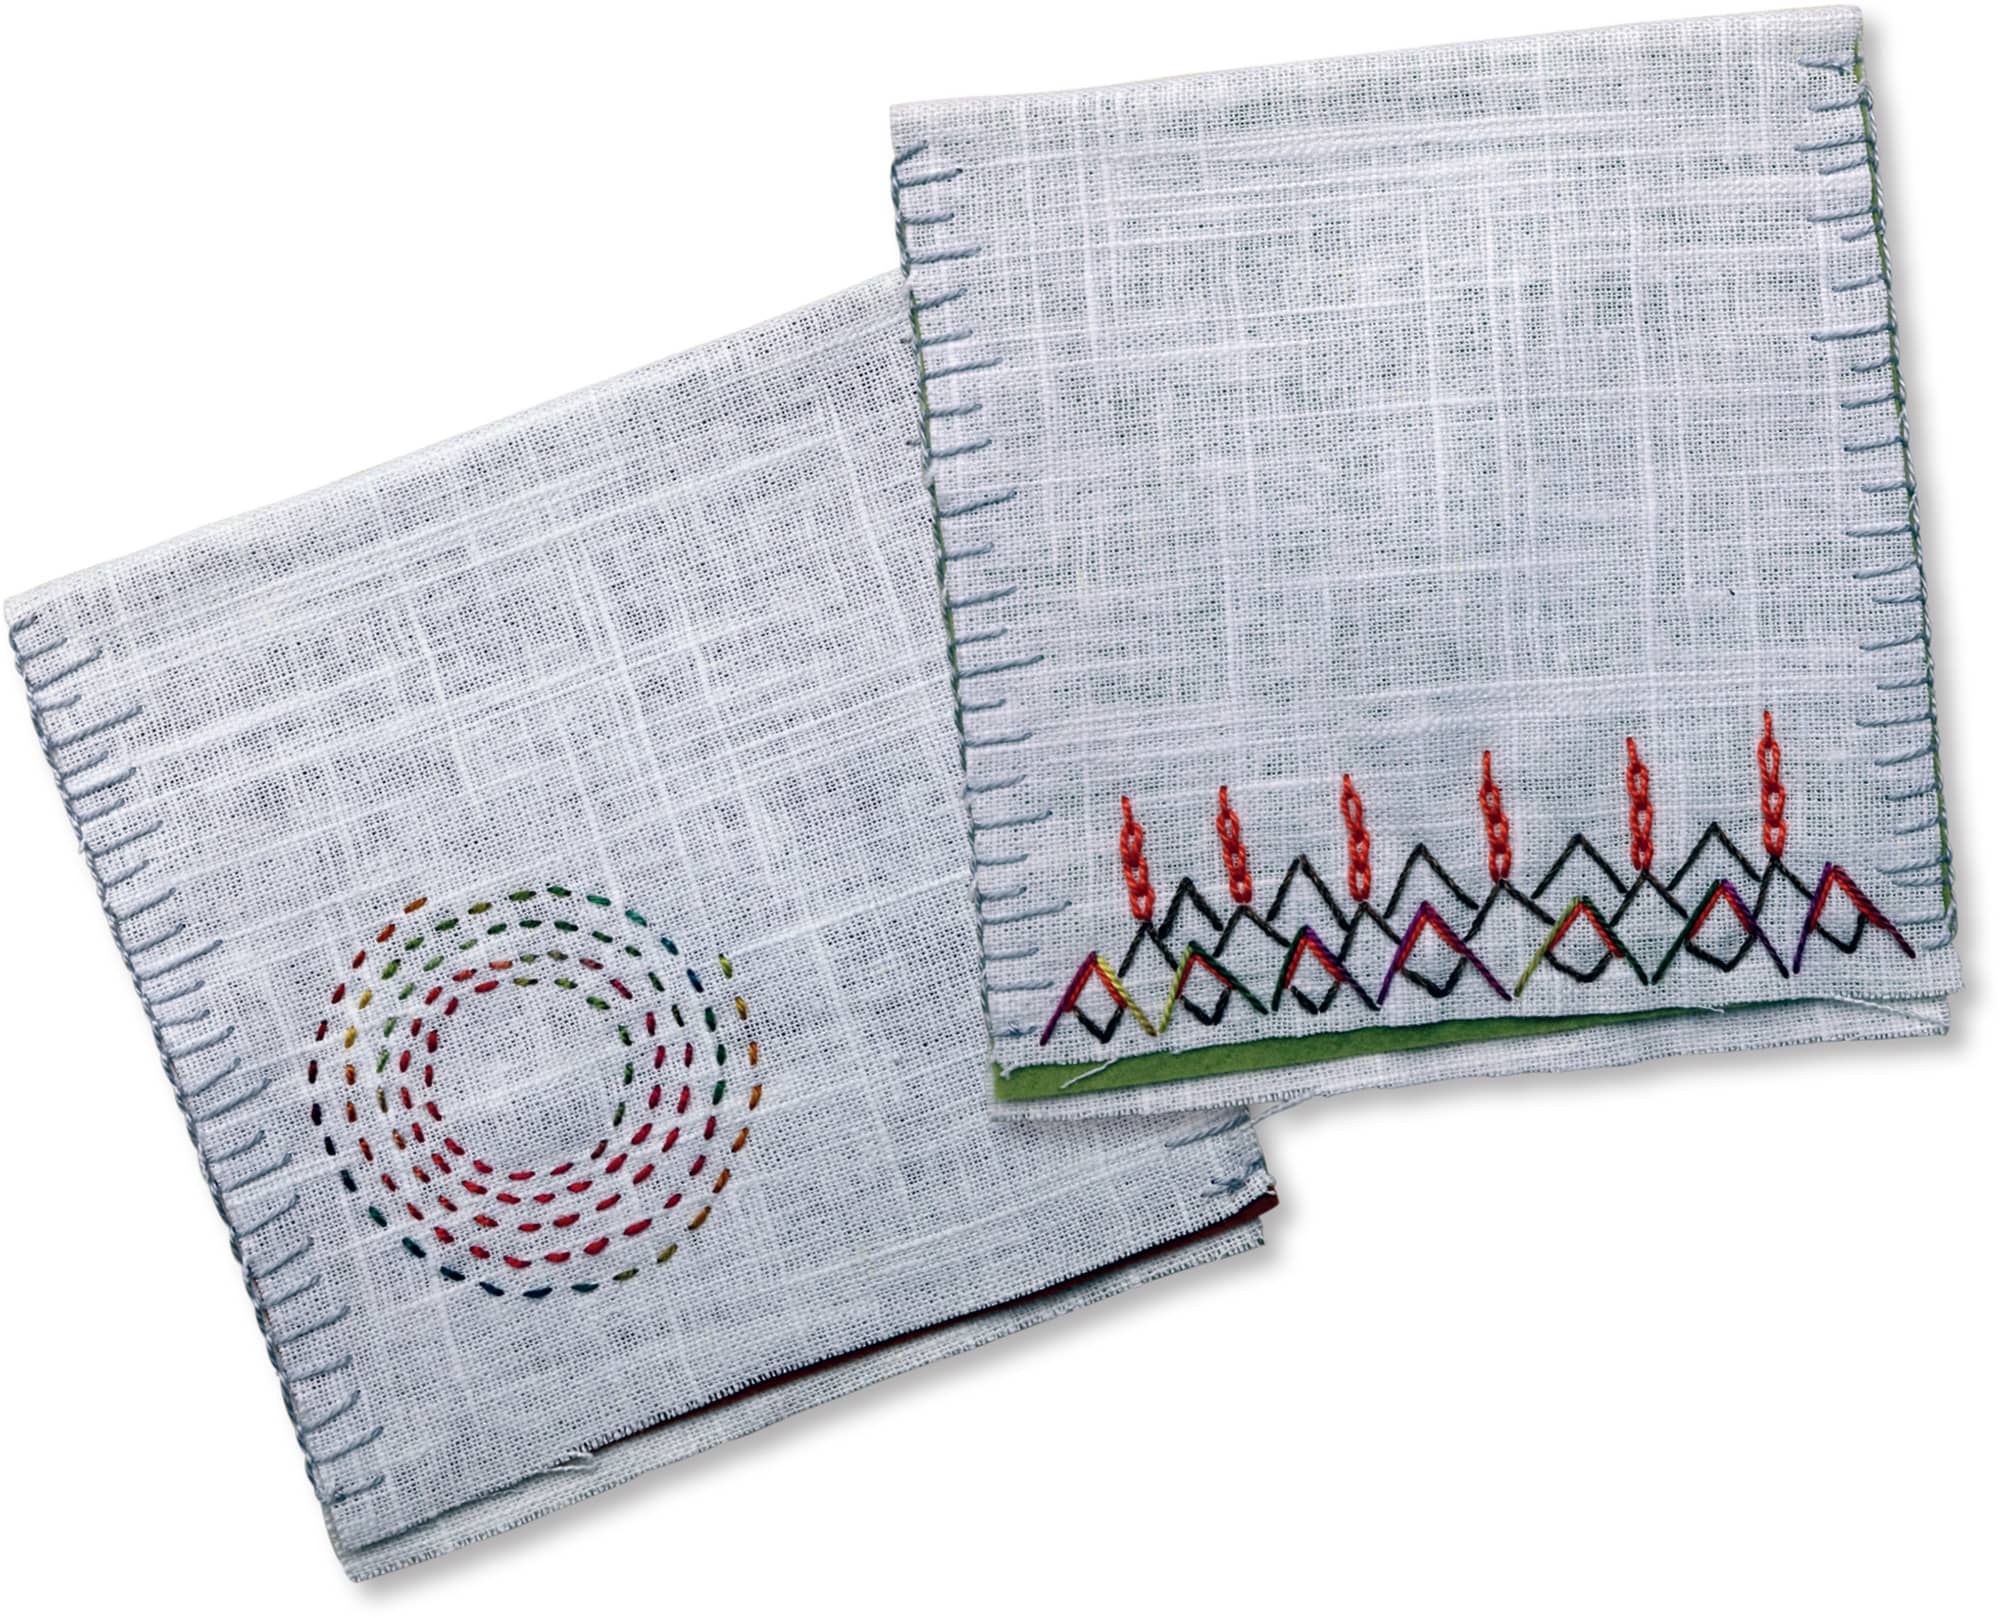
FIGURE [C]
6 Wrap a 6" × 17" (12.7 × 43.2 cm) piece of linen around a 6" × 6" (15.2 × 15.2 cm) piece of felt. Fold the extra fabric back on itself to create a pocket to put items in. Tuck the raw edge under to create a finished look (FIGURE D).
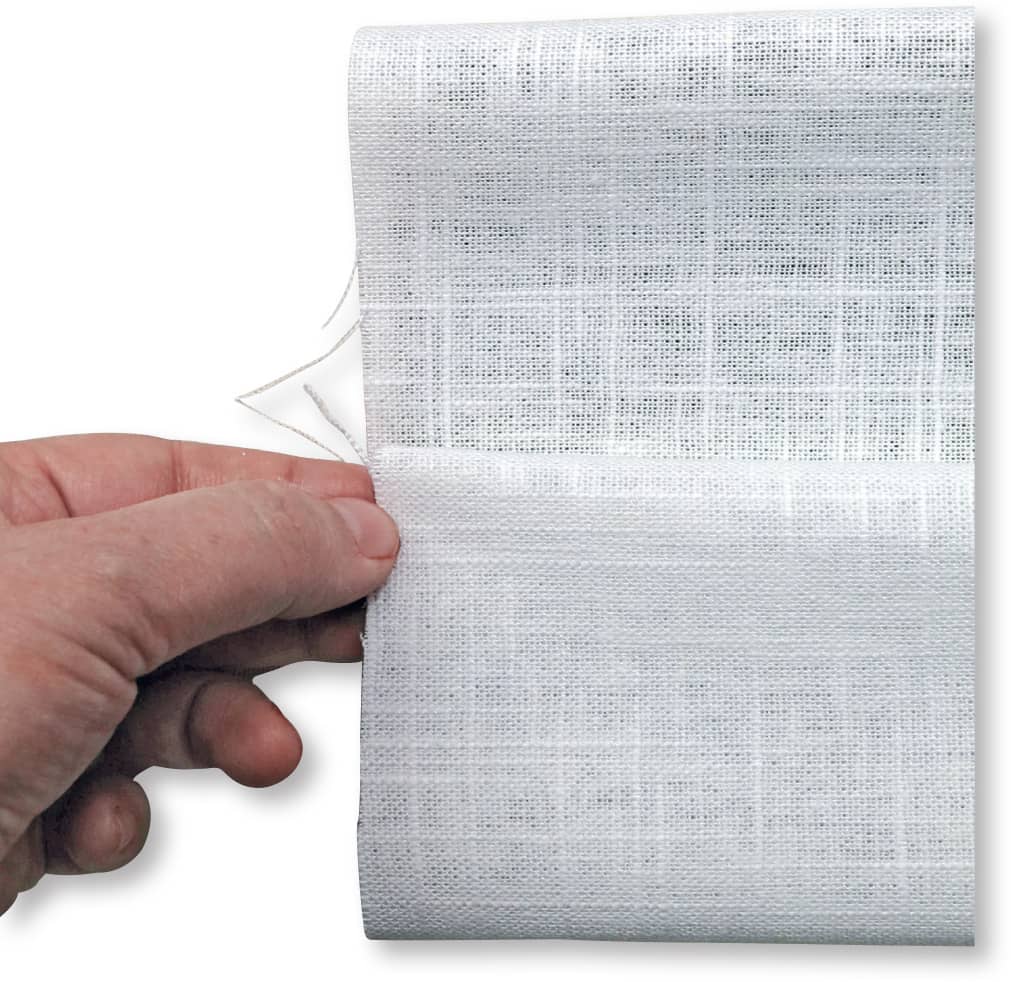
FIGURE [D]
7 Once you’ve created the size pocket you want, pin it in place. Using a combination of stitches, stitch along the top edge of the pocket to create the finished edge. Stitch only through the linen, not through the felt. Blanket stitch the two sides of the page as described in step 4 (FIGURE E).
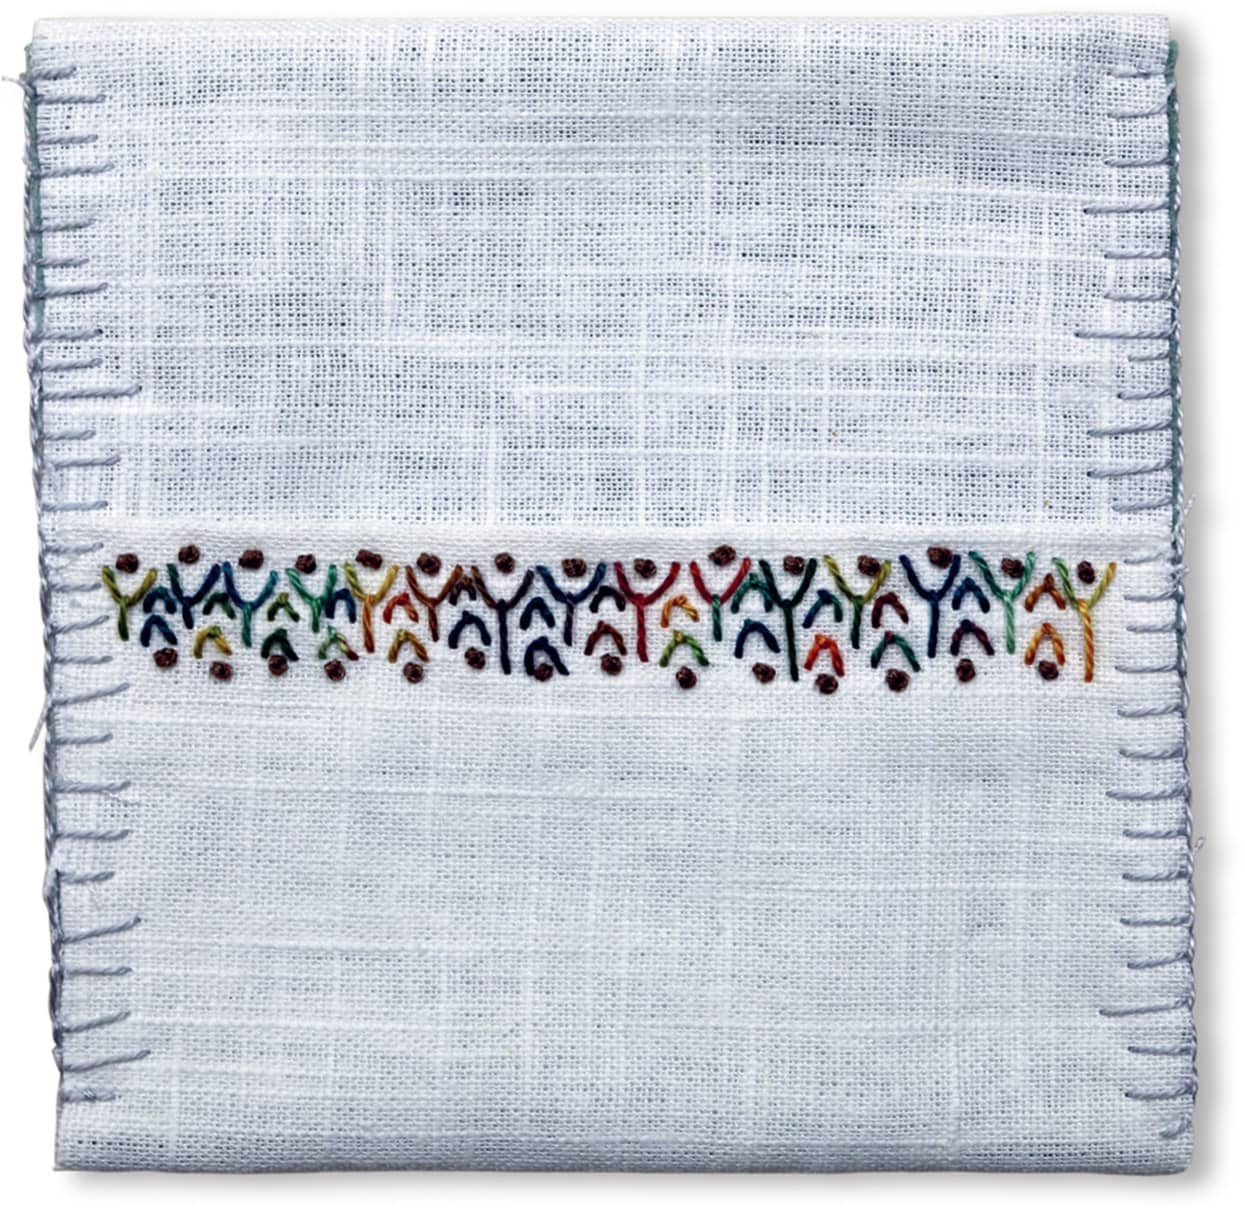
FIGURE [E]
8 Repeat steps 6 and 7 to make a total of two pocket pages.
9 Take one of the book board pieces and wrap a 6" × 14" (12.7 × 35.6 cm) piece of linen around it, securing it to the board with a glue stick (FIGURE F).
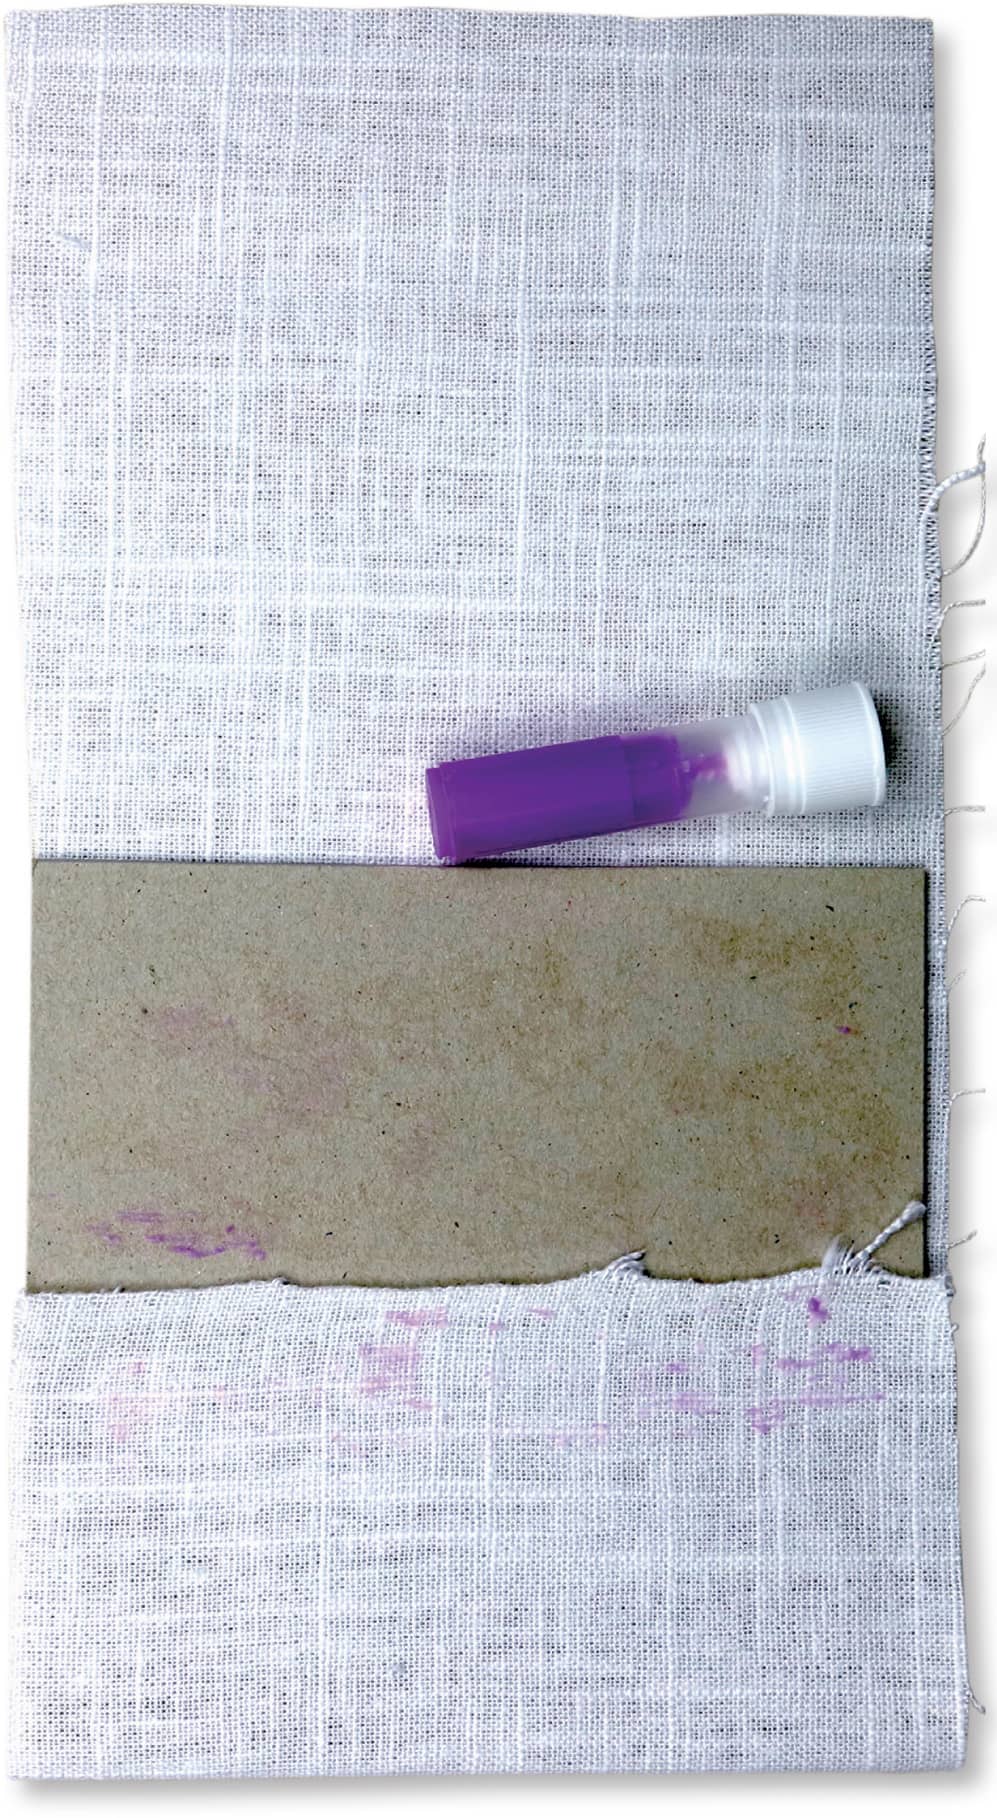
FIGURE [F]
10 Wrap the 5" × 14" (12.7 × 35.6 cm) piece of felt around the linen in the other direction to cover the exposed edges, securing it to the covered board and itself with craft glue. This completes the back cover of the needle book.
11 On the 4" × 4" (10.2 × 10.2 cm) felt square, stitch a design to act as the cover for your needle book (FIGURE G).
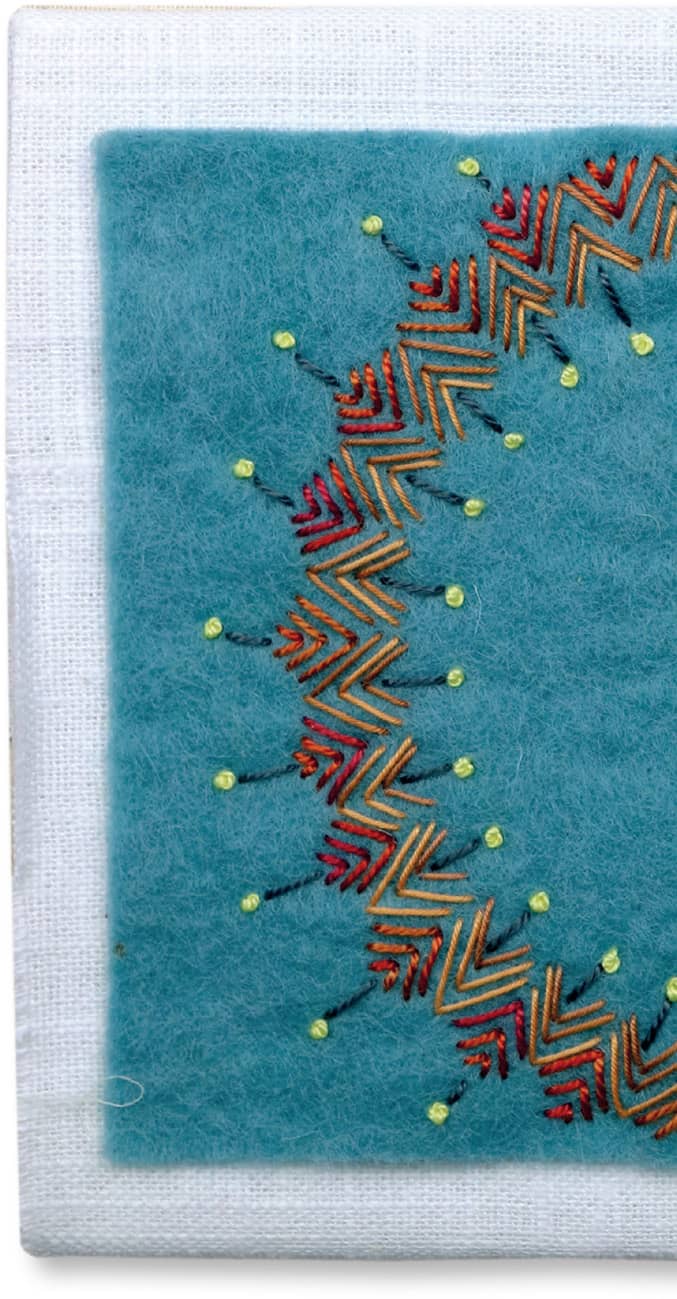
FIGURE [G]
12 For the front board, wrap the remaining two pieces of 6" × 14" (12.7 × 35.6 cm) linen around the board in both directions to cover the exposed edges. Adhere the stitched 4" × 4" (10.2 × 10.2 cm) piece of felt to the linen using craft glue.
13 Using the 11/2" × 50" (3.8 × 127 cm) strip of fabric, tie your needle book together (FIGURE H).
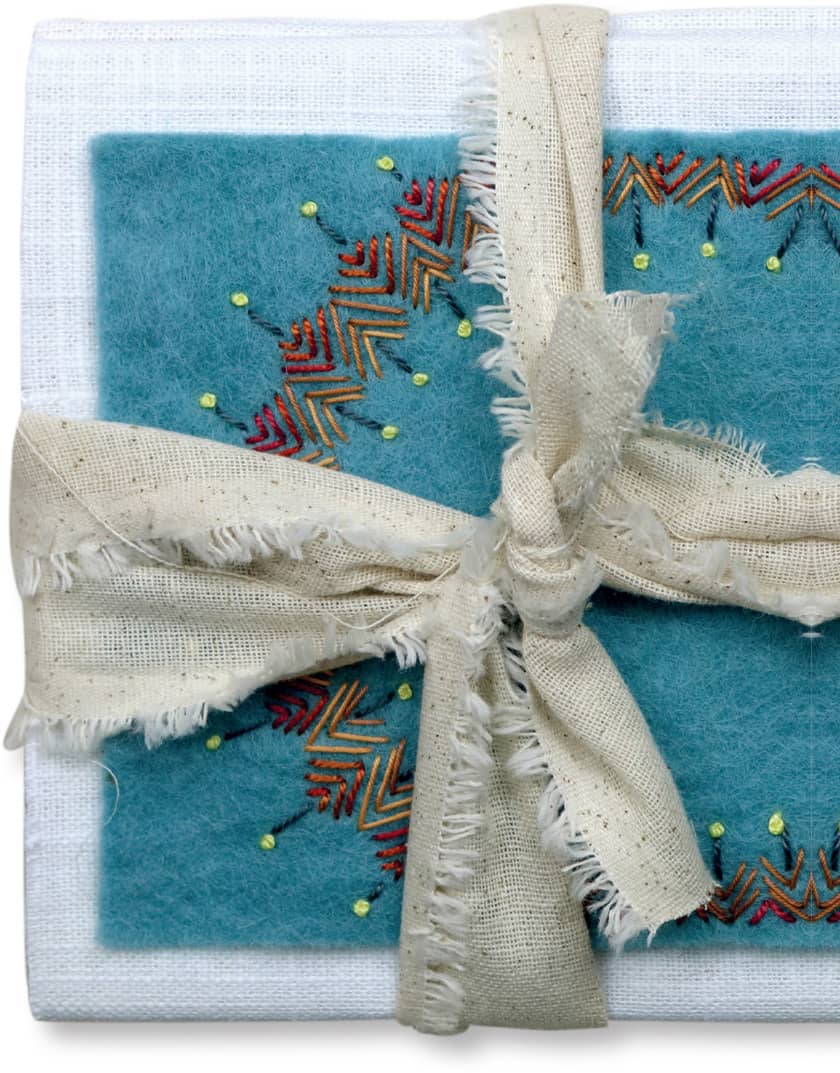
FIGURE [H]
Color-Wedge Stitched Sampler
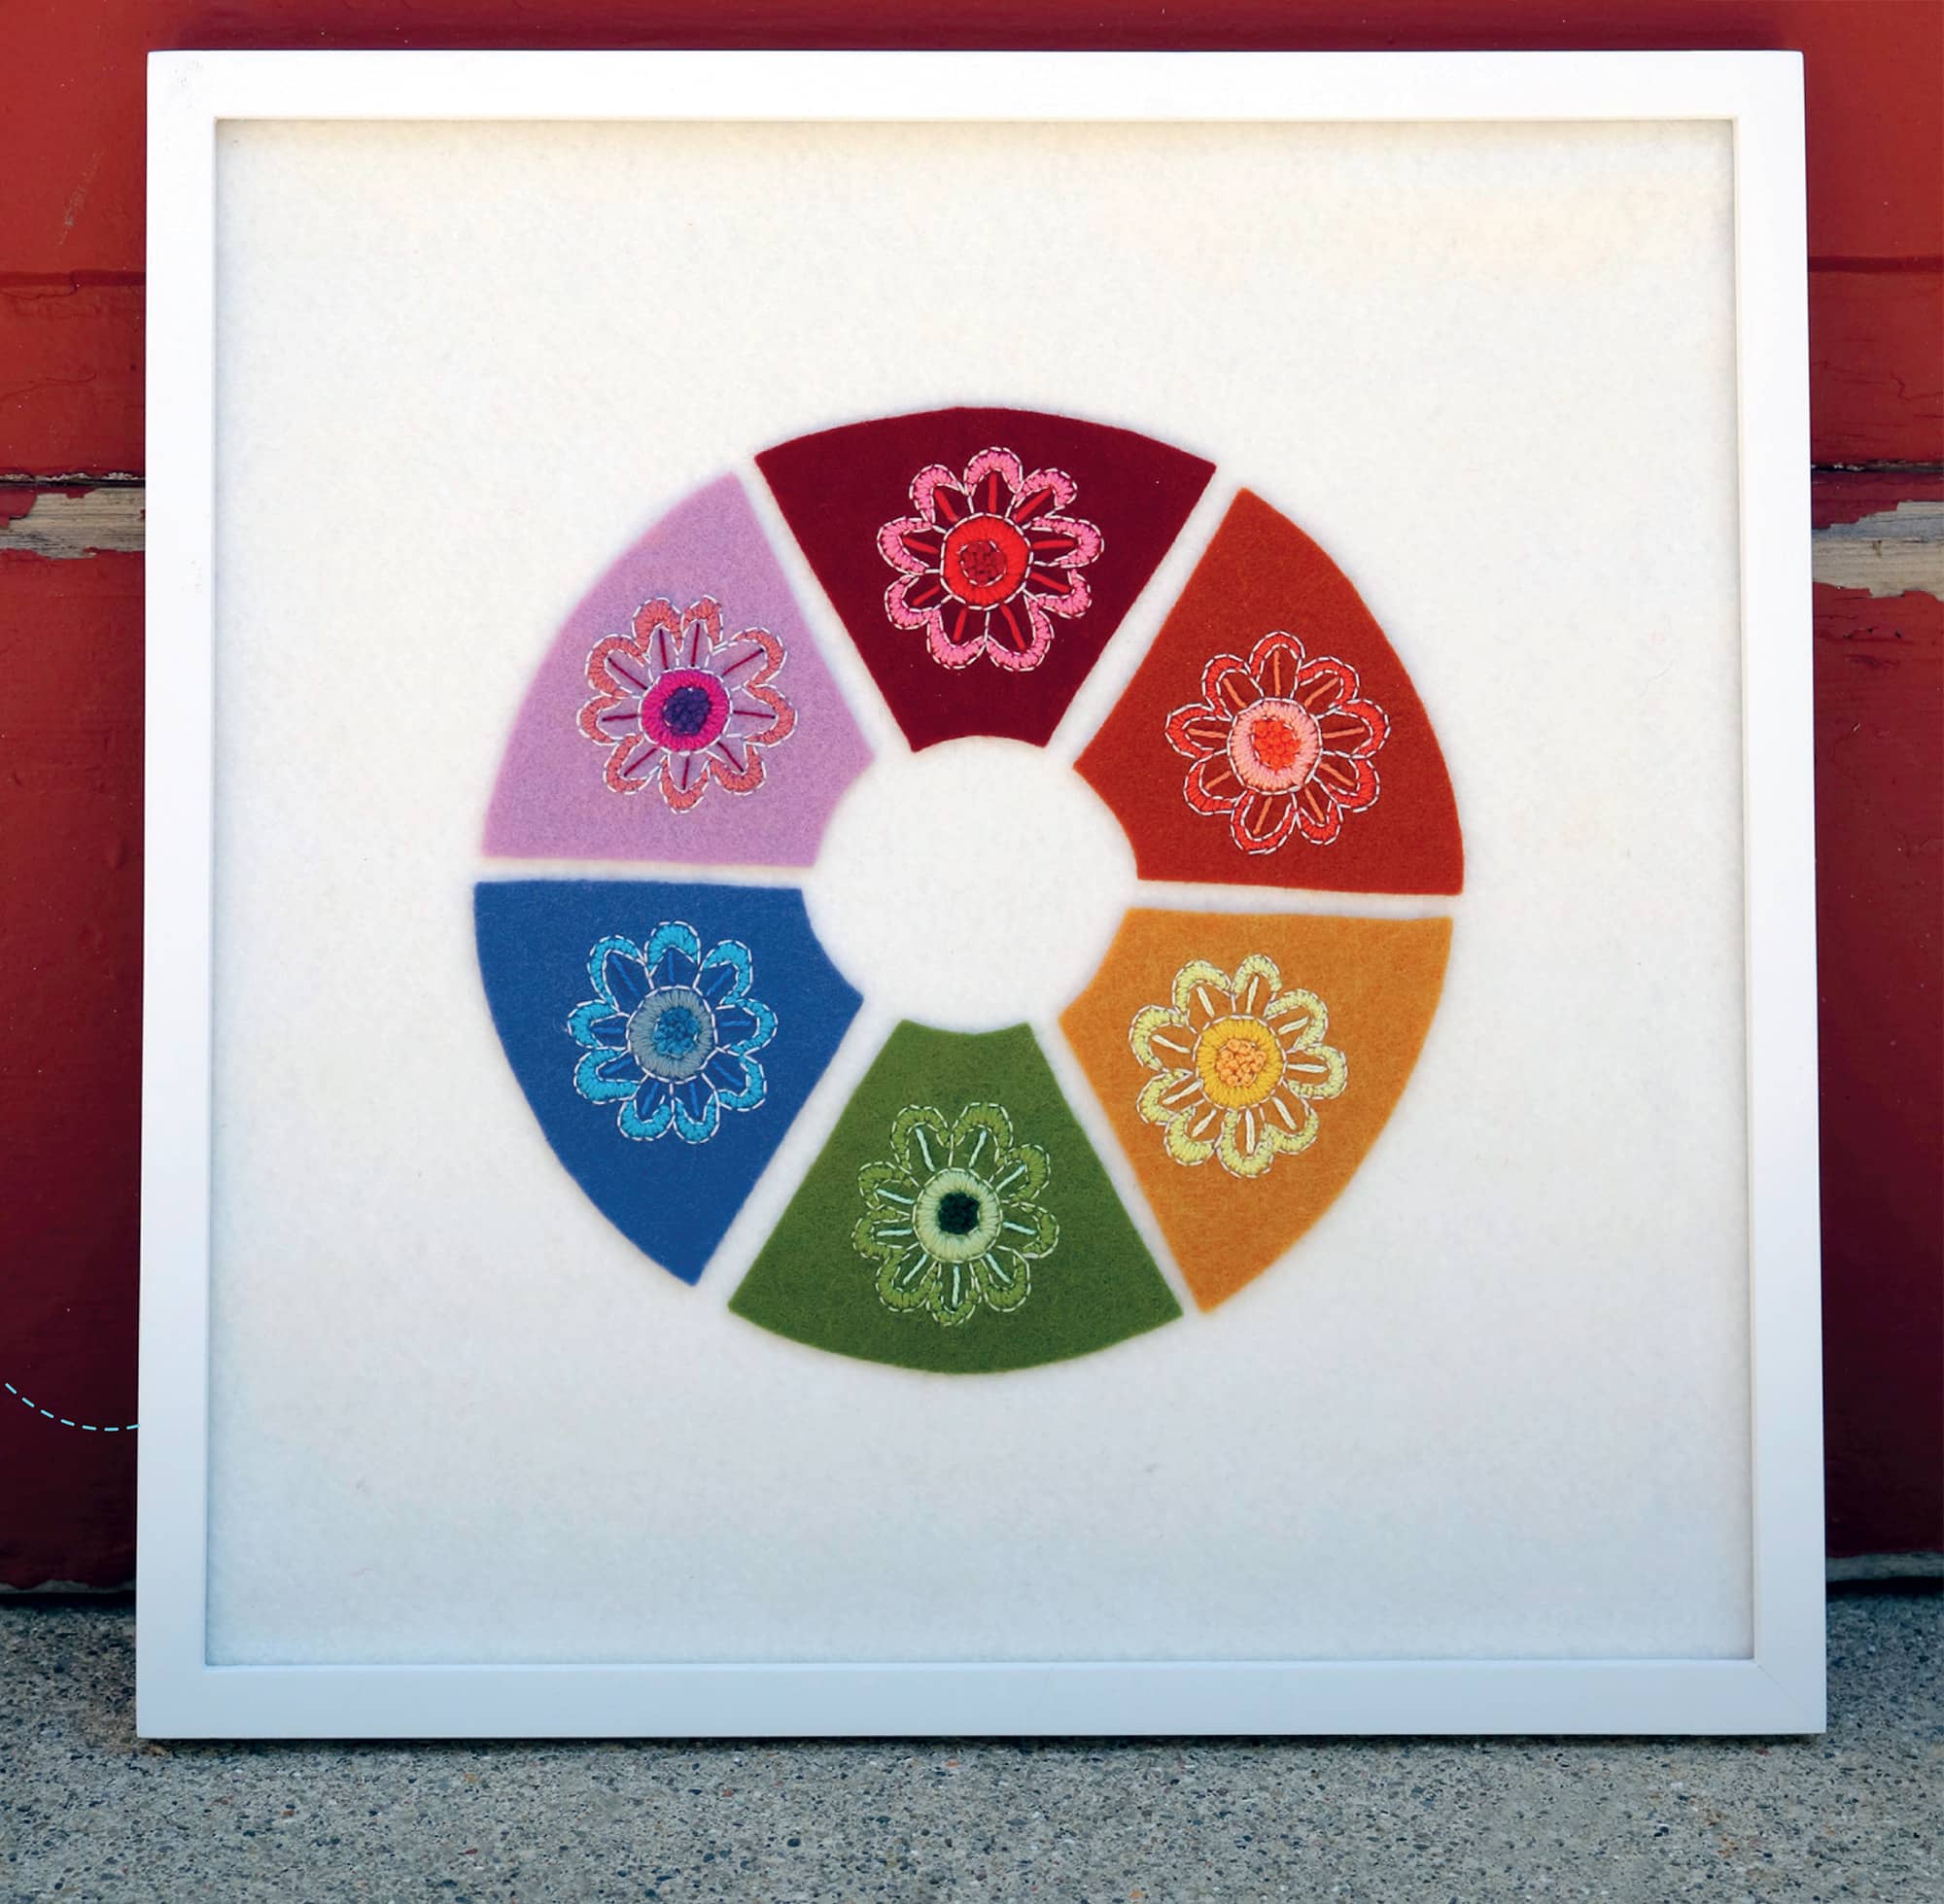
Color has an enormous amount of control over our artwork. It conveys mood, energy, and emotion. When we think of the color wheel, we immediately picture a vibrantly colored circle split into six sections bearing pure red, yellow, orange, green, blue, and purple. There are so many variations of each color that it would be impossible to record them all. The world beyond the primary color wheel is vast, and in this project, we pay homage to all the different tones of each color.
The flower stitched on each wedge is influenced by my love of Polish folk embroidery, which is part of my heritage, and it’s always a celebration of color and incredible skill. This color wheel gives you the opportunity to embrace the tones and shifts in each color family. Look around your environment at the colors that keep you company in your daily life. Stitch those into your color wheel, and record them in felt and thread.
M/A/T/E/R/I/A/L/S
Scissors or rotary cutter
Cutting mat
Water-soluble stabilizer
Color-Wedge Stitched Sampler templates
Marking pen
Six 4" × 4" (10.2 × 10.2 cm) pieces of felt, one each in red, orange, yellow, blue, green, and purple. You don’t need to choose primary colors; you can choose shades.
Pins
White embroidery floss
Size 5 embroidery needle
4 different shades of embroidery thread in each color of the color wheel
A picture frame that can accommodate 12" × 12" (30.5 × 30.5 cm) artwork
One 12" x 12" (30.5 × 30.5 cm) piece of white felt
One 12" × 12" (30.5 × 30.5 cm) piece of white card stock
Double-sided tape
Craft glue
1 With scissors or a rotary cutter and cutting mat, cut six 4" × 4" (10.2 × 10.2 cm) pieces of water-soluble stabilizer. This is larger than what you will need to transfer the Color Wedge Folk Art Flower to each wedge, but it is easier to work with water-soluble stabilizer if the piece is bigger.
2 Download the templates per the instructions shown here. With a marking pen, trace the Color Wedge Folk Art Flower onto each piece of water-soluble stabilizer.
3 Trace the Color Wedge template onto each piece of felt. Cut out the shapes.
4 Center the traced flower onto each wedge and pin in place.
5 Using two strands of white embroidery floss and the embroidery needle, backstitch (see here) over the flower. You’ll stitch through the felt and the stabilizer with each stitch. Do this for the entire outline on each wedge (FIGURE A).
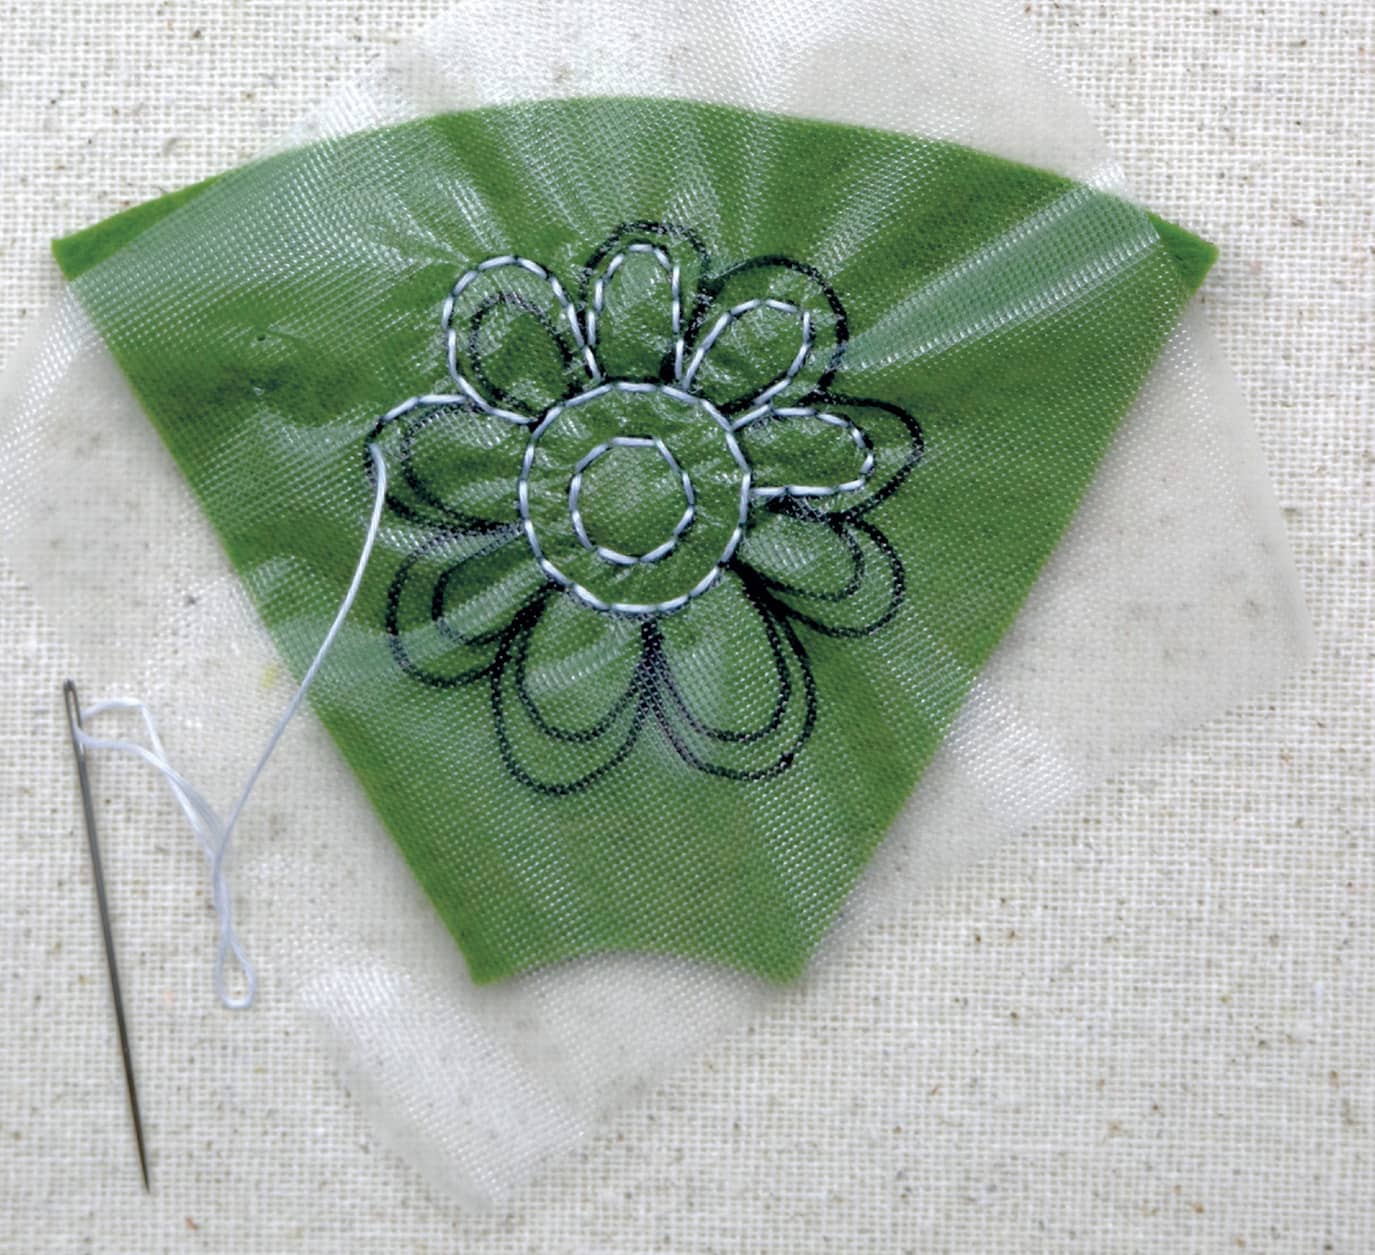
FIGURE [A]
6 Once you have completed the outline on a wedge, fill a small container with hot tap water and soak the felt piece for a few minutes. Rinse with cool water to remove the remaining stabilizer. Set aside to dry completely (FIGURE B).
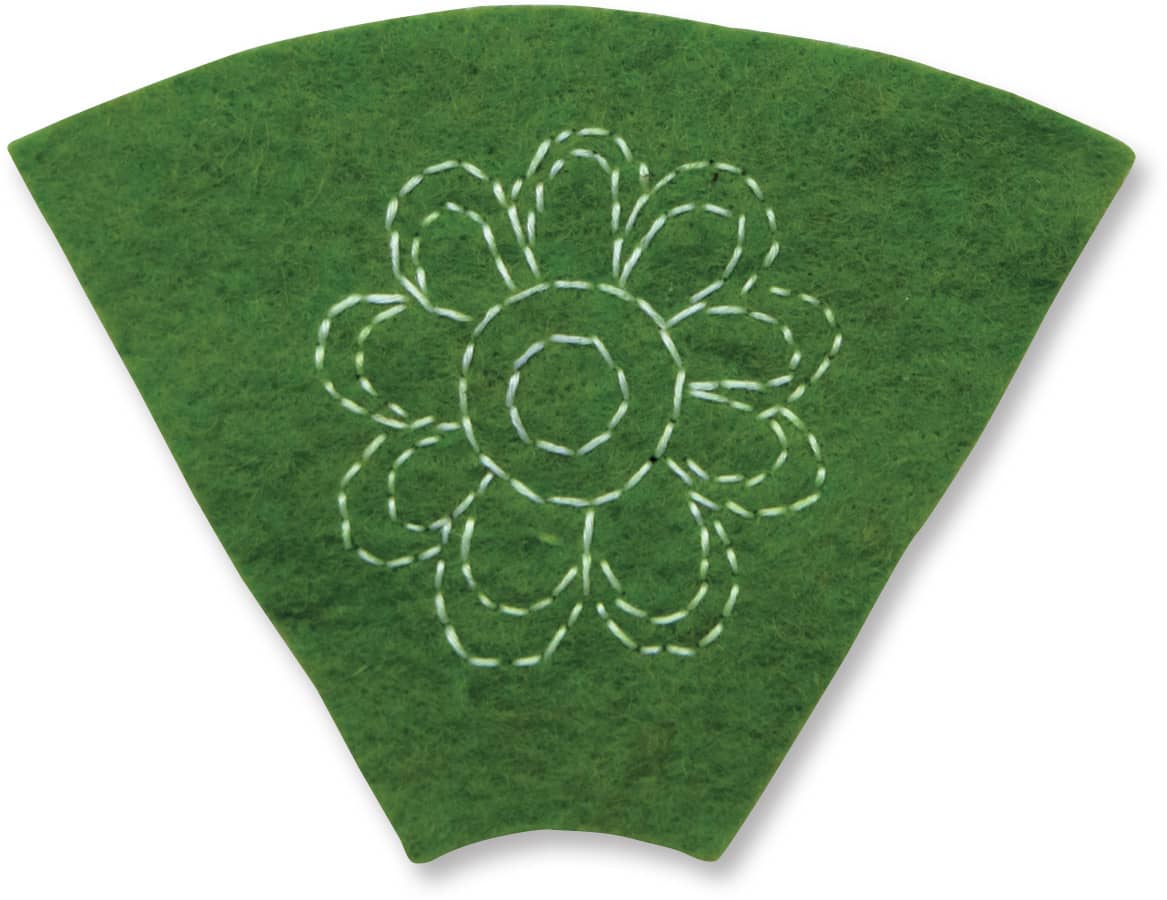
FIGURE [B]
7 Fill in the center ring and the outer ring of each petal with dense satin stitch (see here), using a different shade thread of the color wedge for each one (FIGURE C).
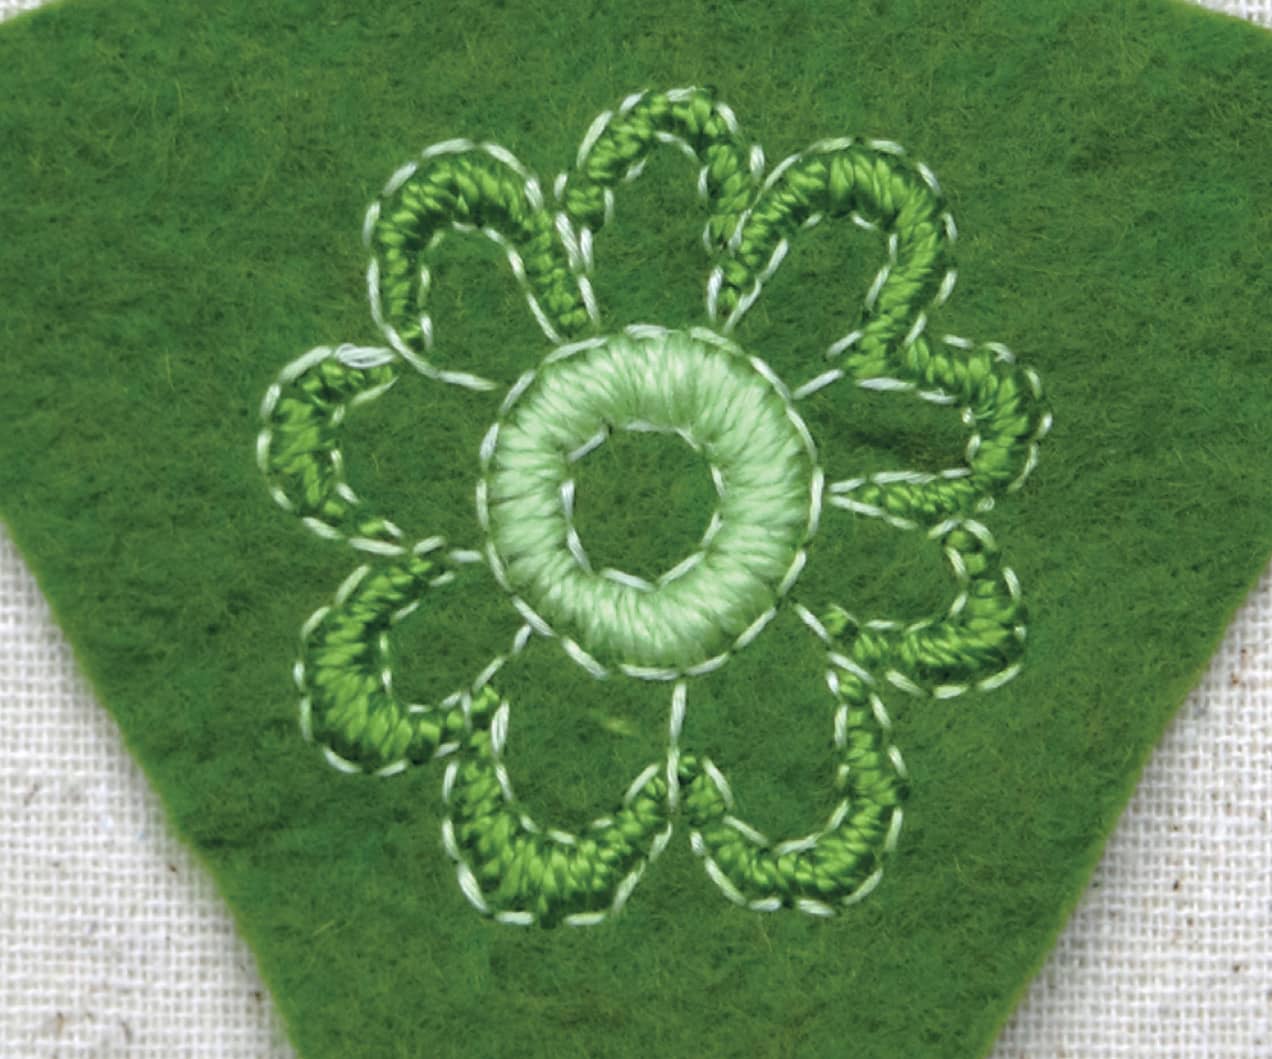
FIGURE [C]
8 Stitch French knots (see here) in a shade of the color wedge in the center circle. Add a single long running stitch (see here) to the center of each petal using the final shade of thread for the color wedge you chose (FIGURE D).
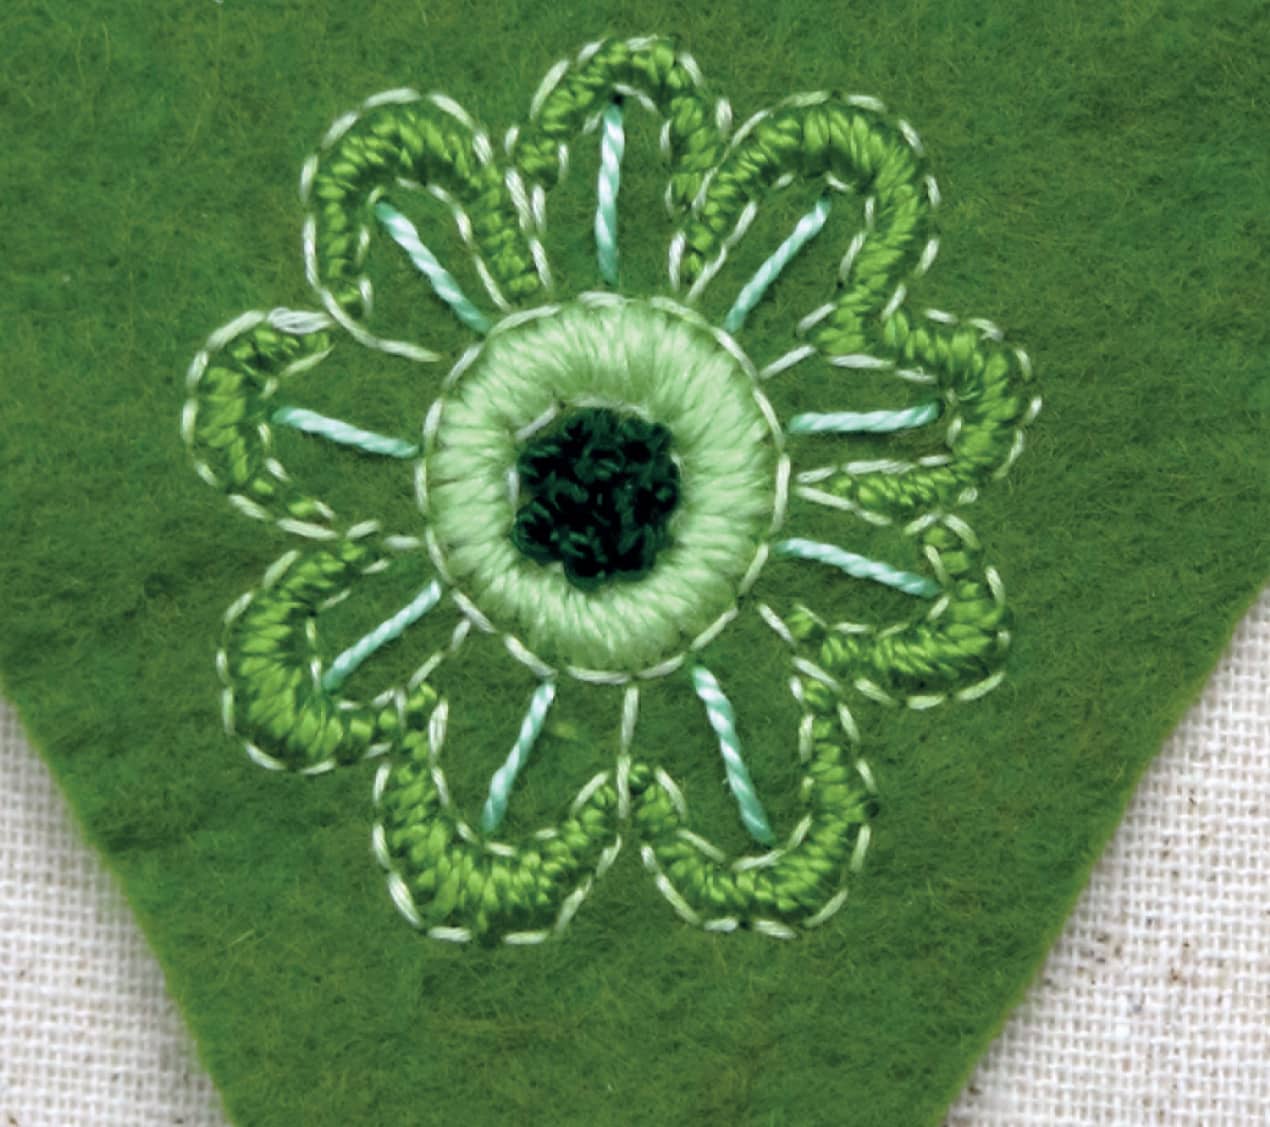
FIGURE [D]
9 Remove the glass from the picture frame and set it aside. (We will not be using it in this project.) Secure the white felt to the white card stock using double-sided tape. Place it in the frame and replace the frame backing.
10 Position the color wedges 2" (5 cm) in from the frame on all sides and secure with a small amount of glue. (Avoid using too much glue; you don’t want it to bleed through the felt. You can always add more later if needed.)
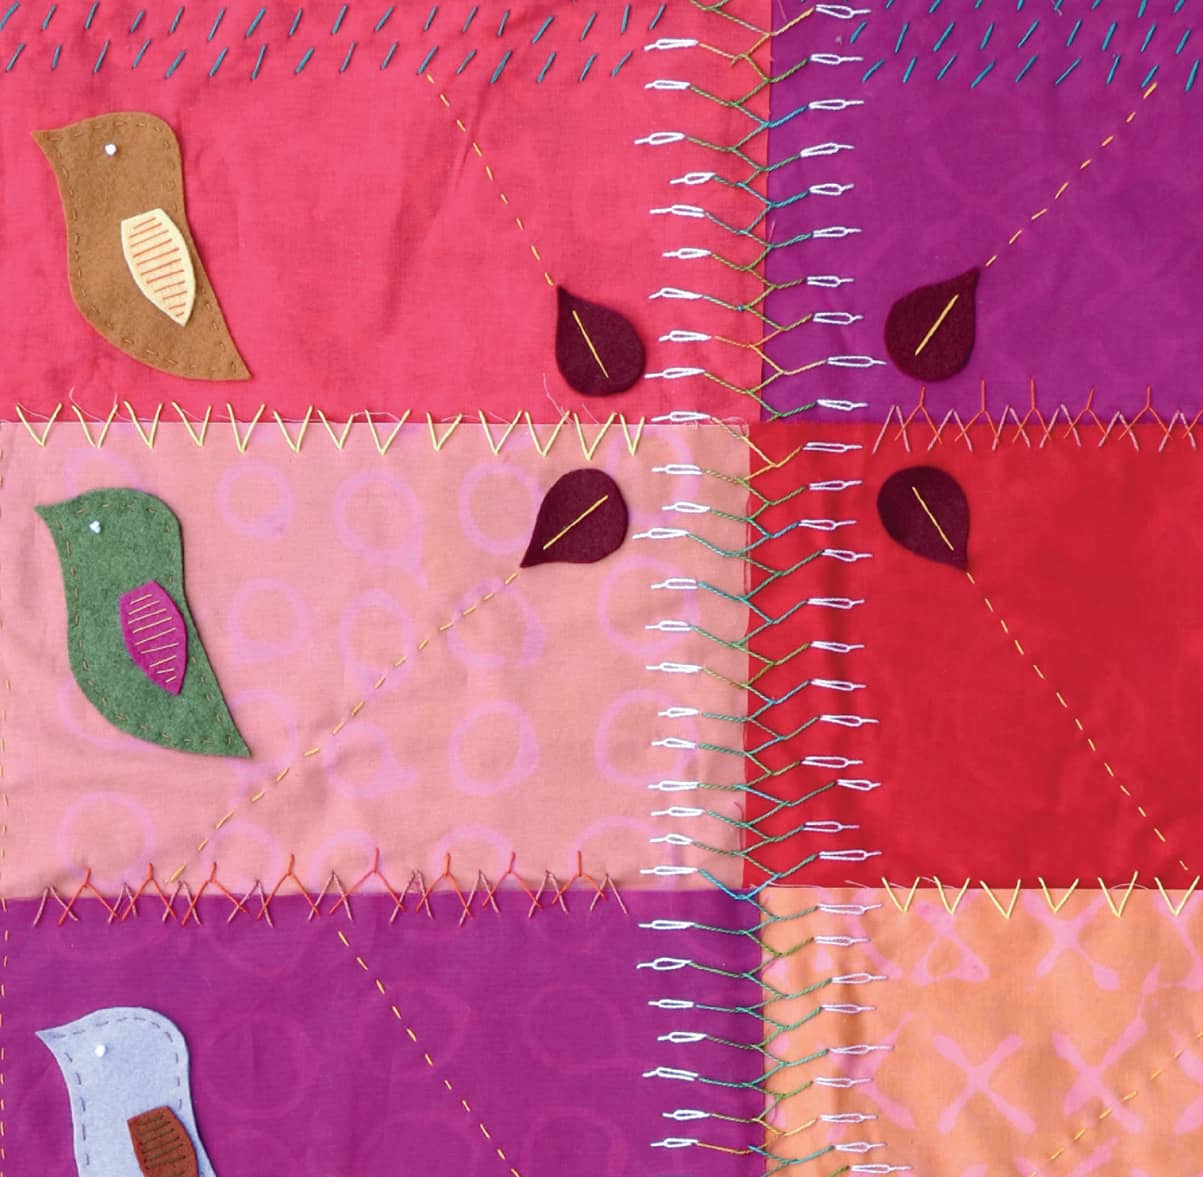
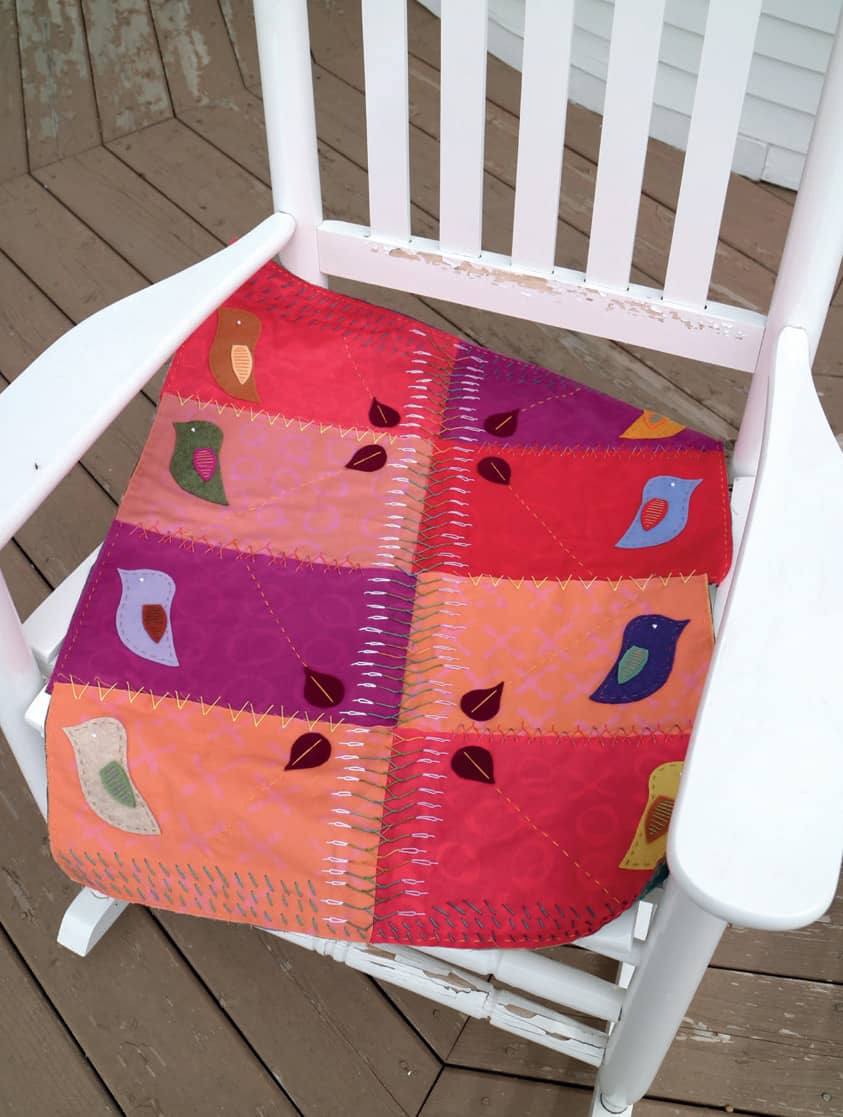
Doodle Love Lap Quilt
The word quilt is used loosely for this project. It bears a strong resemblance, but it’s missing two quilting components commonly used—batting and binding.
I started my fiber-art obsession with crazy quilts and they continue to shape much of my current work. Crazy quilts are usually just two layers of fabric and are primarily a place to display embroidery and embellishment. (Which is one of the reasons I love them so.) I like to leave the edges raw, letting them have some personality by showing their wear over time.
The truth is that I use my laptop a lot—to write, draw, and edit photos. It’s rarely far from my side. I often find myself wishing I had a lightweight, fun little quilt to drape across my legs. Something quirky to ground me in the nontechnical world. This little quilt is just that—little. It’s not meant to cover your entire body, and it’s got several elements that lend themselves to tactile fascination.
M/A/T/E/R/I/A/L/S
Plastic trash bags
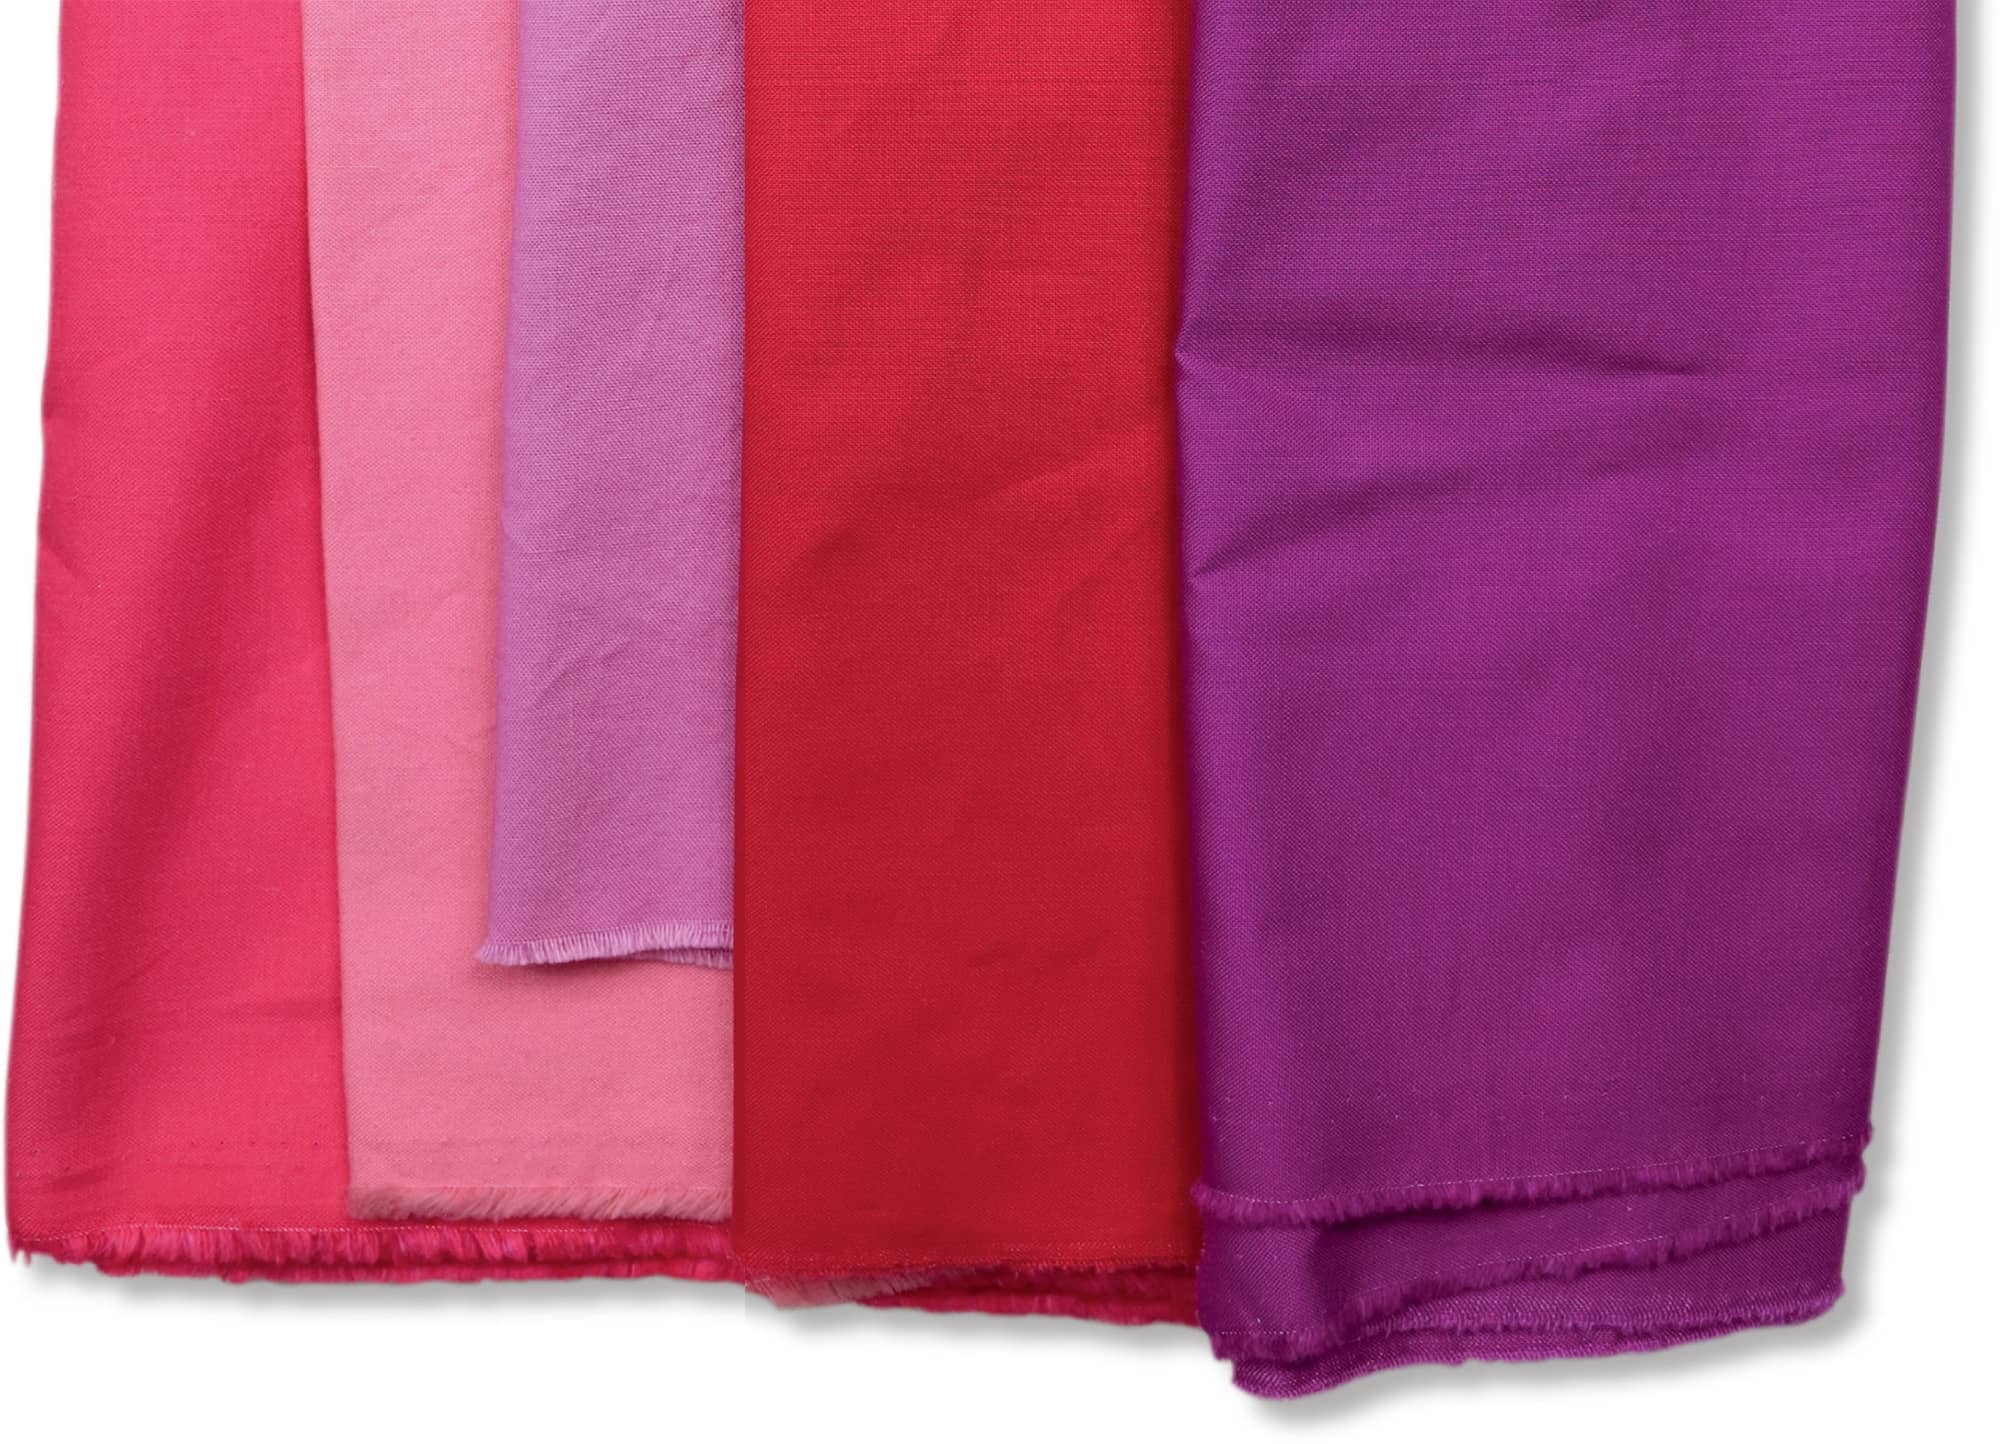
Five 18" × 22" (45.6 × 55.9 cm) (fat quarter) pieces of 100% quilting cotton in various colors (This is more than you need, but when printing fabric, it’s always better to have more than less, so you can choose the portions you like best.)
Washable school gel glue
Liquid Rit dye in Pearl Grey and Lemon Yellow
Plastic container
1 teaspoon measuring spoon
1 cup (235 ml) measuring cup
Rubber gloves
Iron
Rotary cutter
Cutting mat
1 yard (91 cm) hand-dyed fabric for quilt back
Pins
Size 5 perle cotton in a variety of colors
Size 20 chenille needle
Doodle Love Raindrop and Doodle Love Bird templates
Scissors
Fabric marking pen
Felt scraps in a variety of colors
Creating the Glue Gel Resist and Dyeing the Fabric
We start this project by printing an X and O pattern on the fat quarters to create custom-printed fabric. I strongly recommend 100 percent cotton, and the school gel glue, which is the easiest to remove. White school glue cannot be removed.
Glue gel resist is a faux batik process. The dried glue creates a resist on the fabric, meaning it will preserve the original color of the fabric by blocking out any dye placed over it. What makes this a faux process is that the glue breaks down very easily so when we dye our fabric, we have to use much lower heat and can't allow the fabric to sit for a deep shade of dye color. This gives us a subtle wash effect rather than a drastic color difference.
1 Prepare your work surface by laying down a piece of plastic. (A plastic trash bag cut open works fine.)
2 Lay your fabric down on the plastic and add an X and O pattern with the gel glue across the entire piece (FIGURE A). Repeat for all the fabrics.
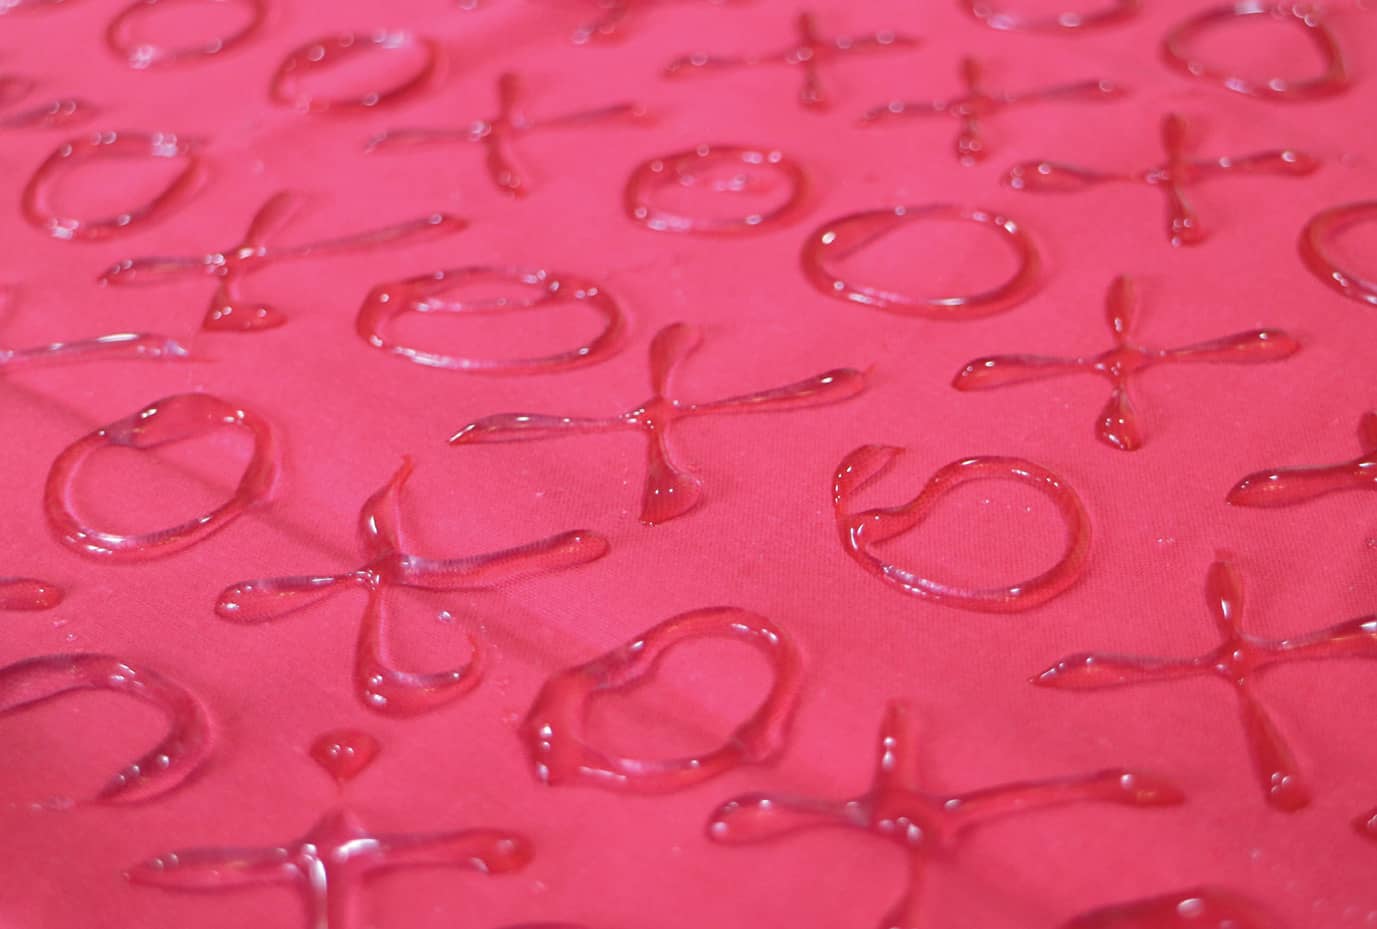
FIGURE [A]
3 Do not hang the fabric to dry because this will cause the glue to run. Move the plastic that the fabric is lying on to a place where the fabric can dry. Let the glue dry completely—it will seep through the fabric to act as a resist, and this can only be accomplished by giving it ample time to dry. I like to make the resist for this kind of fabric before I go to bed, and then it has the night to dry.
4 Once the glue is completely dry, prepare your dye wash in a plastic bucket with 2 teaspoons dye to 5 cups (1200 ml) warm tap water. Do not use boiling water or it will break the glue down too quickly. Use the hottest tap water you have. I used Lemon Yellow liquid Rit on the two paler colors of fabric and Pearl Grey liquid Rit on the three other darker colors.
5 Put on rubber gloves. Lay the fabric with the gel resist into the dye bath; don’t agitate. Allow the fabric to soak for 10 minutes. Do not leave it for longer or the glue may break down and the dye will seep into the blocked areas. Rinse the fabric in hot tap water, gently rubbing it together to loosen up the glue. Hang to dry. You won’t remove all the glue in this step.
6 Place the fabric back in the plastic container and pour very hot water over it. Let it soak until the water is cool. Rinse under tap water and hang to dry. It may take another soak and rinse to get all the glue out, but it’s better to remove it in stages than to stress the fabric by removing it all at once.
7 After all the glue has been removed, iron the fabric. Using a rotary cutter and cutting mat, cut it into 12" × 7" (30.5 × 17.8 cm) pieces for a total of eight rectangles (FIGURE B).
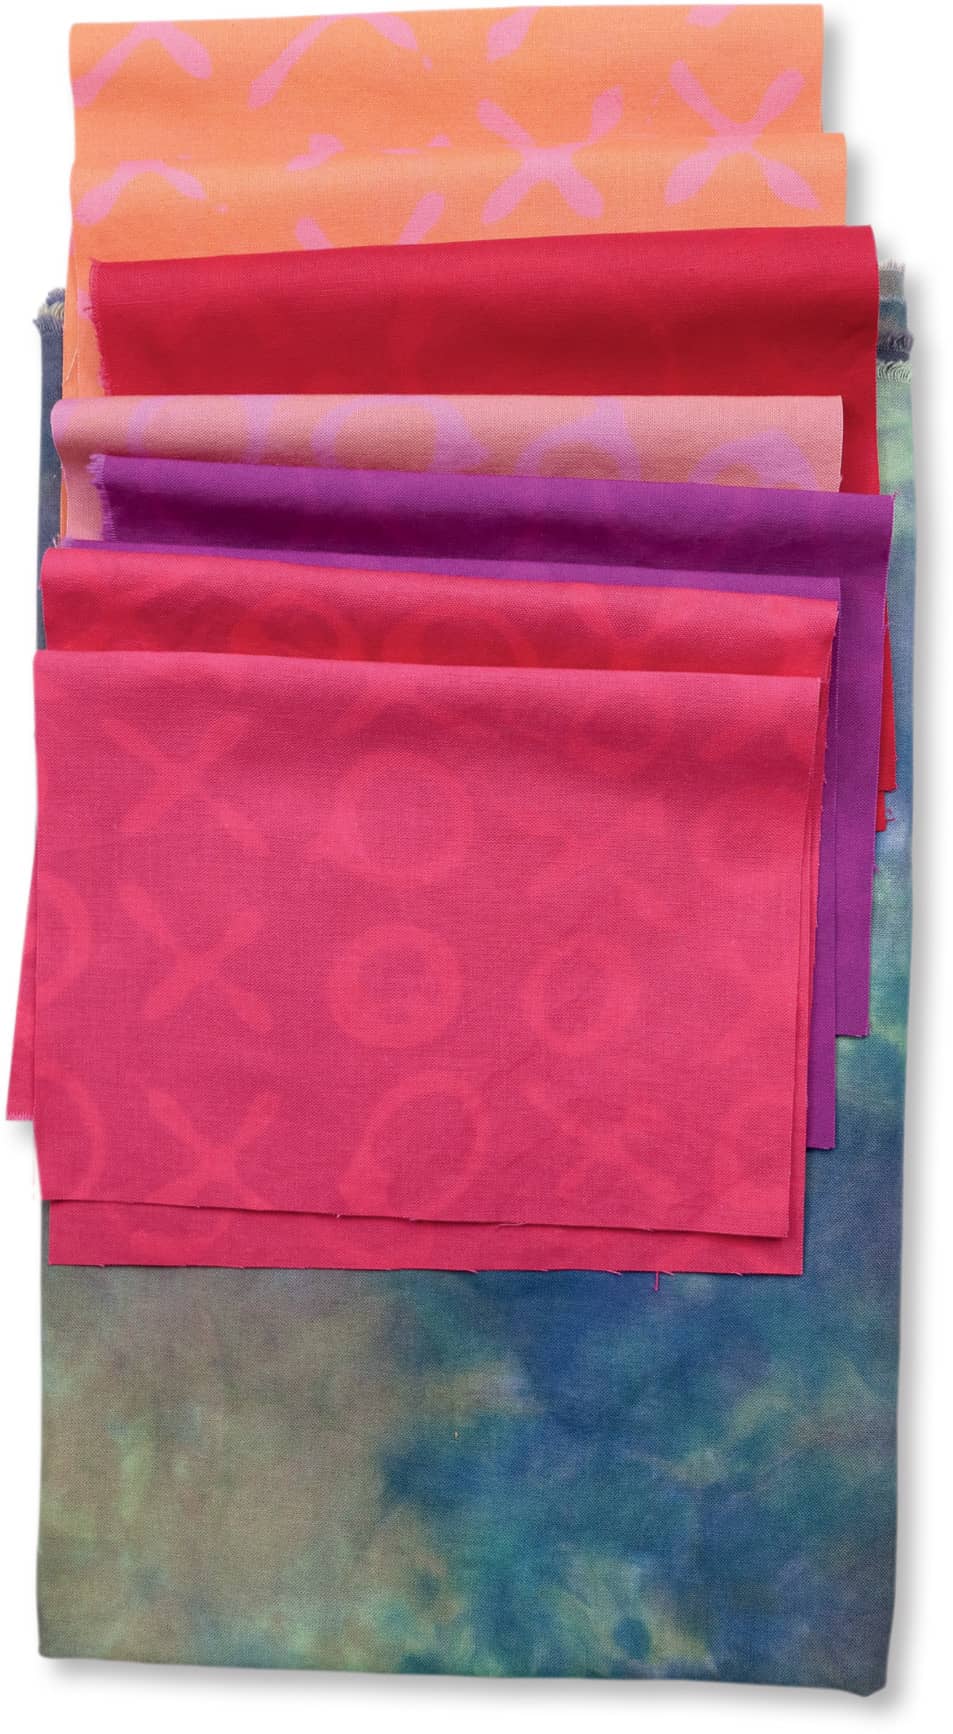
FIGURE [B]
Creating the Quilt
1 Lay out the backing fabric right side down. Arrange the rectangles on top of the backing fabric, right side up, in a color order that you find pleasing. Pin in place (FIGURE C).
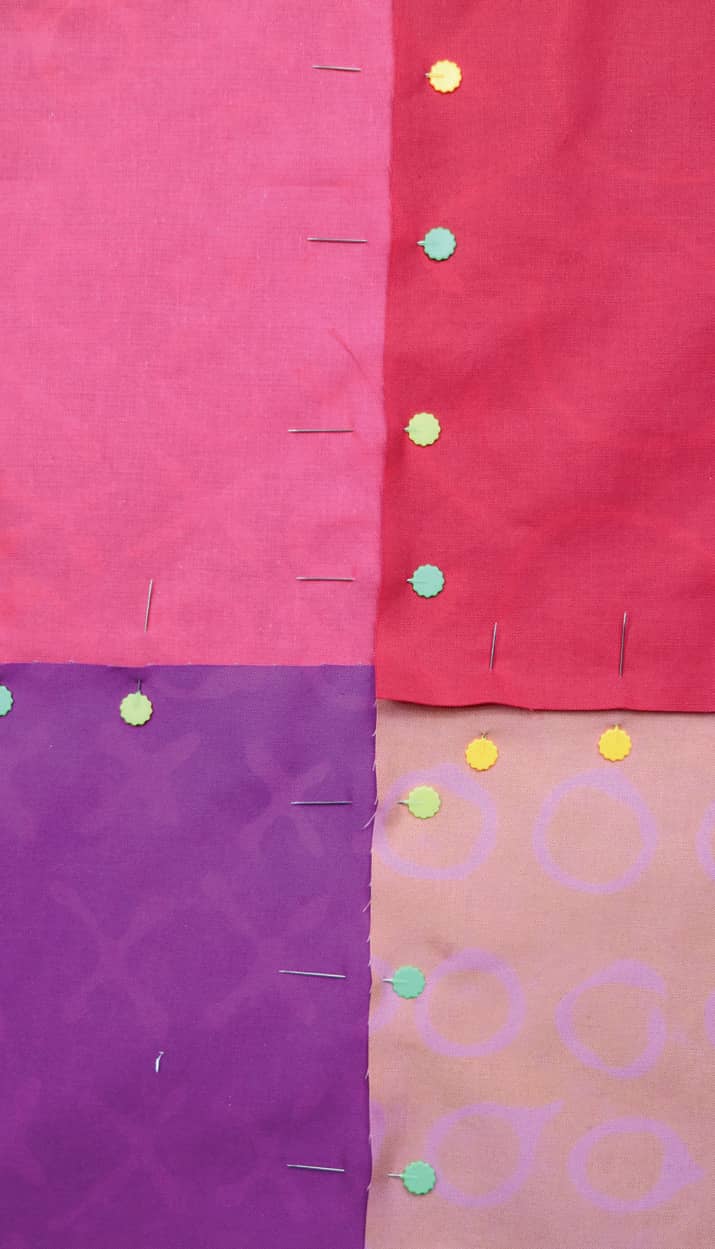
FIGURE [C]
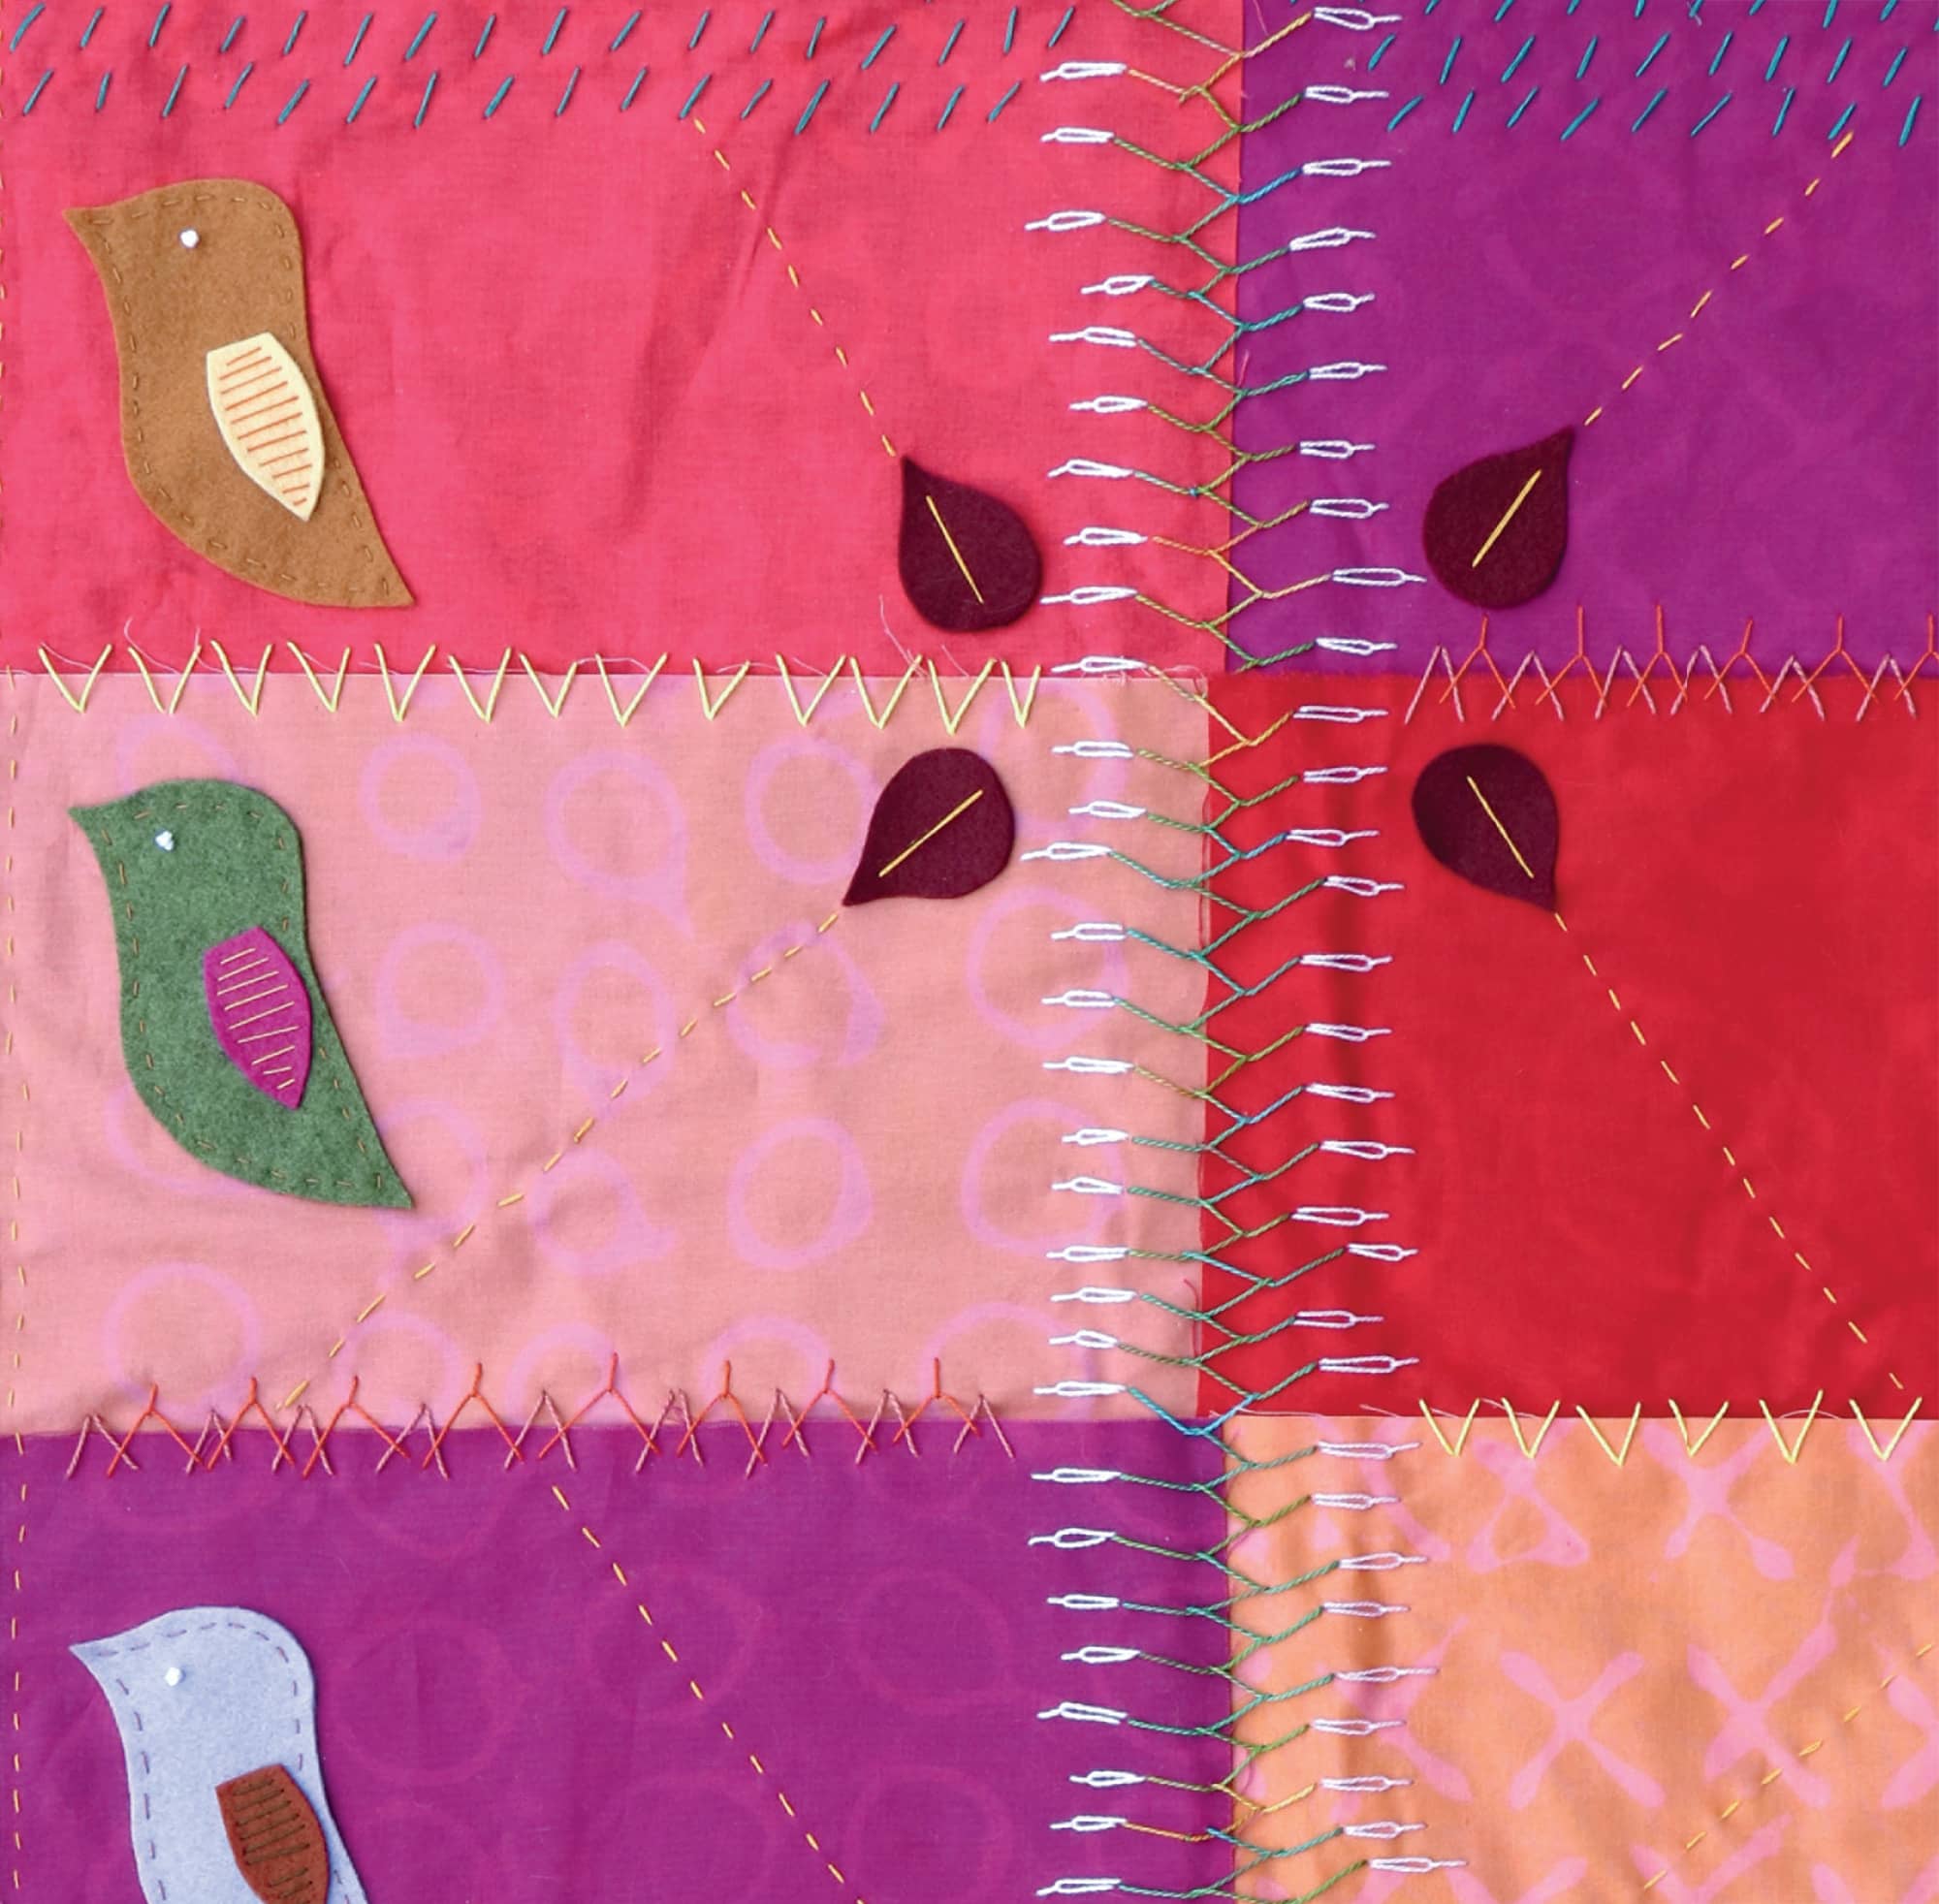
2 With perle cotton and a chenille needle, stitch a wide feather stitch (see here) down the center of the quilt (FIGURE D).
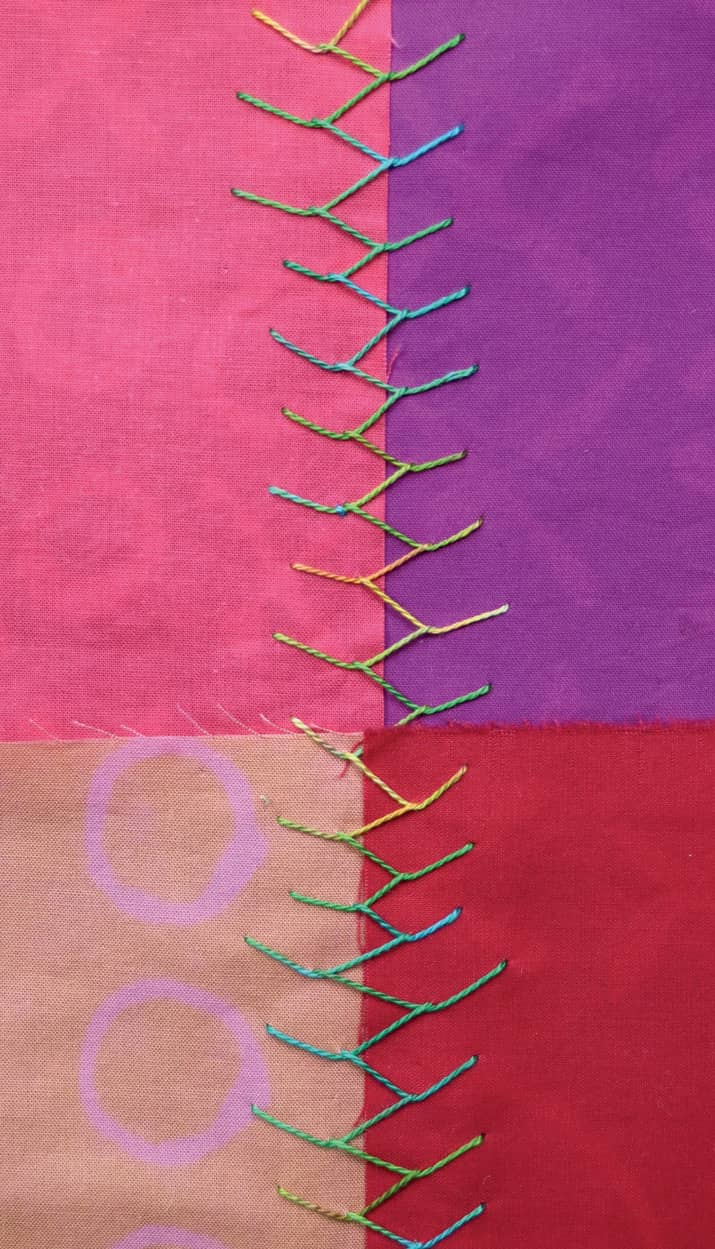
FIGURE [D]
3 Place lazy daisies (see here) at the edges of the wide feather stitch. Add a slanted long running stitch (see here) along the top and arrow stitch (see here) along the horizontal seams (FIGURE E).
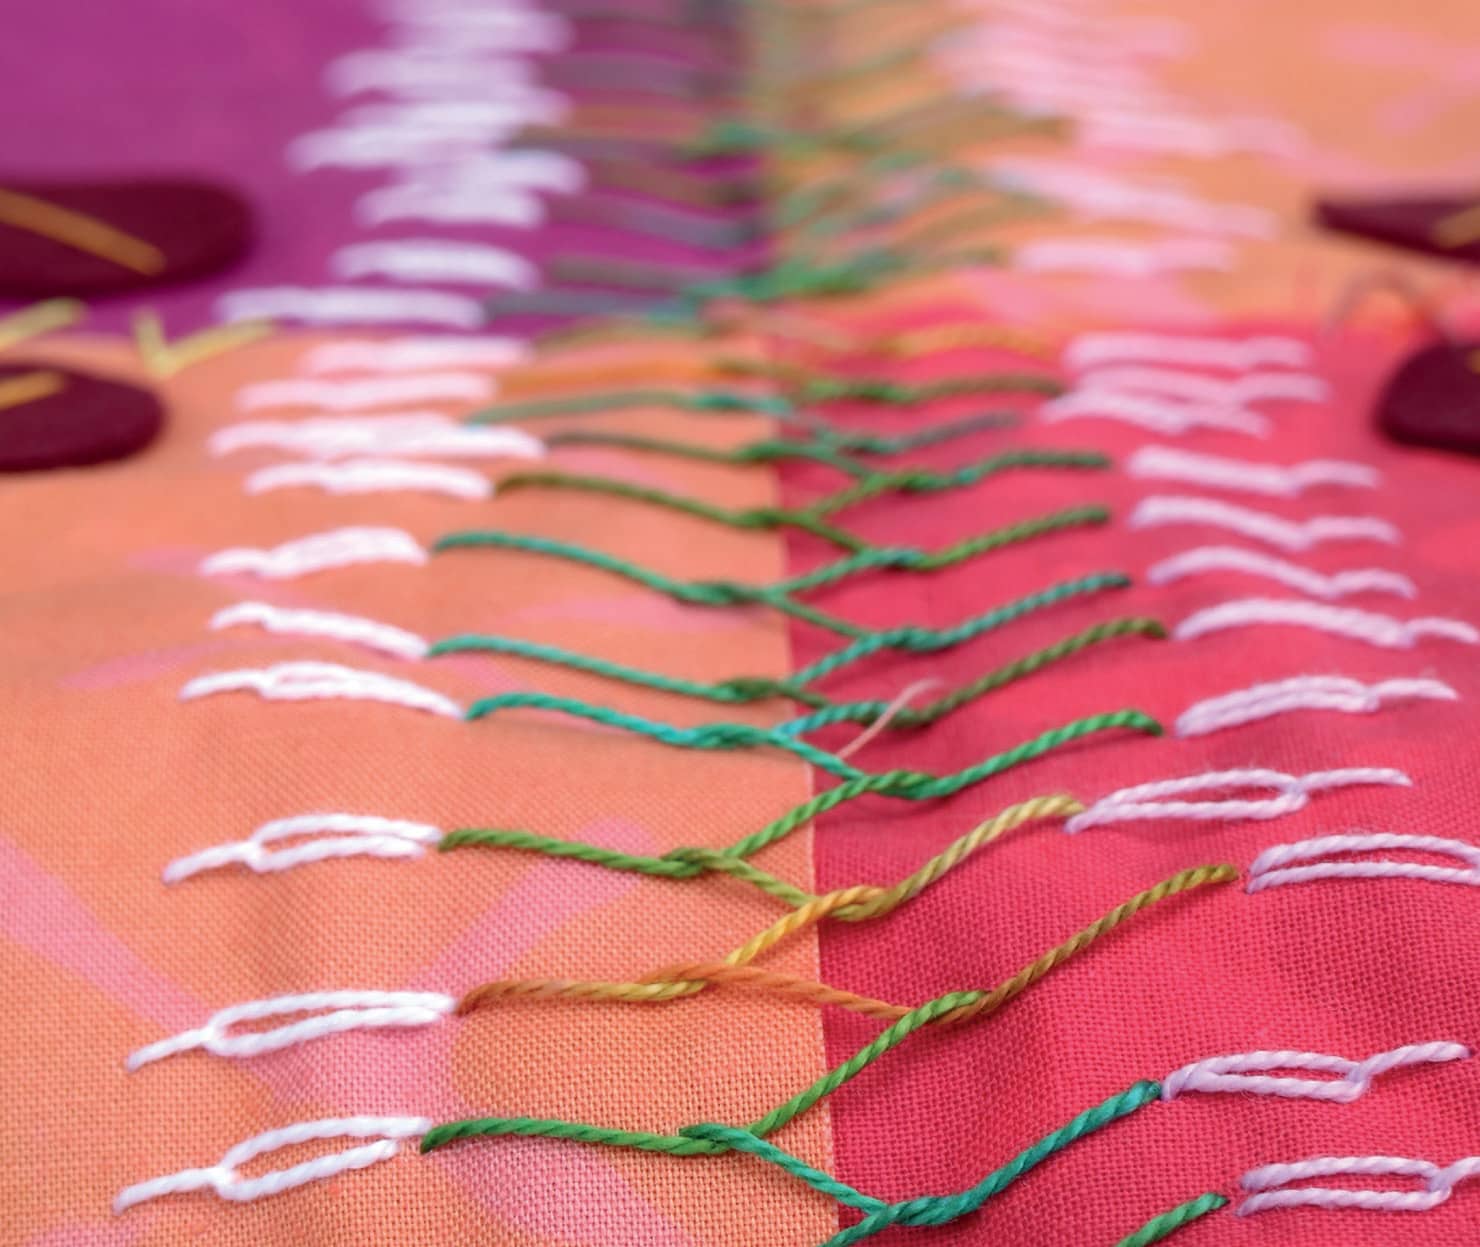
FIGURE [E]
4 Scan and print the Doodle Love Raindrop templates per the instructions shown here. With a fabric marking pen, trace it onto a single color of felt eight times. Arrange the fabric raindrops so that they are in the corner of a rectangle. Add to the quilt with a long straight stitch down the center of the raindrop and continue the straight stitch onto the printed fabric until it reaches another stitched area.
5 Repeat step 4 to trace the Doodle Love Bird template onto different pieces of felt to make a total of eight birds. Attach the wing pieces to the birds using a series of straight stitches. Attach the birds to the quilt at the edges of the rectangles (FIGURE F).
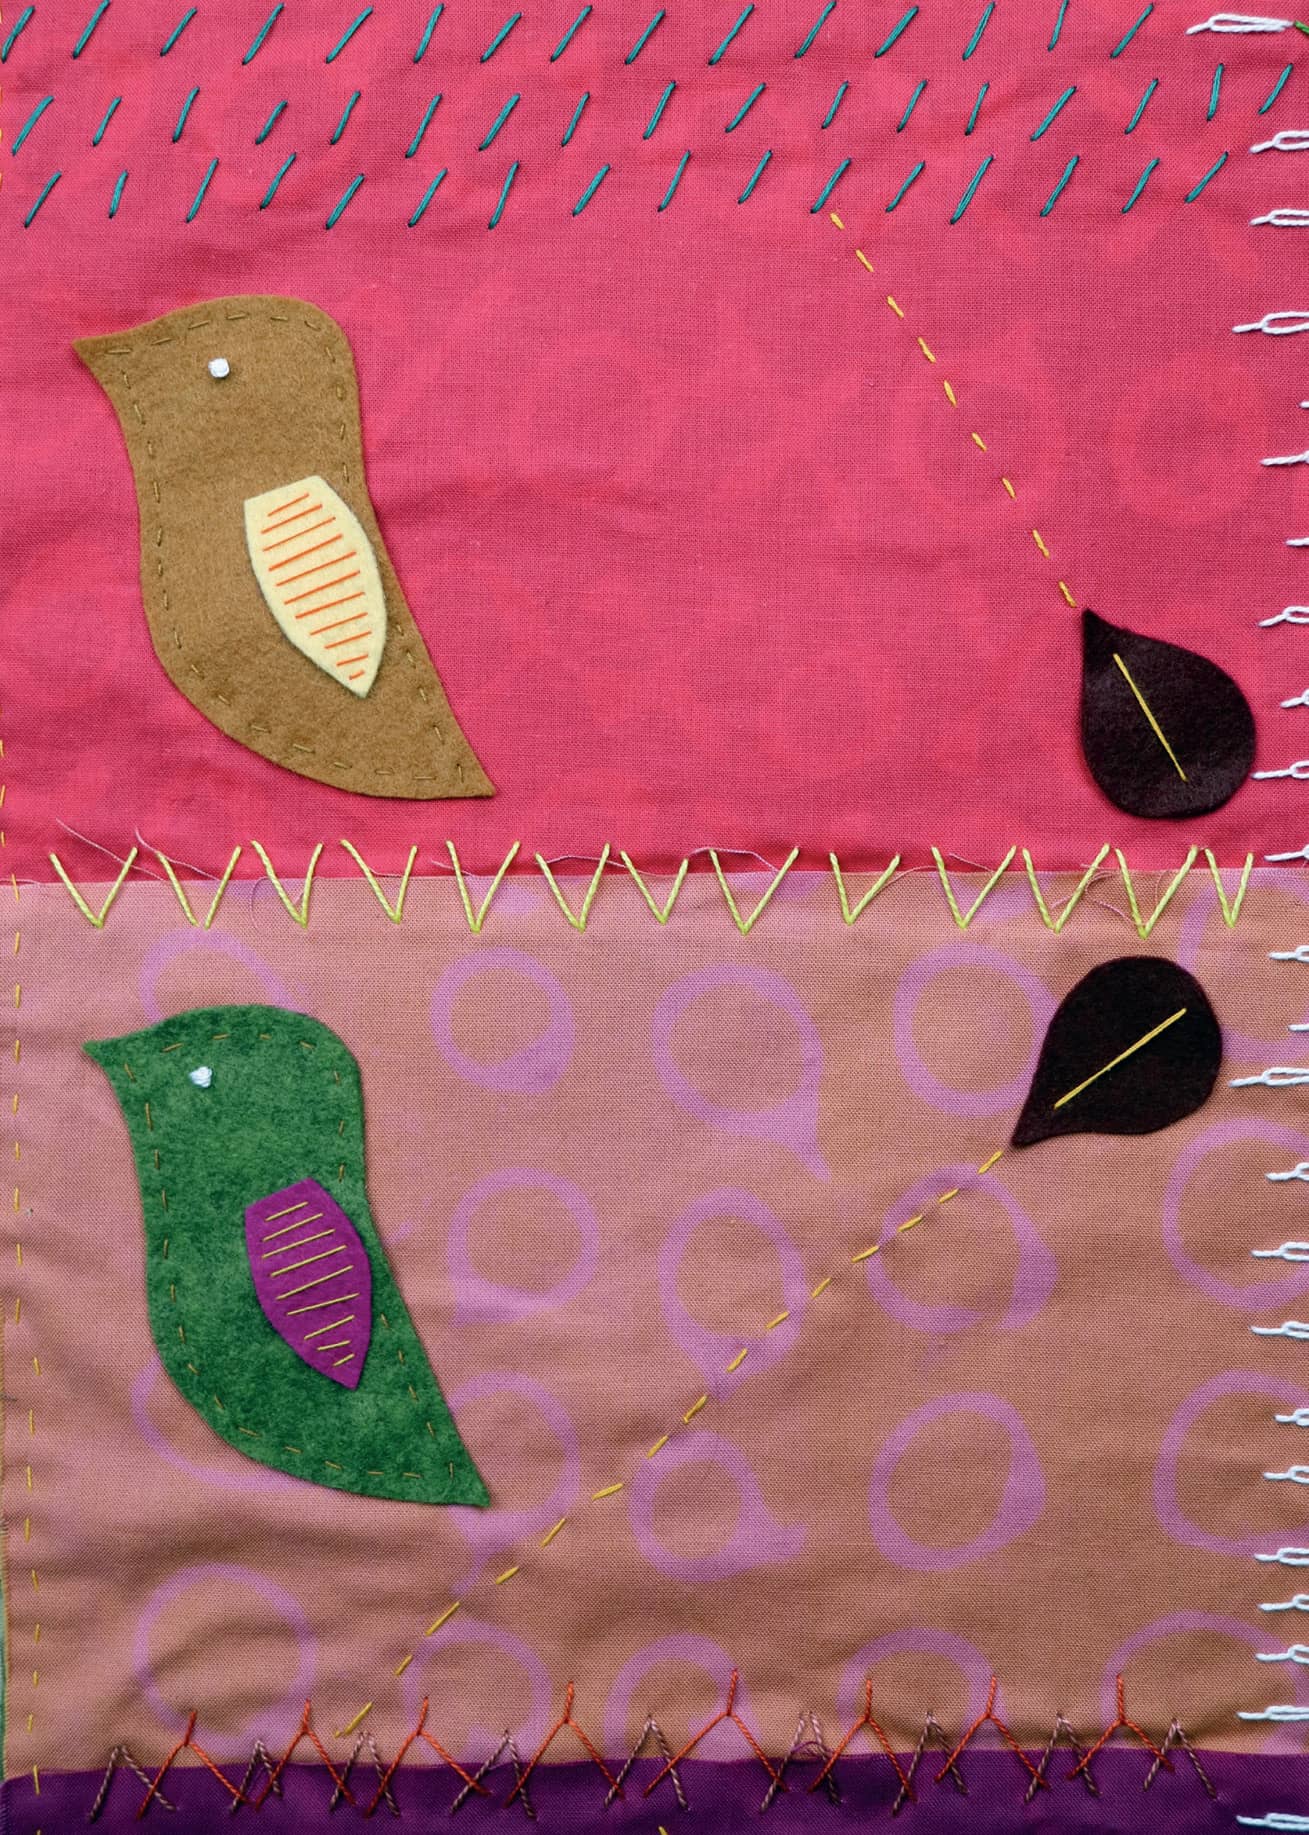
FIGURE [F]
6 Complete the quilt by stitching a running stitch (see here) around the edges to secure the fabric backing and the quilt top together.
Technicolor Begonia Cushion
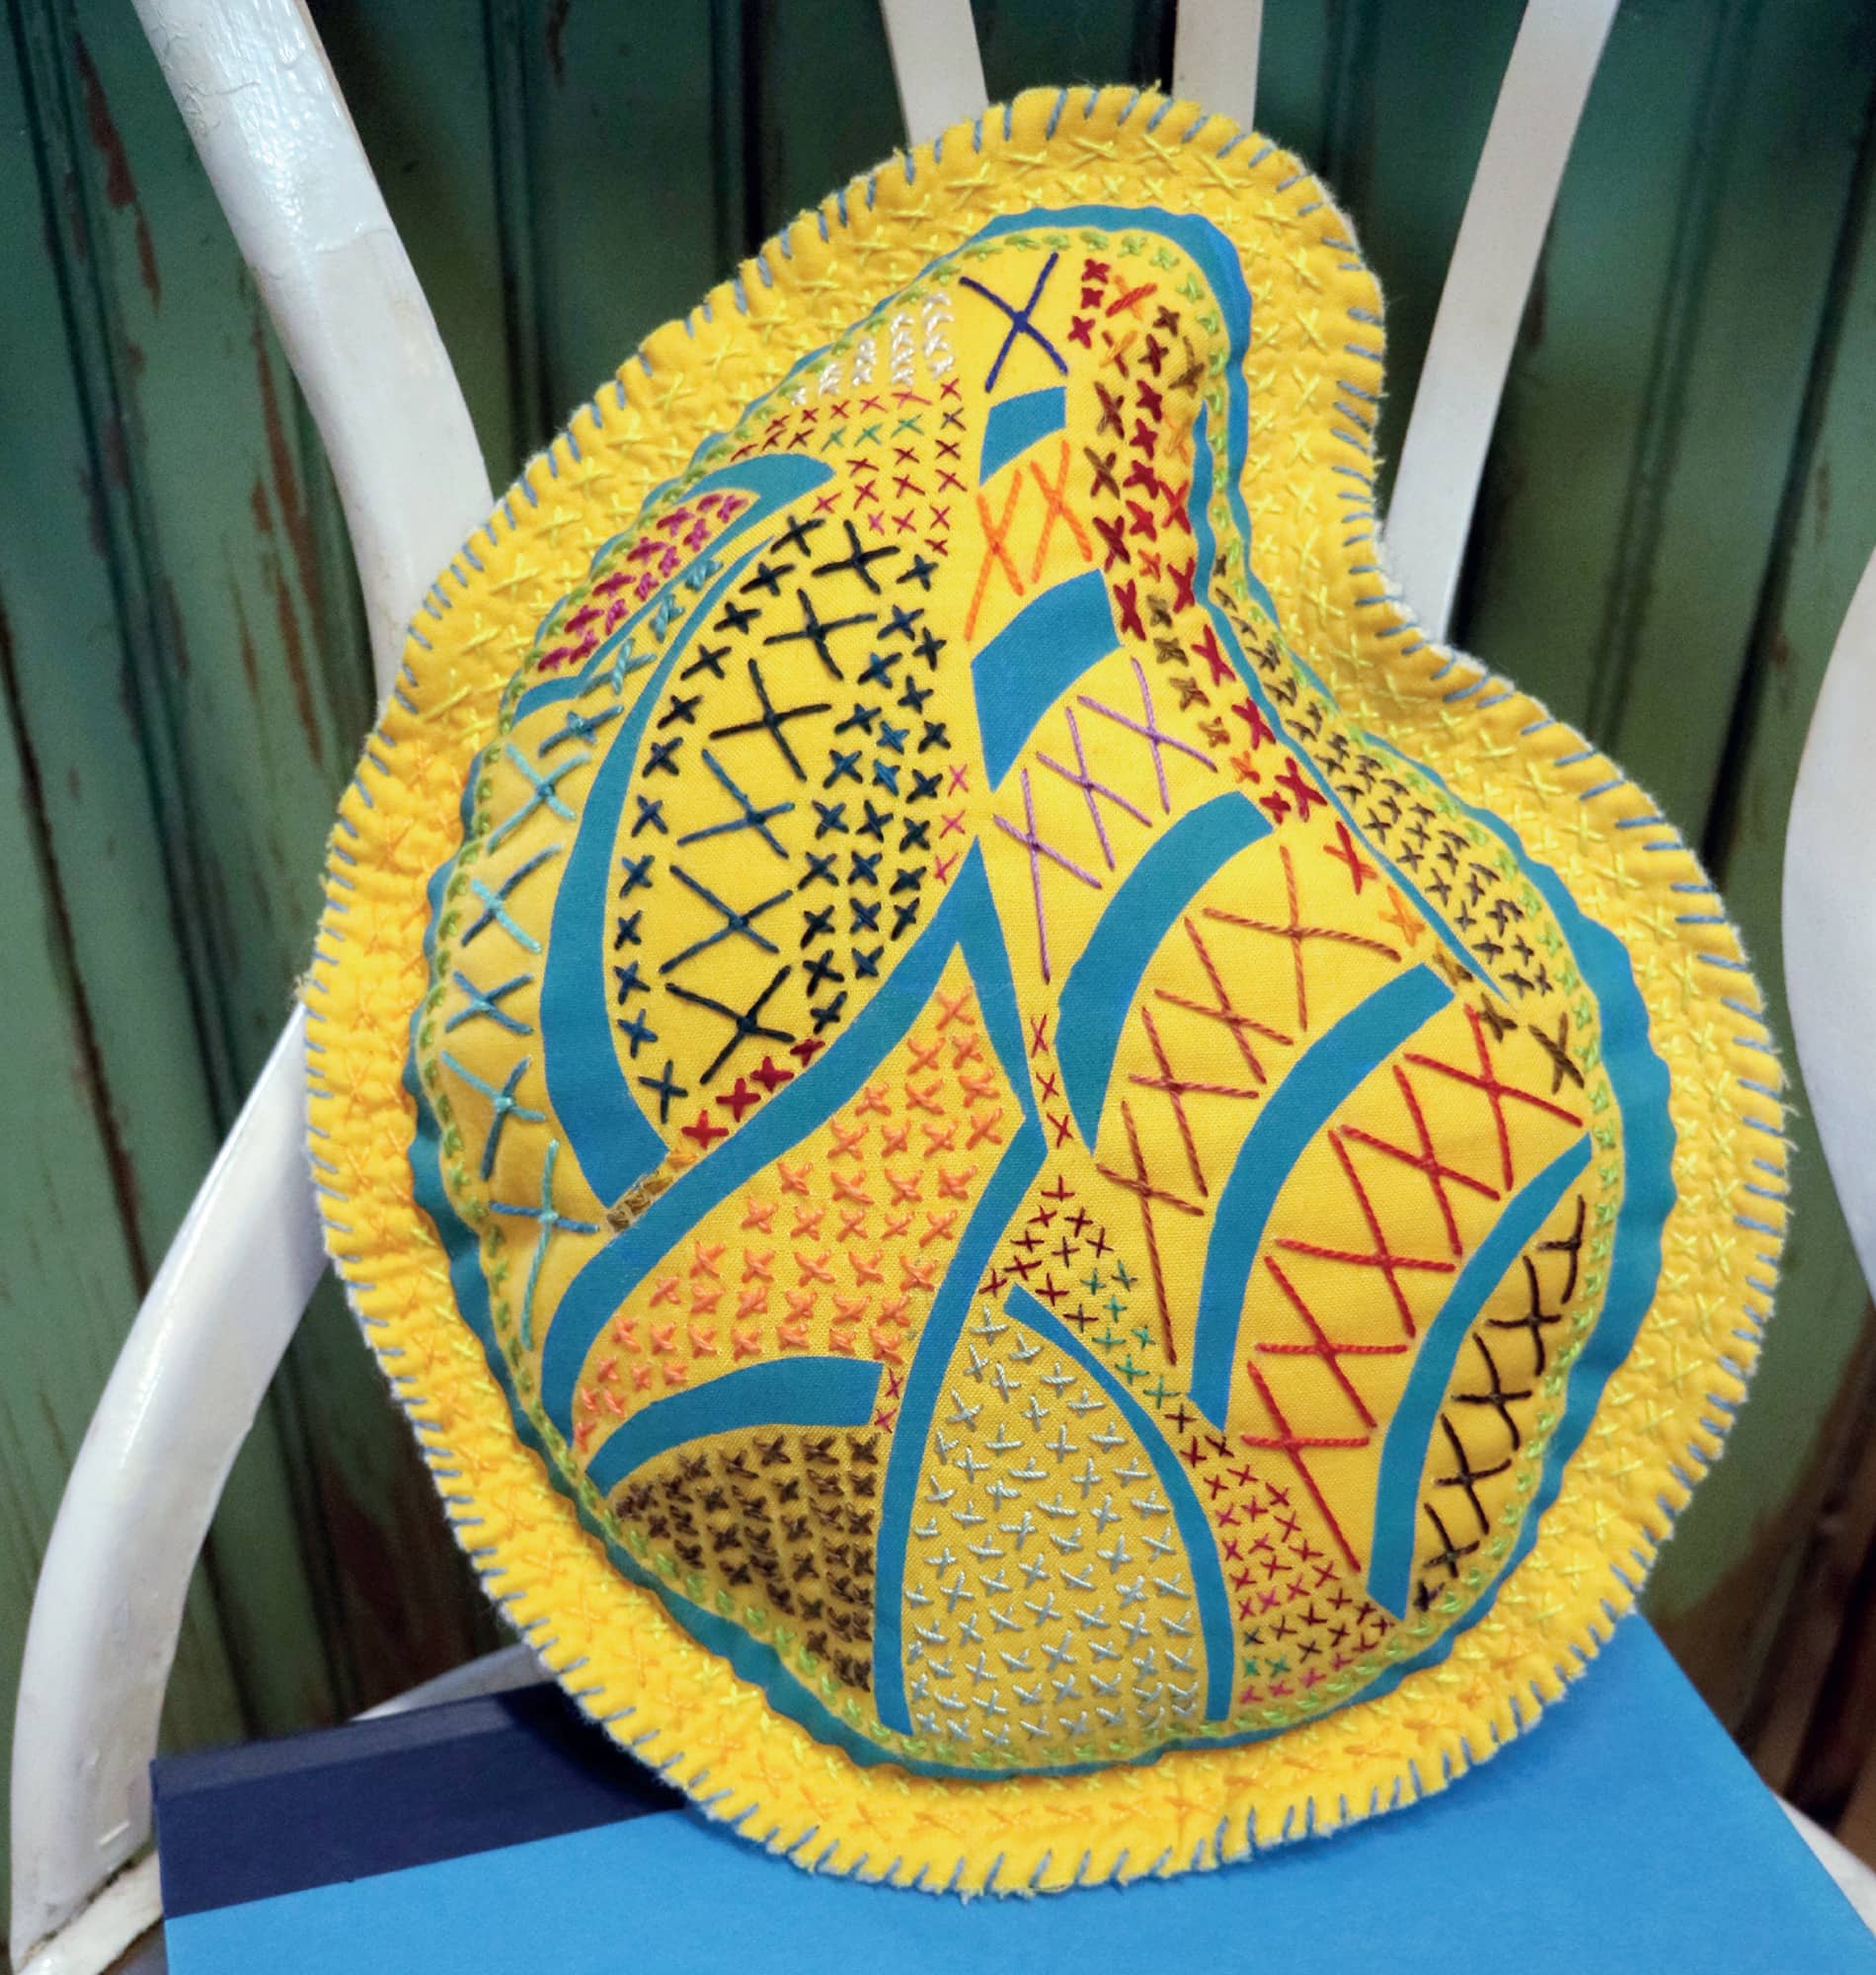
This quirky little cushion draws its inspiration from the free spirit of the begonia plant. My affection for these plants is based hugely on their refusal to conform. They grow in whatever direction they like, as big as they want, and flower when they choose to. They march to the beat of their own drummer.
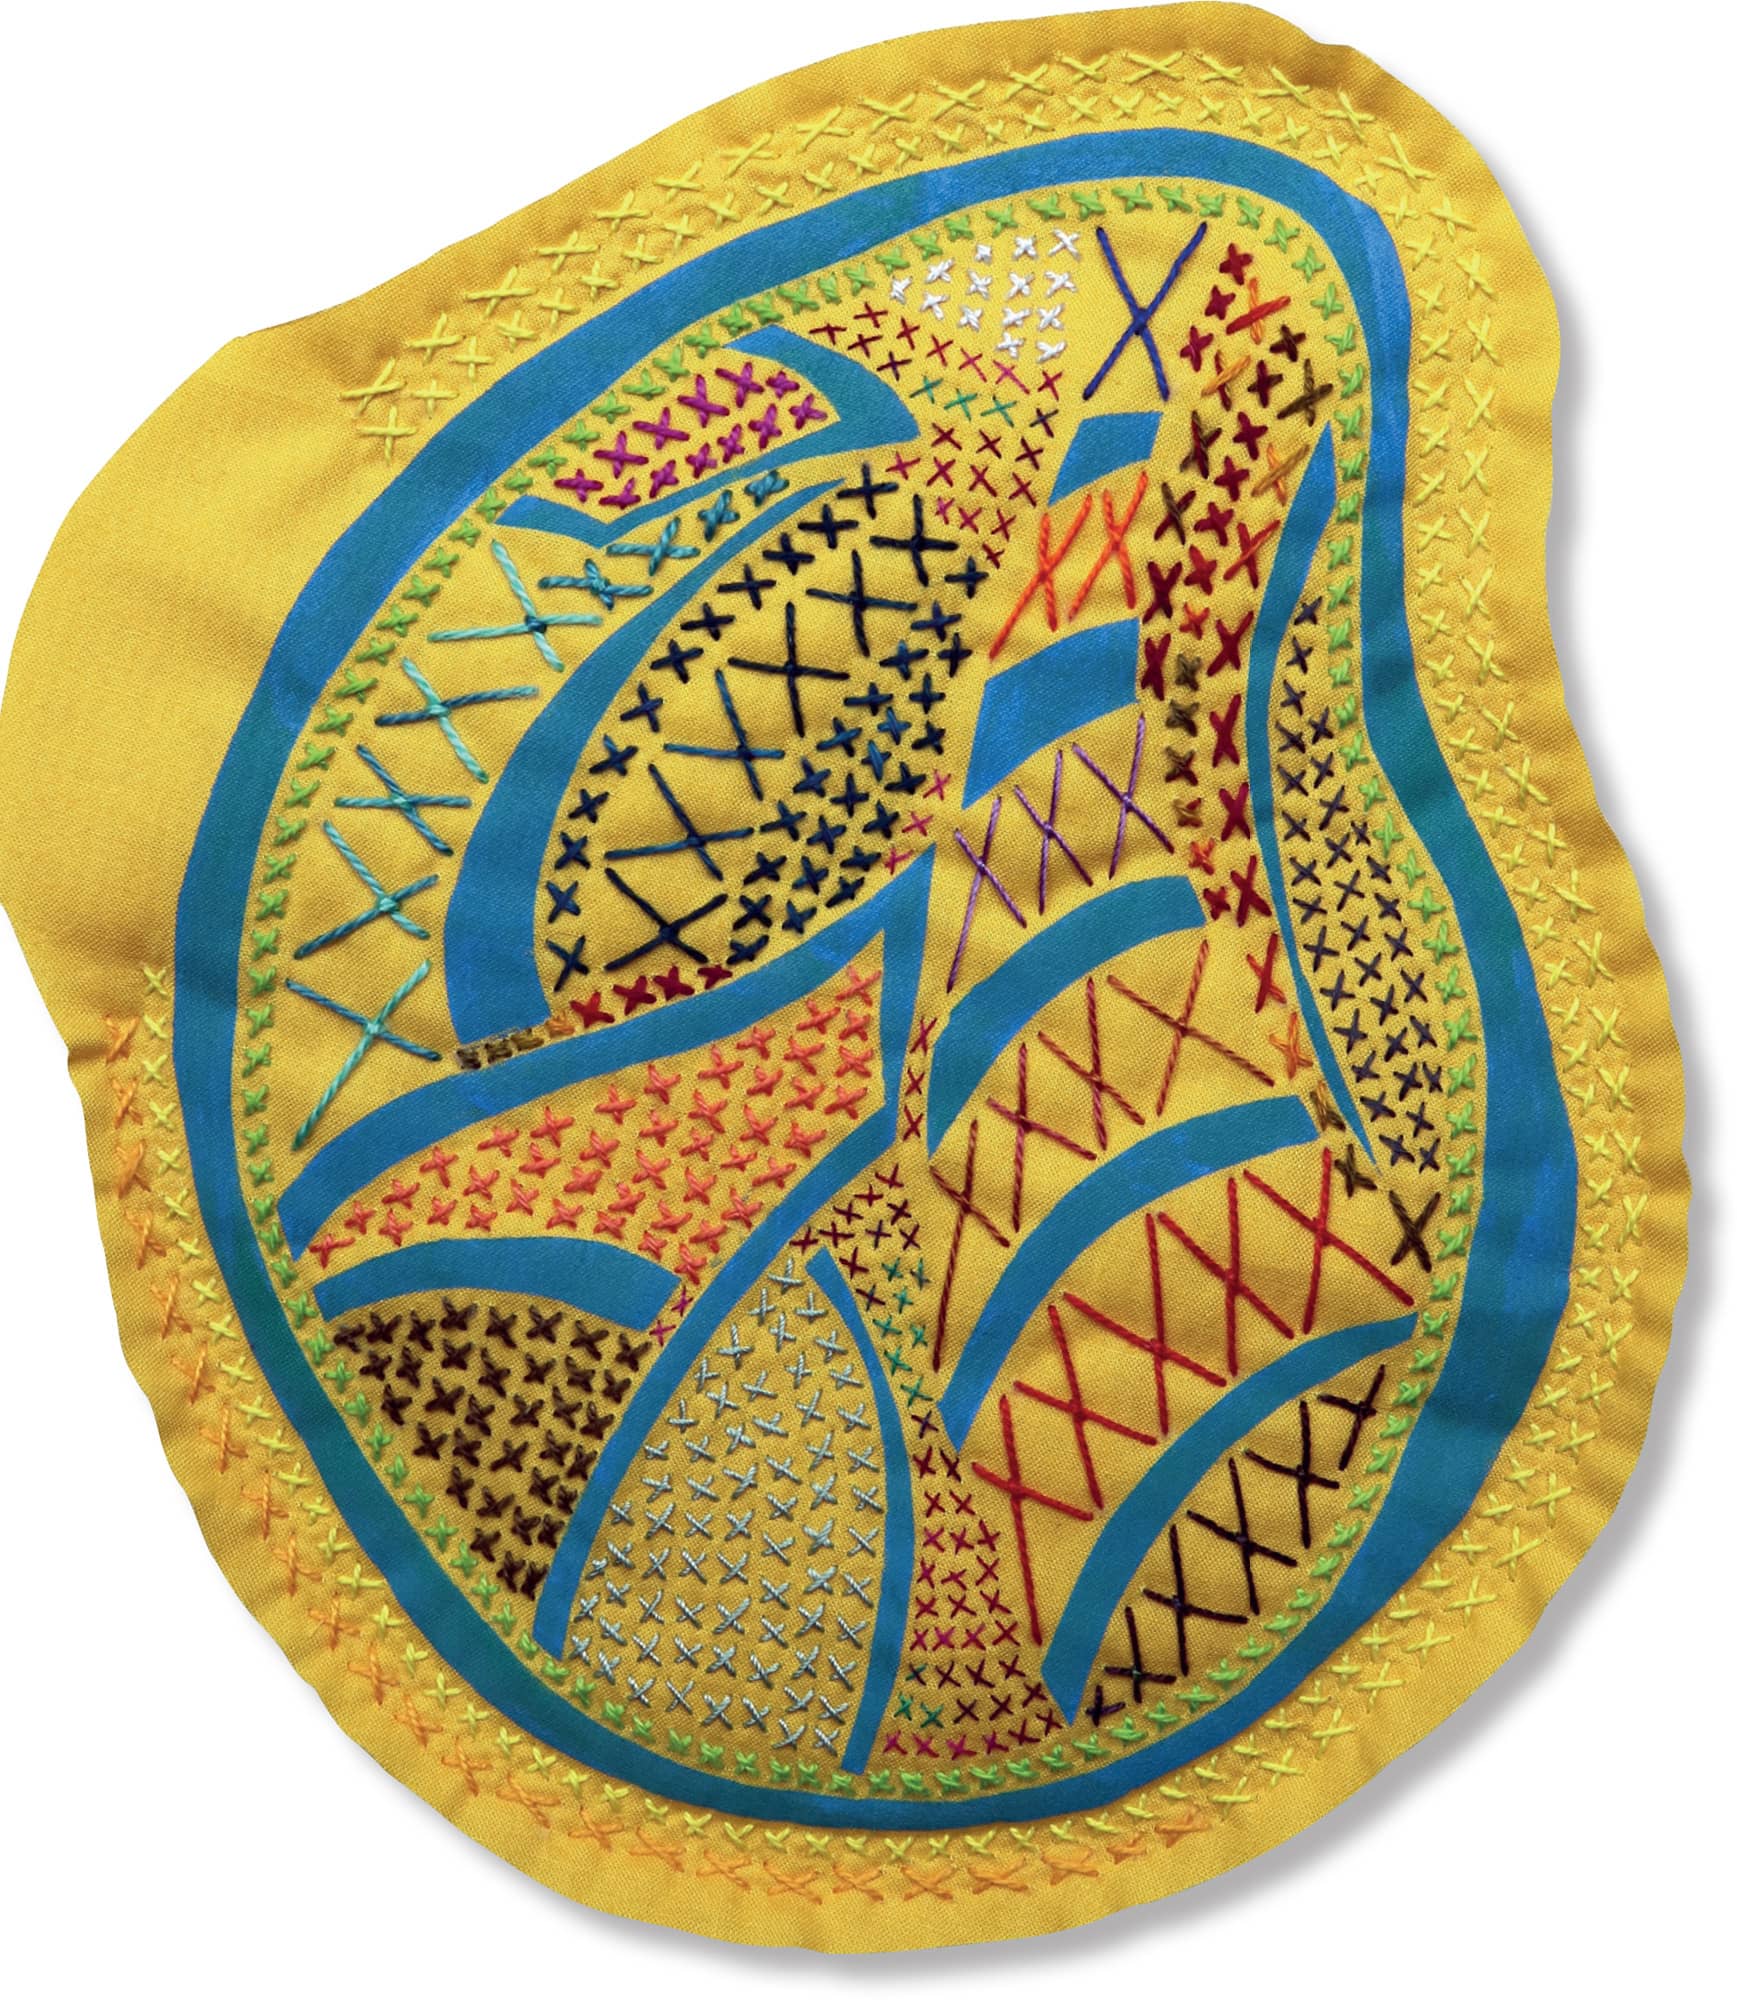
The pattern for this cushion was created in “Creating Your Own Pattern for Stitching” (see here). Its demure size allows you to toss it in your bag and carry it with you for stitching in those odd moments. The only stitch I used on this project was the X stitch, a nod to the world of cross-stitch patterns, which is likely to be the first exposure to hand stitching most of us experience. Varying the size of the stitch and using various threads (cotton, wool, and silk) gives our little cushion a healthy dose of texture.
Last, I cut my cushion the shape of the leaf I designed. It makes it the perfect size for resting a book on while you’re reading or tucking behind your head when you’re relaxing on the patio. (And besides, the world has enough square cushions, doesn’t it?)
M/A/T/E/R/I/A/L/S
Scissors
Stenciled fabric made in Creating Your Own Pattern for Stitching. You can use the template shown here, or follow the steps shown here to create your own.
Two 12" × 12" (30.5 × 30.5 cm) pieces of thick wool felt
Pins
Sizes 5, 8, and 12 embroidery thread in various colors and fiber contents
Size 20 chenille needle
Size 5 embroidery needle
Polyfill stuffing
1 With scissors, trim your stenciled fabric to a 12" × 12" (30.5 × 30.5 cm) square. Lay it on top of a 12" × 12" (30.5 × 30.5 cm) piece of thick wool felt and pin it.
2 Using various threads and the appropriate needles, begin stitching by working a small X stitch (see here) between the inside border and the leaf veins. Then fill in the sections of the leaf with different colors and sizes of X stitches (FIGURE A).

FIGURE [A]
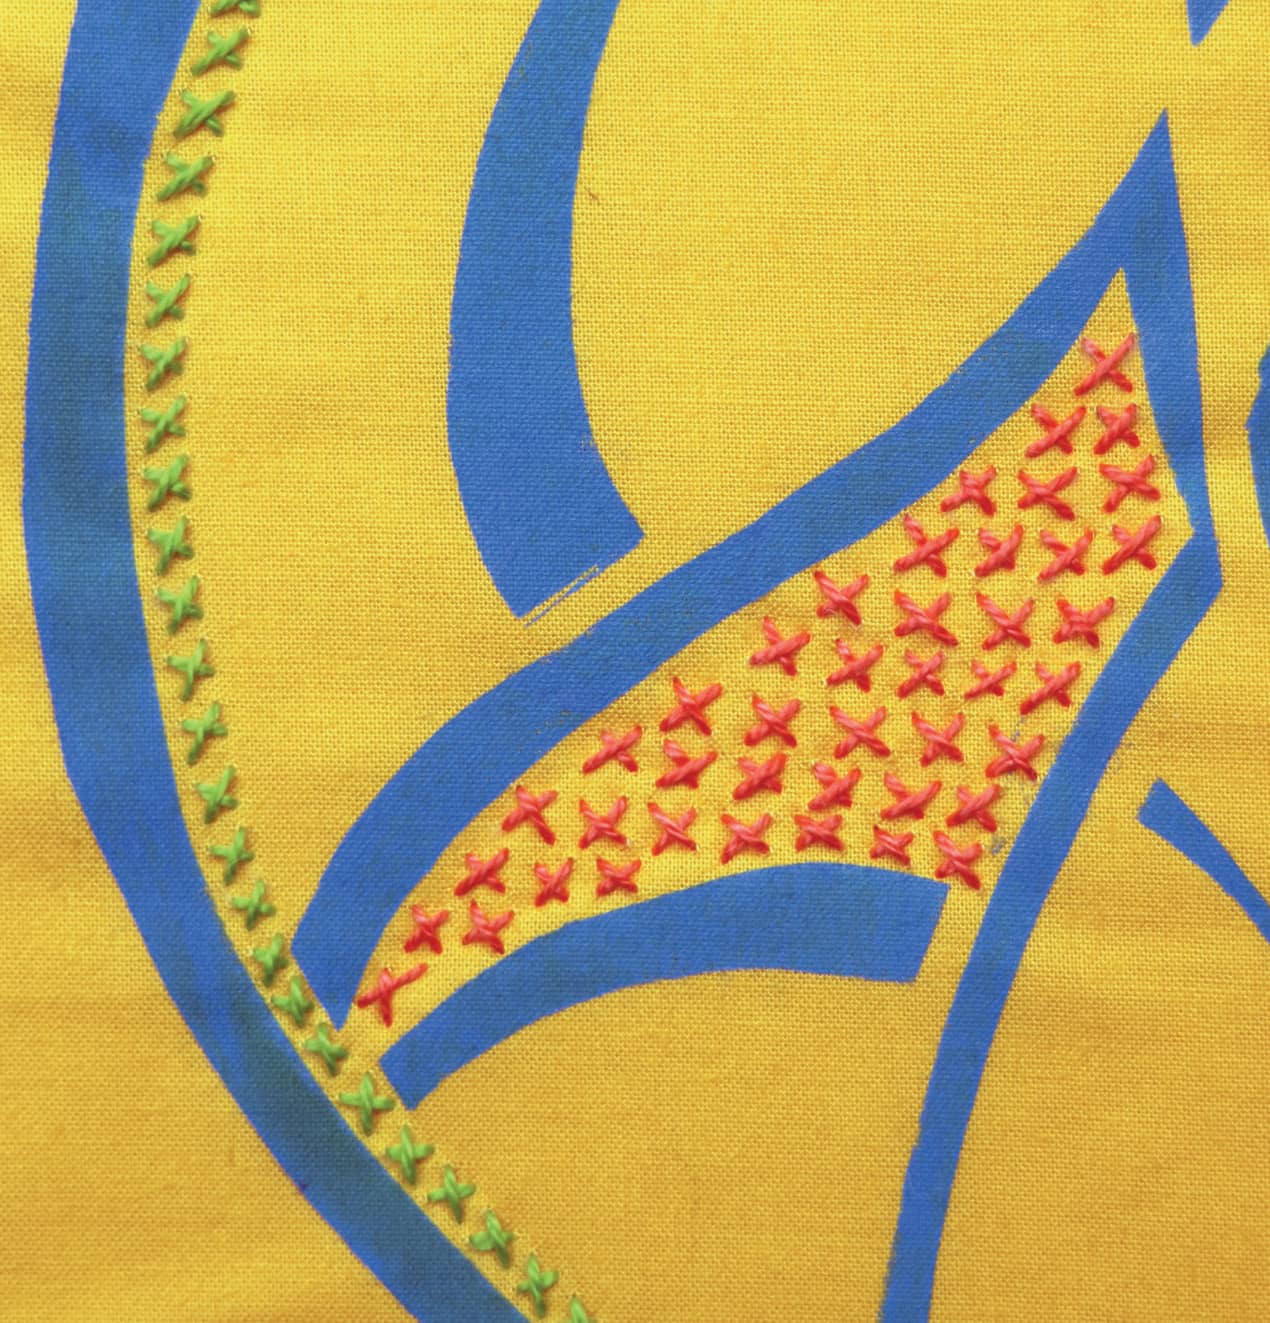
3 After you have filled in the entire leaf, lay the stitched front right side up on top of the second piece of wool felt. Pin in place. Stitch two rows of Xs around the outer border to secure the back felt to the front. Leave a 2" to 3" (5 to 7.6 cm) opening along one side to allow for stuffing.
4 Trim the pillow to the shape of the leaf. Leave a generous 1/4" (6.4 mm) border around the edge and don’t trim the stuffing opening close. This will give you some extra material to hold on to while you stuff the pillow (FIGURE B).
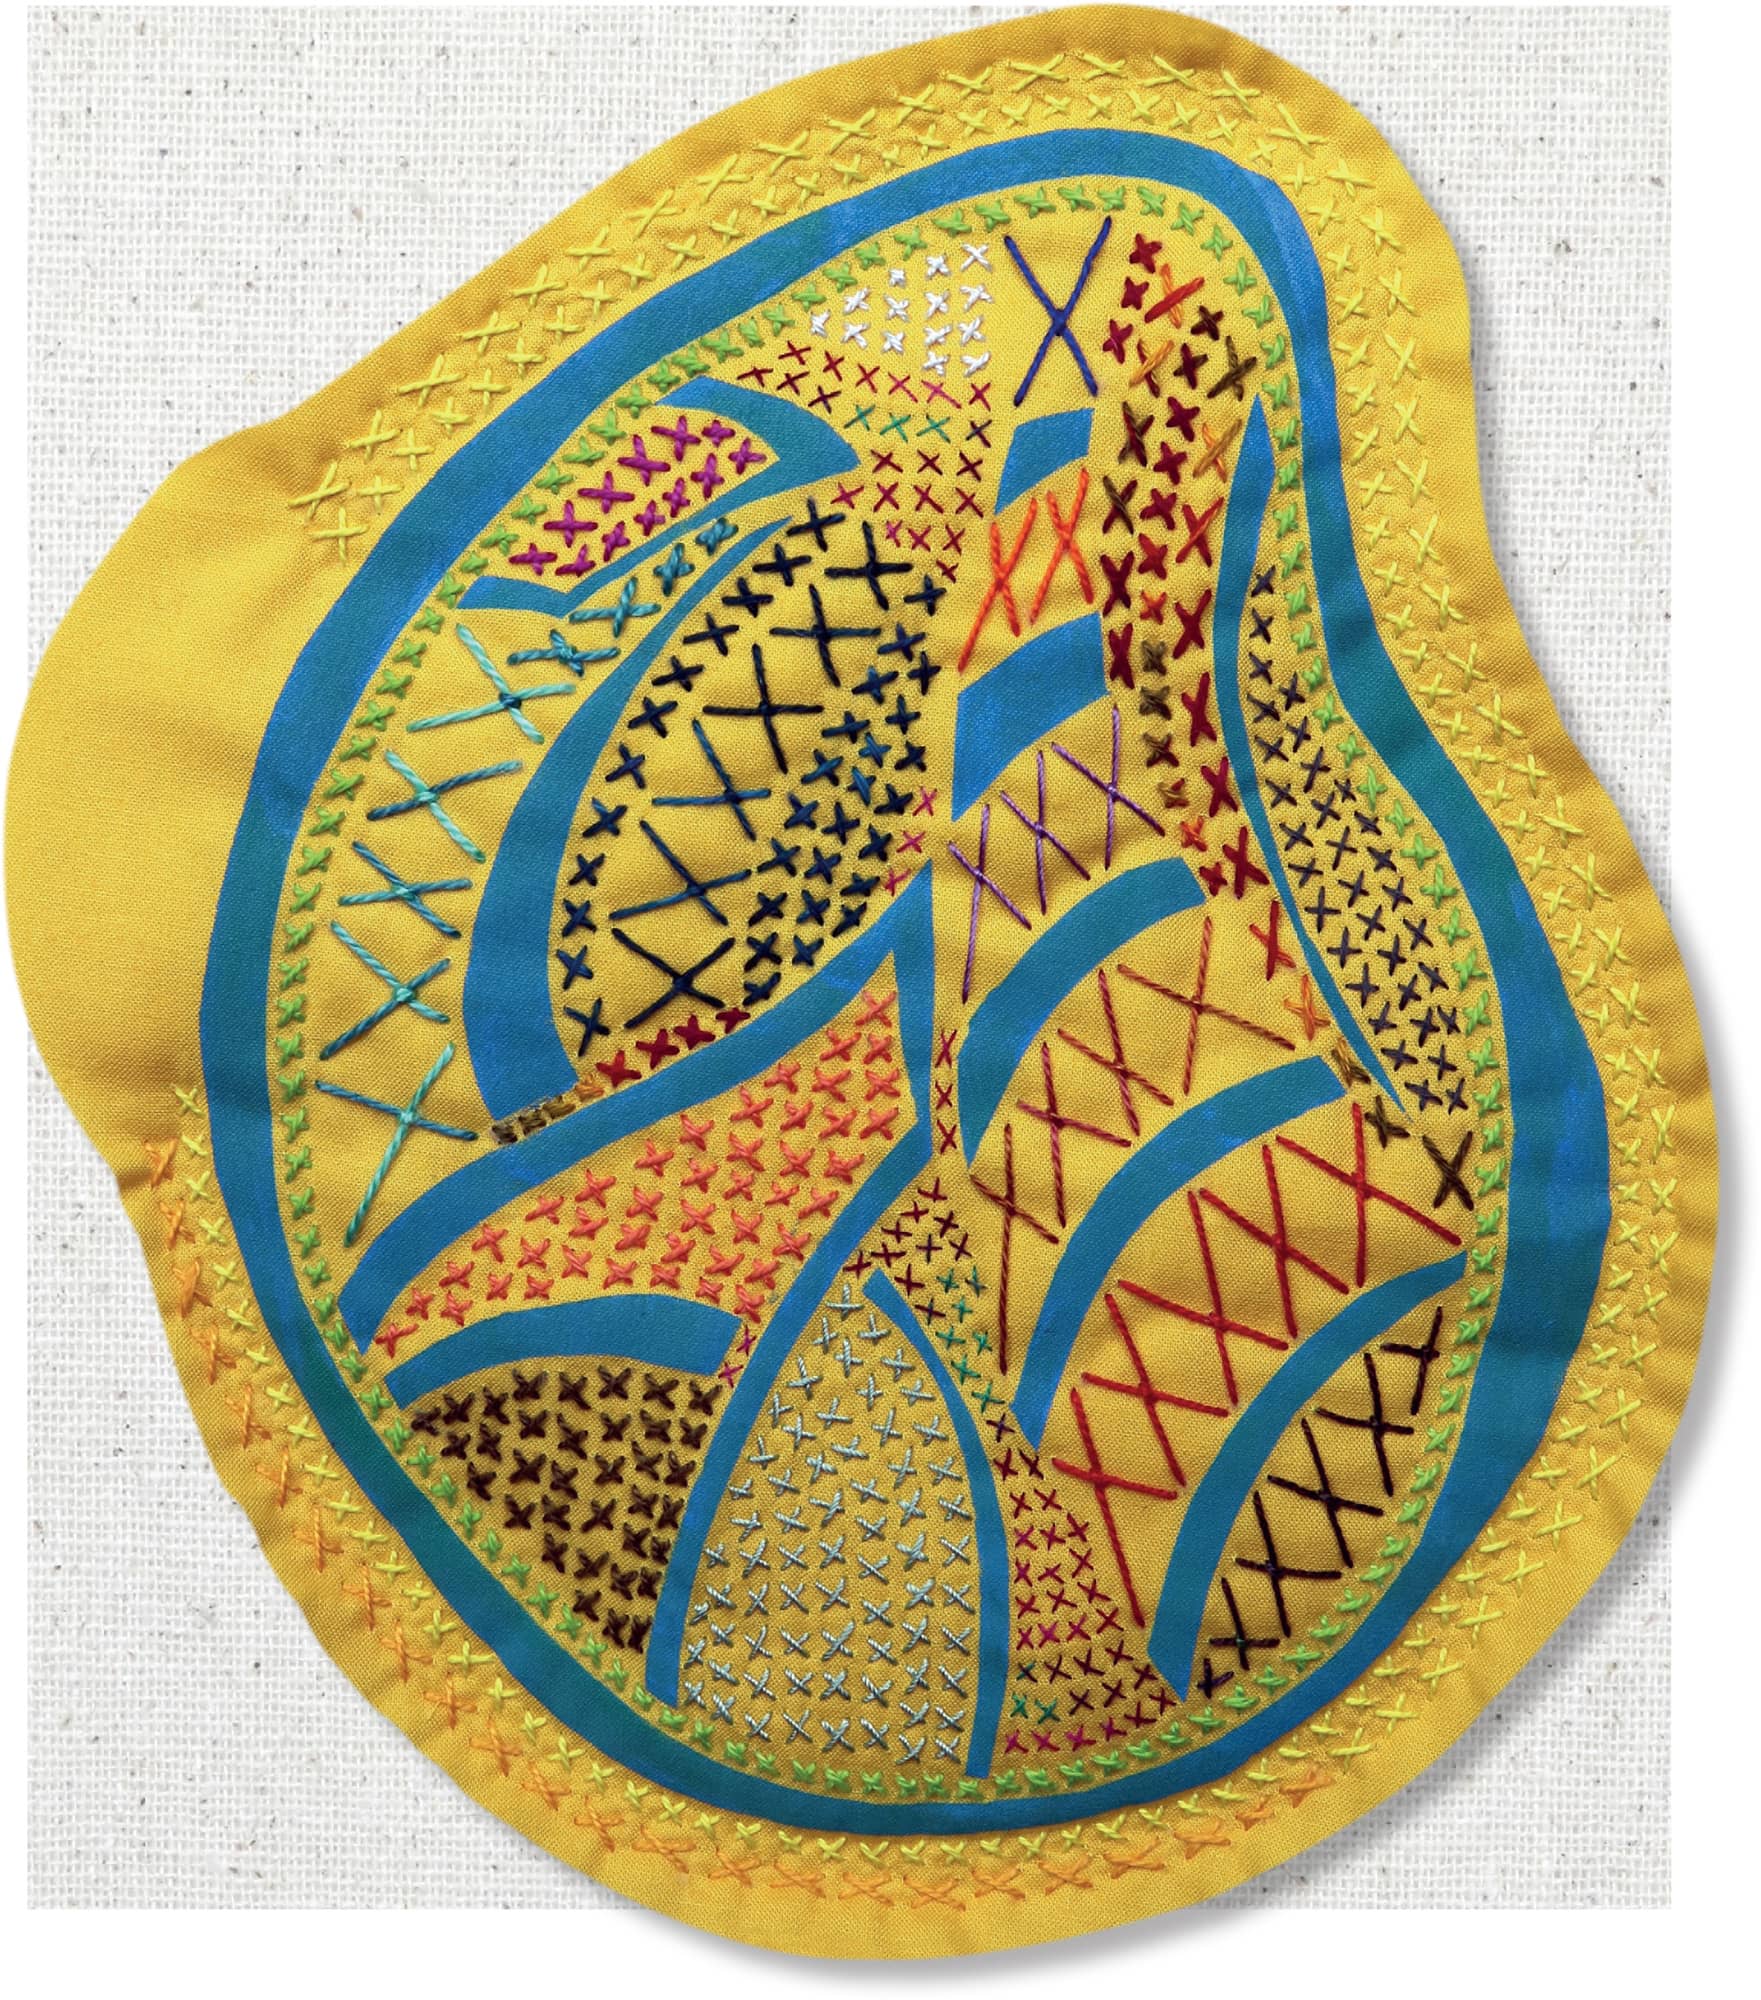
FIGURE [B]
5 Using the polyfill stuffing, stuff the cushion as much as you’d like. You can make a firm pillow or a soft one—it’s totally up to you. When you’re done, trim the extra material at the opening and add X stitches to complete the outer border.
6 Secure the edges by whip stitching the back and front together to create a solid outer seam.