

FREEZING
Freezing may be the quickest and easiest way to preserve fresh-from-the garden produce. These freezer-friendly recipes, charts, and tips provide all the information you need to fill your freezer.
Freezing may be the quickest and easiest way to preserve fresh-from-the garden produce. These freezer-friendly recipes, charts, and tips provide all the information you need to fill your freezer.
PANS AND UTENSILS: To freeze vegetables and fruits, you need a colander and a large pot or saucepan that has a wire basket. An accurate freezer thermometer will help you regulate your freezer temperature to 0°F or below.
When freezing foods, use containers and packing materials that are durable, easy to seal, resistant to cracking at low temperatures, and moisture- and vapor-resistant. Choose the right size container for your volume of food; wasted space can lead to oxidation and freezer burn. Remember that foods containing water expand when frozen, so make sure the containers are expandable or leave enough headspace to allow for expansion. The following options are suitable for frozen foods.
RIGID CONTAINERS: Use sealable, rigid glass or plastic containers designed for freezing.
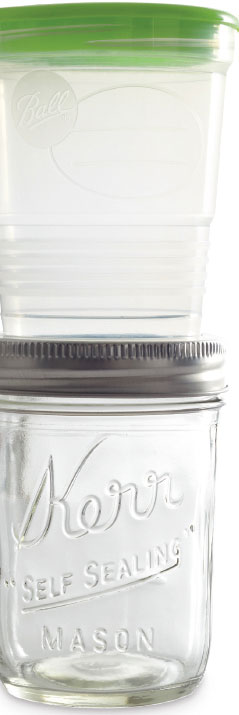
CANNING JARS: Select canning jars approved for freezing—this information is clearly noted on the jar packaging. Use only wide-mouth glass jars; jars with necks can crack more easily as contents expand. To allow for food expansion, do not fill jars above the 1-inch line.
PLASTIC FREEZER BAGS: Use bags designated for freezing, such as resealable bags and vacuum freezer bags. These are made of thicker material than regular plastic bags and are more resistant to moisture and oxygen. In lieu of a vacuum sealer, use a straw to suck air out of bags.
To save space in the freezer, look for containers that you can stack one on top of another. Whether you choose plastic or glass, be sure to label them with both the contents and date.
1. For freezing, select fruits and vegetables that are at their peak of maturity. Hold produce in the refrigerator if it can’t be frozen immediately. Rinse and drain small quantities through several changes of cold water. Lift fruits and vegetables out of the water; do not let them soak. Prepare cleaned produce for freezing as specified in the charts.
2. Blanch vegetables (and fruits when directed) by scalding them in boiling water for the specified time. This stops or slows enzymes that can cause loss of flavor and color and toughen the food. Do not blanch in the microwave because it might not inactivate some enzymes. Timings vary with vegetable type and size.
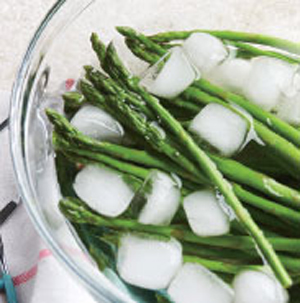
Blanching is a heat-and-cool process. First fill a large pot with water, using 1 gallon of water per 1 pound of prepared food. Bring to boiling. Add prepared food to the boiling water (or place it in a wire basket and lower it into the water); cover. Start timing immediately. Cook over high heat for the time specified in the charts. (Add 1 minute if you live 5,000 feet or higher above sea level.) Near the end of the time, fill your sink or a large container with ice water. When blanching time is complete, use a slotted spoon to remove the food from the boiling water or lift the wire basket out of the water. Immediately plunge the food into the ice water (see photo, right). Chill for the same amount of time it was boiled; drain.
3. Spoon the cooled, drained food into freezer containers or bags (see photo 2), leaving specified headspace (see tip, below). Fruits often are frozen with added sugar or liquid for better texture and flavor. For more information, refer to the chart introduction. Pack as directed in recipes. Here are the packing methods referred to in the charts.
UNSWEETENED OR DRY PACK: Do not add sugar or liquid to fruit; simply pack in a container. This is best for small whole fruits, such as berries.
WATER PACK: Cover the fruit with water or unsweetened fruit juice. Do not use glass jars. Maintain the recommended headspace.
SUGAR PACK: Place a small amount of fruit in the container and sprinkle lightly with sugar; repeat layering. Cover and let stand about 15 minutes or until juicy; seal.
SYRUP PACK: Cover fruit with a syrup of sugar and water. For a very thin syrup, use 1 cup sugar and 4 cups water to yield about 4 cups syrup. For a thin syrup, use 1⅔ cups sugar and 4 cups water to yield about 4¼ cups syrup. For a medium syrup, use 2⅔ cups sugar and 4 cups water to yield about 4⅔ cups syrup. For a heavy syrup, use 4 cups sugar and 4 cups water to yield about 5¾ cups syrup.
4. If using containers, wipe rims. Seal bags or containers according to manufacturer’s directions, pressing out as much air as possible. If necessary, use freezer tape around container lid edges for a tight seal.
5. Label each container or bag with its contents, amount, and date (see photo 3). Lay bags flat; add packages to the freezer in batches to make sure food freezes quickly. Leave space between packages so air can circulate around them. When frozen solid, the packages can be placed closer together.
Vegetables are best cooked from a frozen state, without thawing them first. Thaw fruits in their containers either in the refrigerator or in a bowl of cold water. Use frozen fruits and vegetables within 8 to 10 months.
The correct amount of headspace is as important in freezing as it is in canning. However, in freezing, the headspace allows for the expansion of the food when frozen. When using unsweetened (dry) pack, leave a ½-inch headspace. When using water, sugar, or syrup pack, leave 0a ½-inch headspace for pints and a 1-inch headspace for quarts.
These steps show how to start the freezing process for corn.
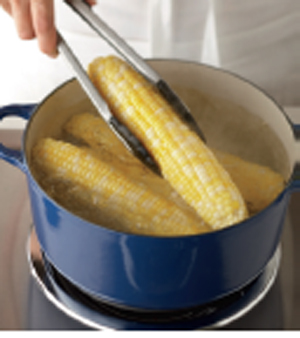
1. When blanching corn, use tongs to remove the corn from the hot water.
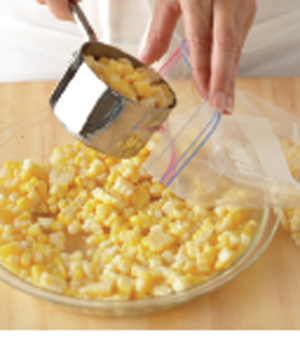
2. Use a measuring cup to keep track of the amount added to each container.
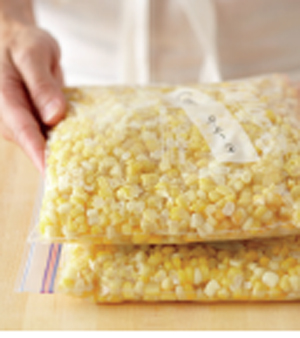
3. If using freezer bags, press the air from the bag and seal. Label with the contents, amount, and date.